Mack Truck E7 Engine Overhaul Operator's Manual 5-101 - PDF DOWNLOAD

Page 167

5-101.bk Page 9 Friday, March 17, 2006 11:05 AM

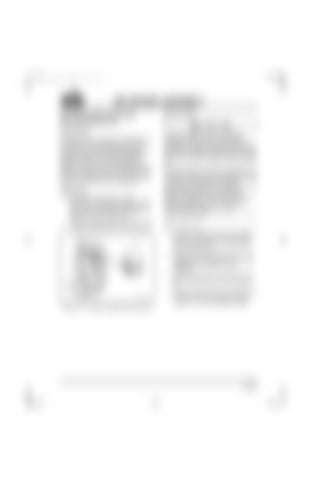
200 ENGINE ASSEMBLY [212 CB] Auxiliary Driveshaft Bushing Replacement DESCRIPTION The front and rear auxiliary driveshaft bushings are identical. Engine lubrication oil passing through the No. 1 camshaft bushing supplies oil to the front auxiliary driveshaft bushing. Oil passing through the No. 4 camshaft bushing supplies oil to the rear auxiliary driveshaft bushing. A groove in the rear auxiliary driveshaft journal, in conjunction with a rifle-drilled hole in the auxiliary driveshaft and a small oil feed tube, supplies lubrication to the air compressor. INSPECTION 1. Using a telescope gauge or inside micrometer, measure the auxiliary bushing bores. Take two readings, perpendicular to each other, in each bore. Record the readings. Refer to Figure 6-10. 2. Compare readings with the tolerances listed in the Fits and Limits chart in this manual.

INSTALLATION

Correct installation of auxiliary driveshaft bushings is very important. If bushings are misaligned, lubrication oil will not be allowed to lubricate the auxiliary driveshaft journal. This will also cause the component lubricated through that journal to run without lubrication and prematurely fail. If the approximately 1.25 inches long (32 mm) oil feed tube, which connects the oil feed hole in the rear of the auxiliary shaft to the oil feed hole in the front of the air compressor crankshaft, is accidentally lost during air compressor or auxiliary shaft service work, the compressor will fail from oil starvation. Also, the loss of oil pressure resulting from the missing tube can cause damage and problems in other components and parts. Refer to Figure 6-11. 1. Position a replacement bushing (2) against the side of the block at the rear bushing bore. Align the oil hole in the bushing with the hole in the block. 2. Using a dark-colored felt-tip marker, mark the block and the bushing with a line (1) to facilitate correct alignment during installation. 3. Clean the surfaces of the bushing and the bore. Dry both surfaces with compressed air.

Figure 6-10 — Auxiliary Driveshaft Bushing ID Check

4. Using camshaft bushing remover/installer kit J 21428-01 (4) and the appropriate pilot adapter J 37713 (3), install the bushing.

Page 6-9


Turn static files into dynamic content formats.

Create a flipbook

Articles inside

200 TROUBLESHOOTING

1min
pages 290-291, 294

200 TROUBLESHOOTING

1min
page 289

200 TROUBLESHOOTING

1min
page 288

TROUBLESHOOTING

3min
pages 285-287

200 TROUBLESHOOTING

2min
pages 283-285

TROUBLESHOOTING

2min
pages 281-282

200 TROUBLESHOOTING

4min
pages 276-278

200 TROUBLESHOOTING

1min
page 275

200 SETUP AND ADJUSTMENTS

15min
pages 259-262, 264-271, 274

200 SETUP AND ADJUSTMENTS

1min
pages 257-258

200 SETUP AND ADJUSTMENTS

13min
pages 244-256

200 ENGINE ASSEMBLY

7min
pages 235-239, 242-243

200 ENGINE ASSEMBLY

7min
pages 223-234

200 ENGINE ASSEMBLY

8min
pages 215-222

200 ENGINE ASSEMBLY

2min
pages 211-214

200 ENGINE ASSEMBLY

5min
pages 207-210

200 ENGINE ASSEMBLY

1min
pages 205-206

200 ENGINE ASSEMBLY

6min
pages 199-204

200 ENGINE ASSEMBLY

4min
pages 193-198

200 ENGINE ASSEMBLY

10min
pages 183-192

200 ENGINE ASSEMBLY

2min
pages 181-182

200 ENGINE ASSEMBLY

5min
pages 177-180

200 ENGINE ASSEMBLY

1min
page 176

200 ENGINE ASSEMBLY

2min
pages 173-175

200 ENGINE ASSEMBLY

1min
pages 171-172

200 ENGINE ASSEMBLY

1min
page 170

200 ENGINE ASSEMBLY

2min
pages 168-169

200 ENGINE ASSEMBLY

1min
pages 167-168

200 ENGINE ASSEMBLY

1min
pages 164-166

200 ENGINE ASSEMBLY

2min
pages 162-163

200 BENCH PROCEDURES

3min
pages 157, 160-161

200 BENCH PROCEDURES

3min
pages 153-156

200 BENCH PROCEDURES

4min
pages 148-152

200 BENCH PROCEDURES

2min
pages 145-147

200 BENCH PROCEDURES

7min
pages 139-144

200 BENCH PROCEDURES

2min
pages 137-138

200 BENCH PROCEDURES

2min
pages 134-136

200 BENCH PROCEDURES

1min
pages 131-133

200 BENCH PROCEDURES

1min
pages 127-128

200 BENCH PROCEDURES

3min
pages 116-121

200 BENCH PROCEDURES

1min
page 115

200 BENCH PROCEDURES

1min
page 113

200 BENCH PROCEDURES

1min
page 112

200 BENCH PROCEDURES

2min
pages 109-111

200 BENCH PROCEDURES

2min
pages 106-108

200 BENCH PROCEDURES

4min
pages 102-105

200 BENCH PROCEDURES

5min
pages 98-101

200 BENCH PROCEDURES

2min
pages 96-97

200 ENGINE DISASSEMBLY

9min
pages 82-89, 92-93, 95

200 ENGINE DISASSEMBLY

1min
page 81

200 ENGINE DISASSEMBLY

1min
pages 77-79

200 ENGINE DISASSEMBLY

1min
pages 75-76

200 ENGINE DISASSEMBLY

4min
pages 68-74

200 ENGINE DISASSEMBLY

3min
pages 61-67

SAFETY INFORMATION

13min
pages 8-10, 12, 14, 16, 18-22, 26-30, 32-34
Issuu converts static files into: digital portfolios, online yearbooks, online catalogs, digital photo albums and more. Sign up and create your flipbook.