1 minute read
Drive Gear


How to Install the Input Shaft and Main Drive Gear
Special Instructions
None
Special Tools
• Bearing Driver T12 (see Table 6 • Toolmaker’s Die
Main Drive Gear
Bushing
Seal*
Bearing Retaining Snap Ring Input Shaft
Main Drive Gear Snap Ring
*(Used for Shipping Only. Do Not Replace.)
Procedure -
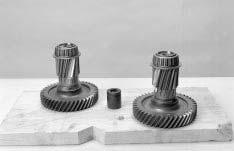
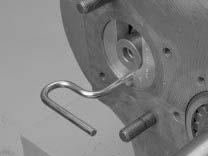
1. Use a highly visible toolmaker’s dye and mark the main drive gear for timing purposes. To mark the gear, paint the toolmaker’s die on any two adjacent teeth, and then paint the two adjacent teeth directly opposite the first two teeth.
2. If necessary, install the bushing in the back of the input shaft.
3. From inside the case, position and hold the main drive gear in its approximate position.
1
5
4
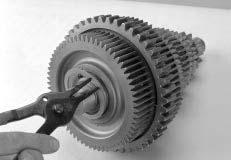
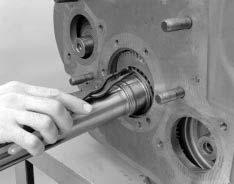
4. From the front, slide the input shaft into the main drive gear, and install the snap ring to trap the shaft in the gear.
Note: You may notice backlash between the external spline teeth of the input shaft and the internal spline teeth of the main drive gear. The backlash is normal.
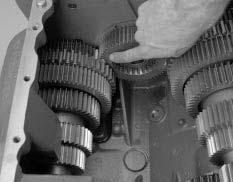
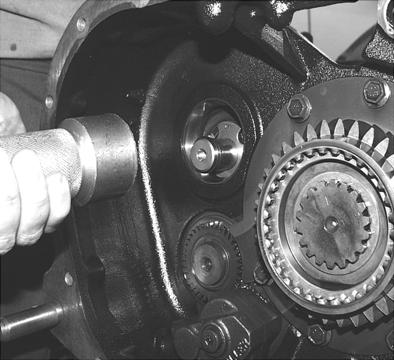
5. Inside the case, mesh the marked tooth on the lower countershaft drive gear with either set of marked teeth on the main drive gear.
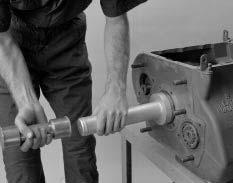
6. While holding the main drive gear in the proper position and in time with the lower countershaft, slide the input bearing over the input shaft and start it into its bore. Use the proper bearing driver (Tool ref. ID T12) to drive it into position until the snap ring bottoms on the case.
Note: The input bearing is not fully installed at this point.
7. Temporarily install the input bearing cover with two or more capscrews.
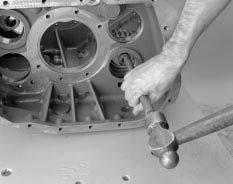
8. From inside the main case, drive the input shaft forward until it is fully seated.
9. Remove the input bearing cover, and install the input bearing retaining snap ring.
Note: Do not replace the small rubber lip seal. It is used only to prevent leakage during shipping.
10.Do not reinstall the input bearing cover at this time. Instead, pull the input shaft and bearing forward to allow for mainshaft installation.
7