1 minute read
How to Assemble the Gear Shift Lever


Special Instructions
Inspect tension spring and washer for wear.
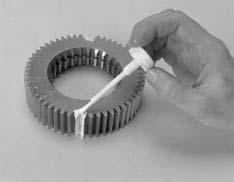
Apply Eaton rust preventative lubricant #71212 or equivalent to the shift lever pivot ball. A rust preventative lubricant film should cover all surfaces between and including the pivot ball.
Seat the tension spring one coil at a time.
Special Tools
• Vise with brass jaws or wood blocks • Item T4: Tension Spring Driver (see Table 6)
1. Pin 2. Bushing 3. Upper Lever 4. Snap Ring 5. Rubber Boot 6. Spade Pin 7. Housing 8. Capscrew 9. Gasket 10. O-Ring 11. Washer 12. Lower Lever 13. Stepped Washer 14. Tension Spring
Procedure -
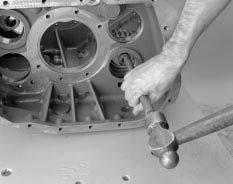
1. With housing bottom facing up, secure the assembly in a vise.
2. If the spade pin is damaged, replace and install the spade pin, in housing tower bore.
3. In models so equipped, install the nut and washer in the housing bore.
4. If the O-ring is damaged, replace; lubricate the O-ring with
Eaton/Fuller lubricant #71206 or equivalent. Install the Oring in the housing tower inside groove.
5. Align the lever ball slot with the spade pin and position the gear shift lever in the housing tower.
6. With dished-side up, install the washer over the ball.
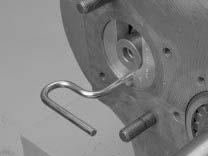
7. Use a tension spring driver T4 to install the tension spring under the housing lugs.
8. Remove the assembly from the vise.
9. Install a rubber boot over the gear shift lever and against the housing.
Note: Make sure the gear shift lever can move.