Front power take-off Zuidberg Removing the power take-off unit – Apply the handbrake. – Chock the wheels.
Y326
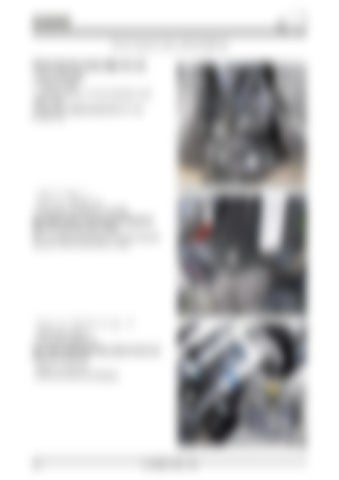
– Drain the housing by removing the hoses (1) of the cooler "1032". – Disconnect the supply harness from the "Y326" solenoid valve.
1
Fig. 4
j26r000axion
– Loosen the screws (1). – Remove the closing plate (2). – Remove the 4 screws (3) of the link arm. Note: Make a mark on the link arm to facilitate the alignment of the jaws upon refitting. Note: The linking shaft between the crankshaft pulley and power take-off input shaft is a slider.
2
3
1
Fig. 5
j26r001axion
– Remove the front lift. Refer to the part: "J1". – Remove the screws (1). – Remove the protection (2).
3
Note: Use an appropriate lifting means to remove the power take-off housing. – Loosen the screws (3). – Remove the power take-off housing.
3
1
j26r002axion
J2.6
Axion 850-810 – 09.2010 – GB
2
Fig. 6


