2 minute read
REPLACING AN EJECTOR BUCKET


Removal
STEP 3
Advertisement
Tools required
-A screwdriver -A hammer -A sleeve for threaded pins -A wooden block -A 30 mm diameter tube (longer than the width of the bucket and strong enough to support the weight of the ejector).
STEP 1
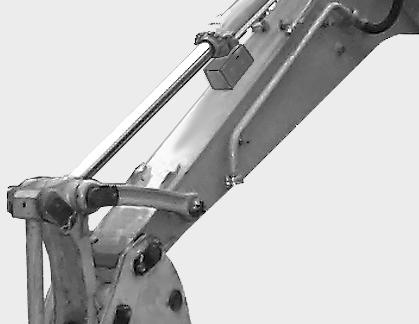
CD98D042 Put a wooden block under the bucket cylinder casing.
STEP 4
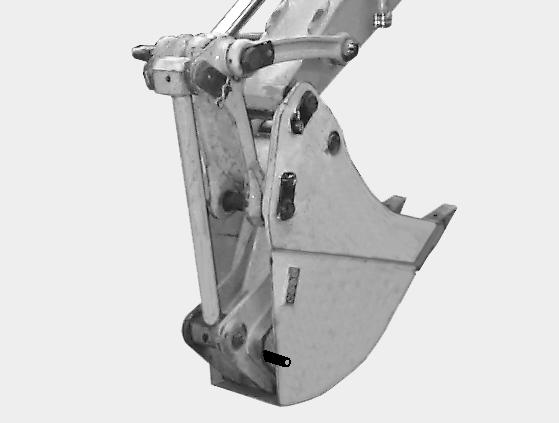
CD98D038 Block the ejector with the tube, extend the attachment and rest the bucket on the ground.
STEP 2
Stop the engine and remove the starter switch key.

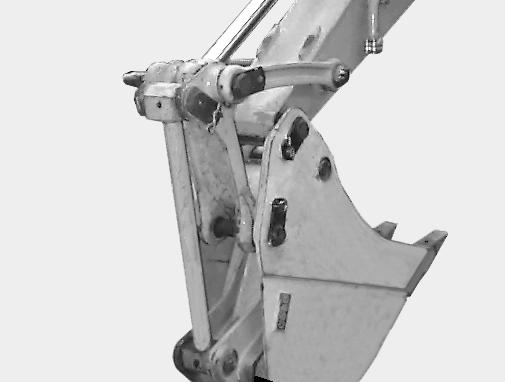
CD98D038 Remove the threaded pin, watching out for the yokes. Tilt the yokes rearward.
STEP 5 STEP 7

CD98D034 Start the engine and retract the bucket cylinder.
STEP 6


CD98D034 Raise the attachment so that the bucket stabilizes. Rest the bucket on the ground. Stop the engine and remove the starter switch key.
CD98D033 Using the screwdriver, remove the split pin from the bucket/dipper linkage pin. Then remove the bucket/dipper linkage pin.
STEP 8
CD98D032 Start the engine. Operate the attachment controls so as to disengage the dipper from the bucket.
WARNING: The tube installed to block the bucket ejector must never be removed when the bucket is in storage.
IMPORTANT: The ejector must be blocked whenever the bucket is transported or handled.
Tools required
-A hammer -A sleeve for threaded pins
STEP 1
3 2 1

CD98D032 Start the engine. Operate the attachment controls to bring the dipper into its housing. Stop the engine and remove the starter switch key.
STEP 2

CD98D035 Insert the linkage pin (1) after aligning the bores of the yoke (2) with the connecting rod (3).
STEP 4
Start the engine.
STEP 5
2 1

CD98D033 Install the dipper/bucket linkage pin and split pin.

CD98D036 Extend the bucket cylinder rod. Align the bores at the cylinder top (1) with the connecting rod (2). Stop the engine and remove the starter switch key.
STEP 6
2
1
3
STEP 7

CD98D038 Install the linkage pin (1) after aligning the bores of the yoke (2) with the connecting rod (3).
CD98D038 Remove the tube to release the ejector.
STEP 8
Lubricate the linkage points.