CLEANING AND INSPECTING
1. Clean all components with warm soap and water. 2. Inspect for cracks and/or loose rivets. 3. Inspect for any missing decals. INSTALLING
1. Place the front body panel/rack assembly into position on the frame. 2. Connect the headlights and running lights; then secure the harnesses to the frame using the existing push clips. 3. Secure the front fascia to the front bumper using the existing four Torx-head screws.
XR127
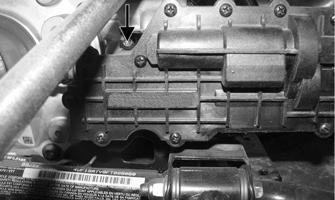
3. Remove the hose clamp securing the gas tank to the gas tank hose. Account for the hose clamp.
4. Secure the lower fascia to the front bumper using two new “patch-lock” bolts. Tighten to 8 ft-lb (10.9 N-m). 5. Secure the rack mount to the frame using new “patch-lock” shoulder bolts. Tighten to 13 ft-lb (17.7 N-m). 6. Secure the front body panel to the footwells using the existing cap screws. 7. With the console tilted up, connect the accessory plug and ignition switch harnesses; then tilt the console into position and slide forward until correctly positioned. 8. Install the center access panel and secure to the console with the two Torx-head screws. Tighten to 8 ft-lb (10.9 N-m). 9. Connect the gauge; then press the gauge into position. 10. Install the side panels making sure the tabs are all correctly in the slots and the shift lever is correctly oriented; then secure with the fasteners.
XR130
CAUTION Seal off the opening to prevent contaminants from falling into the gas tank.
4. Disconnect the taillight connectors. 5. Remove the two Torx-head screws securing the rear fascia to the frame.
11. Install the left-side engine cover; then install the shift lever knob. 12. Install the seat making sure it locks securely in place.
Rear Body Panel/Rack REMOVING NOTE: If the technician’s objective is to remove the rear rack, proceed to step 6.
1. Remove the seat; then remove the shift lever knob and side panels. 2. Remove the Torx-head screws (three on each side) securing the rear body panel to the footwell.
XR131A
6. Remove the four lock nuts securing the rear body panel to the mounting tabs on the frame. Discard the lock nuts.
! WARNING When removing the right rear lock nut, ensure the muffler is properly cooled to avoid severe burns.
16