● Control Heating:Turn theAlde heater on and off via your phone.
● Temperature-Based Control:Turn the heater on or off based on the outdoor temperature.
● Built-in Clock and Timer: Includes clock and timer functions with day, week, and date settings.
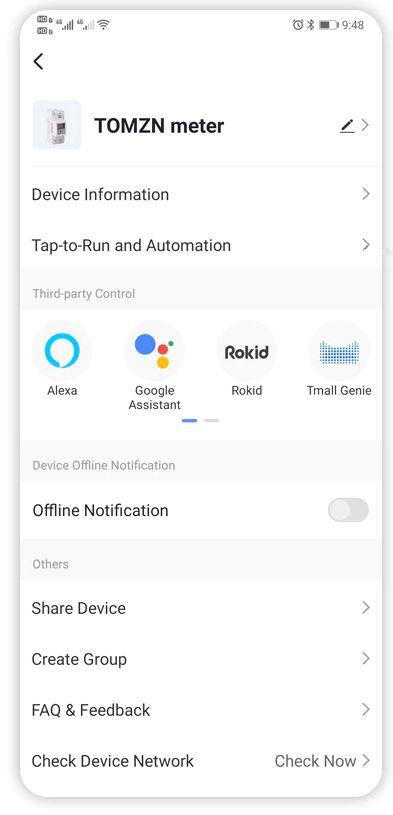
ShareAccess with Others in the Home:
● With a few simple steps, you can invite other people to use your WiFi controller through the Smart Life app.These users will be able to turn the heater on and off just like you can.
Set a Timer:
● The app allows you to set a timer so the controller automatically turns the heater on or off at a specific time of day or week.
ConnectAdditional Devices toAlde Control:
● For example, you can connect your refrigerator or other lights to theAlde control, allowing them to be turned on or off through the controller.


WIFIALDE CONTROLLER TO 3010, 3020 OG 3030
Description:
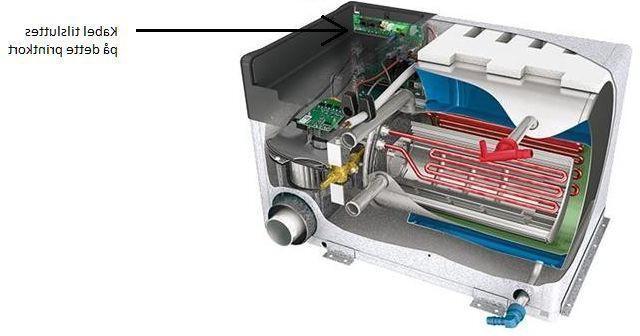
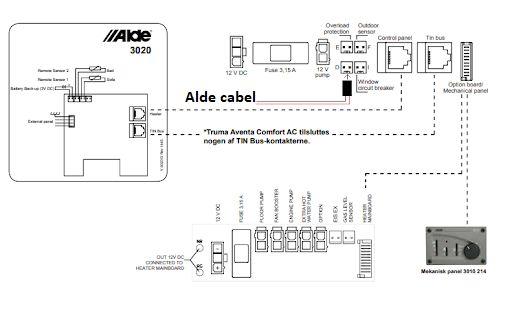
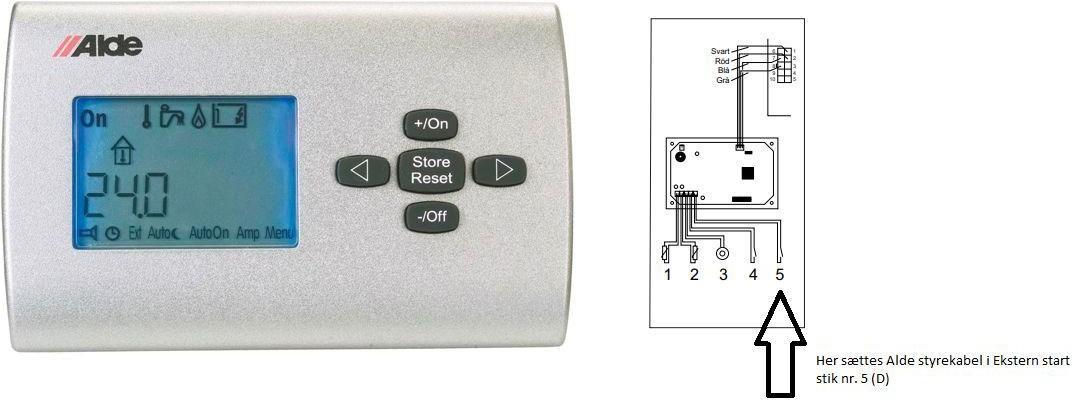
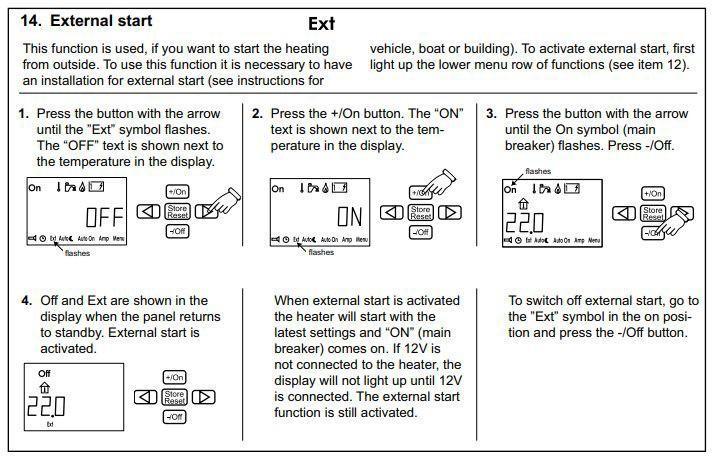
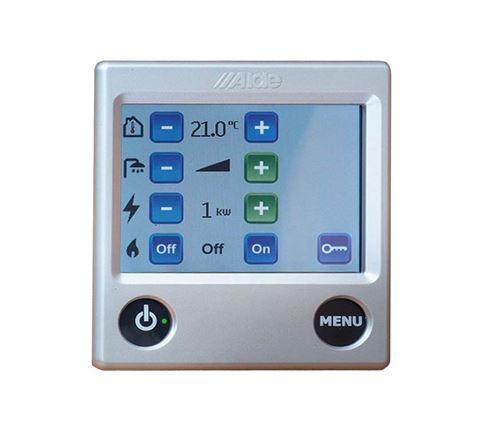
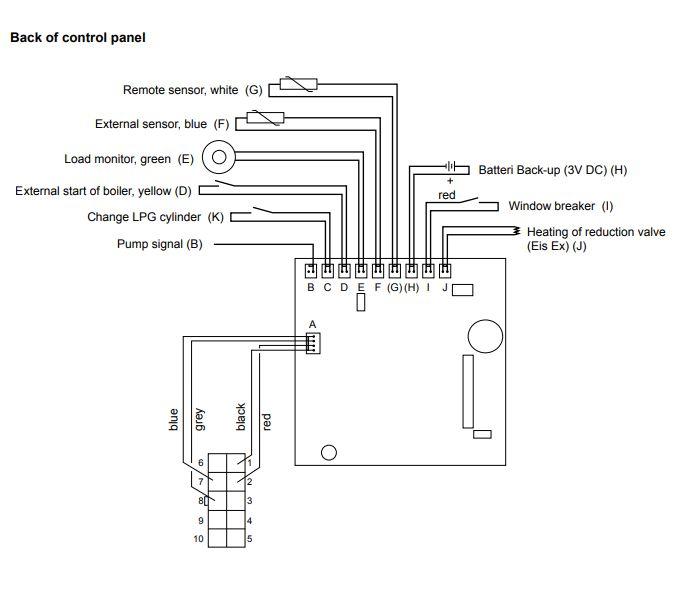
● This small, smart box can remotely control theAlde central heating in your camper with WiFi. It connects easily directly to theAlde unit via the includedAlde intermediate cable, which simply plugs into the correct socket on yourAlde heating system. For anAlde 3010, it should be connected to the "EXT" socket on the back of the control panel, and for anAlde 3020, it should be connected to the "EXT" socket on the control board located on theAlde unit itself (not in the panel).You may ask your camping dealer or GSMTeknik for assistance.
● The controller is connected directly to the caravan’s 12V battery, but if desired, it can also be connected to 230V via an optional power adapter.
● The controller also has an extra relay available, which can be used for many other purposes in the caravan—only your imagination sets the limits.


Technical Data:
● Relay Outputs: 2x Potential-free outputs 2200W (10A/230VAC NC/NO)
● Wireless: IEEE 802.11 B/G/N (2.4GHz) + Bluetooth
● Operating Temperature: -20°C ~ 70°C
● Power Supply: 7-32VDC
● Radio Frequency: 433.92MHz (e.g., can be connected to a remote control)
● Easy Setup: InTuya Smart Life
● Power Failure Notification: Yes
● Compatibility: Google Home &AmazonAlexa
1. Power Up the WiFiAlde Controller
1. Connect Power:
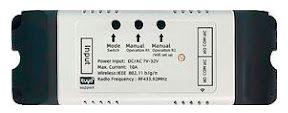
○ Open both covers on the device to reveal the connectors and terminals.

○ Connect the control cable to the “NO” and “COM” terminals on Line 1, as shown below.
○ Connect the power supply to the caravan’s electrical system.The device supports 7-32V (AC/DC).
2. Optional Power Supply:
○ If you prefer to connect the device to 230V, you can purchase an optional power adapter.
Ensure all connections are secure before proceeding to the next setup steps.
Download and Set Up the Smart LifeApp:
1. Download theApp:
○ Download the free app “Smart Life” from the App Store or Google Play Store.
2. Create anAccount:
○ Open the app and tap “Sign up” to create a free account.
○ Enter your email address and select “Denmark” if it’s not already chosen.
○ In the next step, enter the 6-digit verification code sent to the email address you provided.
○ Enter the 6-digit code from the email and proceed to the next step in the app.
3. SetYour Password:
○ Choose a password for the app. It’s recommended to use at least one uppercase letter and one number.
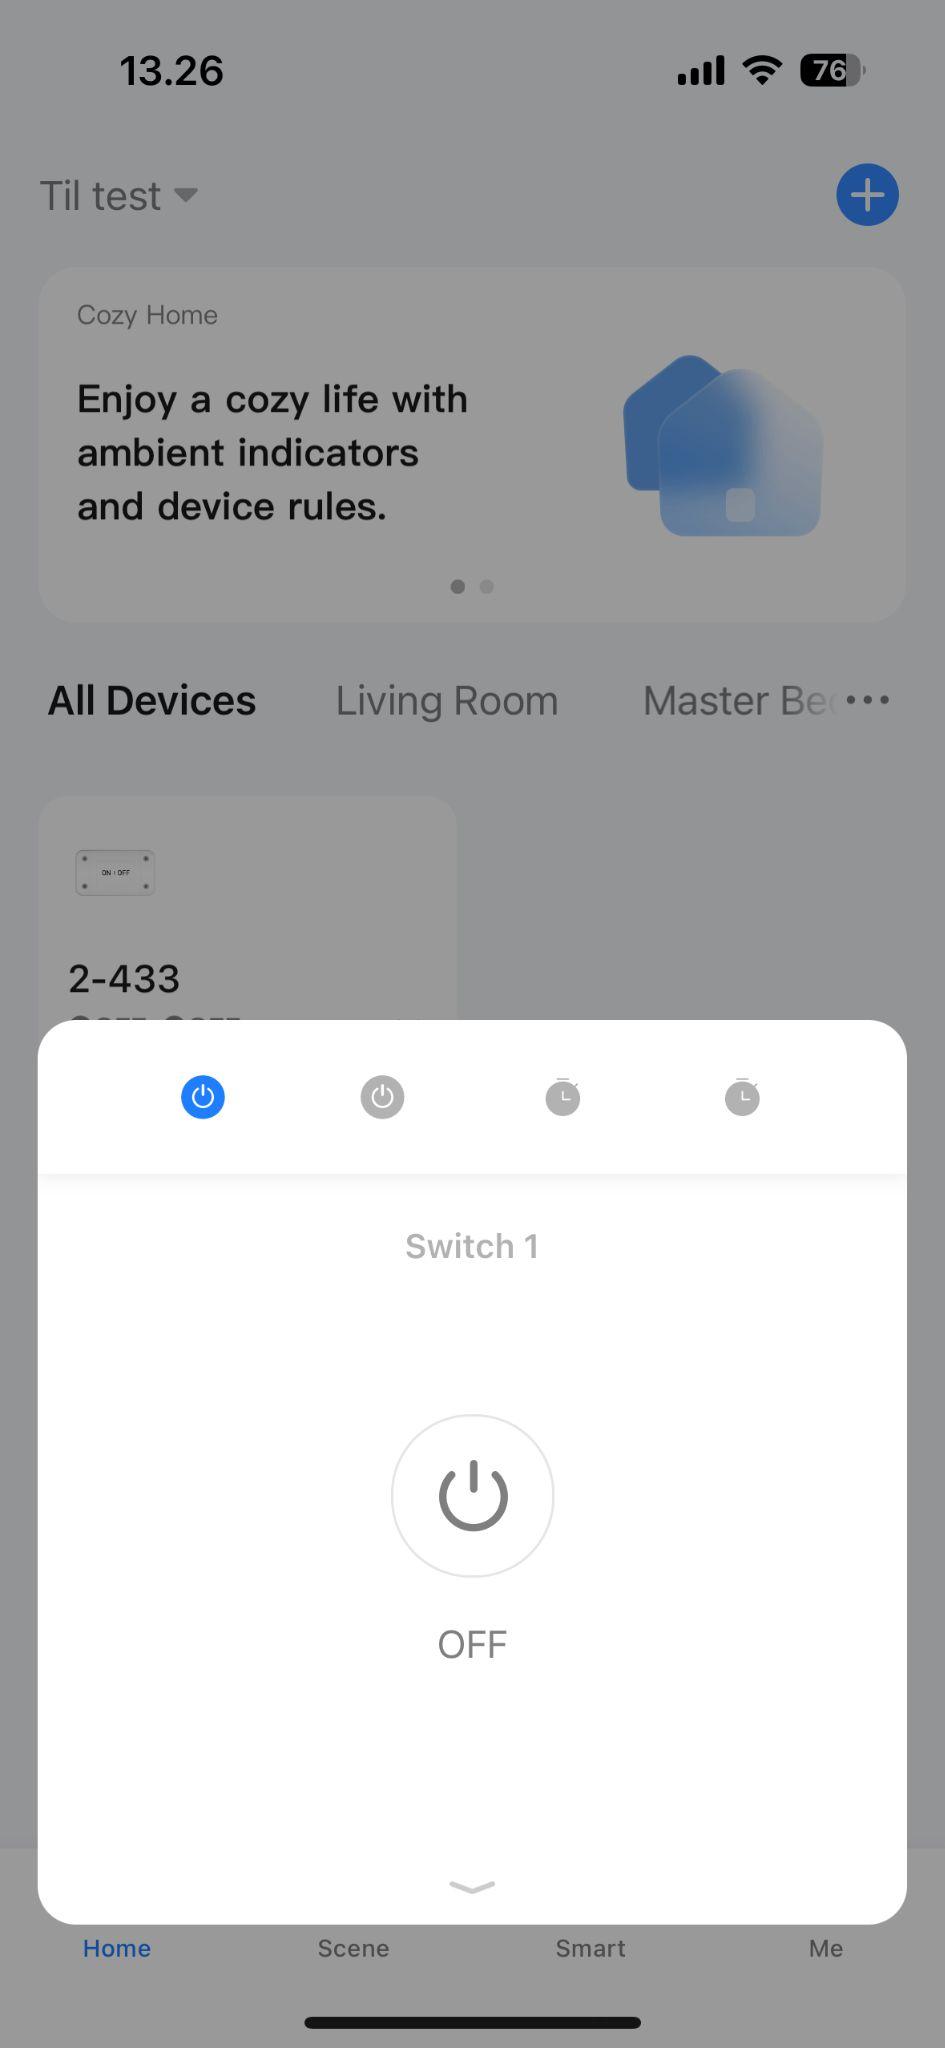
4. Start Screen:
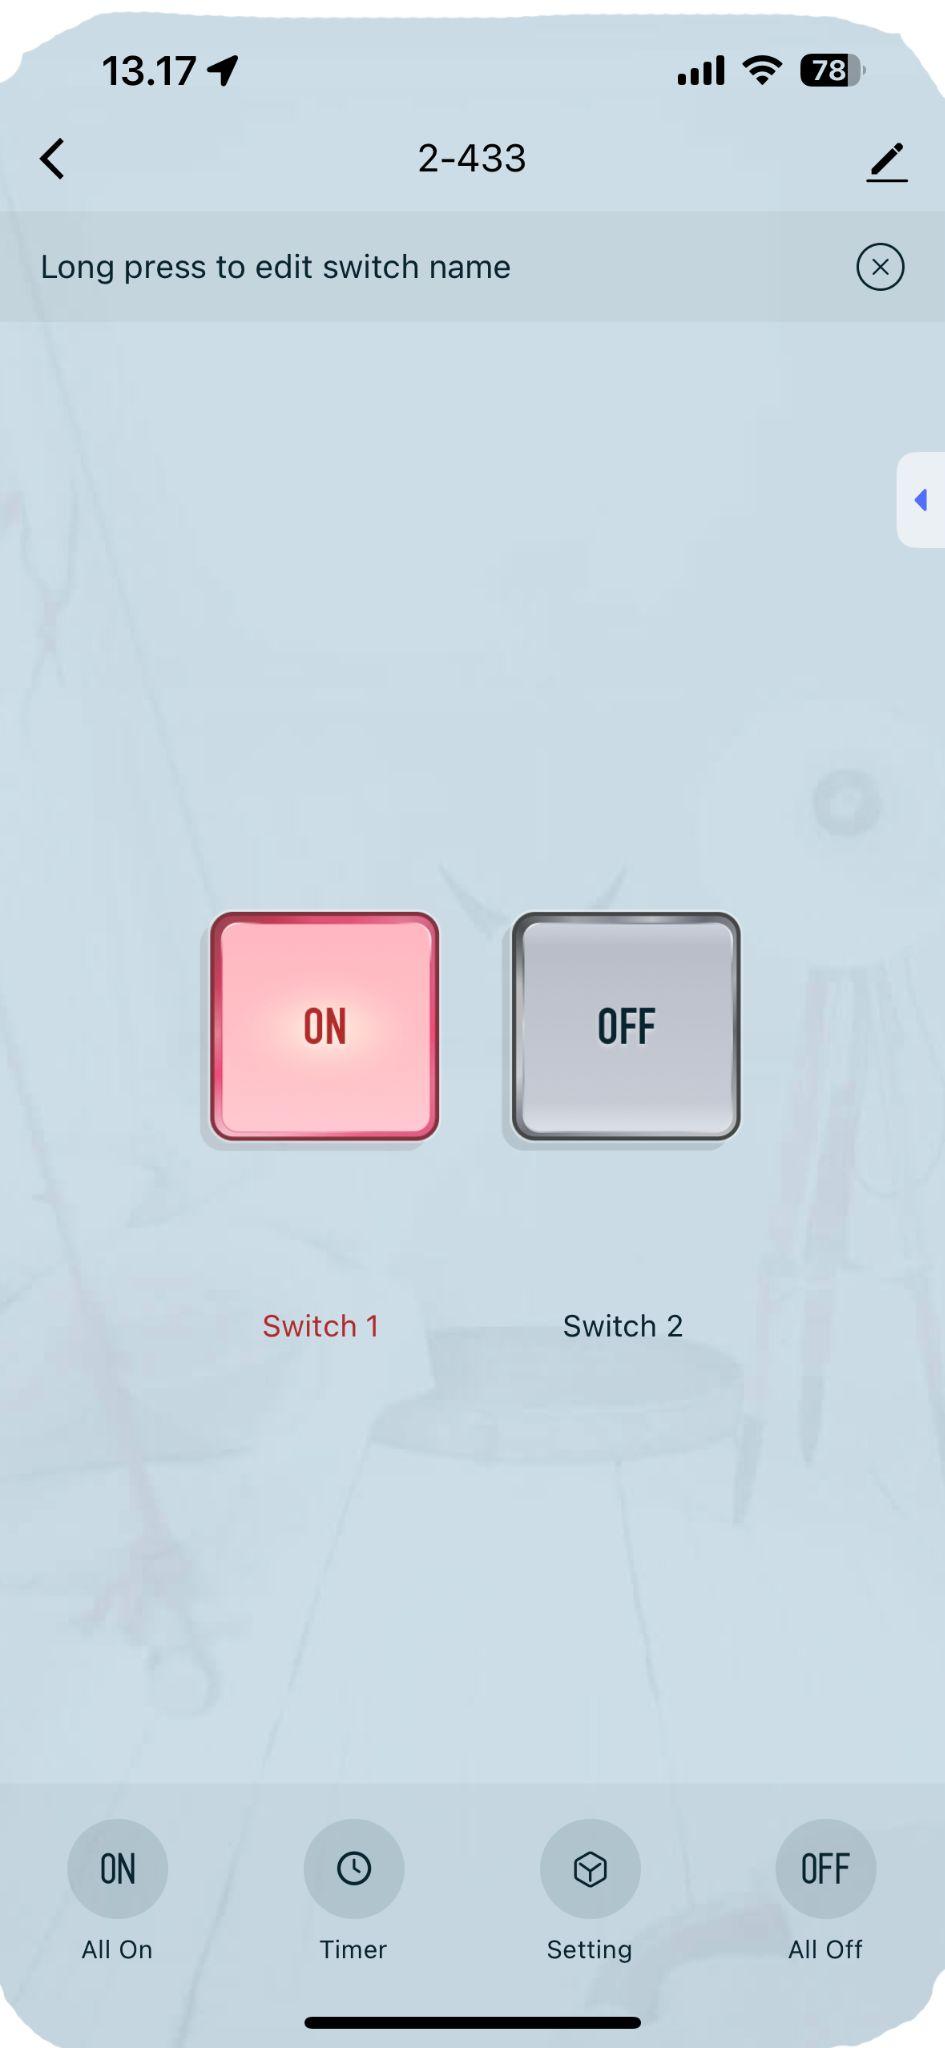
○ This is the Smart Life app’s home screen. Here you can see all your connected devices. If you don’t have any devices yet and want to add one, tap on “ADD DEVICE” (1).
5. Check Settings:
○ Before moving to the next step, ensure that both Wi-Fi and Bluetooth are enabled on your phone.


5.After a short while, the app will display a message saying “Discovering devices.”
1. Tap “Add”:
○ The app will start searching for available devices.
2. SelectYour Device:
○ When your device appears in the list, tap “Add” to proceed with the setup.
6. EnterYour WiFi Code:
1. Enter WiFi Code:
○ Type your WiFi password into the field with the padlock icon (1).
2. Tap “Next”:
○ Proceed by tapping “Next”.
Note: Ensure that your phone is connected to a 2.4GHz network, as the device connects to a 2.4GHz network and not a 5GHz network.
7.Adding the Product:
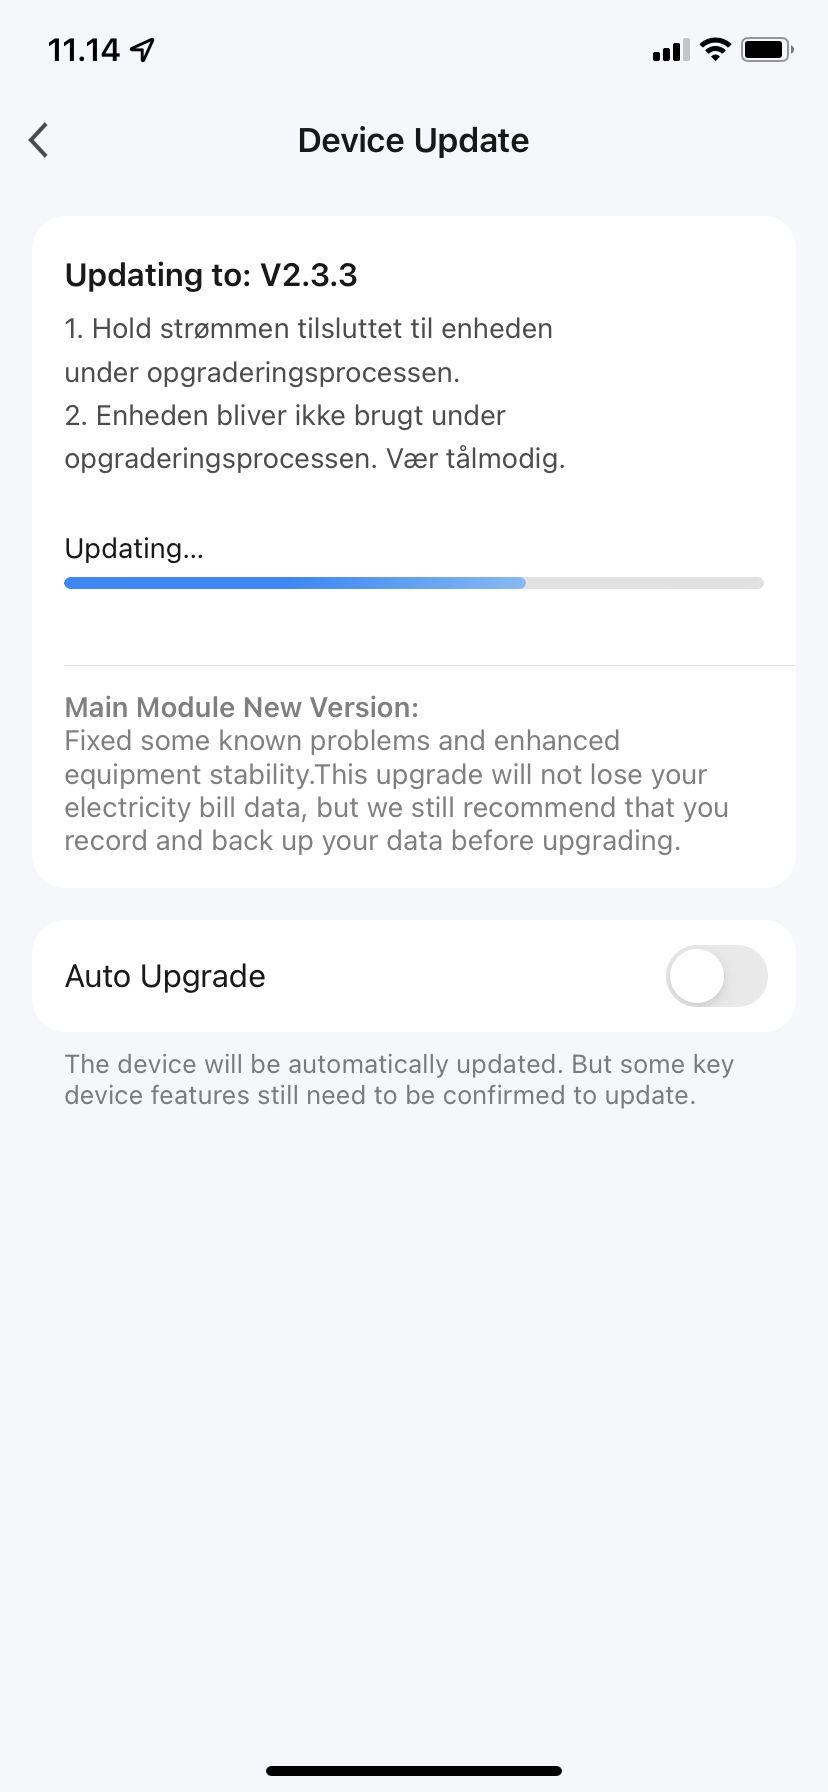
1. Wait for Completion:
○ The product will now be added to the app.This process may take between 1-5 minutes.
2. Finish Setup:
○ Once the process is complete, tap “Done” at the bottom of the app to finish.