


Soft and delicate, with a slightly sweet, milky flavor, BelGioioso Burrata is made with handcrafted Fresh Mozzarella filled with Stracciatella, a mix of soft mozzarella shreds and sweet cream.
Enhance your meals by creating a new, fresh Burrata salad with seasonal produce. Or enrich your pizza or pasta by topping with a garnish of this fresh, creamy cheese just before serving.


The J. Lohr Pure Paso® Proprietary Red Wine combines two historic varieties: Cabernet Sauvignon and Petite Sirah. It is our tribute to one of the world’s great winegrowing regions – a special place we are proud to call home.


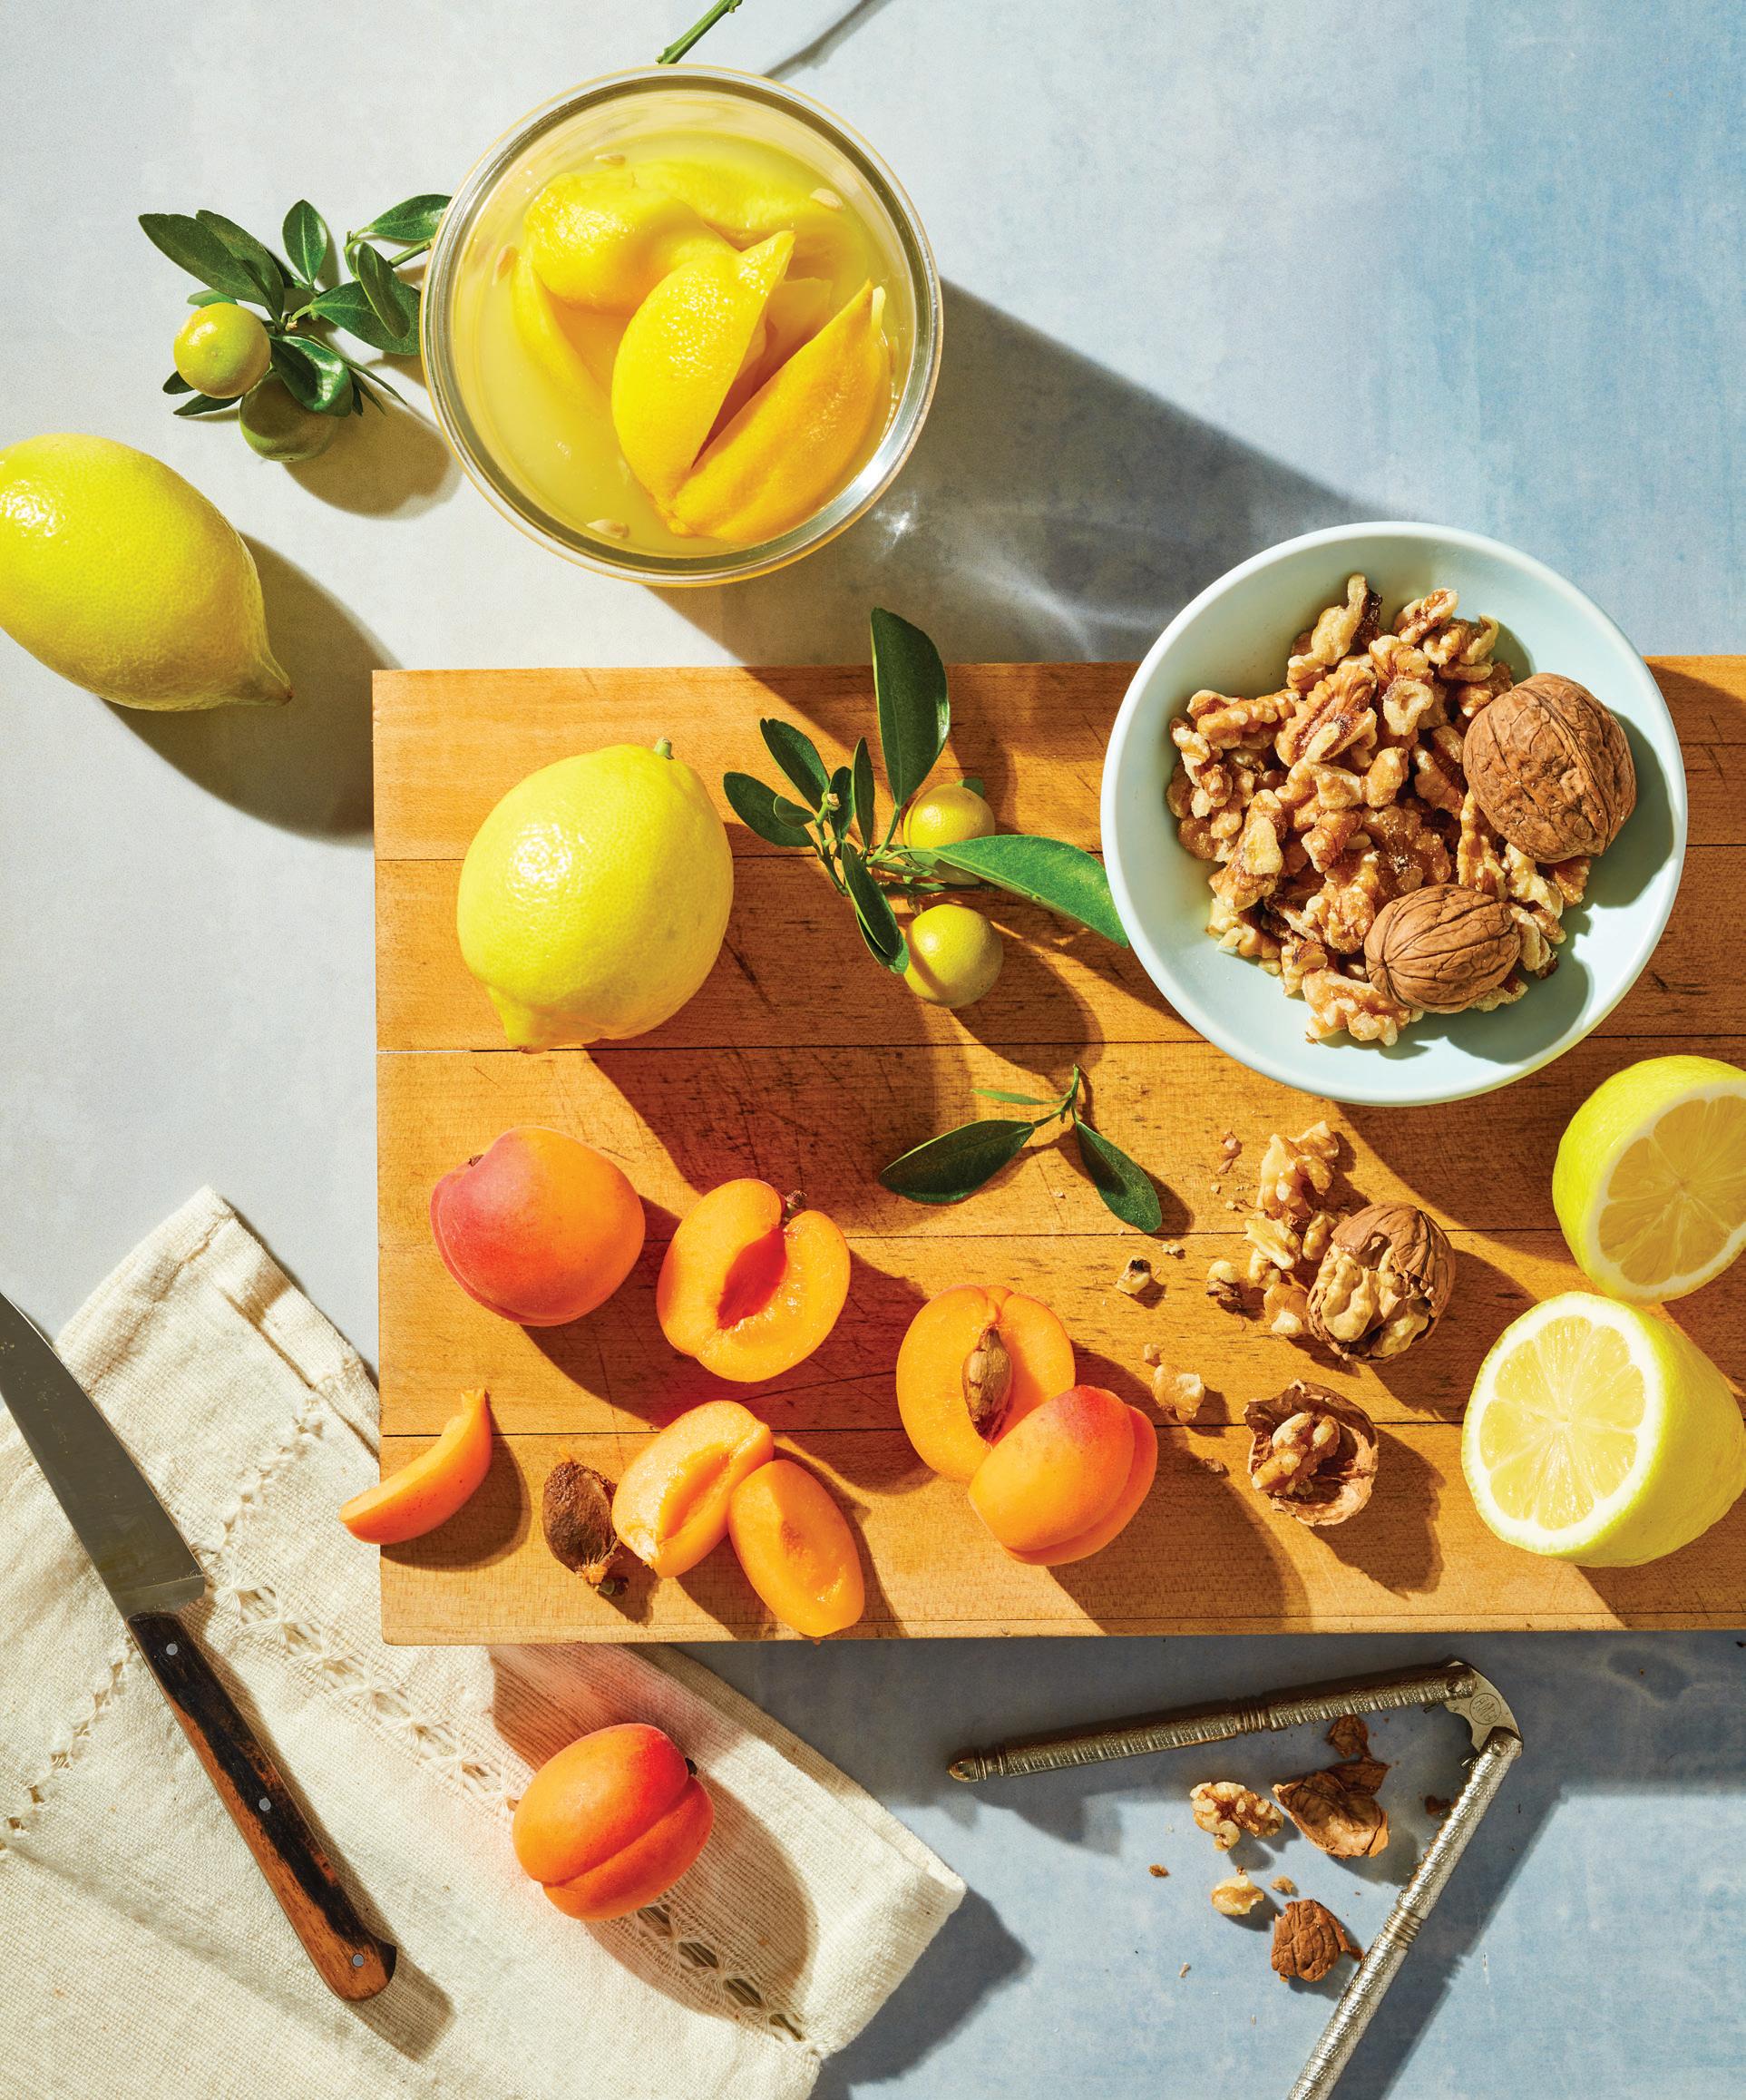
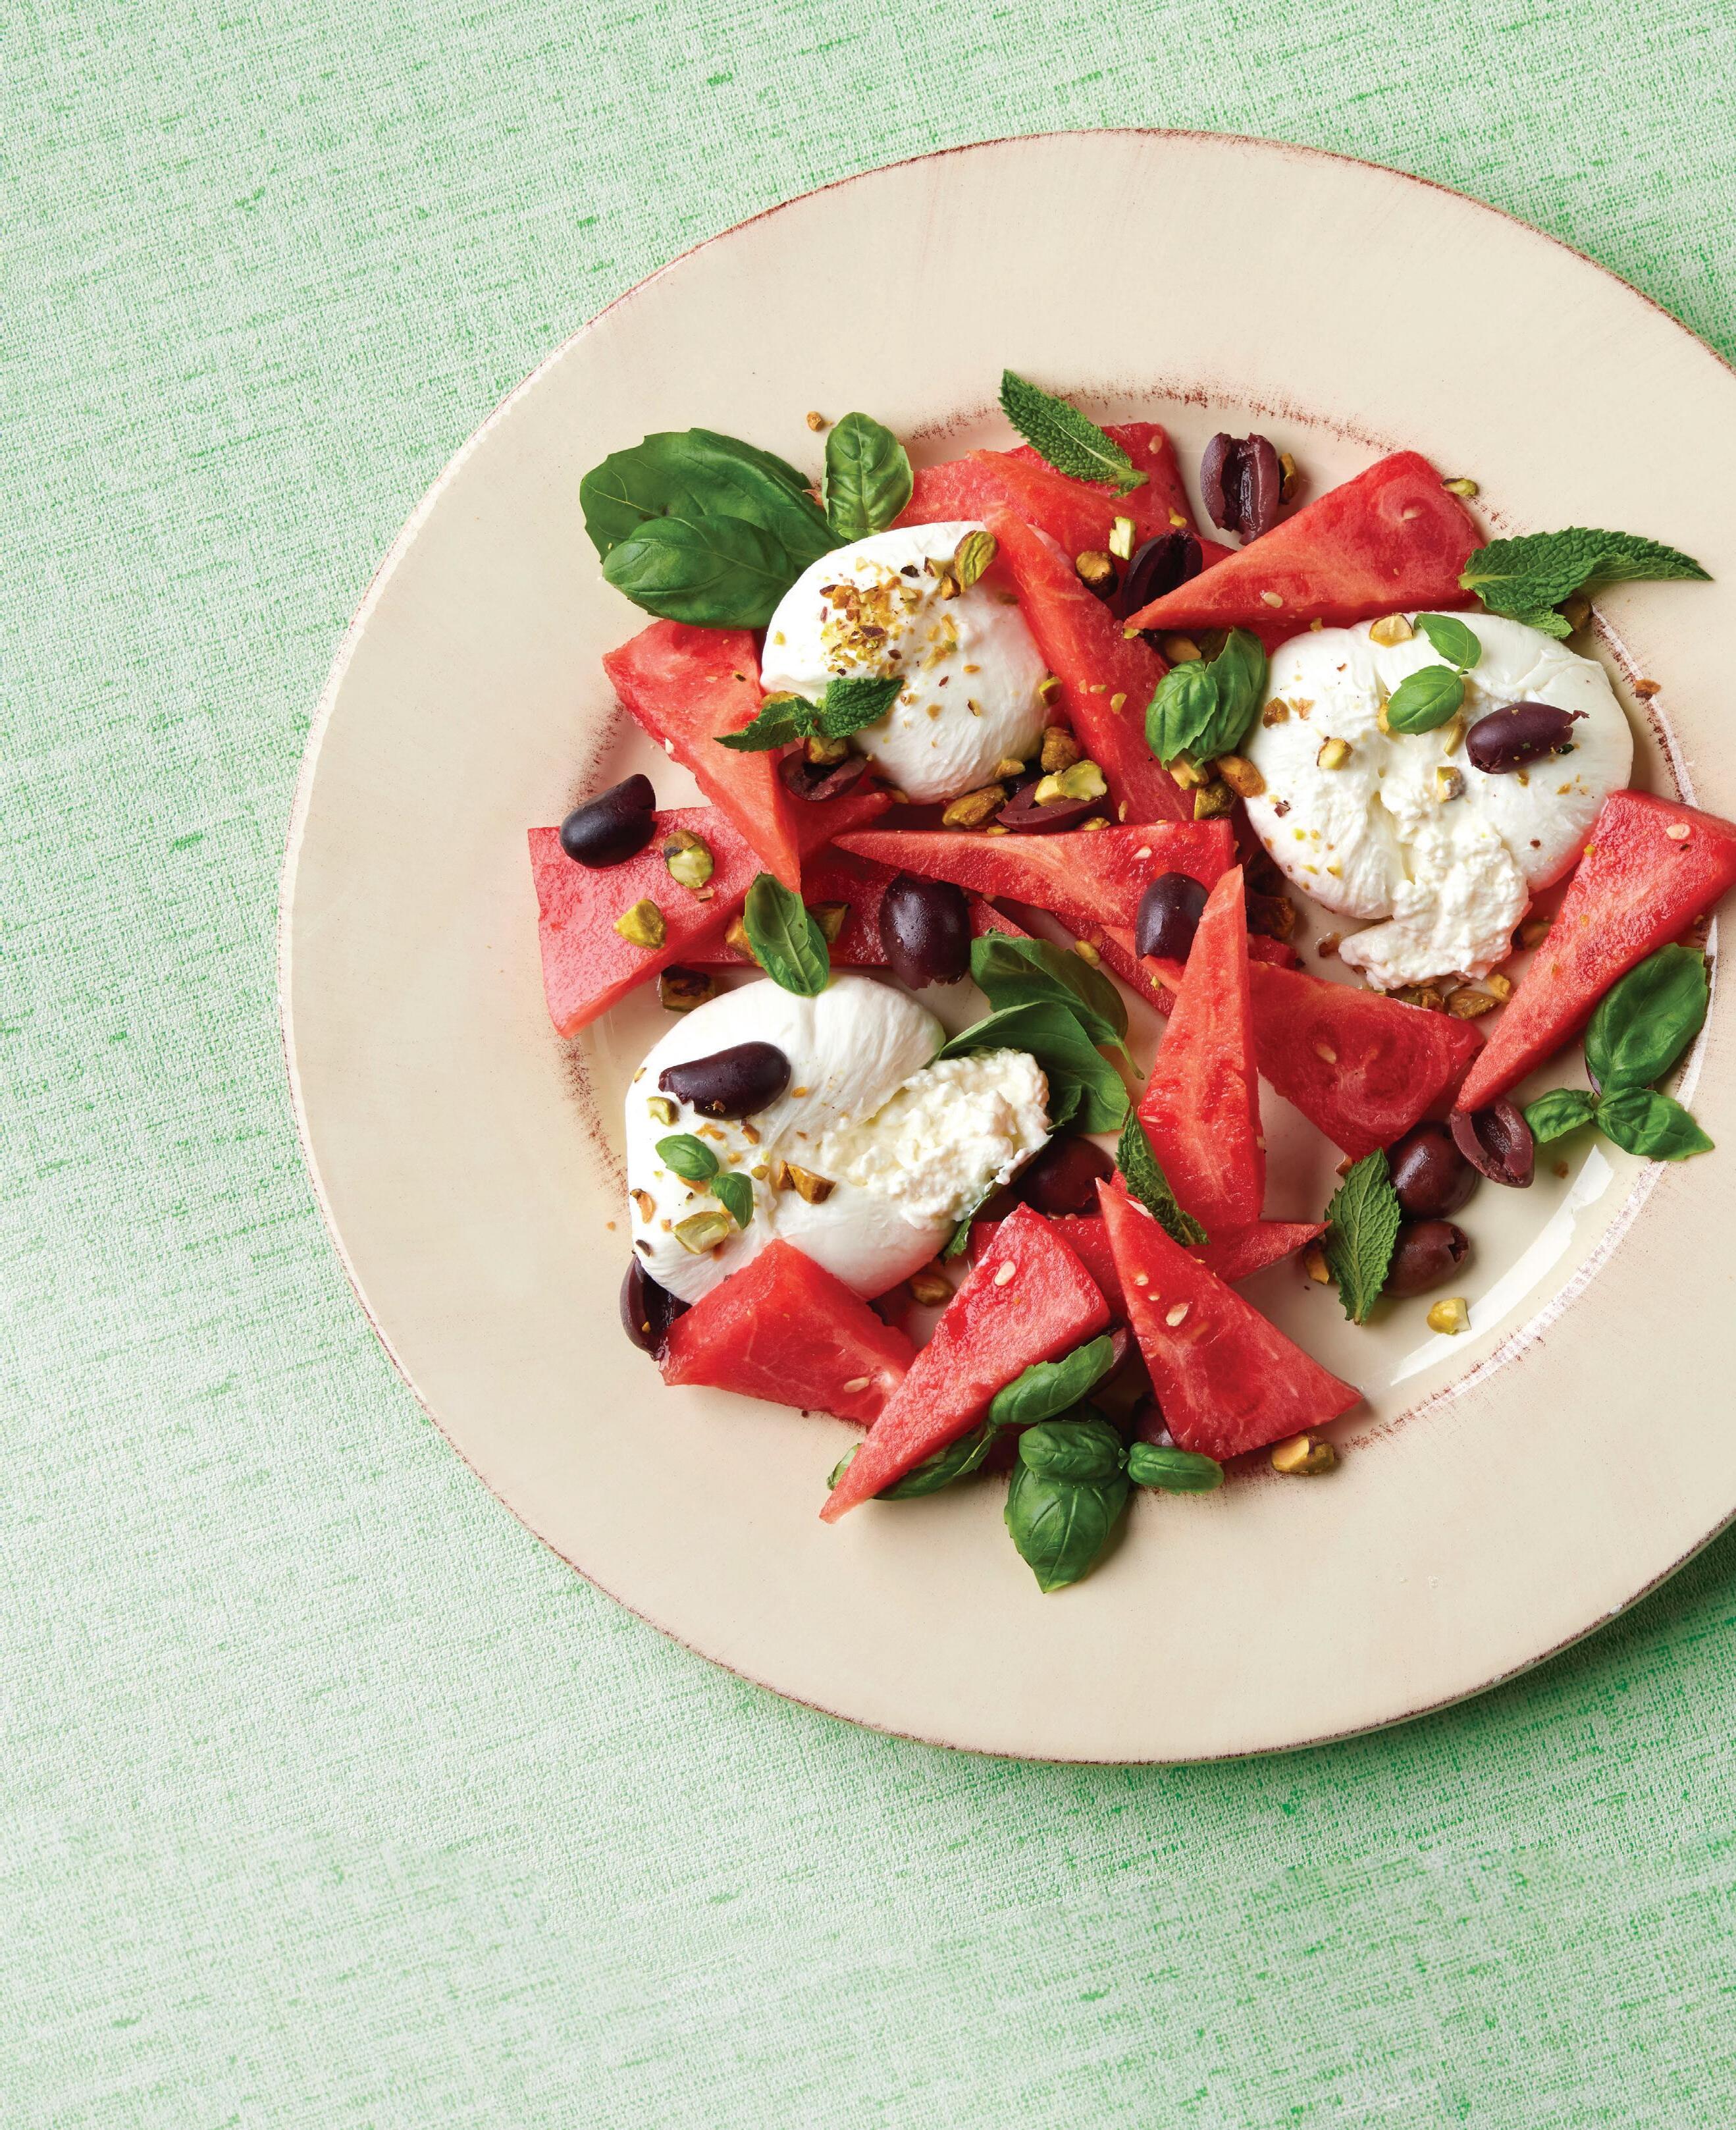
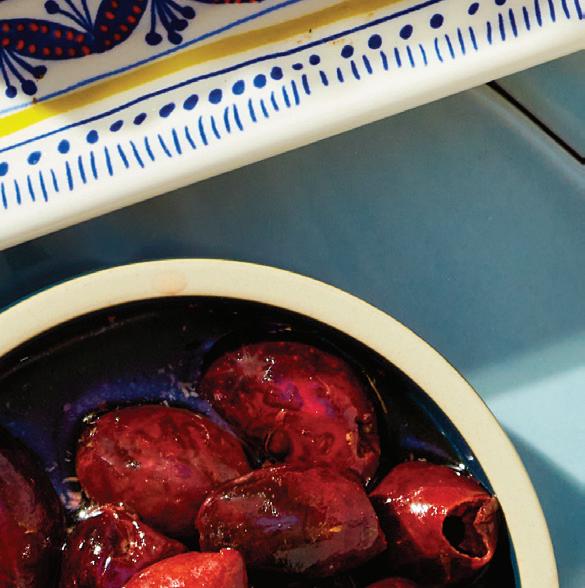
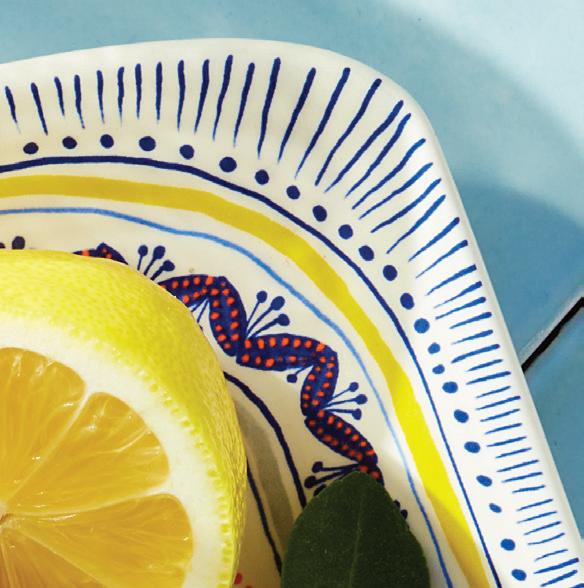
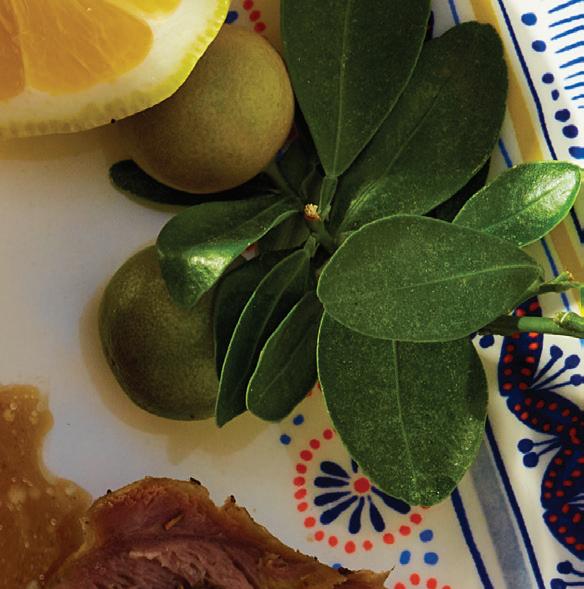
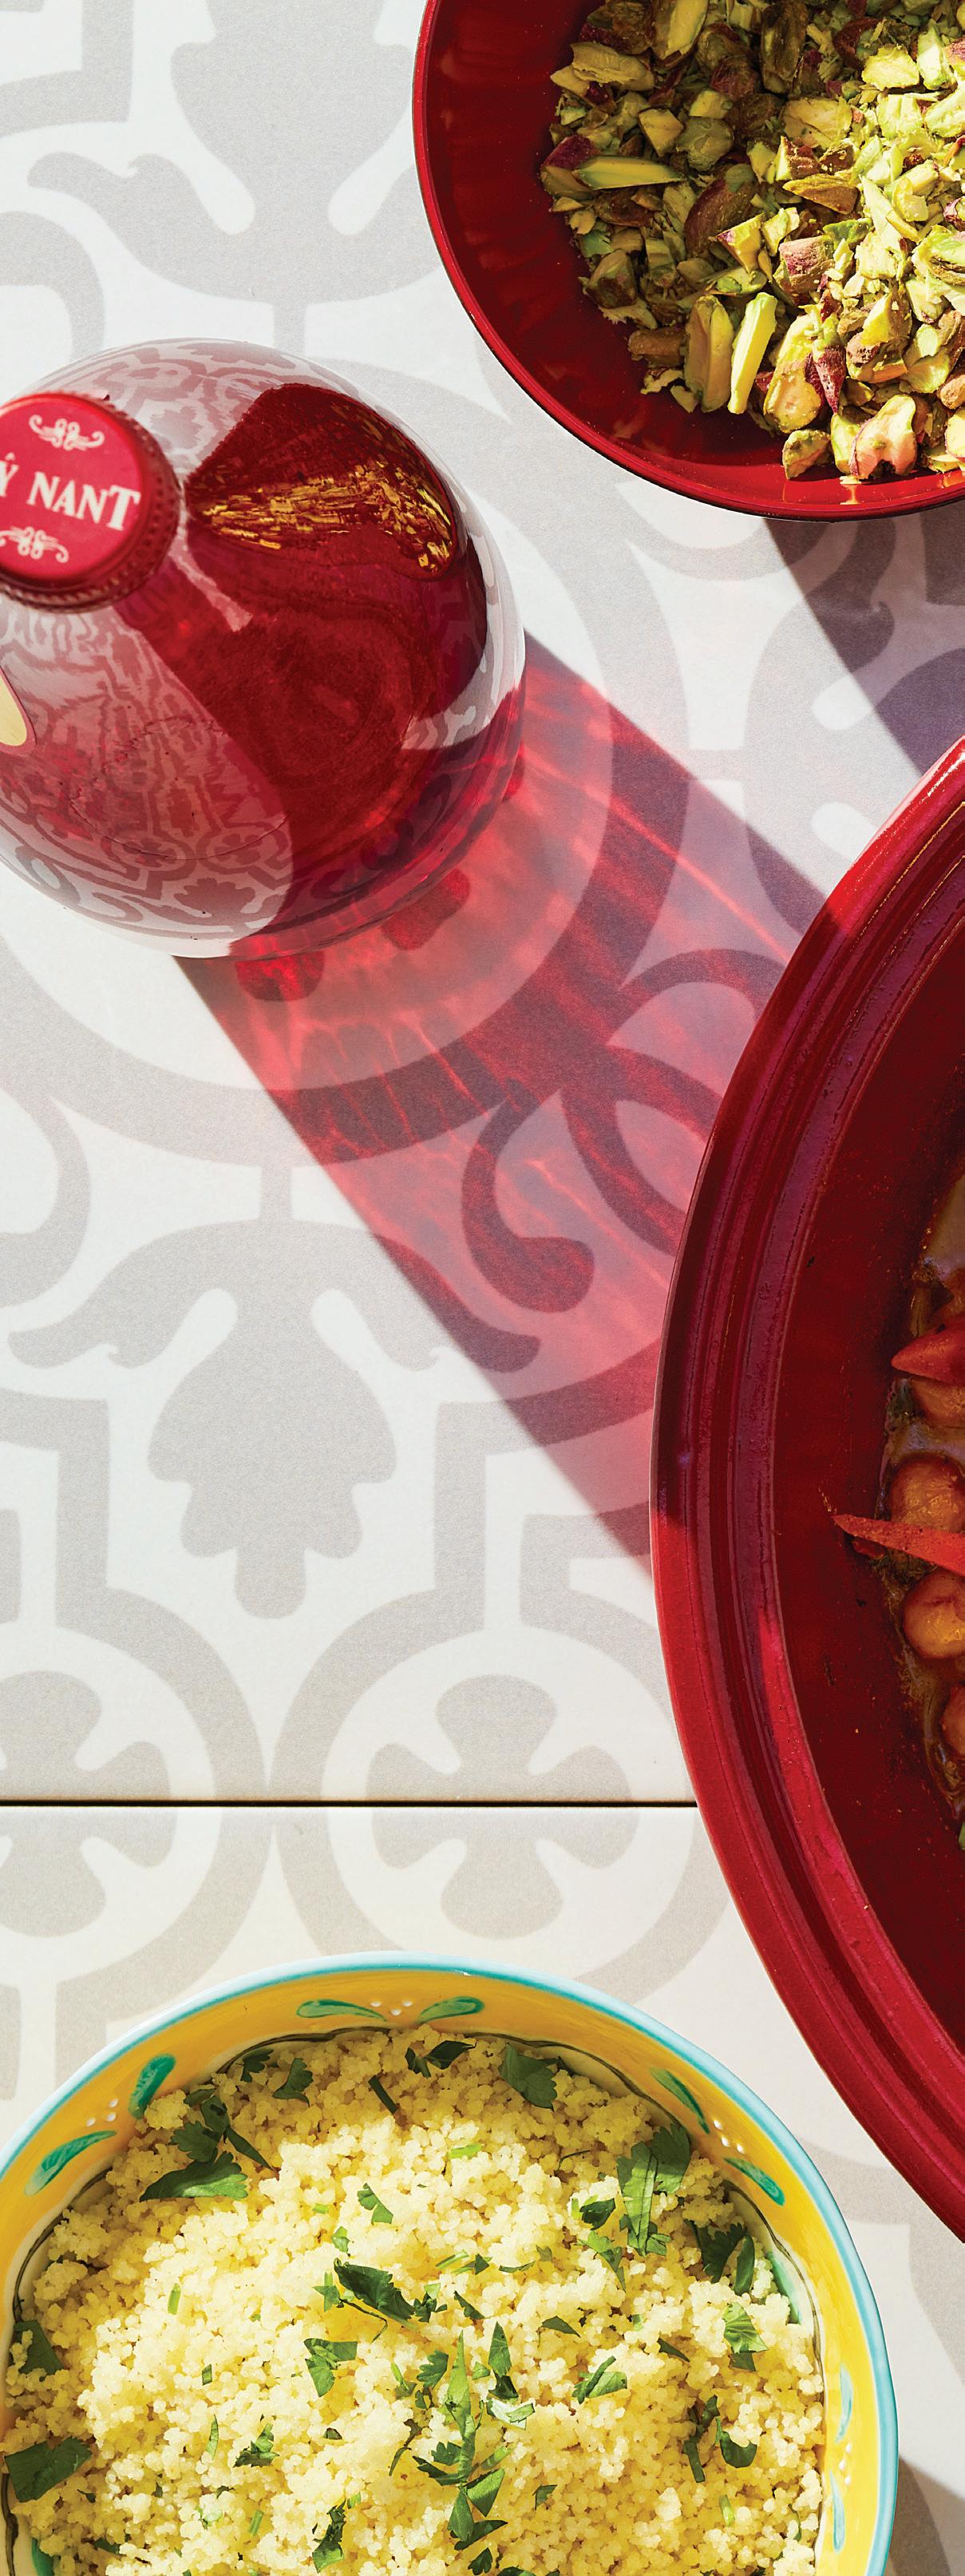
Citrus, nuts, and fresh herbs are hallmarks of Mediterranean cooking (page 20)
“Food is maybe the only universal thing that really has the power to bring eve one together. No ma er what culture, eve where around the world, people get together to eat.”
– GUY FIERI
Enjoy the delights of sweet and savory breakfast fare for any meal
RECIPES BY TONIA GEORGE

20 Savor the Sunshine
Recipes to transport you to the Mediterranean and celebrate the region’s delicious diversity BY
KRISTIN DONNELLY

Chef Richard Ingraham on the power of nutrition, family roots, and his latest cookbook ‘LOVE’ BY
EMMA ENEBAK


ON THE COVER


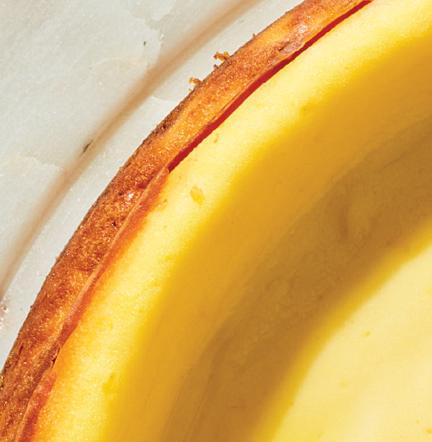
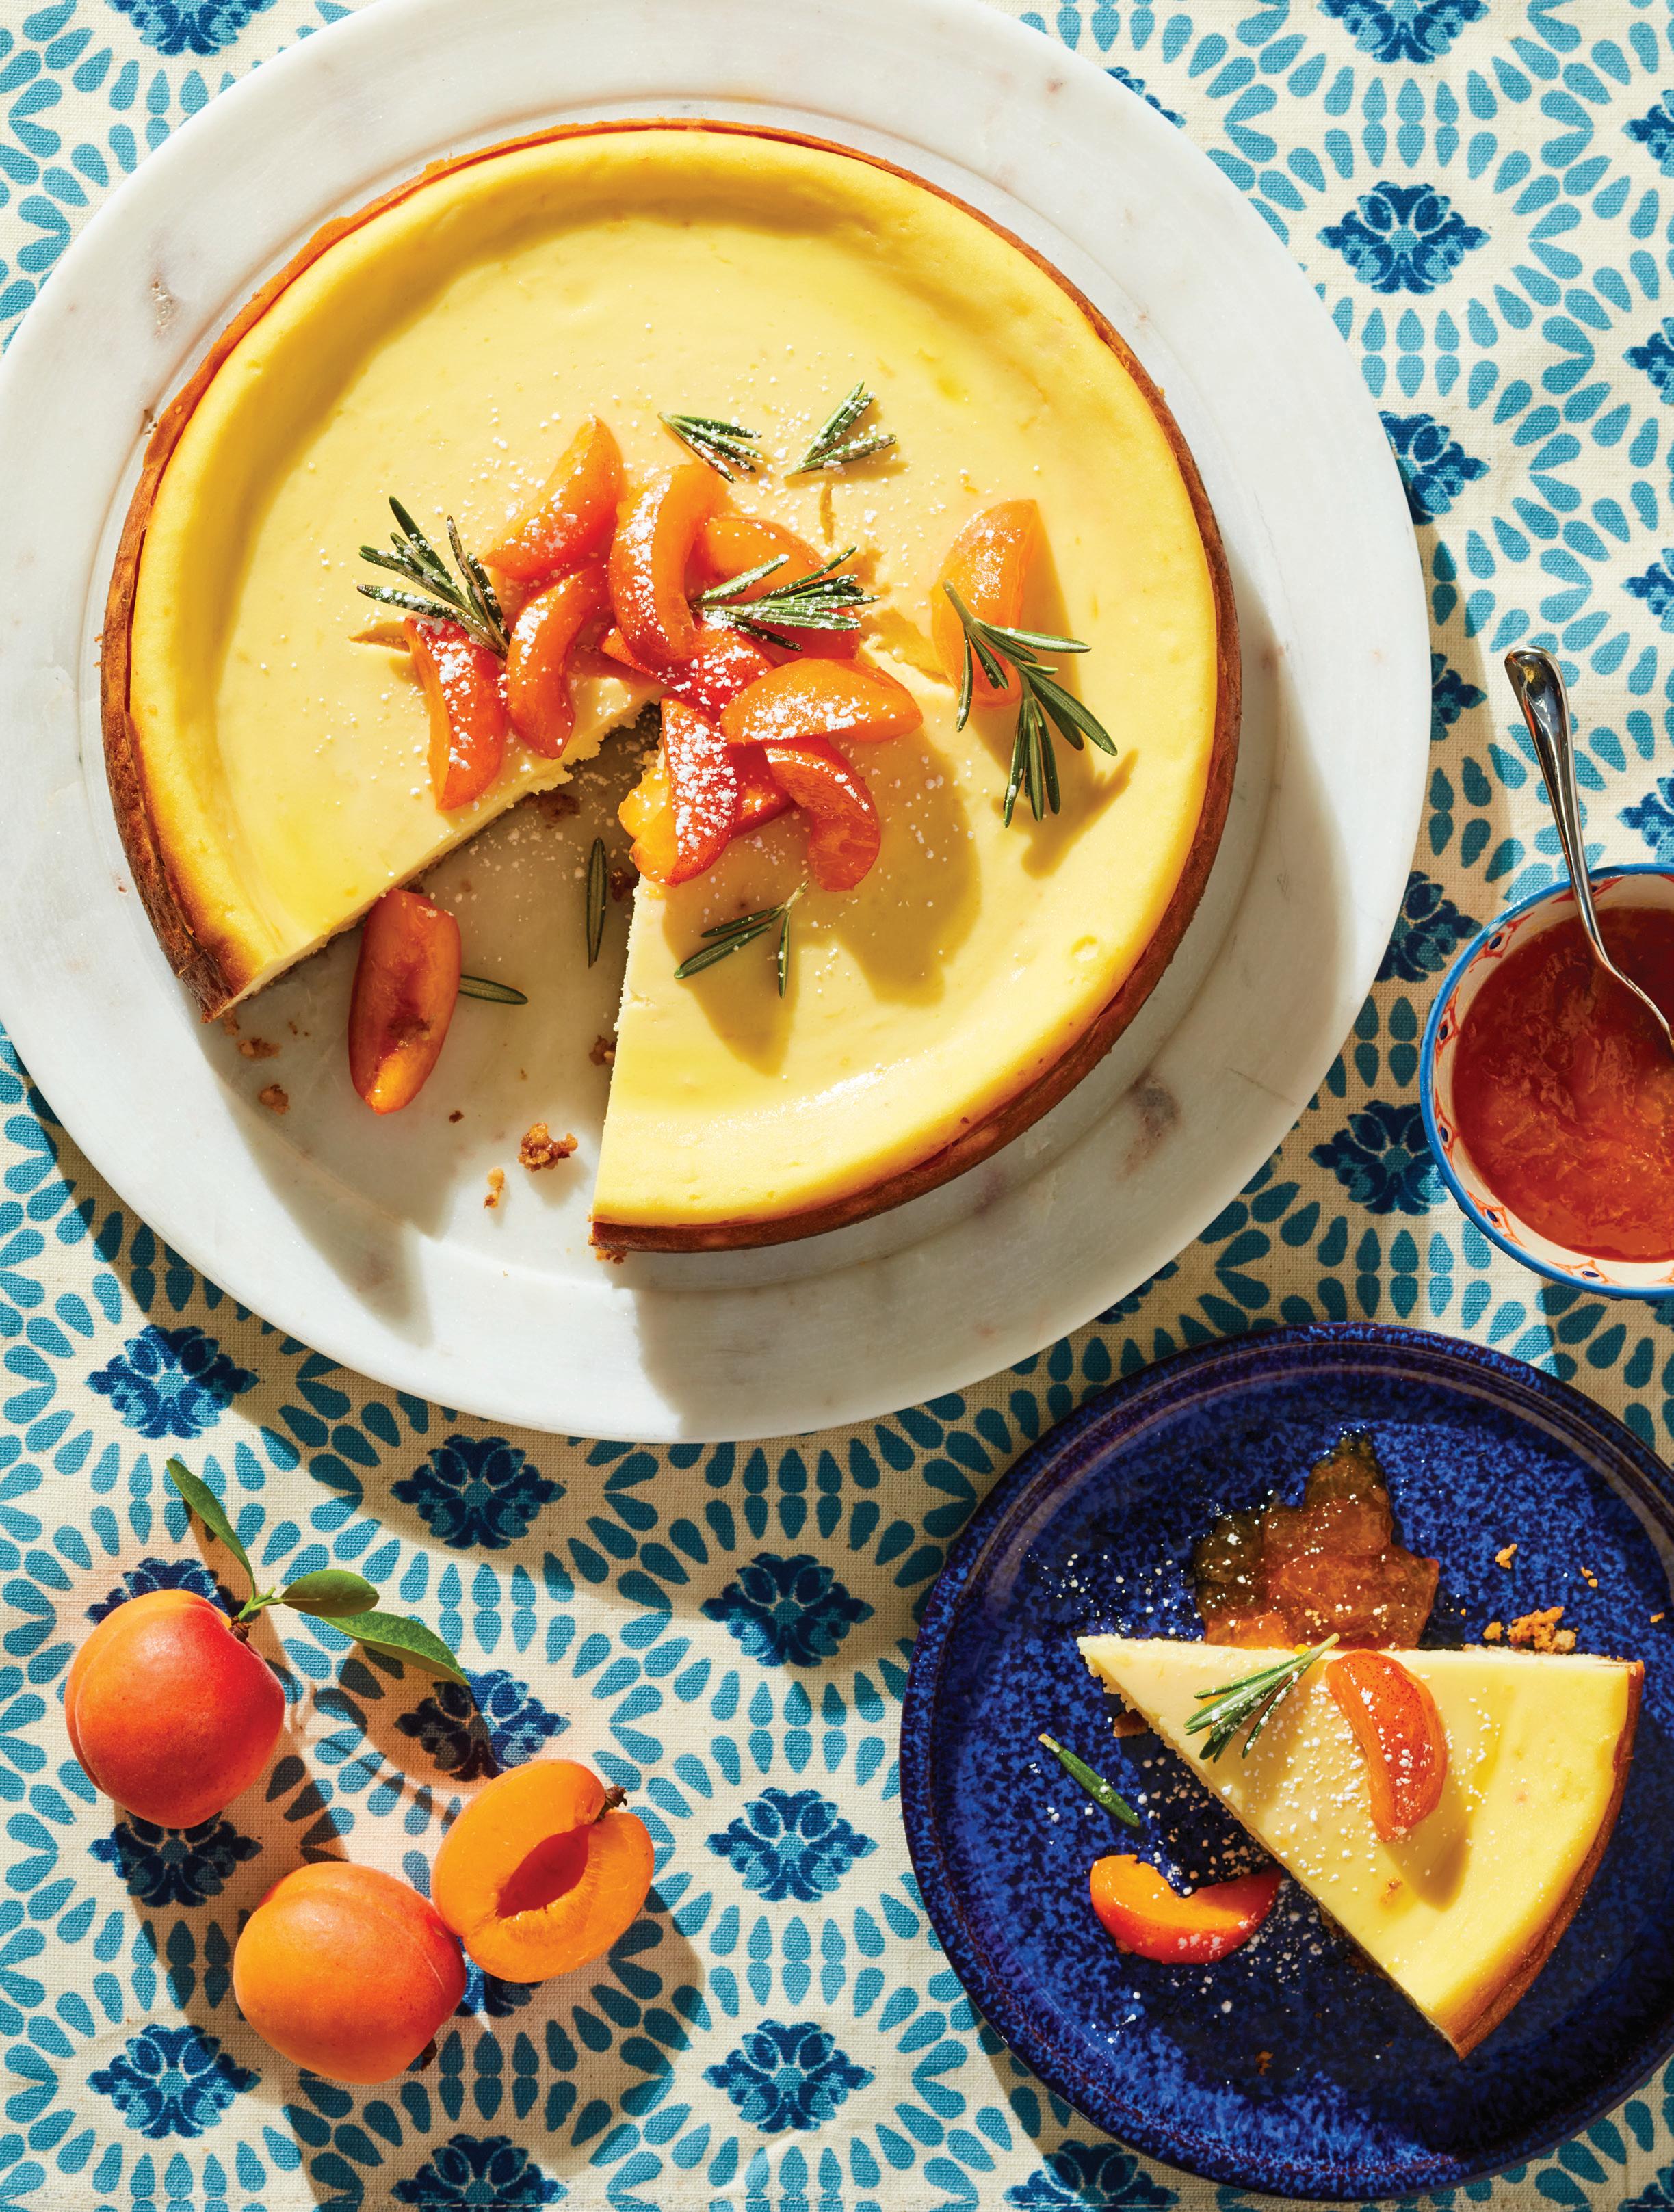
Ricotta Cheesecake with Walnut Crust, page 28
PHOTOGRAPHER
Terry Brennan
FOOD STYLIST Lara Miklasevics
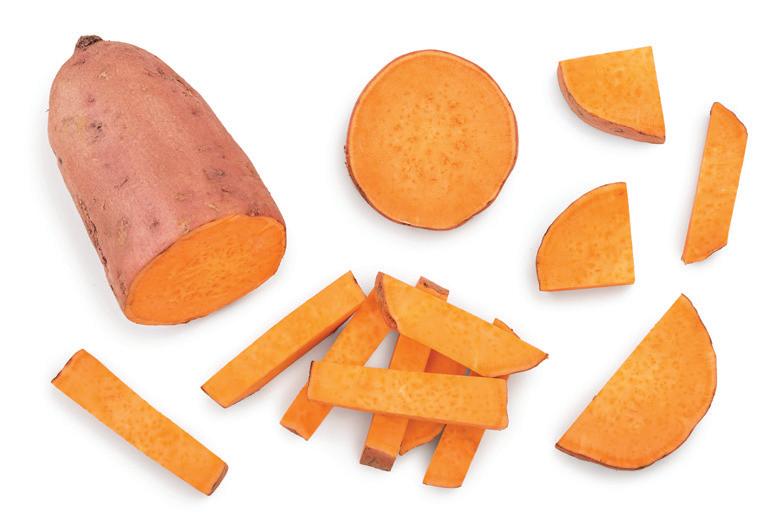
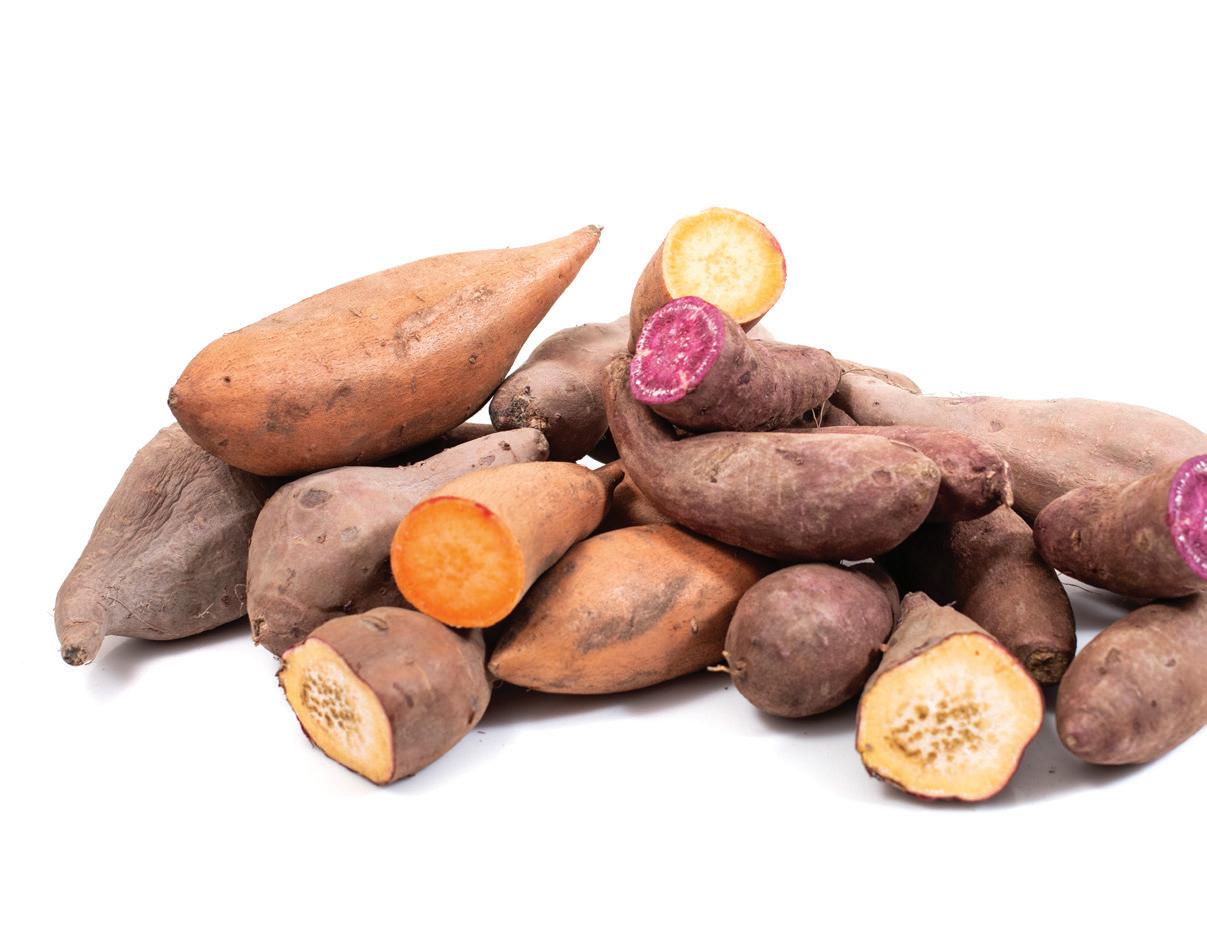
SWEET POTATOES ARE A HEALTHY CHOICE FOR ANY MEAL—IN ANY SEASON
See page 6
Celebrate melty cheese with these gorgeously gooey
MARY SUBIALKA
PUBLISHER
Tammy Galvin
GROUP EDITOR, CUSTOM PUBLICATIONS
Alesha Taylor
CONTENT DIRECTOR
Mary Subialka
CONTRIBUTING EDITORS
Emma Enebak, Macy Harder
CREATIVE DIRECTOR
Ted Rossiter
ART DIRECTOR
Olivia Curti
PRODUCTION DIRECTOR
Deidra Anderson
ADVERTISING COORDINATOR
Sydney Kell
SALES & MARKETING SPECIALIST
Tausha Martinson-Bright
VOLUME 21 , NUMBER 1
Real Food magazine is published quarterly by Greenspring Media, LLC, 9401 James Ave. S., Suite 152, Bloomington, MN 55431, 612.371.5800, Fax 612.371.5801. All rights reserved. No part of this publication may be reprinted or otherwise reproduced without written permission from the publisher. Real Food is exclusively operated and owned by Greenspring Media, LLC. Printed in the USA. realfoodmag.com
The pages between the covers of this magazine (except for any inserted material) are printed on paper made from wood fiber that was procured from forests that are sustainably managed to remain healthy, productive and biologically diverse.
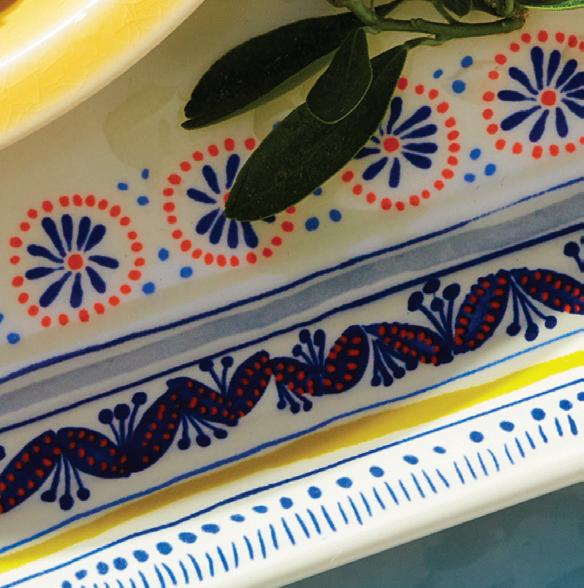
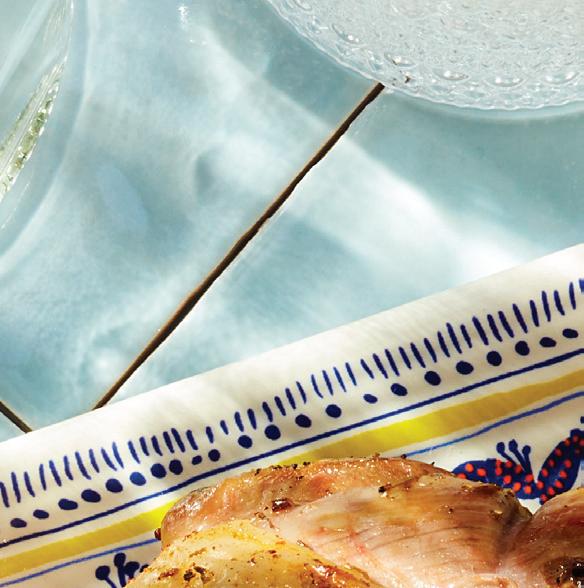
Tips for making your spring events bloom with gorgeous table decor, floral arrangements, and seasonal fare
by alesha taylor
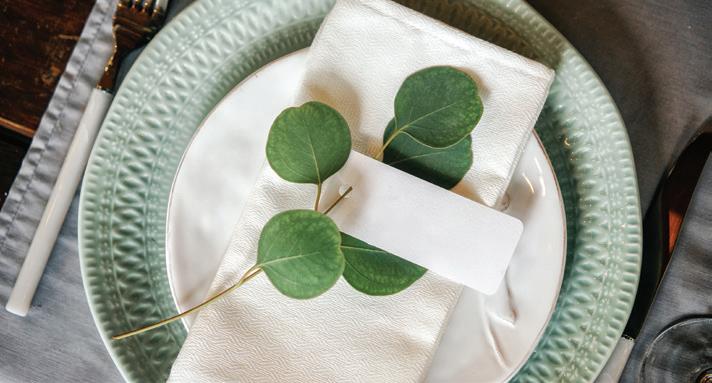
Spring entertaining is all about embracing the season’s vibrant colors, fresh flavors, and laid-back elegance—not to mention, it’s the perfect time to invite friends and family over for relaxed yet memorable gatherings. Whether you’re hosting a simple brunch or a more formal evening affair, a thoughtful approach to table settings, flowers, and food can elevate any occasion. Here’s your guide to mastering the art of spring entertaining with style and ease.
Casual Elegance with a Fresh Twist
Spring is all about fresh beginnings, so why not re ect that in your table se ings? For a casual yet elegant vibe, mix and match elements that complement the season’s natural beauty.
■ Tablecloths and Linens: Light, breathable linens in pastel shades or soft neutrals create a fresh, airy feeling. If you’re aiming for a more rustic look, linen napkins paired with wooden or marble serving trays can add an earthy touch.
■ Table Runner or Centerpiece: A simple, elegant runner in a light floral print or a neutral shade can set the tone. If you’re working with a more minimalistic setup, a single large bowl of fruit or fresh herbs will add a natural centerpiece.
■ Place Cards: For a more intimate gathering, personalized place cards add a thoughtful detail. Use sprigs of rosemary or lavender tied to the card for a fragrant, rustic touch.

Bring the Outdoors In
The quintessential spring touch, flowers bring vibrant color and fragrance to any table. For effortless floral arrangements, keep a few key tips in mind.
■ Choose Seasonal Blooms: Da odils, tulips, and peonies are the stars of spring. These flowers, with their vivid hues, bring instant cheer to the table. Pairing them with greenery like eucalyptus or ferns can create a lush, natural vibe. Wildflowers can also add a rustic charm. Arrange them loosely in Mason jars or small vases for an informal but inviting look.
■ Fragrance Matters: When selecting flowers, be mindful of their scent. While a fragrant centerpiece can be delightful, overly strong scents can compete with the aroma of your food. Opt for lightly fragrant flowers like lilies or daisies, which won’t overpower the meal.
■ Keep It Low: Arrange your flowers in low vases to ensure guests can still engage with each other across the table.
■ Multiple Small Vases: Rather than a single large centerpiece, consider scattering small arrangements throughout the table. This allows each guest to enjoy the beauty of the blooms from any angle.
Spring-Inspired


The food you serve is the centerpiece of any gathering, and spring is the season for fresh, light, and flavorful dishes.


■ Fresh Salads: A light, crisp salad is a perfect starter. Try a spring greens salad with goat cheese, strawberries, and candied pecans. Drizzle with a light vinaigrette made from olive oil, lemon juice, and honey.

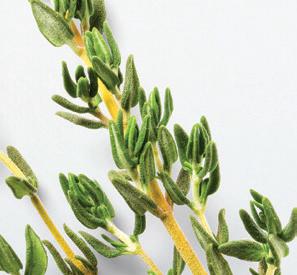
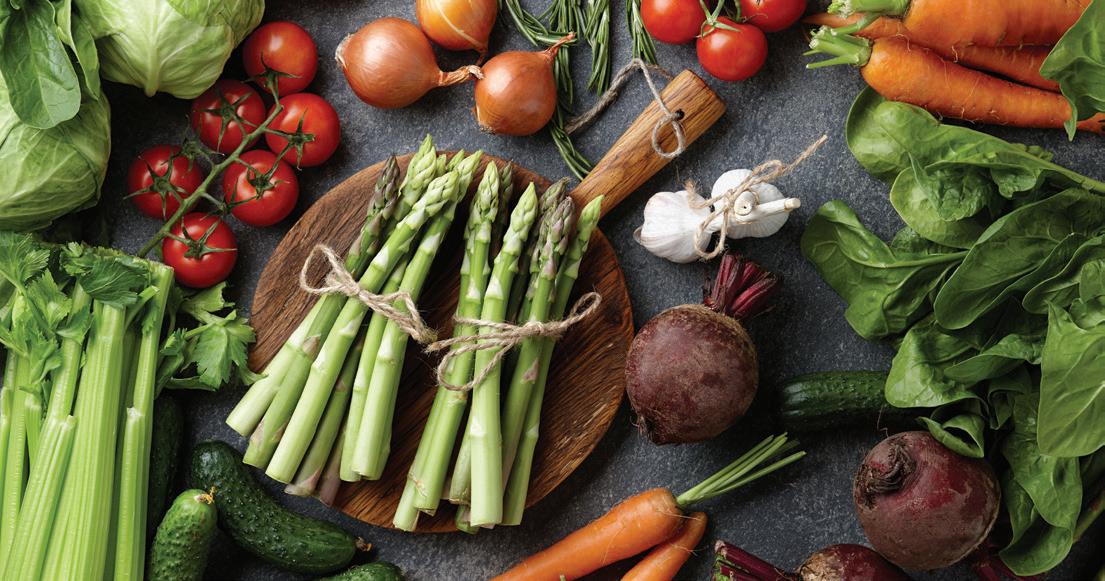
■ Grilled or Roasted Vegetables: Roasting spring vegetables like asparagus, carrots, or radishes enhances their natural sweetness. For added flavor, toss them with a little olive oil, garlic, and fresh thyme before grilling or roasting.
■ Herb-Infused Dishes: Fresh herbs like mint, basil, and tarragon shine in the spring. Use them to flavor everything from pasta and salads to roasted meats. For example, a mint pesto can beautifully complement a grilled lamb dish.
■ Pairing Drinks: Choose light and refreshing options that align with the season. White wines, such as Sauvignon Blanc or Chardonnay, are ideal for pairing with spring salads and seafood. A crisp rosé or an herb-infused gin cocktail can also complement a variety of dishes.
■ Dessert: Don’t forget to end your meal with something sweet! Spring desserts often feature fruits like rhubarb, strawberries, or lemons. A lemon tart with a buttery crust, or fresh berry shortcakes, are both light and satisfying choices that feel like a celebration of the season.
To make entertaining even easier, consider investing in a few key tools that elevate both your preparation and presentation.
■ Serving Trays and Platters: Large, sturdy serving trays and platters allow you to present food beautifully and serve it with ease.
■ Cocktail Shaker and Glassware: For spring cocktails, a good cocktail shaker is essential. Select glassware that complements your chosen drinks—whether it’s a sparkling spritz served in a coupe glass or a classic gin and tonic in a highball glass.
■ Pitchers and Decanters: For wine or sangria, a stylish pitcher or decanter adds sophistication and convenience for serving.
■ Cheese Boards and Serving Bowls: A large cheese board with seasonal fruits, nuts, and a variety of cheeses can double as both a snack and an elegant centerpiece.


Nutrient-rich sweet potatoes make a great year-round
by mary subialka
Sweet potatoes are much more than a staple atop the winter holiday table. This deliciously healthy veggie is a perfect choice year-round on its own and in recipes from breakfast to dessert. The North Carolina Sweetpotato Commission and other representative associations prefer “sweetpotato” one word as a noun rather than “sweet potato” which describes a type of potato, since the sweetpotato is botanically di erent. (You’ll see that in the recipes they provided, though the dictionary still shows two words.)
Scientists believe the sweet potato was domesticated more than 5 ,000 years ago, according to the USDA, but there is debate whether that was in South America or Central America. There is no debate, however, that it’s one of the healthiest vegetables due to its high levels of vitamin A (which plays a role in vision, bone development, and immune function), vitamin C, iron, potassium, and fiber, in addition to nutrients like beta carotene and calcium. One medium sweet potato has only 130 calories, and when eaten with the skin on, it has over 100 % of the recommended daily vitamin A. The tender vegetable requires a long frost-free growing season, so most commercial production in the U.S. is in the southern states, particularly North Carolina and Louisiana, as well as California. It’s also an important food crop in tropical and subtropical countries.


A discussion of this vegetable wouldn’t be complete without clearing up the question about its name. Sweet potatoes (lpomoea batatas) are sometimes called “yams” in the U.S. but, true yams (Dioscorea sp.) are a di erent plant native to Africa, Asia, and Oceana that are white in color with thick bark-like skin that makes them di cult to peel, and neutral starchy flesh and edible roots—plus they can grow up to 6 feet long! Sweet potatoes have thin, edible skin and sweet colorful flesh and grow under the soil while their leaves grow above the ground. Why the confusion? Back in the 1930s, Louisiana sweet potato growers wanted to distinguish their orange-fleshed varieties from the yellow-fleshed types in other states. So they chose a variation of the African word “nyami”—“yam.” Today, to combat that confusion, the USDA requires that all sweet potatoes be labeled as such.
cooking
There are hundreds of sweet potato varieties that can be divided into five basic types: orange or red skin with orange flesh, yellow or purple skin with white flesh, and purple skin with purple flesh. The flavor and texture can vary a little. When cooked, the flesh of the orange skinned, orangefleshed varieties is super-sweet and very moist, especially as compared to pale yellow- or whitefleshed types, which are most potato-like.
Sweet potatoes are more perishable than white potatoes, but can keep up to 2 weeks if stored properly. Store in a cool, dry, wellventilated area away from heat sources. Don’t store in the refrigerator, which can produce a hard center and unpleasant taste. Don’t wash until you plan to use them.
Scrub the skin, trim ends, and cut out bruised spots. Avoid using any carbon blades, which might cause the sweet potato to darken.
Bake: Prick several times with a fork and bake at 400°F 40 to 50 minutes or until tender.
Boil: Place whole in boiling water and cook until tender, about 35 to 40 minutes.
Fry: Peel and cut into lengthwise strips about ¼ to ½ inch thick. Heat oil to 365°F. Place sweet potato strips in oil and fry until brown and tender. Remove from oil and drain on paper towel.
Grill: Slice lengthwise into 1⁄4-inch thick slices. Place on grill. Turn once. Remove when tender.
Microwave: Prick several times and cook on high 4 to 6 minutes or until tender. Turn halfway through cooking time. For more than one, select sweet potatoes similar in size and increase cooking time.
Saute: Peel and cut into 1 4- to 1⁄2-inch thick slices or 1-inch cubes. Place pieces and 2 tablespoons butter or oil in a large skillet and cook, stirring frequently, over medium-high heat until tender.

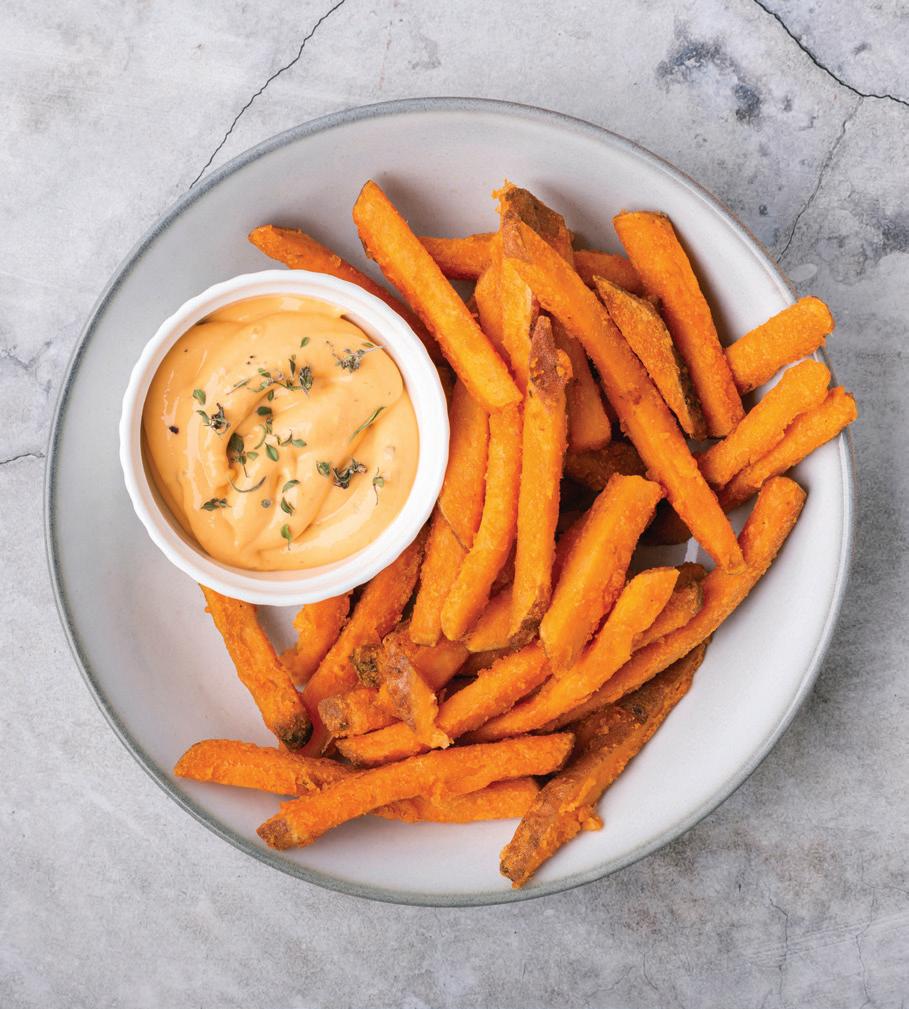
These extra crispy sweetpotato fries don’t require deep-frying— these crunchy bites are baked. Enjoy as a side dish, with dipping sauce, or alone in their simple deliciousness. Make a big batch with multiple dipping sauces for a fun party snack.
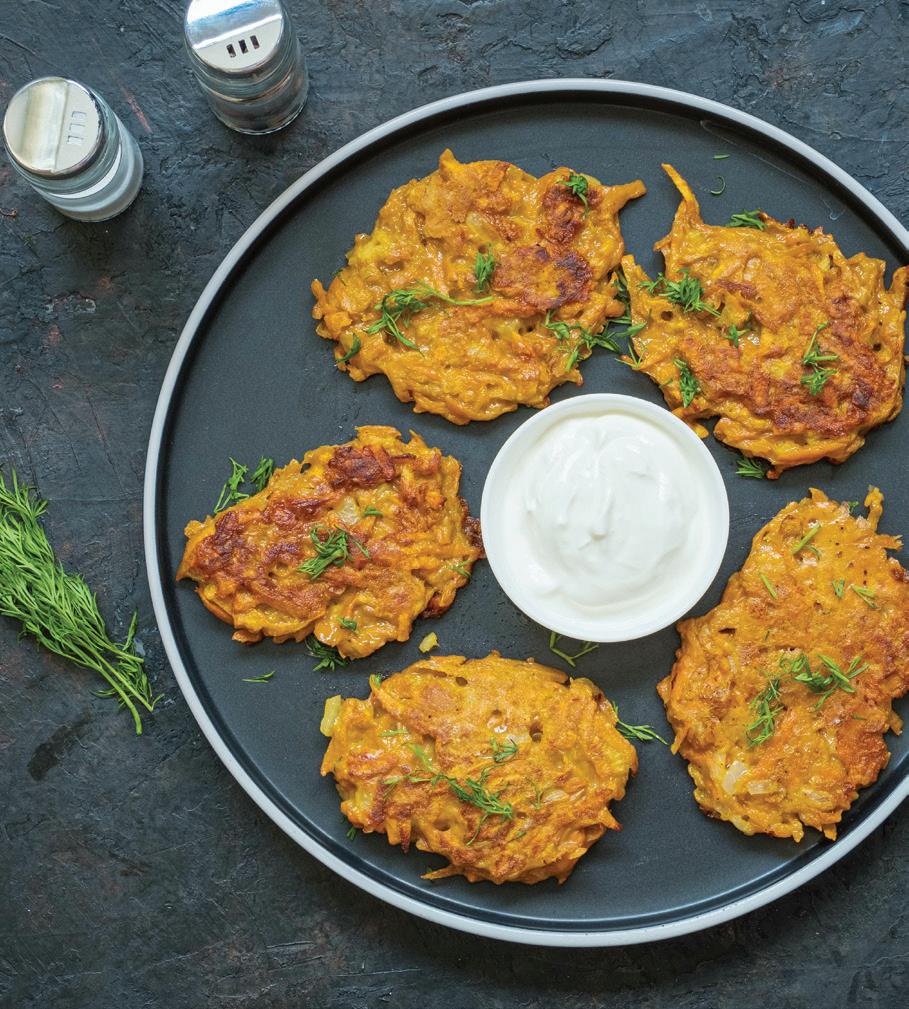
These are a fun twist on traditional sweetpotato latkes. Formed into fritters and baked to golden brown perfection, these are a welcome addition to any meal of the day. Tip: A cheese grater will be your best friend for shredding sweetpotatoes.
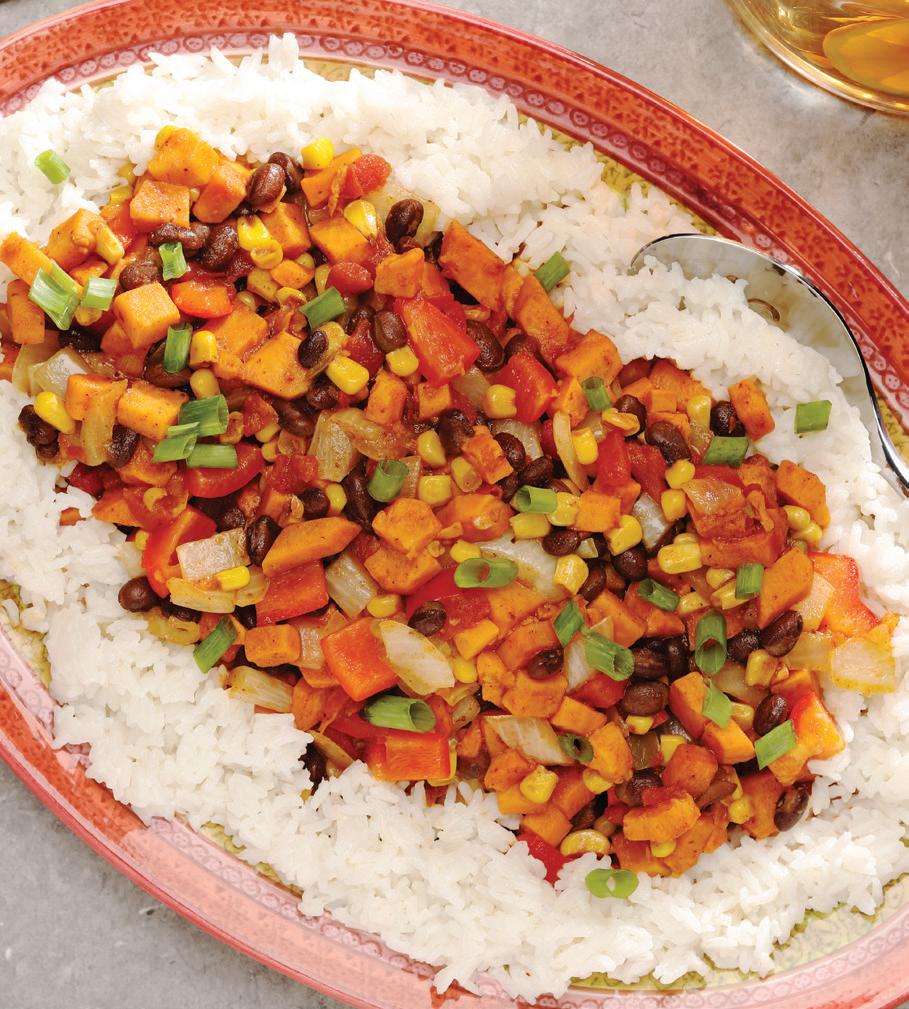
This is a great way to warm up on a chilly day. This dish was a North Carolina State Fair recipe winner.
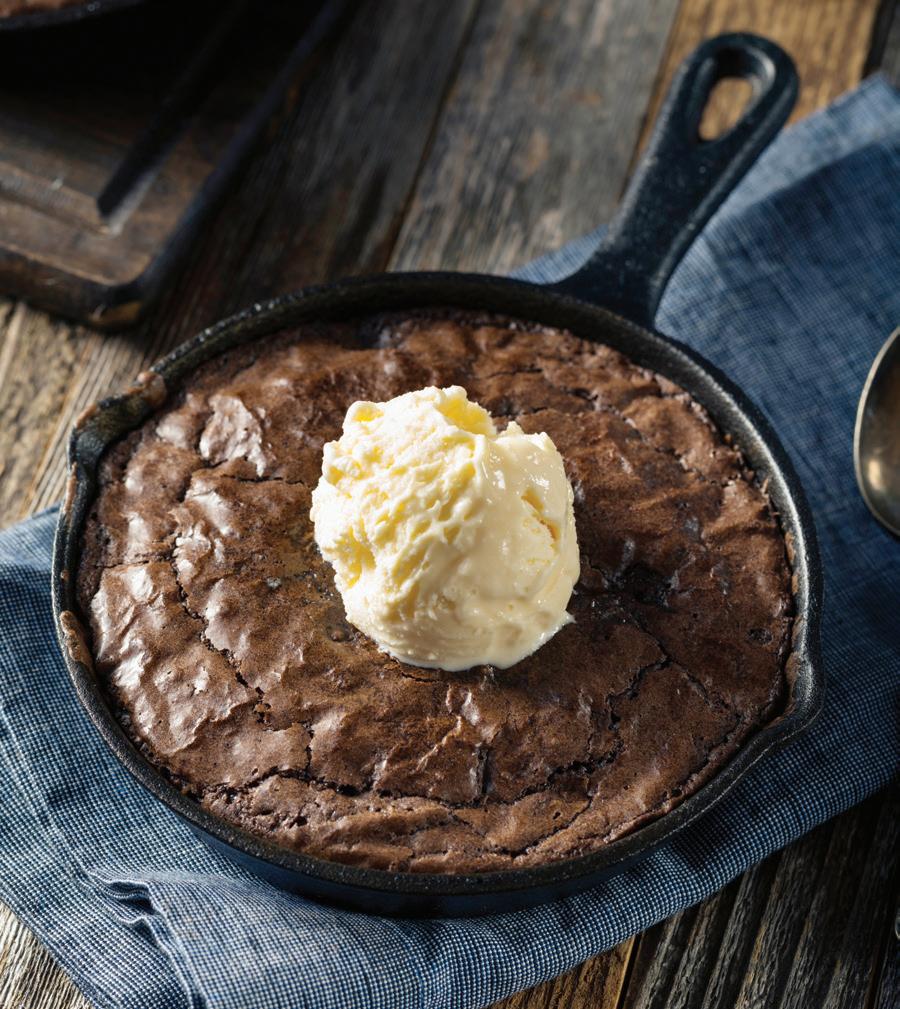
Sweet chocolaty goodness! These are grain free and paleo friendly. While you can bake these in a traditional cake pan, the skillet will give you a nice crispy crust.
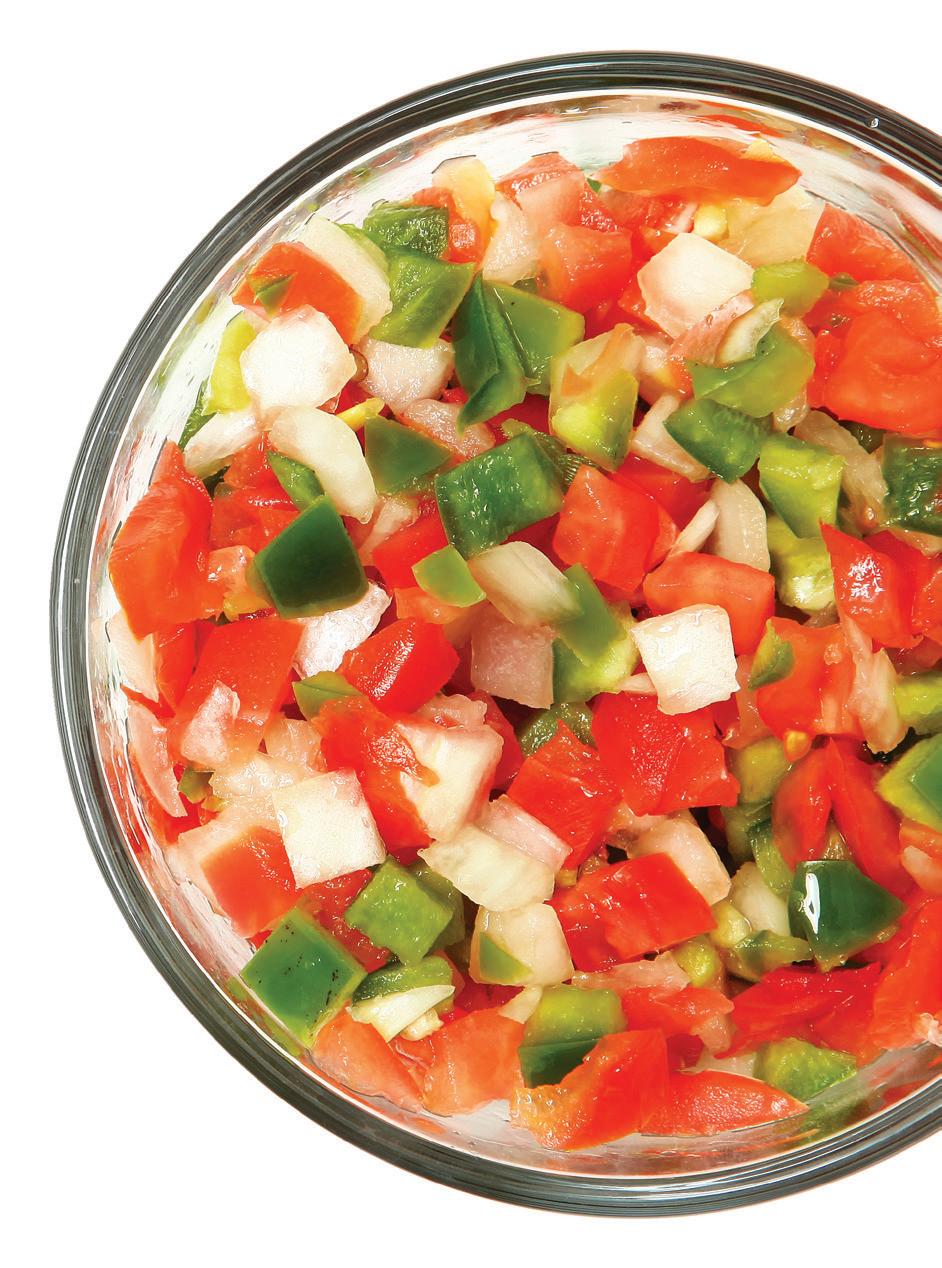
MAKES 10 SERVINGS | RECIPE COURTESY OF THE NORTH CAROLINA
SWEETPOTATO COMMISSION
4 cups diced sweetpotatoes
1 large onion
3 cloves garlic minced
1 large bell pepper
1 can whole kernel corn
1 can chili seasoned diced tomatoes
1 can black beans, undrained
1. Heat oil in a large Dutch oven.
1 package taco seasoning mix
1 teaspoon chili powder
2 cups vegetable stock
1 cup rice
2 cup coconut milk
2 scallions/green onions chopped
2 tablespoons vegetable oil
2. Saute onion, garlic, and bell pepper until tender, about 5 minutes.
3. Add sweetpotatoes and cook until lightly browned.
4. Add taco seasoning and stir. Add corn, beans, tomatoes, stock, and chili powder.
5. Reduce heat to low and cook 25 minutes until all vegetables are tender.
6. Meanwhile, combine coconut milk and rice in a saucepan with tight fitted lid. Bring to a boil. Cover and reduce heat. Cook for 20 minutes, until liquid is absorbed. Serve chili topped with a scoop of chopped scallions.
MAKES 12 SERVINGS | RECIPE BY FIT FOODIE FINDS COURTESY OF NORTH CAROLINA SWEETPOTATO COMMISSION
3 large eggs
½ cup maple syrup
1 cup sweet potato puree (see Cook’s Note)
1 teaspoon vanilla extract
½ cup coconut flour
¼ cup coconut sugar
½ cup unsweetened cocoa powder
1 teaspoon ground cinnamon
1 teaspoon baking powder
⅓ cup mini chocolate chips
1. Heat oven to 350°F and generously spray a 10-inch cast iron skillet with coconut oil cooking spray. Set aside.
2. Place wet ingredients in a large bowl and mix together until smooth. If you are making your own sweet potato puree, follow information in the Cook’s Note. Then, add dry ingredients to the same bowl and mix until combined.
3. Pour batter into skillet and use a spatula to spread out evenly.
4. Bake at 350°F 40 to 45 minutes. Cool 10 minutes before slicing.
Cook’s Note: To make sweetpotato puree, heat oven to 400°F and line a baking sheet with foil. Slice sweetpotato(es) in half lengthwise and spray both sides with coconut oil cooking spray. (1 large sweetpotato equals about 1 cup puree.) Pierce potato(es) with a fork a few times on both sides and place on prepared baking sheet. Roast in preheated oven for 40 minutes or until potatoes are tender. Cool about 5 minutes, scoop out flesh, place in a food processor or use a hand mixer. Blend until smooth.
MAKES 8 SERVINGS | RECIPE COURTESY OF NORTH CAROLINA SWEETPOTATO COMMISSION
7 medium sweetpotatoes
1⁄3 cup olive oil
½ teaspoon salt
1. Heat the oven to 400°F. Line 2 baking sheets with foil and spray with nonstick cooking spray. For crisper results, place a metal rack on each baking sheet.
2. Peel the sweetpotatoes, if desired, and cut into 1⁄4-inch strips.
3. In a large bowl, combine sweetpotatoes, oil, and salt. With your hands, toss to coat.
4. Spread sweetpotatoes in a single layer on racks or foil without crowding and set aside remaining sweet potatoes.
5. Bake until crisp, about 30 minutes, flipping halfway through. Repeat until all the sweetpotatoes are baked.
MAKES 12 SERVINGS | RECIPE BY FIT FOODIE FINDS COURTESY OF NORTH CAROLINA SWEETPOTATO COMMISSION
3 cups shredded sweetpotatoes
1 large egg
⅓ cup all-purpose flour (white whole wheat can be substituted)
1 tablespoon garlic powder
¼ teaspoon cayenne pepper
1 cup thinly sliced red onion
¼ cup chopped chives Salt and pepper, to taste
1. Preheat the oven to 400°F. Line a baking sheet with parchment paper and spray with nonstick cooking spray. Set aside.
2. Use a cheese grater to shred the sweetpotato. If your grater has multiple grate sizes, use the largest one (1 large sweetpotato equals about 3 cups of shredded sweetpotato).
3. Place shredded sweetpotato and all of the other ingredients into a large bowl. Use a spatula (or your hands) and mix until very well combined.
4. Form the hash brown fritters by using a ¼ cup scoop. Working one fritter at a time, scoop the mixture into your palms, press the mixture together to squeeze out as much air as possible, and form a patty.
5. Place the patties on the prepared baking sheet. Repeat until all of the sweetpotato mixture is used up. Drizzle the patties with olive oil and sprinkle with salt and pepper (to taste).
6. Bake for 30 minutes or until the tops of the fritters have firmed up and begin to turn golden brown.
LOCATIONS
BLUE BELL, PA
wine & beer available! 1301 Skippack Pike 215-437-3200
DOYLESTOWN, PA
Simply Fresh By McCa rey’s 200 West State St. 215-348-1000
GLADWYNE, PA
wine & beer available! 1025 Youngs Ford Road 484-229-2777
NEW HOPE, PA
wine & beer available! 300 West Bridge St. 267-741-8001
NEWTOWN, PA
wine & beer available! 2890 South Eagle Road 215-579-1310
YARDLEY, PA 635 Heacock Road 215-493-9616
PRINCETON, NJ
wine , beer & spirits available! 301 North Harrison St. 609-683-1600
WEST WINDSOR, NJ
wine , beer & spirits available! Princeton-Hightstown Road and Southfield Road 609-799-3555
FARM-FRESH FOODS
McCa rey’s brings you the freshest variety of foods—frequently from our own backyard! Look for our locally grown seasonal produce. You’ll love its superior freshness.
CHEF’S KITCHEN
Shopping for dinner at McCa rey’s is like having a personal chef. Find just the right meal for you and your family in our Prepared Foods Department, including our Gourmet To Go family meals.
GOURMET CATERING
McCa rey’s is your best choice for elegant, in-home dining and entertaining. Using only the highest quality, freshest ingredients, our professional catering sta guarantees delicious and elegant food you can serve with absolute confidence.
If you would like to discuss your catering needs or meet with us personally, we are available Monday to Friday 9 a.m. to 5 p.m., Saturday 9 a.m. to noon and by appointment. Please call our Catering Planners at 1-800-717-7174.
mccaffreys.com
La st issue we offered game-changing kitchen hacks to help you start your year off right. We hope it helped you streamline your efforts to meal plan, shop, prep, and find your groove! This issue we want to know what’s trending in your kitchen—whether you’ve adopted some of the food predictions for 2025 , like Vintage Floats or Dump Cakes ?! This issue, we’d like to inspire you to create your own culinary trends, and then let friends and family help you decide if they’re in or out of your menu rotation!
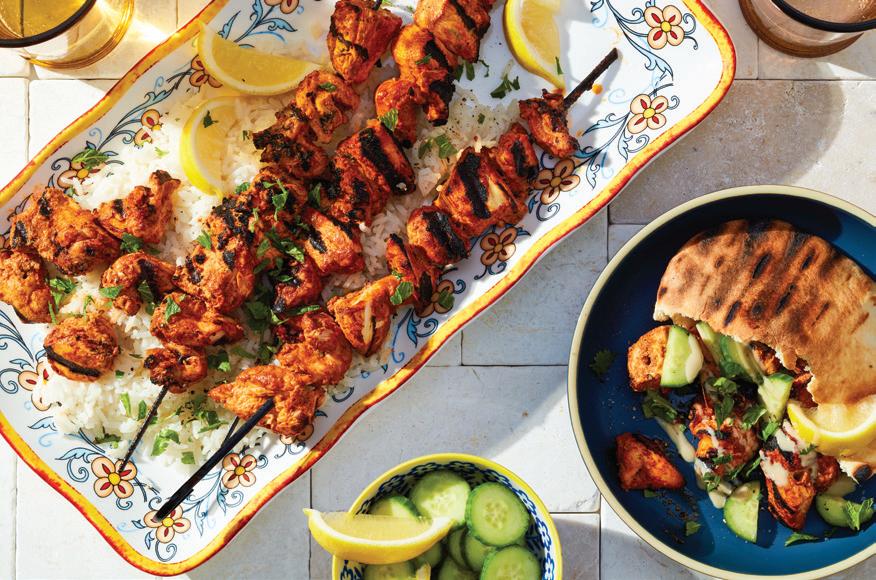
■ Increased access to information and globalization has made some consumers more adventurous with new flavors and ingredients. Sauces are one way to sample global flavors without too much commitment. Try this recipe for Shish Tawook (page 25) featuring a garlicky, lemony yogurt marinade from the Levant part of the Mediterranean, and keep dinner interesting!
■ Who says late morning or early afternoon is the only time to serve brunch? With our tasty twists, brunch can be served any time of day. Pair with a cup of Java Jim’s co ee on a beautifully appointed table, and this recipe for Lemon Ricotta Pancakes with Blackberries (page 33) could go viral on socials!
■ Cheese is a good source of protein and flavor and is becoming more popular in protein-rich diets. Try our recipe for The Ultimate Cheese Toastie (page 45). Talk to our Gourmet Cheese experts who will help you with selections, pairing ideas, and samples. We think you’ll agree with us—cheese will always be trending!
■ Rotisserie Chicken seems to be in all the time too, but how you prepare and present this handy protein varies. Try these recipes for Chicken Lasagna , Chicken Fried Rice , Asian Chicken Salad Wraps, and more (page 36) and see which one your friends and family prefer!
We hope you enjoy this issue. Keep an eye on what recipes are trending at your kitchen/dining room table; it might help spark some ideas and solutions for your meal planning and shopping list!
James J. McCa rey III president
James J. McCa rey IV executive vice president

Every department has a great selection to make any day or special occasion delicious


It’s easy to brighten someone’s day or a special occasion—Easter, Mother’s Day, a birthday, or anniversary—with flowers. Stop by our floral department and pick up a variety of fresh-cut, grab-and-go bouquets of favorites such as roses, lilies, and orchids, seasonal blooms, or potted plants. Whether celebrating an occasion or wishing someone well, whatever you want to express, you can do it with flowers.
Freshly baked goodies and breads are ready for you to pick up in the bakery department. Every day our bakers are busy making cakes, pastries, fresh breads, rolls, and desserts. Pick up delicious readymade items when you stop in the store or place orders for special occasion cakes and trays of goodies for your spring parties. Delicious gluten-free selections are always available, too.
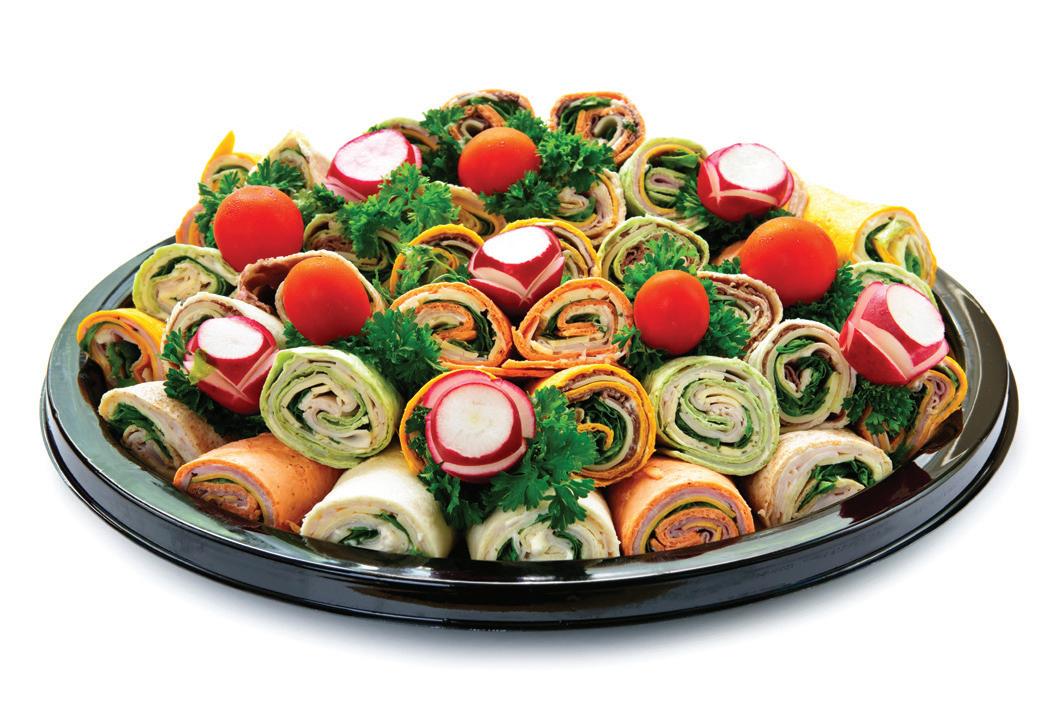
Planning a party? Make it easy on yourself: You gather the people, and we’ll provide the food. Whether it’s a small or large get-together, our catering department can prepare a delicious variety of foods for you from appetizers and sides to entrees. Choose from crudité, charcuterie, and other small bites, plus handmade sandwiches and more for any occasion.
We also have a great selection of grab-and-go foods, whether you need something for lunch or dinner tonight or the weekend ahead. Our prepared food items cover almost every imaginable cuisine—find fresh, chef-crafted gourmet meals and side dishes from classics to some of today’s most exciting recipes.
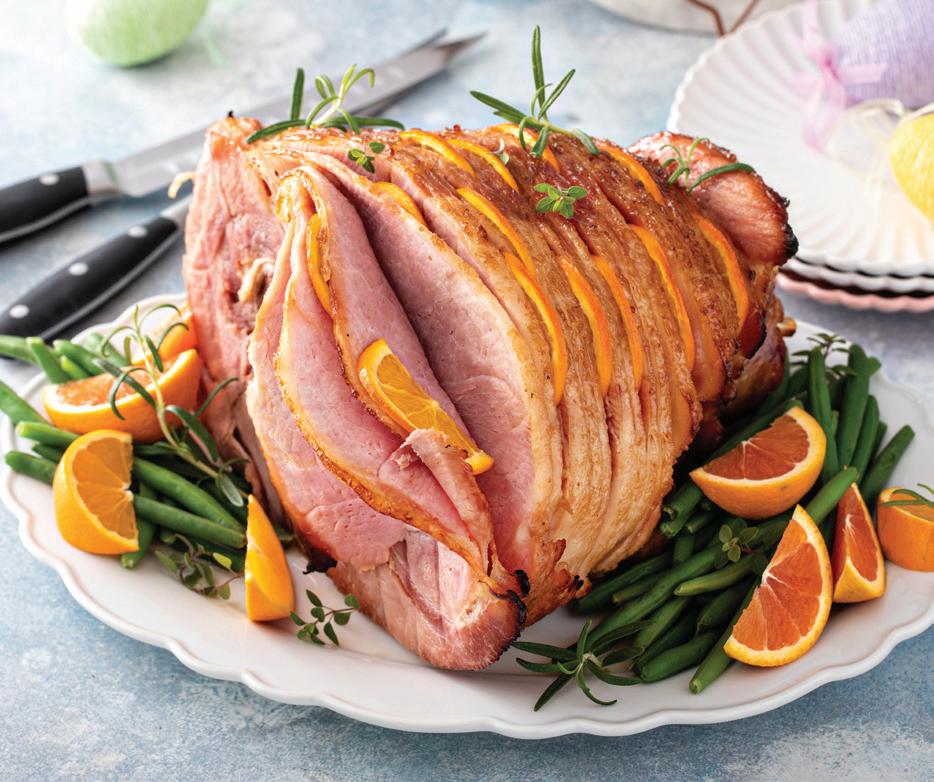
Our knowledgeable and friendly meat department sta will help you select from a full line of the finest meats ready for your oven, pan, or grill. You’ll find a quality selection of organic and all-natural beef, poultry, and pork from brands you love. Celebrating Easter or other occasion with ham? Find a great selection, whether you prefer smoky or sweet, bone-in or boneless, or unsliced or sliced.
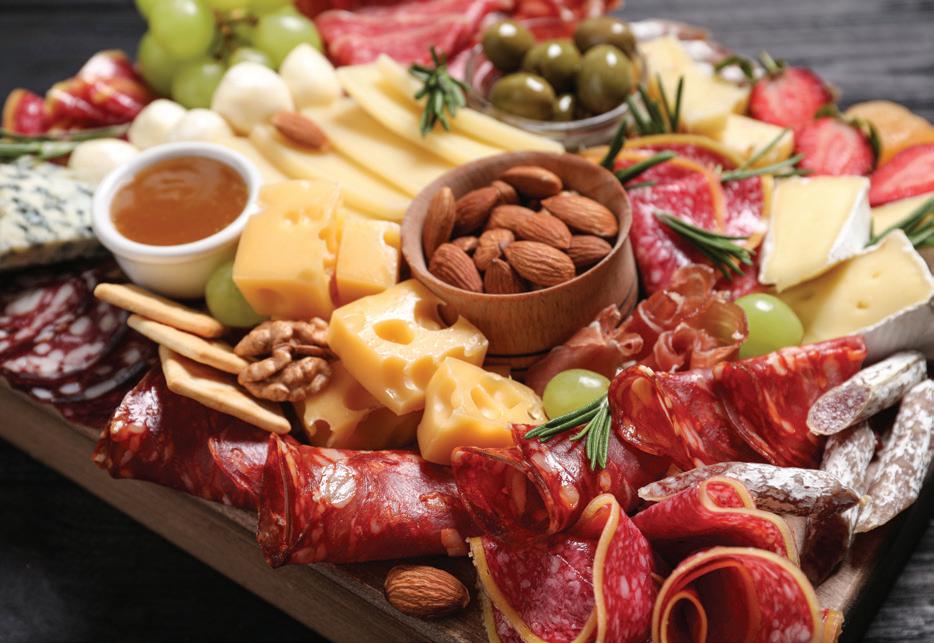
Our deli departments feature a great selection with hundreds of di erent cheeses from around the globe and locally. Whether you’re making sandwiches or putting together a charcuterie board, you’ll find something for every taste. Complete your board with dried or fresh fruit, olives, nuts, and sweet or savory spreads. We can also help you with a selection of ready-made charcuterie and cheese trays to simply grab and go or if you need readymade sandwiches and salads, too.
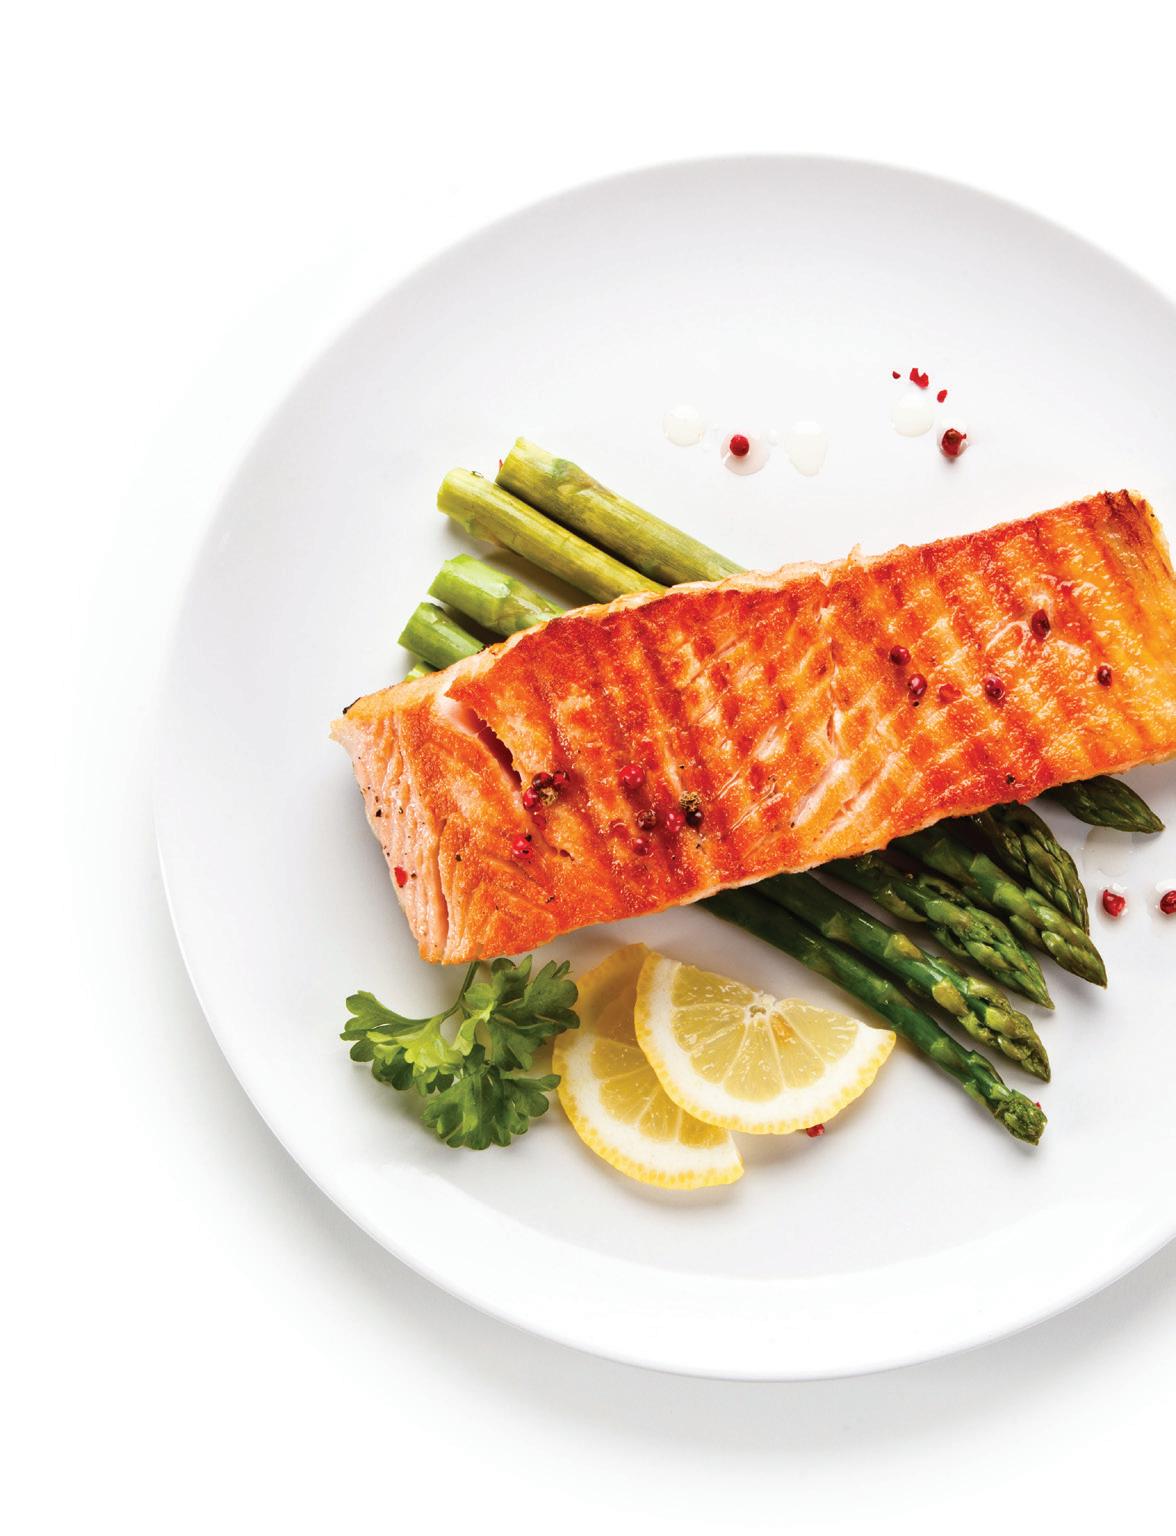
Catch a great selection in our seafood department, where you can find perfect options to create a healthy meal. Find hand-cut and trimmed fillets or steaks for the pan or grill or a wide array of shellfish. Our friendly seafood experts can help you with questions and preparation of various items—feel free to ask them when you’re in store.
Share a sweet for any occasion. We have a delicious variety of treats to help you celebrate a special day or any day “just because.” From dark and milk chocolates to fruity candies, there’s something to satisfy every sweet tooth.

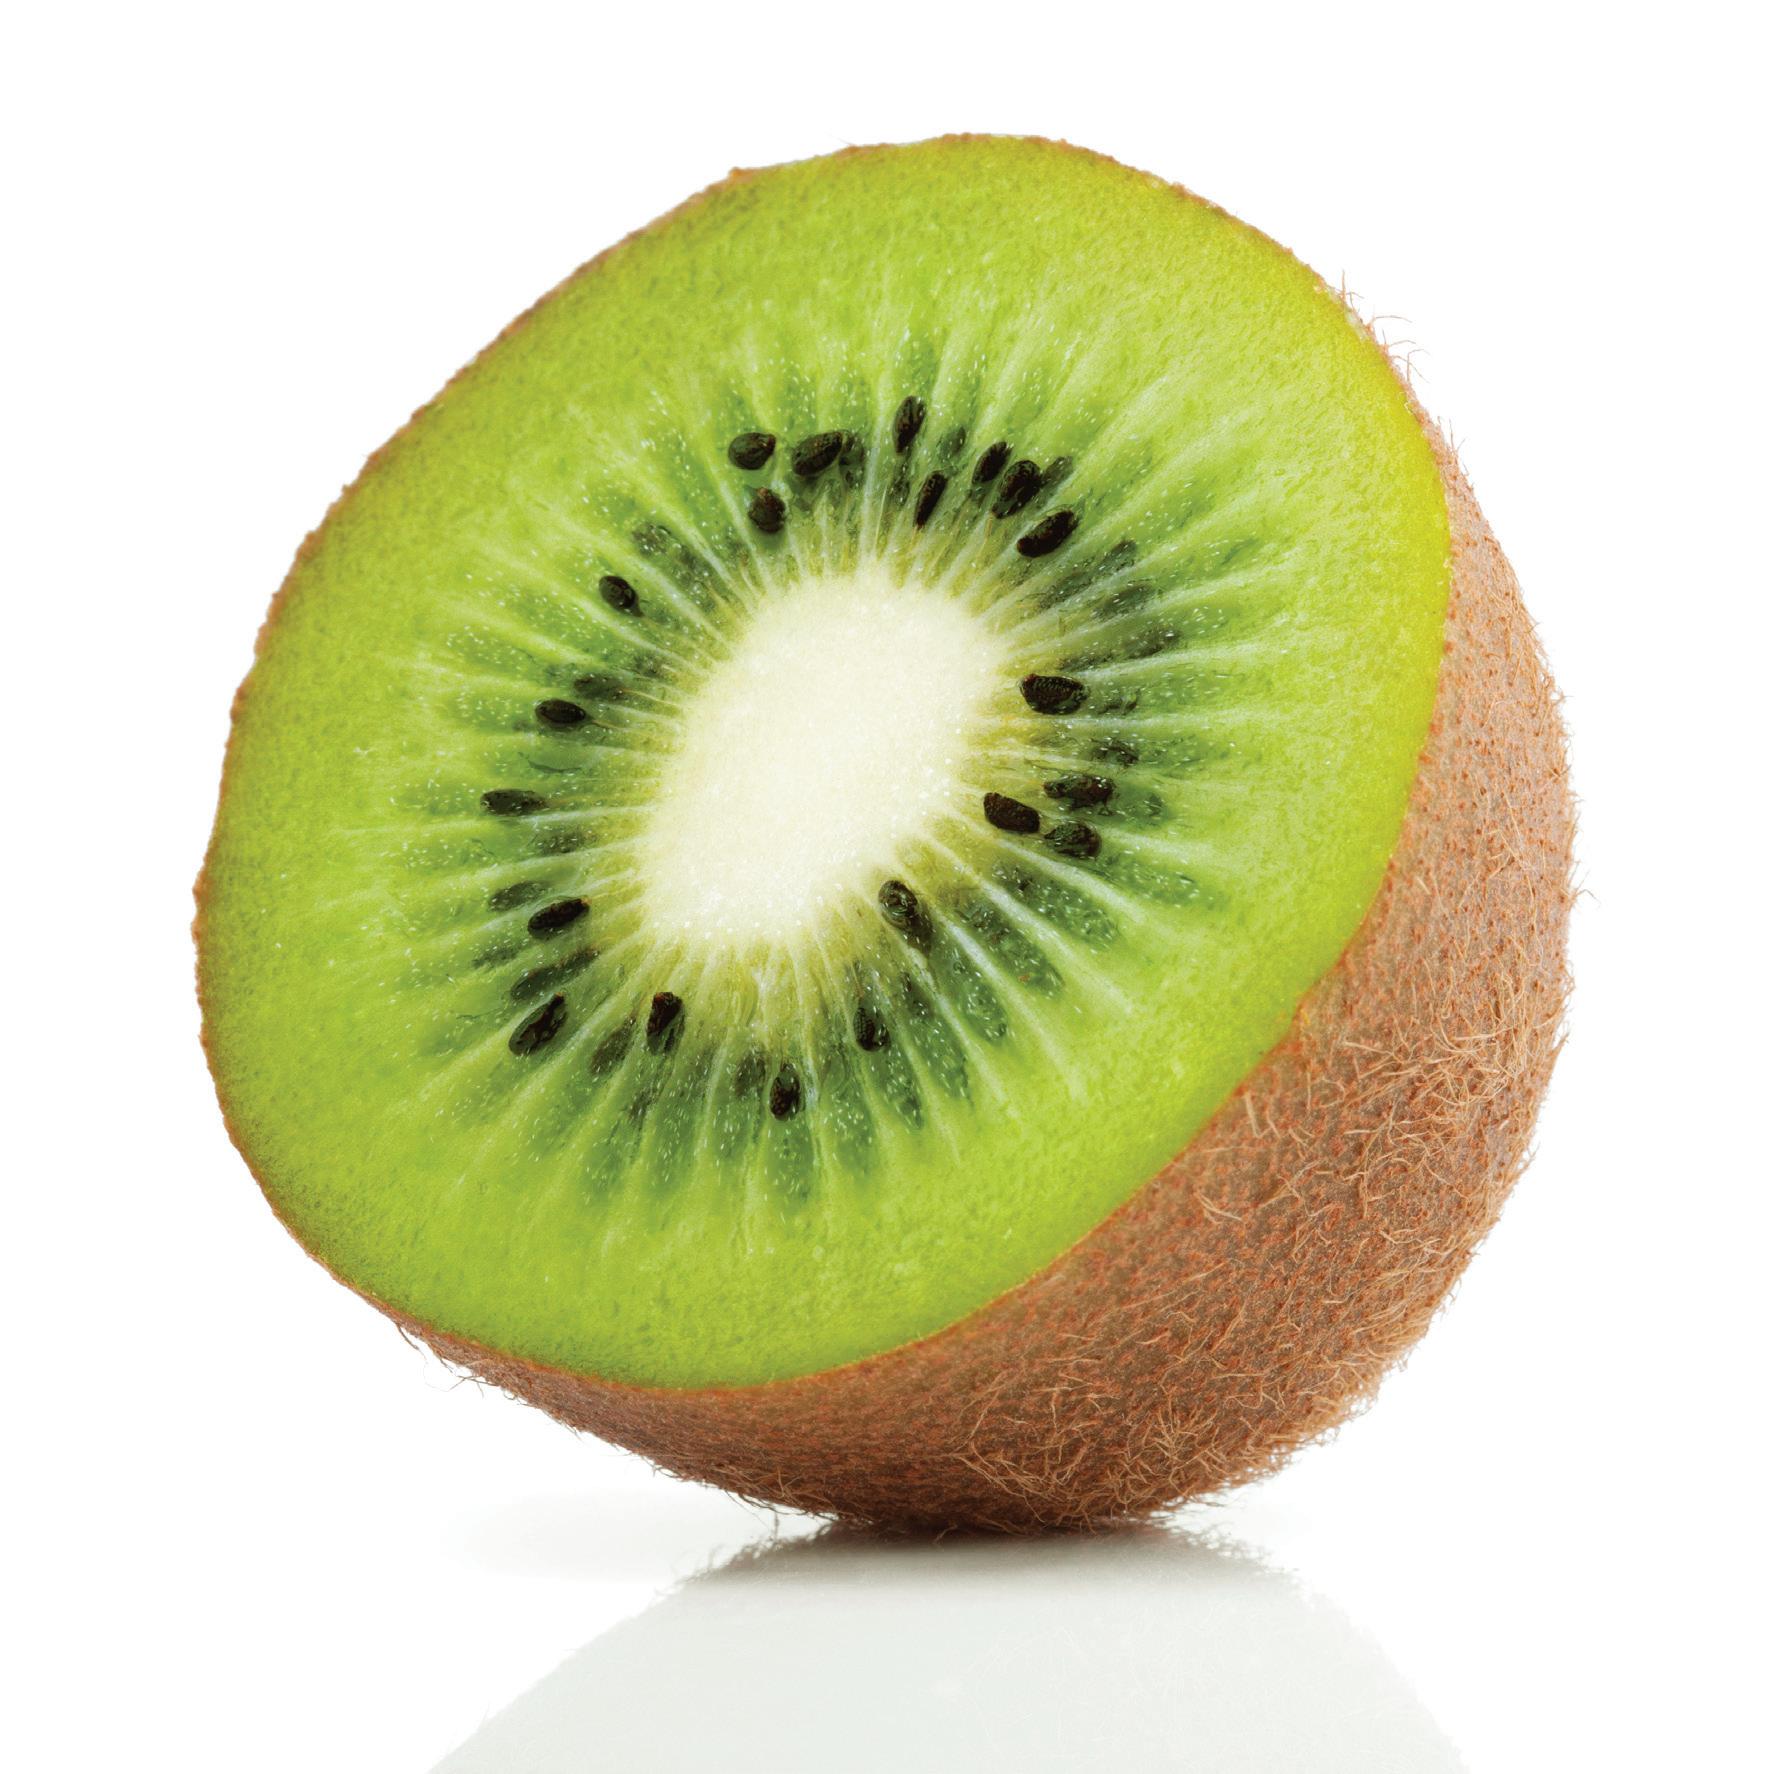
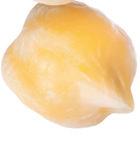
Little kiwifruit is big on vitamins and flavor
Kiwifruit’s papery, curious-looking fuzzy exterior hides its bright green flesh dotted with small black seeds. About the size of a large brown chicken egg, kiwifruit is sweet and slightly tart, somewhat like a gooseberry with a hint of strawberry. Originally from China, and once known as the Chinese gooseberry, kiwifruit was named after New Zealand’s flightless brown and fuzzy kiwi bird in the early 1960 s. Kiwifruit is available year-round because California kiwifruit is in season October through May, and the New Zealand crop hits the market June through October—so any time is perfect to enjoy this delicious fruit.
naturally nutritious
Each serving of kiwi has twice the vitamin C of the equivalent amount of orange. It’s also an excellent source of vitamins K and E, folate, and potassium. It’s a good source of dietary fiber, vitamin B6, calcium, magnesium, phosphorous, and manganese. One large kiwi (without skin) has only 56 calories.
peeled or unpeeled?
It’s your choice: The skin is edible and loaded with nutrients and fiber—just make sure to rinse it in water first. The peach-like fuzz can be rubbed o a little before eating.
n Peel with a paring knife or potato peeler and slice.
n Or, cut in half and scoop the flesh out with a spoon.
is it ripe?
Press the outside of the fruit with your thumb. If it gives to slight pressure, it’s ripe; if it doesn’t, it’s not ready to eat.
n Kiwi can be left to ripen for a few days to a week at room temperature, away from exposure to sunlight or heat.
n To speed up the ripening process, place kiwi in a paper bag with an apple or banana and leave it on the counter for a day or two.
n When ripe, they can be stored at room temperature for a couple days or in a plastic bag in the refrigerator for 10 days or possibly up to 3 weeks.
enjoying kiwi
Enjoy on its own. Add kiwi to tossed green salads. Serve sliced kiwi and strawberries topped with yogurt. Add to fruit salad (at the last minute). It makes a delicious topping for cereal. Serve on a fruit and cheese tray. Whip up a smoothie— blend kiwi with strawberries, banana, and some milk or yogurt, and add a little honey.
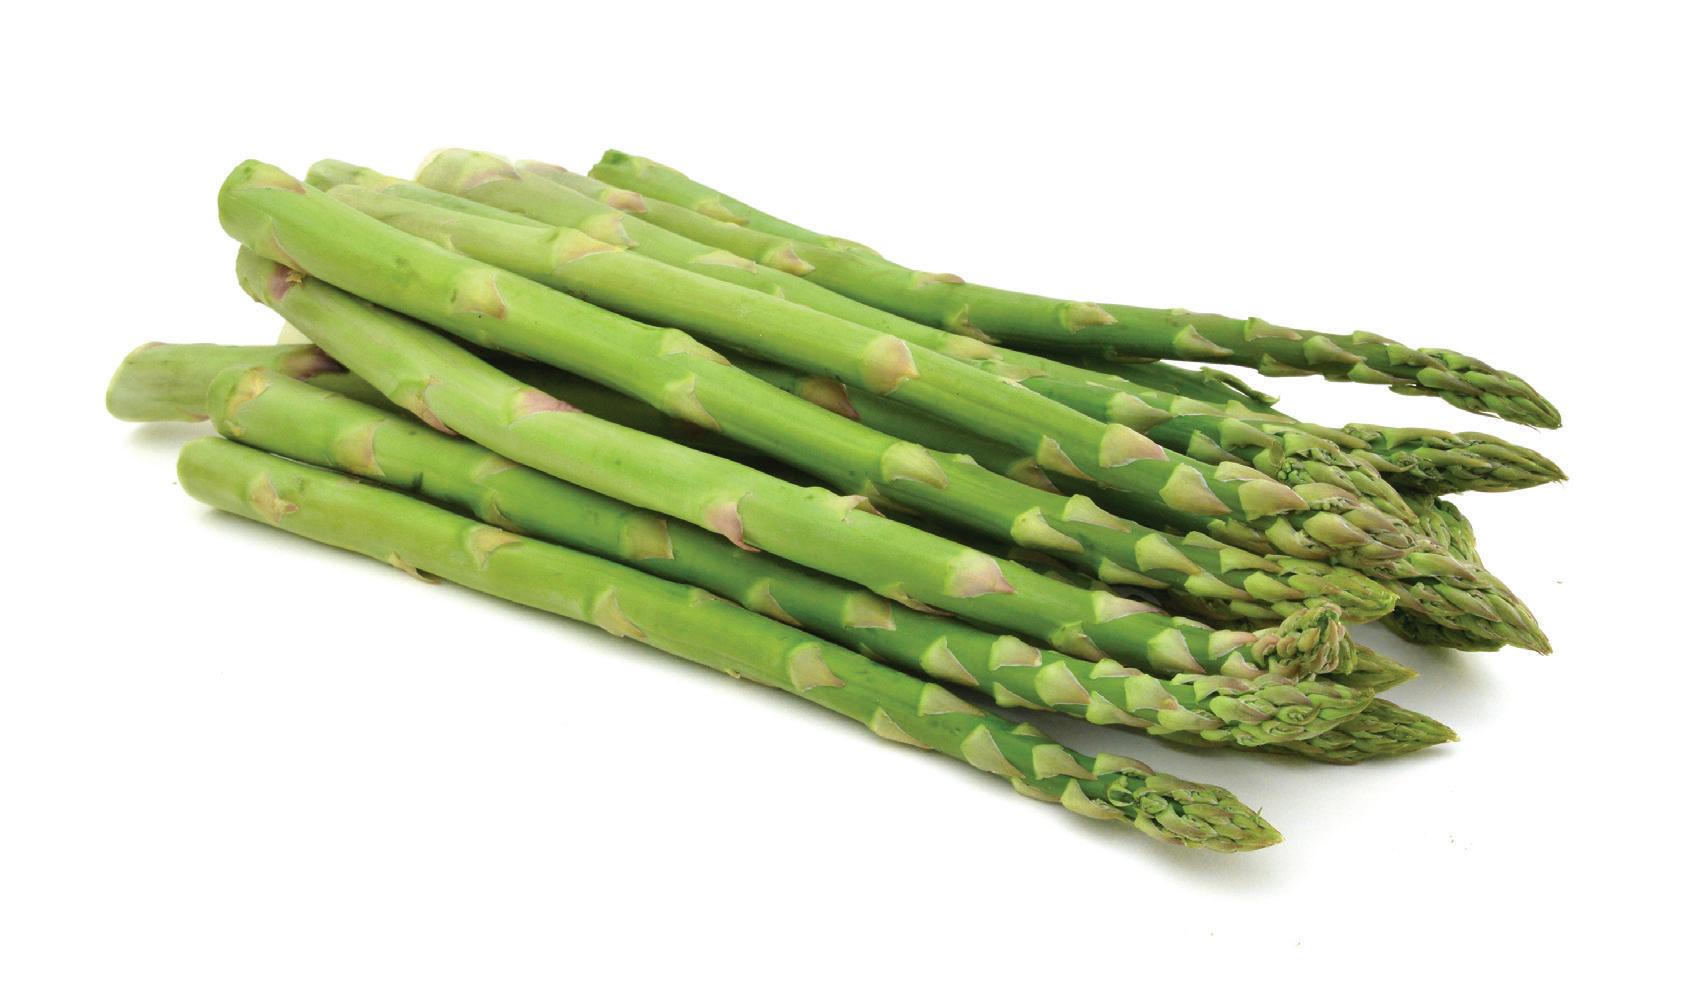
Domestic, fresh asparagus peaks from about February to June, which makes it a perfect time to incorporate this tasty veggie into your weekly menus while its trip to the store is shorter and sweeter. California produces approximately 70 % of the domestic fresh supply with Washington state and Michigan providing the balance. Other states also grow asparagus in smaller quantities. This spring vegetable really is a superfood. Asparagus is an excellent source of folic acid, a good source of potassium, and a fairly significant source of vitamin C, thiamine, and vitamin B 6 . It also packs an antioxidant punch as it contains both beta-carotene and lutein. Its abundance of fiber also aids digestive health. And, five spears have only about 25 calories. Asparagus is versatile in the kitchen—simply steam it or include it in quiche, toss it in pasta, add to salads, and more.
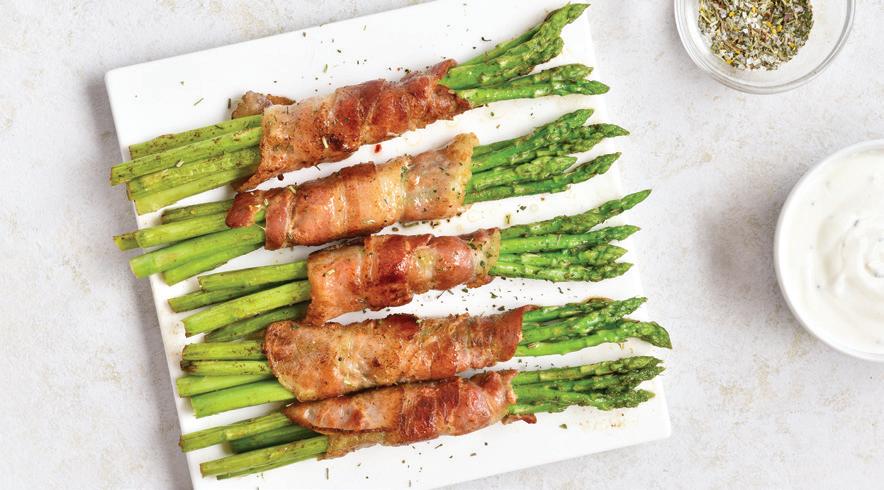
MAKES 6 SERVINGS | RECIPE BY STEVEN CAPODICASA
2 bunches fresh asparagus
¼ cup olive oil, plus more for drizzling
2 cloves fresh garlic, minced
Salt and pepper, to taste
12 thin slices prosciutto Fresh basil
1. Heat grill to high. Trim ends of asparagus and toss with ¼ cup olive oil, garlic, salt, and pepper.
2. Grill marinated asparagus until tender and golden brown.
3. Wrap 3-4 grilled asparagus with sliced prosciutto, place on a platter, and drizzle with olive oil. Garnish with basil leaves.
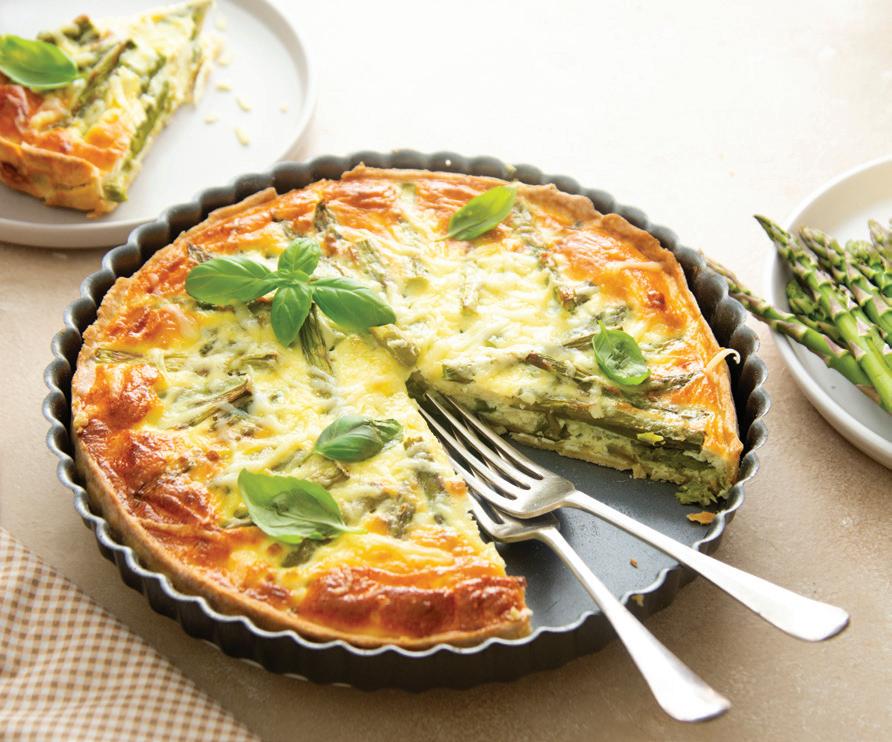
MAKES 6 TO 8 SERVINGS | RECIPE BY STEVEN CAPODICASA
1 (9-inch) prepared pie crust/dough
½ tablespoon olive oil
8 asparagus spears, ends removed and cut into 1-inch pieces
2 cups fresh baby spinach
5 large eggs
1 cup milk
¾ cup crumbled feta cheese
¼ cup shredded Gruyere cheese
Salt and pepper, to taste
4 scallions, coarsely chopped
1. Heat the oven to 375°F. Line a 9-inch pie plate with pie dough and place in the freezer while you prepare the other quiche ingredients.
2. In a large skillet, heat olive oil over medium heat. Add the prepared asparagus and spinach. Cook until asparagus spears are slightly tender and spinach is wilted. Set aside.
3. In a large bowl, whisk together eggs and milk. Stir in the feta and Gruyere cheese. Season with salt and pepper, to taste.
4. Remove pie crust from the freezer. Place prepared asparagus pieces, spinach, and scallions on the bottom of the crust. Pour the egg and cheese mixture over the vegetables and into the crust. Place prepared quiche on a foil-lined cookie sheet.
5. Bake the quiche for 45 minutes or until it is set and slightly golden brown. Let it stand for 15 minutes before serving.
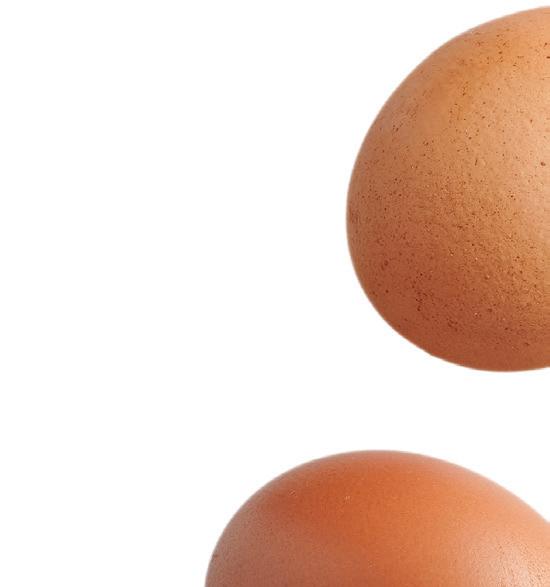
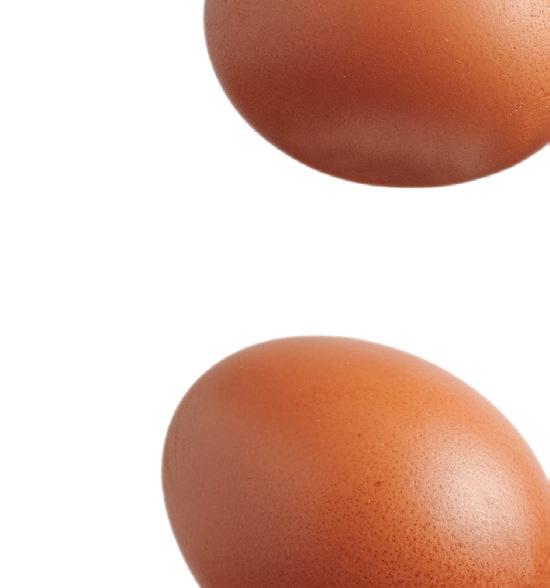
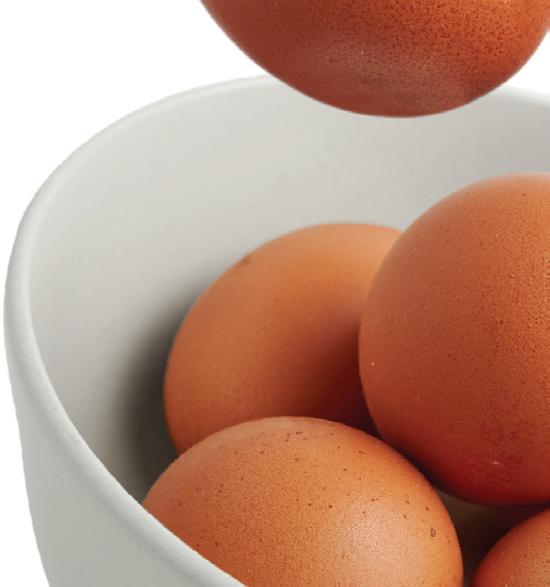

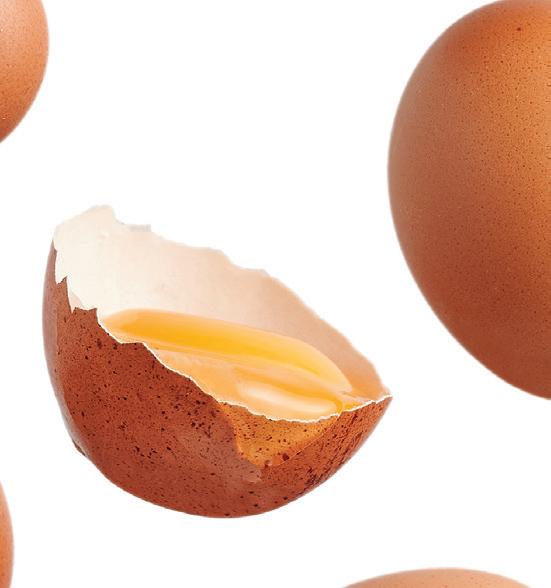
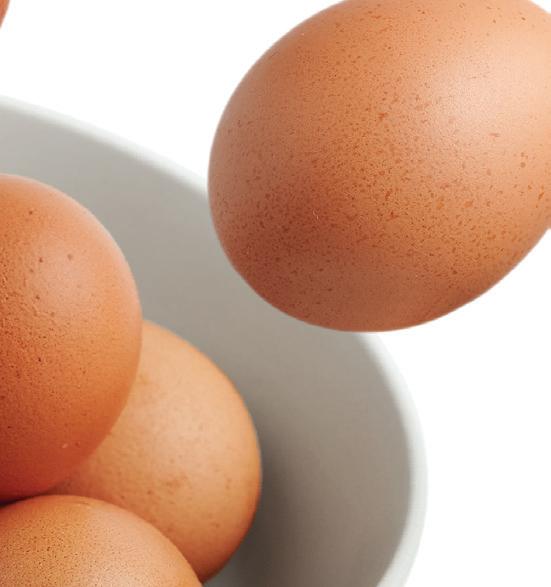

Eggs are the staple of all staples, and it’s hard to imagine breakfast and brunch without them. One way to make the most of your precious supply is to use them in dishes that stretch them to provide more servings using fewer eggs, such as quiche, eggy muffins, and more. That way, a few eggs in a recipe can feed more people with often just the equivalent of one egg per person. Serve some potatoes, fruit, and salad with these egg dishes to round out your brunch.


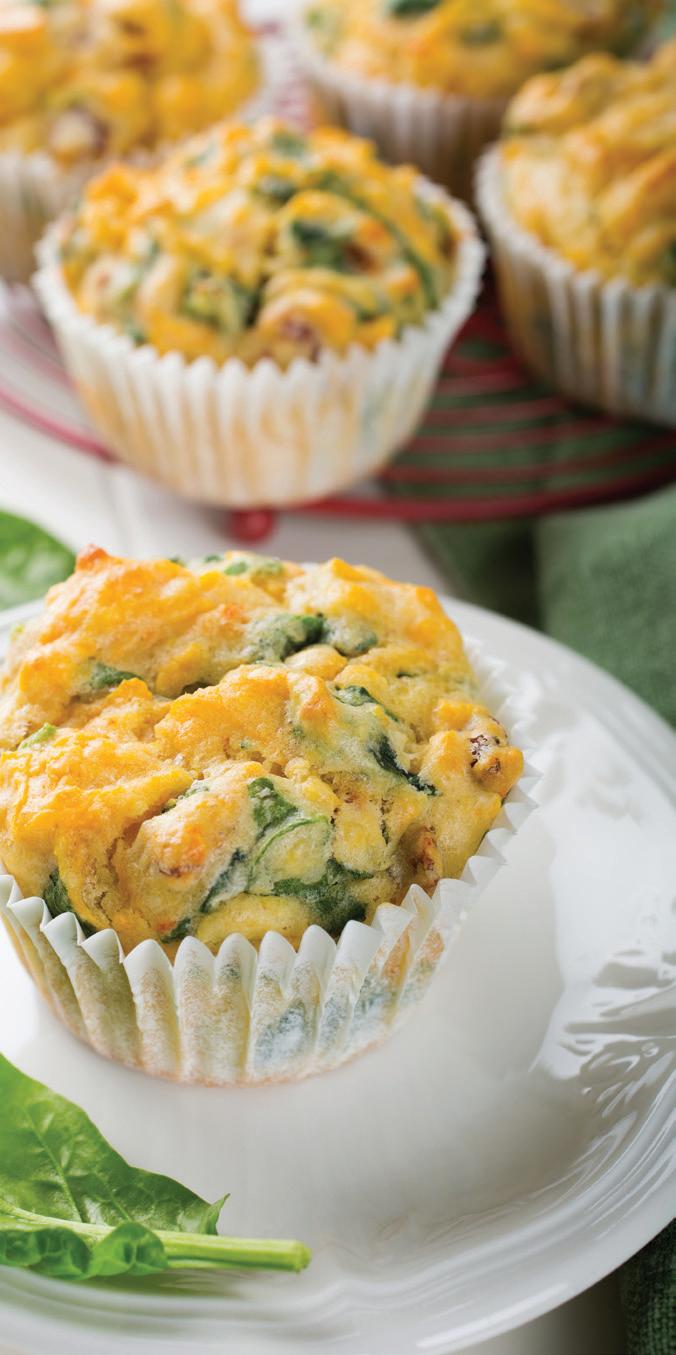


Breakfast Quiche Bites MAKES 4 SERVINGS | RECIPE BY STEVEN CAPODICASA


tablespoon olive oil cup diced onion shallot, peeled and finely minced teaspoon minced fresh thyme


1 cup baby spinach leaves, coarsely chopped
1. Heat oven to 350°F.
½ cup smoked mozzarella cheese
¼ cup milk
½ teaspoon salt
¼ teaspoon freshly ground black pepper
4 large eggs
2. Coat 6 medium mu n cups with cooking spray. Heat a medium saute pan over medium-high heat. Add oil and swirl to coat. Add prepared onions, shallots, and thyme and saute 3 minutes or until almost tender. Add spinach and saute 4 to 5 minutes or just until spinach begins to wilt, stirring constantly. Transfer spinach mixture to a small bowl and cool 3 minutes. Stir in cheese.
3. Combine milk, salt, pepper, and eggs and whisk until blended. Stir in cheese mixture. Divide mixture evenly among prepared mu n cups. Bake in preheated oven for 20 minutes or until pu ed and set. Serve warm.


8 large eggs
¼ cup sour cream
¼ teaspoon salt
¼ teaspoon pepper
3 tablespoons minced fresh Italian parsley
1 cup cubed fully cooked ham
½ cup shredded cheddar cheese
½ cup shredded Gruyere cheese
1. Heat the oven to 375°F. Coat 8 medium-size mu n cups with cooking spray and set aside.
2. In a bowl, whisk the eggs, sour cream, salt, and pepper until blended. Stir in parsley.
3. Divide ham and cheese among the 8 prepared mu n cups. Top with egg mixture, filling cups 3⁄4 full.
4. Bake until a knife inserted in the center comes out clean, about 20 minutes. Carefully run a knife around sides to loosen.
5. Serve with your favorite side salad or with bacon or sausage.
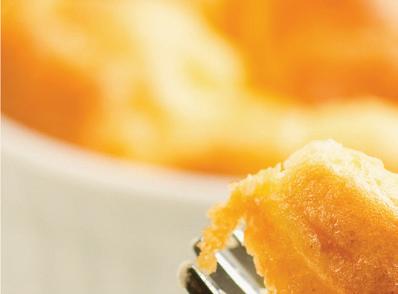
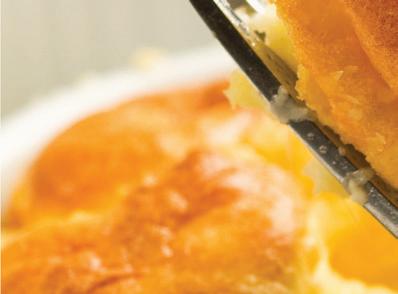
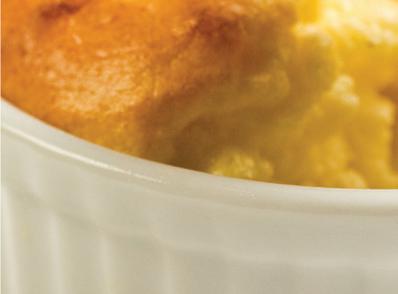
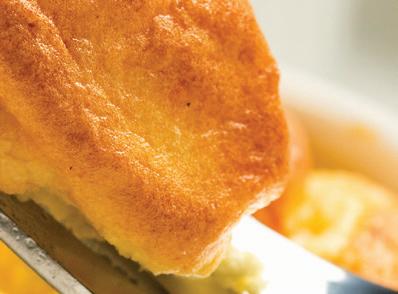
MAKES 6 SERVINGS | RECIPE BY STEVEN CAPODICASA
1 tablespoon softened butter, for coating ramekins
1 stick sweet butter
1 cup all-purpose flour
2 tablespoons dry mustard
½ teaspoon freshly ground black pepper
1½ cups half-and-half, warmed
½ cup grated extra sharp cheddar cheese
¼ pound ParmigianoReggiano cheese, thickly grated
¼ pound Asiago cheese, thickly grated
Salt and pepper, to taste
6 egg yolks
¼ cup chopped parsley
6 egg whites
1. Butter 6 medium (3-inch) ramekins, being sure to coat entire ramekin. Heat oven to 325°F.
2. Melt the stick of butter in a thick bottom saucepan over medium-low heat. Blend in flour, dry mustard, and black pepper and cook until mixture bubbles, stirring constantly.
3. Whisk in warmed half-and-half, reduce heat to low, whisking constantly, and cook for 10 minutes.
4. Remove from heat and add in cheeses, stirring constantly. Cool mixture for 5 minutes and add in egg yolks and chopped parsley, whisking to incorporate.
5. In a separate bowl beat egg whites until soft peaks form, then gently fold slightly cooled cheese mixture into beaten egg whites.
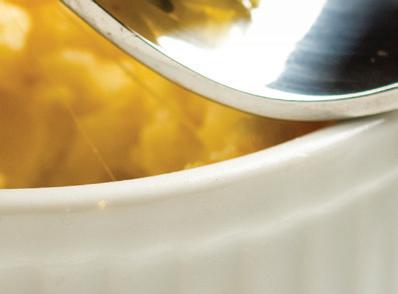
6. Carefully place prepared mixture into buttered ramekins and bake in a preheated oven for approximately 20 to 25 minutes or until center of sou és are set.
Uncork delicious wines for perfect pairings with these recipes and cheeses
Château Teyssier Bordeaux
GARLIC-AND-HERB-CRUSTED ROAST LEG OF LAMB WITH SKORDALIA | PAGE 29


Blackberry and stewed kirsch with hints of warming brown spice. Plump texture with a chew to the tannins, balanced by refreshing acidity in the straightforward finish.
Cheese Pairing: Comté or Ossau Iraty


Santorini Assyrtiko
SHISH TAWOOK | PAGE 25
This wine is a classic benchmark of the variety and its homeland. A vibrant aromatic cocktail of sea-breeze freshness and citrus fruits and peach with honeyed undertones. Bone-dry, brightly acidic with a textural mineral smokiness and a food-begging finish.
Cheese Pairing: Odyssey Feta


La Spinetta Barbera

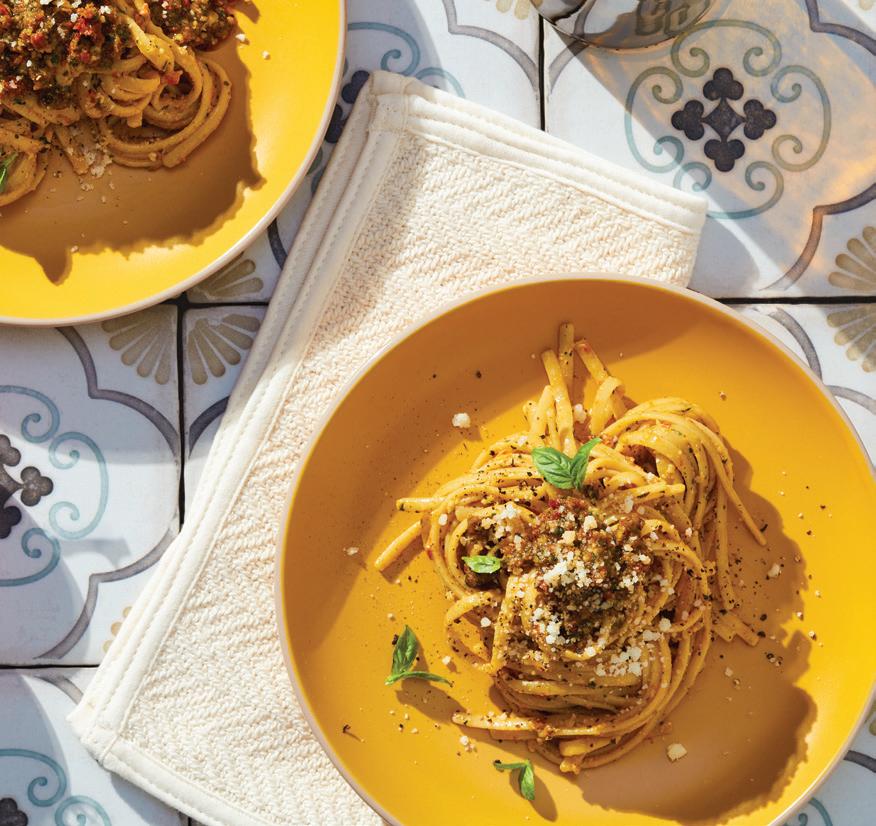
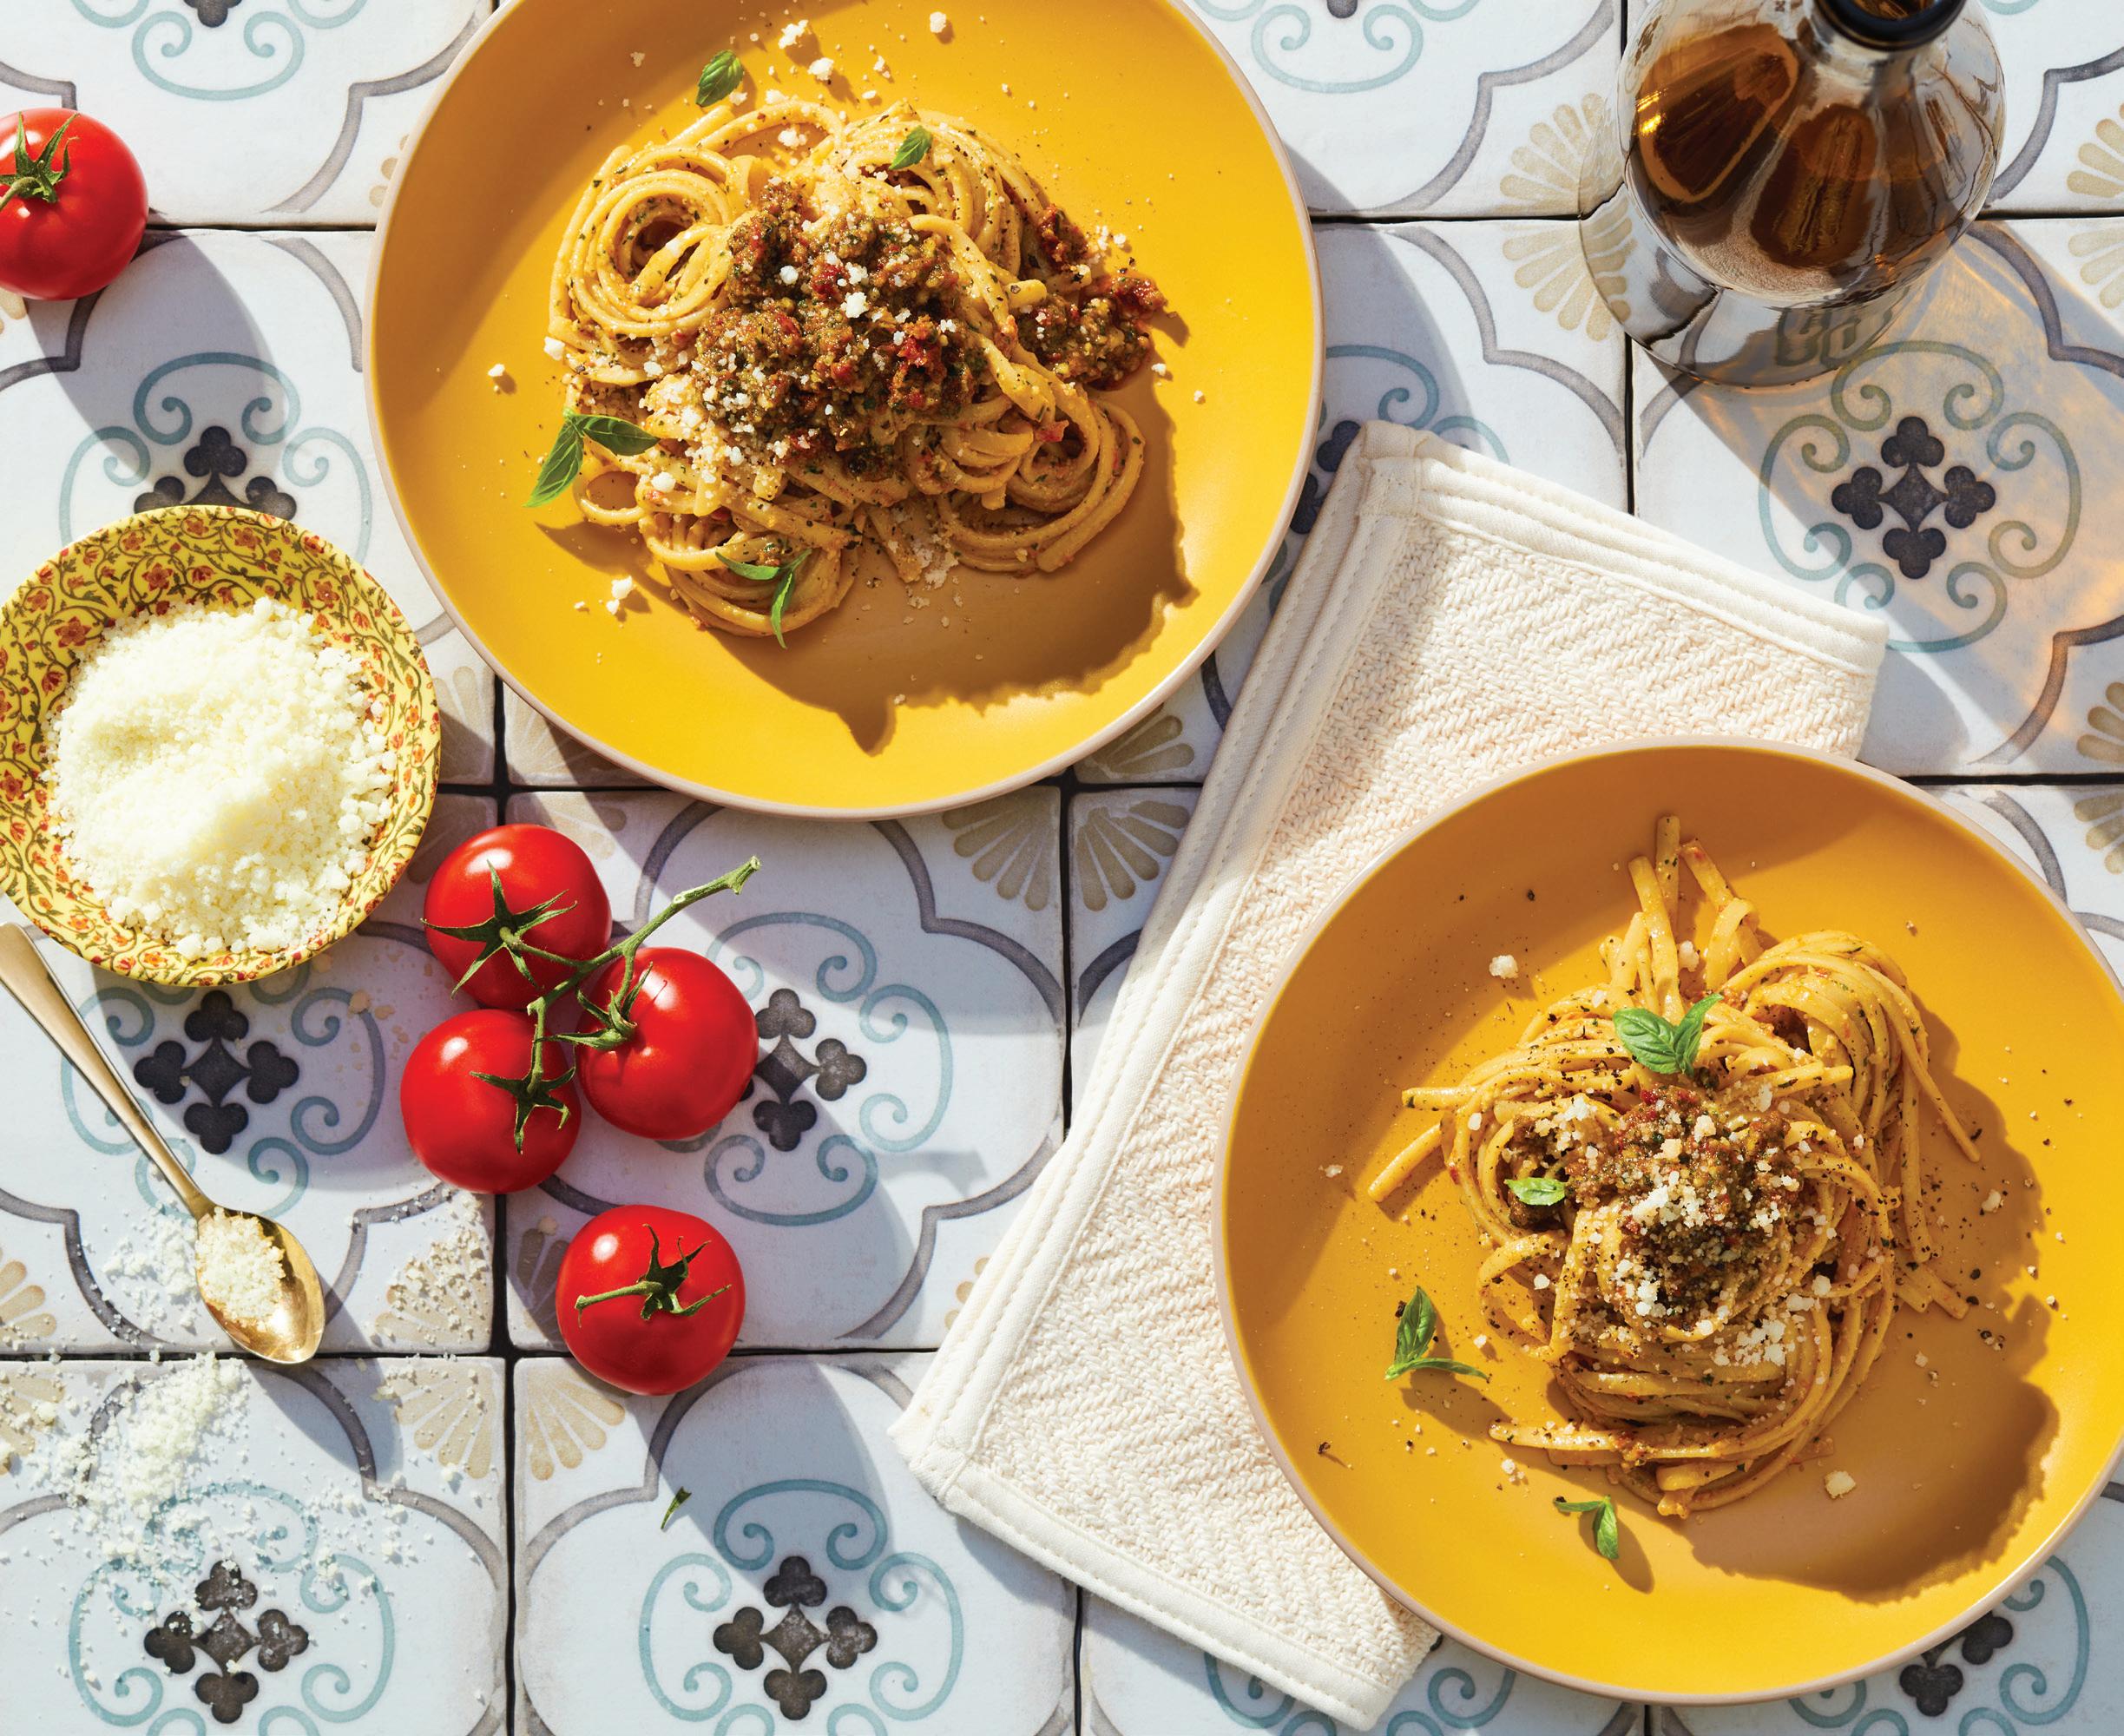
PASTA ALLA TRAPANESE | PAGE 27
This exudes a rich concentration and relatively tame acidity, thanks to 45-year-old vines and low vineyard yields. Aromas of blueberry, wet earth, and a hint of orange peel come through, and its full body and intensity are balanced by a silky-smooth finish, combining richness with finesse.
Cheese Pairing: Locatelli Pecorino Romano


Cune Brut Cava
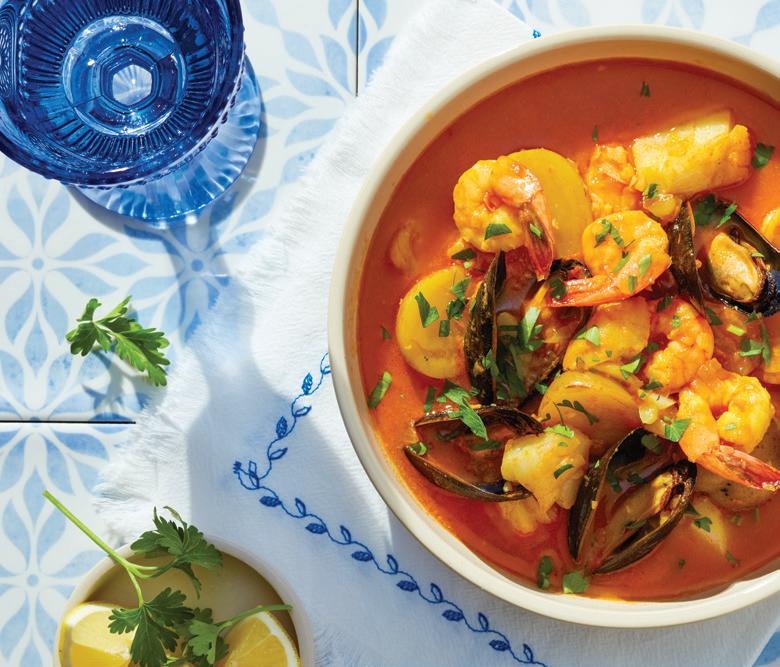
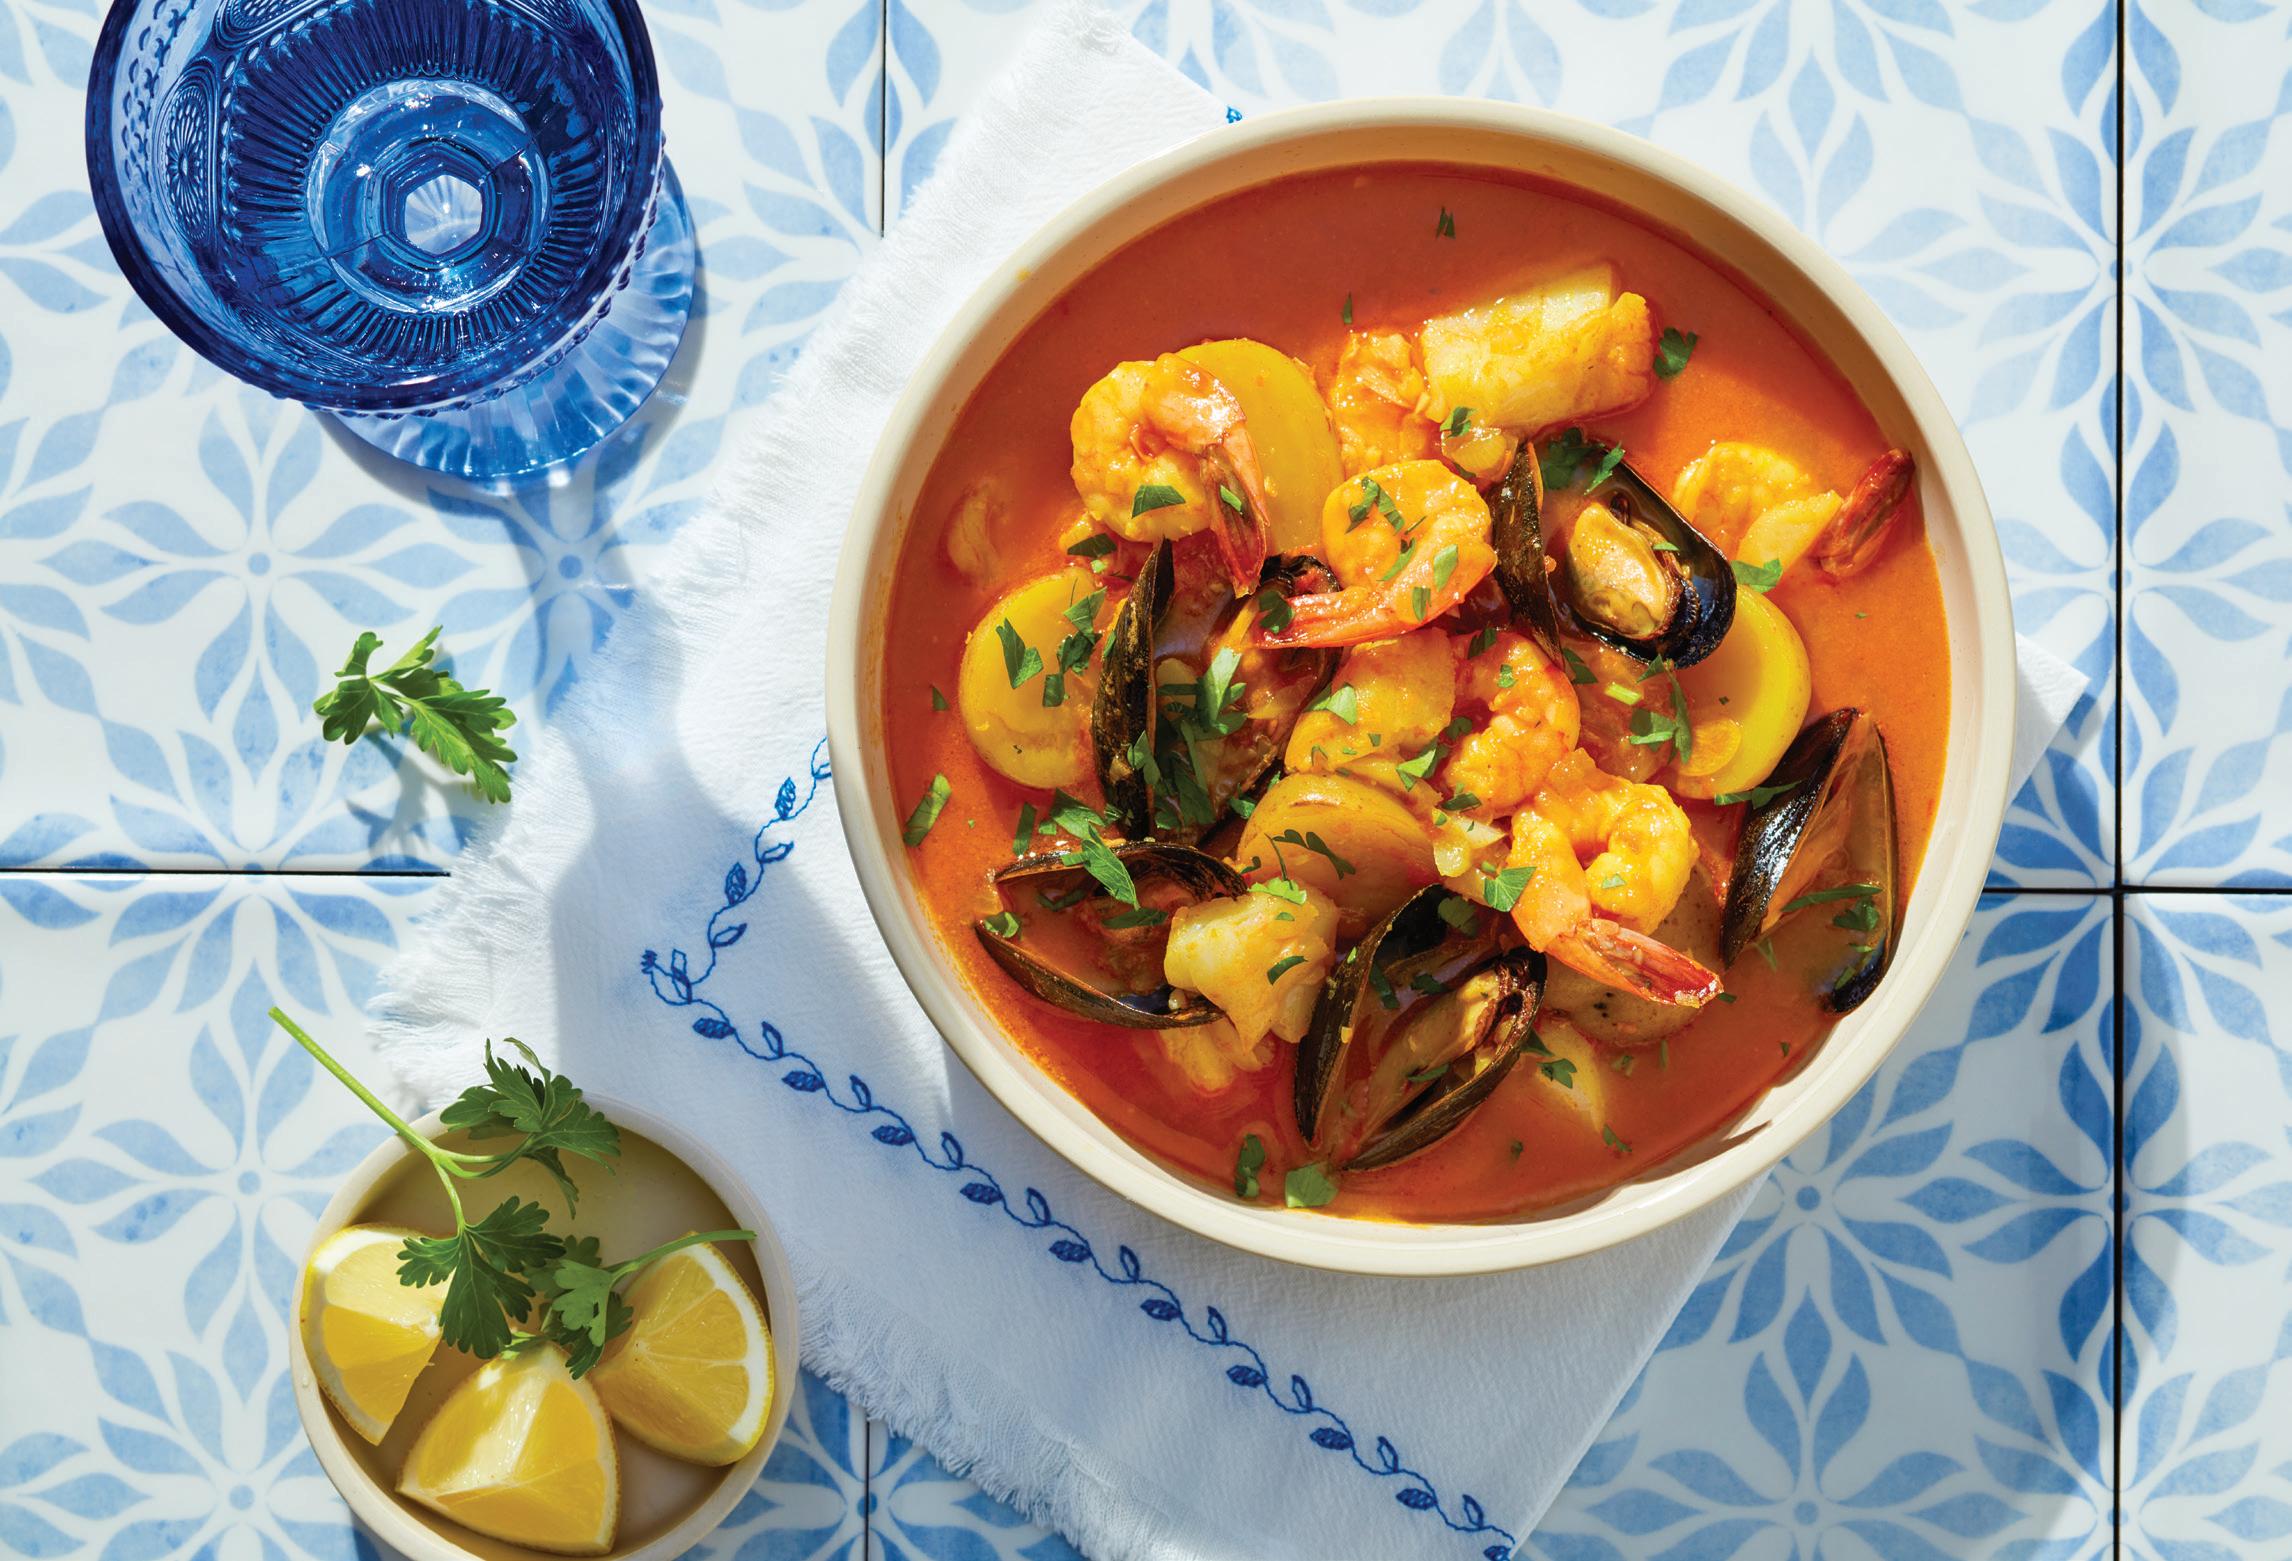
CATALAN SEAFOOD STEW | PAGE 26
A good release of tiny bubbles rising in trains ends up forming a cheerful crown of mousse. Very elegant sparkling wine with fruit notes and typical nuances of aging in bottle. In the mouth, it is very nice, with slightly sweet points and final apple reminiscences. Good acidity and persistence. Long and complex aftertaste due to long aging in the bottle.
Cheese Pairing: Manchego (aged 3 months)
Some wines may not be available in all locations.
Turn to recipes in this issue that feature these good-for-you foods
by mary subialka
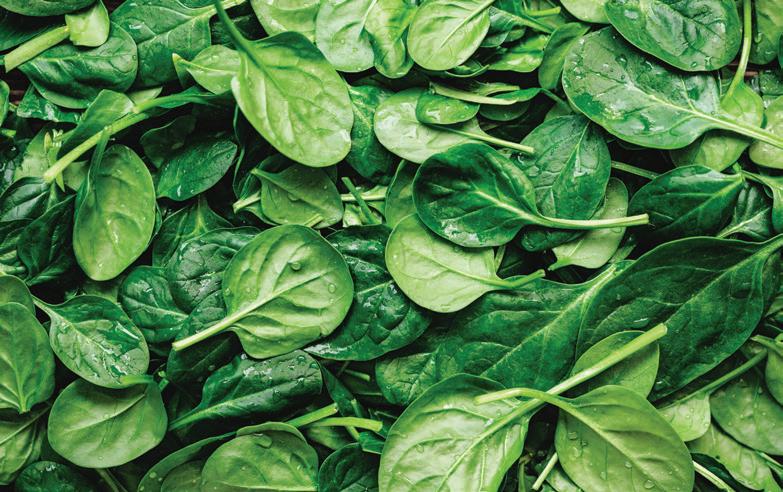
Fresh spinach is low in calories but high in nutrients. One cup has just 7 calories but provides over 100% of your daily vitamin K needs to help bones absorb calcium more e ectively. It’s also an excellent source of iron, protein, fiber, and vitamins A and C, plus high in calcium—supporting your eyes, heart, blood pressure, and digestion. Plus, some carotenoids in spinach are beta carotene, lutein, and zeaxanthin, which are phytonutrients that support proper functioning of the body’s cells, according to Mayo Clinic. Enjoy it in salads or in recipes from quiche to Chicken Lasagna on page 38.


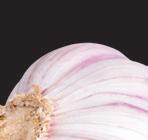


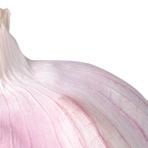
This little workhorse that adds delicious flavor to numerous dishes is rich in minerals including potassium, calcium, magnesium, manganese, iron, zinc, and selenium. Some studies have found garlic may lower blood pressure and work as an anti-inflammatory. The Arthritis Foundation recommends garlic—especially fresh—as part of an anti-inflammatory diet.


Carbs often get a bad rap, but they’re an essential nutrient that breaks down into a source of energy for the body, especially the brain, according to Mayo Clinic. Health research suggests people need at least 130 grams of carbohydrates every day to meet the body’s energy needs—that’s about 25% of calories in a 2,000-calorie diet, notes Mayo. Pasta Alla Trapanese on page 27 gives you an energy-boosting 60 grams of carbs per serving.


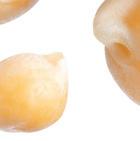
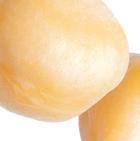
Power-packed chickpeas (also known as garbanzo beans) are a great plant-based protein. Just 1 cup cooked chickpeas contains 15 grams of protein (twice as much as quinoa and almost three times as much as a medium-size egg), 50% of your daily value of dietary fiber, zero grams of cholesterol, and very little sodium and fat. They also have a low glycemic index and many essential vitamins and minerals. Their fiber and protein do a good job of satisfying your appetite, too. They are the main ingredient in hummus, and this staple of Mediterranean cuisine shines in the Vegetable Tagine with Preserved Lemon and Prunes recipe on page 22.


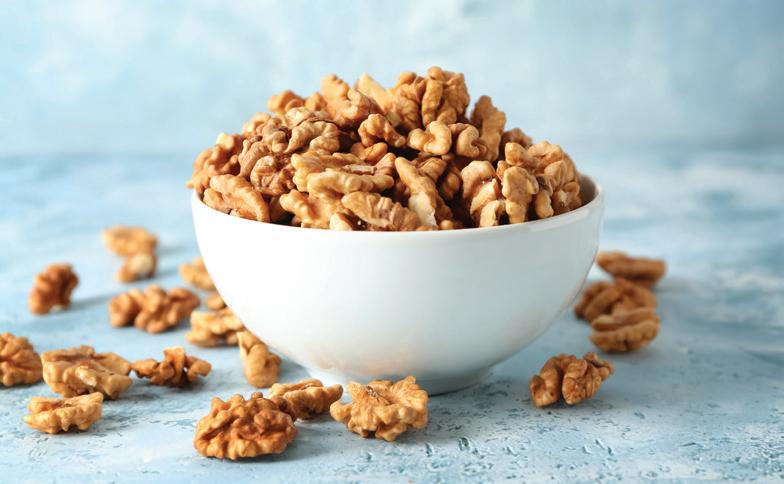
Nuts are a classic plant-based protein powerhouse. Plus, walnuts have 2.5 grams of omega-3 fatty acid, which has been linked to improved brain, gut, and heart health. One ounce of walnuts also has 4 grams of protein (just 2 grams less than the protein in an egg), and is a good source of fiber, and has 45 milligrams magnesium. Get a healthy serving of walnuts with your dessert in the Ricotta Cheesecake with Walnut Crust on page 29.


A home cook’s guide to culinary terminology and techniques
by macy harder


If seeing “cheffy” terms like “sous vide” and “mirepoix” in a recipe makes you want to give up and order takeout instead, you’re not alone. But while it might seem daunting at first, understanding the chef’s vocabulary can help take your home cooking to the next level. Not sure where to start? This guide to some essential culinary techniques and terminology includes several basic concepts to learn, practice, and apply in your own kitchen.
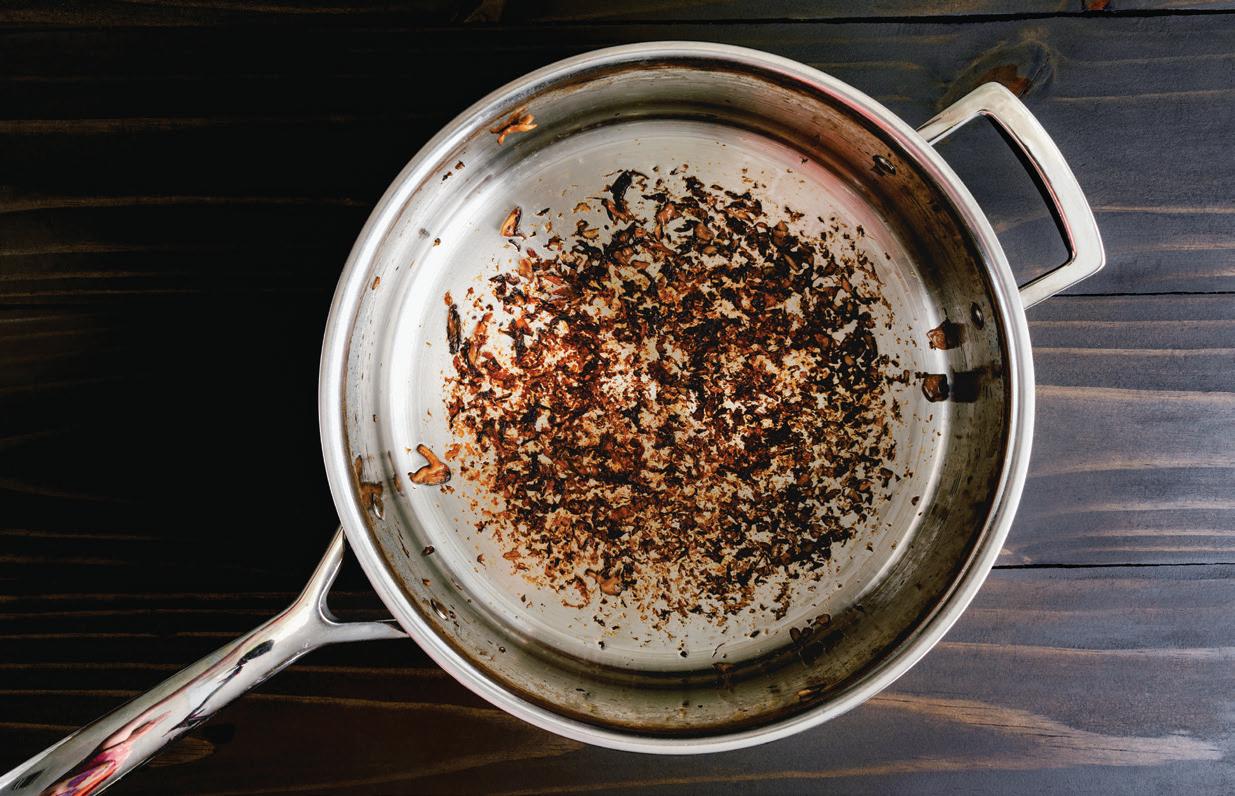
Definition: Small particles of browned food, especially meat, that adhere to the bottom of a cooking pan and are used in making sauces.
Don’t scrub off the caramelized pieces stuck to your pan after cooking meat or veggies—these flavorful bits are known as “fond,” a contraction of the French “fonds de cuisine,” or “the foundation of cooking,” and can be used to make stocks, broths, and sauces.
Fond is released by deglazing the pan (stainless steel, cast iron, or enameled cast iron work best), which can be done by adding any liquid to the hot pan after the meat or vegetables have been removed. As the liquid sizzles, scrape the fond from the bottom of the pan with a wooden spoon. The result is a liquified concoction that can be flavored, thickened, and used as the basis of pan sauces or gravies.


Definition: A culinary process in which ingredients are prepared and organized (as in a restaurant kitchen) before cooking; also: the set of ingredients prepared using this process.
A French phrase that means “put in place,” “mise en place” is the practice of having all ingredients and supplies organized and ready to go before cooking, an essential part of any kitchen’s e ciency. This precooking ritual can include chopping and measuring ingredients, se ing up your cook’s station ahead of time, or gathering all necessary seasonings in one place.
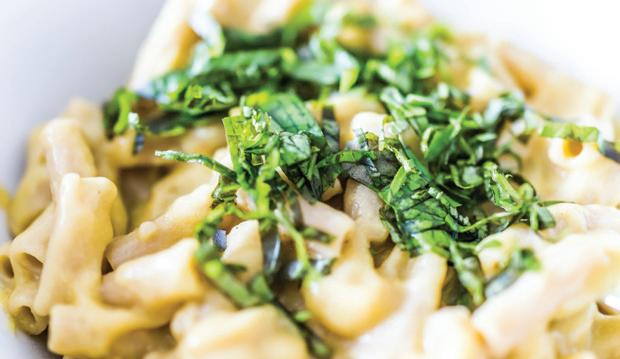
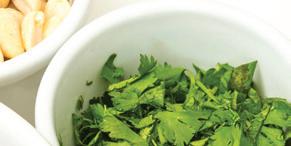
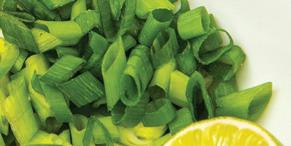
Definition: Shredded or finely cut vegetables or herbs used especially as a garnish.
A French technique rooted in the verb “chiffonner,” or “to crumple,” this process involves cutting salad greens and herbs into long, thin strands to better distribute flavor and avoid bruising. Lettuce, spinach, basil, and mint are often cut into chiffonade and used to garnish pizza, pasta, soups, salads, and more. This method of slicing is done by stacking the leaves, tightly rolling them together, and slicing perpendicular to the roll.


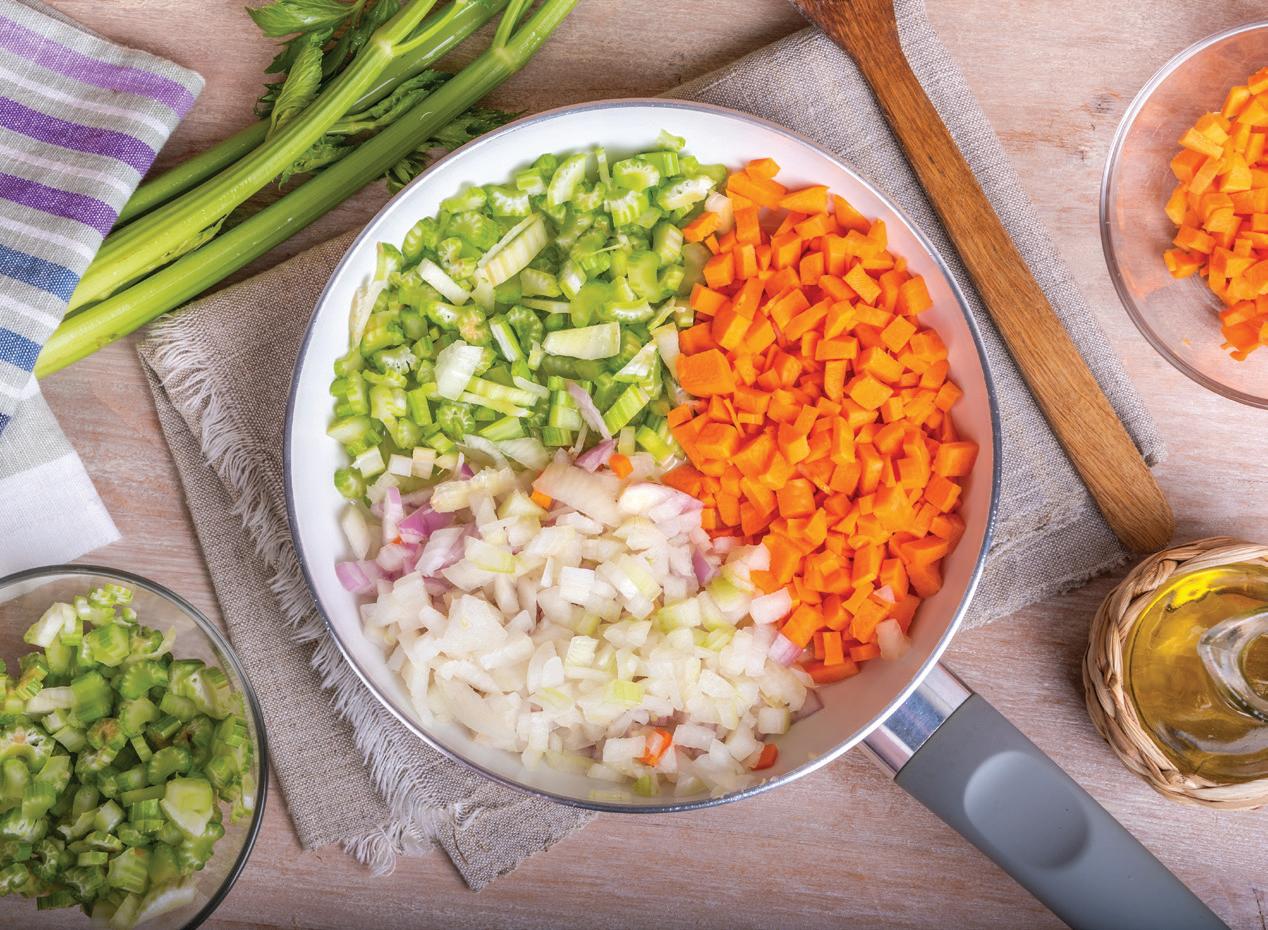
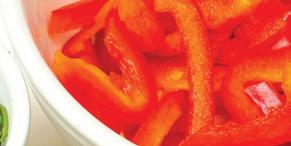
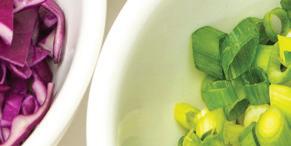
Definition: A sauteed mixture of diced vegetables (such as carrots, celery, and onions), herbs, and sometimes ham or bacon used especially as a basis for soups, stews, and sauces.
“Mirepoix” is a French aromatic blend that typically refers to diced carrots, onions, and celery—a combination that creates a fundamental base for stocks, soups, and other recipes. The vegetables should be cooked on medium-low heat for about 10 minutes to extract the most flavor before combining with other ingredients.
De nition: The combination of onion, bell pepper, and celery as it is employed in Cajun and Creole cuisine. A variant of “mirepoix,” the Holy Trinity of onion, bell pepper, and celery is the aromatic base used in many Cajun and Creole dishes, including jambalaya and gumbo. After cooking over medium-low heat for around 10 minutes, the Holy Trinity mixture can be used with many soups, stews, and rice dishes.
sous vide
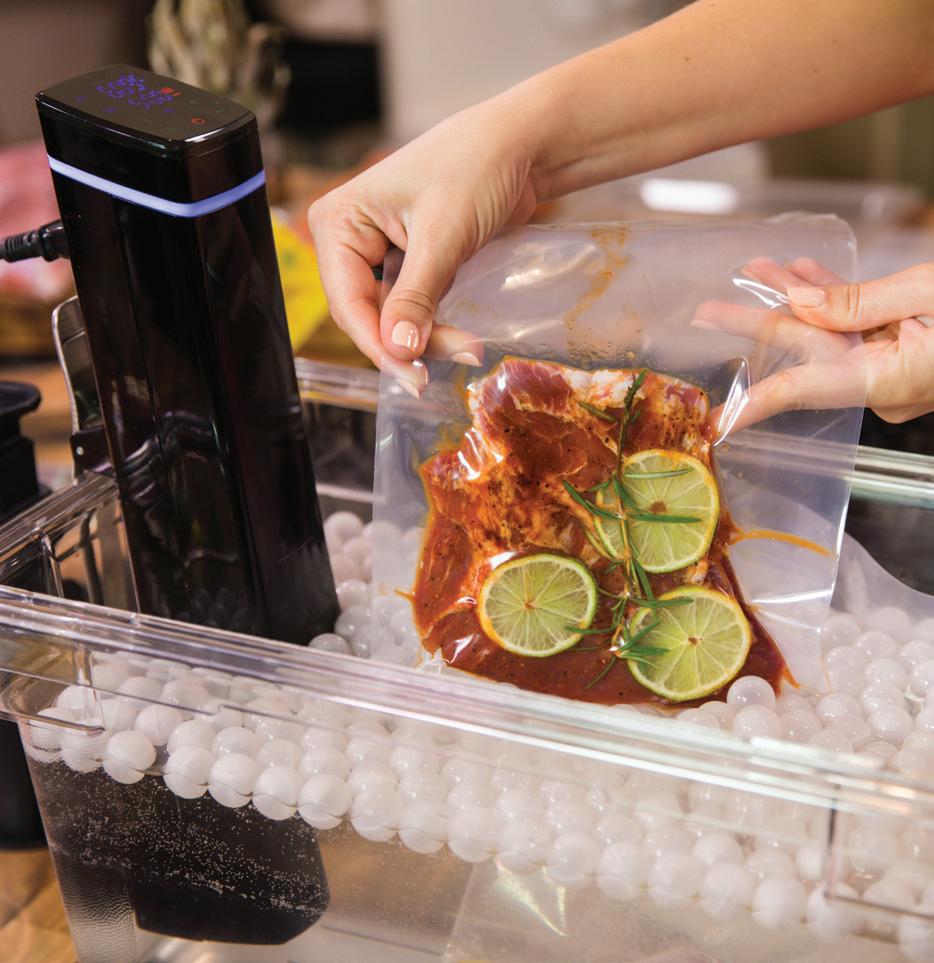
Definition: Relating to or denoting a method of cooking food slowly in a vacuum-sealed pouch at a low temperature so as to retain most of the juice and aroma.
Originating from the French term for “under vacuum,” “sous vide” refers to a gradual and controlled method of cooking protein. Chefs vacuum seal the meat in an airtight container before dropping it in a bath of temperature-controlled water, which ensures it doesn’t get overcooked. Then, a sous vide machine warms the water to a constant temperature using a heated metal coil, and uses constant circulation to avoid any hot or cold spots. It takes the guess work out of cooking meat on a stove—sous vide cooking slowly heats the protein only to the desired temperature, never above. Afterward, give it a very quick sear on high heat for exterior caramelization, and voilà.
High-end restaurants often use the sous vide technique for fish, chicken, and steaks, but it has become more accessible to home cooks in recent years. Small, affordable, sous vide machines and vacuum sealers make for convenient meal prepping and perfectly prepared protein, every time.


by kristin donnelly


The idea of “the Mediterranean diet” is often reduced to just a few ingredients, like olive oil, fish, and wine, but the food in the region is wildly diverse. Many countries do, however, share a common love for bold, fresh flavors— including citrus, garlic, and herbs. In the Middle East and North Africa, warm spices are brought into the mix, too.
The recipes here celebrate the region’s diversity, including a Sicilian pesto you can make with herbs and a few pantry ingredients and Levantine spiced yogurt-marinated chicken skewers (aka Shish Tawook)—both perfect for a weeknight. If you’re looking for something more celebratory, the Greek-style Garlic-and-Herb-Crusted Leg of Lamb with Skordalia fits the bill, as does the comforting Vegetable Tagine with Preserved Lemon and Prunes, inspired by Morocco.


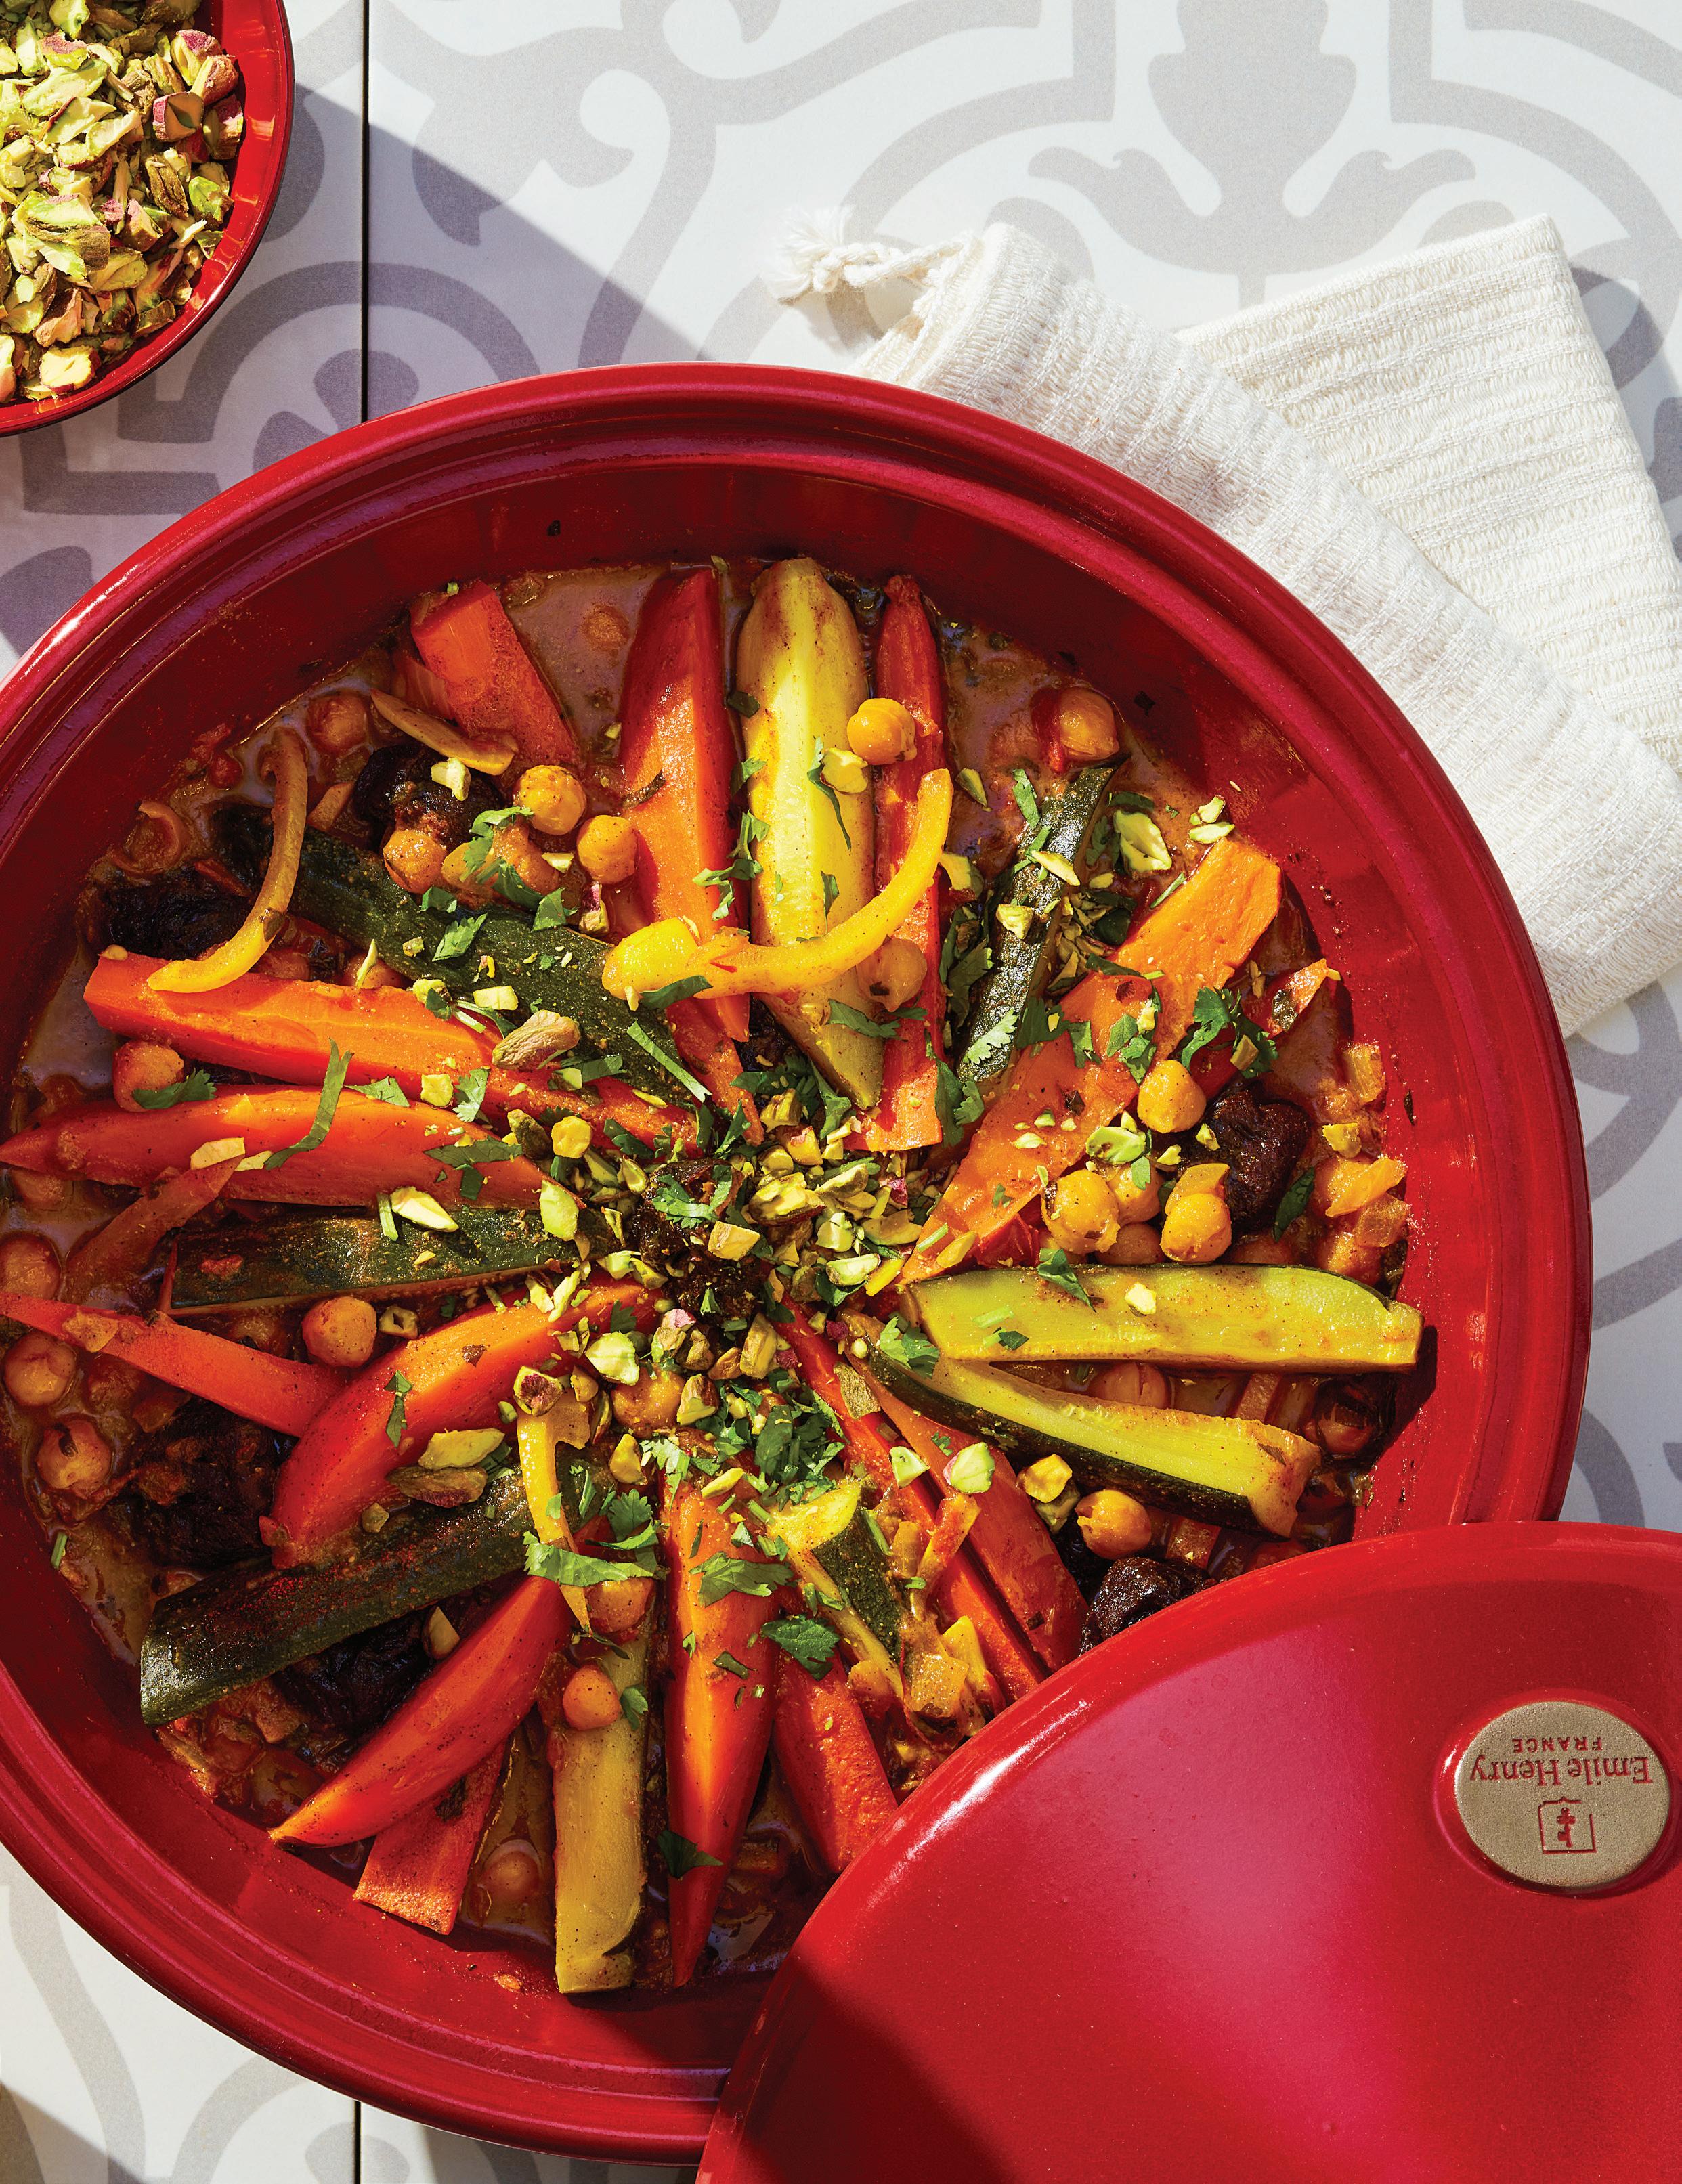
Tagine is both the name of the conical vessel Moroccan cooks use as well as the rich stews people make in them. Even if you don’t have a tagine pot, you can still recreate the magic in a Dutch oven or heavy-bottomed pan. Soft-cooked vegetables sometimes get a bad rap, but here, they become deeply satisfying when infused with the warmly spiced sauce. The preserved lemon adds a salty, citrusy kick, and prunes bring a deep sweetness. A sprinkle of pistachios on top finishes the dish with a welcome crunch. Serve it over couscous or flu y basmati rice to soak up the sauce.
Small pinch of sa ron
2 tablespoons warm water
2 teaspoons ground coriander
2 teaspoons ground ginger
1 teaspoon ground cinnamon
1 teaspoon ground cumin
¼ teaspoon turmeric
1 large zucchini
1 small sweet potato
2 medium carrots
2 tablespoons extra virgin olive oil
1 medium yellow onion, chopped
4 garlic cloves, thinly sliced
1⅛ teaspoons fine sea salt, divided ¼ cup chopped cilantro, plus more for serving
1. Heat the oven to 350°F.
2 medium tomatoes, diced 1½ cups low-sodium vegetable broth or water
1 preserved lemon, skin only, cut into thin strips
12 pitted prunes
1 (24 -ounce) can chickpeas, drained Cooked couscous or basmati rice, for serving Coarsely chopped pistachios, for garnish
2. In a small bowl, crumble the sa ron into the warm water.
3. In a separate small bowl, mix together the coriander, ginger, cinnamon, cumin, and turmeric.
4. Cut the zucchini in half crosswise, and the cut each half lengthwise into three wedges so you have 6 long pieces.
5. Peel the sweet potato and cut it into 6 wedges.
6. Cut each carrot in half crosswise. Cut the fatter ends in half lengthwise and leave the skinnier ends whole so you have 6 long pieces.
7. In a large tagine (if you have one) or an ovenproof Dutch oven or heavy pot, heat the oil over medium heat.
8. Add the onion and garlic, add ½ teaspoon salt, and cook, stirring, until softened, about 5 minutes. Stir in the dry spices and chopped cilantro, and cook until fragrant, about 1 minute.
9. Add the tomatoes and stir until they start to soften and break down, about 3 minutes. Add the vegetable broth, sa ron water, preserved lemon peel strips, prunes, chickpeas, and ½ teaspoon salt, and bring to a boil, then turn o the heat.
10. Arrange the zucchini, carrots, and sweet potato in an alternating pattern on top of the other vegetables. Spoon a little bit of the sauce on top, then sprinkle with the remaining ⅛ teaspoon salt.
11. Cover your tagine and transfer to the oven. Cook for 30 to 40 minutes, until the vegetables on top are soft.
12. Garnish with pistachios and the remaining cilantro and serve hot with cooked couscous or rice.
Cook’s Note: If you would like to add chicken, use a 14-ounce can of chickpeas and add in 1½ cups cooked rotisserie chicken at the same time.
Nutrition (per serving, tagine only): Calories: 200, Fat: 6g (Sat: 1g), Cholesterol: 0mg, Sodium: 590mg, Carb: 33g, Fiber: 7g, Sugar: 13g, Protein: 5g
MAKES 4 SERVINGS
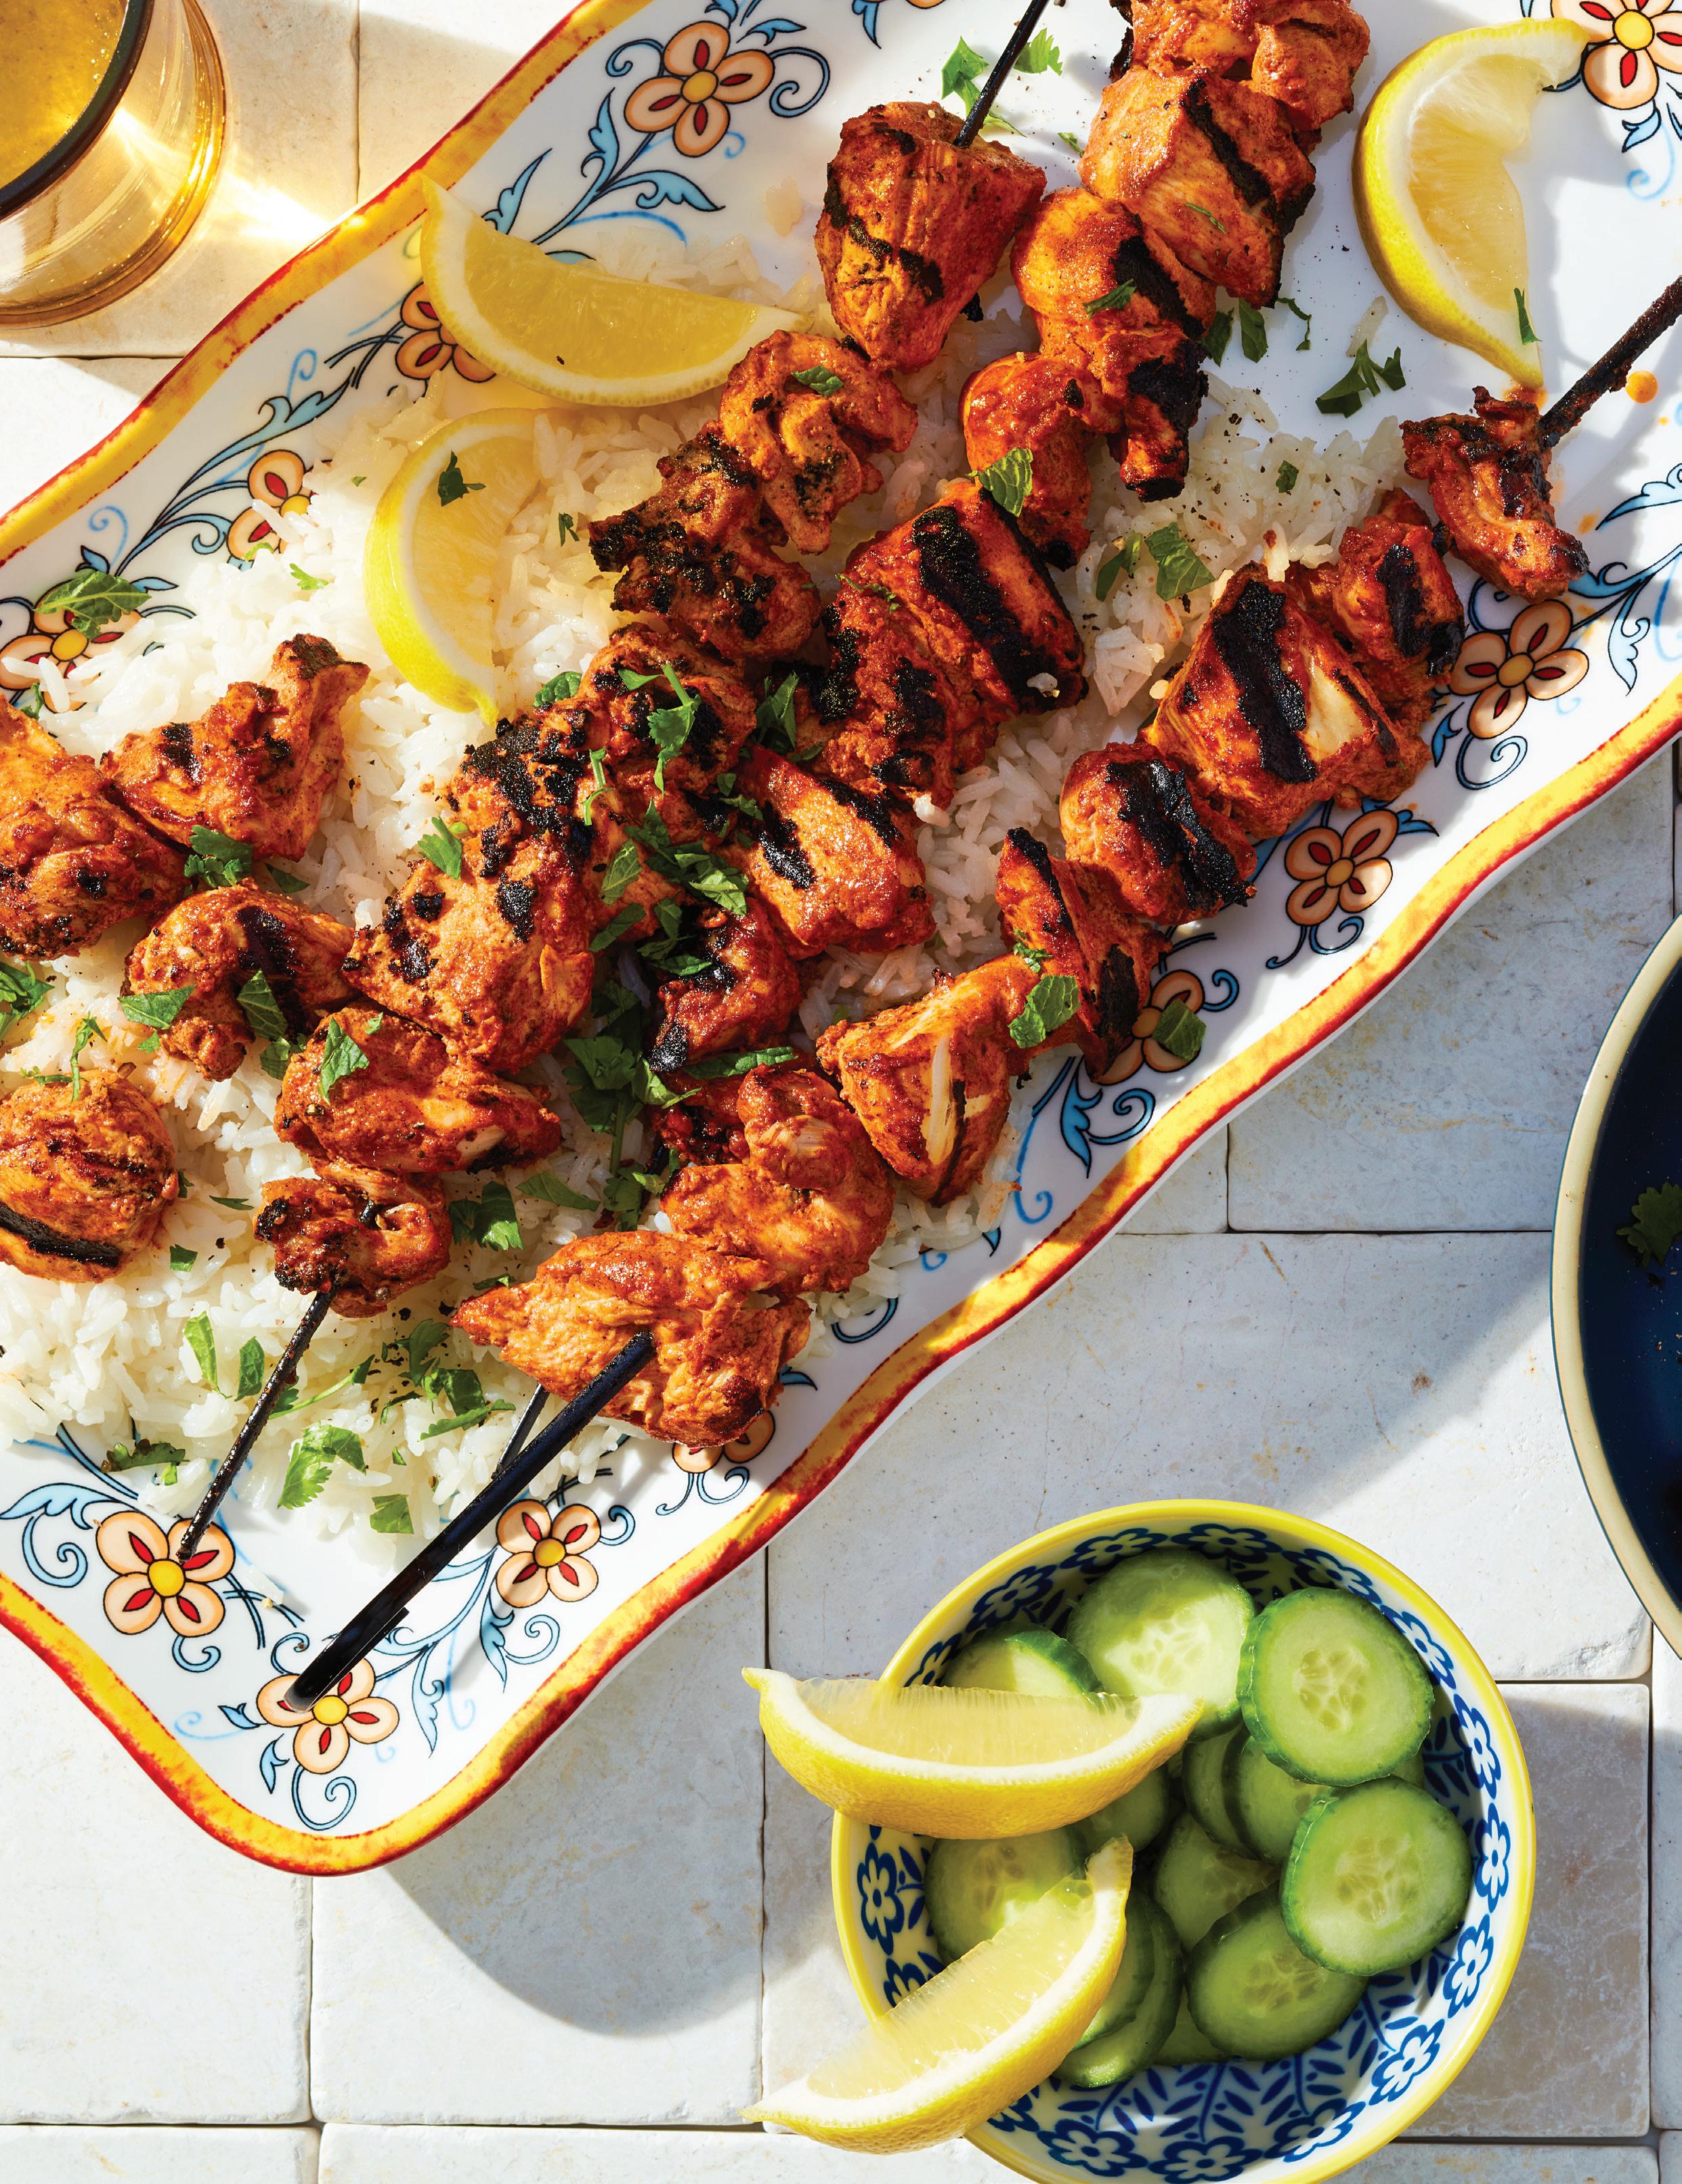
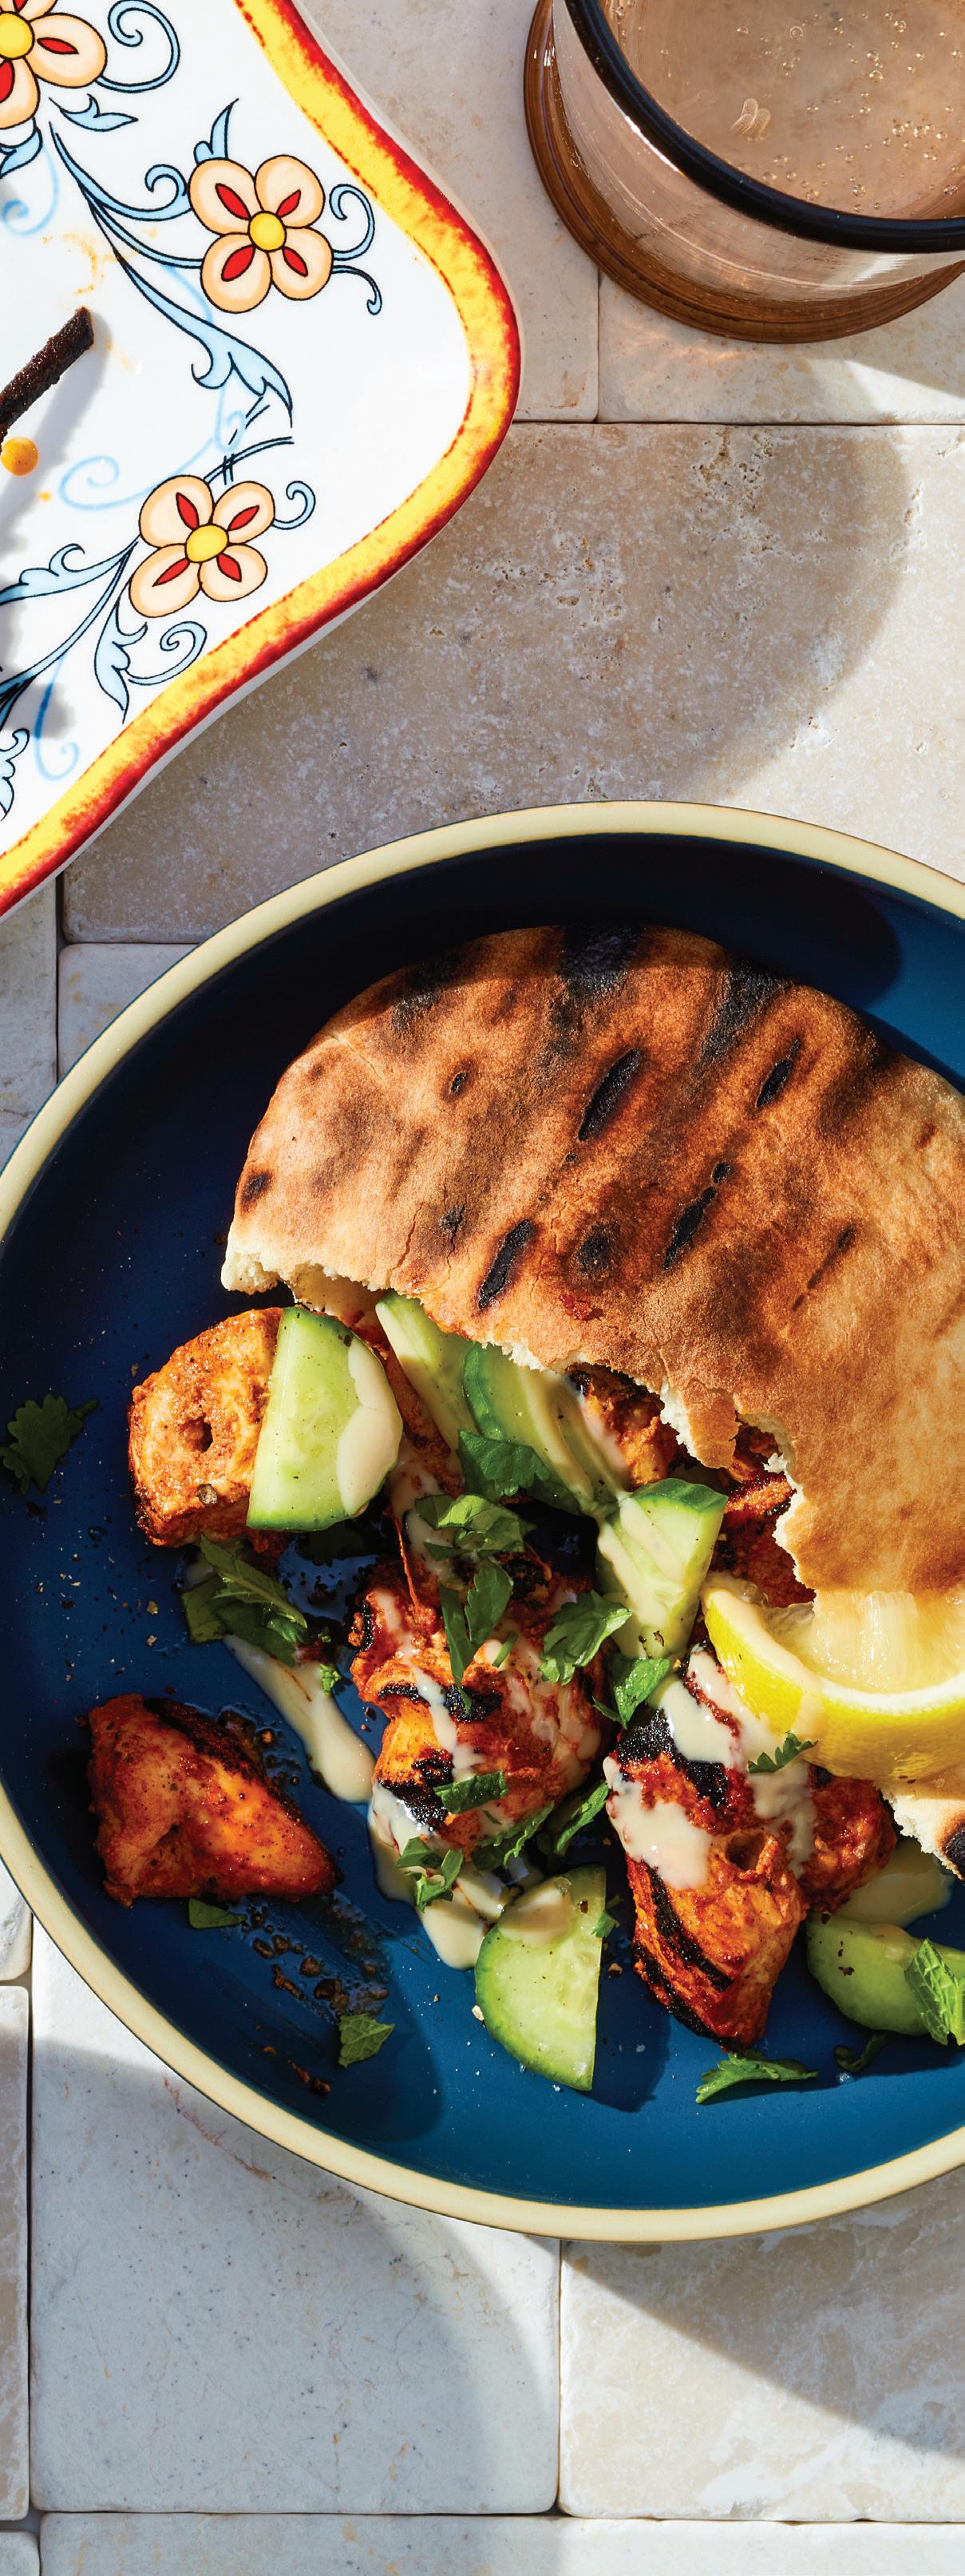
Shish Tawook, which translates to chicken skewers, is a beloved dish in the Levant part of the Mediterranean. The chicken typically has a garlicky, lemony yogurt marinade that caramelizes beautifully when grilled, thanks to the addition of tomato paste. The spices vary from cook to cook. Using a charcoal grill will bring an added depth of flavor to these, but you can also cook them indoors with a grill pan or under a broiler. You can serve the chicken tucked into a warm pita or over a bed of flu y rice. A drizzle of creamy tahini sauce, some crisp cucumber slices, and a sprinkle of fresh cilantro pull everything together.
for the chicken
½ cup plain 2% fat Greek yogurt
¼ cup fresh lemon juice
¼ cup extra virgin olive oil
3 tablespoons tomato paste
6 large cloves garlic, minced or finely grated
1 tablespoon sweet paprika
2 teaspoons ground cumin
1 teaspoon ground ginger
1 teaspoon fine sea salt
½ teaspoon allspice
½ teaspoon cinnamon
¼ teaspoon freshly ground black pepper
1½ pounds boneless skinless chicken thighs or breasts, cut into 1½-inch pieces
for serving
½ cup well-stirred tahini
¼ cup warm water, plus more as needed
¼ teaspoon salt
Warm pita or cooked rice
Sliced cucumber and chopped cilantro, for serving
1. For the chicken, in a large bowl, whisk together the yogurt, lemon juice, olive oil, tomato paste, garlic, paprika, cumin, ginger, salt, allspice, cinnamon, and black pepper. Add the chicken and toss until the pieces are well coated with the marinade.
2. Refrigerate the chicken for 2 to 4 hours. (You can skip marinating, but the chicken will be less tender and flavorful.)
3. Light a grill over medium-high heat, preheat a grill pan, or light a broiler on high.
4. If you’re going to use the broiler, line a baking sheet with foil, then set a rack on top.
5. Thread the chicken onto 6 to 8 metal skewers so that as much surface area of the chicken pieces will be exposed to the heat as possible.
(No need to scrape o the marinade.)
6. Oil the grill grates or rack.
7. If you’re grilling the chicken, set the skewers on the grates and grill, turning occasionally, until the marinade looks dry all over and blistered or charred in spots and the chicken is cooked through, 6 to 8 minutes. If it looks like the marinade is burning, reduce the heat to medium.
8. If you’re using the broiler, arrange the skewers on the rack and set under the broiler about 3 inches from the heat. Broil until the marinade on top looks dry and the chicken is blistered in spots, about 4 minutes. Move the skewers around as needed to help the chicken cook evenly. Flip the skewers and cook until the other side also looks dry and blistered in spots and the chicken is cooked through, about 4 minutes longer.
9. For serving, in a bowl, whisk together the tahini, warm water, and salt. Whisk in a little more water as needed to create a sauce that’s just pourable. 10. You can either make wraps with the pita or serve the chicken over rice. Drizzle with the tahini, top with cucumber and cilantro, and serve.
Nutrition (per serving, chicken with tahini only): Calories: 520, Fat: 34g (Sat: 5g), Cholesterol: 95mg, Sodium: 810mg, Carb: 18g, Fiber: 4g, Sugar: 5g, Protein: 38g
MAKES 4 SERVINGS
Catalan seafood stew, or "suquet de peix," perfectly captures the essence of Mediterranean coastal cooking. It’s the kind of dish traditionally made by fishermen using the day’s catch and whatever ingredients they had on hand. This version combines mussels, shrimp, and white fish, layered with tender potatoes and a sa ron-scented broth that’s both light and deeply satisfying. The technique of grating tomatoes is a signature in Catalan cooking.
Many stews in Catalonia are typically thickened with a piccada—a mixture that can include nuts, garlic, and day-old bread. Here, minced almonds act as an optional thickener, but the stew is also lovely without it. (For an extra garlic punch, you can mince up another clove to add in at the end, too.)
1 pound small yellow potatoes, halved lengthwise
1 tablespoon, plus ¾ teaspoon fine
sea salt, divided
2 pounds mussels, cleaned
2 medium tomatoes, halved
Pinch of sa ron
2 tablespoons warm water
¾ pound white fish fillet, such as monkfish or cod, cut into 4 pieces
2 tablespoons extra virgin olive oil
1 medium yellow onion, chopped
4 large garlic cloves, thinly sliced
1 teaspoon Pimenton de la Vera or other smoked paprika
½ cup dry white wine
1 cup clam juice or fish stock
¼ cup slivered blanched almonds, minced (optional)
½ pound large shrimp, peeled and deveined Chopped parsley, for serving
1. In a very large pot, cover the potatoes with water and season with 1 tablespoon fine sea salt. Bring to a boil over high heat and cook until barely tender, about 10 minutes. Drain and rinse the pot.
2. While the potatoes cook, look through the mussels to make sure all are tightly closed. (If any are slightly open, press them closed. If they don’t stay closed, discard them.)
3. On the large holes of a box grater, grate the cut sides of the tomatoes with a bowl underneath to catch the tomato puree. Grate until you reach the skins, then discard the skins. (You’ll have about 1½ cups tomato puree.)
4. In a small bowl, crumble the sa ron into the warm water.
5. On a plate, season the fish with ¼ teaspoon salt.
6. Return the pot you used for the potatoes to medium heat and add the olive oil. When it’s warm, add the onion, garlic, and remaining ½ teaspoon salt and cook until the onion is softened, about 5 minutes. Add the pimenton and cook until fragrant, about 30 seconds. Add the dry white wine, bring to a boil, and cook until reduced by about half. Add the tomato puree, sa ron water, and clam juice and bring to a boil. Add the potatoes and almonds, if using, and cook to let the flavors meld and the juices thicken slightly, about 5 minutes. Taste and add more seasoning, if desired.
7. Stir in the mussels, then nestle in the shrimp and fish, trying to make sure they’re touching the liquid. Cover the pot and cook until the mussels are opened and fish and shrimp are cooked through, 3 to 4 minutes. Discard any mussels that do not open.
8. Shower the stew with chopped parsley and serve in shallow bowls.
Nutrition (per serving): Calories: 500, Fat: 17g (Sat: 2.5g), Cholesterol: 155mg, Sodium: 2000mg, Carb: 28g, Fiber: 4g, Sugar: 9g, Protein: 53g
MAKES 4 TO 6 SERVINGS
In Sicily, cooks make pesto with almonds and tomatoes, plus the usual garlic, herbs, and olive oil. The sauce tastes fresh and vibrant in summer with fresh garden tomatoes, but at other times of the year, sun-dried tomatoes are more flavorful and easy to keep in the pantry. A little squeeze of lemon at the end brings out the sweetness of the tomatoes.
1 tablespoon, plus ¼ teaspoon fine sea salt, divided
1 pound linguine
2 medium garlic cloves
½ cup raw slivered almonds
1⁄3 cup sun-dried tomatoes packed in oil, plus 1 teaspoon of the oil
1½ cups loosely packed fresh mint leaves or basil or a mix of the two
2 ounces freshly grated Pecorino-Romano cheese (about ½ cup)
Zest of 1 lemon, plus 1 tablespoon fresh lemon juice
½ cup extra virgin olive oil
1. Bring a large pot of water to a boil and add the 1 tablespoon sea salt. Add the linguine and cook until al dente, about 10 minutes, or according to the package instructions. Scoop out about ½ cup of the cooking liquid, reserve it, and drain the pasta.
2. Meanwhile, in a food processor, combine the garlic and almonds and pulse until coarsely chopped. Add the sun-dried tomatoes with the 1 teaspoon oil from the jar, and mint and pulse until everything is finely chopped. Pulse in the cheese, lemon zest, and the ¼ teaspoon salt. With the machine on, gradually add in the olive oil and process until you have a paste. Pulse in the lemon juice.
3. Transfer half of the pesto to a large serving bowl. Add the hot pasta and toss, adding a little of the cooking liquid to loosen it up. Taste and season with more salt, if desired.
4. Transfer to bowls, top with a little more pesto, and serve, passing any remaining pesto at the table.
Nutrition (each per 6 servings): Calories: 540, Fat: 29g (Sat: 3g), Cholesterol: 0mg, Sodium: 1280 mg, Carb: 60g, Fiber: 4g, Sugar: 3g, Protein: 15g
MAKES 1 (8 -INCH ) CAKE, 8 TO 12 SERVINGS
Inspired by Italian cheesecakes, which often use ricotta as the base, this cake highlights its milky richness with exceptionally creamy mascarpone. Gently sweet with a touch of lemon zest and vanilla, it’s milder than traditional cheesecake and it's perfect with a swipe of jam or some fresh fruit on top. Using powdered sugar and baking the filling at a lower temperature helps keep the cake stable, so you don’t need a water bath.
for the crust
1 tablespoon unsalted butter, melted, plus more for the pan
6 ounces (2 cups) walnut halves
2 tablespoons granulated sugar
1. Heat the oven to 350°F.
for the filling
24 ounces well-drained ricotta
8 ounces mascarpone
1 cup powdered sugar Zest of 2 lemons
2 teaspoons vanilla extract
5 large eggs
Jam or fresh fruit, for serving
2. For the crust, butter an 8-inch springform pan and line the bottom with parchment paper, then butter the paper.
3. In a food processor, pulse together the nuts and sugar until finely chopped. Add the melted butter and process until the nuts hold together when pressed.
4. Press the nut mixture in an even layer on the bottom and about ½ inch up the sides of the pan.
5. Bake the crust in the preheated oven until fragrant, just dry to the touch, and golden, 12 to 15 minutes. Let cool completely.
6. For the filling, reduce the oven to 300°F. Clean out the bowl of the food processor.
7. In the food processor, combine the ricotta and mascarpone and pulse until it has the texture of buttercream frosting, about 30 pulses. Scrape down the sides.
8. Add the sugar and process to incorporate. Add the lemon zest and vanilla and pulse a few times to incorporate.
9. With the machine on, add the eggs one at a time, allowing each to incorporate before adding the next. Scrape down the sides and pulse a few times just to make sure you have a homogenous batter.
10. Set the cooled crust on a baking sheet. Pour the batter into the prepared crust and spread into an even layer.
11. Bake until the edges of the cake are set, the center of the cake is just a little bit wobbly, and an instant-read thermometer registered 155°F when inserted into the center, about 70 minutes.
12. Let the cake cool on the baking sheet to room temperature. Run a knife around the edges of the cake and loosen the spring form, then chill the cake for at least 6 hours or overnight.
13. Slice and serve chilled on its own or with jam or fresh fruit.
Cook’s Note: For a fruity topping, warm cut fresh apricots in a glaze of about 1 tablespoon water with 1⁄4 cup apricot jam and a drizzle of honey.
Nutrition (each per 12 servings, with 1 tsp. apricot jam): Calories: 370, Fat: 27g (Sat: 10g), Cholesterol: 130mg, Sodium: 100mg, Carb: 23g, Fiber: 1g, Sugar: 52g, Protein: 10g
Nutrition (each per 12 servings, cheesecake only): Calories: 360, Fat: 27g (Sat: 10g), Cholesterol: 130mg, Sodium: 95mg, Carb: 19g, Fiber: 1g, Sugar: 12g, Protein: 10g
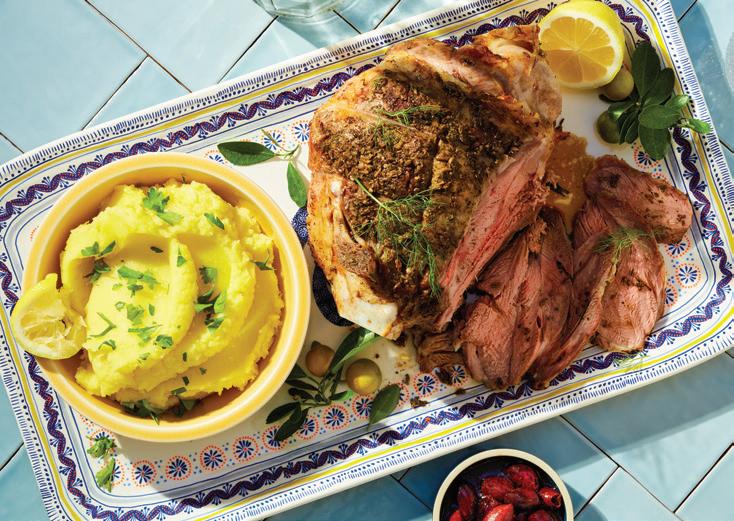
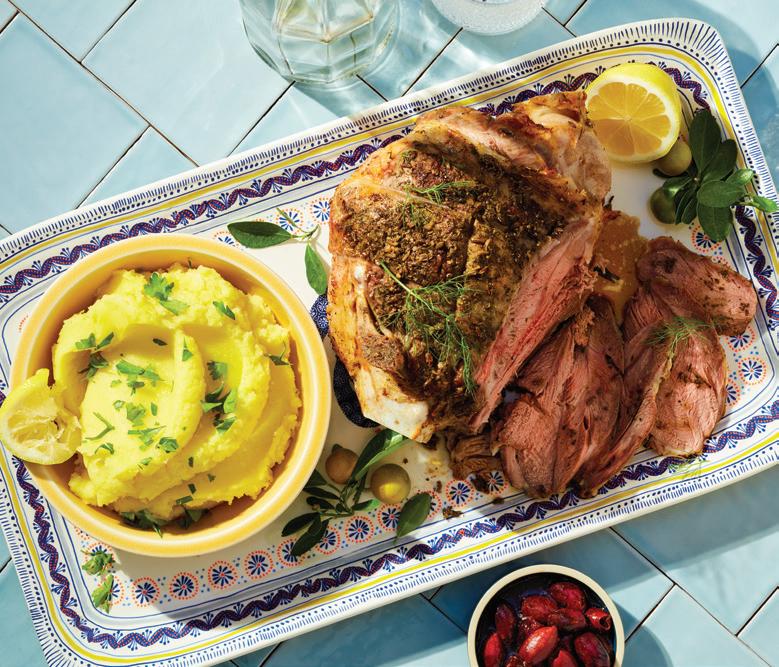
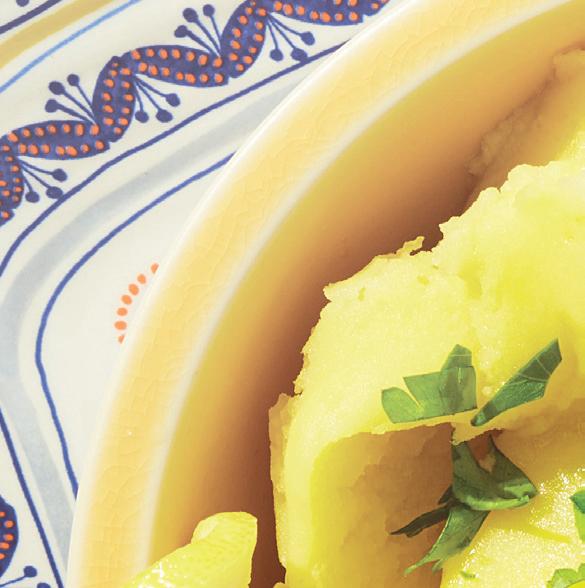
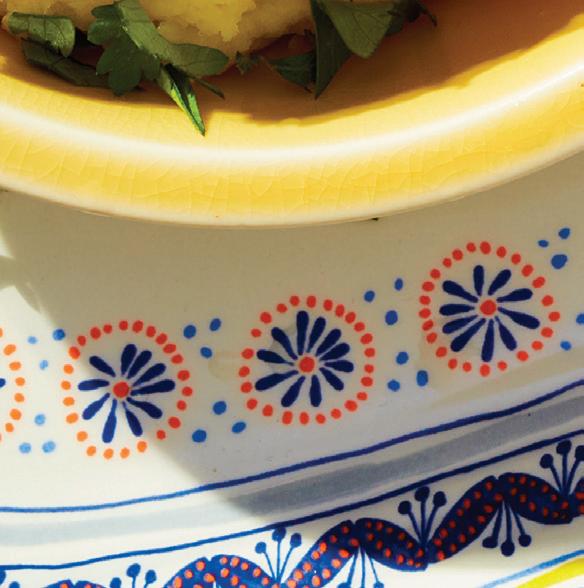
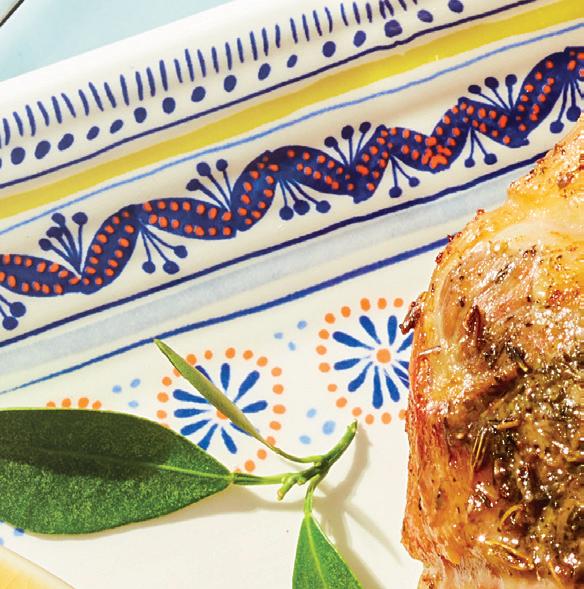
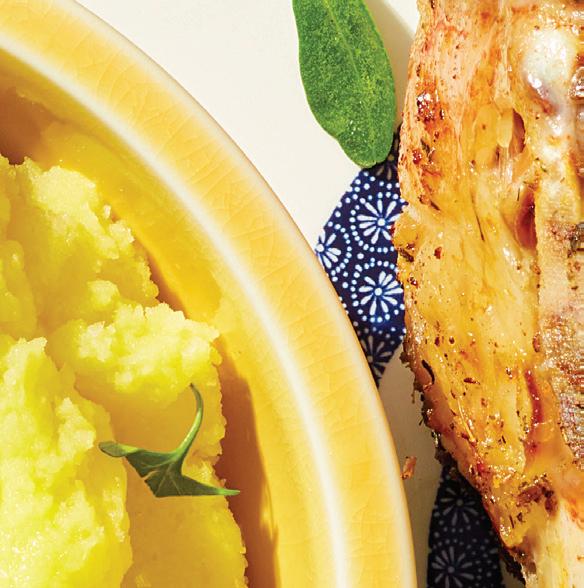
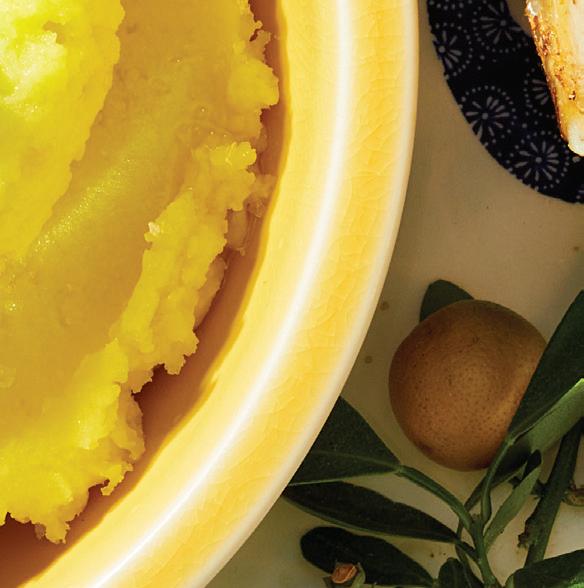
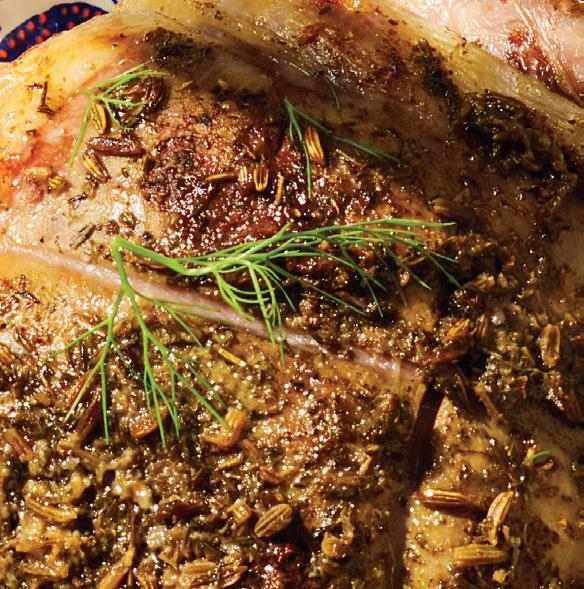
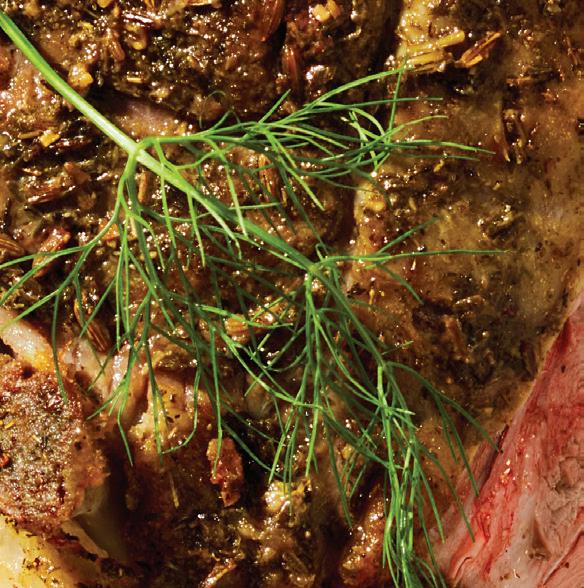
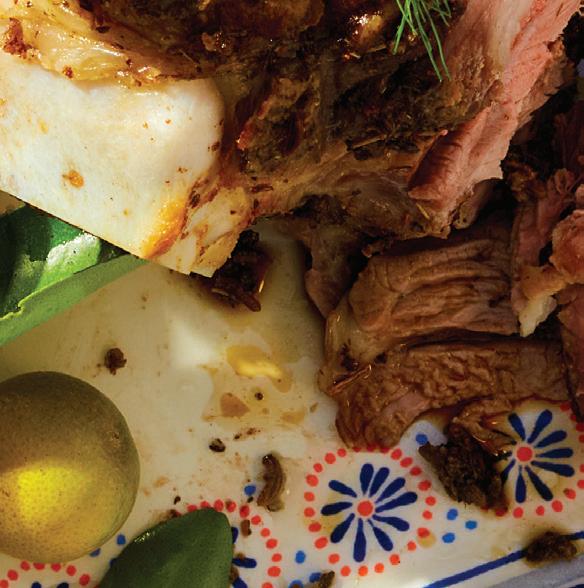
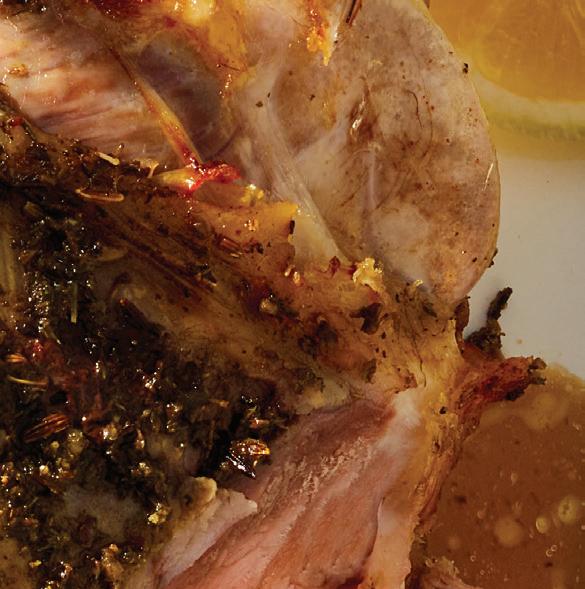
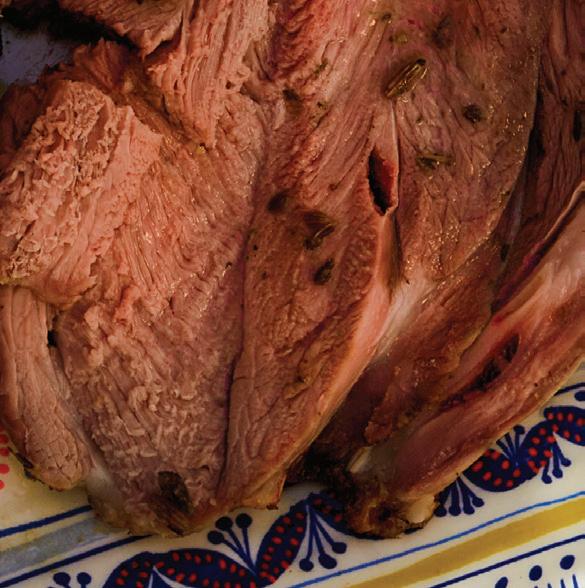
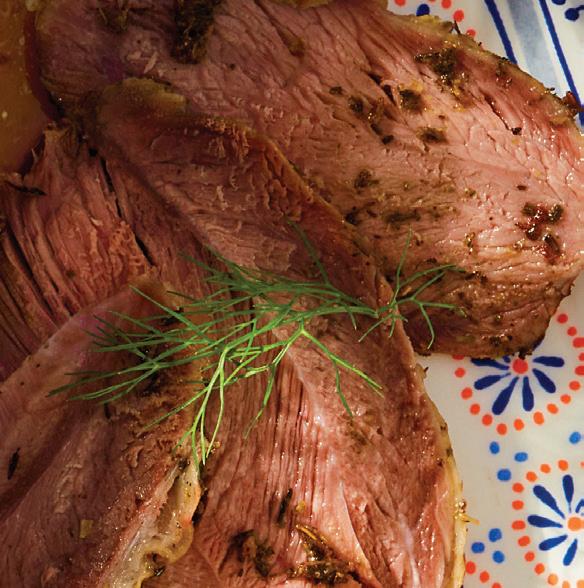
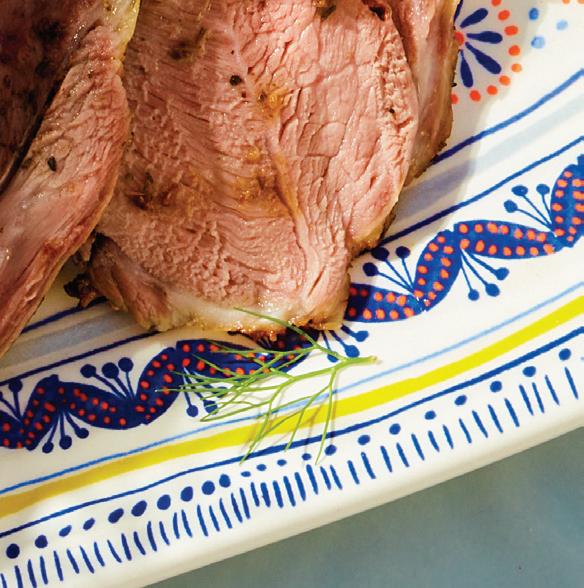
Garlic-and-Herb-Crusted Roast Leg of Lamb with Skordalia (pictured on p. 20)
MAKES 8 TO 10 SERVINGS
Lamb is a centerpiece of many Greek feasts, especially for Easter and other family gatherings. This version stays true to its Mediterranean roots with a rub of oregano, thyme, fennel, and olive oil. For the best flavor, marinate the lamb for at least a full day ahead. Two is even better. After roasting on high heat to give it a rich crust, the lamb then cooks slowly at a lower temperature to ensure you have exceptionally tender meat. Skordalia, a lemony, garlicky potato mash, is typically served at room temperature or even chilled as a dip or sometimes with fish, but it’s beautiful here as a side dish.
for the lamb
1 (5 -6 pound) leg of lamb roast, part bone cut o
2 tablespoons coarse sea salt
2 teaspoons dried oregano
2 teaspoons dried thyme
1 teaspoon fennel seeds
2 tablespoons olive oil
½ lemon
for the skordalia
4 pounds Yukon Gold potatoes, peeled and cut into 1-inch pieces
4 garlic cloves, peeled
1½ teaspoons fine sea salt
5 tablespoons lemon juice ¾ cup olive oil
Chopped parsley, for garnish
1. Using a small, sharp knife, make small, shallow slits all over the lamb.
2. Using a mortar and pestle or mini food processor, pound or process together the salt, oregano, thyme, fennel, and olive oil. Rub the herby salt all over the lamb and into the slits. Transfer to a bowl or baking sheet, lightly cover, and refrigerate for 24 to 48 hours.
3. Let the lamb stand at room temperature for 1 hour.
4. Heat the oven to 450°F. Set a rack in a roasting pan. Lightly pat the lamb dry, being careful not to remove too much of the rub. Set the lamb fat side up on the rack and roast until the top is nicely browned, 20 to 25 minutes. Reduce the oven heat to 325°F and add 1½ cups of water to the pan. If you have a probe thermometer, stick it into the thickest part of the lamb, then lightly tent it with foil.
5. Continue roasting the lamb until it reaches 115°F, about 2 hours. Uncover the lamb and squeeze some of the juice from the half lemon on top. If the pan is dry, add a little more water. Continue cooking the lamb until it reaches 125°F for rare to medium-rare or 135°F for medium-rare to medium, 20 to 30 minutes longer. Remove from the oven and squeeze more lemon juice on top. Transfer to a carving board, lightly tent with foil, and let rest for 10 to 20 minutes.
6. While the lamb cooks, put the potatoes for the skordalia in a large saucepan, cover with water, add 1 tablespoon salt, and bring to a boil. Boil until the potatoes are tender all the way through when pricked with a fork, about 15 minutes. Drain and return to the pot. Return the pot to the heat and cook just for 1 minute, shaking the pan, until any excess moisture on the potatoes evaporates.
7. As the potatoes cook, using a mortar and pestle, mash the garlic, the salt, then add the lemon juice. Let stand for at least 5 minutes. (You can also make a garlic paste with your knife by chopping and mashing the garlic with the salt.)
8. Press the potatoes through a ricer into a bowl or mash the potatoes with a masher. Stir in the garlic-lemon mixture, then add the olive oil a little bit at a time and stir until it’s incorporated.
9. Slice the lamb and transfer to a platter. Garnish the skordalia with parsley and serve with the lamb.
Nutrition (each per 10 servings with skordalia): Calories: 590, Fat: 28g (Sat: 6g), Cholesterol: 130 mg, Sodium: 1850mg, Carb: 40g, Fiber: 4g, Sugar: 2g, Protein: 46g
RECIPES BY TONIA GEORGE | PHOTOS BY JONATHAN GREGSON
Does the smell of bacon in the air conjure up fond memories of visiting grandparents or other family and friends for weekend brunch? Or maybe the sweet scent of a stack of pancakes or baked goodies triggers your taste buds? Whether you’re cooking for your own household or hosting a get-together, these delights ordinarily served for the morning meal are a delicious choice to stir up great memories and make new ones anytime of the day. In these recipes from “The Perfect Start to Your Day: Nourishing & Indulgent Recipes for Breakfast & Brunch” by Tonia George, you’ll have plenty of ideas to satisfy everyone’s sweet and savory sides with cafe-quality muffins and pancakes and eggs dished up with a side of spice or in a hearty English quiche. Bacon fragrance is included. – mary subialka
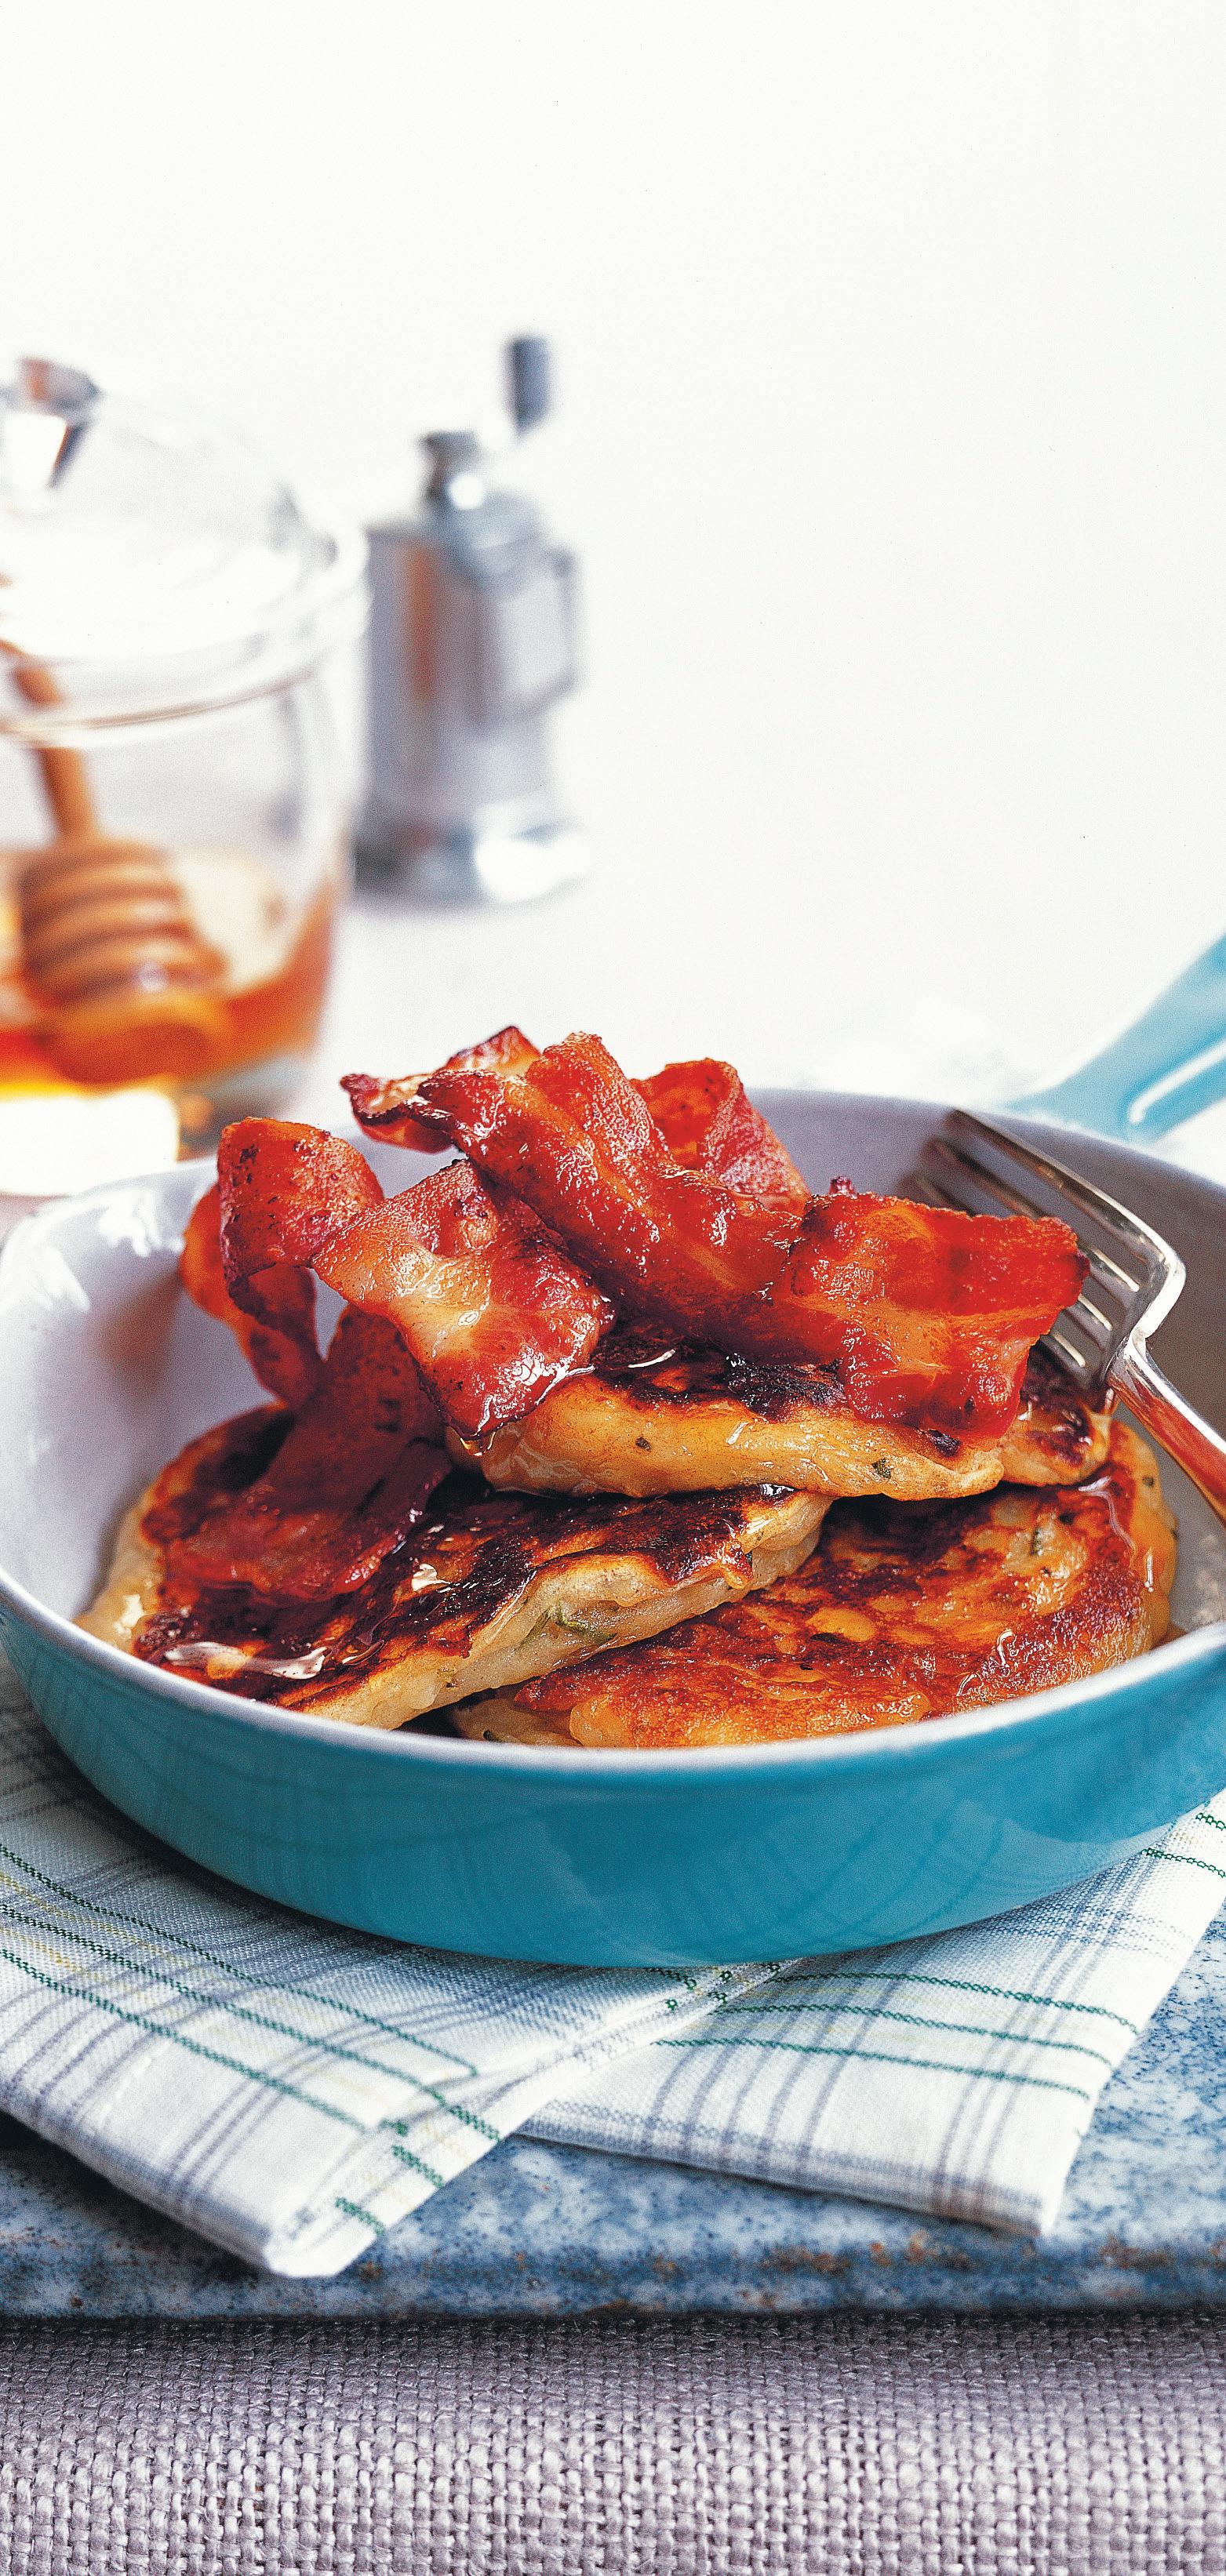
These pancakes are based on the Irish potato dish called boxty, in which some of the potatoes are cooked and mashed, and the others are grated to give the pancakes a bit of texture on top of the flu ness. – tonia george
1 pound potatoes, divided
1 tablespoon finely chopped fresh rosemary needles
1 cup plus 2 tablespoons all-purpose flour
½ teaspoon baking soda
1 cup plus 2 tablespoons buttermilk
12 slices bacon
2 tablespoons butter, divided Sea salt and freshly ground black pepper Honey, to serve
1. Put a generous half of the potatoes in a saucepan of cold, salted water and bring to a boil. Cook for 20 to 25 minutes, until soft. Drain and mash, then season and add the rosemary. Let cool.
2. Meanwhile, peel and grate the remaining potatoes and leave them raw. Put both sets of potatoes in a mixing bowl and beat in the flour and baking soda, then the buttermilk.
3. Preheat the grill/broiler. Grill/broil the bacon until well done (there’s no need to turn it over while it’s being grilled/broiled). Let cool for 4 to 5 minutes, until crisp. Turn o the grill/ broiler and keep the bacon in a low oven while you continue cooking.
4. Heat half the butter in a frying pan over lowmedium heat and wait for it to sizzle. Drop 2 to 3 ladlefuls of the batter into the pan, spaced apart, and spread out with a spatula. They need about 3 minutes on the first side, then a little less on the other side. Keep warm with the bacon in the oven while you cook the rest.
5. Serve 2 to 3 pancakes per person, with a few slices of bacon and some honey to drizzle over.
Nutrition (per serving): Calories: 420, Fat: 15g (Sat 7g), Cholesterol: 40mg, Sodium: 710mg, Carb: 55g, Fiber: 3g, Sugar: 6g, Protein: 16g
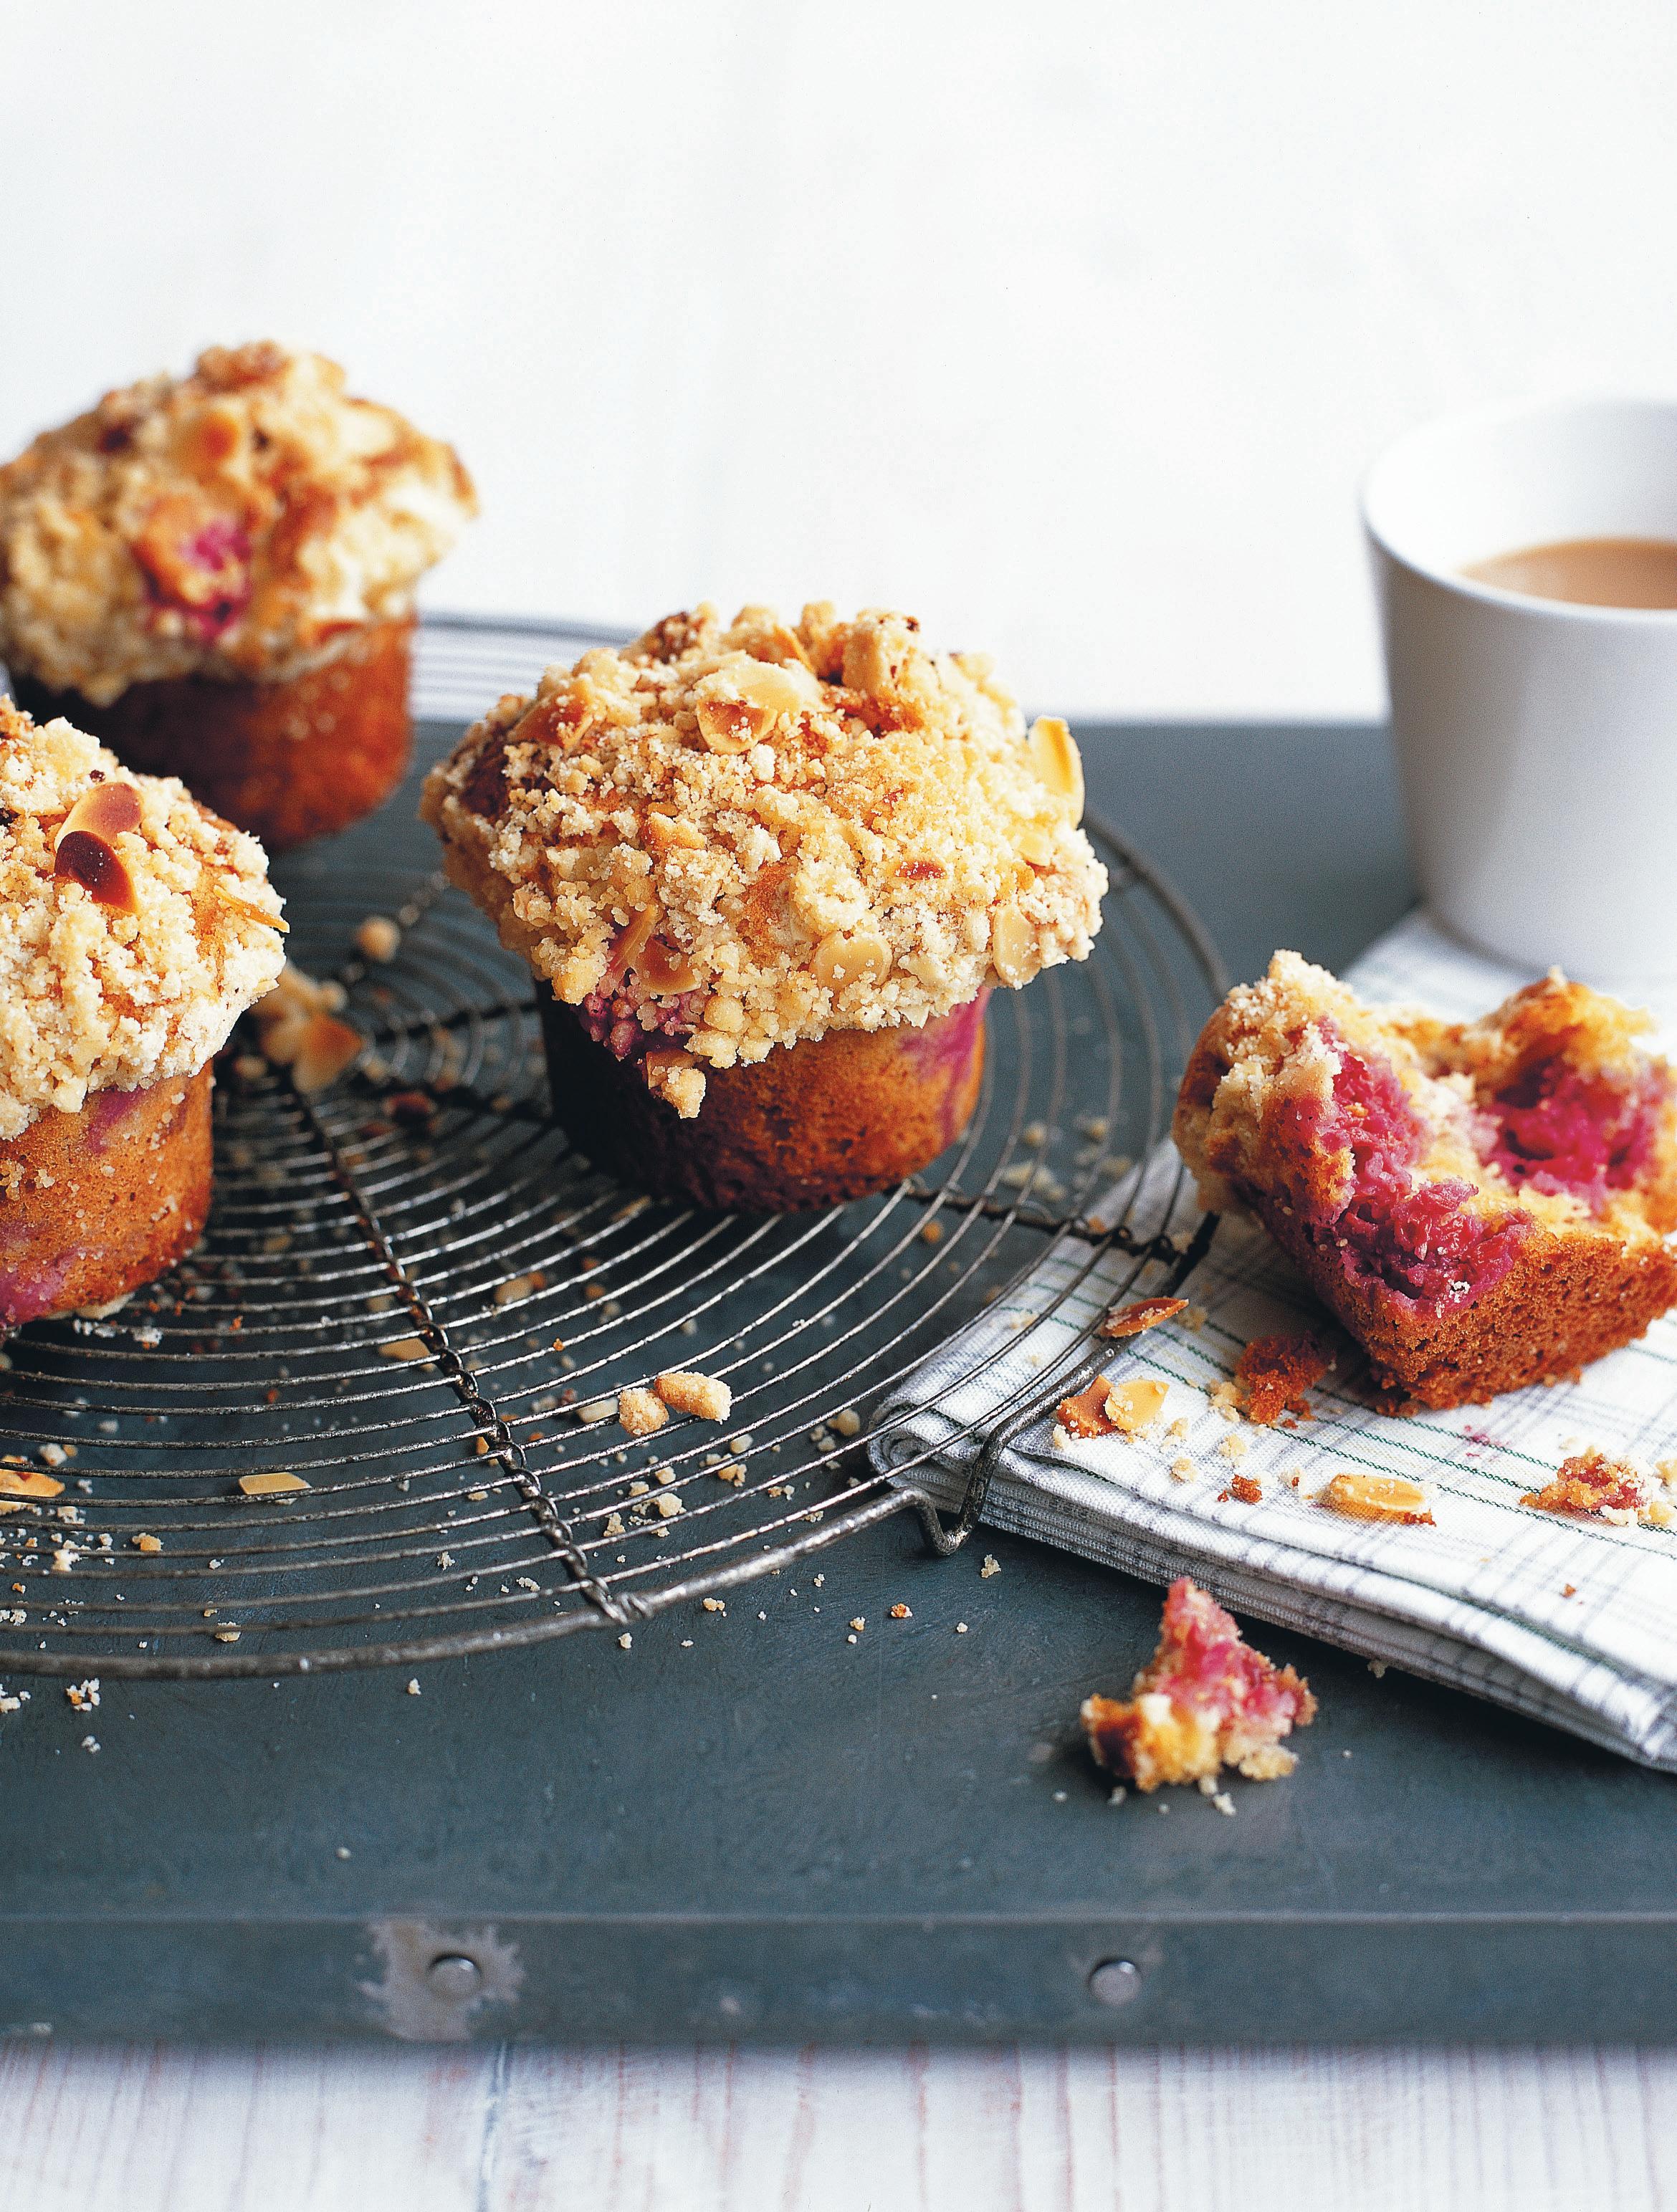
These look like the muffins which are sold in cafes and seem to have exploded out of their pans with their generous proportions. There is no secret trick to this—just fill the paper cases up to the top. – t g
for the topping
¾ cup all-purpose flour
5 tablespoons butter, chilled and cubed
2 tablespoons sugar
3 tablespoons sliced or slivered almonds
for the muffins
2¾ cups all-purpose flour
3 teaspoons baking powder
1 teaspoon baking soda
¾ cup fine granulated sugar
½ teaspoon salt
2 eggs, beaten
1 stick unsalted butter, melted
¾ cup sour cream
¼ cup whole milk
1¼ cups raspberries
1. Heat the oven to 325˚°F. Line a 12-hole mu n pan with paper cases and grease the surface of the pan where the mu ns will rise and stick.
2. To make the topping, put the flour and butter in a food processor and pulse briefly, just until the butter is blended. Tip out into a bowl and add the sugar and almonds, pressing the mixture together with your hands.
3. To make the mu ns, sift the flour, baking powder, baking soda, sugar, and salt into a large mixing bowl. Put the eggs in a bowl, add the melted butter, sour cream, and milk and whisk to combine.
4. Pour the wet ingredients into the dry ingredients and scatter the raspberries on top. Using a large spoon, fold until the mixture is moistened. It needs to be lumpy and shouldn’t be overworked. Spoon into the paper cases right to the top. For regular-size (not exploding!) mu ns you can spoon the cases two-thirds full—you will be able to make more of these with this amount of mixture. Finish by scattering over the topping.
5. Bake in the preheated oven for 25 to 28 minutes for large mu ns, or 18 to 22 minutes for the smaller ones. Let cool for 5 minutes in the pan before transferring to a wire rack.
Nutrition (per muffin): Calories: 350, Fat: 17g (Sat 9g), Cholesterol: 70mg, Sodium: 340mg, Carb: 45g, Fiber: 2g, Sugar: 16g, Protein: 6g
MAKES 4 SERVINGS
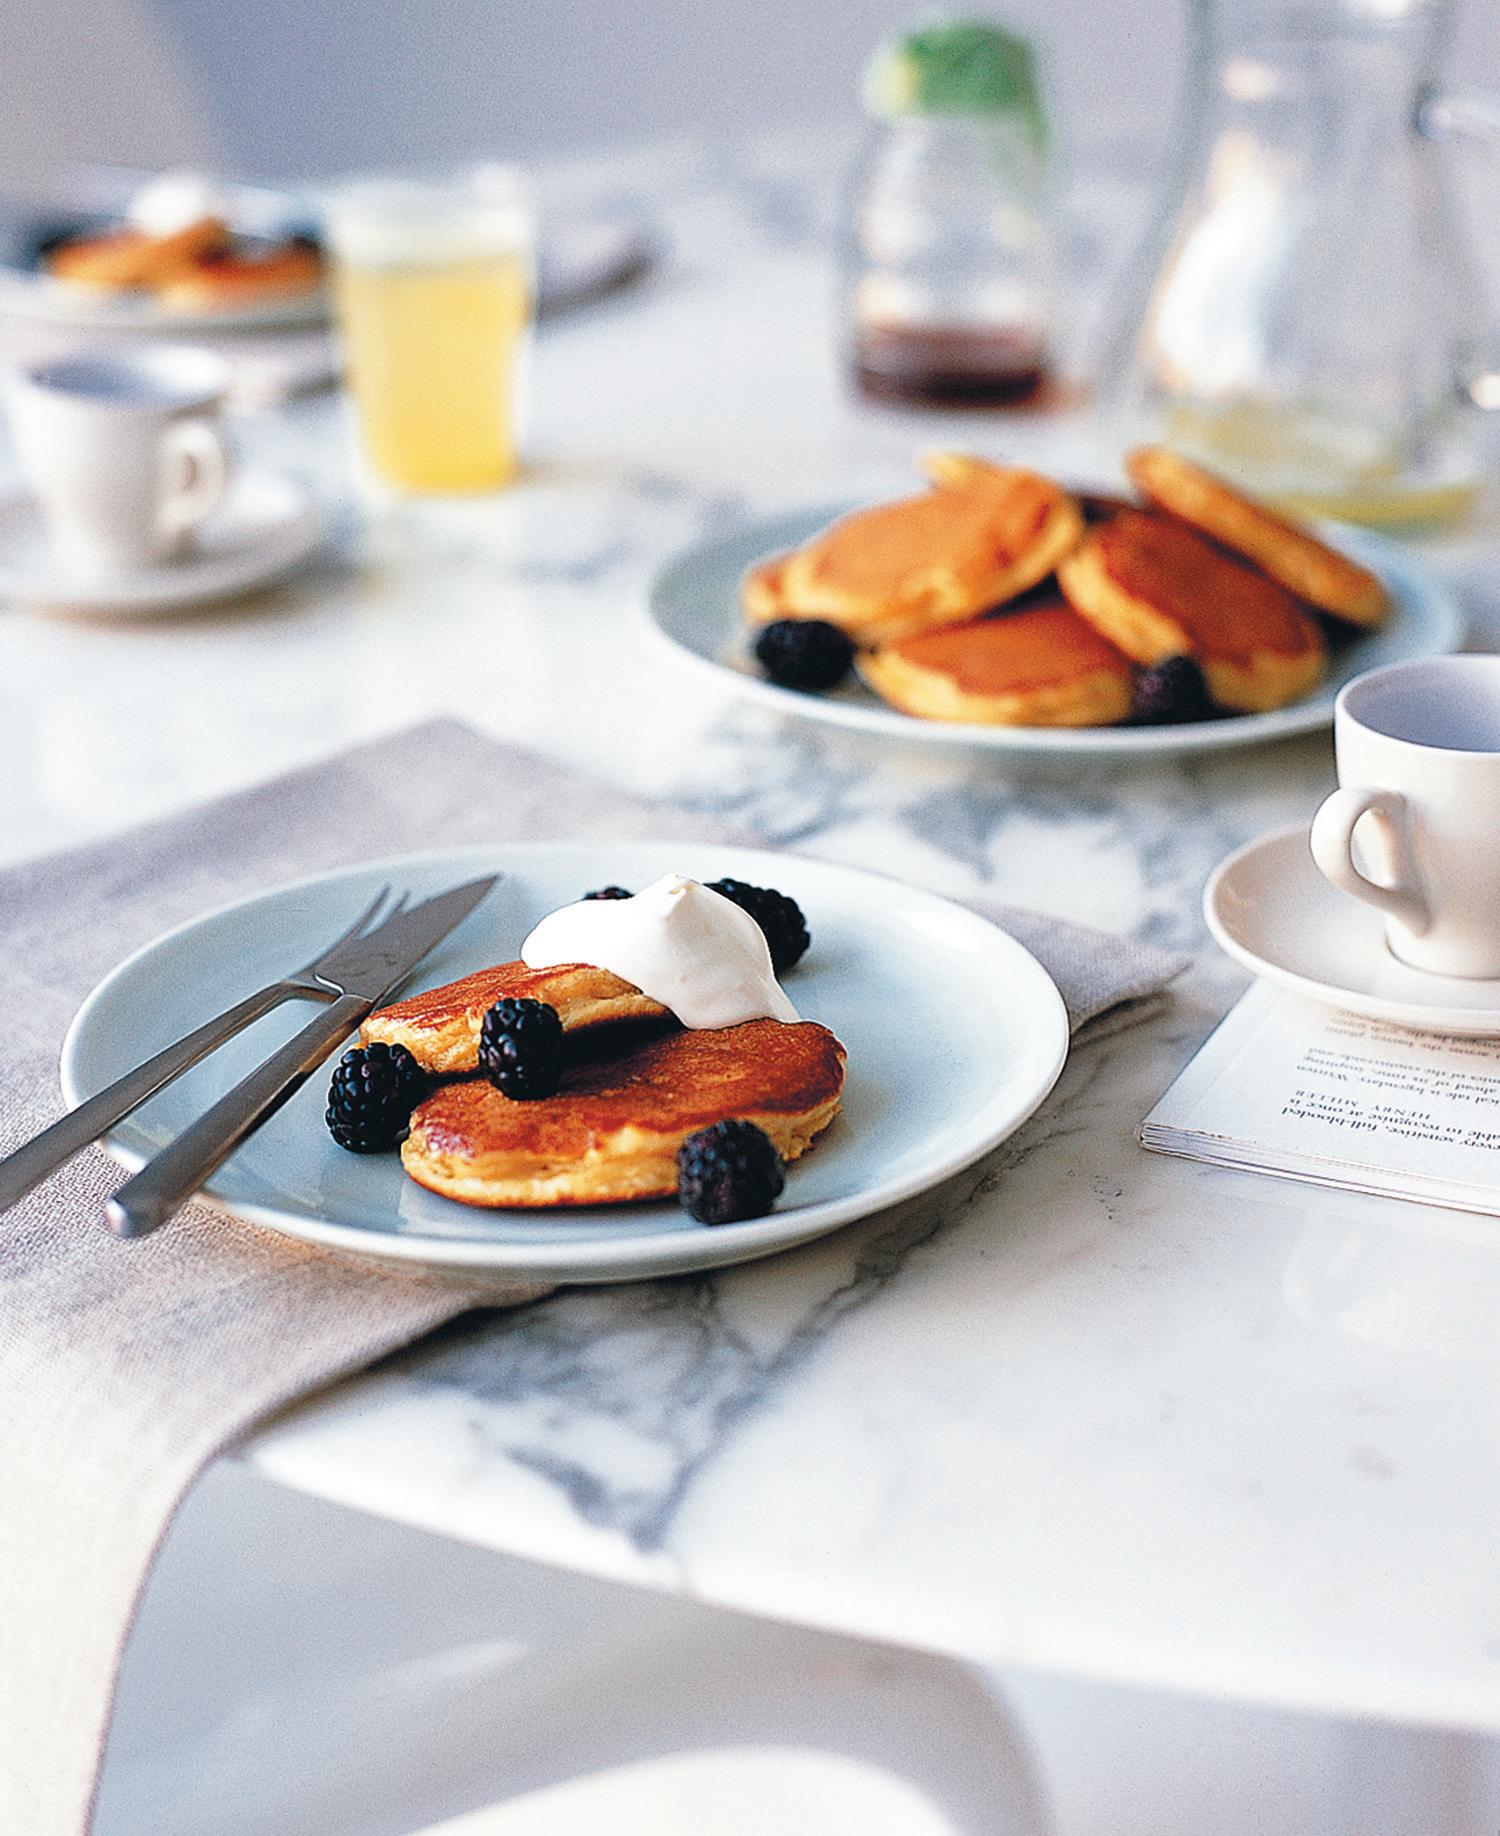
These pancakes are very flu y and light. They need cooking slowly as they are so delicate. You can turn them into savory pancakes by omitting the sugar and folding through some chopped green herbs, such as chives and tarragon, then serving with smoked salmon instead of blackberries. – t g
1 cup ricotta
Juice and grated zest of 1 unwaxed lemon
3 eggs, separated
3 tablespoons butter, melted, divided ¾ cup all-purpose flour
1 teaspoon baking soda
A pinch of salt
4 tablespoons fine granulated sugar Blackberries and crème fraîche, to serve
1. Heat the oven to low.
2. Put the ricotta, lemon juice and zest, egg yolks, and half the butter in a mixing bowl
and beat together. Sift in the flour, baking soda, and salt and fold in.
3. Whisk the egg whites in a separate bowl with an electric handheld whisk until soft peaks form. Add the sugar and whisk until glossy and firm. Using a large metal spoon, fold the whites into the batter.
4. Wipe a heavy-based frying pan with scrunched-up paper towel dipped in the melted butter. Drop a big tablespoon of batter in the pan to make a 2½ -inch circle. Cook in batches of 3 or 4 depending on the size of the pan. Cook for 2 minutes on each side until risen and cooked through. Keep warm in the oven while you make the rest. Serve with blackberries and crème fraîche.
Nutrition (per serving, pancakes only): Calories: 340, Fat: 17g (Sat 9g), Cholesterol: 170mg, Sodium: 500mg, Carb: 35g, Fiber: <1g, Sugar: 13g, Protein: 14g
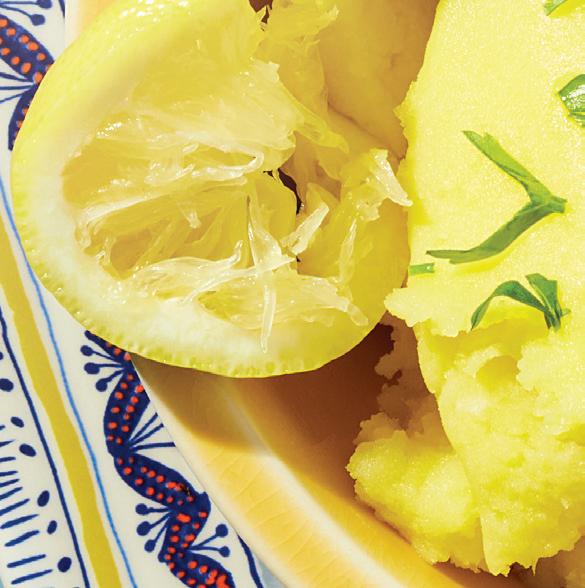
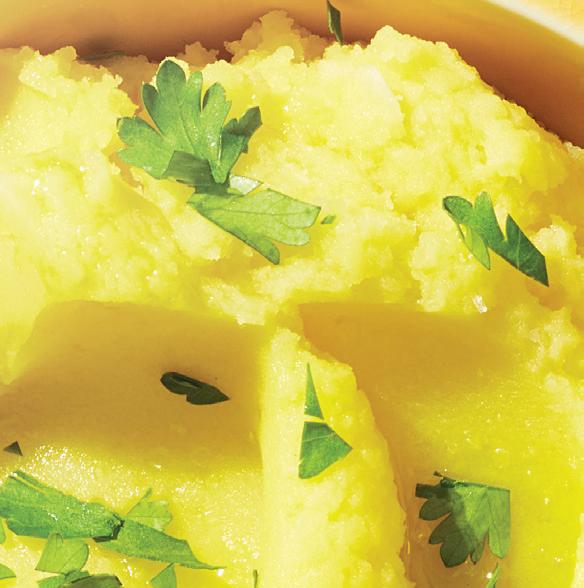
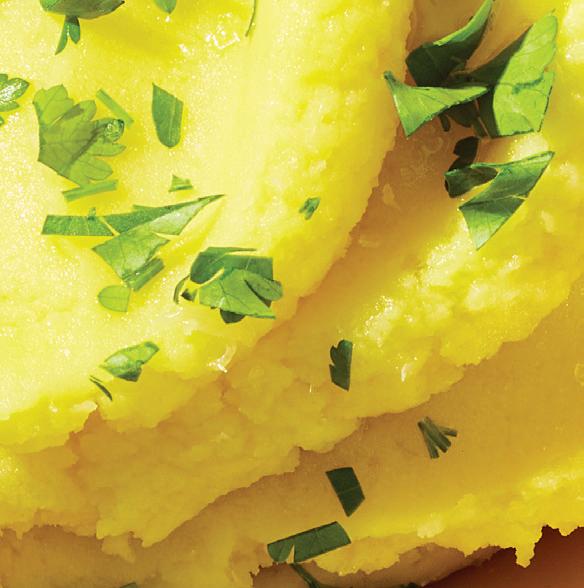
MAKES 4 SERVINGS
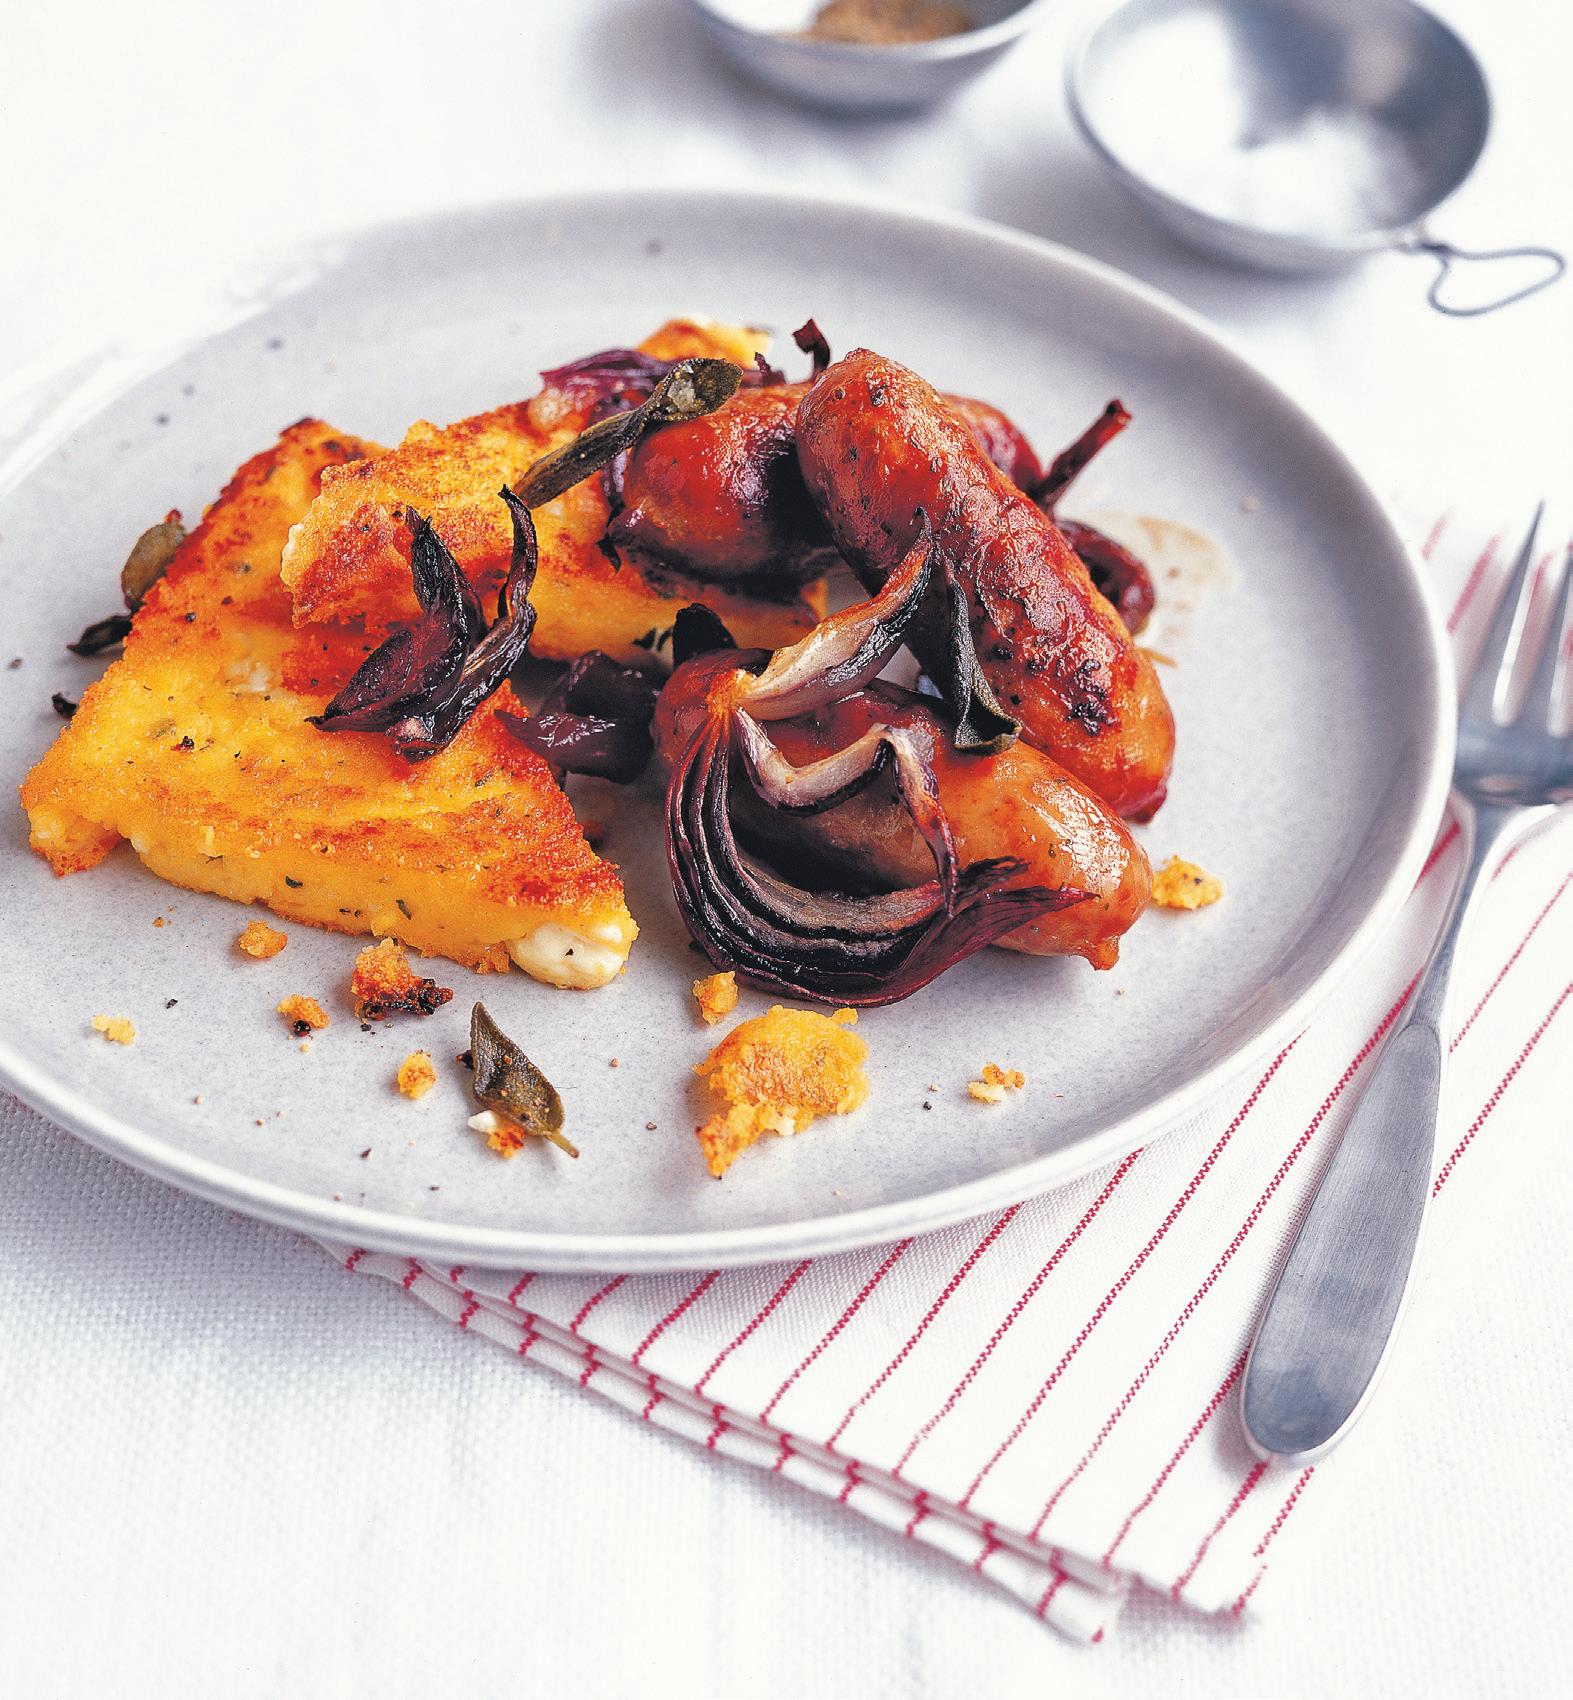
If you are not yet sold on polenta, I urge you to try this method of preparation because it has converted many a person. The secret is that it needs to be seasoned well and enriched with lots of cheese, as well as being fried over high heat until golden so that you get the crunchy exterior and the soft creaminess inside. – t g
12 pork sausages
2 red onions, peeled and cut into slim wedges
A handful of fresh sage leaves
6 tablespoons olive oil, divided
1 cup instant polenta (see Editor’s Note)
1 tablespoon chopped fresh thyme leaves
½ cup grated Parmesan
11⁄3 cups crumbled feta
Sea salt and freshly ground black pepper, to taste
1. Heat oven to 375°F. Grease an 8-inch square pan.
2. Put the sausages and onions in a roasting pan. Scatter the sage over the top and drizzle with 2 tablespoons of the oil, then toss everything together. Roast in the preheated oven for 30 to 35 minutes, until golden and cooked through.
3. Bring 2 2⁄3 cups water to a boil with a pinch of salt and 1 tablespoon of the oil. Remove from the heat and pour in the polenta. Mix it with a wooden spoon and lots of elbow grease. Return to low heat for about 2 to 3 minutes, stirring constantly. Remove from the heat, beat in the thyme and cheeses, and season generously. Spoon into the prepared pan and smooth out the surface. Let cool and set.
4. Tip the polenta onto a board and quarter, then cut each quarter in half to make triangles. 5. Heat a frying pan over high heat and add the remaining oil. Add as many polenta triangles as you can and fry for 2 to 3 minutes on each side, until golden. Serve with the sausage mixture.
Editor’s Note: Some polenta products not labeled “instant” still cook quickly, but check your polenta packaging for cooking instructions and adjust accordingly, if needed.
Nutrition (per serving): Calories: 780, Fat: 54g (Sat 17g), Cholesterol: 115mg, Sodium: 1410mg, Carb: 46g, Fiber: 3g, Sugar: 7g, Protein: 27g
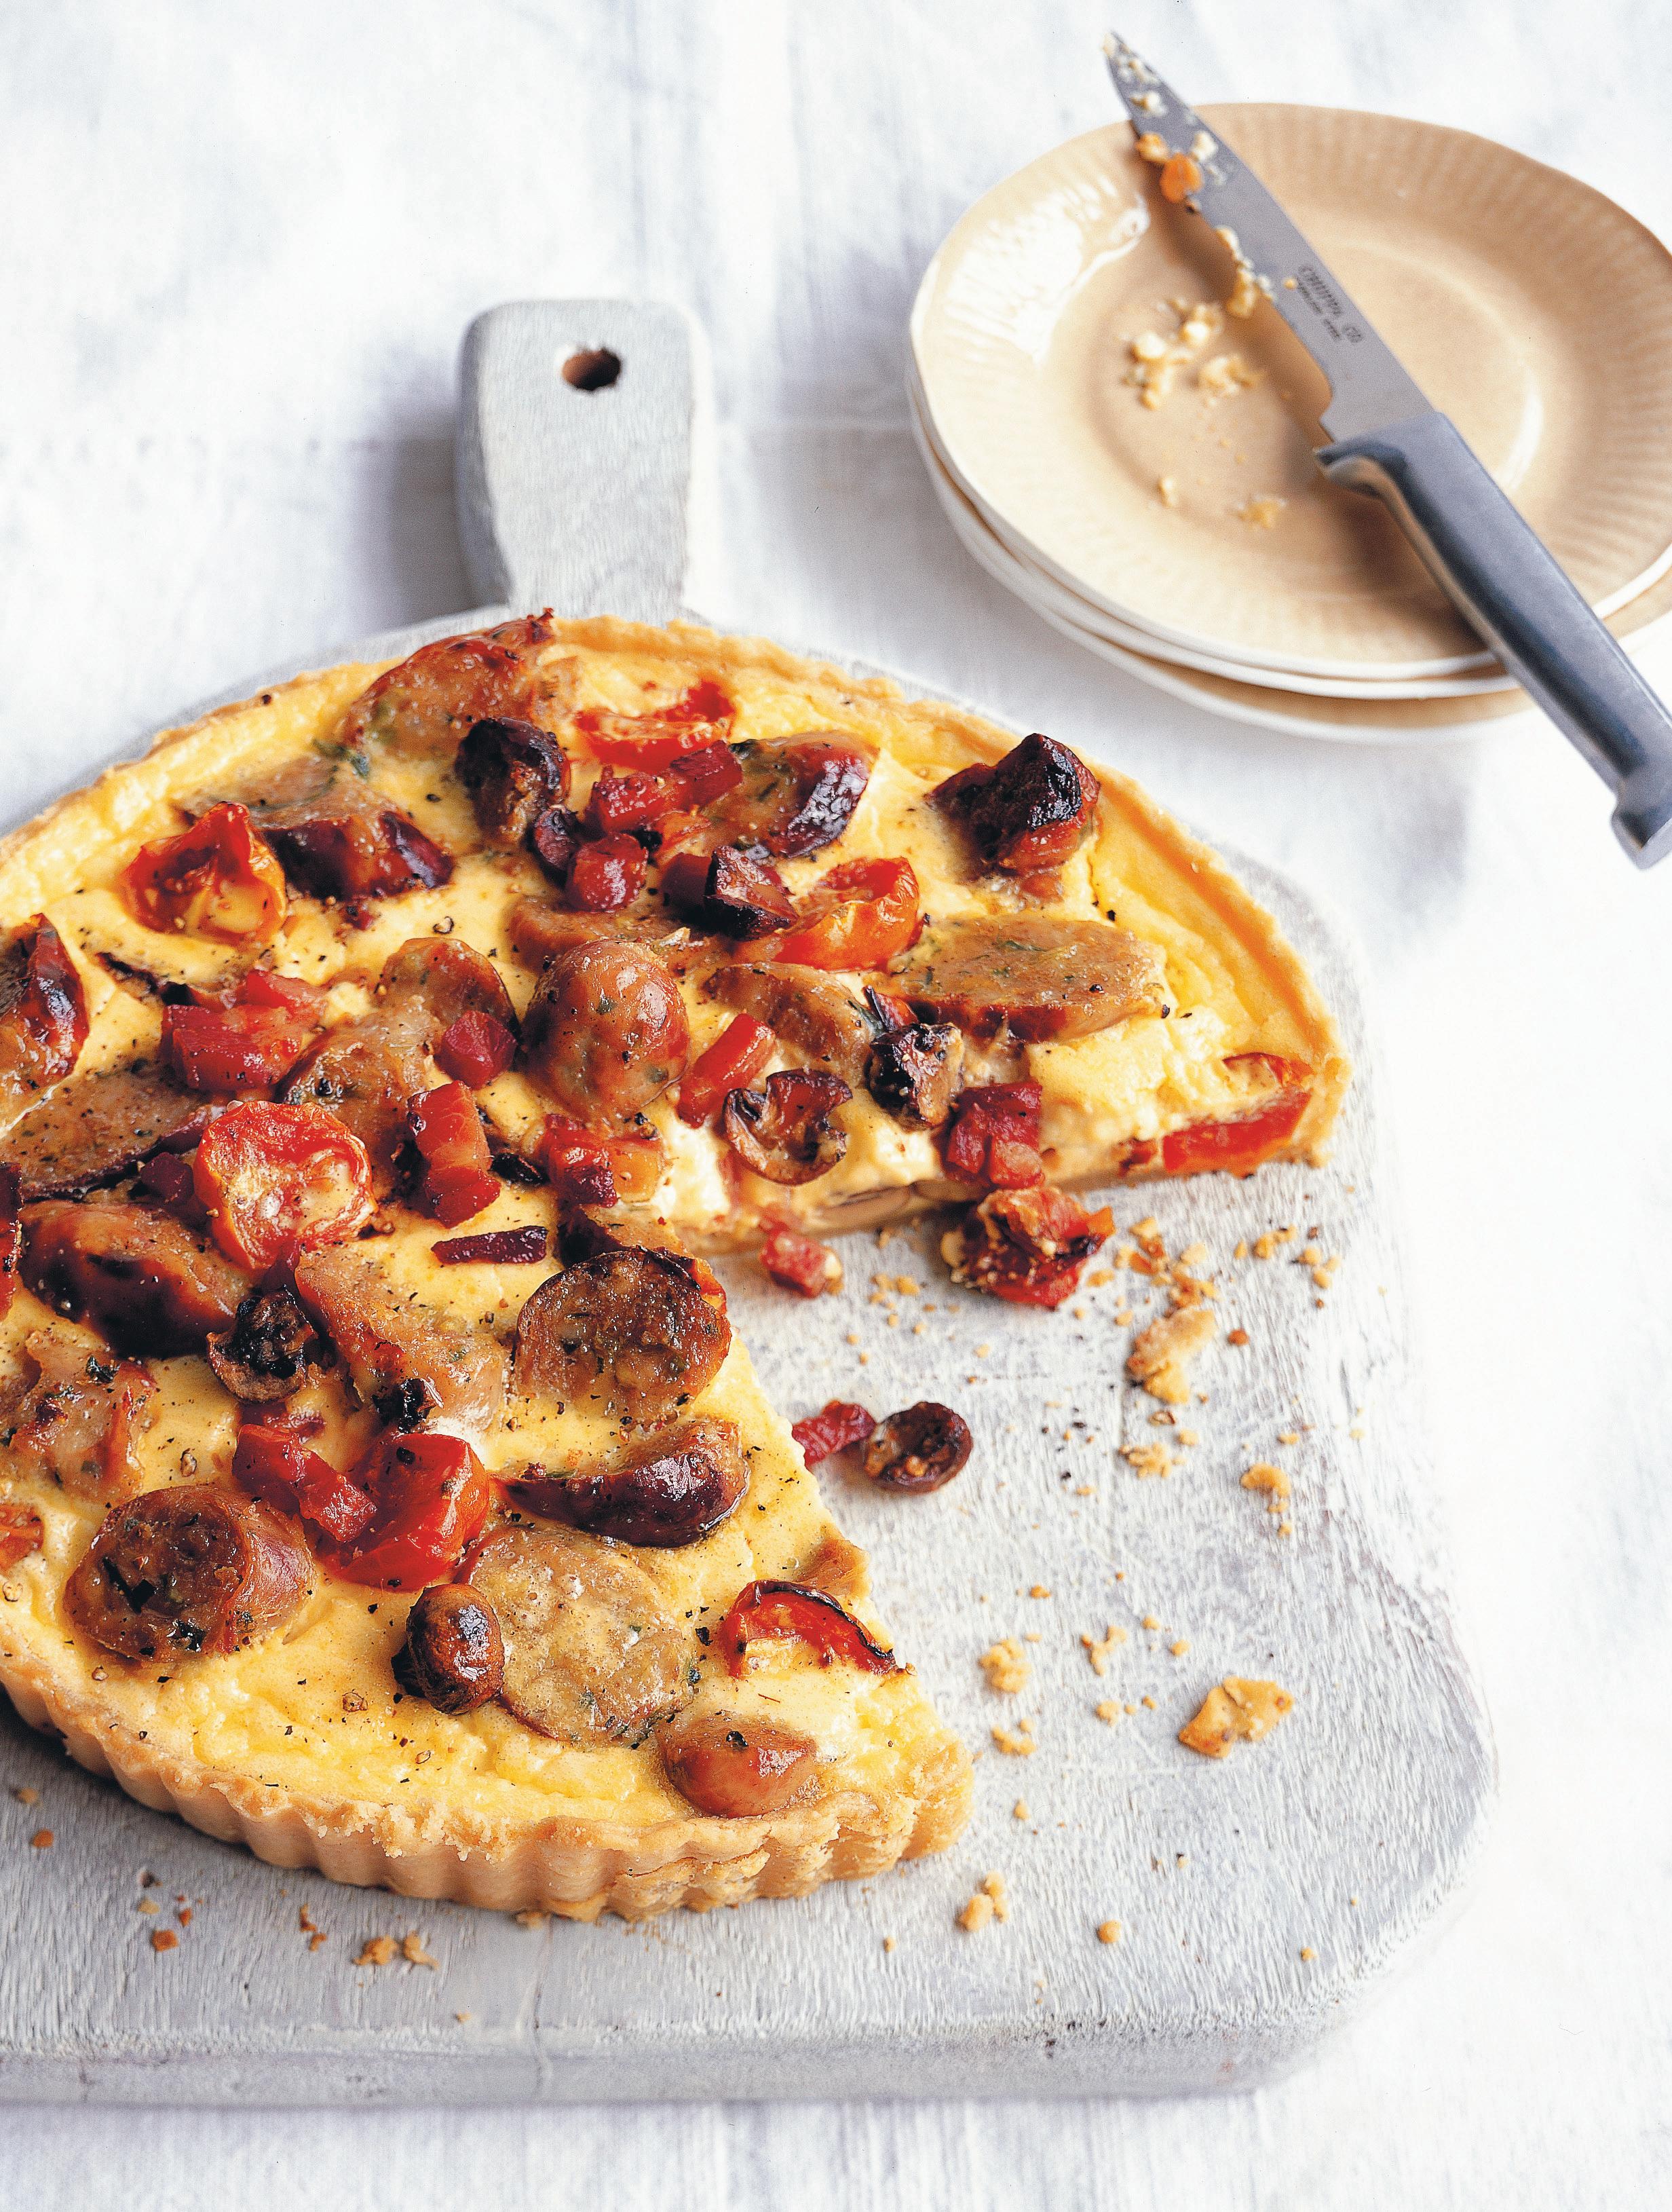
Here are all the flavors of a traditional full farmhouse English fry-up in a quiche. Bake it the day before a long, early-morning journey when you have to have your breakfast on the go. Try to resist smothering it in ketchup! –t g
for the pastry
1¾ cups all-purpose flour
1 teaspoon English mustard powder
10 tablespoons butter, chilled and cubed
1 egg, beaten
for the filling
4 pork sausages
6½ ounces cherry tomatoes, halved
6½ ounces bacon, cubed
6½ ounces button mushrooms, halved
1 tablespoon olive oil
1¼ cups crème fraîche
3 large eggs, beaten
1 teaspoon English mustard powder
1. Heat the oven to 400°F. Gather a 10-inch fluted, loose-bottomed tart pan and baking beans.
2. To make the pastry, put the flour, mustard powder, and butter in a food processor and pulse until they are just combined. Add the egg and run the motor until the mixture just comes into a ball. Turn out, wrap with plastic wrap, and refrigerate for 30 minutes.
3. To make the filling, put the sausages in a roasting pan and roast in the preheated oven for 10 minutes. Take the pan out of the oven, throw in the tomatoes, bacon, and mushrooms, drizzle over the oil and return to the oven to roast for 15 to 20 minutes, until everything is tender and cooked through. Leave the oven on.
4. Roll out the pastry on a lightly floured surface until it is about 1⁄8 inch thick and use it to line the tart pan. Press the pastry into the corners and leave the overhang. Prick the base with a fork, line with baking parchment, and fill with baking beans. Bake in the oven for 8 minutes, then remove the beans and paper. Trim o the overhang and reduce the heat to 300°F. Return the pastry case to the oven for 2 to 3 minutes to dry out while you prepare the filling.
5. To finish the filling, slice the sausages and scatter them with the rest of the roasted ingredients into the pastry case. Mix the crème fraîche, eggs, and mustard powder and pour over everything in the pastry case. Bake for 30 to 35 minutes, until set around the edges. Turn o the oven and let the tart cool in the oven, with the door open, for 15 minutes. Cut into slices and serve warm or cold.
Nutrition (per serving): Calories: 750, Fat: 61g (Sat 32g), Cholesterol: 255mg, Sodium: 420mg, Carb: 30g, Fiber: 2g, Sugar: 3g, Protein: 18g

RECIPES AND PHOTOS FROM “THE PERFECT START TO YOUR DAY: NOURISHING & INDULGENT RECIPES FOR BREAKFAST & BRUNCH” BY TONIA GEORGE © 2024 REPRINTED WITH PERMISSION FROM RYLAND


Making delicious meals is easy with a little help from rotisserie chicken
BY MARY SUBIALKA
ick up a rotisserie chicken—or two—from the deli and have dinner tonight, plus easily prep for the week ahead. Serve this meaty main dish with a vegetable and side for dinner or pull and shred the meat to easily get a step ahead on meals, using it in a range of recipes from lasagna and enchiladas to quick wraps for lunch and more. One chicken will yield about 4 cups of shredded meat, which is enough for any of these recipes.
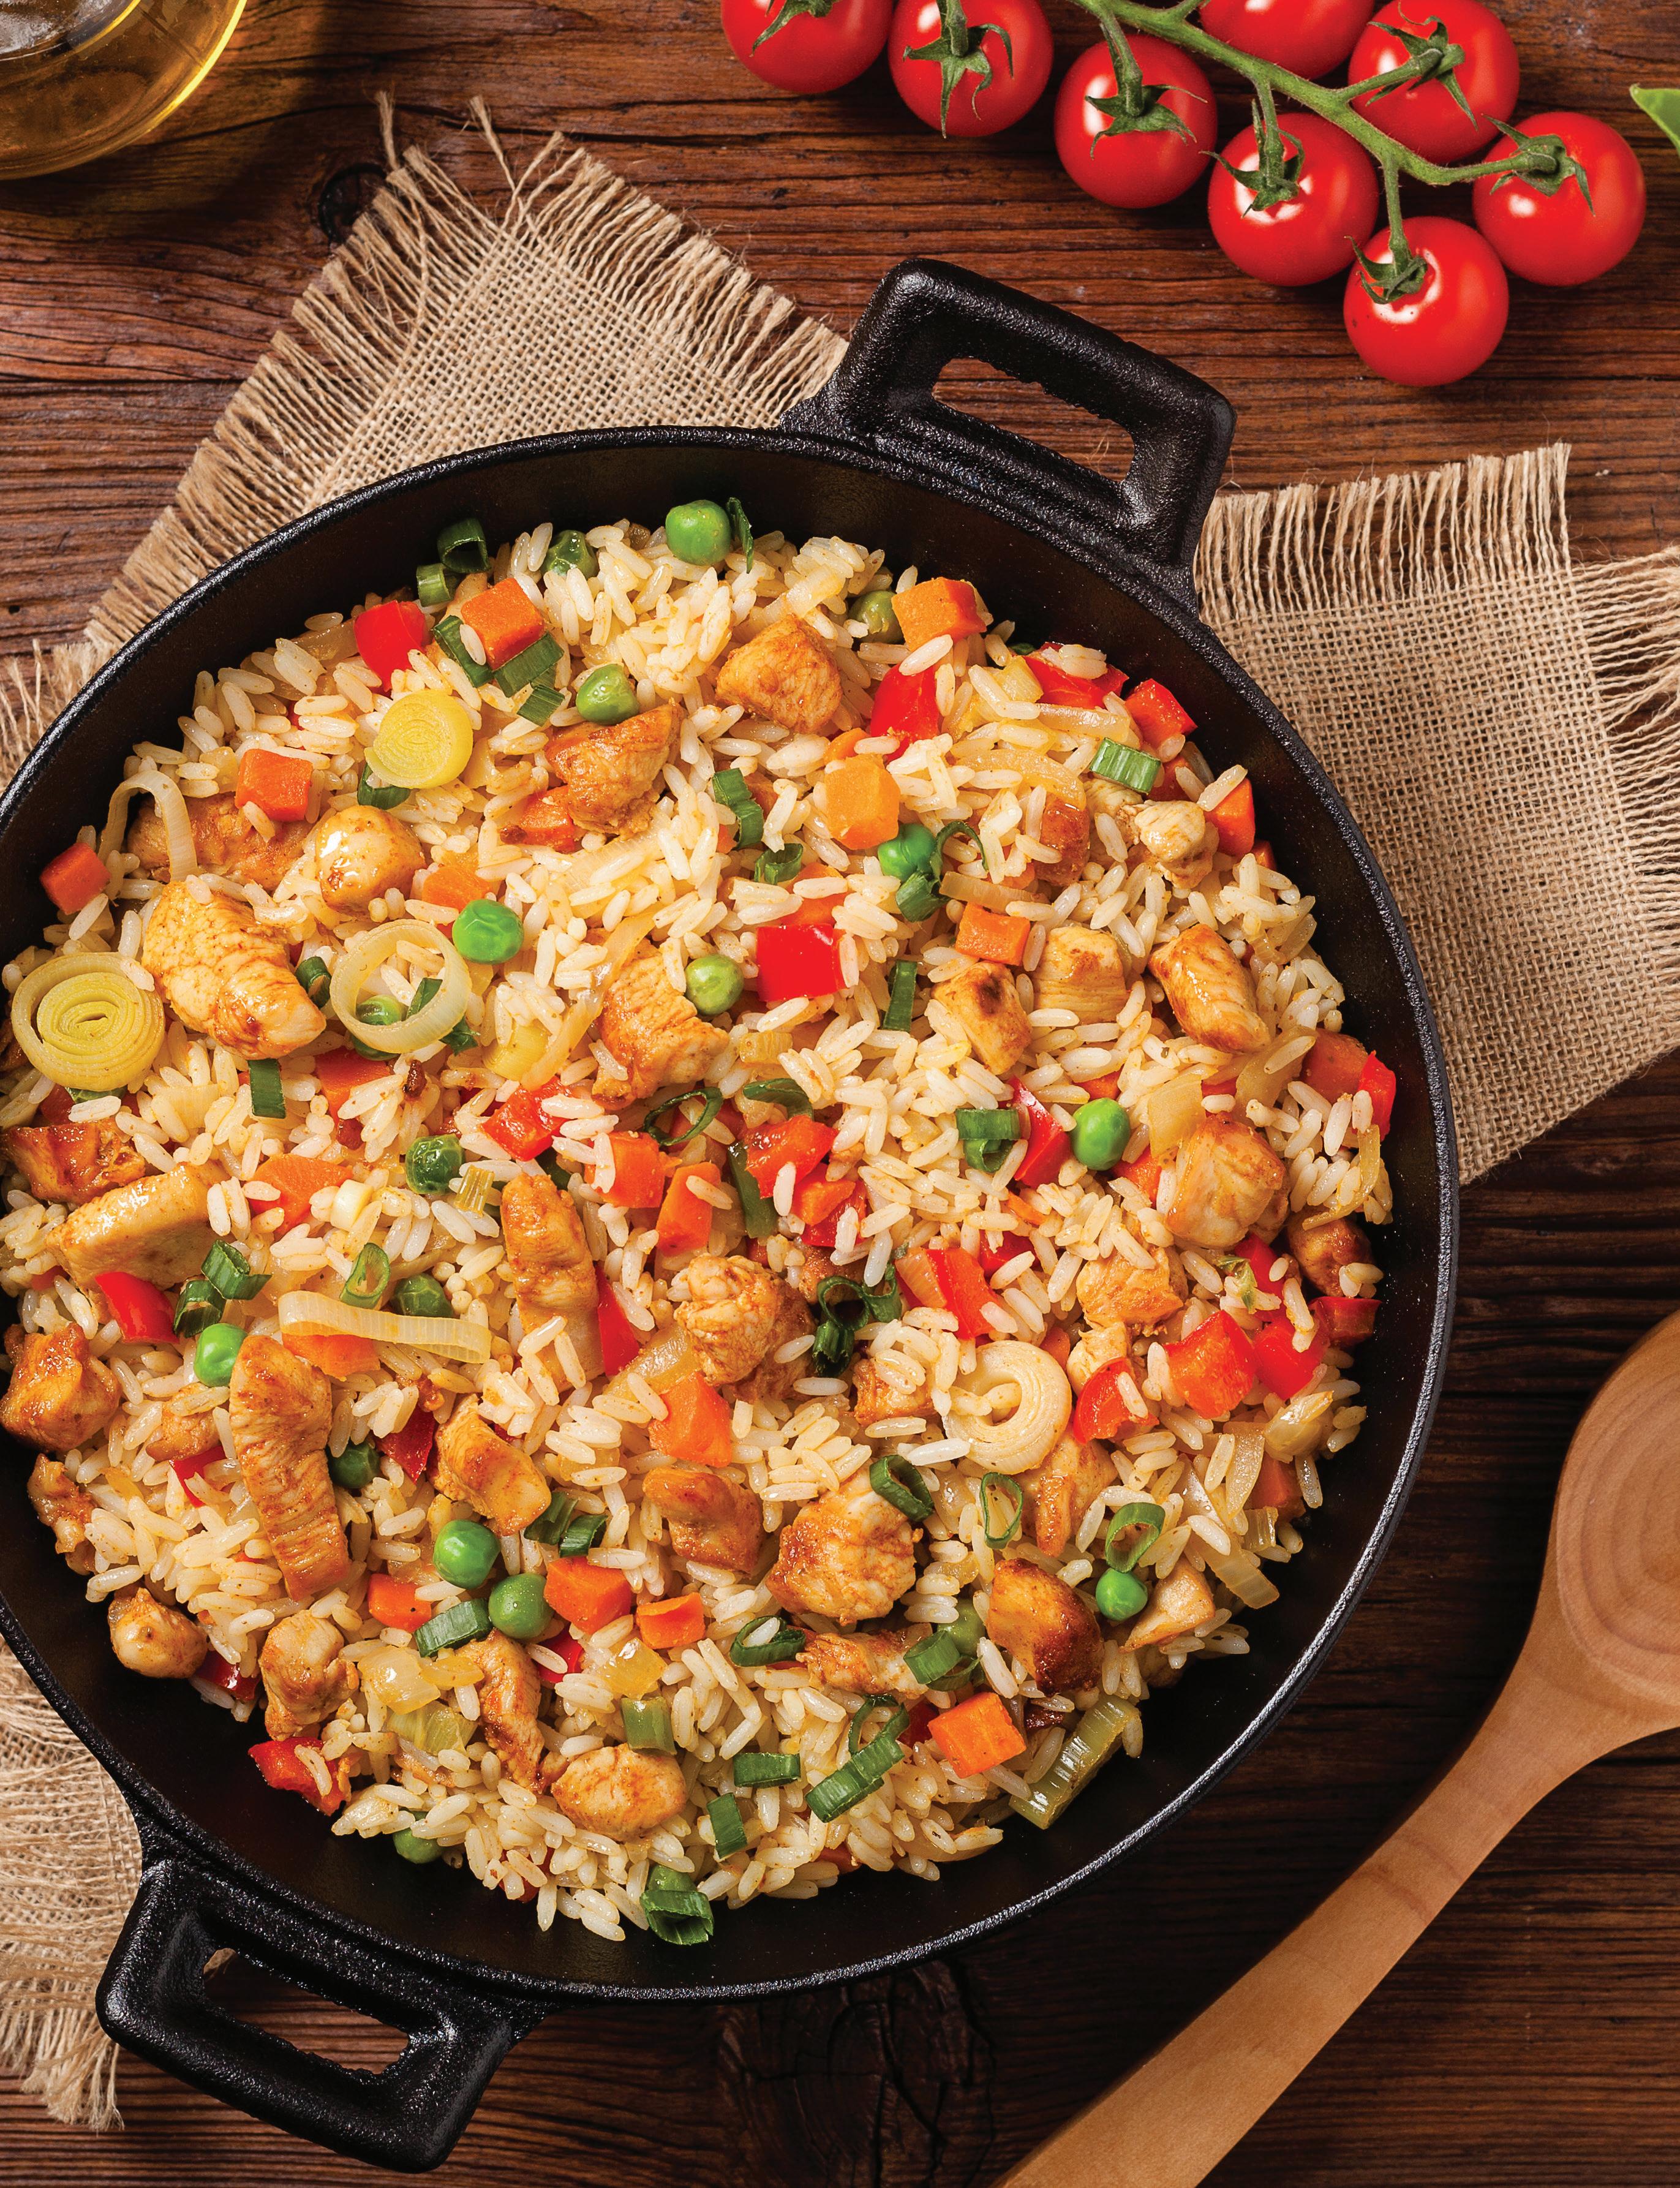
MAKES 4 SERVINGS | RECIPE BY MADGE BAIRD FROM “ 101 THINGS TO DO WITH ROTISSERIE CHICKEN”
What’s not to love about fried rice with veggies and rotisserie chicken in one flavorful dish? – m s
2 tablespoons canola oil
3 green onions, chopped
½ small green bell pepper, cut in small dice
3 large eggs
¼ teaspoon ground pepper
2 tablespoons chopped fresh chives or 1 tablespoon dried
3 cups cooked brown rice
¾ cup frozen peas and carrots
1¼ cups diced rotisserie chicken
1 tablespoon soy sauce
½ teaspoon Creole seasoning (optional)
1. Heat oil on medium in a large nonstick skillet. Add onion and bell pepper and cook, stirring frequently, until onion begins to brown.
2. Crack eggs into the skillet and sprinkle with pepper; scramble while cooking, stirring constantly.
3. When eggs are nearly cooked but still moist, add chives, rice, and vegetables. Mix all ingredients together and continue cooking about 10 minutes, turning every few minutes to rotate rice on bottom of skillet.
4. Add chicken and sprinkle soy sauce and Creole seasoning, if using, over the rice. Stir and turn thoroughly to distribute soy sauce. Cook 2 to 3 minutes more to heat chicken through.
Nutrition (per serving): Calories: 370, Fat: 14g (Sat: 2.5g), Cholesterol: 165mg, Sodium: 720mg, Carb: 39g, Fiber: 4g, Sugar: 1g, Protein: 22g
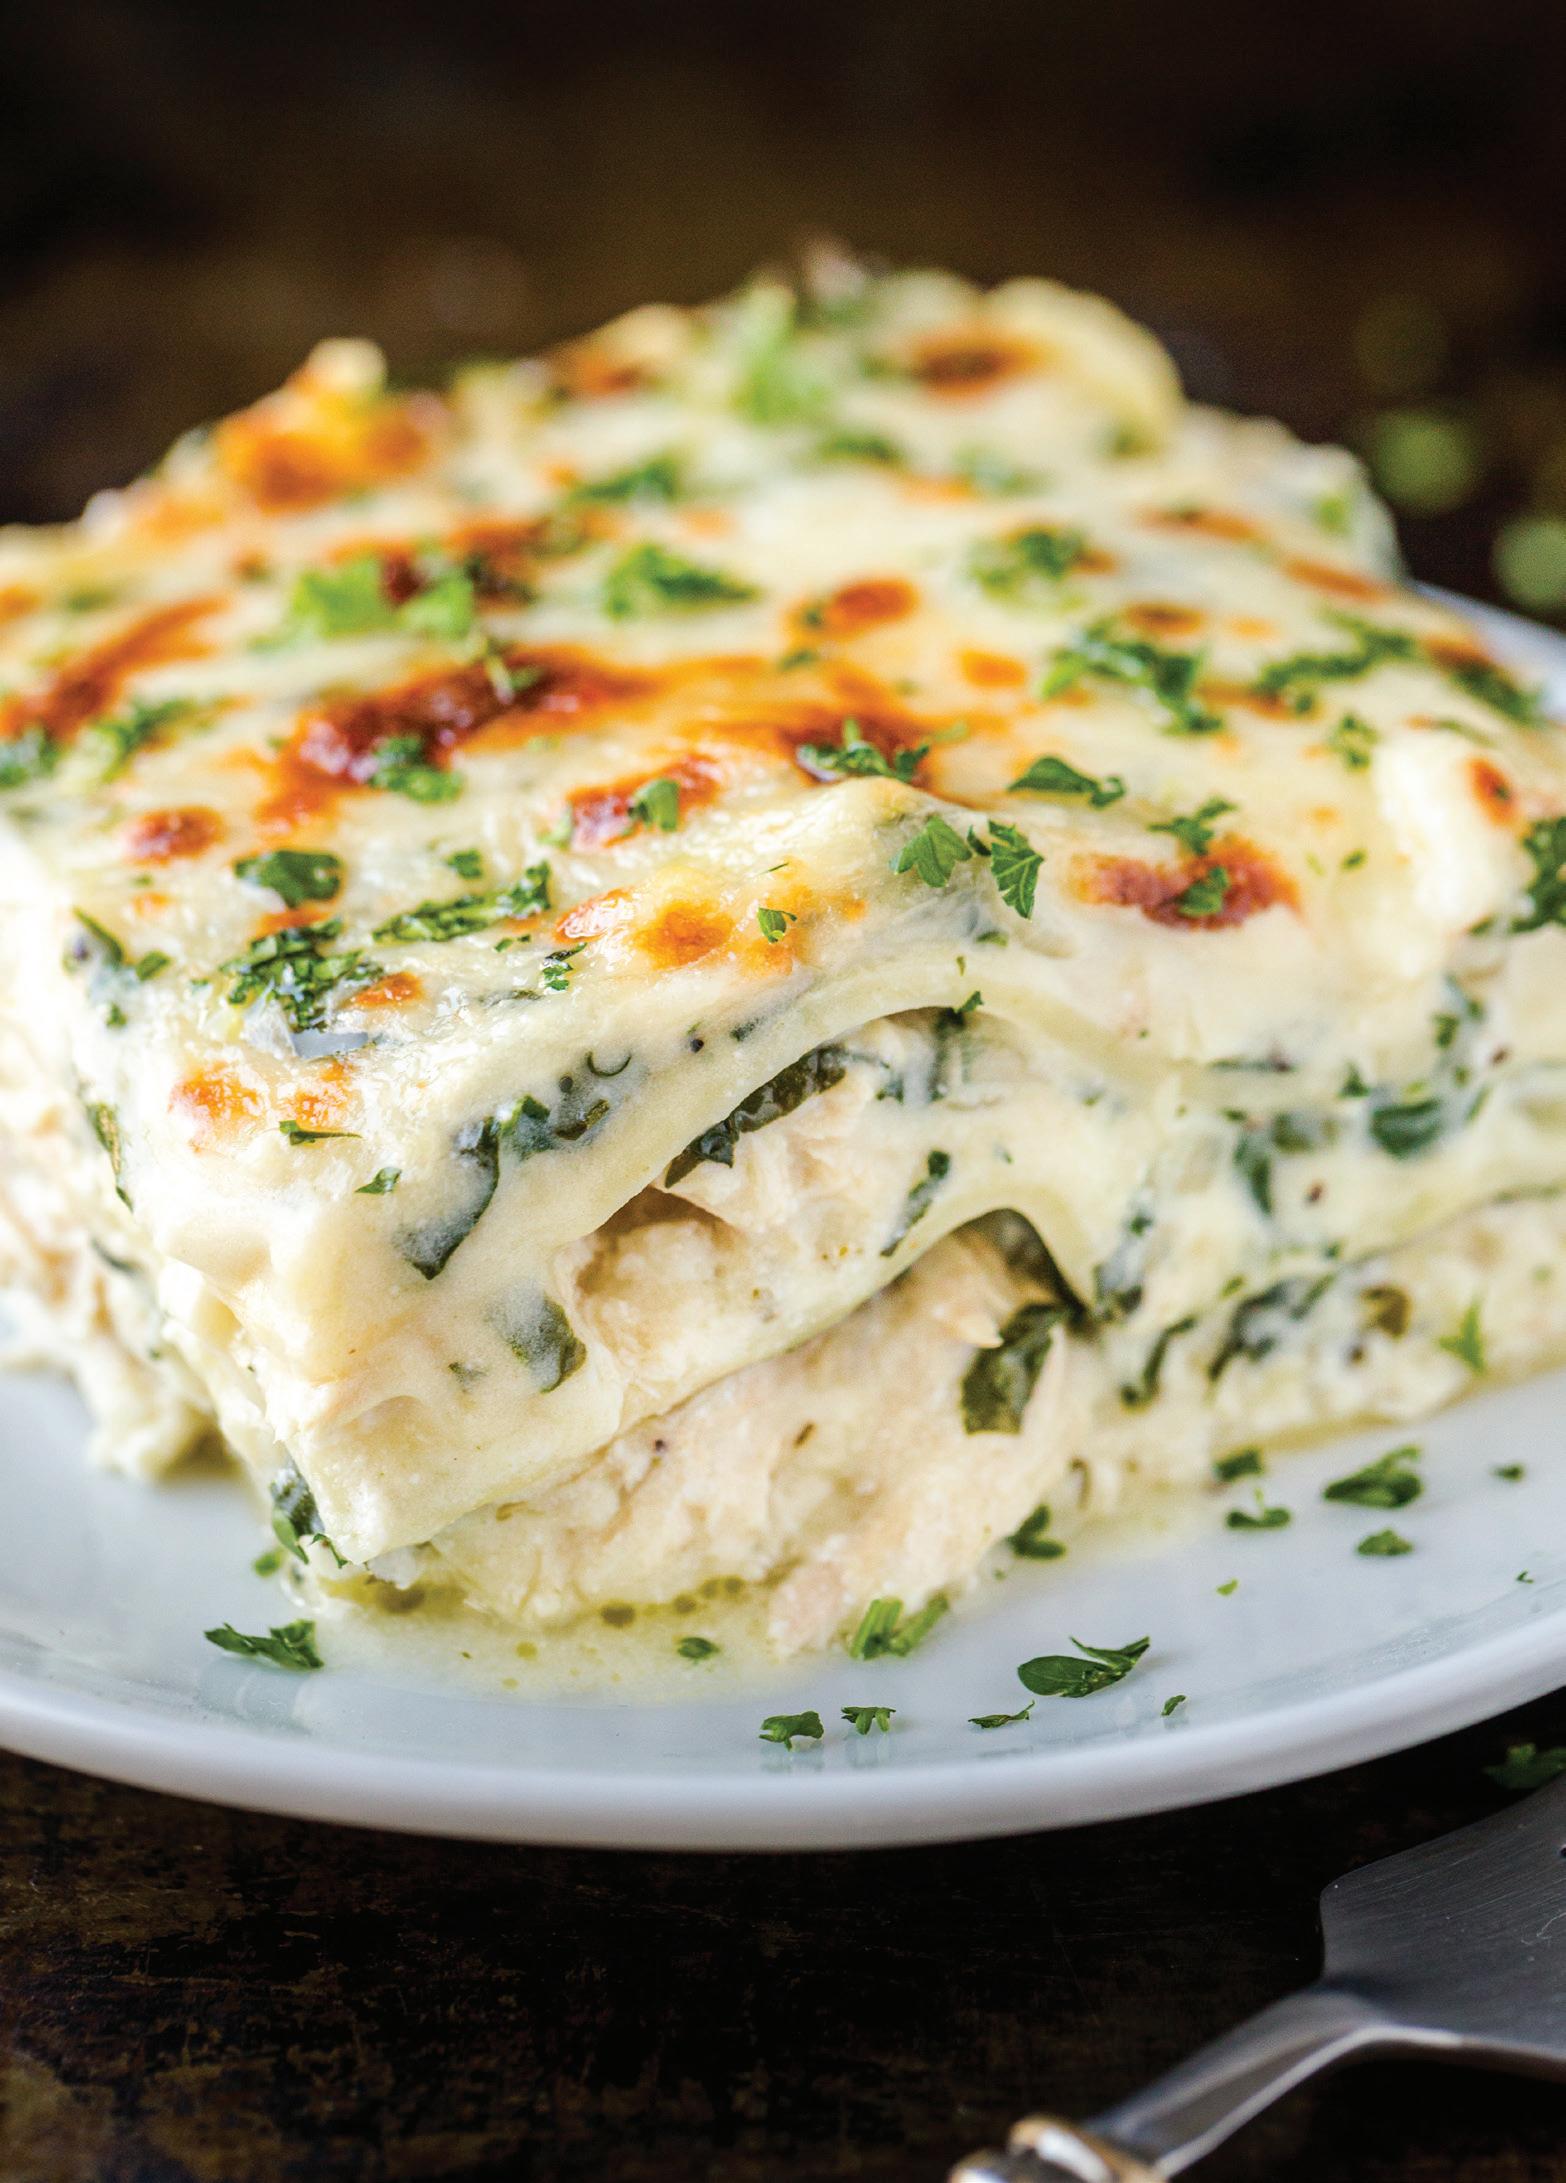
MAKES 12 SERVINGS | RECIPE BY NATASHA KRAVCHUK, NATASHASKITCHEN.COM
This white-sauce lasagna is so satisfying with its layers of noodles and tender chicken in a creamy spinach sauce. It reheats well, too, making it perfect for meal planning. – n k
9 lasagna noodles, cooked al dente
4 cups shredded rotisserie chicken, divided for the spinach cream sauce
1 tablespoon olive oil
1 medium onion, finely chopped
4 tablespoons unsalted butter
1⁄3 cup all-purpose flour
2½ cups chicken broth
1½ cups half-and-half, (or equal parts heavy cream and milk)
5 ounces fresh spinach, coarsely chopped
2 teaspoons sea salt
½ teaspoon black pepper
3 garlic cloves, minced for the ricotta cheese sauce
15 ounces ricotta
1 large egg
3 cups (12 ounces) shredded mozzarella cheese, divided
¼ cup Parmesan cheese
¼ cup parsley
1. Cook pasta in a large pot of salted water according to package instructions until al dente then drain hot water and add cold water to the pot to stop the cooking process and prevent noodles from sticking together. Shred the chicken and measure out 4 cups.
2. To make the spinach sauce, place a pot or large saucepan over medium heat, add olive oil and saute onions for 3 to 4 minutes or until softened. Add butter and whisk in flour. Continue whisking 3 minutes or until flour mixture is golden.
3. Add chicken broth, half-and-half, salt, and black pepper. Whisk until smooth and simmer 5 minutes until thickened to a light gravy consistency.
4. Add minced garlic and chopped spinach and stir to combine, then remove from heat.
5. To make the ricotta cheese sauce: In a large bowl, whisk together ricotta, egg, 2 cups mozzarella cheese, Parmesan, and parsley.
6. Heat oven to 375°F.
7. To assemble the lasagna, add a little spinach sauce to the bottom of a 9x13-inch casserole dish, then add 3 noodles, top with half of the ricotta sauce, 2 cups shredded chicken, and then ladle 1⁄3 of the spinach sauce over the chicken. Add another layer of 3 noodles, remaining half of ricotta cheese, 2 cups shredded chicken, and 1⁄3 of the spinach sauce. Then add 3 noodles, remaining spinach sauce, and sprinkle on the reserved 1 cup mozzarella cheese.
8. Arrange 10-12 toothpicks over the top to keep the foil from touching the cheese then cover with a large sheet of foil. Bake on the center rack in the preheated oven for 45 minutes then uncover and broil 2 to 3 minutes to brown the cheese. Rest at least 10 minutes uncovered before slicing.
Cook’s Notes:
n This will keep up to 4 days in the refrigerator if you were using freshly cooked chicken (rather than leftovers). You can also wrap tightly in several layers of plastic wrap and freeze up to 3 months.
n To reheat leftovers, it helps to sprinkle on a little bit of water before reheating in the oven or the microwave since noodles will naturally soak up some liquid in the lasagna as it sits. Heat until the edges bubble and the cheese is fully melted on top.
Nutrition (per serving): Calories: 380, Fat: 20g (Sat: 10g), Cholesterol: 105mg, Sodium: 910mg, Carb: 23g, Fiber: 1g, Sugar: 3g, Protein: 27g

MAKES 4 TO 6 SERVINGS | RECIPE BY MADGE BAIRD FROM “ 101 THINGS TO DO WITH ROTISSERIE CHICKEN”
This fresh take on dinner mixes in the favorite flavors of Greek salad in comforting pasta—complete with chicken. – m s
1 (14 ounce) can vegetable broth
1 (14 ounce) can fat-free chicken broth
½ cup crumbled feta cheese with lemon, garlic, and oregano, or to taste
½ cup chopped red onion
1 cup pitted kalamata olives
1½ cups halved cherry tomatoes
1 bunch fresh spinach leaves, cut in ribbons
1½ cups diced rotisserie chicken
2 tablespoons flour
½ teaspoon oregano leaves
⅓ cup cream
3 cups cooked rotelle, orecchiette, or other pasta
1. In a deep frying pan, bring broth and feta to a simmer, then add onion, olives, and tomatoes. Simmer until onion starts to become translucent, about 4 minutes.
2. Add spinach and chicken to the broth and continue cooking 2 to 3 minutes. Whisk flour and oregano into cream, and whisk cream into broth mixture and return broth to a low boil. Continue whisking while the liquid thickens and the flour cooks, about 3 minutes. Divide pasta among bowls and ladle sauce over top.
Nutrition (each per 6 servings): Calories: 400, Fat: 23g (Sat: 5g), Cholesterol: 55mg, Sodium: 1350mg, Carb: 34g, Fiber: 5g, Sugar: 3g, Protein: 17g
Barbecue Sandwiches: Mix shredded rotisserie chicken with your favorite barbecue sauce and serve on buns for a delicious super easy lunch or dinner.
Tacos: Either saute chicken with green salsa or place it in taco shells or soft tortillas and add salsa to taste, plus shredded cheese, lettuce, sour cream, and other toppings of choice.
Curry Chicken Salad: Mix the shredded chicken with mayonnaise and curry powder plus salt and pepper to taste for a flavorful sandwich.
Pasta: Add to cooked penne or fettuccine mixed with alfredo or pesto sauce.
Nachos: Place tortilla chips on a plate, top with shredded cheese, sprinkle with shredded chicken, and microwave for about 20 to 25 seconds or until the cheese is melted. Serve with salsa and sour cream, if desired.
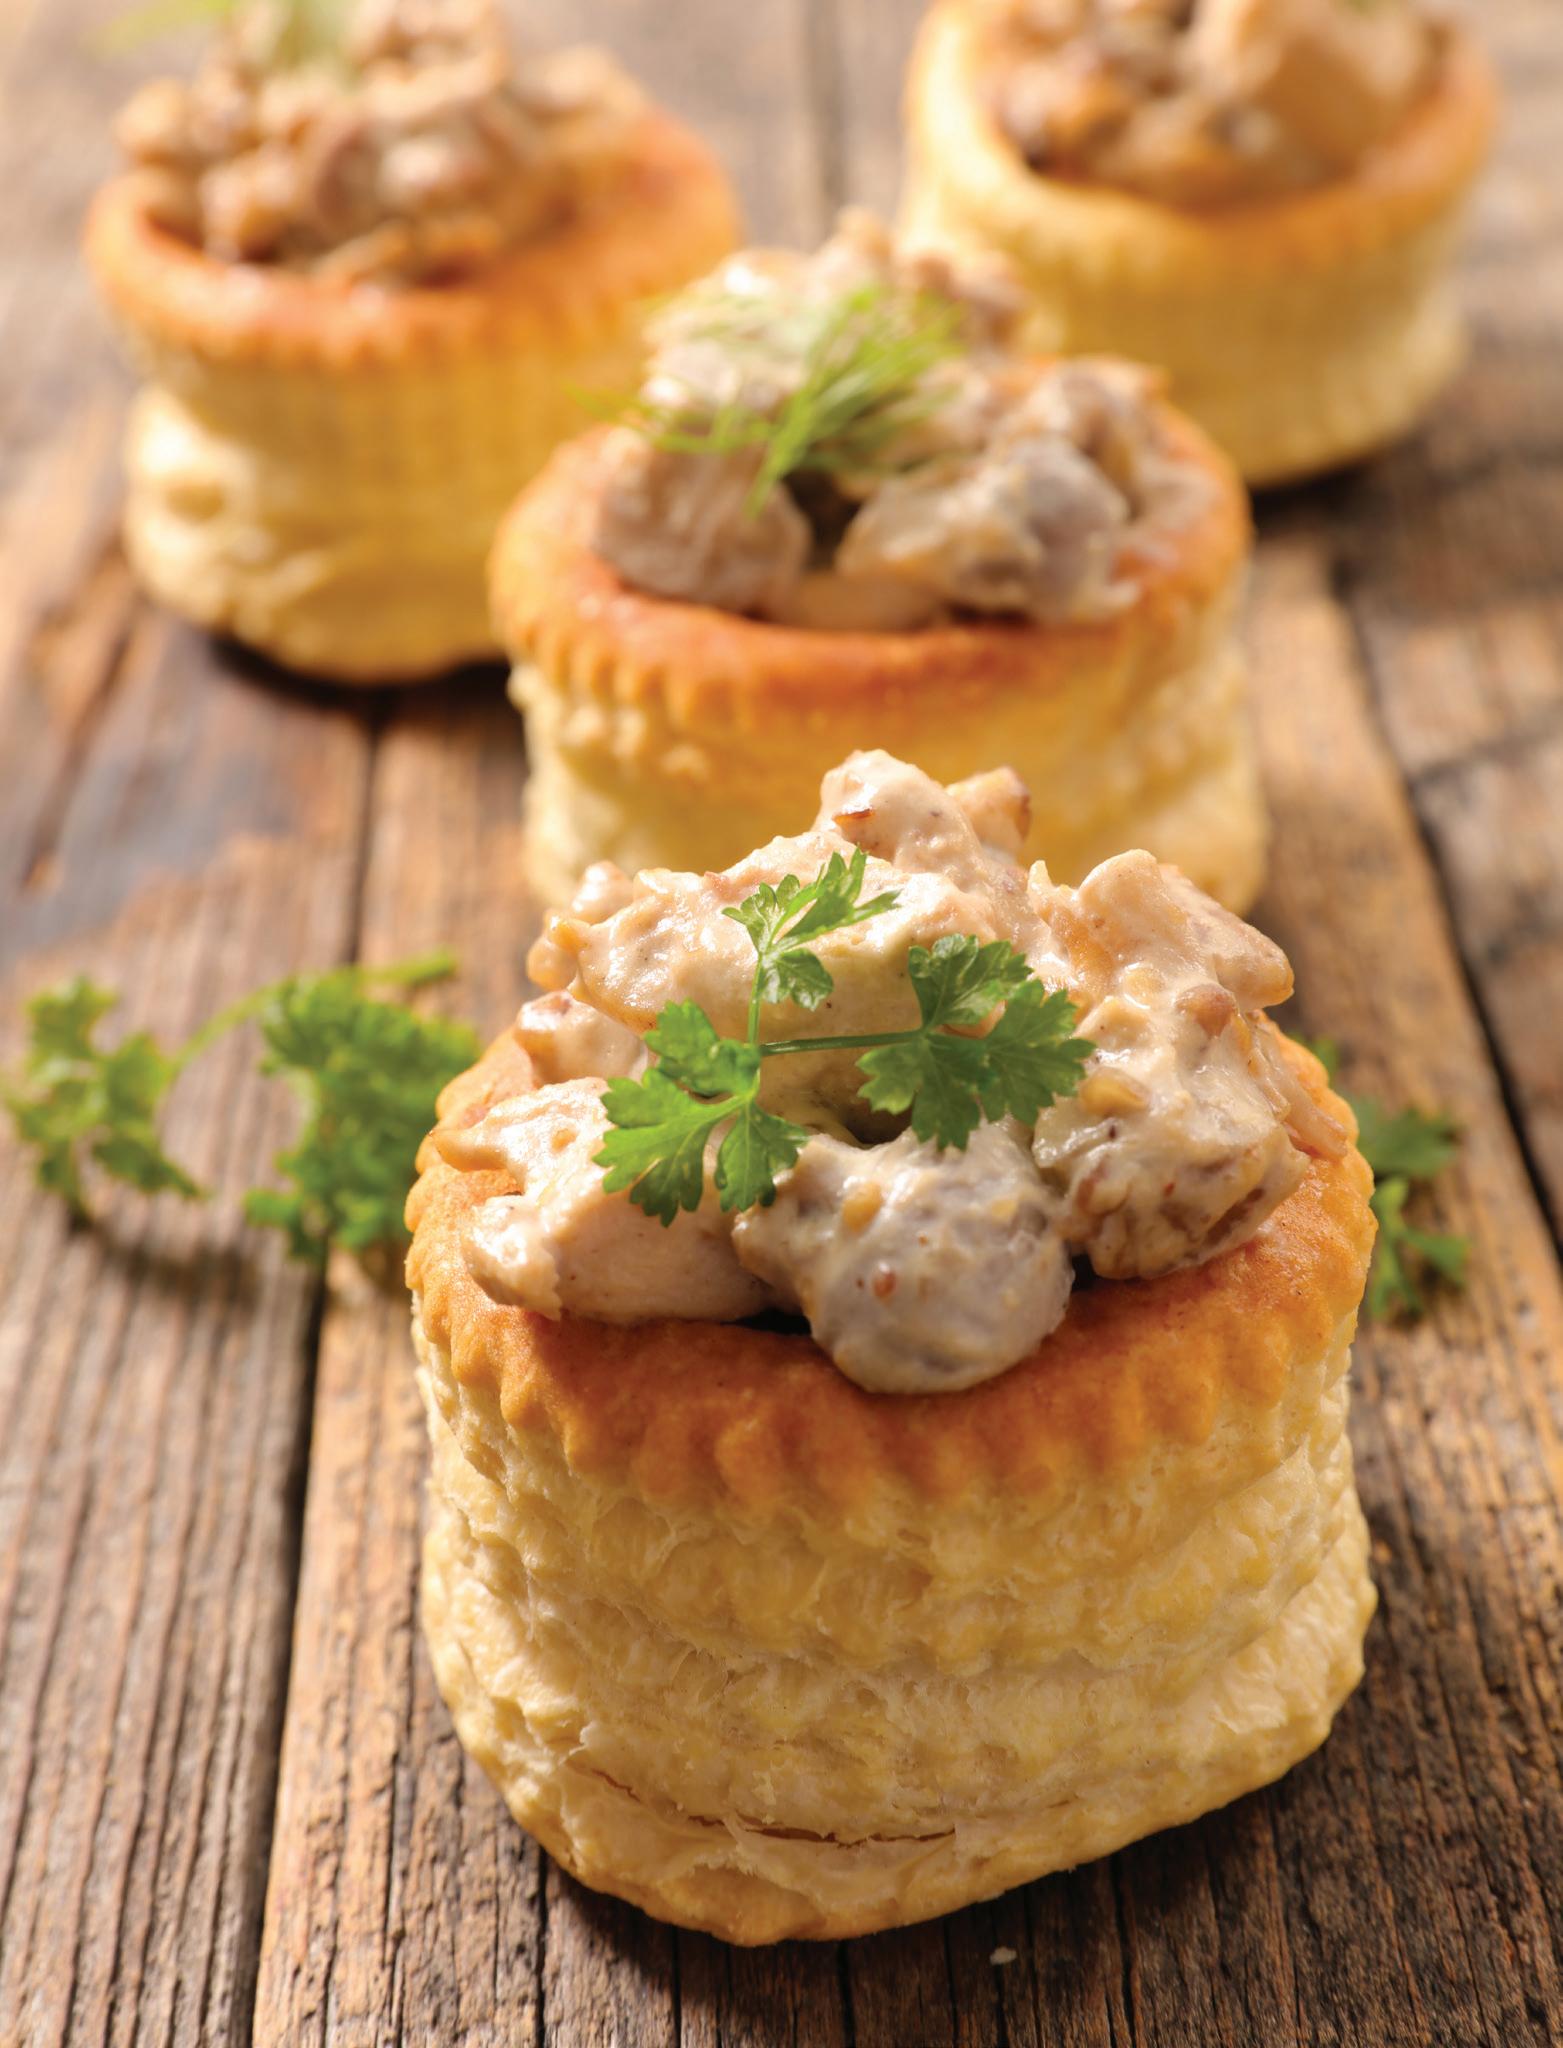
MAKES 6 PASTRIES | RECIPE BY MADGE BAIRD FROM “ 101 THINGS TO DO WITH ROTISSERIE CHICKEN”
Frozen pu pastry with rotisserie chicken makes these fun appetizers even easier. – m s
1 (6 -count) package frozen pu pastry shells
8 ounces fontina cheese (or other soft, mild white cheese)
½ cup sun-dried tomatoes (not in oil)
¾ cup minced rotisserie chicken
3 green onions, thinly sliced
4 ounces light cream cheese, room temperature
10 leaves fresh basil, minced
1 teaspoon Worcestershire sauce
1. Bake pastry shells according to package directions. Remove from oven just as pastries begin to brown. (They will finish baking after the filling has been added.)
2. Meanwhile, prepare the filling. Cut fontina into small cubes to make about ¾ cup. Soak tomatoes in hot water about 12 minutes to soften; drain and mince. Then, combine all filling ingredients together in a bowl.
3. When pastry shells are baked, remove the “hats” from the centers and set aside. Spoon filling into the centers and quickly return to oven another 2 to 3 minutes, until cheese melts. Remove from oven, replace “hats,” and serve warm.
Nutrition (per serving): Calories: 400, Fat: 28g (Sat: 10g), Cholesterol: 70mg, Sodium: 590mg, Carb: 20g, Fiber: 1g, Sugar: 4g, Protein: 17g
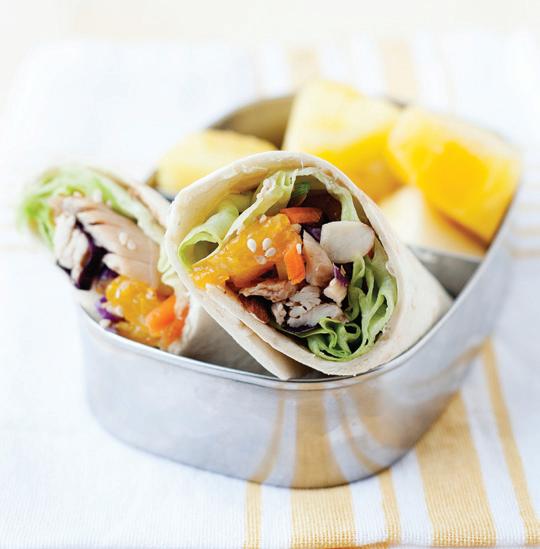
MAKES 4 SERVINGS | RECIPE BY LAURA FUENTES
These make a great healthy lunch full of texture with shredded carrots, almonds, cabbage, and sweetness from mandarin oranges. – l f
for the sesame ginger dressing
¼ cup rice vinegar
2 tablespoons low-sodium soy sauce
1½ tablespoons sesame seeds
1½ teaspoons brown sugar or honey
1 teaspoon grated fresh ginger
½ garlic clove, grated
1 teaspoon sesame oil
for the chicken salad
2 cups cooked chopped/shredded chicken
1 (10 5 -ounce) can mandarin oranges, drained
2 stalks celery, finely chopped
2 large carrots, shredded
1 cup shredded cabbage
2 green onions, chopped
¼ cup sliced almonds (optional)
½ teaspoon salt
¼ teaspoon black pepper
4 large flour tortillas
Iceberg lettuce leaves
1. In a lidded jar or medium bowl combine the dressing ingredients. Place the lid onto the jar and seal. Shake to combine and refrigerate until ready to use, for up to 1 week.
2. For the chicken salad, in a large bowl, combine the cooked chicken, mandarin oranges, celery, carrots, cabbage, almonds, green onions, salt, and pepper. Cover and refrigerate for up to 2 days and toss with the dressing when ready to serve. Add ½ cup dressing and toss to combine.
3. To make the wraps, place 1 to 2 iceberg lettuce leaves on top of a tortilla. Scoop ¾ cup of the chicken salad on top of the lettuce. Fold the wrap over, fold in the sides, and wrap tightly.
Nutrition (per serving, with almonds): Calories: 300, Fat: 17g (Sat: 2g), Cholesterol: 15mg, Sodium: 1130mg, Carb: 24g, Fiber: 6g, Sugar: 9g, Protein: 14g

From Madge Baird, author of “101 Things to Do with Rotisserie Chicken”
n The best time to remove the meat from the chicken is right when you get it home, while it’s still warm but not too hot to handle. The skin and meat come o the bones of a warm chicken much easier than a refrigerated one. If you’re not going to deal with it or eat it right away, the bird needs to be refrigerated.
n If the chicken is fall-o -the-bone tender, the back of a knife is all it takes to lift or scrape the meat from the bone. Shred or dice small pieces and save bits picked from the wings to use in recipes. The breast meat needs to be pried or cut away from the ribcage and should come o in big pieces.
n Lemon juice is king when it comes to getting the chicken scent o your hands after cleaning the bird.
n Purchasing two chickens at a time and freezing some of the meat is a huge time saver. As long as you’re in the small mess of picking the meat from the bone, you might as well do two and have some chicken ready for another easy weeknight meal.
n Chicken toughens and dries out if it is overcooked; so, when adding it to casseroles, soups, and skillets, add the precooked chicken near the end of the cooking time.
n When storing the portion of the bird that you’re not going to consume the first day, remember that it’s safe to keep cooked chicken in the refrigerator for only 3 to 4 days. To freeze chicken, divide into portions of 1 to 2 cups—amounts that are convenient for use in subsequent recipes. Use frozen chicken within 4 months.
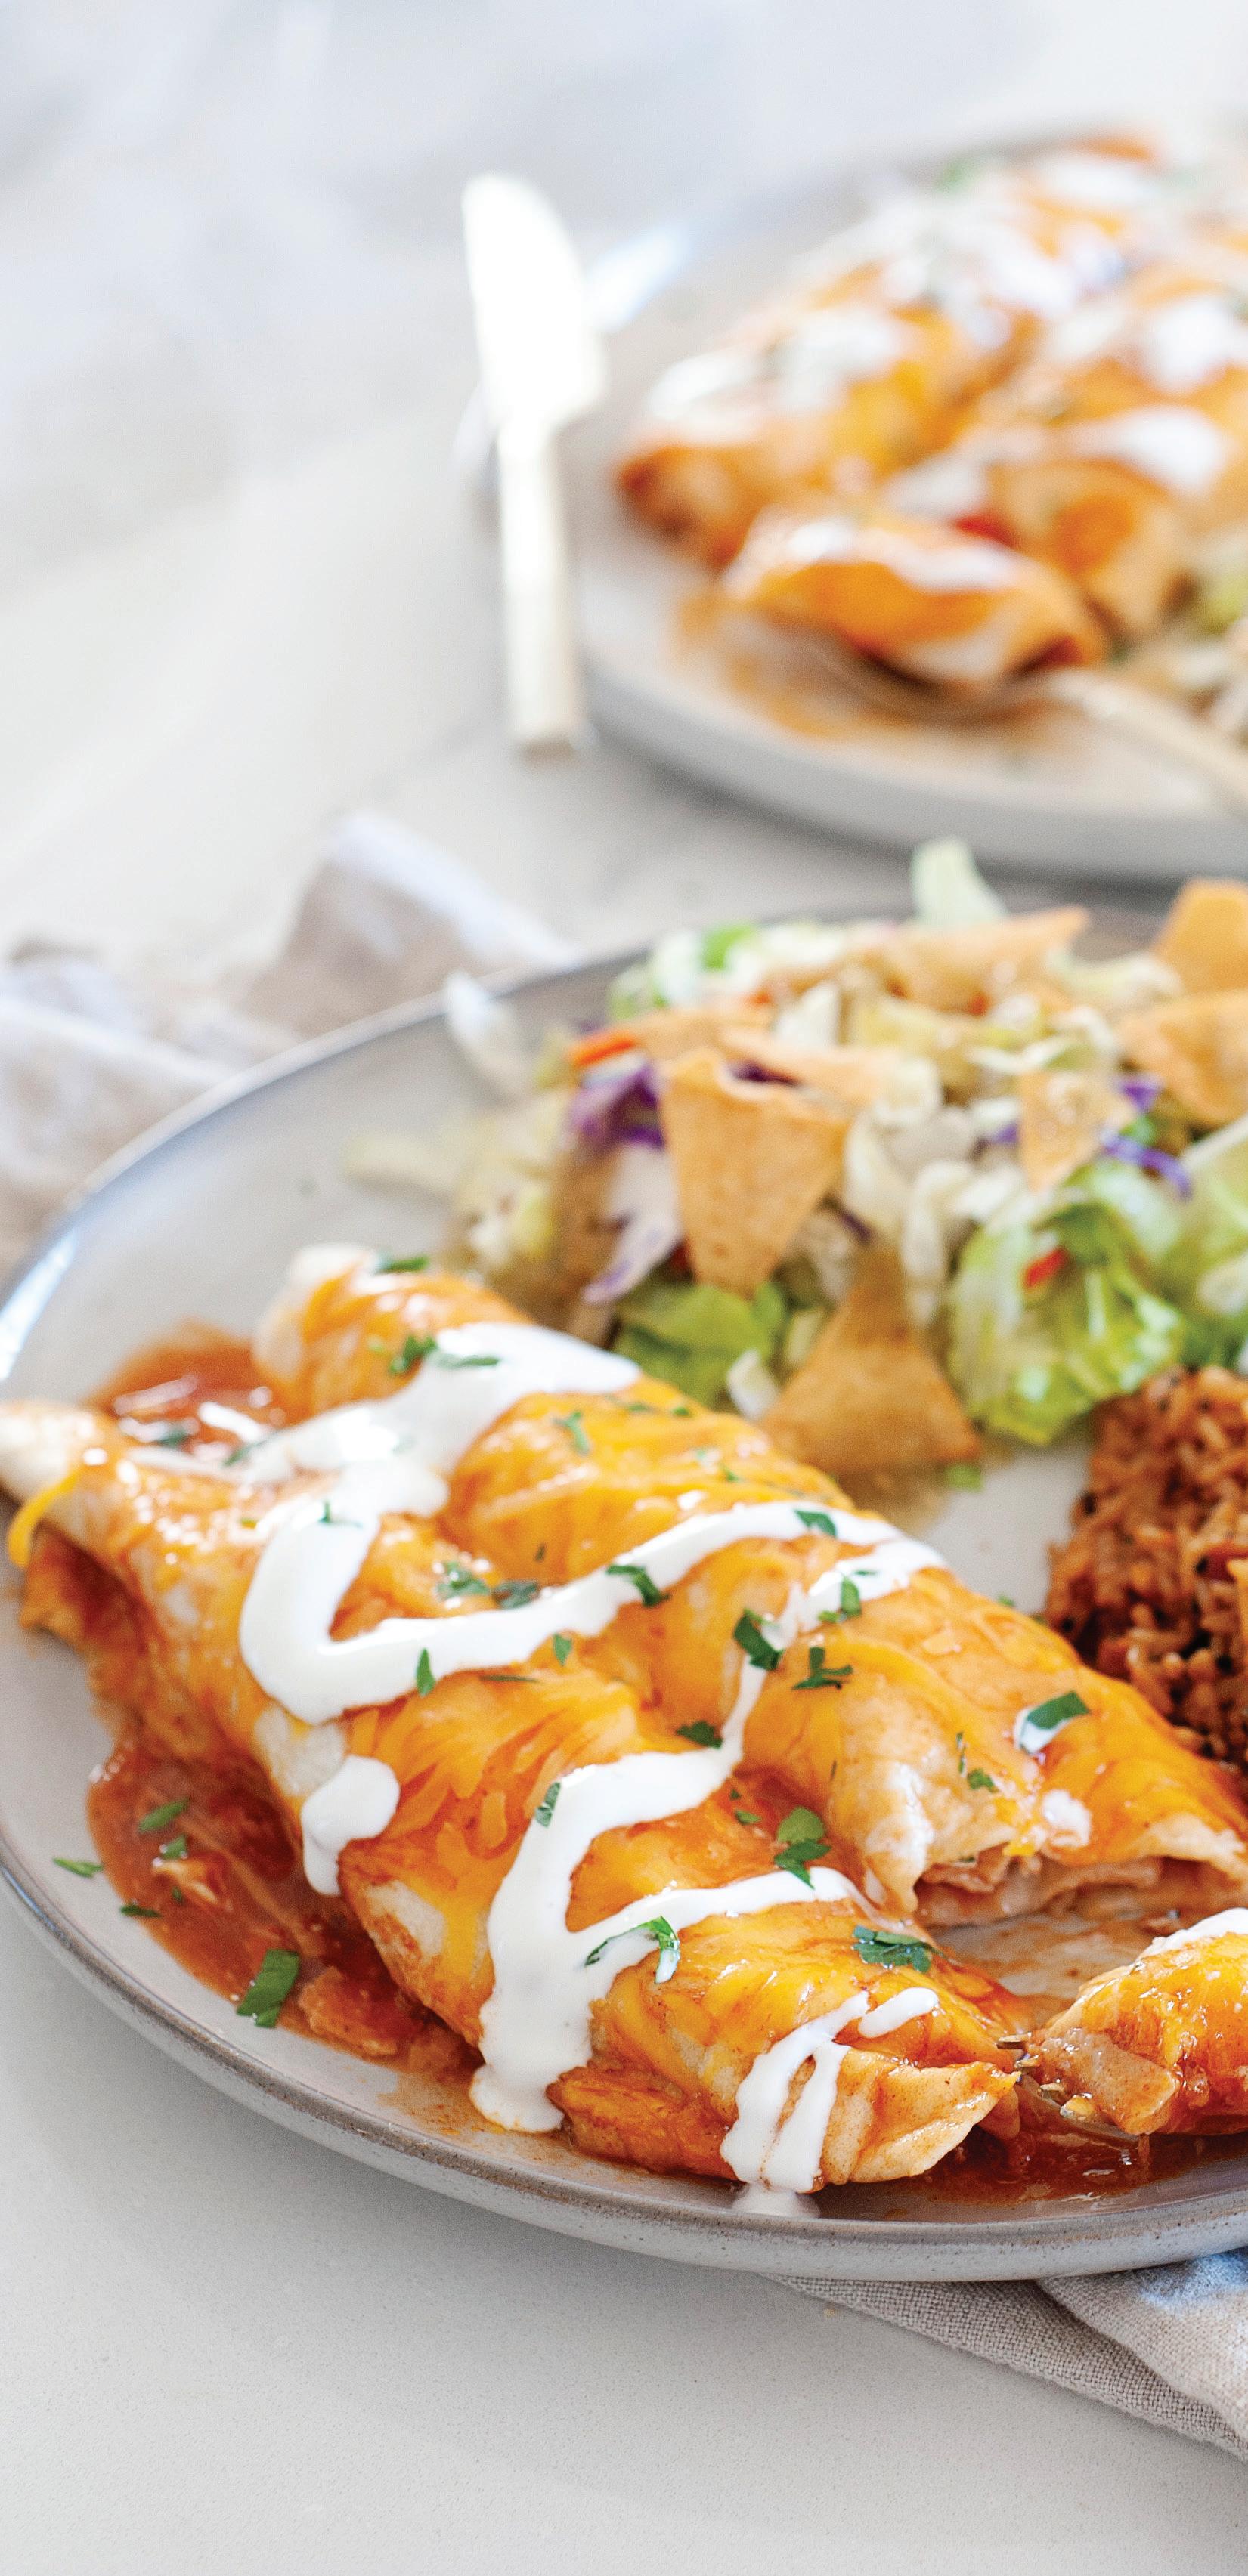
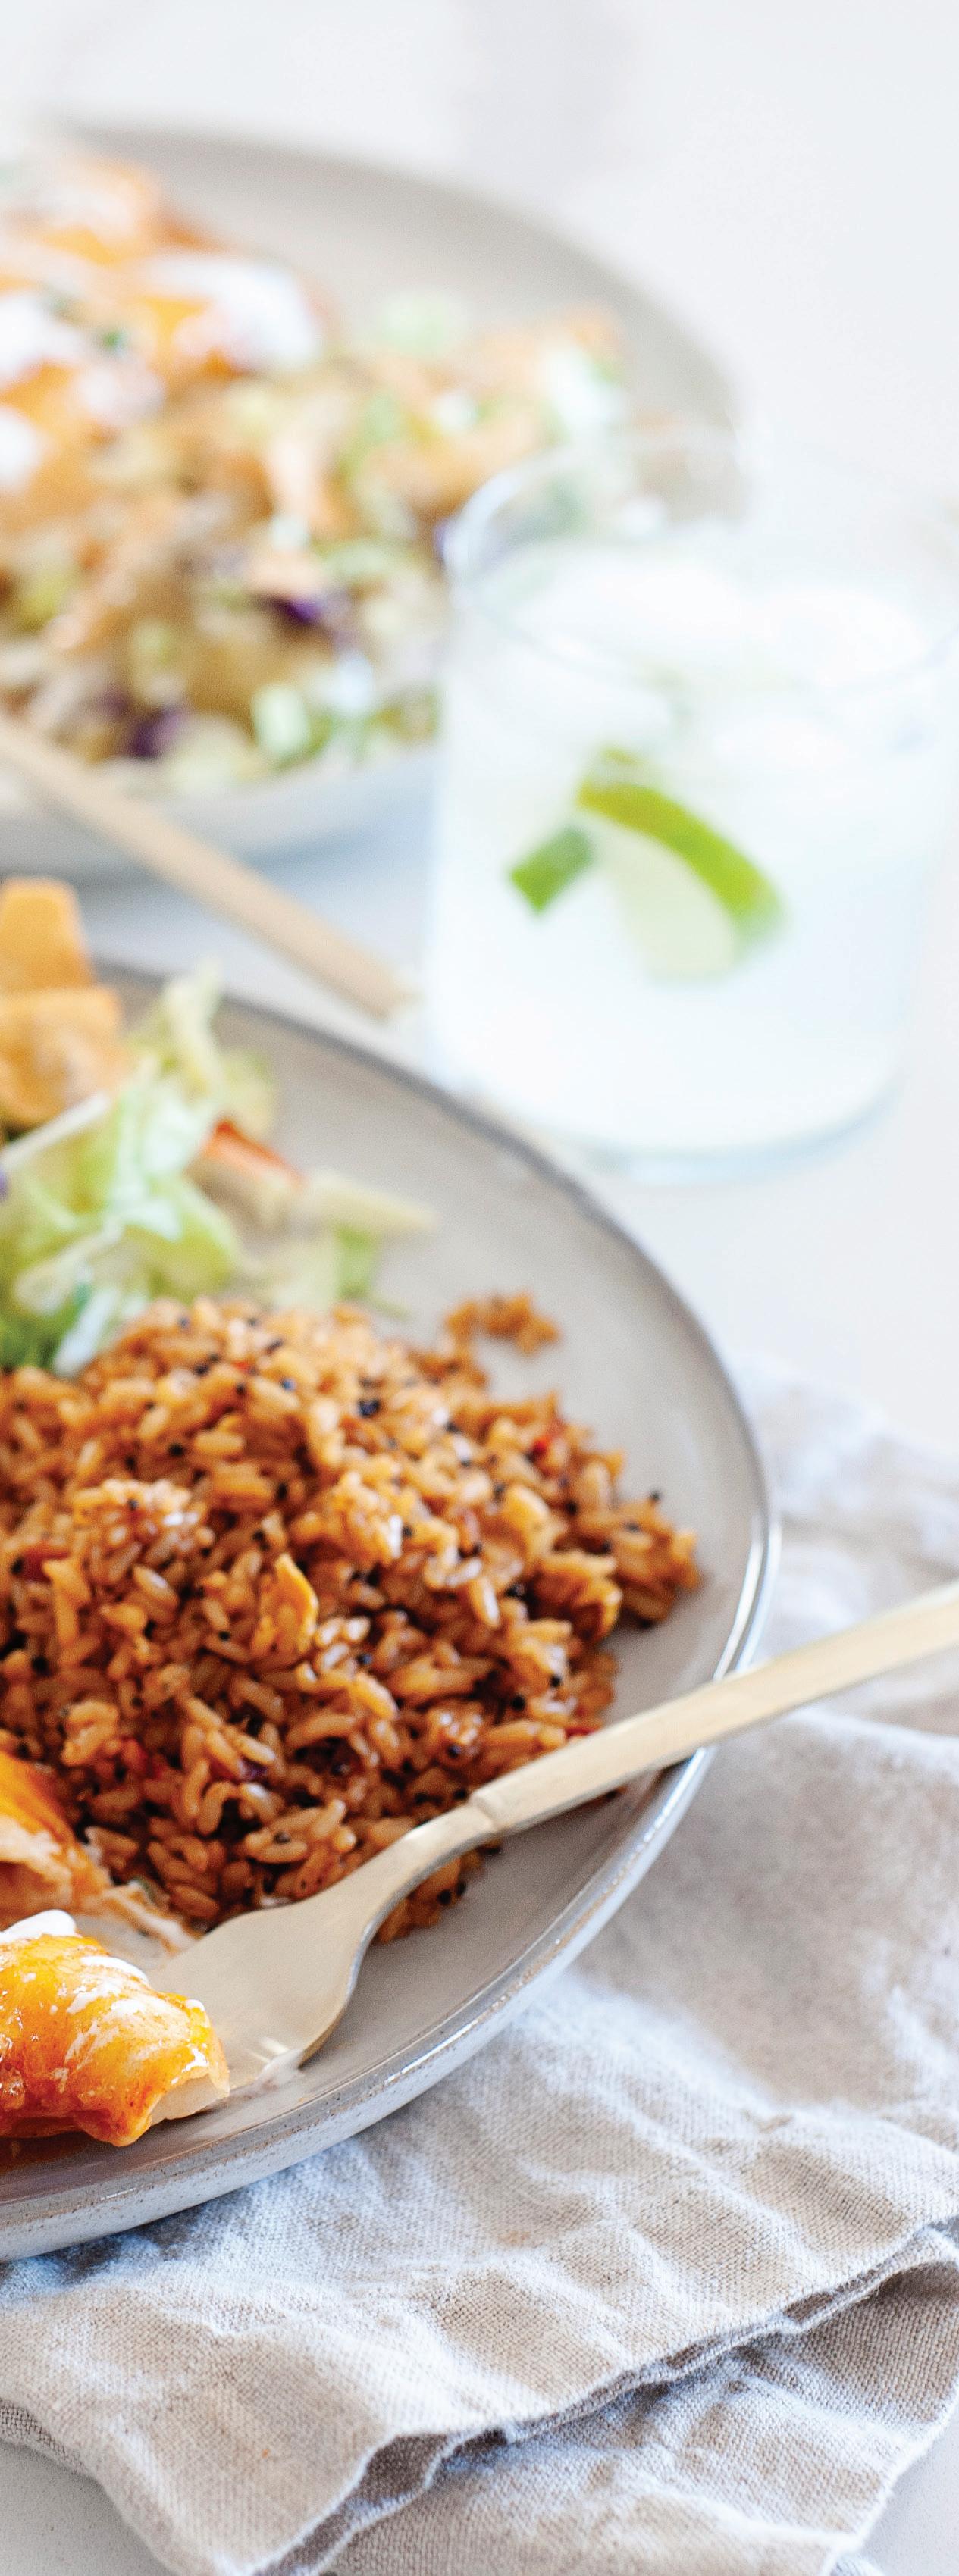
MAKES 4 SERVINGS | RECIPE BY LAURA FUENTES
Start with rotisserie chicken and this enchilada recipe becomes a breeze to make in one bowl. Enchiladas may sound like a lot of work for a midweek dinner, but with this recipe, you can assemble them in 10 minutes and then just let them bake. When I’m in a hurry and I want a dinner recipe that my family will devour, these quick enchiladas are always a hit. – l f
1 rotisserie chicken
2 (10-ounce) cans enchilada sauce, divided (see Cook’s Notes)
1 (10-ounce) can diced tomatoes and green chilies, drained 1½ cups shredded cheddar cheese, divided
8 flour tortillas, burrito sized Sour cream, for serving Cilantro, for garnish
1. Heat the oven to 350°F and spray or grease a 9x13-inch baking dish.
2. Remove the meat from the rotisserie chicken and place it directly into a large bowl—you’ll need a minimum of 4 cups of cooked, shredded rotisserie chicken, more if you want to stu the enchiladas more. (You can use a hand mixer to finely shred it in under a minute.)
3. To assemble, pour a third of a can, about ½ cup, of enchilada sauce in the baking dish. Move it around to distribute and coat the bottom of the baking dish.
4. Pour 1 (10-ounce) can of enchilada sauce over the shredded chicken, the drained tomatoes and green chilies, and 1 cup of shredded cheese. Mix well to combine.
5. Place a tortilla on a flat surface, top with ½ cup of the chicken mixture, placing it in the middle of the tortilla, and roll it up tightly as possible. Place it in the baking dish, seam-side down. Repeat this process with the remaining tortillas.
6. Pour the remaining sauce from the can over the tops of the enchiladas and spread it evenly using the back of a spoon. Sprinkle the remaining ½ cup of shredded cheese on top.
7. Cover the enchiladas with foil and bake in the preheated oven for 20 to 25 minutes, removing the foil during the last 5 minutes of cooking, until the sauce on the sides is hot and bubbly.
8. Remove pan from the oven and let the enchiladas rest for 5 minutes before serving. Top with sour cream, cilantro, and your favorite toppings.
Cook’s Notes
■ Oven-baked enchiladas can become soggy when there’s too much sauce in the filling and around the enchilada, so in this recipe, cheese is added in the filling to bind the chicken and ingredients, and it has just enough sauce to make them tasty but not too much so the tortillas aren’t drenched in excess sauce and become soggy.
■ If you have any leftovers of these chicken enchiladas, you can store them in an airtight container for up to 3 days. To reheat, microwave for 1 to 2 minutes until warmed enough.
Nutrition (per serving):
Calories: 760, Fat: 31g (Sat: 14g), Cholesterol: 130mg, Sodium: 2670mg, Carb: 61g, Fiber: 1g, Sugar: 6g, Protein: 47g
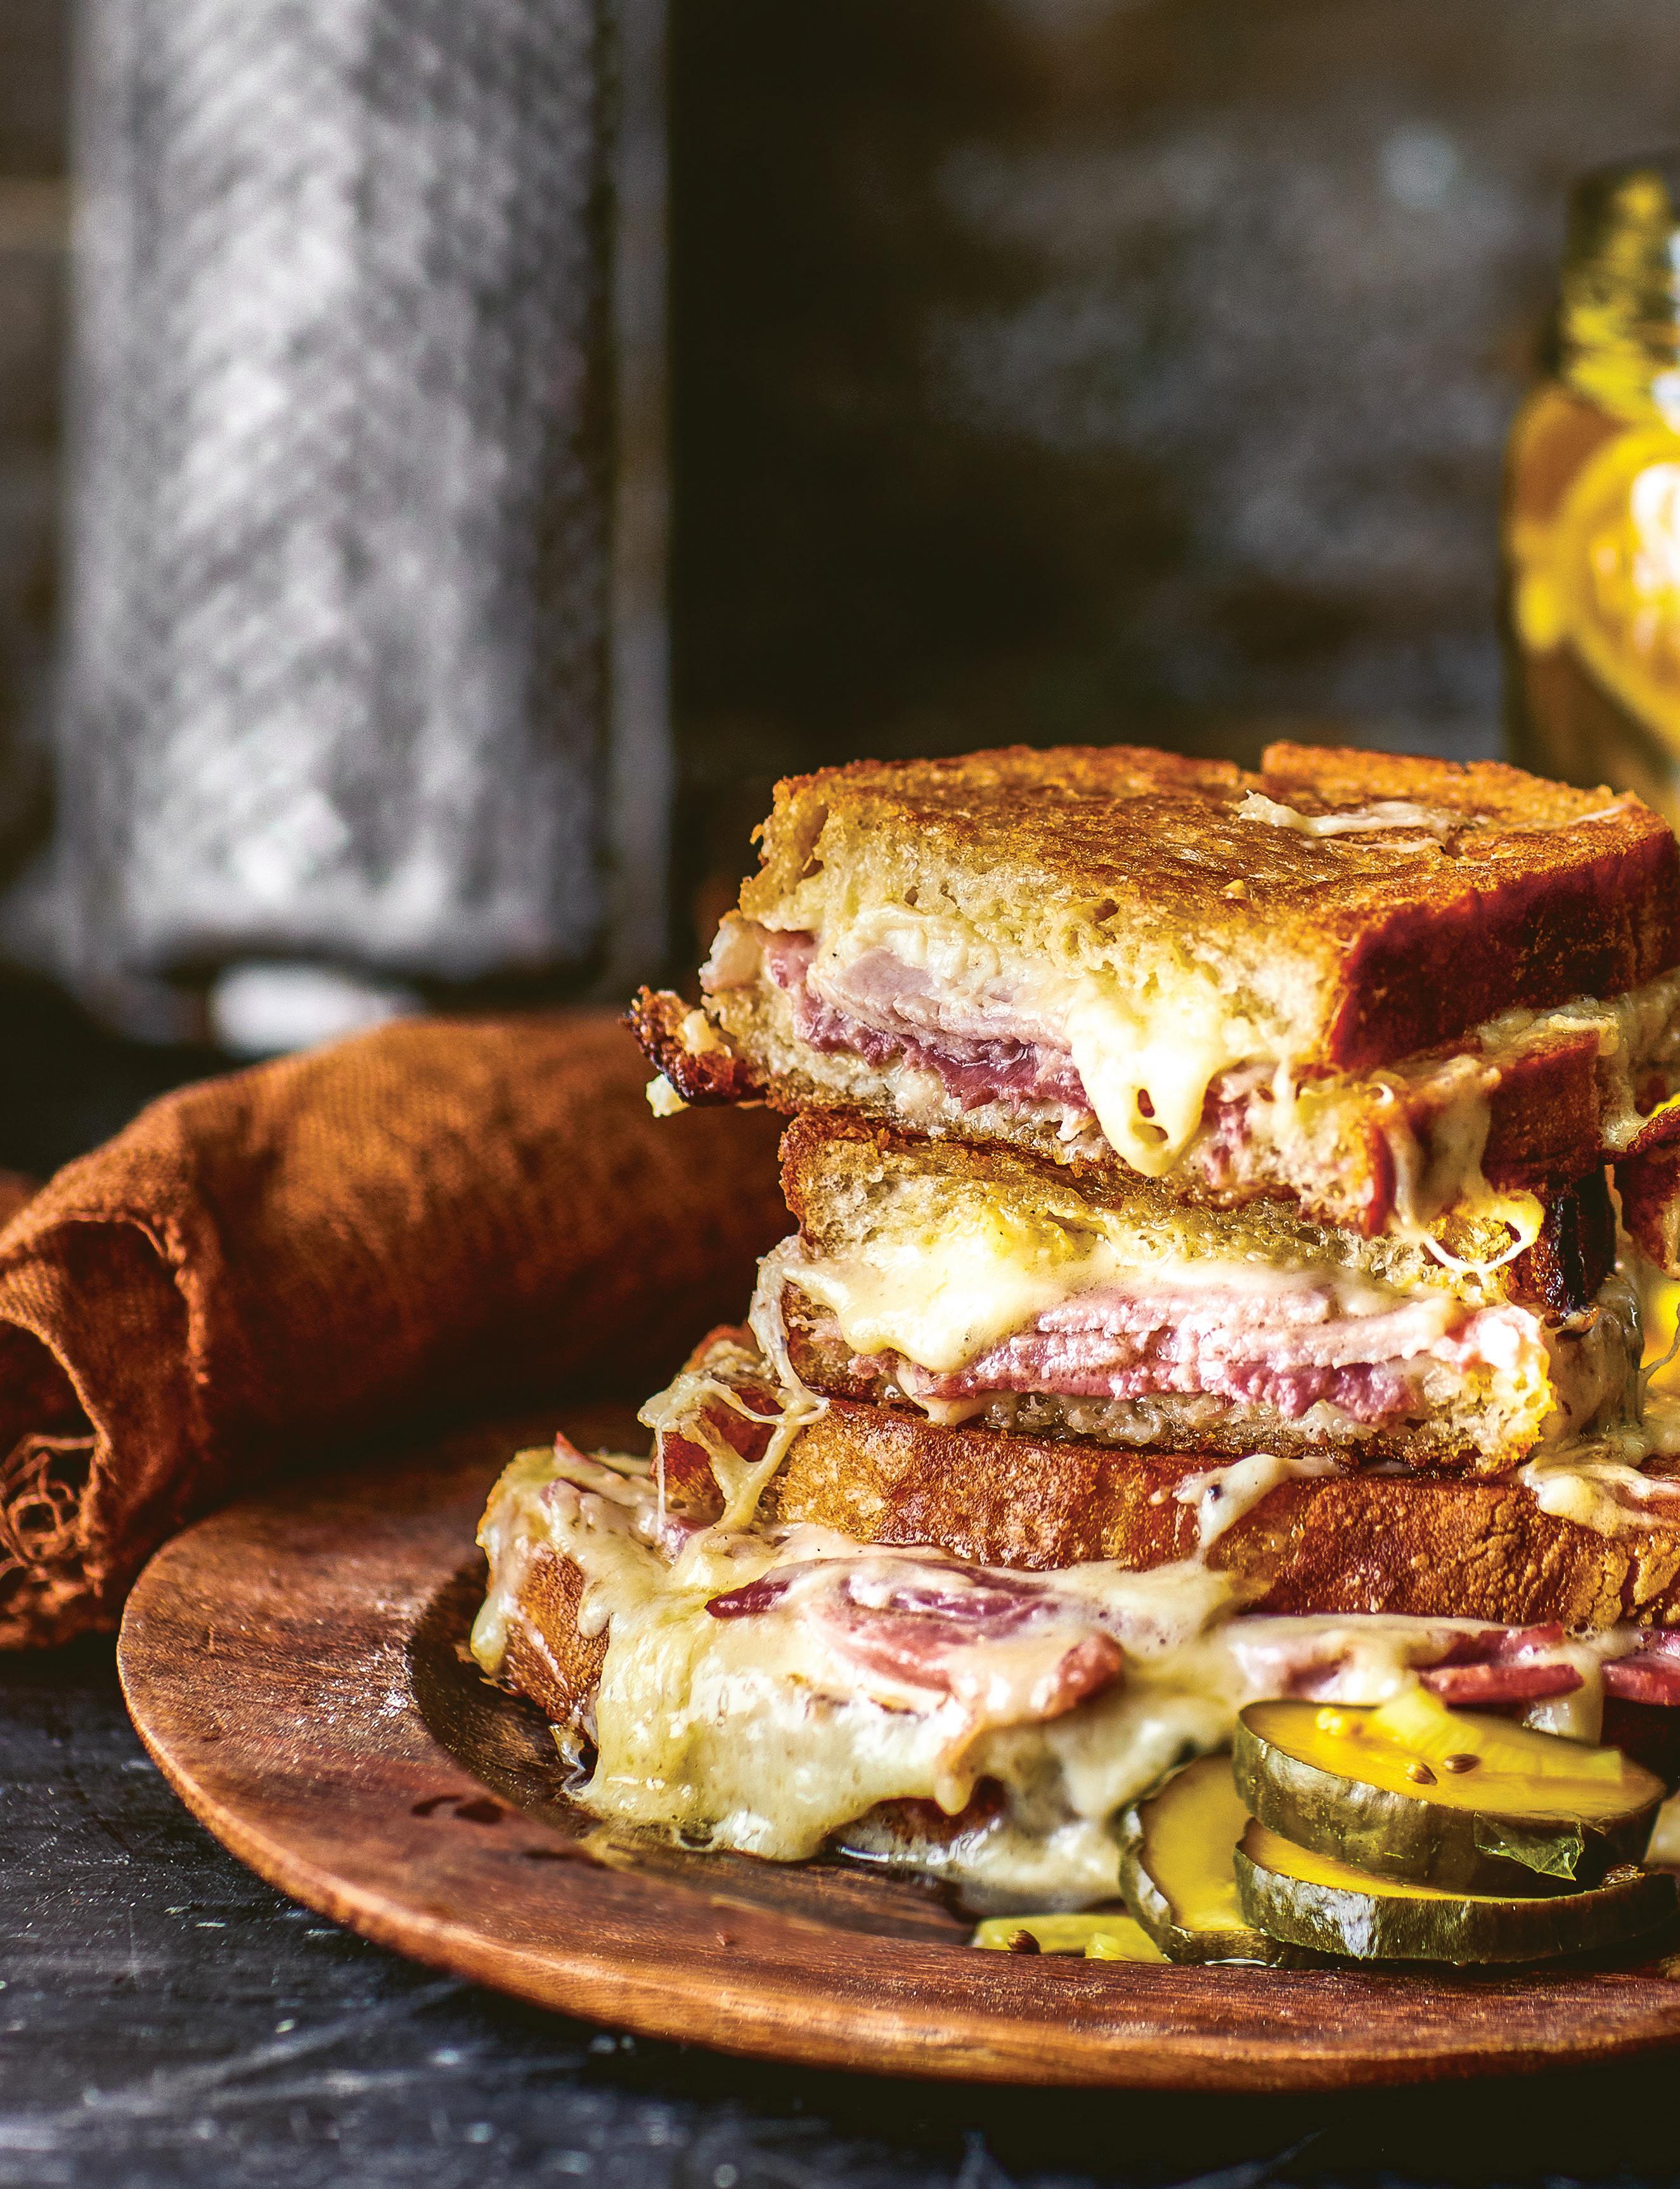


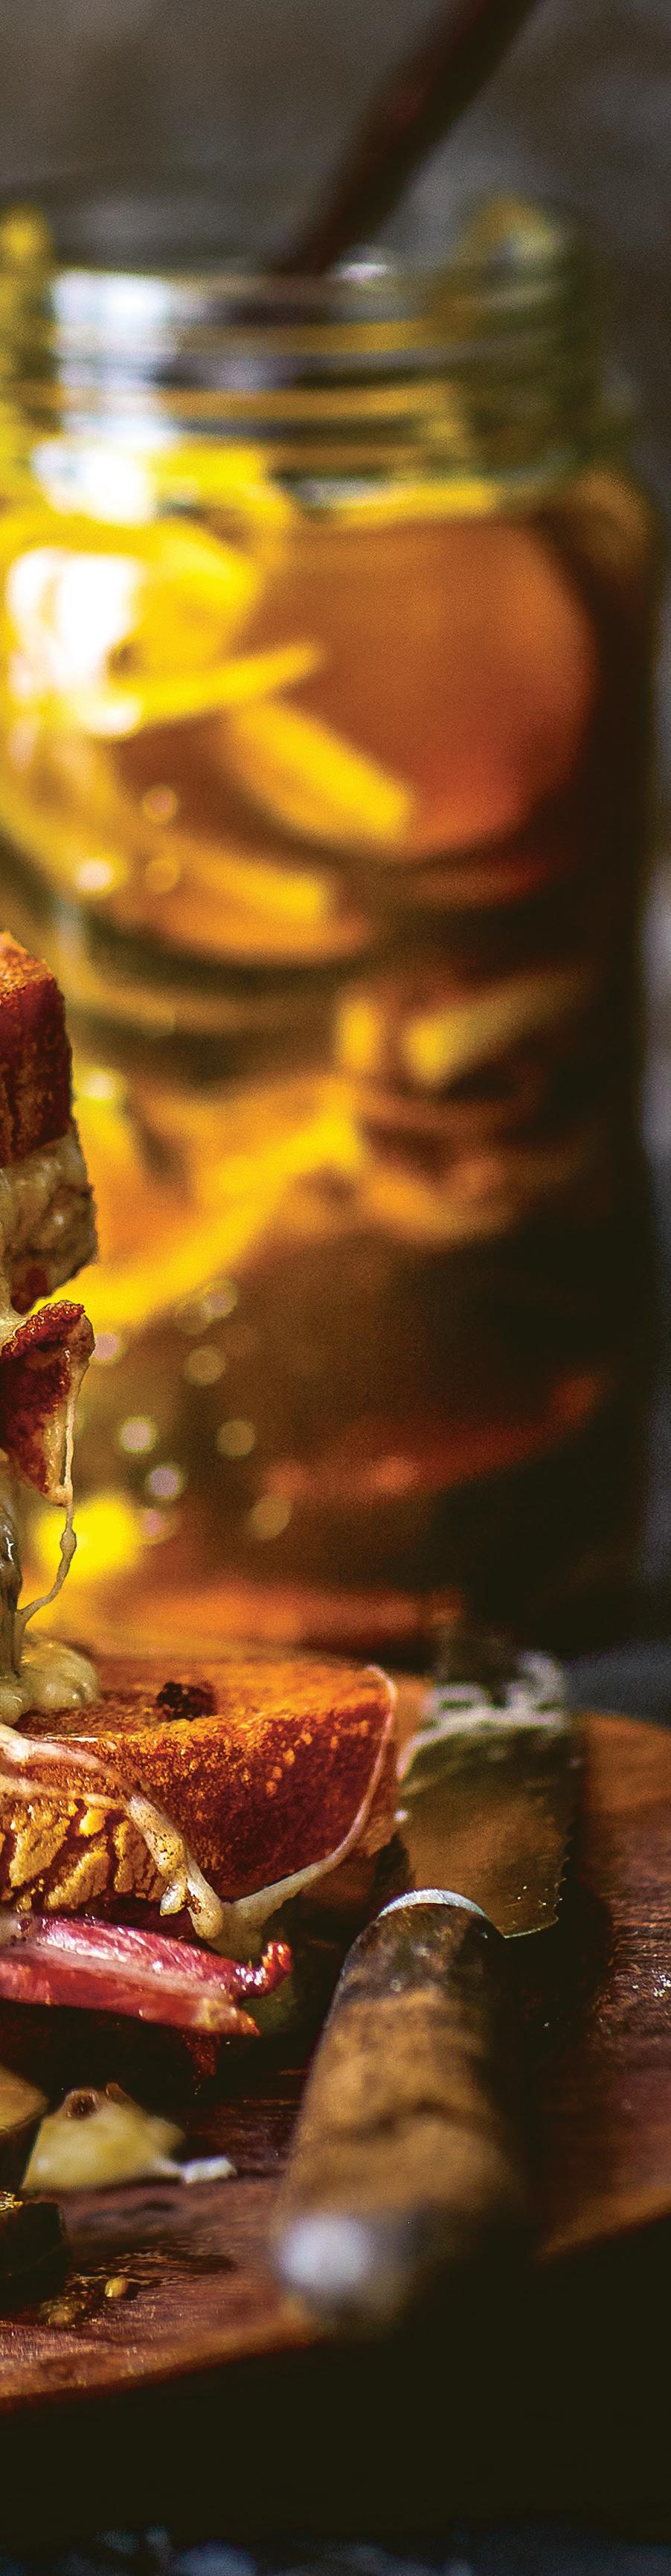
From ancient cheesemakers to modern-day chefs, melted cheese has been capturing our hearts for centuries—celebrate it with these mouthwatering recipes
There’s something undeniably magical about melted cheese. Whether it’s the irresistible stringy pull of a grilled cheese sandwich or the golden, bubbling goodness of a fondue pot, melted cheese has a way of turning any meal into an indulgent experience. The love affair with melted cheese spans continents and cultures, from Switzerland’s fondue and Italy’s cheesy pizzas and pastas to the comforting Welsh rarebit and American mac ‘n’ cheese. These beloved dishes, often with variations found around the world, all share one thing in common: an abundance of gooey, golden cheese. But why does this food have such universal appeal? It could be the velvety texture, the way it melts and transforms, or the sheer comfort it brings when paired with carbs. Whatever the reason, melted cheese remains a true indulgence we can’t resist. Pulled (no pun intended) from Ryland, Peters & Small’s “Melted Cheese: 60 Gorgeously Gooey Recipes,” these recipes celebrate melted cheese in all its glorious forms. – alesha taylor
The Ultimate Cheese Toastie
MAKES 2 SERVINGS | RECIPE BY LOUISE PICKFORD | PHOTO BY IAN WALLACE
What makes a good cheese toastie? This starts in a skillet and finishes in the oven, ensuring a crisp toasted crust and an evenly soft and gooey center. Use good-quality mustard, cheese, and ham. –l p
5½ ounces aged Gruyere, finely shredded
1 tablespoon dry white wine
3 tablespoons crème fraîche or sour cream
4½ tablespoons unsalted butter, softened
4 slices sourdough or rustic white bread
1 tablespoon Dijon mustard
2 thick slices good-quality cooked ham
Freshly ground black pepper
Pickles, to serve
1. Heat the oven to 375°F.
2. Combine the Gruyere, wine, crème fraîche, and some pepper to make a paste. Butter one side of each piece of bread, followed by a little mustard. Place 2 of the slices mustard side up on aboard. Spread half of the cheese paste over the
mustard, top with the ham, then the remaining paste. Top with the remaining slices of bread, mustard side down, and press together.
3. Melt the remaining butter in an ovenproof skillet over medium-low heat, add the sandwiches, and cook for 1 minute on each side until lightly golden. Transfer the pan to the preheated oven and bake for 10 minutes until golden, gooey, and yummy. Serve with pickles.
Nutrition (per serving): Calories: 770, Fat: 58g (Sat: 34g), Cholesterol: 185mg, Sodium: 1120mg, Carb: 27g, Fiber: 1g, Sugar: 3g, Protein: 35g
MAKES 4 TO 6 SERVINGS | RECIPE BY LAURA
WASHBURN HUTTON | PHOTO BY MARTIN BRIGDALE
Putting the mozzarella in the middle as well as on top of this pasta bake means you get a lovely inner layer of melting cheese, as well as a browned topping. Blissfully simple to make. Other vegetables can be used here according to what’s in season or to hand—sweetcorn, broccoli, and spinach will all work nicely here. –l w h
3 tablespoons olive oil
1 small onion, finely chopped
1 carrot, finely chopped
2-3 celery sticks, from the inner section, with leaves, finely chopped
1 red, yellow, or orange bell pepper, deseeded and finely chopped
1½ cups diced mushrooms
3 garlic cloves, finely chopped
½ cup dry white or red wine
½ to 1 teaspoon red pepper flakes
½ tablespoon fresh thyme leaves or 1 teaspoon dried thyme
Large handful of fresh parsley or basil leaves, finely chopped
1 (14 -ounce) can chopped tomatoes
3 cups tomato puree
Pinch of sugar
1 pound, 2 ounces dried rigatoni
1 pound, 2 ounces mozzarella, sliced
Salt and black pepper, to taste
1. Heat the oil in a large saucepan, add the onion, and cook over low heat for 3 to 5 minutes until soft. Add the carrot, celery, and pepper. Season and cook for 2 to 3
minutes. Stir in the mushrooms and garlic and cook for 1 minute more. Add the wine and cook for 1 minute more. Stir in the red pepper flakes, thyme, parsley, tomatoes, tomato puree, and sugar. Season generously and stir. Reduce the heat and simmer, uncovered, for 20 to 30 minutes. Taste and adjust the seasoning if necessary.
2. Meanwhile, cook the pasta according to the package instructions until al dente. Drain well and set aside.
3. Heat the oven to 400°F.
4. Combine the cooked pasta and the vegetable sauce and mix well. Spread half the pasta in the prepared dish evenly. Top with half of the mozzarella. Top with the remaining pasta in an even layer and arrange the remaining mozzarella slices on top.
5. Bake in the preheated oven for 25 to 30 minutes until the cheese melts and bubbles. Serve immediately.
Nutrition (each per 6 servings):
Calories: 700, Fat: 22g (Sat: 10g), Cholesterol: 55mg, Sodium: 960mg, Carb: 87g, Fiber: 7g, Sugar: 15g, Protein: 36g

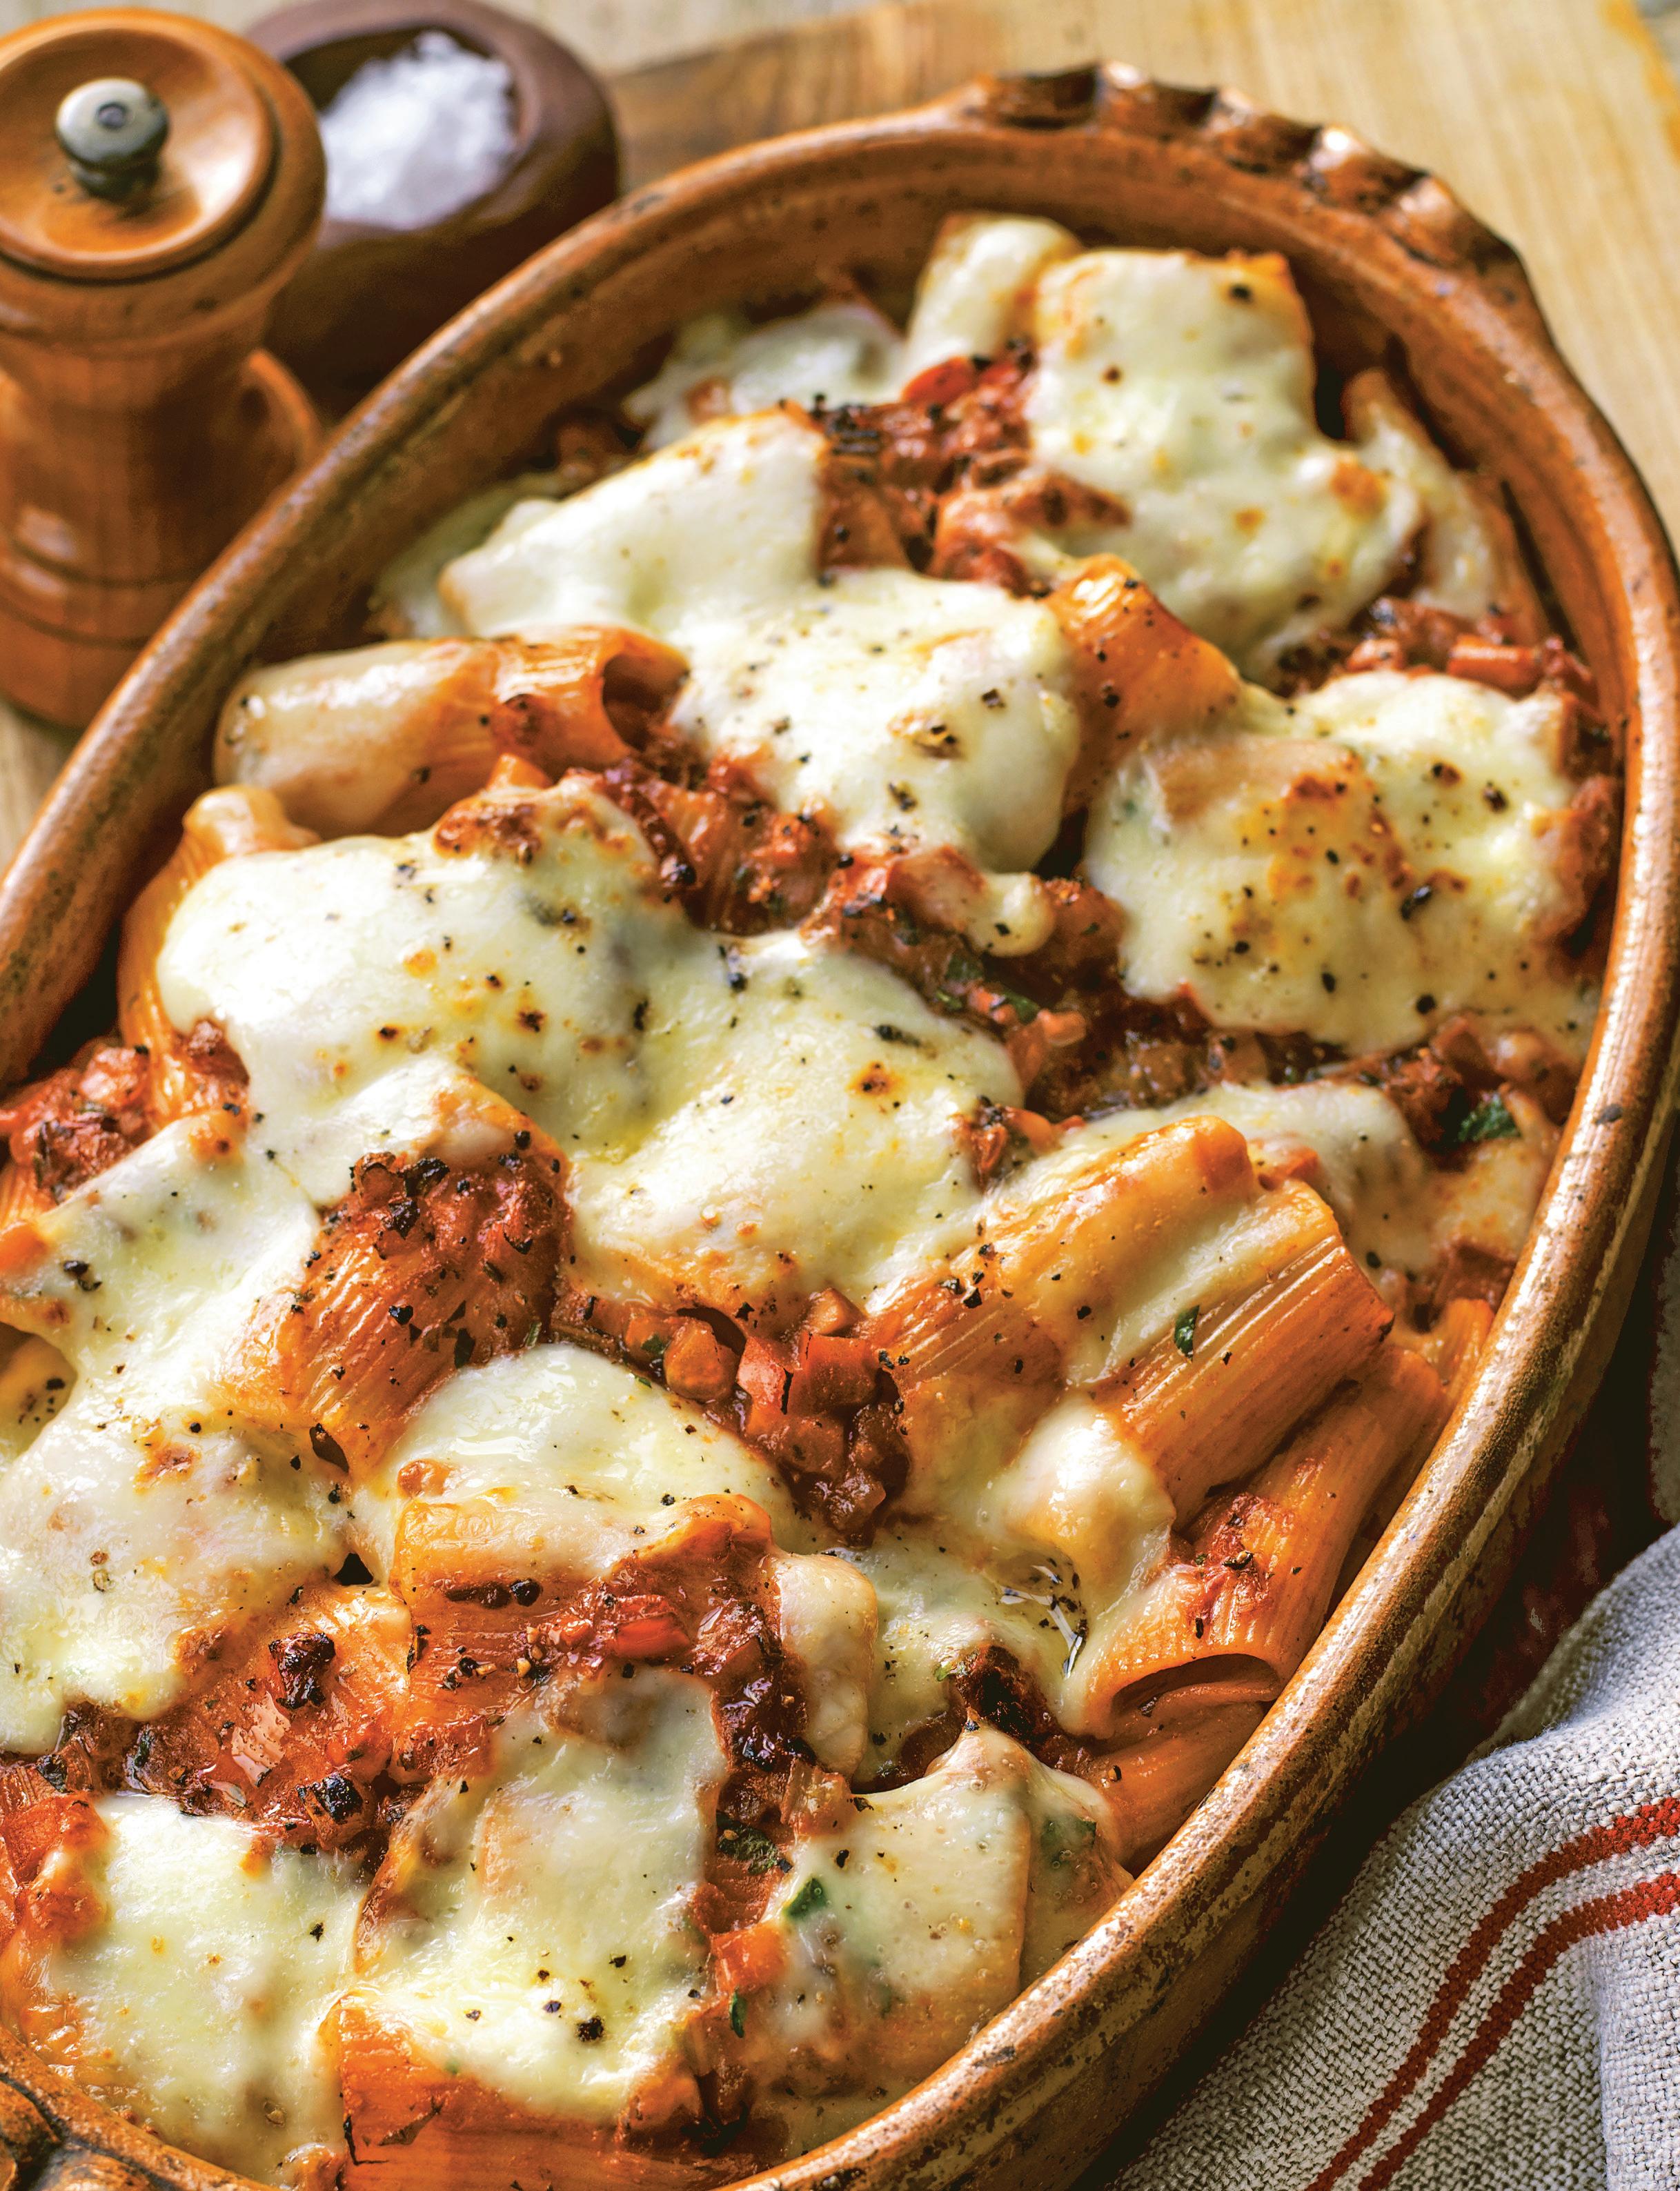
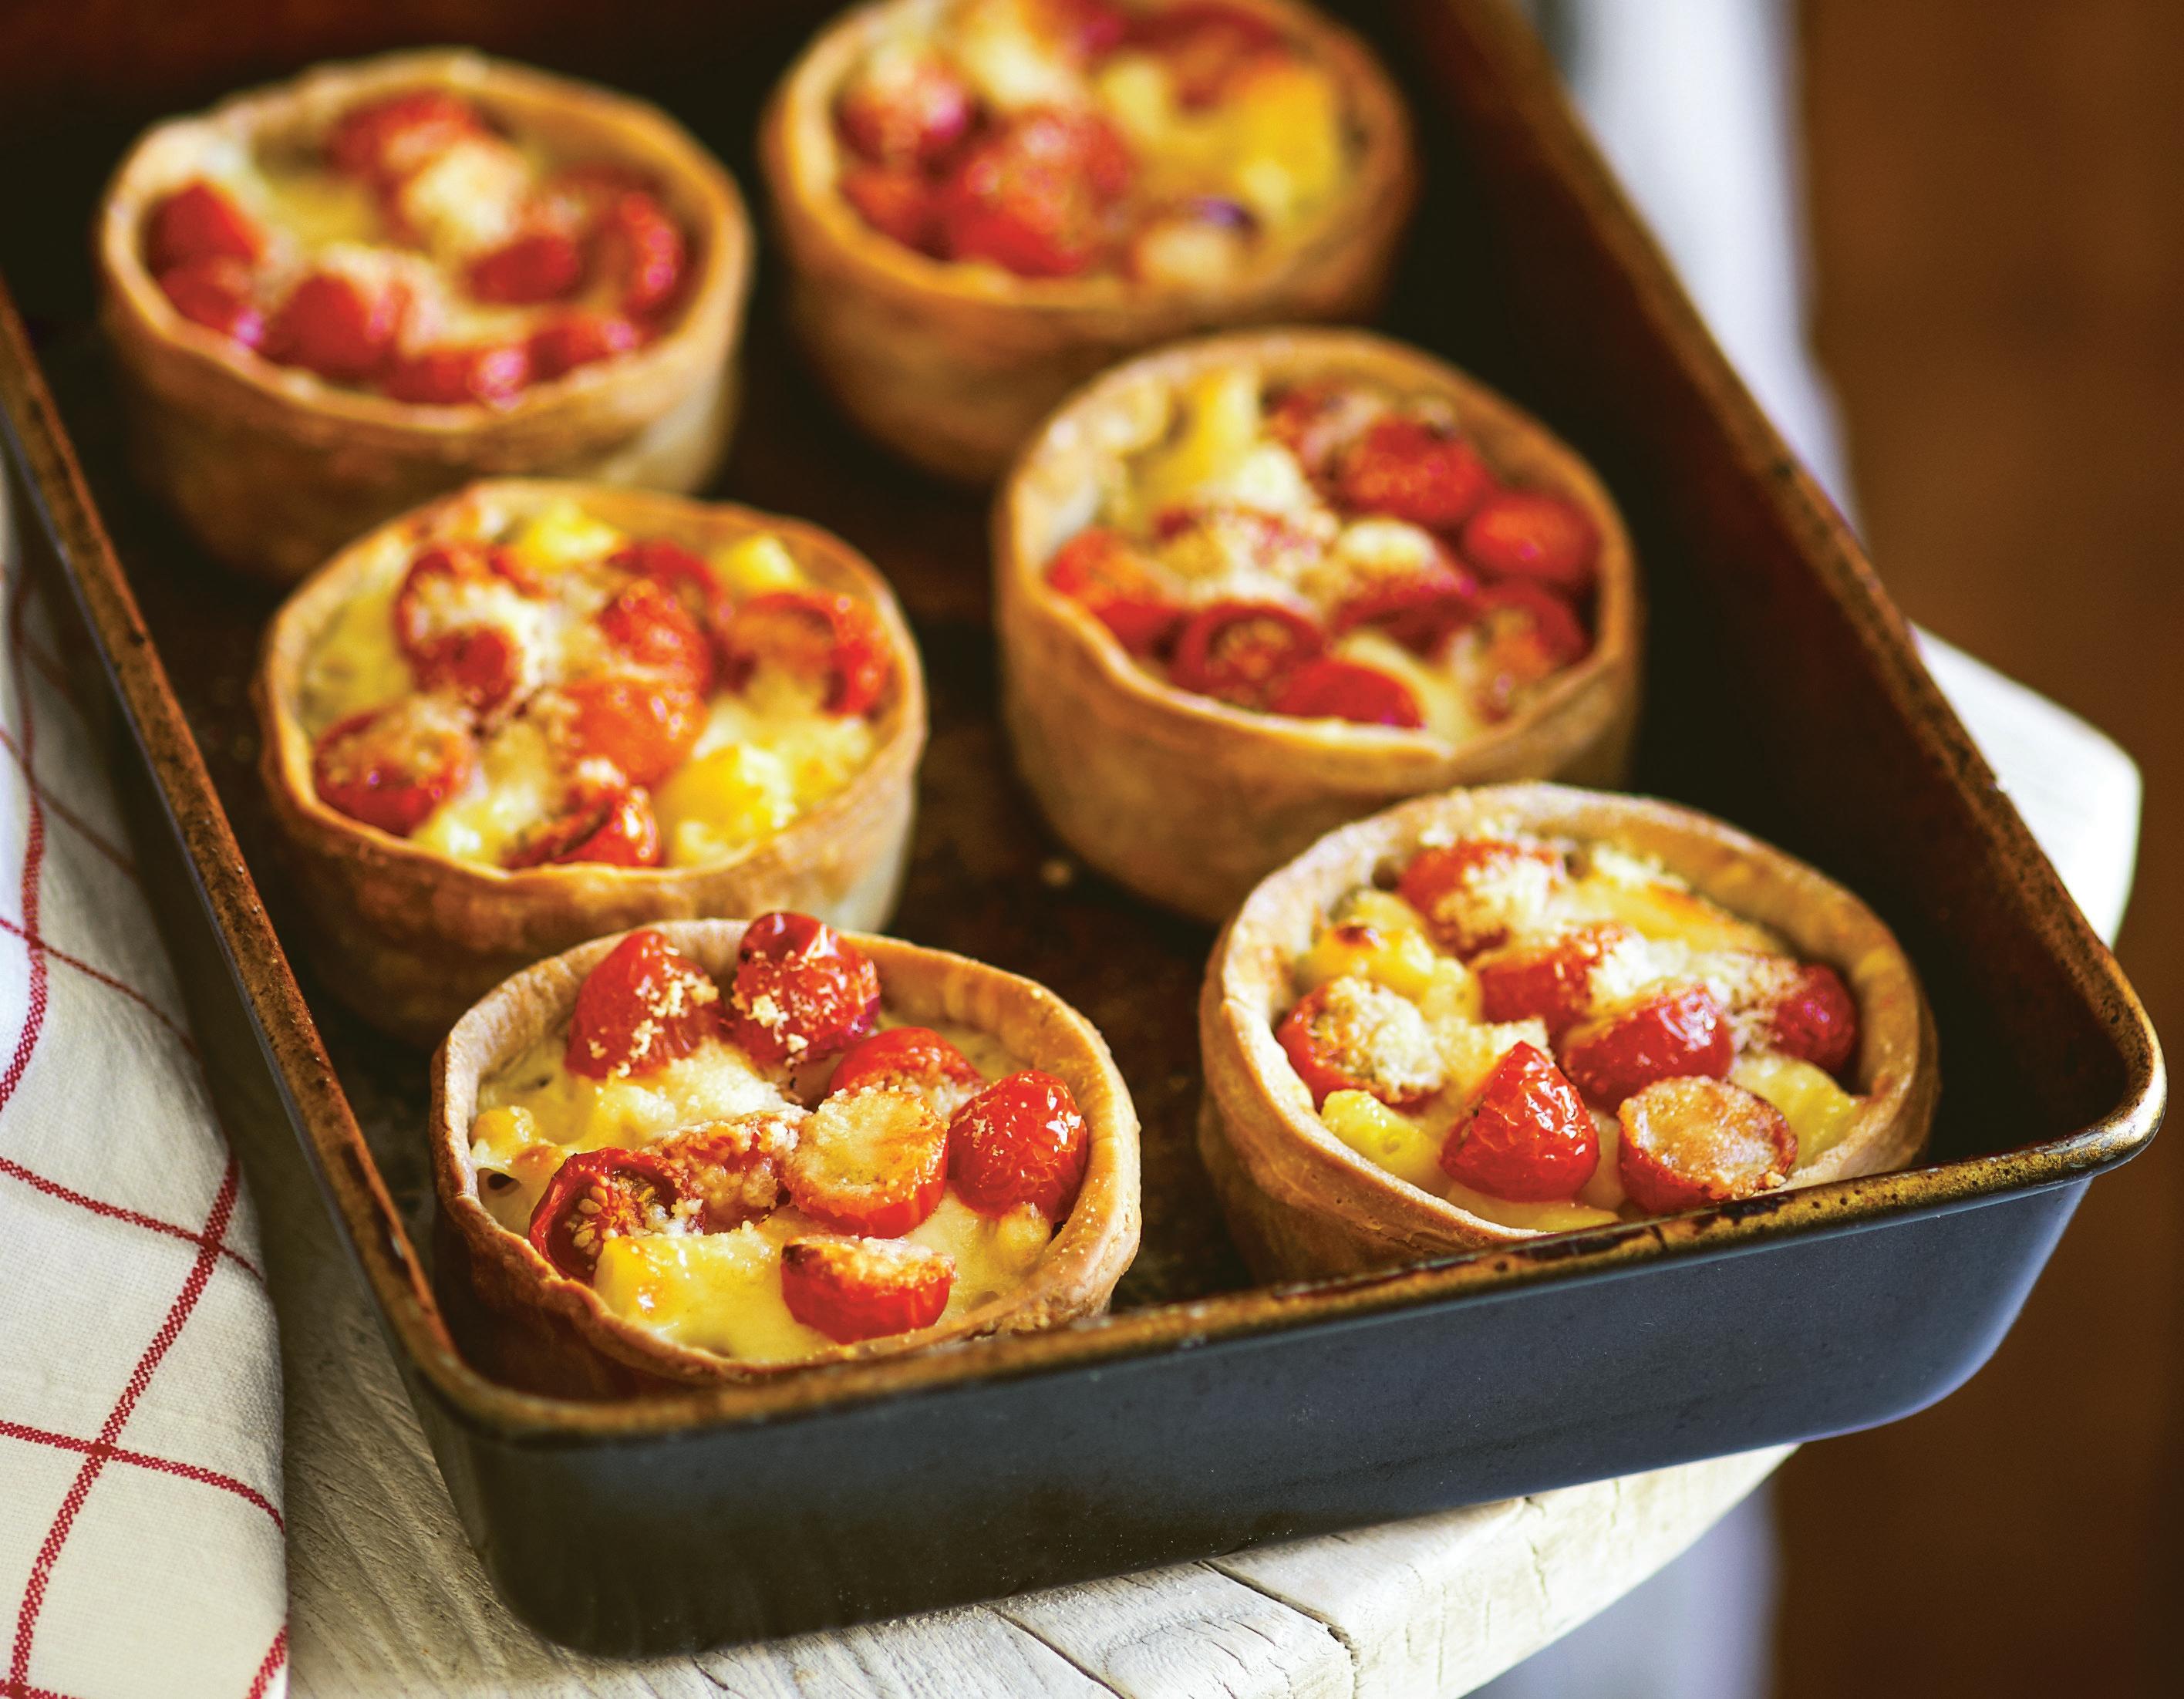
MAKES 6 SERVINGS | RECIPE BY MAXINE CLARK | PHOTO BY STEVE PAINTER
This is a take on the classic Scottish macaroni pie or ‘peh.’ These are delicious served freshly baked out of the oven—once you’ve tried cheesy pasta baked in a pastry case you will never look back! –m c
2 pounds store-bought shortcrust/pie pastry
4 ounces dried pasta shapes (such as small rigatoni, fusilli, tubetti, or macaroni)
3 tablespoons unsalted butter
2½ tablespoons all-purpose flour, plus extra for dusting
Pinch of cayenne pepper
Pinch of English mustard powder
1½ cups whole milk
3½ ounces sharp cheddar, shredded
30 cherry or baby plum tomatoes, halved
1¾ ounces Parmesan, shredded Salt and black pepper, to taste
6 (4 -inch) straight-sided ramekins, jars, chef’s rings, or other small pie molds
1. Divide the pastry dough into 6 pieces. On a lightly floured surface, roll out each piece thinly with a rolling pin. Line each mold with a piece of pastry and smooth gently to fit. Don’t worry about uneven edges—these will be trimmed o later. Set on a tray and chill for 30 minutes. When firmly set, use a sharp knife to trim the pastry on each one to 2 inches deep.
2. Heat the oven to 400°F.
3. Cook the pasta according to the package instructions. While the pasta is cooking, melt the butter in a pan and add the flour, cayenne pepper, and mustard. Cook, stirring, for 1 minute. Remove from the heat. Pour in the milk and whisk in well. Return to the heat and stir until boiling. Simmer, stirring all the time, for 2 minutes.
4. Drain the pasta and stir into the sauce. Season to taste and stir in the grated cheddar. Set aside and leave to cool until tepid.
5. Spoon the pasta into the pastry cases, leaving enough of a rim of pastry projecting above to hold the tomatoes. Pile the tomato halves over the surface of the pies and sprinkle with the Parmesan. Stand the pies in a shallow baking pan and bake in the preheated oven for 25 to 30 minutes, or until the filling is golden and bubbling and the pastry is cooked through.
Nutrition (per serving): Calories: 920, Fat: 54g (Sat: 24g), Cholesterol: 40mg, Sodium: 940mg, Carb: 93g, Fiber: 4g, Sugar: 6g, Protein: 15g
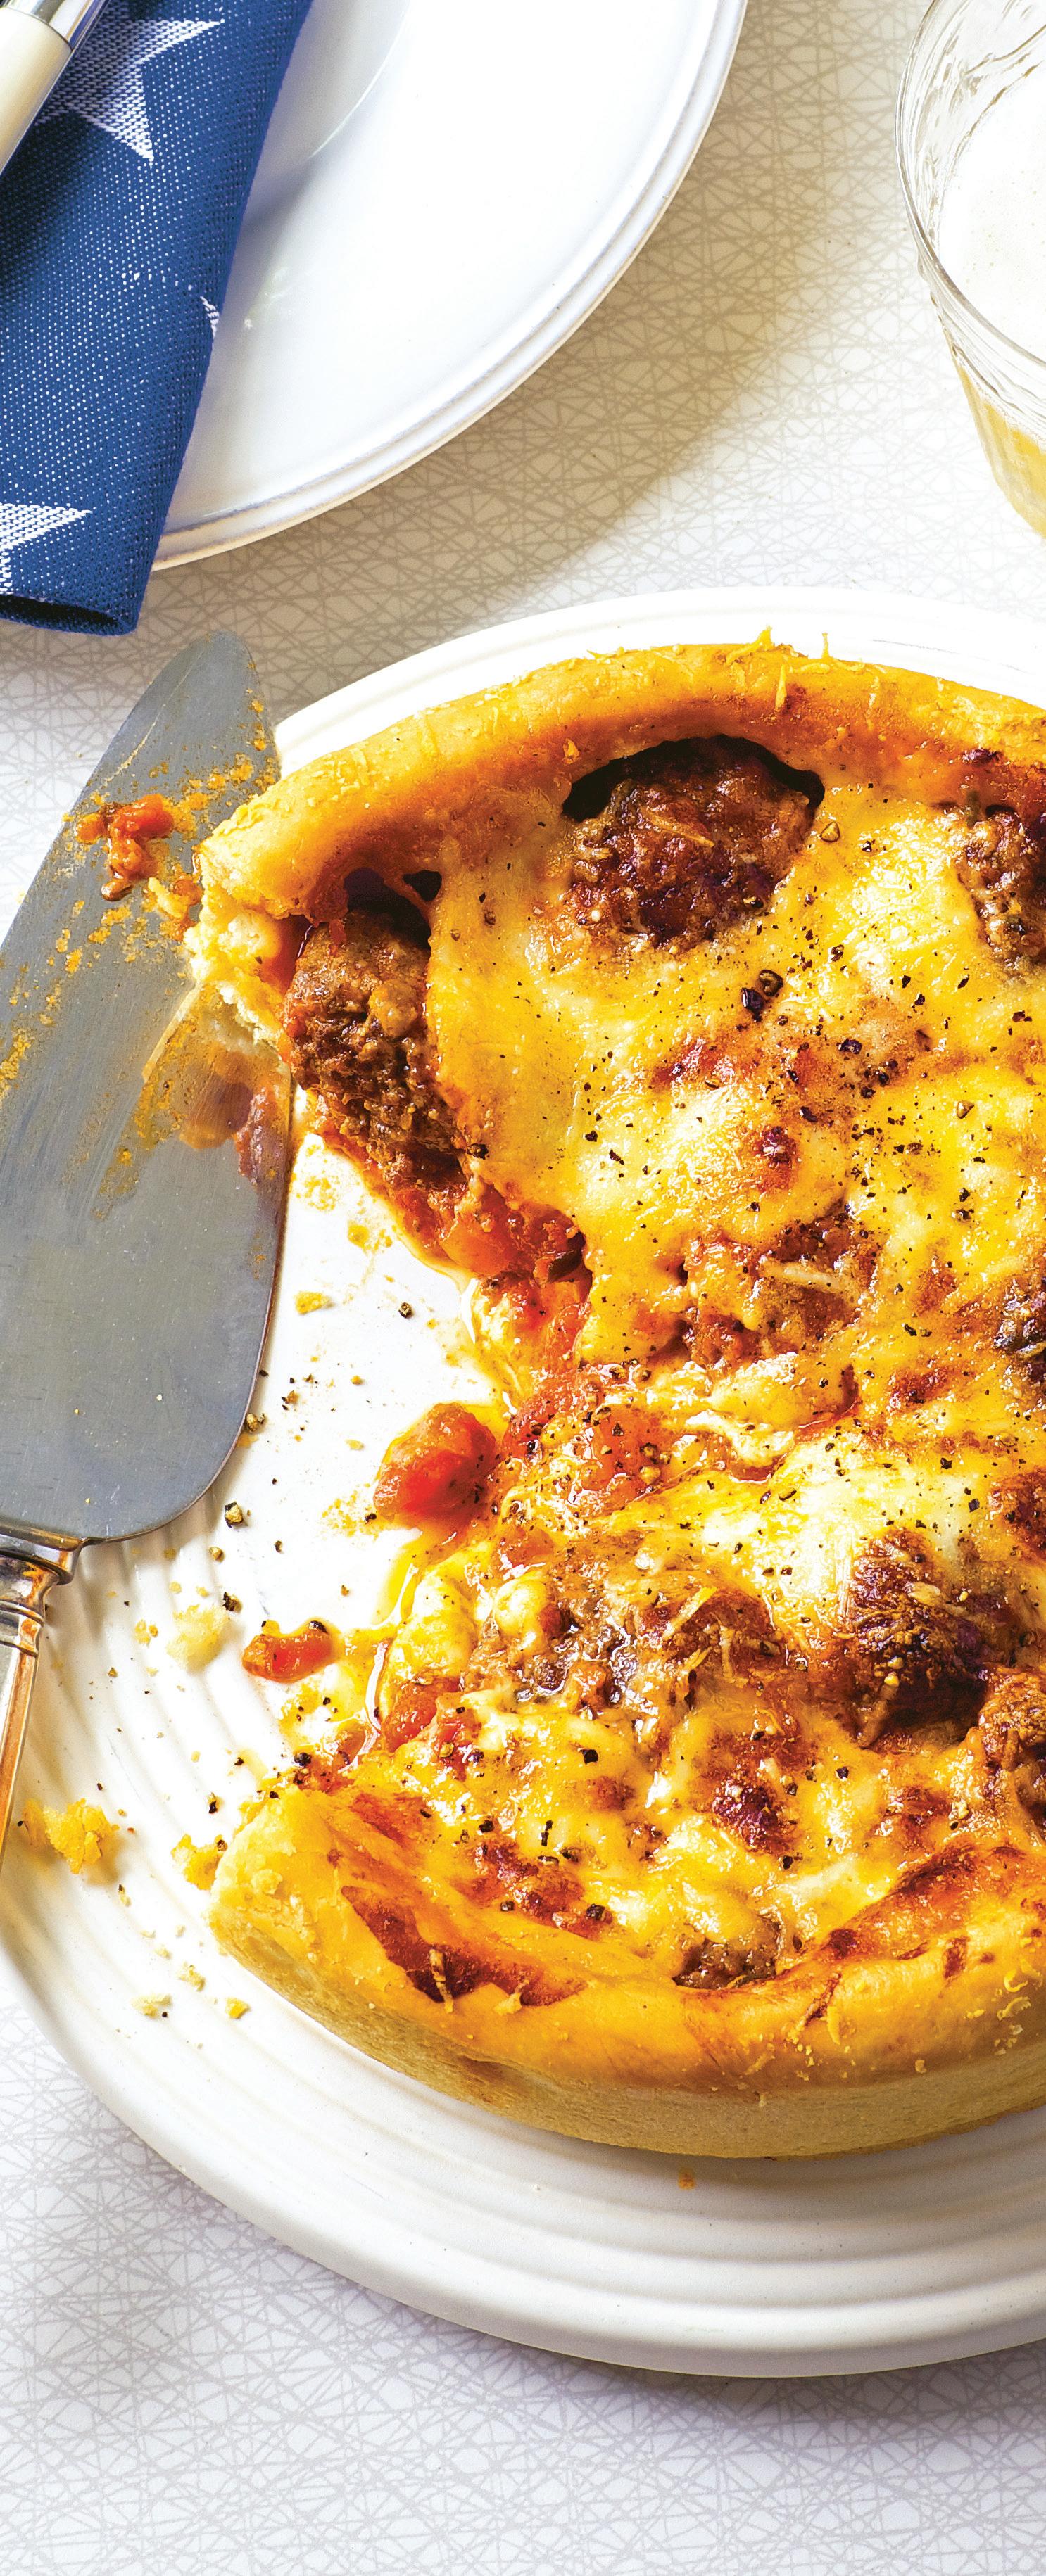
MAKES 4 SERVINGS
RECIPE BY TORI HASCHKA | PHOTO BY ISOBEL WELD
This is like a Chicago-style pizza that has tall sides that contain an oozy filling. –t h
for the pizza dough
¼ tablespoon fast-action dried yeast
¼ tablespoon sugar
¾ cup water
¼ cup clarified butter or shortening
2 cups all-purpose flour
Salt
for the tomato sauce
1 onion, finely chopped
2 tablespoons olive oil
2 garlic cloves, thinly sliced
1 (14 -ounce) can tomatoes
1 pear, peeled, cored, and chopped into small pieces
1 heaped teaspoon dried oregano
1 bay leaf
for the pizza
1 pound beef meatballs
10 ½ ounces fresh mozzarella, patted dry
3 tablespoons shredded Parmesan
1. Gather a nonstick 8-inch loose-bottomed cake pan and set aside. For the dough, mix the water with the yeast and sugar, and leave for 5 minutes. Put the yeast mixture, butter or shortening, 1 cup flour, and a pinch of salt in an electric mixer with a dough hook and mix for 5 minutes. Add ¾ cup more flour and mix until a dough forms. Add the remaining flour if needed. The dough should be wet but shouldn’t stick to your hands. Put the dough in a covered bowl in the fridge to rise overnight.
Remove 2 to 3 hours before use.
2. To make the sauce, lightly saute the onion in a heavy-based casserole dish with the olive oil and garlic. When the onion is translucent and soft, add the tomatoes, pear pieces, oregano, and bay leaf. Cook slowly for 1 hour, stirring occasionally, until the pear has dissolved into the tomatoes. Remove the bay leaf and blitz the sauce with a stick blender until smooth.
3. Heat the oven to its highest setting. Brown the meatballs in a skillet and add to the tomato sauce. Pat the dough into the base of the cake pan, up the sides, and firmly all around the edge using your knuckles.
4. Place three-quarters of the mozzarella in the bottom of the pan. Cover with the meatballs and tomato sauce. Top with the remaining mozzarella and the Parmesan. Bake in the preheated oven for 25 to 30 minutes until the crust is pu ed and golden. If the inside is still soupy, return to the oven for 5 to 10 minutes.
5. To serve, remove the sides of the cake pan and cut into quarters with a large knife or cake server.
Nutrition (per serving): Calories: 1030, Fat: 67g (Sat: 36g), Cholesterol: 150mg, Sodium: 910mg, Carb: 64g, Fiber: 6g, Sugar: 11g, Protein: 44g
MAKES 4 SERVINGS | RECIPE BY LIZZIE KAMENETZKY | PHOTO BY NASSIMA
ROTHACKER
Molten Comté, with its nutty, earthy taste and creamy texture, is the ideal choice for these oozing toasts that soak up the rich broth of the onion soup to perfection. –l k
2 tablespoons unsalted butter
3 tablespoons olive oil
2 pounds, 4 ounces large onions, very thinly sliced
1 cup dry white wine
4 cups rich beef stock
Good pinch of grated nutmeg
Small handful of fresh thyme sprigs
2 fresh bay leaves
1⁄3 cup good-quality Madeira
1 day-old baguette or other crusty bread, cut into slices
1 garlic clove, peeled
5½ ounces Comté, shredded Salt and black pepper, to taste
1. Melt the butter in a heavy-based pan or flameproof casserole dish and add the oil. Add the onions and season with salt. Cook over low heat, stirring occasionally, for at least 45 minutes until they have reduced right down to a golden, sticky mass.
2. Add the wine and bubble, stirring, for a minute, then add the beef stock, a good grating of nutmeg, and the herbs. Simmer for about 20 minutes, then add the Madeira and bubble for 5 minutes more. Check the seasoning and spoon into 4 small ovenproof bowls or dishes.
3. Preheat the grill/broiler to high.
4. Toast the slices of crusty bread and rub one side all over with the garlic. Put the toasts on top of the bowls so that they cover the surface of the soup. Sprinkle with lots and lots of cheese and put on a baking sheet under the grill/broiler until the soup is bubbling and the cheese toasts are melted and golden. Serve immediately.
Nutrition (per serving): Calories: 750, Fat: 29g (Sat 12g), Cholesterol: 60mg, Sodium: 1340mg, Carb: 85g, Fiber: 7g, Sugar: 15g, Protein: 31g
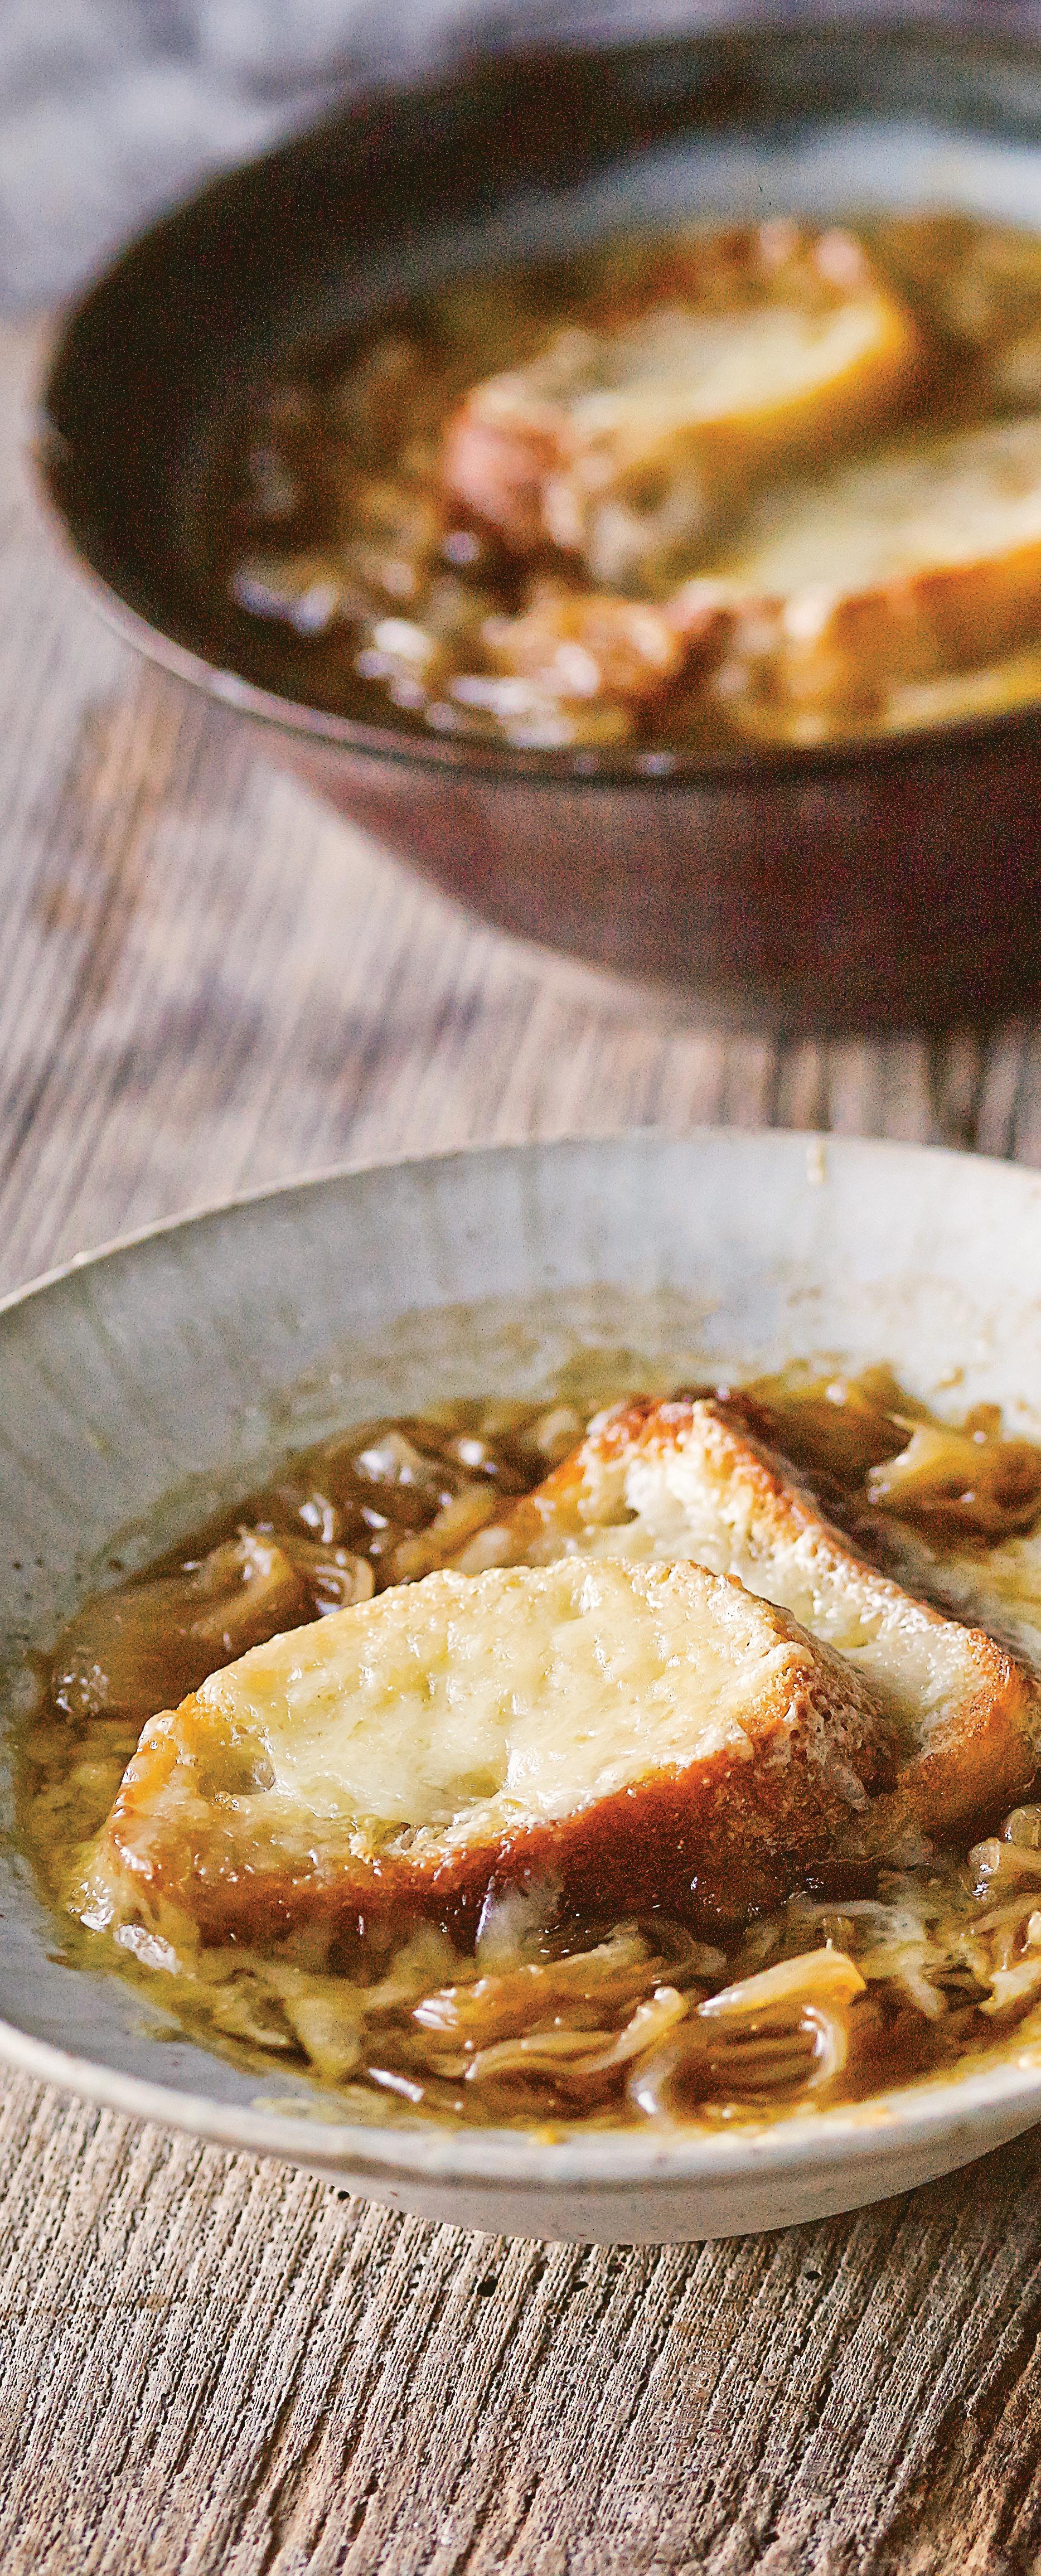
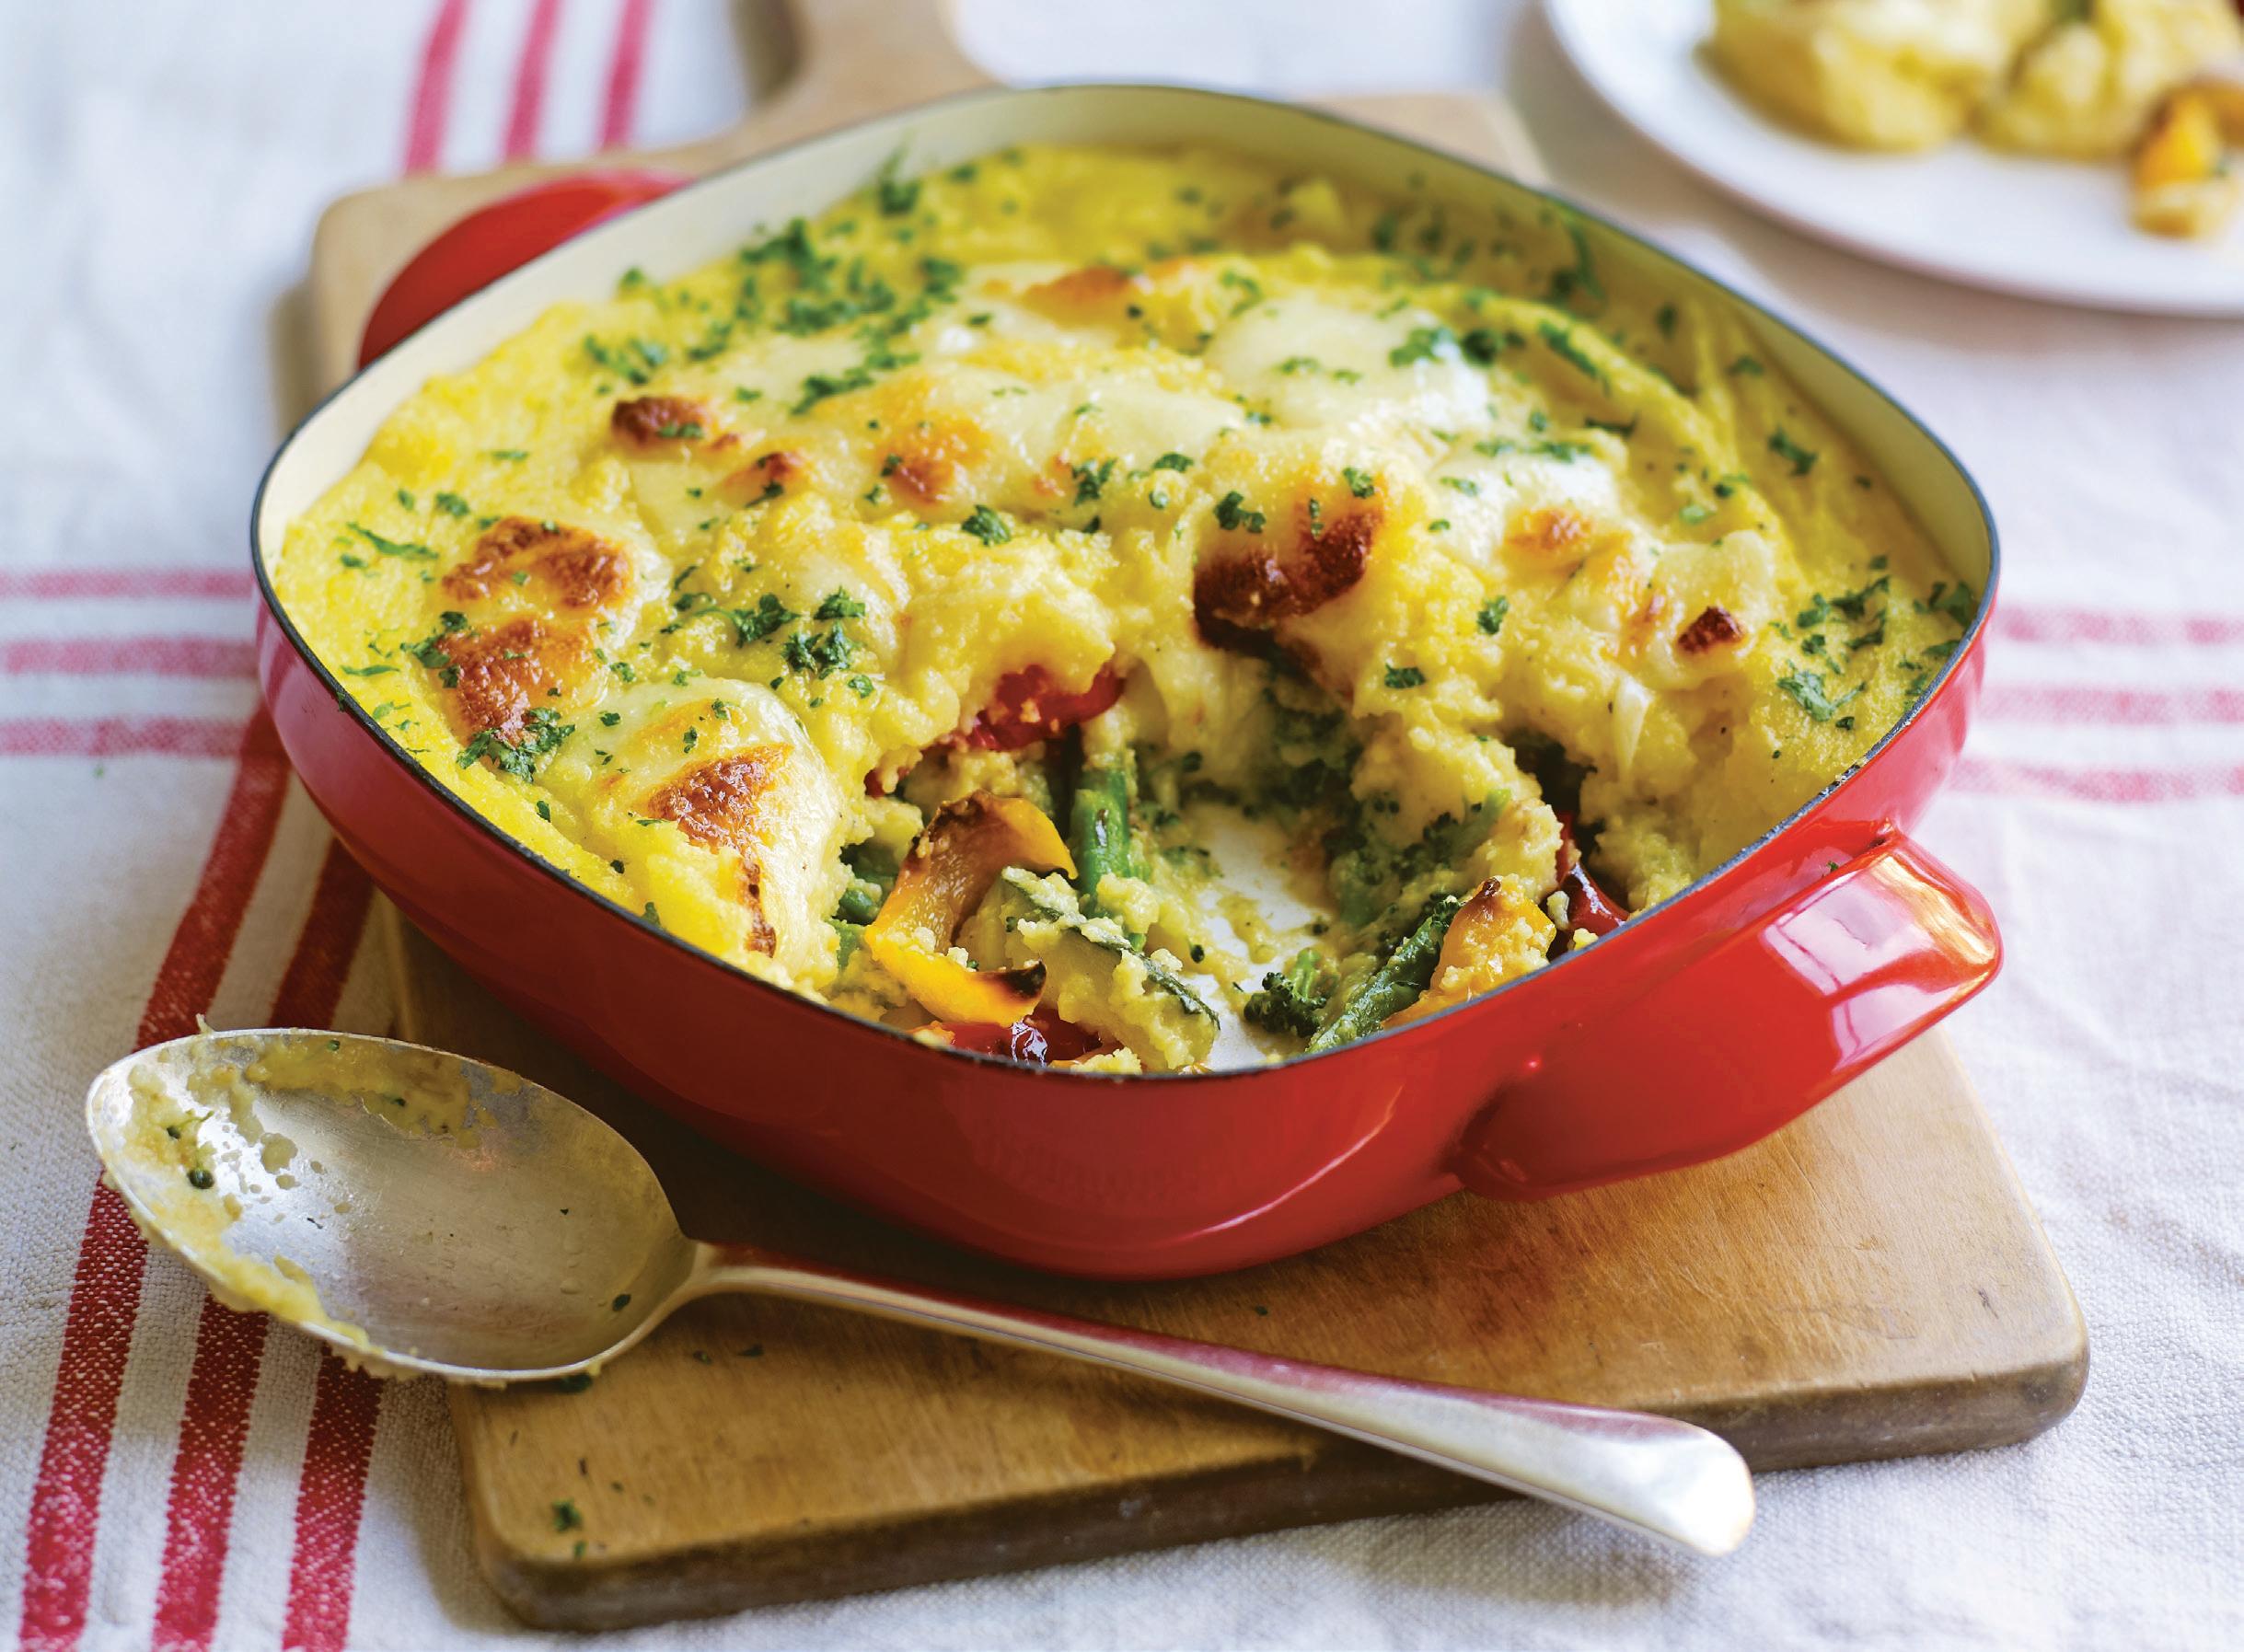
MAKES 6 TO 8 SERVINGS | RECIPE BY LAURA WASHBURN HUTTON | PHOTO BY KATE WHITTAKER
Polenta is classic Italian cornmeal, which is cooked into a kind of porridge. For this recipe you need the quick-cook version, as it can be prepared very speedily. It is used here to cover oven-roasted vegetables and topped with melting mozzarella to make a comforting and nutritious pie. –l w h
2 small zucchini
1 red bell pepper
1 yellow bell pepper
10½ ounces broccoli, sliced into long thin ‘trees’
1 red onion, sliced into thick rings
2 to 3 tablespoons extra virgin olive oil
11⁄3 cups quick-cook polenta
1 tablespoon butter
2¾ ounces cheddar, shredded
1 ( 4½-ounce) mozzarella ball, sliced Salt, to taste
1. Heat the oven to 400°F.
2. Cut the zucchini in half widthways, then halve lengthwise and cut into long thin fingers. Deseed the bell peppers, then cut into thick slices. Spread the vegetables in a single layer on a baking sheet
and add the broccoli and onion. Drizzle over the oil and toss to coat. Season lightly with salt.
3. Roast in the oven for 10 to 20 minutes until just tender and lightly browned. You may need to roast in batches, depending on the size of your vegetables. The broccoli may cook faster. Check after 15 minutes and remove it, if necessary, then continue cooking the other vegetables. Remove from the oven and transfer to a baking dish.
4. Put 3¼ cups water in a large pan, season lightly, and add the polenta in a stream. Cook, whisking continuously, until thick. Take care as polenta can bubble up a bit ferociously.
5. When thick, lower the heat and continue cooking, stirring continuously, for 5 minutes more.
6. Remove from the heat and stir in the butter and cheddar. Pour over the vegetables in the dish and spread out with a spatula. Arrange the
mozzarella on top and bake in the preheated oven for 25 minutes until browned and bubbling. Serve hot.
Nutrition (each per 8 serving):
Calories: 280, Fat: 14g (Sat: 6g), Cholesterol: 25mg, Sodium: 200mg, Carb: 31g, Fiber: 3g, Sugar: 5g, Protein: 10g
RECIPES AND PHOTOS FROM “MELTED CHEESE: 60 GORGEOUSLY GOOEY RECIPES” © 2019 REPRINTED WITH PERMISSION FROM RYLAND, PETERS & SMALL.


Chef Richard Ingraham on the power of nutrition, family roots, and his latest cookbook ‘LOVE’


BY EMMA ENEBAK

Chef Richard Ingraham is no stranger to the spotlight. The Miami-born chef known for his innovative, nutrition-focused culinary style has been cooking for high-profile stars for decades, working as a personal chef for former NBA player Dwayne Wade, and eventually founding ChefRLI, a company that connects private chefs with athletes and entertainers across the country. He trained in the culinary program at the Art Institute of Atlanta and initially focused on pastry, working in local restaurants, but found his calling in private chef work.
Beneath the notoriety of his starstudded career, Ingraham holds his humble Southern roots close, an inspiration that shines through in his second and latest cookbook, “LOVE: My Love Expressed Through Food,” which released last fall. Peppered with personal anecdotes, cherished family memories and photos, interactive QR codes, and inspiring quotes and affirmations, “LOVE” demonstrates food’s ability to revive relationships, interweave cultures, and ultimately, deepen our love for one another. Packed with a diverse range of soul-inspiring recipes influenced by Ingraham’s upbringing and his work with elite athletes, this mini master class from one of the nation’s top chefs will delight beginning chefs. We caught up with Chef Ingraham after the book’s successful release to chat all things “LOVE,” from his favorite recipes and best beginner tips to his hopes for the book’s long-lasting impact.
Can you describe your earliest memories in the kitchen or with food? Has it always been a passion for you, or did it come about later in life?
I wouldn’t say food was a passion. I was surrounded by it all the time, of course, with my grandmother cooking, my mother, my uncles. Back then, to go out to eat was a luxury. Even to have Burger King and McDonald’s, it was a treat. Every single meal was prepared every day, or every other day, because we would have leftovers. So, I was surrounded by cooking all the time, but some of the more memorable moments were during the holidays with my grandmother coming over and cooking and getting things ready for Christmas or Thanksgiving; going to my godmother’s house for the big Easter barbecue that she would have every year right after church—all of those types of things.
In your new cookbook, you write about how family has had a heavy influence on your career. Can you elaborate on this a bit more?
Yes, one of my major reasons for even wanting to cook professionally was because of what food is, and what I’ve seen it do, as far as bringing joy and bringing people together. In some instances, it heals relationships as well. So, I wanted to be a part of that, that magic of cooking and doing it for people, and letting my food and my efforts be the things that bring happiness or joy to people’s lives.
Would you say that your family has done that for you as well?
Definitely. Cooking has definitely brought joy to our family. Because of, like I said, my grandmother’s cooking and my uncles’ and my aunts’ and everybody cooking, I saw that firsthand. I saw that love and that joy that was brought together because of what they were doing in the kitchen.
Your career has employed a heavy focus on nutrition, working as a private chef for elite athletes including Dwayne Wade. Are there any experiences that inspired your passion for nutrition or to work with athletes in particular?
No, getting into nutrition and cooking healthy types of food was strictly brought on by my work with athletes. It wasn’t something that I struck out to do, it was a necessity to be able to work with these athletes. I started out during a time where nutrition really wasn’t a focus, because the players were just relying on their good genes, and, of course, their youth to be able to do what they do. But nutrition came along, and I’m not sitting here saying that I’m the inventor of bringing nutrition into sports, but in my particular instance, it was me saying to my athletes that their age and their athleticism wasn’t going to continue to bring them to the highest of heights in their sports while still eating the way that they were. So, I knew they needed to change, and I took it upon myself to learn what I could do to bring nutrition into their diets, and through that, I was able to work with other athletes and do the same thing.
Would you say that these experiences with athletes transformed your cooking overall? Have you brought that nutritional aspect with you into other jobs and to other clients? Well, yes, it had to. Certain things had to change. My first cookbook, which is much more of a nutrition-based cookbook than [“LOVE”], was written because people wanted to know how they could eat like an athlete or eat like a champion. So, yes, it definitely changed my cooking. But with this new cookbook, I’m truly cooking everything that I’ve always wanted to cook, you know, all of the fats and all of the creams and ice creams and stuff like that. You know, that’s the good stuff.
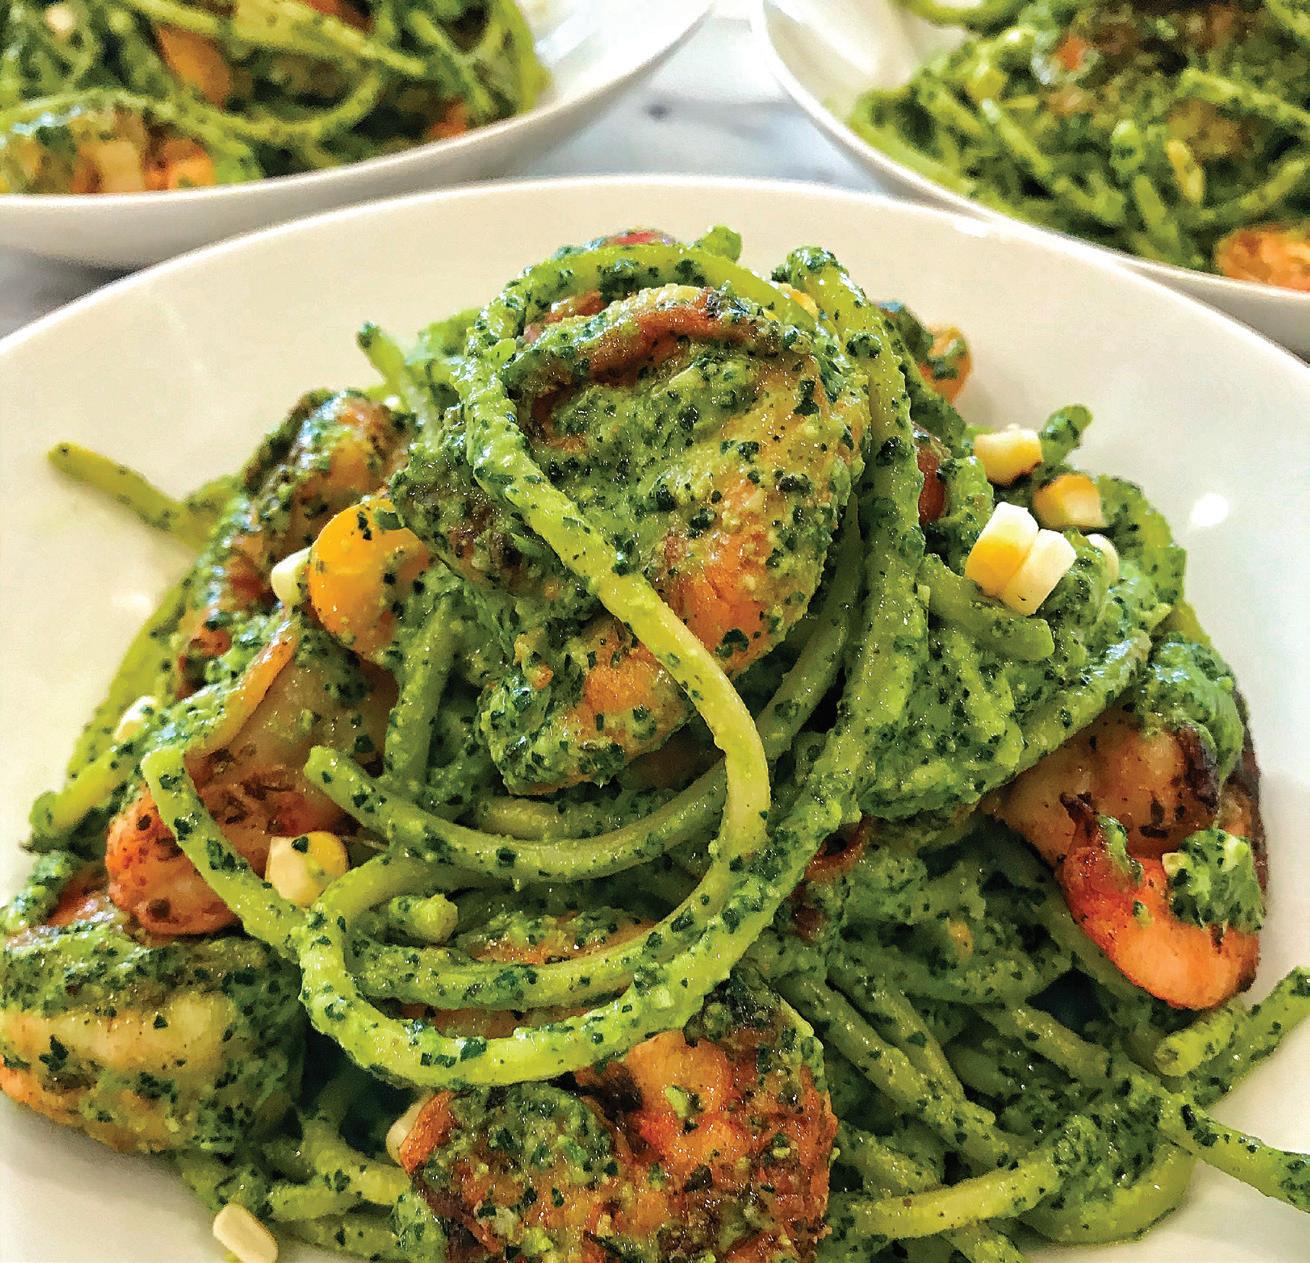
MAKES 4 TO 6 SERVINGS | RECIPE AND PHOTO FROM “LOVE” REPRINTED WITH PERMISSION
1 package bucatini pasta
1½ pounds jumbo shrimp, peeled and deveined
1 teaspoon kosher salt
½ teaspoon fresh ground black pepper
1 teaspoon red pepper flakes
1 teaspoon Italian seasoning
2 tablespoons grapeseed oil, divided
4 tablespoons unsalted butter, divided
6 garlic cloves, minced
4 ears corn, grilled and cut o the cobb, about 2 cups
1 cup cherry tomatoes, halved
1½ cups Collard Green Pesto (recipe right)
¼ cup chicken broth
1. Bring a large pot of salted water to a boil. Add bucatini to the pot and cook according to package directions to al dente. Drain and reserve.
2. In a medium bowl, season shrimp with kosher salt, fresh ground black pepper, red pepper flakes, and Italian seasoning. Heat 1 tablespoon grapeseed and 2 tablespoons unsalted butter over medium high heat in a large skillet.
3. Add the shrimp to the skillet and cook for 1 minute on each side.
4. Add garlic and cook with shrimp stirring frequently. About 1 minute.
5. Transfer the shrimp to a bowl and reserve. Don’t clean the pan.
6. Heat remaining 1 tablespoon grapeseed oil and 2 tablespoons unsalted butter over medium high heat.
7. Saute corn and tomatoes until tomatoes begin to release their juices and the corn is heated through, about 5 minutes. Transfer shrimp to the pan with tomatoes and corn.
8. Add bucatini and Collard Green Pesto to the skillet and stir to evenly coat. Add chicken broth to loosen, if needed. Taste and adjust seasoning. Serve immediately.
MAKES 2 CUPS
1 bunch collards, ribs discarded, leaves roughly chopped
½ cup pecans, toasted
6 garlic cloves
5 ounces Parmesan cheese, shredded
Zest and juice of 1 lemon
2 teaspoons red pepper flakes
3⁄4 cup olive oil
Kosher salt, to taste
Freshly ground black pepper, to taste
1. Combine ice and water in a medium bowl to create an ice bath.
2. Bring a large pot of salted water to a boil over medium high heat. Blanch collard greens until bright green, about 1 minute.
3. Transfer blanched collard greens into the ice bath. Remove the collard greens from the ice bath and dry with paper towels.
4. Combine collard greens, pecans, garlic cloves, cheese, lemon juice, zest, and red pepper flakes into the food processor. Pulse to combine then, with the food processor on, drizzle olive oil in a slow stream until pesto comes together. Taste and adjust seasoning with kosher salt and fresh ground black pepper.
Let’s talk a little bit about your new cookbook ‘LOVE.’ In your opinion, what does it mean to cook with love?
I’ve always said that you can’t get any more intimate with a person than to cook for them. I’ve always felt that no matter what was going on in my life, when I stepped into my client’s home, I wanted to impart love into the food that I was preparing for them. I believe in great energy, and I know that the energy that’s inside of you is transmitted to the food, then it is ingested by your client, or by your guest or whomever is eating that particular item. … because negative energy is a poison. So, I definitely think that in cooking for people, you have to have that love, you have to have that joy, and that’s why it’s so important for me to cook for people that I really care about. It’s not about money. It’s about the joy that I feel, and those that I cook for can feel it in the food they taste.
You’ve mentioned that honoring your culture and roots has been an important part of your career. How does this shine through in the book?
It shines through in all of the stories and pictures that are in the book. So, you get to see my ancestors, my grandmother, my grandfather, my aunts. You hear stories about them and how they’ve influenced me to be able to do what I do with such passion and with such love.
And then the dishes themselves. Some of them are based upon my heritage. Like my fried chicken with French toast— instead of chicken and waffles, we do French toast with it. My hot cakes, my stewed sausage, and tomato omelet.
It’s things like that where you’re stepping back into your roots, but you’re trying to bring it forward in a new fashion. That’s my ode to my heritage—not forgetting those recipes or those flavors, but trying to take them and let them transcend through time into the present, so that we can still get that wonderful flavor, but just take it to another level.
If you had to choose just a few, what are some of your personal favorite recipes in the book?
I mean, it’s crazy, because that’s kind of like asking who are your favorite children?
Are there any that are the most personal to you, or have deep connections to your roots?
Well, I’ll tell you this, they’re all very personal. And I’m going to tell you why they’re
personal, because these aren’t dishes that were just made for the book. These are actual dishes that I fed [my clients]. These are actual dishes that I’ve prepared for people that I care about. With that being said, each one of them, when I was preparing it, was special. But of course, if you look through the book, you can tell that I love seafood. So, one of the dishes that I really care for is the king crab and avocado toast. I also love the seared scallops with asparagus salad and sweet pea pesto. And, speaking of pesto, I have a bucatini with shrimp and collard green pesto as well, which is really good. And then, for dessert, the lemon blueberry cake, which is good because that’s the cake that I made for my son one year. The vanilla bean lemon donuts, which are amazing as well. So that’s just a few, but there are so many more that I really care for as well.
Which recipes from the book would you recommend a beginner chef start with?
I would say the breakfast items, like, of course, the French toast. The French toast waffles, which are basically French toast that you just put inside of a waffle iron, just to give it a different texture. Breakfast items are always the easiest for me. So, I would always say, start off with breakfast items first and then work your way throughout.
But one thing that I really tried to make sure of was that all of the recipes are well written, so that people will be able to comprehend the meaning of each ingredient that’s going into it, and the way the method is written as well. And that’s why I’ve even gone as far as putting a glossary in the back of the book, in case there are any ingredients that people might not be able to understand. And methodology, you know, what is blanching? What is poaching? It helps to educate you as you go through the book.
‘LOVE’ includes curated playlists made by you, and you touch on the influence music has had on your career as well. Can you tell us a bit more about this? What are some of your favorite songs to cook to?
It really depends upon the mood. But one of the greatest things about this book is, of course, besides the pictures of family and the recipes, is the inclusion of QR codes. I just think that’s such an innovative move to be able to put QR codes into the cookbook. And what those QR codes do is, when you hit on them, you can actually see me speaking the same way
“It’s not about money. that I feel, and those that I cook for can feel it in the food they taste.”
– CHEF RICHARD INGRAHAM
you and I are talking now. If you go to some of the dishes and hit the QR codes, it will take you straight to my Instagram, and you will be able to see me making the lobster risotto, putting the final touches of butter on top and things like that. But as far as the playlist itself, it comes from a story of my father and I, and how he would listen to smooth jazz on Sundays. I hated it because that wasn’t my style of music at the time. When he would walk out of the room, I would change it, and then we would play this li le game until he was tired of it and would have to tell me to stop. But one Sunday, I actually sat in his chair and listened to the music, and it changed me. The way that the music sounded changed me, and I found myself later on—once I became an adult and a chef and started cooking—turning to music when I cooked. It just made me feel good, and it eased any nervousness that I may have had of trying a new recipe. It all went away with the infusion of music. So, I thought, why not create a QR code that would lead to Spotify so people would be able to listen to the same music that I listen to while they try these recipes as well? It’s just a truly interactive book, and I love it. Some of the songs that I love...well I can tell you some of the artists, because I love too many songs. Barry White, Quincy Jones, The Notorious B.I.G., Erykah Badu, just to name a few of them.
What do you hope is the main thing readers take away from your book? Not only ‘here I am as a personal chef, sharing with you stories of my journey and showing you my family,’ but also what food does with love, and what love being inside of food looks like. This is everything that I have encompassed in this book. I often say that my tank right now is on ‘E’ because I have literally put
everything I have into this book, and I just want people to really be able to feel the power of love through food.
In your opinion, what is the most essential skill, or maybe mindset, that a beginner chef should develop?
I think a beginning chef should have no fear. Be fearless in the kitchen. Fear is what holds us back, not only in the kitchen, but in life—period. But especially the kitchen, because you’re scared that you’re going to fail and you’re going to have to start all over again with all of these ingredients. But if you love what you do, then you’re not afraid to fail, because you know that failure is only a lesson. It’s not a loss, it’s a lesson. So, cook fearlessly, because that’s what cooking is all about. It’s about expression. It’s self-expression, just like any other art form.
As someone who has reached such a high level of success, what legacy do you want to leave behind for future chefs and food lovers?
My love for my cra , and what loving your cra and being passionate about your craft can do for you. When I started out in this business, I didn’t even know that there were personal chefs or private chefs. I didn’t know what I wanted to do or where I wanted to be. I just knew I wanted to cook, and with hard work, perseverance, and the love of my craft, this is where I am, and I’m still not where I’m going to be. I’m still evolving because I’m still working hard. So, my legacy would be, ‘this is what working hard does for you.’ It gets you to a place where you never thought that you would ever be. Not looking for accolades, just looking for work and looking for the love that I put into my work, because I know everything else will follow.


Toast brunch with a variety of tasty cocktails
by mary subialka


When it comes to brunch cocktails, the traditional Mimosa or Bloody Mary can be tasty partners to the sweet and savory fare atop the table. But the usual suspects can become, well, usual. Break out of the mold and mix up some of these cocktails for your midday meal that will also complement a brunch spread— but stir things up a li le.


Bee’s Knees: For a traditional version, stir 2 barspoons honey in 1¼ ounces white and 1¼ ounces Navy rum until dissolved. Add 1 ounce orange juice, ½ ounce milk, and ½ ounce heavy cream. Shake with ice and strain into a chilled cocktail glass. Garnish with an orange twist. For a variation, mix 2 ounces London dry gin with 3 barspoons honey and ¾ ounce lemon juice.


Espresso Martini (pictured): In a cocktail shaker over ice, combine 2 ounces vodka, 1 ounce co ee liqueur (such as Kahlúa), 1 ounce espresso or cold brew concentrate, and ½ ounce simple syrup. Cover and shake vigorously, then strain into a coupe glass. Garnish with three co ee beans, if desired, which represent health, wealth, and happiness. Variations: If you don’t like sugar in your co ee, skip the simple syrup. If you prefer a creamier version, add ½ ounce Baileys Irish Cream.


Hugo Spritz: Add ½ ounce St. Germain elder ower liqueur and 1 mint sprig into a wine glass. Gently muddle and let sit for 3 minutes. Add ice, 4 ounces Prosecco, and 1 ounce soda water and stir gently to combine. Garnish with a mint sprig and a lemon wheel.


Kir Royale: Pour ½ ounce crème de cassis liqueur (which is black currant avored) into a wine glass or ute and top with sparkling wine.


Tequila Sunrise: Shake 2 ounces tequila and 3 ounces orange juice with ice and strain into an ice- lled Collins glass. Pour ¾ ounce grenadine in a circle around the surface of the drink, and it will sink, creating a “sunrise” e ect.