4.Performing Actions
Events will often require one or more Soldiers to attempt an action (eg: dive for cover, carry a wounded comrade, not panic in a tense situation, intimidate enemy soldiers into surrendering, shoot a rifle, fight with club or bayonet, throw a grenade). When this is required, each Soldier attempting the action rolls a number of D6 dice equal to the Stat appropriate for that action. Each die is counted separately (dice are not added together.)
Each 5 or 6 rolled is one “success.”
Actions have a “difficulty” that represents how hard the action is to perform. In order to be successful at an action, a minimum number of successes must be rolled.
The more difficult the action, the higher this number will be. There are three difficulty levels:
Average ............... requires one success
Difficult ............... requires two successes
Very Difficult requires three successes
EXAMPLE: The Soldier must dive for cover, a Difficult Speed action. The Soldier has Speed 3, and rolls three D6 dice, the results being 2, 5 and 6. Since two of the dice have rolled either a 5 or a 6, the action is successful.
When a Soldier is wounded, he becomes less effective at performing actions. The loss of effectiveness depends upon the wound location, the severity of the wound, and the action being attempted. Due to wounds and/or being unarmed, a Soldier may have zero dice in a Stat; if forced to attempt an action using that Stat, the action automatically fails (see “9. Wounds”).
4.1 Botches
If none of the regular dice produce a success (or if a Soldier has zero dice in that Stat), roll the botch die. If the botch die rolls a 1, the result is a botch (instead of just a failure) and the worst possible result will occur. The Event will give details of what happens next.
Luck rolls may not be used to reroll the botch die.
4.2 Unarmed Penalty
Soldiers equipped with an appropriate weapon (a club, or a rifle with bayonet) can attempt Fight actions without any penalties. Soldiers without any of these weapons are “unarmed” for the purposes of attempting Fight actions, and roll one fewer dice when fighting.
5.Luck
Luck represents a number of rerolls that can be used to (possibly) save the Soldier from a failure when performing an action. Each point of Luck provides a reroll of one or more dice.
After rolling to perform an action, the player may, if desired, spend a point of Luck to reroll any dice that did not roll a success. Luck points may be spent one after another, allowing for several attempts at the same action.
The player should imagine a scenario that “explains” why the bad result didn’t happen. For example, a Soldier who was shot in the chest finds that a Bible in his breast pocket stopped the bullet.
EXAMPLE 1: A Soldier with Speed 3 tries to dive for cover as a machine gun opens up, a Difficult Speed action). The player rolls three D6 dice, producing results of 2, 2 and 6. The Soldier fails the action, since he needed two successes. Without any rerolls, he will suffer a wound. The Soldier has Luck 4 and hasn’t spent any Luck yet. The player spends a Luck to reroll the two dice that were too low, with the new result being a 3 and a 1. Neither is a success. Another Luck is spent, and the two dice are again rerolled. This time, the reroll result is a 5 and a 4. Because the Soldier now has a total of two successes, he succeeds in diving for cover. At the end of the action, the Soldier has two Luck remaining.
EXAMPLE 2: A Soldier with Throw 3 tries to throw a grenade, an Average Throw action. He rolls three D6 dice, producing results of 3, 3 and 4, a failure. If the player does not spend any Luck, a D6 would be rolled to see if a botch occurs. The consequences for grenades botches can be quite nasty – including the Soldier dropping the grenade at his feet and suffering a wound, so the player decides to spend Luck. The Soldier has Luck 3 and hasn’t spent any Luck yet. The player spends a point of Luck and rerolls all three dice, getting a 5, 2 and 1. The single success is enough and the grenade sails toward its target. At the end of the action, the Soldier has two Luck remaining.
Luck can also be used to alter the outcomes of certain Events. Luck replenishes at the start of each game.
A Soldier’s total Luck may increase between games, as a result of campaign play (see “18. Campaign Play”). Luck cannot increase beyond 10.
6.Equipment
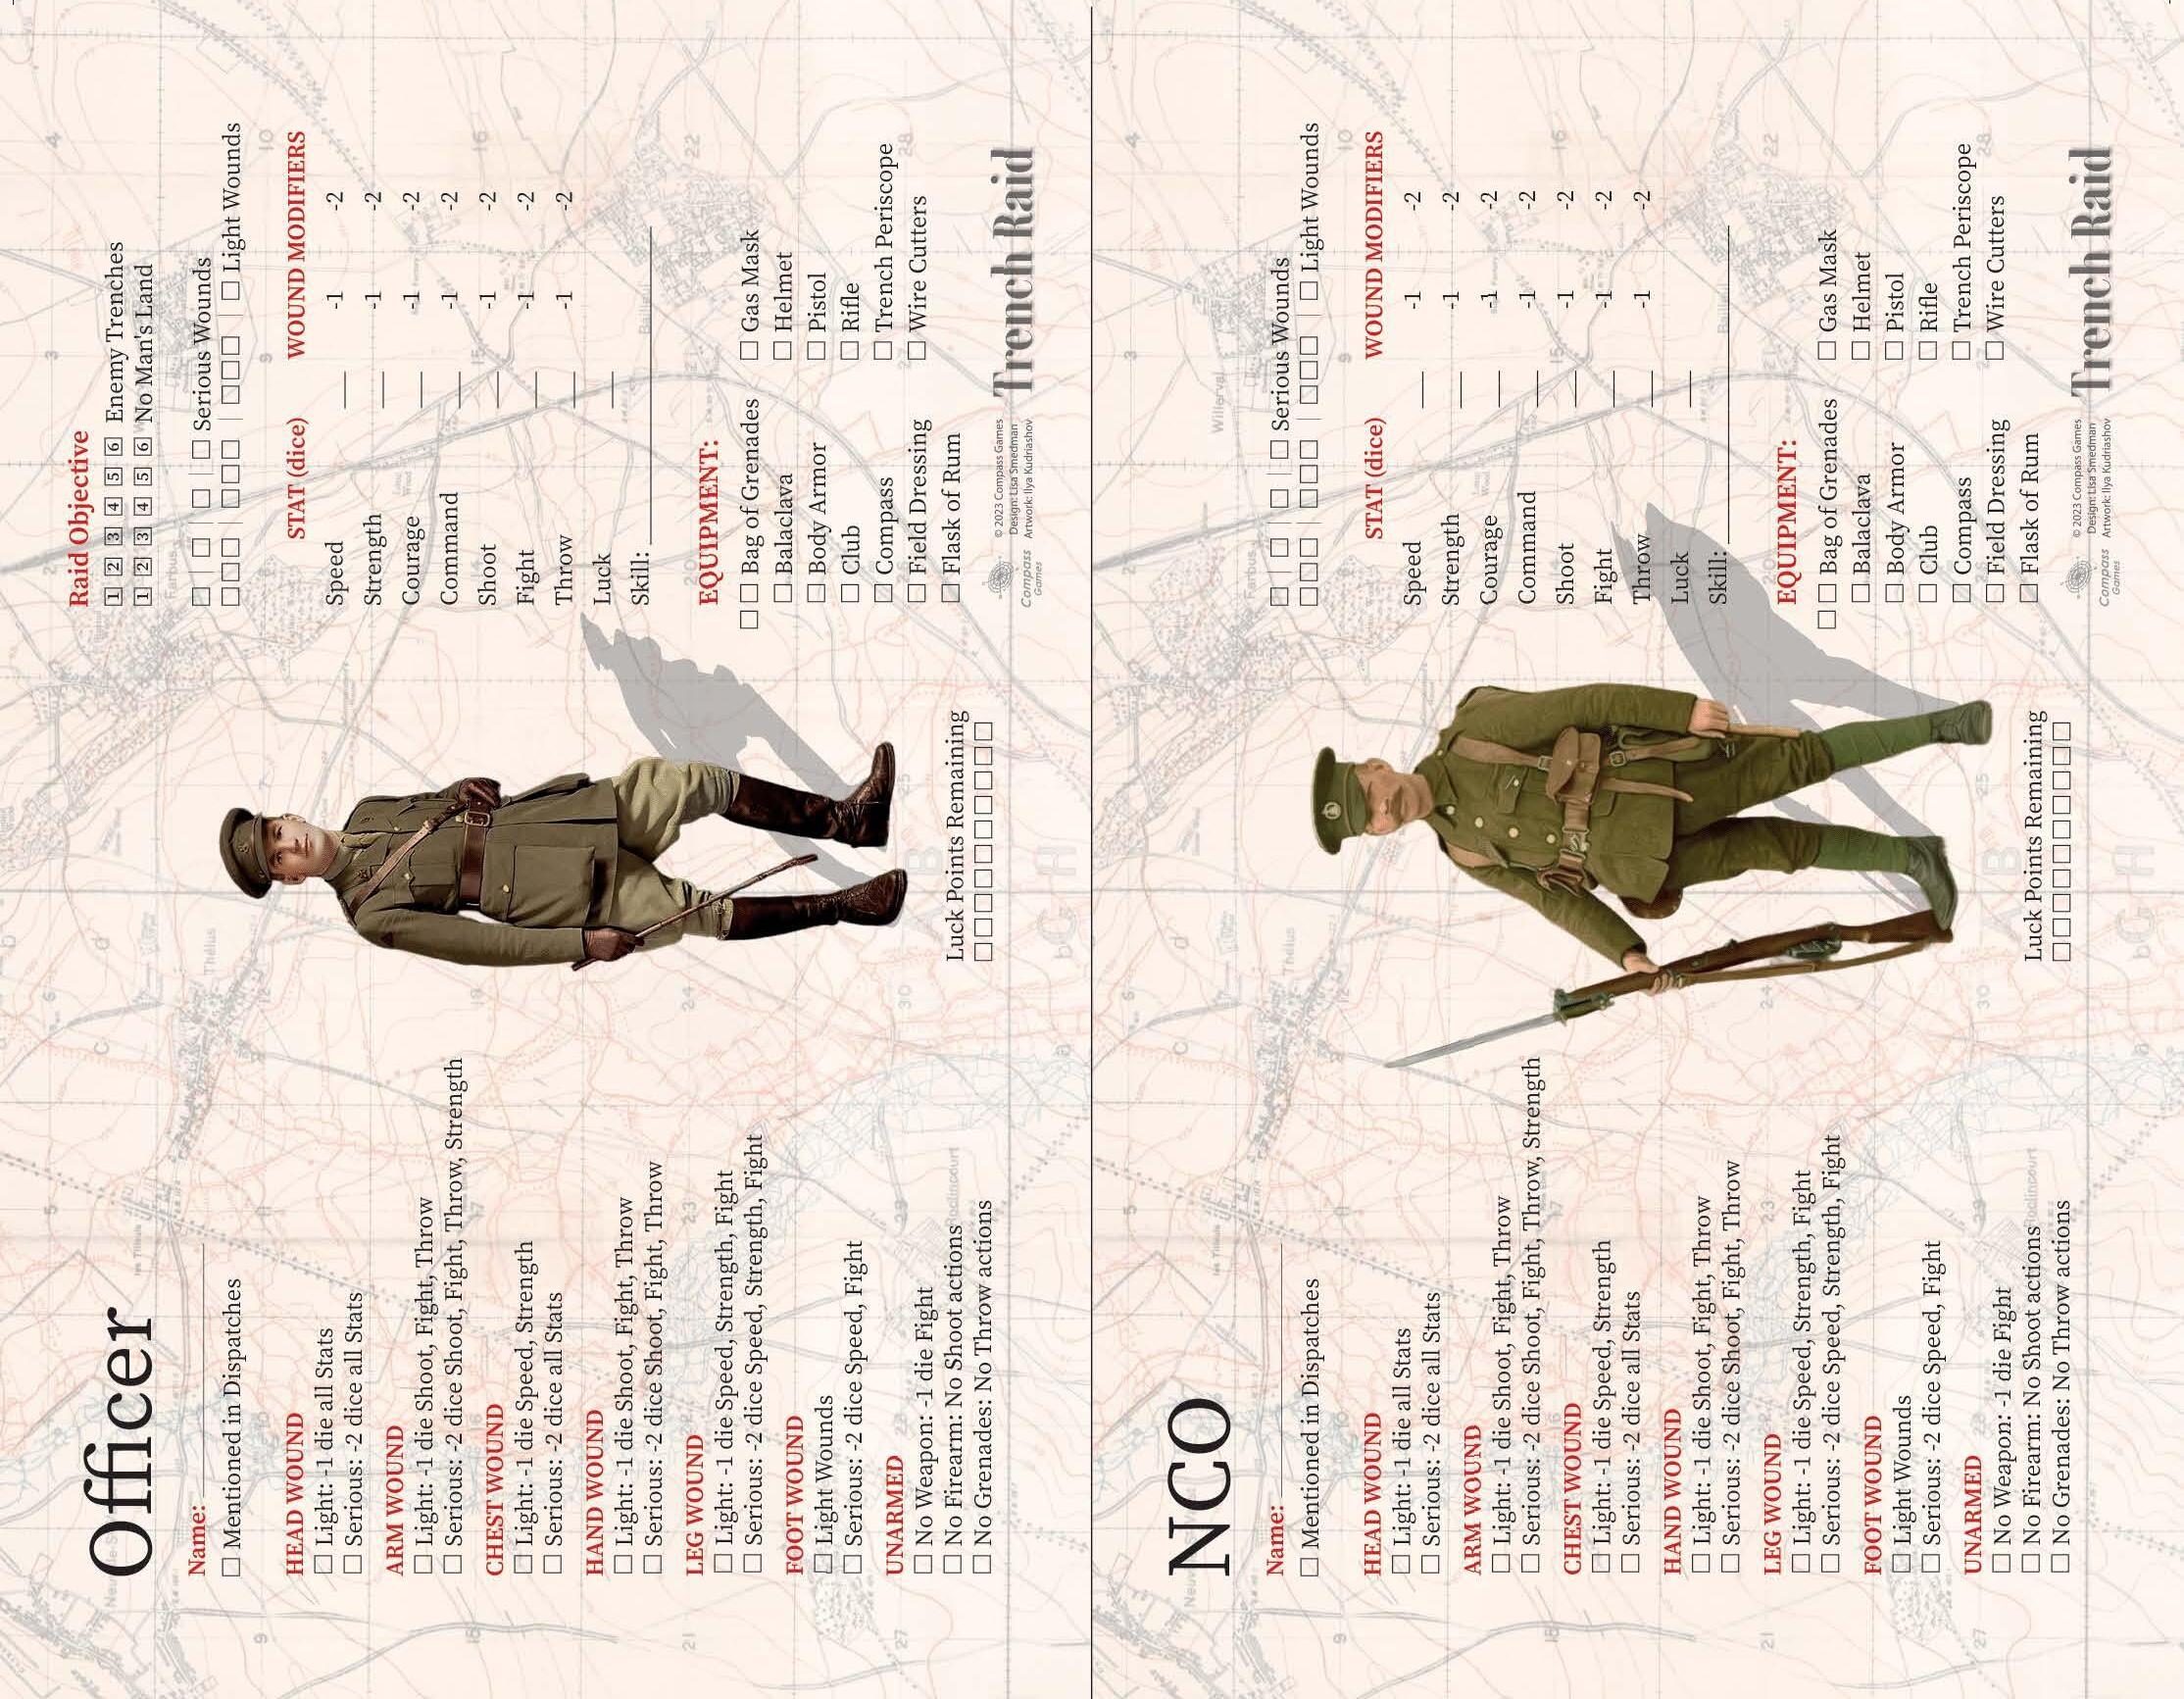
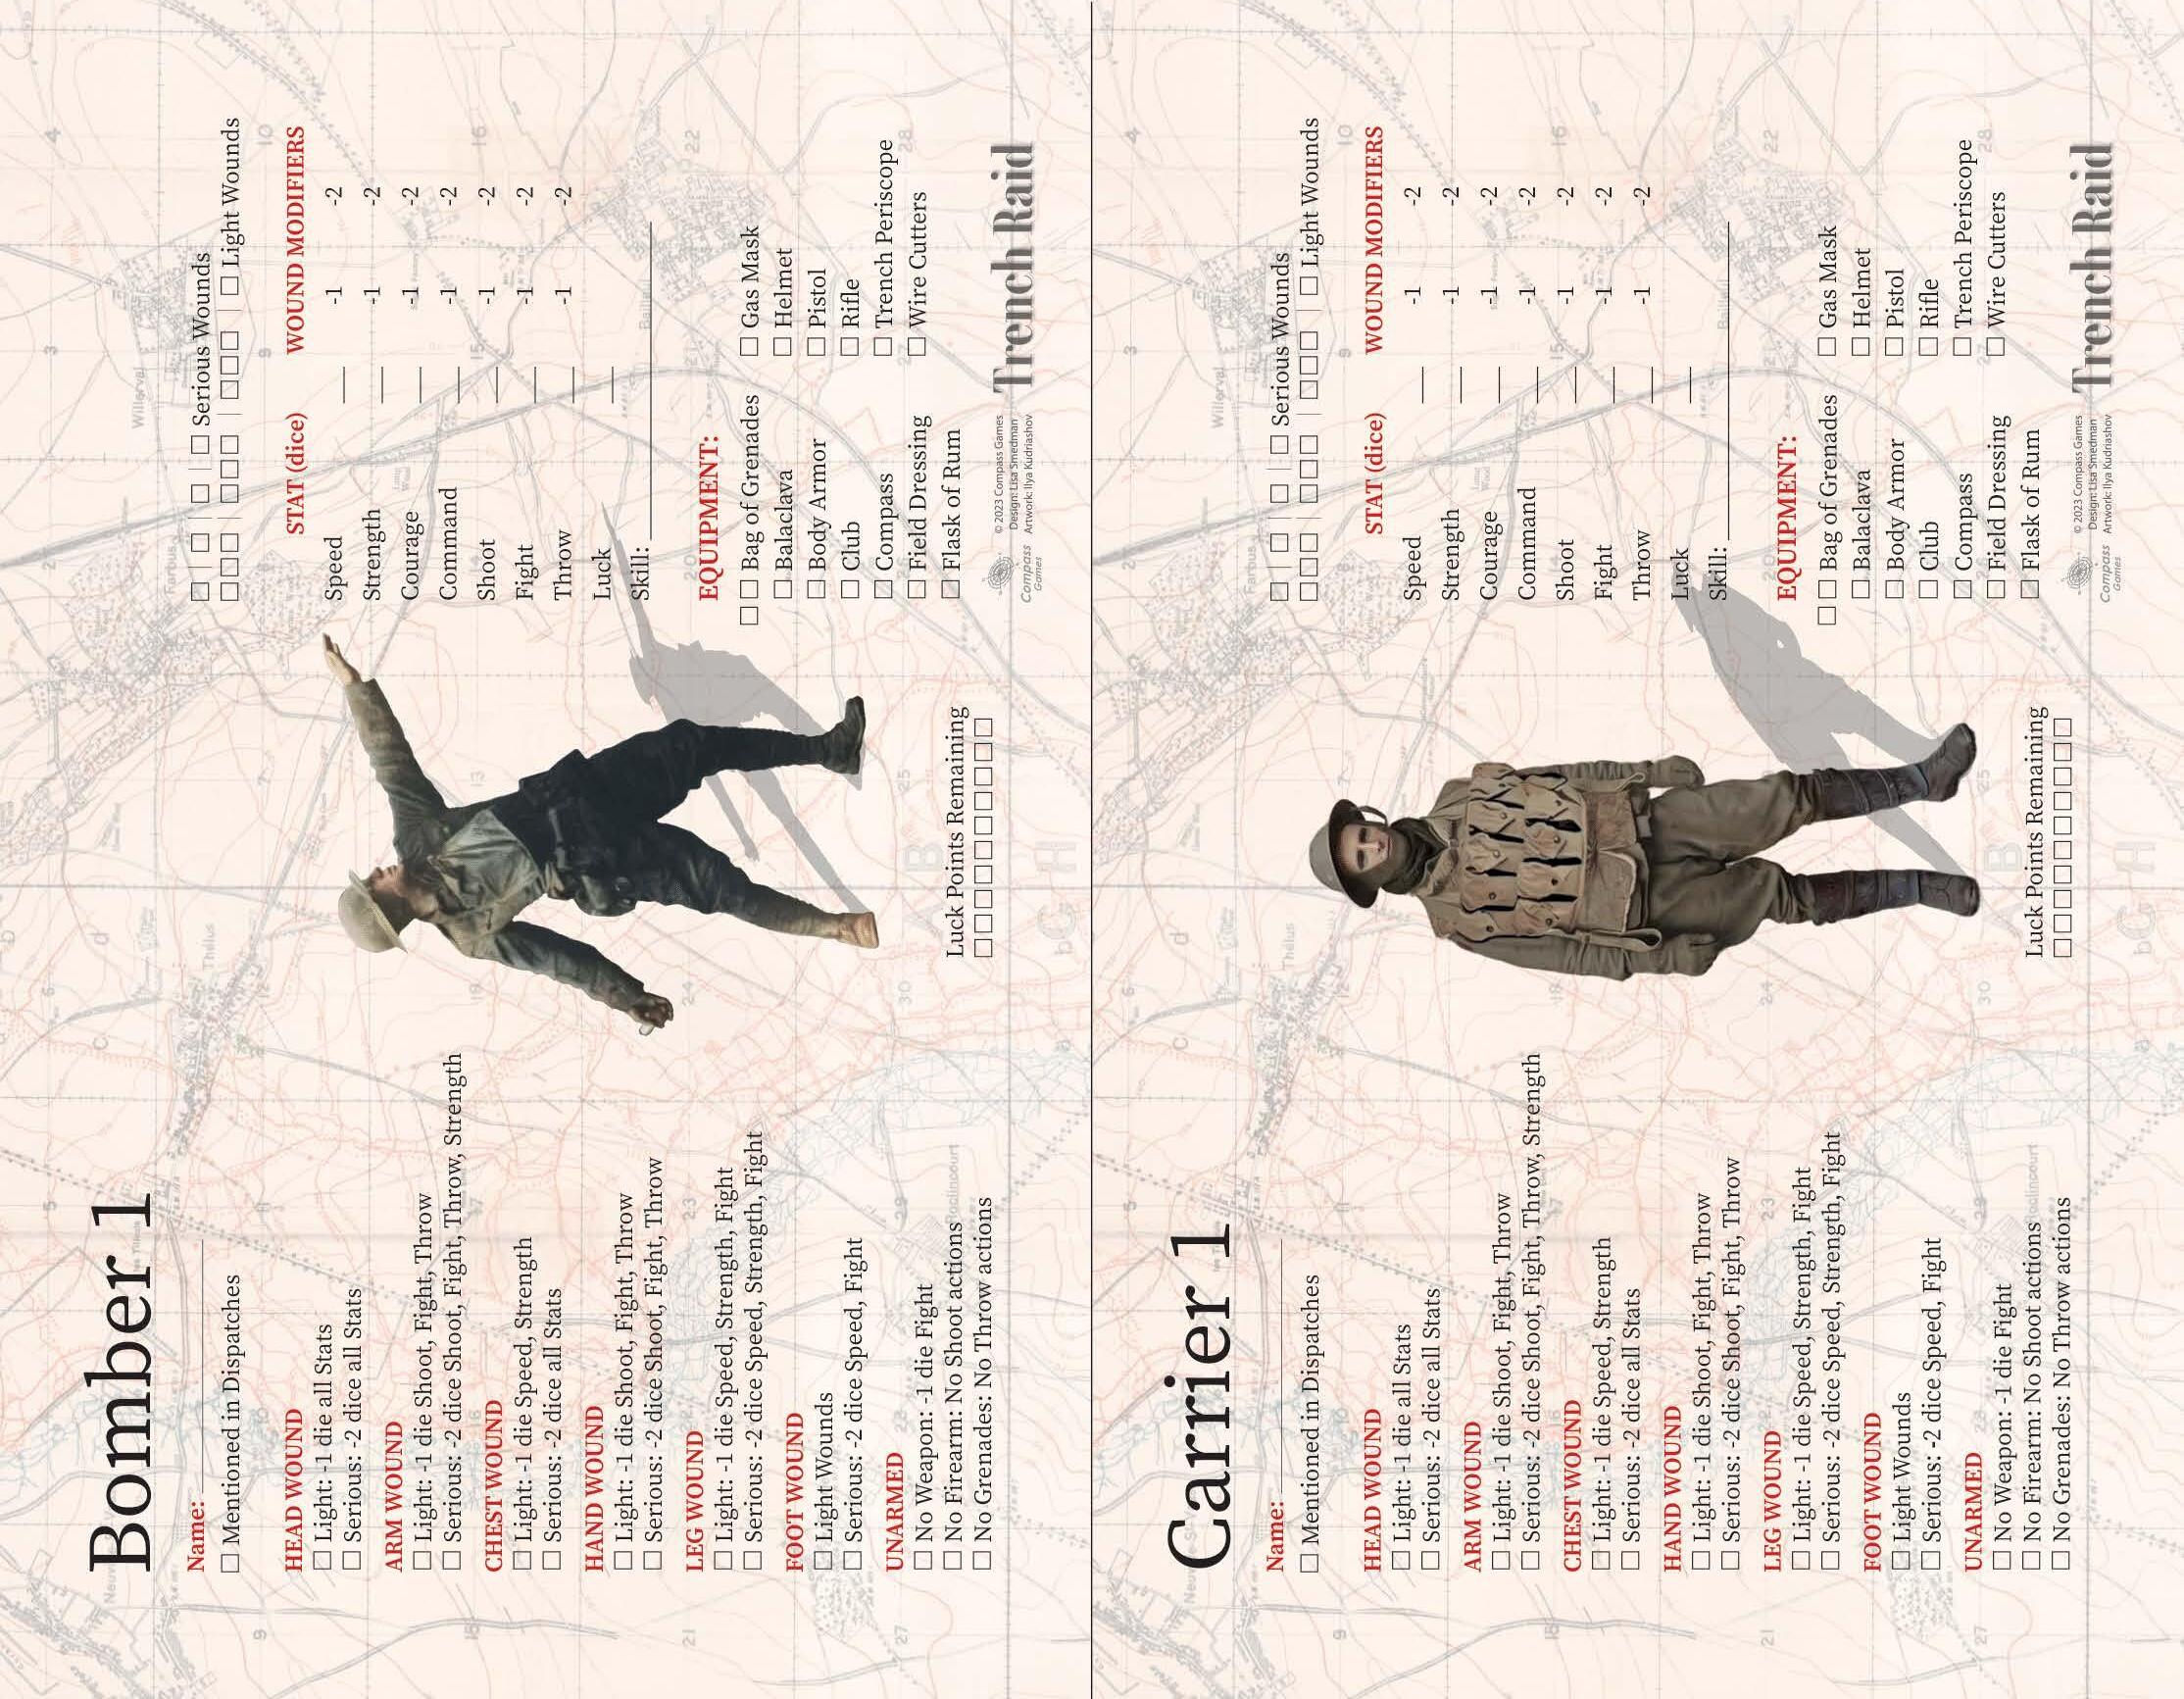
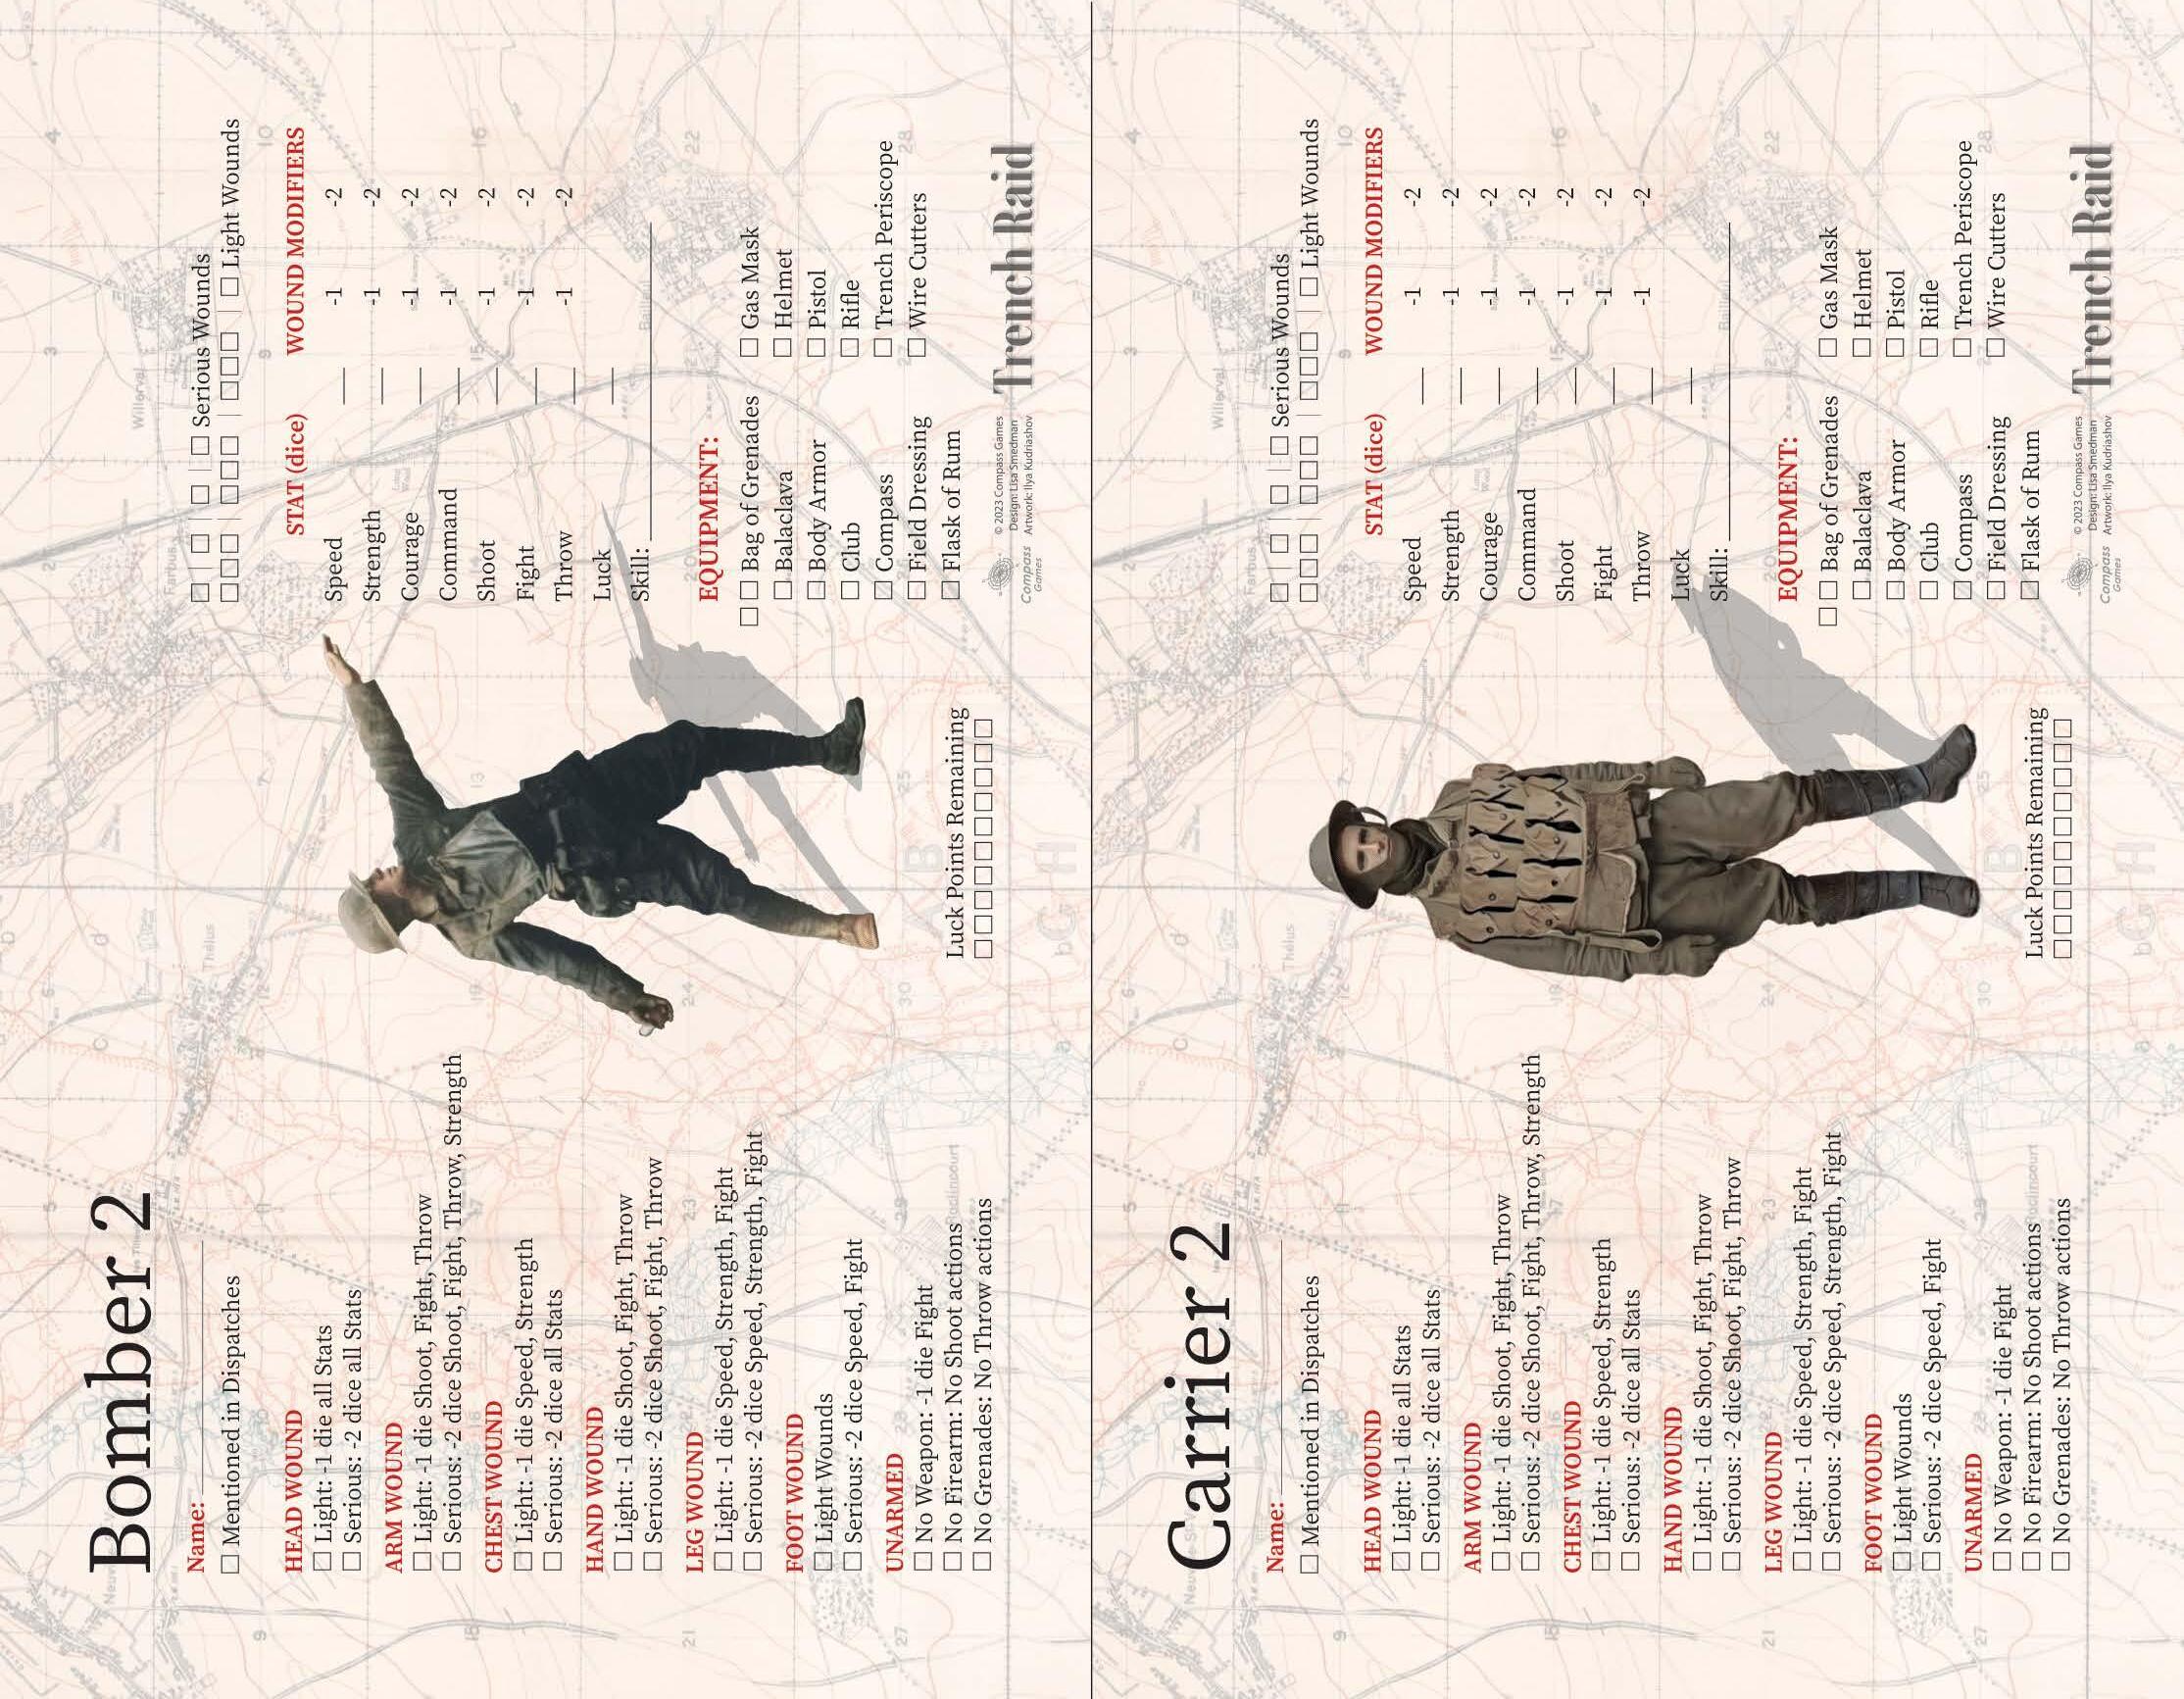
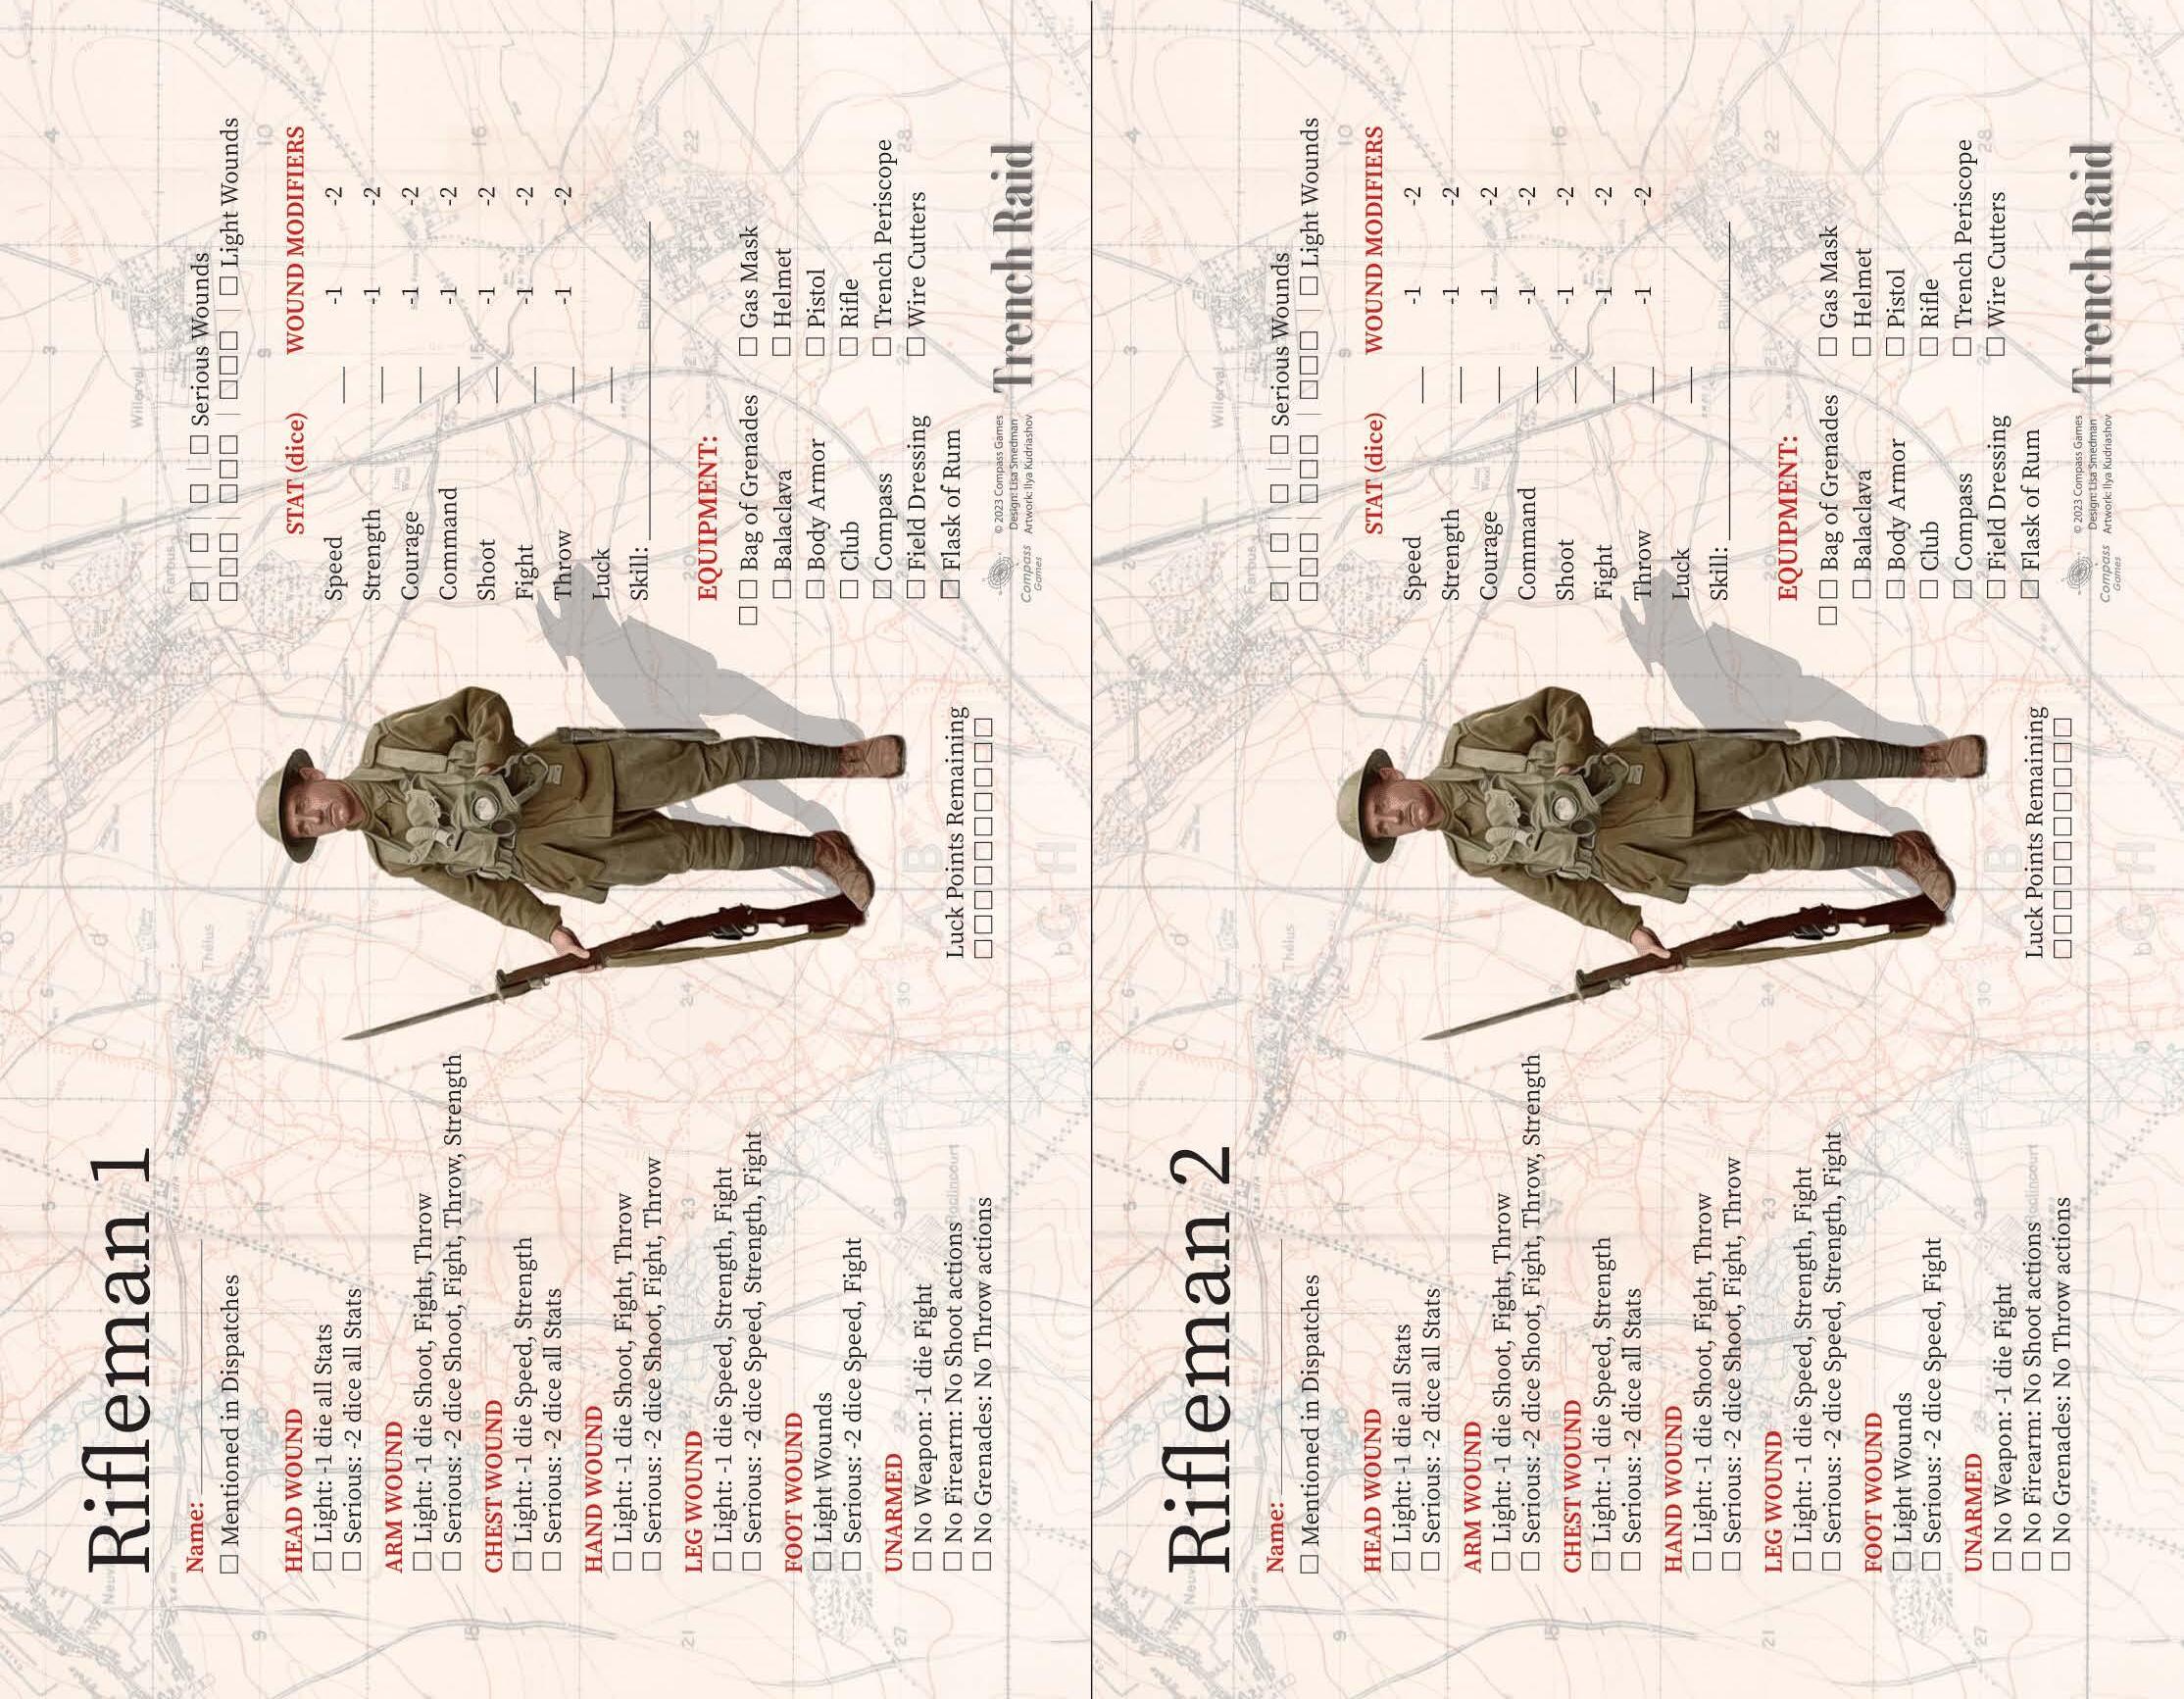
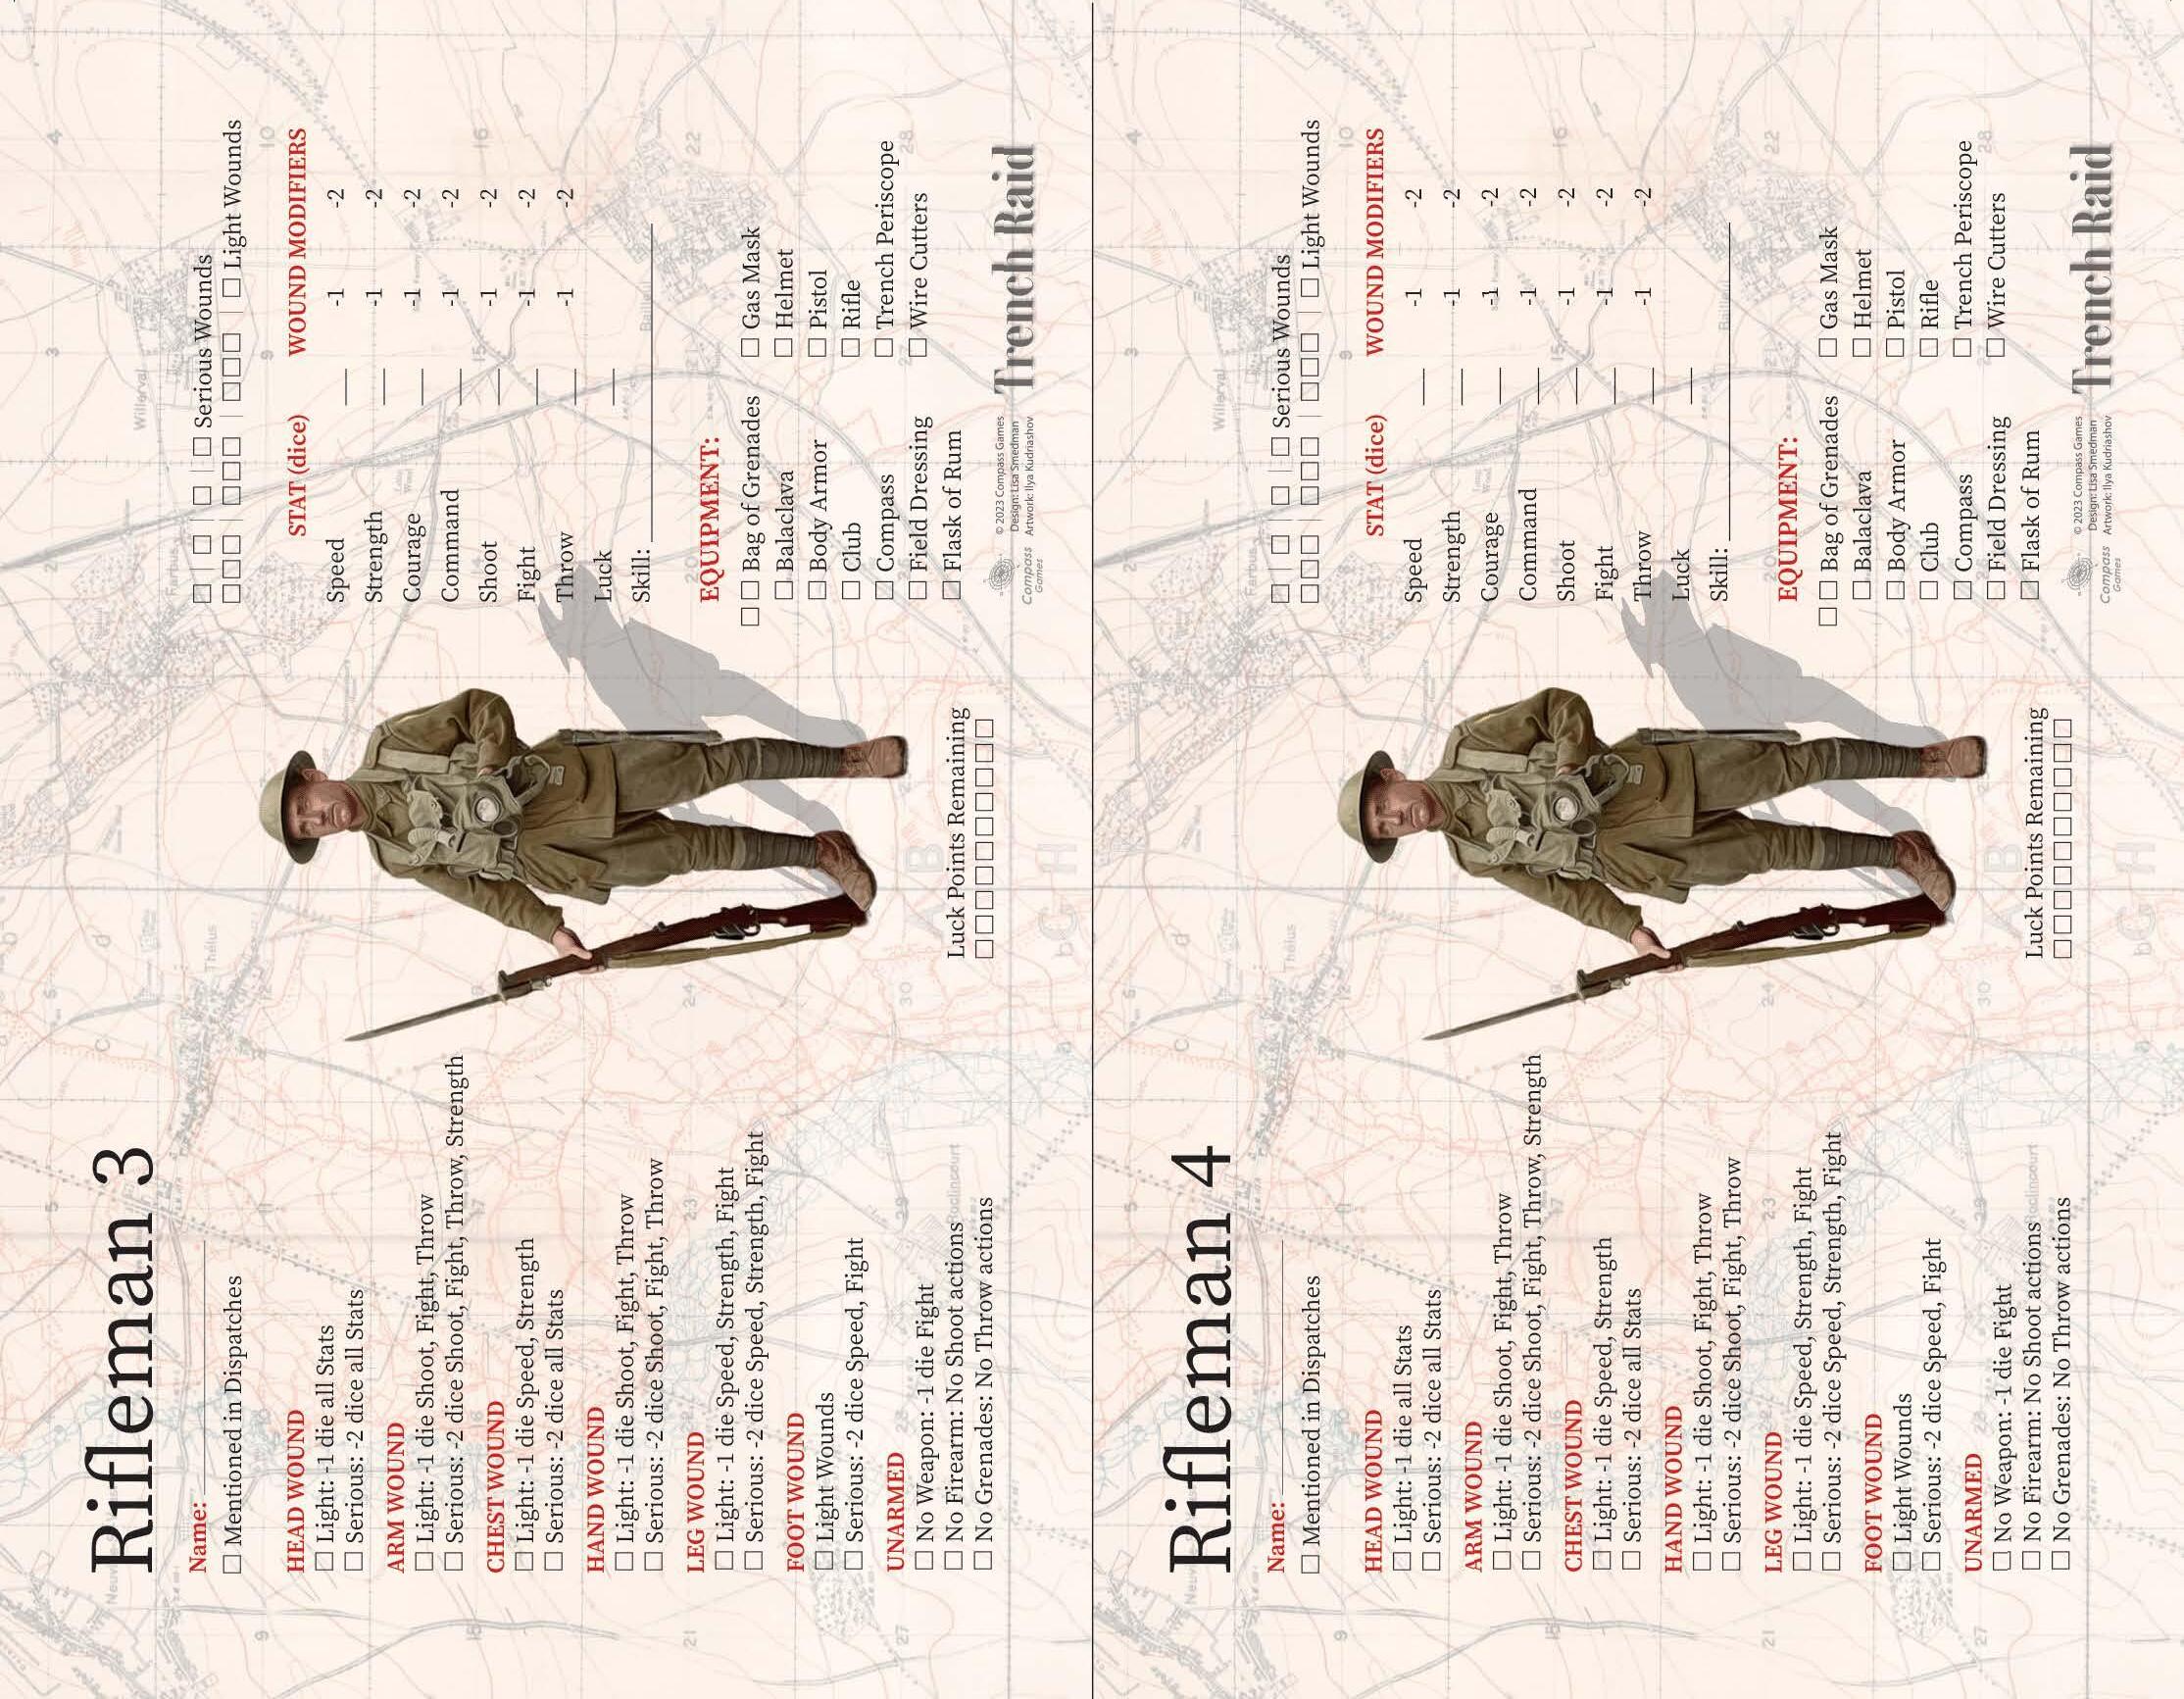
Each Soldier may carry up to five pieces of Equipment. At the start of a game, the player chooses what Equipment will be taken along on the raid, and records it on the Soldier Cards.
Certain restrictions apply, when equipping Soldiers at the start of the game:
Officer – Must start with a pistol. May not start with a rifle or grenades.
NCO – Must start with a rifle or pistol. No restrictions on other equipment.
Rifleman – Must start with a rifle. May not start with grenades or a pistol.
Bomber – Must start with grenades. May not start with a rifle or a pistol.
Bomb Carrier – Must start with grenades. May not start with a rifle or a pistol.
It is recommended that Soldiers who do not have rifles be equipped with a club. Without a rifle or club, the Soldier is subject to the unarmed penalty when performing a Fight action.
Once the Soldiers have set out on their trench raid (after the raiding party has moved onto the first No Man’s Land hex and has resolved any associated Event), equipment may be swapped back and forth between Soldiers however the player wishes, during the portion of the turn where Equipment is redistributed, as long as the maximum number of pieces of Equipment permitted per Soldier is not exceeded.
Soldiers may also choose one Special Skill (see “7. Special Skills”) to take the place of one piece of equipment. These skills may not be transferred between Soldiers.
Equipment that is worn (Balaclava, Body Armor, Helmet) is assumed to always be worn by the Soldier who has it. This equipment may be discarded or given to another Soldier (who immediately puts it on) but is never just carried. It is either on or gone.
6.1 Bag of Grenades
At the start of the game, a Soldier may be equipped with up to two bags of grenades. Grenades are normally thrown by Bombers, but any Soldier can attempt to throw a grenade.
On a botched Throw result, roll a D6 die:
1-3: The thrower drops the grenade at his feet and suffers 3 wounds.
4-6: The thrower drops the grenade at the feet of another member of the raiding party, either the man directly ahead of him, or the man directly behind him (player’s choice;
if there is no one in front or behind the thrower the empty spot may be chosen). That Soldier suffers 3 wounds.
Each time a grenade is thrown, roll the D10, together with the other dice. On a roll of 1, the grenade the Soldier just threw was the last grenade in the bag; erase it from the Soldier Card. When a Soldier has used up all of his grenades he may no longer Throw. He may replenish his supply by taking a bag of grenades from another Soldier during the portion of the turn where Equipment is redistributed. (Carriers typically pass their bags to Bombers.)
6.2 Balaclava
Trench raiders used burnt cork to blacken their faces and hands, making themselves more difficult to see in the dark. In addition, some wore a balaclava – tight fitting knitted headgear that left only the face exposed, rendering the rest of the head difficult to see in the dark.
This headgear makes the Soldier less likely to be targeted by a Sniper – but makes it tougher to get a gas mask on. A balaclava has no effect if worn with a helmet.
6.3 Body Armor
Some soldiers wore improvised armor, taking a metal plate and securing it to their chest with straps. This armor was bulky and awkward, but excellent protection against a stray bullet.
When making a Severity roll for a chest wound (except for wounds caused by gas), roll an additional die.
When attempting a Fight or Throw action, the Soldier rolls one fewer dice (eg: a Fight 4 Soldier wearing body armor rolls 3 dice). Armor can always be taken off to negate this penalty – but only during the portion of the turn where Equipment is redistributed.
6.4 Club
A club, also known as a “cosh,” enables a Soldier who does not have a rifle to attempt Fight actions without the -1 die unarmed penalty. It’s an improvised but effective weapon.
6.5 Compass
A compass can negate the “Lost in the Dark” Event; on a D6 roll of 2 or higher, the raiders do not become lost. On a 1, the compass is broken and must be erased from the Soldier Card.
6.6 Field Dressing
A field dressing (roll of bandages) can be used to mitigate the effects of a Serious Wound that might otherwise incapacitate a Soldier. It may even be taken from the Soldier who was carrying the field dressing, as long as there is another Soldier who is not himself incapacitated to do the bandaging.
When making a roll to see if a Soldier is incapacitated by a Serious Wound, roll two D6 dice. The higher of the two results is used. Once used, field dressing is gone from the game; erase it from the card of the Soldier who was carrying it.
6.7 Flask of Rum
Can be used to add +1 die to a Courage action either before or after seeing the result of a roll. Once used, it is consumed; the flask is empty.
6.8 Gas Mask
When not in use, gas masks were carried in a bag; when needed, they were pulled over the face. Getting a gas mask on in time could save a soldier’s life, but it was difficult to see or be heard when wearing one.
6.9
Helmet
Soldiers going out on trench raids normally wore black woollen caps, favoring camouflage and ease of movement over protection.
When making a Severity roll for a head wound, roll one additional die. Helmets also affect the “Star Shell” Event, and make getting a gas mask on more difficult.
6.10 Pistol
A pistol enables the Soldier to attempt Shoot actions. Soldiers are assumed to always have enough ammunition for their pistols.
6.11 Rifle
A rifle enables the Soldier to attempt Shoot actions. Soldiers are assumed to always have enough ammunition for their rifles. Each rifle has a bayonet, and thus can also be used to attempt Fight actions.
6.12 Trench Periscope
Trench periscopes were used to see over the top of a trench. Using a periscope, the raiders could peer into adjacent Enemy Trench hexes to learn what they hold before choosing whether to enter it. A trench periscope may also be used in the final hex of No Man’s Land (a hex adjacent to the Enemy Trench Line) to see what is inside adjacent enemy trenches.
6.13 Wire Cutters
Wire Cutters are used to cut barbed wire, an action that requires a successful Average Strength action (see “11.1 Barbed Wire” in “11. Mapping No Man’s Land”). A failure result means the wire is still intact. A botch result means the wire is still intact, and the wire cutters have broken and become useless; erase them from the Soldier Card.
7.Special Skills
Each soldier may know one Special Skill. This is recorded on the Soldier Card and takes up one Equipment slot. (A Soldier with a Special Skill may carry a maximum of four pieces of Equipment.)
z Speaks German (+1 die to Command actions vs. enemy soldiers and dogs)
z Medic (+1 die when checking for Incapacitation, if a field dressing is available)
z Runner (+1 die to Speed actions)
z Strongman (+1 die to Strength actions)
z Religious (+1 die to Courage actions)
z Politician (+1 die to Command actions)
z Marksman (+1 dice to Shoot actions)
z Pugilist (+1 die to Fight actions)
z Cricket Player (+1 die to Throw actions)
8.Objectives
At the start of the game, the player rolls to determine the Objective the raiding party is trying to carry out. Some Objectives only require the party to venture into No Man’s Land, while others require them to enter enemy trench lines. Roll a D6 to determine where the Objective lies.
1-3: Enemy Trenches
4-6: No Man’s Land
8.1 No Man’s Land Objectives:
Roll a D6 to determine the specific Objective.
1. Cut a gap in the enemy wire.
Special Rules: The barbed wire that needs to be cut is directly in front of the enemy trenches; all hexes immediately in front of the enemy trench line are filled with barbed wire. The raiders must advance into any of these hexes and successfully cut the wire to complete this objective.
2. Lay white guide tapes up to the enemy trenches, in preparation for an upcoming attack.
Special Rules: The raiding party must advance in a straight line from their jumping off point all the way to the enemy trench line (to the last hex of No Man’s Land) to complete this objective. If any barbed wire is encountered along the route, it must be cut. The raiders may then return by any route they wish.
3. Rescue a wounded pilot who crash landed in No Man’s Land. The wounded pilot must be carried back to the trench lines, and must still be alive in order for the objective to be completed successfully. He was reported by another patrol to be sheltering in a ruined building.
Special Rules: If a “Wounded Men” Event occurs, the pilot will automatically be among the wounded. Otherwise, if the raiding party enters a Ruined Building hex that is at least 5 hexes away from their jumping off point, they find the pilot.
4. Destroy an enemy listening post.
Special Rules: If a “Listening Post” Event occurs, that is the listening post the raiders were sent out to destroy.
Otherwise, as long as the raiding party is within four hexes of the enemy trench lines, roll a D6 at the start of the mapping phase of each turn. On a roll of 5-6, the listening post is in in a blank hex of the player’s choosing adjacent to the hex the raiders occupy.
5. Bring back the body of one of your dead officers who fell in no man’s land. Valuable documents must not fall into enemy hands!
Special Rules: If a “Wounded” Event occurs, the officer isn’t dead – he’s just wounded! He may either be carried back to the trench lines (see “9.4 Carrying Wounded Back”) –or the raiding party can just leave him there, and bring back the documents.
Otherwise, as long as the raiding party is five or more hexes away from their jumping off point, each time the raiders enter a hex for the first time, roll the D10. On a roll of 10, the body of the officer is found in that hex. The raiding party need only bring back the documents.
6. Take out an enemy sniper.
Special Rules: The enemy sniper is somewhere within No Man’s Land, likely disguised as a tree. If a “Sniper” Event occurs, this is the sniper the raiders were sent out to eliminate.
Otherwise, if the raiding party enters a Shattered Forest hex that is at least 5 hexes away from their jumping off point, they find the sniper; immediately play through the “Sniper” Event, rather than rolling to see if an Event occurs.
The Objective is completed whether the sniper is killed, or flees.
8.2 Enemy Trenches Objectives:
1. Destroy an enemy strong point.
Special Rules: Roll a D6 to determine which type of strong point the raiding party has been sent out to neutralize. As soon as the raiders clear a hex of this type, the objective is complete.
1-2: Machine Gun Nest
3-4: Mortar Emplacement
5-6: Pillbox
2. The brass have decided the enemy is getting a little too comfortable in their lines, and needs softening up. You are to bomb an enemy dugout.
Special Rules: As soon as the raiders clear a hex of this type, the objective is complete.
3. Intelligence reports indicate that a company Headquarters is located in the enemy trenches opposite your position. You are to seize maps and other documents from this headquarters.
As soon as the raiders clear any hex that contains a Headquarters, the objective is complete.
4. Capture an officer for interrogation and bring him back alive to your own trenches.
Special Rules: This objective can be fulfilled if any of the following occur while within enemy trench lines:
z If the raiders clear a Headquarters and capture the officer.
z If the raiding party sends a man into a Dugout and captures an officer.
z If the raiding party clears a Field Dressing Station and captures an officer.
This Objective can also be fulfilled within No Man’s Land, if the “Wounded Men” Event comes into play and one of the wounded is an enemy officer.
5. Scout the enemy trenches to see if poison gas cylinders have been brought up to the front line. The cylinders will be within the Front Trench line, if they are present.
Special Rules: To complete this Objective, the raiding party must explore the 13 hexes (1504–1516) of the enemy’s Front Trench that are immediately opposite their jumping off point. The raiders must enter and clear the six hexes to the left and right of the enemy Front Trench hex that is immediately in line with their jumping off point.
6. Collect shoulder straps and ID disks from dead enemy soldiers to identify enemy units.
Special Rules: This objective can be completed on any enemy trench hex in which a battle takes place, as long as the raiding party has performed at least one successful Fight or Shoot action. It may not be performed in No Man’s Land, since the corpses there might be months old, and thus from units no longer at the front lines.
9. Wounds
A failure or botch result, for certain actions, will cause the Soldier to suffer one or more wounds. When this happens, roll two D6 dice to determine where the Soldier was wounded. The location will in turn dictate how many dice are used to determine how severe the wound is.
Next, roll either 1, 2, 3 or 4 D6 dice (as determined by the table above) and use the die that produces the highest result (eg: three D6 dice are rolled, with the results being 2, 3, and 5 – the “5” result is used). This will determine how severe the wound is.
1 Dead * out of play
2 Serious Wound -2 dice on certain Stats
3–5 Light Wound -1 die on certain Stats
6 Just a Scratch no effect
* If the Location was “hand” or “foot,” a Dead result is instead a Serious Wound.
Some Equipment can reduce the chances of a Soldier taking a wound, allowing the Soldier to roll an additional die when determining severity (see “6.3 Body Armor” and “6.9 Helmet” in the “6. Equipment” section).
With some Events, a failed or botched action automatically results in a certain level of wound – or even certain death. The Event will specify whether this is the case.
9.1 Wounds and Actions
Wounds reduce a Soldier’s ability to perform actions. Wounded Soldiers attempting actions roll 1 or 2 fewer dice, depending upon the wound location.
The table below shows which actions are affected. This information is repeated on the Soldier Cards. Circle either the “-1” or “-2” next to the affected Stats on that Soldier’s card.
Head all Stats all Stats
Hand Shoot, Fight, Throw Shoot, Fight, Throw
Arm Shoot, Fight, Throw Shoot, Fight, Throw, Strength
Chest Speed, Strength all Stats
Leg Speed, Strength, Fight Speed, Strength, Fight
Foot Speed Speed, Fight
Always use the highest current penalty applicable to the action being performed.
Example: a Soldier with Fight 4 has a Light Wound to the hand (-1 die) and a Serious Wound to the foot (-2 dice) and is attempting a Fight action. The higher penalty is the one imposed: the Soldier rolls 2 fewer dice. The soldier would thus roll 2 dice (Fight 4 minus 2 = 2 dice rolled.)
If a subsequent wound would impose the same level of penalty, no adjustment is made.
Example: A Soldier with a Light Wound to the hand suffers a penalty of -1 die when trying to Throw. If he suffers a Light Wound to the arm, the second -1 penalty to Throw doesn’t stack onto the first; he is still at a -1 penalty.
Penalties imposed by equipment (or for attempting to Fight with the “unarmed” penalty) do stack on top of penalties for wounds, and may reduce the number of dice rolled still more.
Sometimes, these penalties will result in the number of dice rolled being reduced to zero (or below). In this case, the Soldier is too wounded to even attempt the action. No dice are rolled, and the result is an automatic failure. The player should still roll to see if the failure is a botch.
9.2 Gas
Chlorine and phosgene gas affected the lungs, causing the Soldier to choke to death. A Soldier wearing a gas mask is protected from this gas. A Soldier without a gas mask, or who can’t get his gas mask on in time, suffers either a Serious Wound to the chest (lungs) or death.
Mustard gas raised painful blisters on the skin, as well as affecting the lungs. All Soldiers – even those protected by gas masks – exposed to it suffer 1 Light Wound from mustard gas. On a botch, the Soldier is blinded and automatically incapacitated.
9.3 Incapacitation
A Soldier can only sustain so many wounds before he becomes incapacitated, unable to move or perform actions. At this point, he must either be left behind (see “17.3 Men Left Behind”) or be carried back to his own trenches by Soldiers who are not themselves incapacitated (see “9.4 Carrying Wounded Back”). Incapacitated raiders who are left behind will most likely die of their wounds or be captured by the enemy.
Multiple wounds of the same severity in the same location do not cause additional Stat penalties (a Soldier who already has a Light Wound to the arm doesn’t receive any further penalties for additional Light Wounds to the arm). But each wound taken
TRENCH RAID
must be recorded in the boxes for tracking total wounds, found on the bottom of each Soldier Card.
Check to see if a Soldier is incapacitated each time a Soldier takes a Serious Wound, and/or each time the Soldier has accumulated three Light Wounds. Roll a D6, and if the result is equal to or higher than the value below, the Soldier continues to be functional.
Total Wounds D6 Roll Required to Continue Being Functional
1st Serious Wound * or 3rd Light Wound 4+
2nd Serious Wound * or 6th Light Wound 5+
3rd Serious Wound * or 9th Light Wound 6
4th Serious Wound * or 10th Light Wound Incapacitated
Should anyone in the raiding party have a field dressing (including the wounded man), an attempt may be made to stabilize the wounded man; roll two D6 dice instead of one, and use the higher of the two results. Regardless of the outcome, the field dressing is then erased from the card of the Soldier who provided it. Only one stabilization attempt may be made per incapacitation check, no matter how many field dressings the raiders have, and there must be at least one Soldier who is not incapacitated in the raiding party.
Should the field dressing be applied by a Soldier with the Medic skill, add an additional die to the roll; use the highest result. (This die is not added if there aren’t any field dressings available –a medic needs something to work with!) Needless to say, this bonus doesn’t apply if the medic himself is incapacitated.
Once a Soldier has suffered his 4th Serious Wound or his 10th Light Wound, he is automatically incapacitated – even field dressings won’t prevent him from becoming incapacitated.
9.4 Carrying Wounded Back
When a member of the raiding party is incapacitated, or when a captured enemy who is wounded must be carried back to complete an Objective, Soldiers from the raiding party may be designated to carry that man back to the lines. The player may choose any Soldier who is not himself incapacitated to do this. A Soldier carrying a man back leaves the raiding party and is out of the game. Before they set out, they may give other Soldiers their equipment.
To see if they make it back to their own lines, the Soldier doing the carrying attempts a Strength action. The difficulty depends on how far the raiding party is from their own trenches.
Carrying Wounded Back
Distance Difficulty
1–6 hexes Automatic Success
7–12 hexes Average
13–22 hexes Difficult
On a failed roll the Soldier isn’t able to carry the wounded man all the way back to his own trenches; he is forced to abandon the wounded man in no man’s land (see “17.3 Men Left Behind”) and returns to the trenches alone.
On a botch, the man the Soldier was carrying dies before he can be carried all the way back. In addition, the Soldier doing the carrying gets lost and is treated as left behind (see “17.3 Men Left Behind”).
If the Soldier designated to bring the incapacitated man back is aided by two enemy stretcher bearers, they will carry the wounded man while the raider supervises and directs them (see “13.5 Enemy Stretcher Bearers” Event). A one-time bonus of 2 D6 dice is added to the Strength roll of the raider who is directing the bearers.
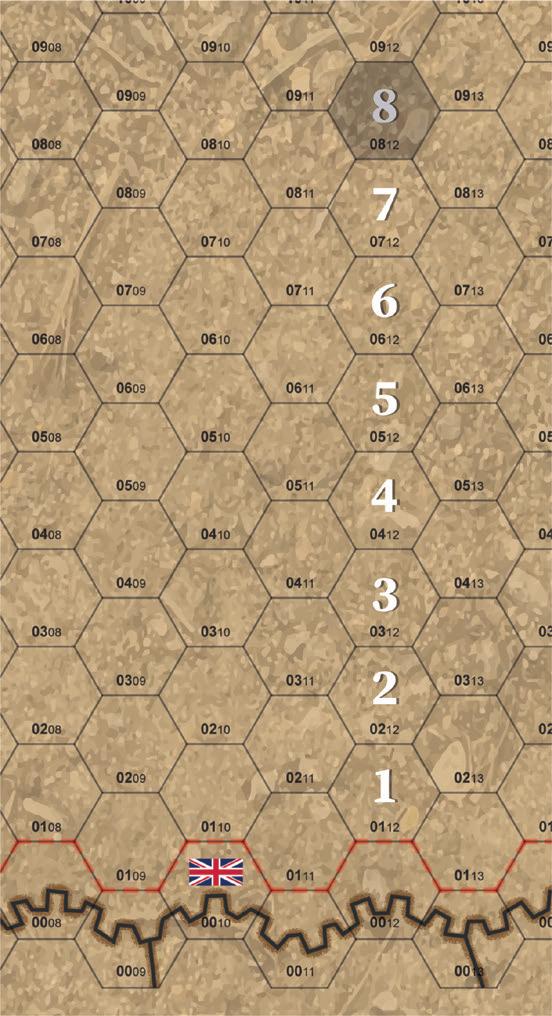
In the example at right, the raiding party is on the gray hex. They are 8 hexes away from their own trench lines. The Strength roll required to carry an incapacitated Soldier back to safety would be Average.
If the player desires, two Soldiers may be designated to carry back a wounded man. The Soldiers each make a Strength roll, but a success by either of them counts as a success for the entire party; each Soldier may use his Luck on his own rolls. Should both of the Soldiers fail their rolls, the wounded man has been left behind (see “17.3 Men Left Behind”).
If required, each Soldier should check for a botch individually. Should either of the Soldiers roll a botch, the wounded man has died. Should both of the Soldiers roll a botch, they become lost and are treated as left behind (see “17.3 Men Left Behind”).
9.5 Blinded
Soldiers who are blinded by mustard gas are automatically incapacitated. They must be led by a sighted man back to their own lines.
Because blinded men can still walk, any number of them can be led back by a single sighted man. The row of blind men simply hang on to each other, letting the sighted man lead them all. The Soldier leading them rolls on the Carrying Wounded Back table to see if they successfully reach their own lines. If enemy stretcher bearers are with the raiders, a blinded man may be carried back on a stretcher instead of being led back; the usual bonuses apply.
9.6 Death
If a Soldier is killed, his body is left behind. Before leaving him, the others in the raiding party may take his Equipment if they like, as long as they do not surpass the maximum number of pieces of equipment they are allowed to carry.
10. Prisoners
Whether as a result of fulfilling their Objective, or as the result of an Event, the raiding party might wind up taking prisoners. When this happens, the raiders have two options. They can either shoot them, or they can attempt to escort the prisoners back to their own trench lines.
In order to shoot the prisoners, an order must be given by the Officer (or the NCO, if the Officer is incapacitated or no longer with the raiding party). The Officer or NCO must attempt a Very Difficult Command action – only on a success will the raiders shoot the prisoners.
Escorting prisoners back is risky; prisoners tagging along with the raiders can adversely affect some Events. There’s also a chance the raiders won’t make it all the way back with their prisoners – that an Event will kill those the raiders are escorting.
If an Event causes a prisoner to be killed, and the raiders don’t want him to die, any Soldier may spend 1 Luck point to have the prisoner only be wounded, instead. The wound is serious enough to incapacitate the prisoner; he must be carried back (see “9.4 Carrying Wounded Back”).
ESCORTING PRISONERS WITHIN ENEMY TRENCHES
While within the enemy trench lines, as long as an enemy trench hex is clear, the raiders may proceed into it with their prisoners without incident.
It’s a different matter if the raiders enter an uncleared trench hex (including a previously cleared hex that turns out, after all, to no longer be cleared). Should a battle erupt in the hex (any situation that requires the raiders to make a Fight, Shoot or Throw action) the escorted prisoners are automatically lost. They either join in the fight and are killed, or run off and escape in the resulting confusion.
ESCORTING PRISONERS IN NO MAN’S LAND
Once in No Man’s Land, the prisoners typically tag along with the raiding party without trying to escape. They do have an effect on some Events, however – see the individual Events for details.
11.Mapping No Man’s Land
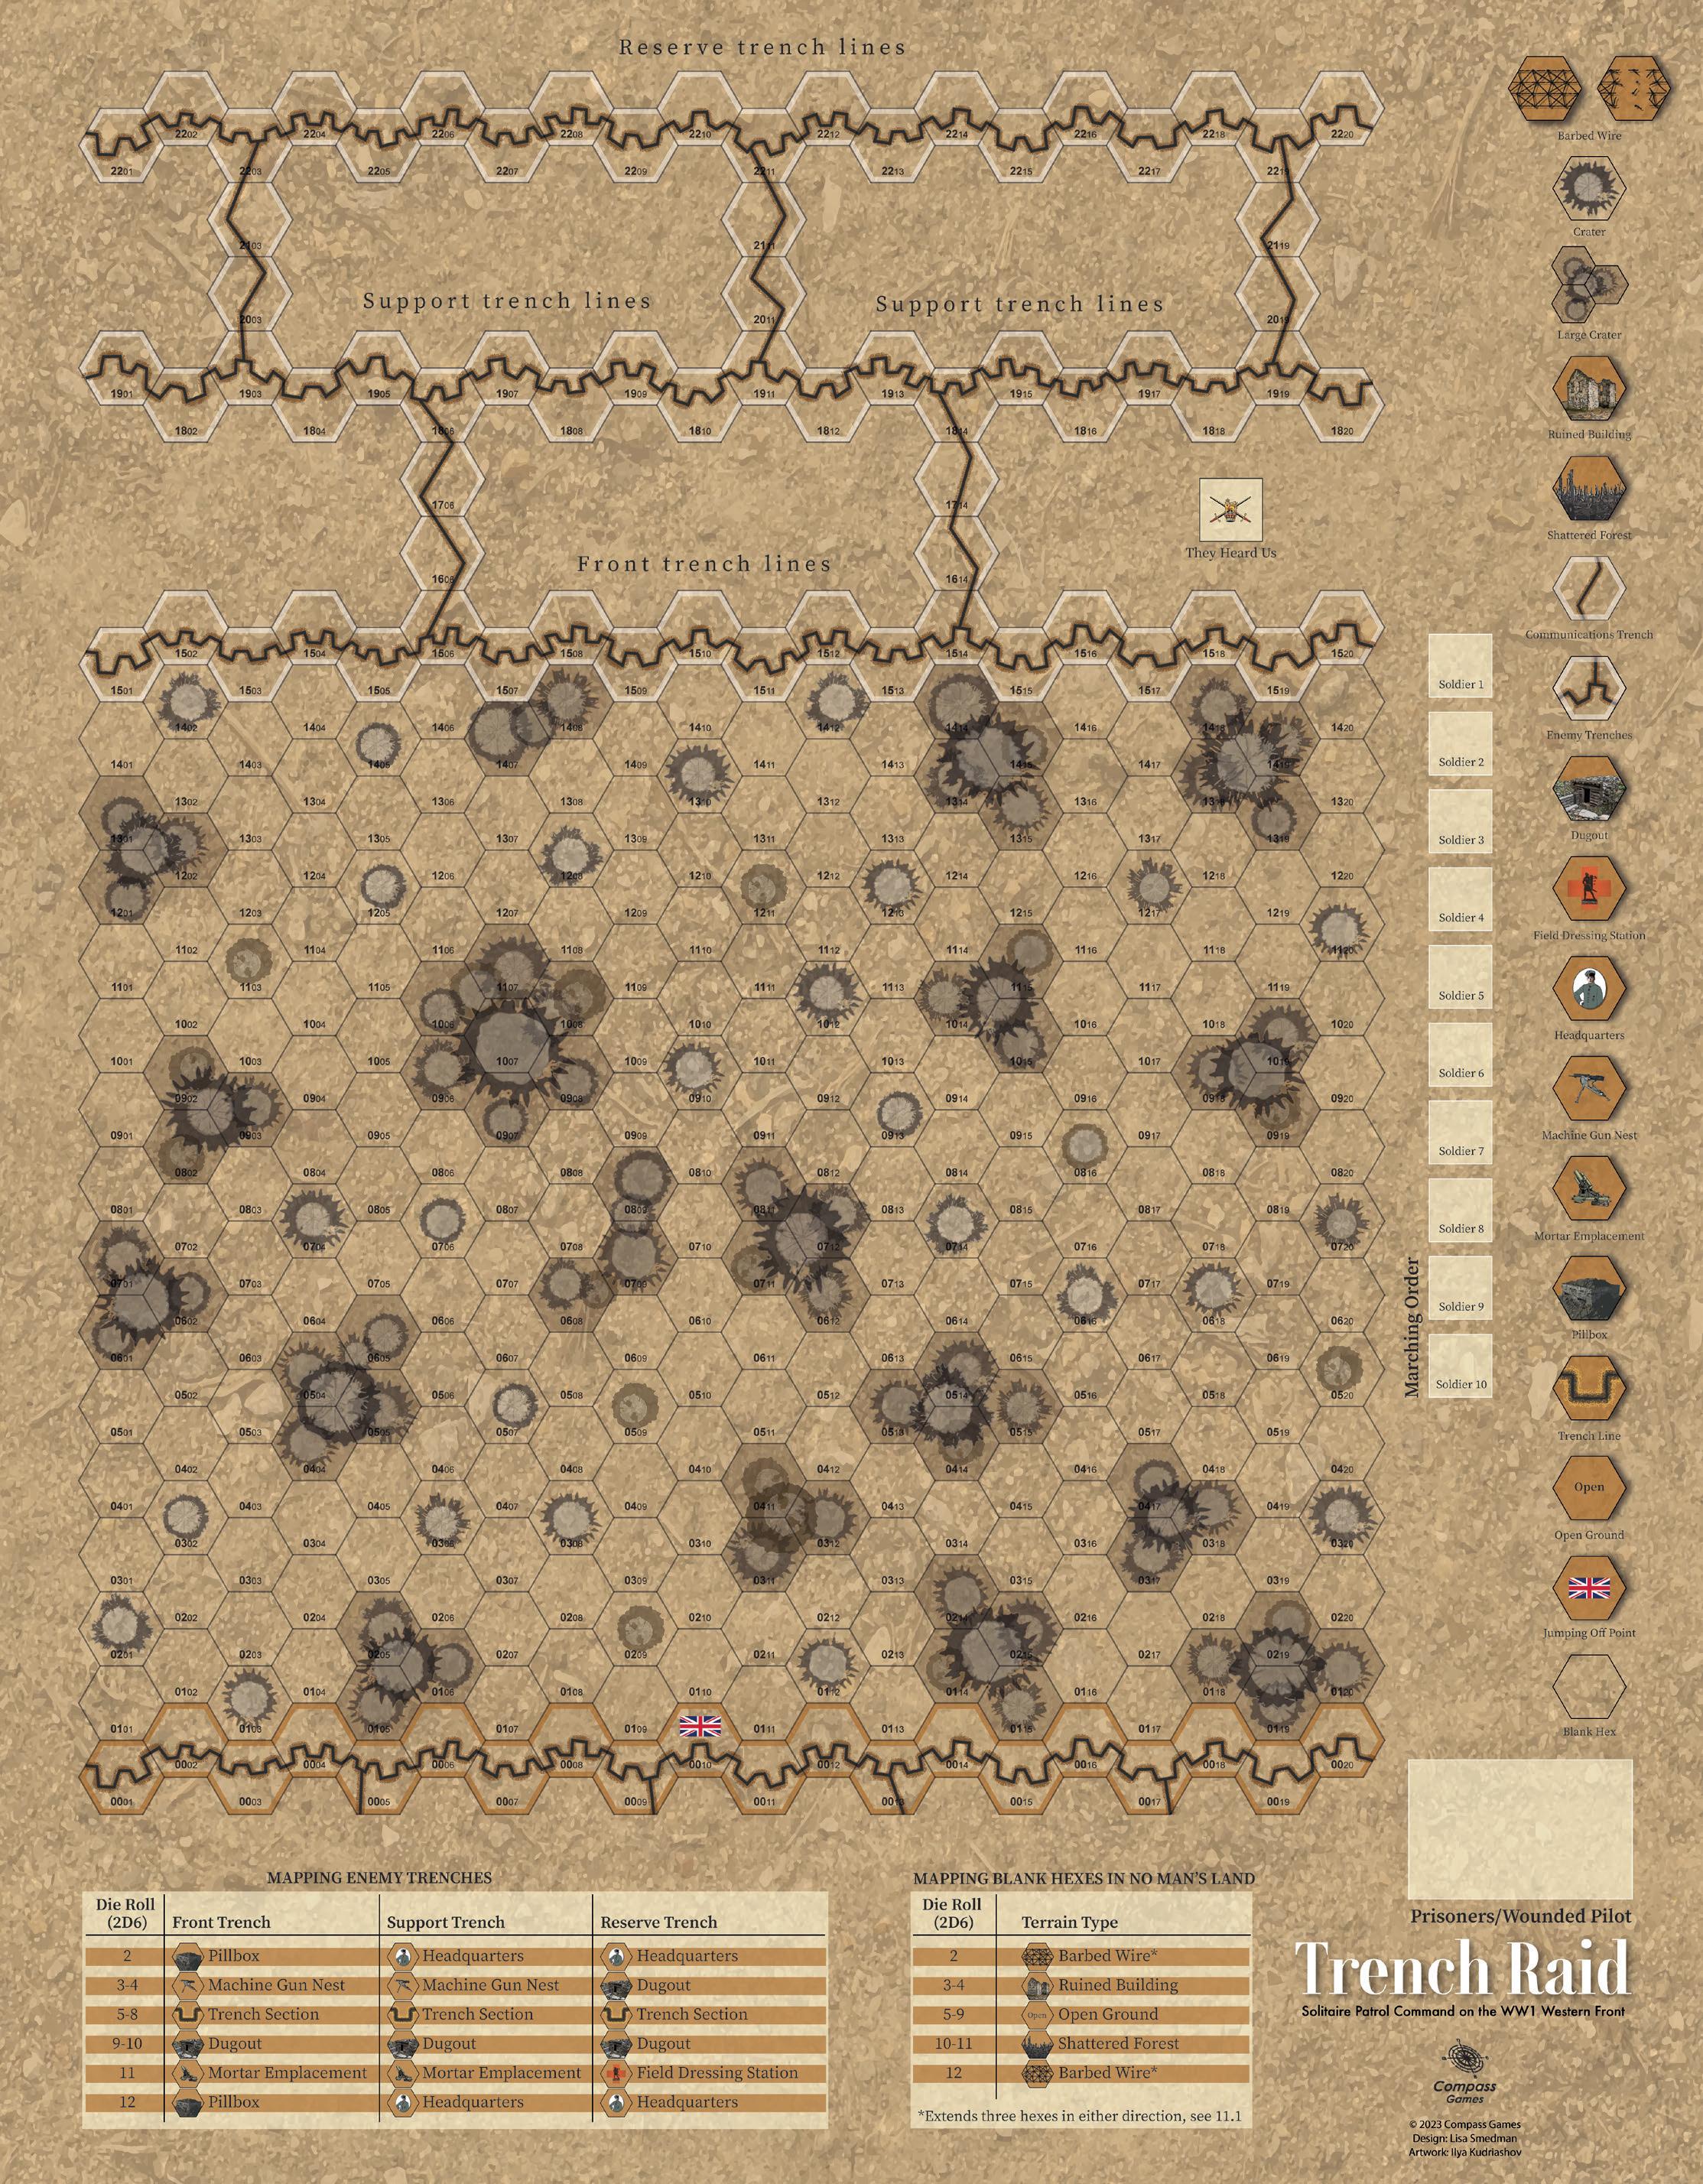
As the raiding party moves through No Man’s Land, the player gradually fills in details of the map. The final step of each turn involves mapping any blank (non-crater) hexes adjacent to the hex the raiders occupy. For each adjacent blank hex also in No Man’s Land, roll two D6 dice to determine what type of terrain the hex contains, then place a terrain counter of that type on the hex.
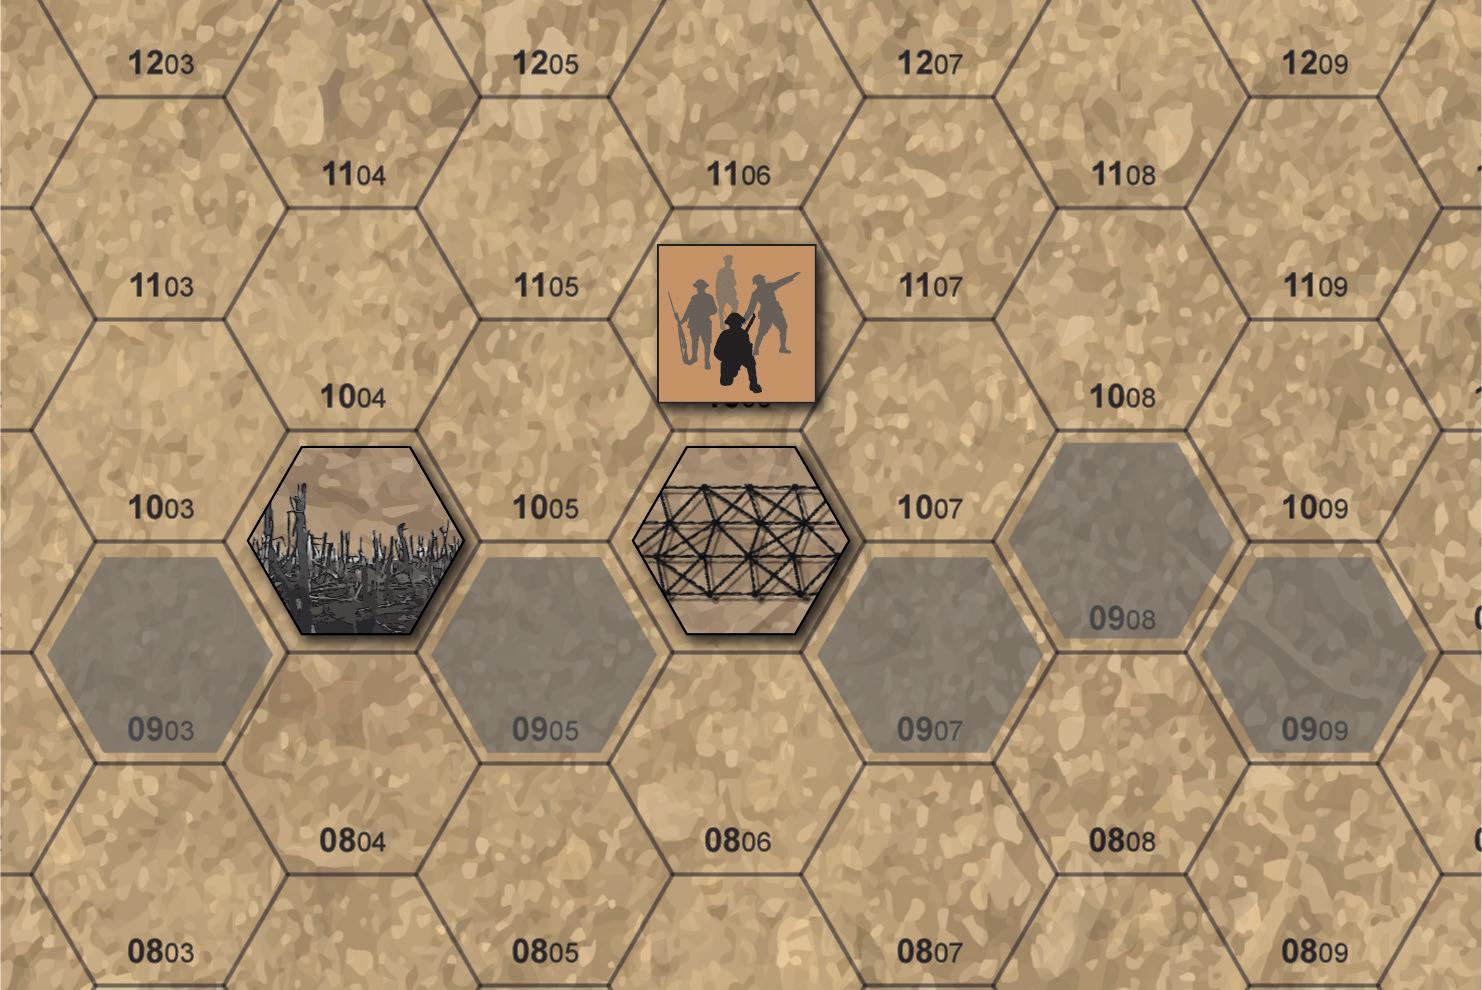
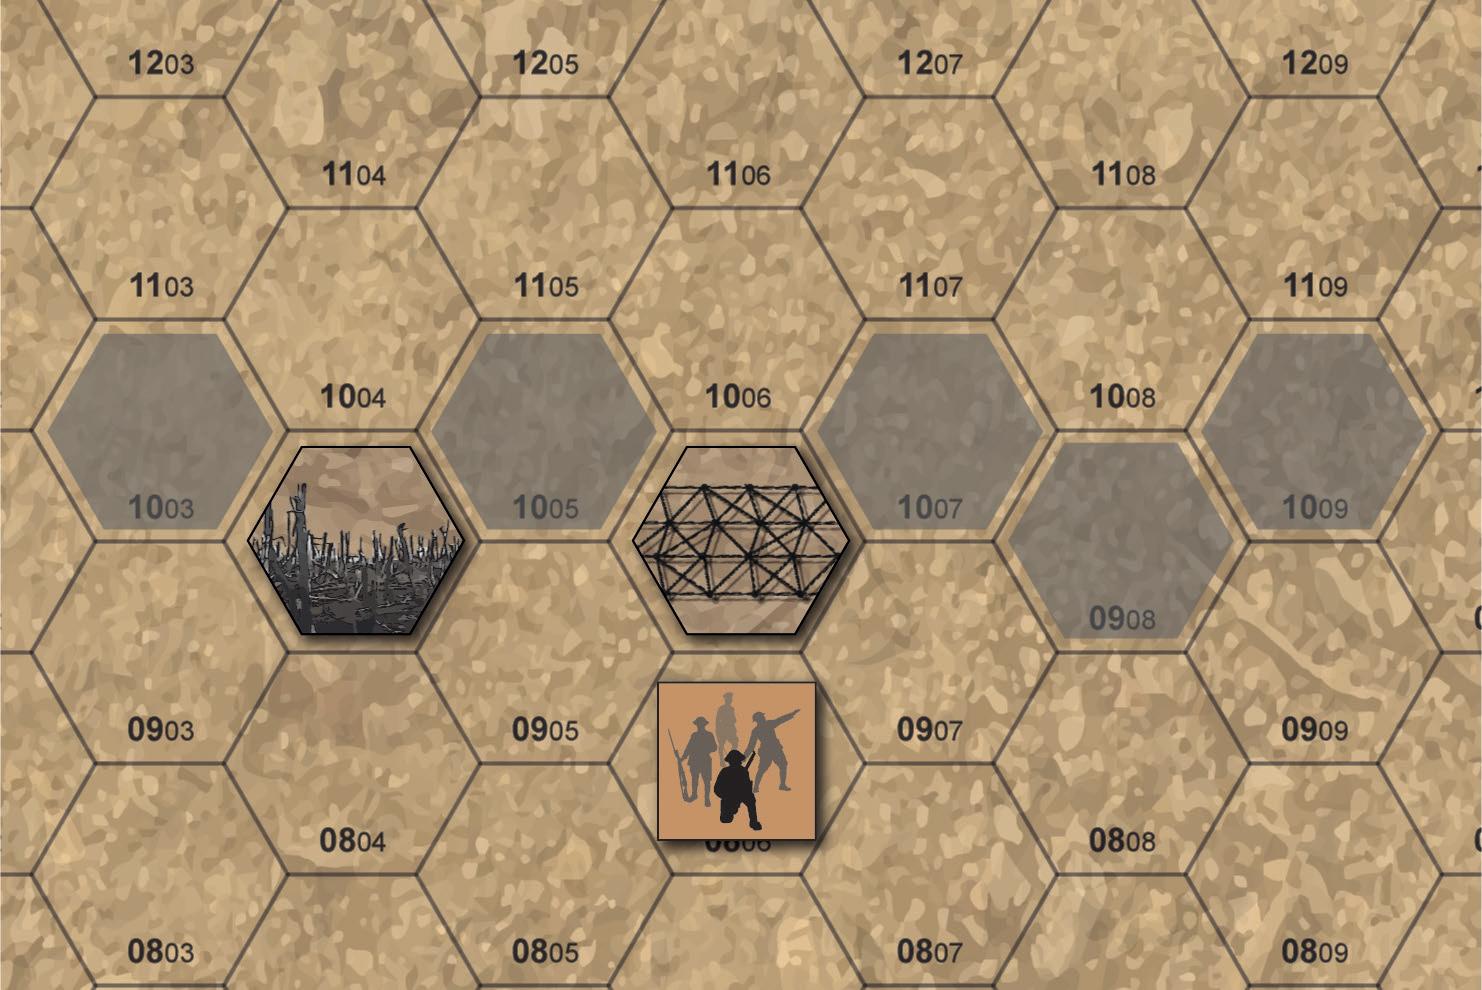
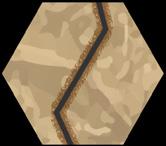
Barbed wire stretches horizontally across the map. It extends for three hexes to the left and right of whatever hex it is in encountered in, branching off the facing opposite the one facing the Raiding Party (as described below), and can be placed on top of blank hexes only. If any of these hexes already contains a terrain counter (or is a trench hex or a crater hex), do not add a Barbed Wire counter to that hex.
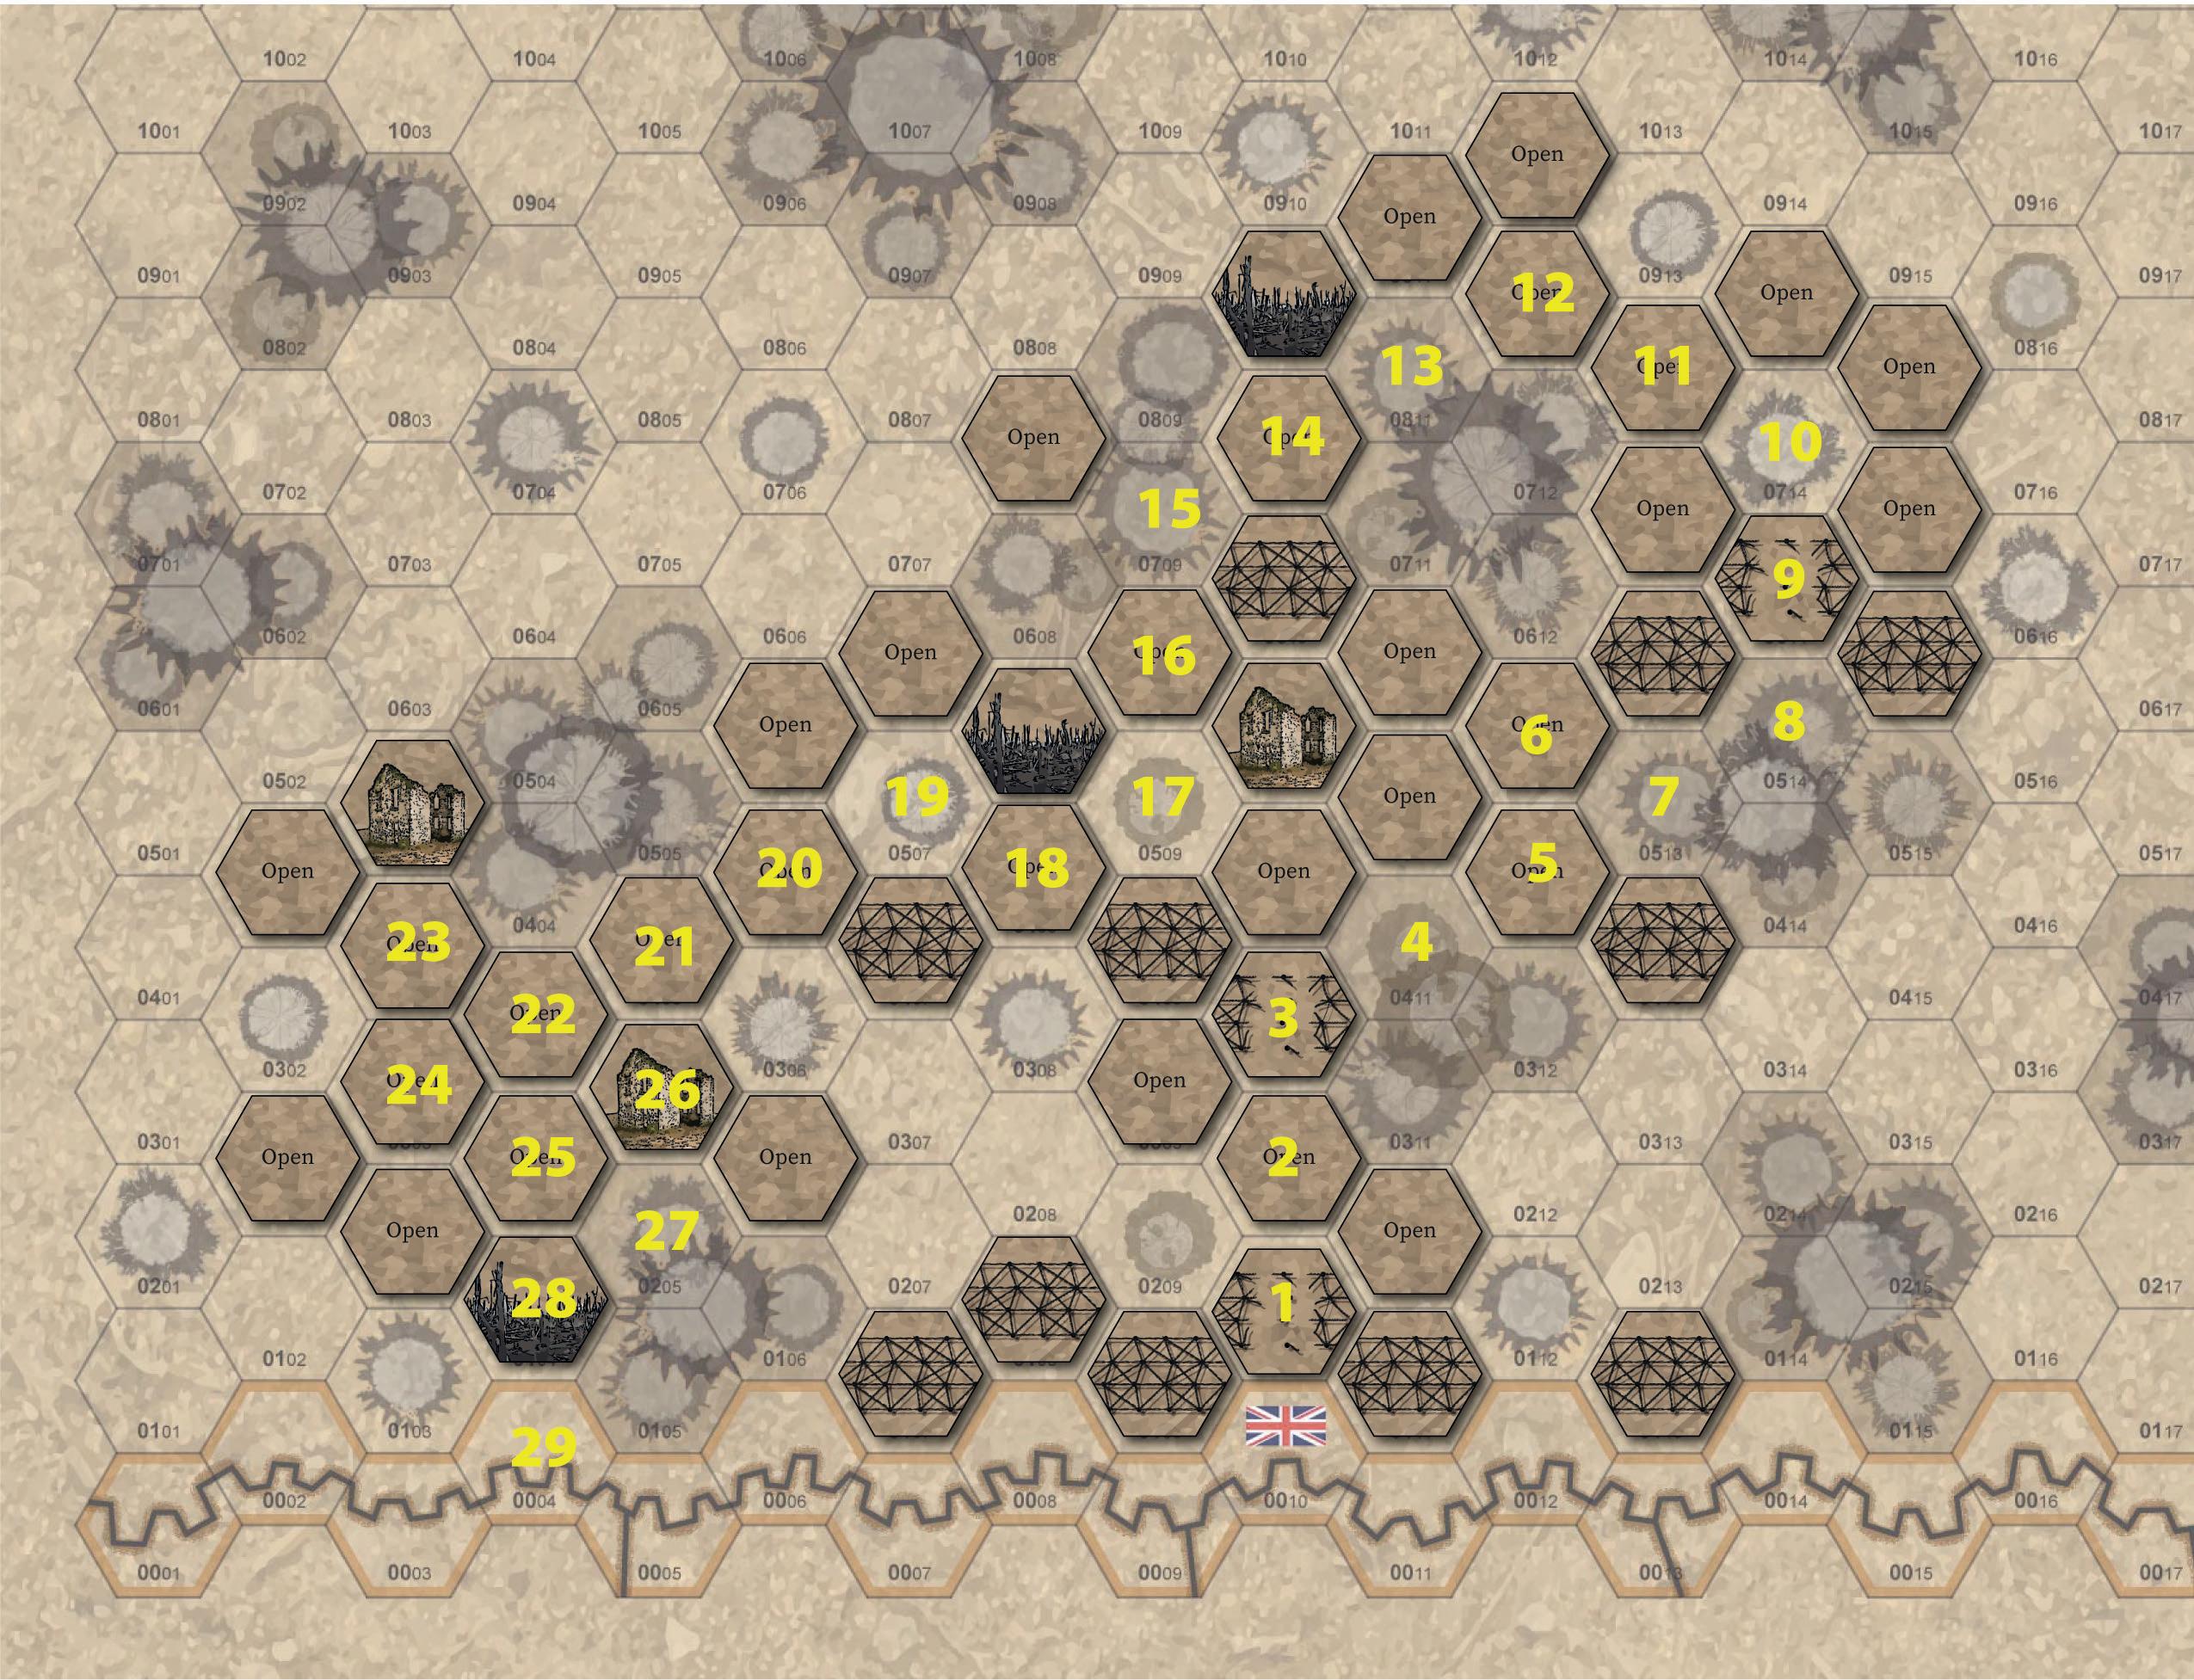
In the first illustration, the raiders are moving down the map, towards their own lines, when they encounter barbed wire.
In the second illustration, the raiders (R) are heading up the map. While mapping, they encounter barbed wire in the hex immediately above them. The barbed wire extends for three hexes to the left and right (gray hexes). One of those hexes, however, has already been mapped and contains a Shattered Forest counter (tree symbol) so no barbed wire is placed there.
3–4
11.1 Special Case: Barbed Wire
12.Properties of Terrain
12.1 Barbed Wire
Barbed wire blocks the raiders’ progress until it is cut. The raiders can enter the hex, but can’t move past it until the wire is either cut or clambered over.
Each Soldier who is carrying Wire Cutters can attempt an Average Strength action to cut the wire (see “6.13 Wire Cutters” under “6. Equipment”).
Should the wire cutting rolls fail, the raiders may remain on the hex and try again to cut it on their next turn. Each turn they remain in place, roll for an Event.
If the raiders don’t have wire cutters (or choose not to use them), they can clamber over the barbed wire. To do this, each Soldier must attempt an Average Strength action. On a failure, the Soldier suffers 1 Light Wound. On a botch, the Soldier suffers 1 Light Wound and is hopelessly tangled in the wire and must be left behind (see “17.3 Men Left Behind”).
Once cut, a hole remains open for the rest of the game. Use a Cut Wire counter to indicate the wire is cut.
12.2 Open Ground
No effect.
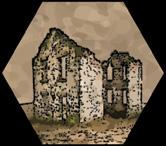
12.3 Ruined Building
The remaining walls of this building provide cover from machine gun fire and sniper fire.
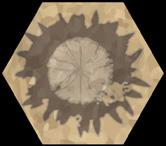
12.4 Small Crater
A small crater occupies a single hex on the map, and provides cover from machine gun fire.
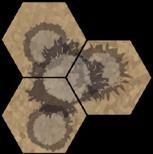
12.5 Large Crater
A large crater occupies two or more contiguous hexes on the map, and provides cover from machine gun and artillery fire.
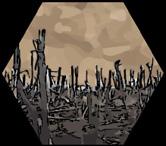
12.6 Shattered Forest
The stumps of shattered trees help prevent the raiders from being hit by snipers and machine gun fire – but these obstacles also make shooting more difficult.
13.Events in No Man’s Land
Each time the raiding party enters a hex in No Man’s Land, roll a D6 to see if an Event occurs. The likelihood of an event depends on what type of terrain the raiding party is in.
Events in No Man’s Land
Terrain Type Event (D6)
Barbed Wire 1
Shattered Forest 1–2
Ruined Building 1–2 Small Crater 1–3 Open Ground 1–3 Large Crater 1–3
If there is an Event, roll the 20-sided die and consult the table, then play through the Event.
Some Events only affect certain members of the raiding party – a certain number of Soldiers at the front of the party, or at the rear of the party, for example. Soldier counters at the top of the column are in the “front” of the raiding party, while those to the bottom of the column are in the “rear” of the raiding party.
The Marching Order may not be rearranged until after any actions associated with the current Event have been resolved.
No Man’s Land Event
Die Roll (D20) Event
1Accidental Shot
2Artillery Barrage
3Discarded Equipment
4Enemy Dog
5Enemy Stretcher Bearers
6 Enemy Trench Raiders
7Enemy Wiring Party
8Lingering Gas
9Listening Post
10Lost in the Dark
11Machine Gun Opens Up
12Missing Man
13Mutilated Corpses
14Sniper
15Star Shell
16Swarm of Rats
17Tempting Souvenirs
18Unexploded Shell
19Waterlogged Ground
20Wounded Men
13.1 Accidental Shot
One of your Soldiers stumbles and falls, accidentally firing his rifle or pistol.
Roll the D10 to determine who the bullet hits; this Soldier suffers a wound. The Soldier who was shot can spend 1 Luck to have the bullet miss him, instead.
If none of the Soldiers in the raiding party is carrying a rifle or pistol, this Event has no effect.
13.2 Artillery Barrage
Artillery opens up – yours or the enemy’s, it’s impossible to tell –and shells rain down on you. If hit by one, there won’t be enough pieces of you left to fill a teacup.
Each Soldier must attempt a Very Difficult Speed action to find cover. On a failure, the Soldier suffers two wounds. On a botch, the Soldier is killed, and all Equipment carried by that Soldier is destroyed.
If there are prisoners with the raiding party, each prisoner must also attempt a Very Difficult Speed Action; the prisoner’s Speed is 3. On a failure, the prisoner is killed.
If the raiding party is on a Large Crater hex, the difficulty is instead Difficult.
13.3 Discarded Equipment
It’s your lucky day – just the piece of equipment you need is laying on the ground, right in front of you.
The player may select any one piece of Equipment (but not a Special Skill) and equip it to a Soldier, as long as the maximum number of pieces of Equipment for that Soldier is not exceeded. (Soldiers may drop equipment to make this possible, but may not drop souvenirs.)
13.4 Enemy Dog
A sentry dog from the enemy trenches has blundered out into no man’s land alone. Unless you can silence it, the dog will alert the enemy with its barking.
There are two options for silencing the dog; the player can only attempt one of them.
A Soldier may attempt a Difficult Command action to quiet the dog. (This action is affected by the “Speaks German” Special Skill.)
A Soldier may attempt an Average Fight action to kill the dog quietly. On a failure, the dog escapes, wounded and barking. On a botch the same thing happens – but the dog bites the Soldier first, inflicting 1 Light Wound.
Alternatively, the Soldiers can just let the dog go, in which case it barks. If the Soldiers do not silence the dog, the barking may alert the enemy (see “They Heard Us!”, page 19).
13.5 Enemy Stretcher Bearers
Two enemy stretcher bearers are out in no man’s land, searching for enemy wounded.
One Soldier may attempt a Difficult Command action. (This action is affected by the “Speaks German” Special Skill.)
On a success, the stretcher bearers surrender without a fight and become prisoners (see “10. Prisoners”). They can be pressed into service carrying a wounded man back to your trenches (see “9.4 Carrying Wounded Back”).
If the Command roll fails, they fight. Each Soldier must attempt an Average Fight or Shoot action. On a failure, nothing happens. On a botch, the Soldier takes 1 wound.
The fighting ends either when there have been 2 successes (killing the stretcher bearers) or after every Soldier has attempted an action (driving off the stretcher bearers).
If the raiders are escorting prisoners, they join in the fight. The number of successes that must be rolled increases by the number of prisoners (eg: if the raiders have 4 prisoners with them, then 6 successes are required – two to defeat the stretcher bearers, and 4 more to defeat the prisoners who joined in the fight).
If the raiders are on a Shattered Forest hex, any Shoot actions are Difficult. At the end of the fight, any surviving prisoners and stretcher bearers flee into the night.
13.6 Enemy Trench Raiders
You’re not the only raiding party out tonight. You’ve just blundered into a raiding party from the enemy lines. You’d better fight quietly; if the enemy hears shots, he’ll know you’re coming!
Roll a D6 to determine the odds.
If the raiders are escorting prisoners, those prisoners join in the fight; subtract one from the die roll.
1: odds are two to one in enemy’s favor – Very Difficult
2–5: odds are one to one – Difficult
6: odds are two to one in your favor – Average
Each Soldier must attempt a Fight action. On a failed roll, the Soldier takes 1 wound. On a botched roll, the Soldier takes 2 wounds. The difficulty depends on the odds, as above.
After each Soldier has undertaken his action, the event ends; the enemy trench raiders (including any prisoners who joined in the fight) were either killed or driven off.
13.7 Enemy Wiring Party
Trench raiders weren’t the only ones active in no man’s land at night. Wiring parties were sent out at night to lay and repair barbed wire (or to cut wire, if closer to your lines), and you’ve just blundered into one.
A four-man enemy wiring team is laying barbed wire. Fortunately, they’re encumbered by tools and wire. Each Soldier must attempt an Average Fight or Shoot action. On a failure, nothing happens. On a botch, the Soldier takes 1 wound.
The event ends either when there have been 4 successful Fight or Shoot actions (killing the enemy wiring party) or after every Soldier has attempted an action (driving them off).
If the raiders are on a Shattered Forest hex, any Shoot actions are Difficult.
13.8 Lingering Gas
The air here is filled with lingering gas. If it’s chlorine or phosgene gas, it could cause serious respiratory damage, or even kill. If mustard gas, a mask won’t offer any protection against the painful blisters it can cause.
Roll a D6 to determine the type of gas:
1–3: CHLORINE/PHOSGENE: Soldiers equipped with gas masks must attempt an Average Speed roll to get their masks on in time. On a failure, the Soldier suffers a Serious Wound to the chest. On a botch, the Soldier dies.
A Soldier wearing a balaclava or helmet must make a Difficult Speed roll, since he must take the balaclava or helmet off before putting on his mask.
A Soldier without a gas mask automatically fails and suffers a Serious Wound to the chest, since he has no protection. Roll a D6 to see if this failure is a botch. On a botch, the Soldier dies. If the raiders are escorting prisoners, roll a D6 for each prisoner to see if he is carrying a gas mask: on a roll of 4, 5 or 6, he has a mask. Prisoners must also make Speed rolls to get their masks on; the prisoner’s Speed is 3. If the roll fails, the prisoner dies.
4–6: MUSTARD GAS: Soldiers must attempt an Average Speed roll to scramble away from the gas. On a failure, the Soldier suffers 1 Light Wound. On a botch, the Soldier is blinded, and automatically incapacitated.
If the raiders are escorting prisoners, each must also make Speed rolls to get away from the gas; the prisoner’s Speed is 3. If the roll fails, the prisoner is blinded and incapacitated.
13.9 Listening Post
Enemy soldiers have been posted here to listen for raiding parties – and you’ve just blundered into them!
First, roll a D6 to see how many enemy soldiers are manning the listening post. Then roll a D6 for each of these enemy soldiers to see if he is awake; if a 6 is rolled, the man is asleep, and does not take part in the battle. If all enemy soldiers are asleep, the event ends; the raiders sneak past the sleeping enemy.
Count the number of enemies who are awake, and if the raiders are escorting prisoners, add the prisoners as well; this many
Soldiers must attempt an Average Fight or Shoot action, starting with the soldier at the front of the party and working towards the rear from there. (If there aren’t enough Soldiers remaining in the raiding party, just roll once for each Soldier.) On a failed roll, the Soldier takes 1 wound. On a botched roll, the Soldier takes 2 wounds.
After the required number of Soldiers have undertaken their actions, the Event ends; the enemy (including any prisoners who joined in the fight) were either killed or driven off.
If the raiders are on a Shattered Forest hex, any Shoot actions are Difficult.
13.10 Lost in the Dark
In the chaos of no man’s land, the raiding party loses its way. Roll a D6; on their next turn, the raiders must:
1: Move one hex down.
2: Moves one hex down and left.
3: Move one hex down and right.
4: Move one hex up.
5: Move one hex up and left.
6: Move one hex up and right.
If this movement would take the raiding party off the map, reroll the die.
Any Soldier carrying a compass may roll a D6 to attempt to negate this Event; the raiders do not become lost if a 2 or higher is rolled. On a 1, that Soldier’s compass is broken and must be crossed off his Soldier Card.
13.11 Machine Gun Opens Up
A machine gun opens up, filling the air with lead! Fortunately, the gunners have a hard time spotting you in the darkness.
Each Soldier must attempt a Difficult Speed action to throw himself to the ground. Soldiers who fail this roll take 1 wound. Soldiers who botch this roll take 2 wounds.
If there are prisoners with the raiding party, each prisoner must also attempt a Speed Action; the prisoner’s Speed is 3. On a failure, the prisoner is killed.
If the raiding party is on a Small Crater, Large Crater or Ruined Building hex, the difficulty is instead Average.
13.12 Missing Man
In the darkness, one of the members of the raiding party has blundered off and gotten lost.
Each Soldier, starting with the last man in the Marching Order and working up the column, must roll a D6 to determine whether he has become separated from the raiding party in the darkness. (Any prisoners the raiders are escorting must roll, as well, after the raiders have finished rolling –if the prisoners include an officer, he will be the last of the Germans to roll.) The first Soldier to roll a 1 is the one who is lost; this Soldier is left behind and must make his own way back to the trenches (see “9.4 Men Left Behind”).
This Event ends either when a man goes missing, or after each Soldier has made a roll. (If none of the Soldiers rolls a 1, the man who blundered off returns to the raiding party.)
13.13 Mutilated Corpses
Hideously mutilated corpses lie in a tangle underfoot. Each Soldier must attempt an Average Courage roll in order not to be unnerved by the sight of them.
On a failure, the Soldier is unnerved, and his Courage is at a -1 penalty for the rest of the game. On a botch, his Courage is at a -2 penalty. Circle the appropriate penalty on the Soldier Card.
If there is an Officer or NCO in the raiding party (and he has not lost his nerve – be sure to test the Office and NCO first) he may attempt a Command action to snap an unnerved Soldier out of it (reversing the effects of the Courage penalty). To reverse a -1 penalty is a Difficult action. To reverse a -2 penalty is a Very Difficult action.
The Officer and the NCO may each make only one such attempt, but both attempts may be made on the same Soldier
If a Soldier has rum, he may drink it to bolster his Courage before or after making the roll; erase the rum from the Soldier’s card.
13.14 Sniper
An enemy sniper is hidden somewhere in no man’s land, all but invisible due to camouflage. He’s shooting at you! Before the raiding party can react, the sniper takes a shot at the Soldier in the front (or the first Soldier who is not wearing a balaclava), automatically causing a Serious Wound.
The next Soldier in the column (the Soldier immediately behind the one who was shot) may attempt to take out the enemy sniper, but this requires a Very Difficult Shoot or Throw action. On a success, the sniper is killed and the event ends. On a failure, the sniper shoots back and inflicts a wound to that Soldier. On a botch, it’s a Serious wound.
If the sniper is still alive, the next Soldier in the column can attempt a Difficult Shoot or Throw action. On a success, the sniper is killed and the event ends. On a failure, the sniper shoots back and inflicts a wound to that Soldier. On a botch, it’s a Serious wound.
If the sniper is still alive, the next Soldier in the column can attempt an Average Shoot or Throw action. On a success, the sniper is killed and the event ends. On a failure, the sniper shoots back and inflicts a wound to that Soldier. On a botch, it’s a Serious wound.
If the sniper is still alive, he stops shooting and flees back to his lines.
When determining the first man to be shot, the player should skip over all men wearing balaclavas until one without a balaclava is reached. If all of the raiders are wearing balaclavas, the sniper targets the first Soldier in the column –but the wound is a Light Wound, rather than a Serious Wound. Other than determining which man gets shot first (and possibly, the severity of his wound), balaclavas have no other effect on this Event.
If there are prisoners with the raiding party, any of the Soldiers may spend 1 Luck to have the sniper’s shot hit a prisoner, instead. The prisoner is killed by the shot.
If the raiding party is on a Ruined Building or Shattered Forest hex, the severity of the first wound the sniper inflicts (on the first Soldier) is determined randomly, rather than automatically being a Serious Wound.
If the raiders are on a Shattered Forest hex, any Shoot actions are increased by one level of difficulty.
If any of the Soldiers botches a Throw action, special rules come into play (see “6.1 Bag of Grenades” in the “6. Equipment” section).
13.15 Star Shell
A flare goes up, filling the area with brilliant white light as it slowly parachutes to earth. Unless you remain completely motionless, the enemy could spot you and open fire.
Each Soldier must attempt an Average Courage action in order to freeze in place until the star shell fades out. If all of the Soldiers succeed, nothing happens and the event ends. Rum may not be used to bolster this roll – drinking the rum would involve moving!
If there are prisoners with the raiding party, each prisoner must also attempt a Courage action; the prisoner’s Courage is 3. Otherwise, keep track of how many Soldiers (and prisoners) fail their rolls. Total them up, and add 1 to the total for each Soldier who succeeded in their Courage action and is wearing a helmet. (British helmets had a distinctive silhouette that makes the standing man more identifiable.)
Next, roll a D6 to see if the enemy machine gunners spotted the movement. If the die result is equal to or less than the number above, a machine gunner opens up. If any of the Soldiers or prisoners botched their Courage rolls, the machine gunner automatically spots movement, and fires. If the machine gun opens fire, each Soldier who is still standing must attempt a Difficult Speed action to throw himself to the ground. Soldiers who fail this take 1 wound. Soldiers who botch this roll take 2 wounds.
Prisoners who are still standing must also attempt a Speed action; the prisoner’s Speed is 3.
If the raiding party is on a Small Crater, Large Crater or Ruined Building hex, the difficulty of the Speed action is instead Average.
13.16 Swarm of Rats
Rats scurry through the mud, eating corpses. When disturbed, they bite!
Each Soldier must attempt an Average Fight or Shoot action to kill rats. On a failure, nothing happens. On a botch, the Soldier suffers 1 Light Wound. The rats then scurry away. If there are prisoners with the raiding party, the prisoners will attempt to escape in the resulting chaos. Each prisoner must attempt a Difficult Speed action; the prisoner’s Speed is 3. On a success, the prisoner runs off and escapes. If the raiders are on a Shattered Forest hex, any Shoot actions are Difficult.
13.17 Tempting Souvenirs
An enemy corpse has a “souvenir” you just can’t resist: an Iron Cross, a “pickelhaube” helmet, or a Luger pistol (unfortunately, without ammunition).
Each Soldier must attempt an Average Command roll (representing the Soldier’s self-discipline) to resist the lure of the souvenirs. On a failure or botch, the Soldier picks up the souvenir – and if they were already carrying the maximum amount of Equipment allowed, they must drop one piece of Equipment of the player’s choice. The dropped Equipment may not be taken by another Soldier.
13.18 Unexploded Shell
One of your Soldiers has just blundered into an unexploded shell –will it go off?
Roll the D10 to randomly determine one Soldier: a 1 is the Soldier in the lead, a 2 is the man behind him, and so on. (If the roll is higher than the number of Soldiers in the raiding party, reroll
the die until a Soldier is determined). That man must make a Difficult Speed roll to determine whether he jostles the shell, setting it off.
On a failed roll, that Soldier is killed, and all Equipment carried by him is destroyed. On a botched roll, he is killed and the two Soldiers to either side of him are also hit by the explosion; each suffers a wound.
If there are prisoners with the raiding party, the Soldier who is randomly determined may spend 1 Luck to have it be a prisoner who blunders into the unexploded shell. The prisoner makes the Speed roll; the prisoner’s Speed is 3. On a failure, the prisoner is killed; no one else is hurt. On a botch, the prisoner is killed and the Soldier who was randomly selected suffers a wound.
13.19 Waterlogged Ground
A previous rainfall has turned the ground into a slippery morass of mud.
Soldiers may slip in the mud and injure themselves on sharp debris lying on the ground. Each Soldier must make an Average Strength roll to not slip.
Failure means the Soldier slips in the mud and either takes a Light Wound or loses 1 piece of Equipment (player’s choice).
On a botch, the Soldier disappears into quicksand-like mud and drowns. No attempts to pull him free can be made.
If there are prisoners with the raiding party, each prisoner must also attempt a Strength action; the prisoner’s Strength is 3. On a failed roll, the prisoner disappears into the mud and drowns.
13.20 Wounded Men
You blunder into wounded soldiers, and face a dilemma: should you weaken your raiding party, in order to carry them back to your lines?
Roll a D6: this many wounded have been found. Roll again to determine whether they are enemy or friendly:
1–3: enemy soldiers
4–6: friendly soldiers
If the wounded men are enemy soldiers, roll a D6 to see if an officer is present. An officer is among the wounded on a roll of 6.
These wounded men may be carried back to the friendly trench lines. How many wounded are carried back (anywhere from none to all of them) is up to the player – but for each wounded man carried back, the player must detach one or two Soldiers from the raiding party to do the carrying (see “9.4 Carrying Wounded Back”).
For each friendly soldier carried back to your own trench lines (regardless of whether the wounded man and those carrying him survive the journey) add 1 bonus Luck to any Soldier remaining behind in the raiding party. The extra Luck must be used during this game; it does not carry over to subsequent games.
14.Mapping Enemy Trenches
Once the raiding party is within the Enemy Trenches, the raiders must follow trench lines; they cannot venture into any hex that isn’t part of a trench.
In World War One, both sides typically dug three lines of defence (which run horizontally across the player map): the Front Trench, Support Trench, and Reserve Trench, connected via Communications Trenches.
When the raiders first pass from No Man’s Land into the enemy trenches – possibly triggering a reaction from the enemy as they do so (see “They Heard Us!”, page 19), they enter the Front Trench of the enemy. The raiders must follow this trench, moving either to the left or to the right. They may only enter the Support or Reserve trenches via a Communications Trench. Unlike No Man’s Land, where the raiding party can see into all adjacent hexes, trench hexes are hidden from view by the twists and turns the trenches take. It isn’t until the raiding party actually enters a trench hex that a roll is made to determine what that hex contains.
The exception is a raiding party equipped with a trench periscope. These raiders may peek over the top to learn what the next trench hex contains before choosing whether to enter it.
Mapping Enemy Trenches
Die Roll (2D6) Front TrenchSupport TrenchReserve Trench
Headquarters
2PillboxHeadquarters
3–4
Machine Gun Nest Machine Gun Nest
Dugout
5–8Trench SectionTrench SectionTrench Section
9–10DugoutDugoutDugout
11 Mortar Emplacement Mortar Emplacement Field Dressing Station
12PillboxHeadquartersHeadquarters
When rolling to determine what is in each hex of the enemy trenches, the results will be different depending upon whether the raiders are in the Front, Support, or Reserve trench lines.
THEY HEARD US!
Stealth when crossing No Man’s Land was of the utmost importance to a raiding party. When the raiding party at last reaches the enemy trenches, there may be a penalty if the raiding party wasn’t quiet.
During the crossing of No Man’s Land, if any of the Soldiers in the raiding party fired their guns (performed a Shoot action) or threw grenades (performed a Throw action) or if the “Enemy Dog” Event came into play and resulted in the dog barking, or if the “Accidental Shot” occurred, the enemy soldiers know the raiding party is coming, and are on the fire step, ready to repel them.
Should this be the case, actions performed within the first enemy hex the raiders enter are all at one difficulty higher (eg: an Average action becomes a Difficult action).
If any of the Soldiers speaks German, he can try to trick the enemy into thinking the raiding party is a friendly raiding party, by attempting a Difficult Command action. On a failure, the enemy is not fooled. Even if more than one Soldier speaks German, this attempt may only be made once.
15.Events in Trenches
Each time the raiders move onto an uncleared hex that is not a Communications trench while within the enemy trenches, they must resolve an Event based on the type of hex they have entered.
Once a hex has been “cleared” a raiding party may usually re-enter it without incident. The next time the raiders enter that hex, roll a D6 die: on a roll of 1, the hex is no longer cleared and an Event must be resolved, as per that terrain type. (If the raiders are escorting prisoners, additional rules apply for uncleared hexes: see “10. Prisoners.”)
15.1 Communications Trench
Communications trenches are already printed on the map; no mapping rolls are made for these hexes. They are typically busy places at night, with enemy moving up to the front lines under cover of darkness.
Roll a D6 for each hex of the Communications Trench that the raiders enter.
1: Enemy reinforcements armed with flame throwers are moving up the trench. Each Soldier in the raiding party must attempt a Difficult Fight or Shoot action. On a failure, the Soldier takes 1 Serious Wound as the enemy bring their flame throwers to bear. On a botch, the Soldier is killed.
Once all actions have been resolved, the hex has been cleared.
2–3: Enemy reinforcements are moving up the Communications Trench. Each Soldier in the raiding party must attempt an Average Fight or Shoot action. On a failure, the Soldier takes 1 wound. On a botch, the Soldier takes 2 wounds.
Once all actions have been resolved, the hex has been cleared.
4–5: Enemy troops carrying food, mail, or other supplies are moving up the Communications Trench. Fortunately, they’re too encumbered to fight effectively. Each Soldier in the raiding party must attempt an Average Fight or Shoot action. On a failure, nothing happens. On a botch, the Soldier takes 1 wound.
Once all actions have been resolved, the hex has been cleared.
6: The hex is clear. No actions required.
15.2 Dugout
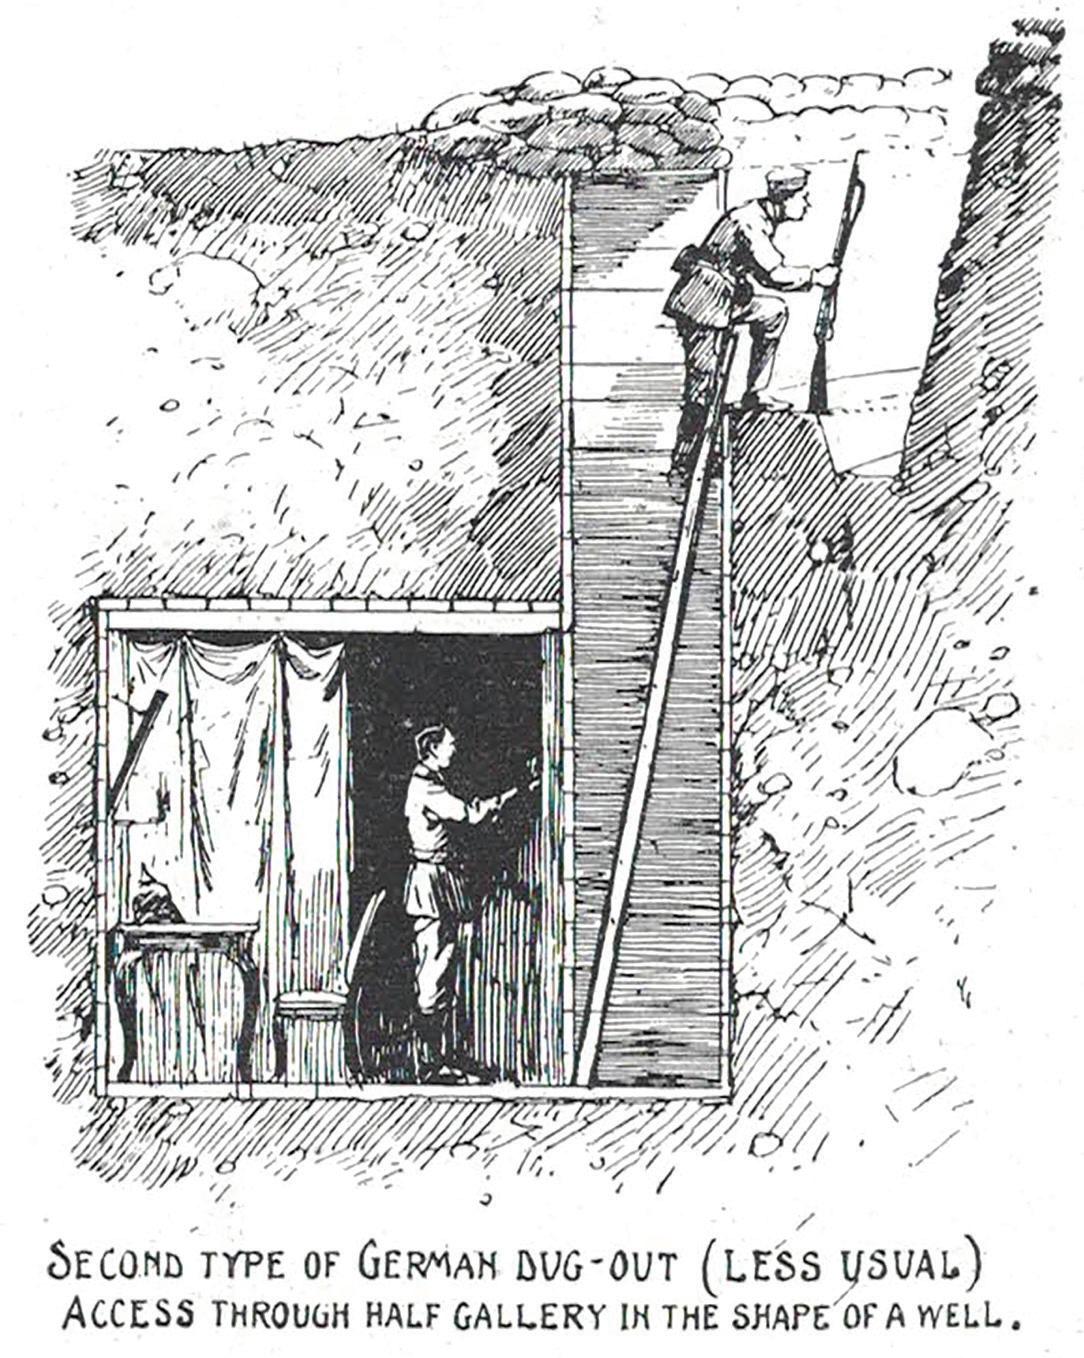
Dugouts provide shelter for the enemy during artillery bombardments, and serve as living quarters. This one has stairs leading down into darkness. What happens next depends on whether the raiding party was quiet in its approach.
If the raiding party attempted any Shoot or Throw actions on the previous hex, the enemy inside the dugout have been alerted, and have emerged from their dugout and are in the trench line, ready to fight. Each Soldier in the raiding party must attempt a Difficult Fight or Shoot action. On a failure, the Soldier takes 1 wound. On a botch, the Soldier takes 2 wounds.
Once all actions have been resolved, the dugout has been cleared.
If the raiding party was quiet on the previous hex (no Shoot or Throw actions attempted) the enemy are still within the dugout. The raiders may either toss grenades into the dugout (which will fulfill the “Bomb an enemy dugout” Objective) or they may send a man down into it, in an attempt to take prisoners (which might fulfill an Objective to capture an enemy officer).
BOMBING THE DUGOUT: If any of the Soldiers has grenades, they may attempt an Average Throw action to toss a grenade down into the dugout. On a botch, special rules come into play (see “6.1 Bag of Grenades” in the “6. Equipment” section).
Whether the enemy inside the dugout have been killed depends upon the number of successful Throws made. After all Throw actions have been resolved, roll a D6. If the result is equal to or less than the number of successful throws, all of the enemy inside the dugout have been killed, and the dugout has been “cleared.”
Otherwise, survivors will emerge as the raiding party passes by, attacking the last three men in the raiding party. These last three Soldiers must attempt an Average Shoot or Fight action in order to kill the survivors. Failure means the Soldier takes 1 wound. A botch means the Soldier takes 2 wounds.
Once all actions have been resolved, the dugout has been cleared.
ENTERING THE DUGOUT: One Soldier may enter the dugout and try to take prisoners, in the hopes of capturing an enemy officer or being “mentioned in dispatches.” This is a risky move, since the staircase is so narrow that only the one Soldier can descend it at a time.
In order to descend into the dugout alone, a Soldier must first attempt an Average Courage action. Only on a success can he enter; rum may be used before making the roll. Should he fail, other Soldiers may also try to muster up the courage to enter the dugout – but only one Soldier can enter it.
Next, the Soldier entering the dugout attempts a Difficult Command action. If successful, the men inside the dugout surrender, and the Soldier is “mentioned in dispatches” (see “18. Campaign Play”). The raiders gain D6 prisoners. Roll the D6 a second time: on a 6, one of the prisoners is an officer. Alternatively, any Soldier may spend 1 Luck to have an officer be among the prisoners.
On a failed Command action, the Soldier in the dugout is killed. The enemy inside the dugout then emerge into the trench line and attack the raiders. Each Soldier must attempt an Average Fight or Shoot action. On a failure, nothing happens. On a botch, the Soldier suffers 1 wound.
Once all actions have been resolved, the hex has been cleared. Should the raiders capture prisoners, they need to decide what to do with them (see “10. Prisoners”).
15.3 Field Dressing Station
The field dressing station is filled with enemy wounded, plus medical staff (doctors, orderlies, stretcher bearers).
One Soldier in the raiding party may attempt a Difficult Command action. On a success, the medical staff surrender without a fight: the raiders gain D6 prisoners, any of whom can be pressed into service as stretcher bearers.
On a failure, the medical staff put up a fight; fortunately, they’re not well armed. Each Soldier must attempt an Average Fight or Shoot action. On a failed roll, nothing happens. On a botched roll, the Soldier takes 1 wound.
After each Soldier has undertaken his action, the event ends; the medical staff were either killed or driven off. The enemy wounded remain, however.
Roll a D6: on a 6, one of the wounded is an enemy officer. Alternatively, any Soldier may spend 1 Luck to have an officer be among the wounded. If the Objective was to capture an enemy officer, this officer may be carried back to the raiding party’s trench line (see “9.4 Carrying Wounded Back”).
Should the raiders capture prisoners, they need to decide what to do with them (see “10. Prisoners”).
Once all actions have been resolved, the hex has been cleared.
15.4 Headquarters
The headquarters is occupied by an enemy officer and his support staff.
One Soldier in the raiding party may attempt a Command action. The difficulty is Average for an Officer, Difficult for an NCO, and Very Difficult for any other soldier. On a success, the enemy officer and his staff surrender.
As long as at least one of these prisoners is brought back to the raiders’ trench lines, the Soldier who performed the successful Command action is “mentioned in dispatches” (see “18. Campaign Play”).
If the Germans surrender, roll a D6 to determine how many of them there are, in addition to the officer. (There will be 1 officer, plus D6 other ranks.)
If the Command action was a failure or botch, the officer and his staff put up a fight. Each Soldier must attempt a Difficult Fight or Shoot action. On a failed roll, the Soldier takes 1 wound. On a botched roll, the Soldier takes 2 wounds.
After each Soldier has undertaken his action, roll a D6 to see if any of the enemy survived the battle.
1–2: all enemies killed
3–4: one enemy survivor
5–6: two enemy survivors
If there are two survivors, roll two dice. If either rolls a 6, one of the survivors is an officer.
The survivors are badly wounded. If the Objective was to capture an officer, one or two Soldiers must be dispatched (along with stretcher bearers, if available and desired) to carry the officer back to the trench lines (see “9.4 Carrying Wounded Back”).
Should the raiders capture prisoners, they need to decide what to do with them (see “10. Prisoners”).
Once all actions have been resolved, the hex has been cleared.
15.5 Machine Gun Nest
A machine gun opens up, and each of the 3 Soldiers at the front of the raiding party must attempt a Difficult Speed action to throw themselves to the side to avoid the bullets. (Soldiers behind these three are deemed to be around the bend of a traverse, and need not make a roll.) Soldiers who fail this roll take 1 wound. Soldiers who botch take 2 wounds.
The machine gun nest now must be taken out. This happens as soon as a Soldier succeeds in a Throw or Shoot or Fight action.
The difficulty depends on the action being attempted:
Average for Throw
Difficult for Shoot
Very Difficult for Fight *
On a botched Fight or Shoot action, the Soldier takes 1 wound. On a botched Throw action, special rules come into play (see “6.1 Bag of Grenades” in the “6. Equipment” section).
Once all actions have been resolved, the hex has been cleared.
*If a Soldier takes out a machine gun nest with a Fight action, he is “mentioned in dispatches” (see “18. Campaign Play”).
15.6 Mortar Emplacement
The trench ahead is occupied by a three-man mortar team, in addition to regular troops. They are armed with grenades.
Soldiers with grenades may attempt a Difficult Throw action to toss a grenade into the mortar emplacement. If a throw is successful, the enemy mortar team are all killed and the hex has been cleared. On a failure, nothing happens. On a botch, special rules come into play (see “6.1 Bag of Grenades” in the “6. Equipment” section).
If none of the throws is successful, the enemy in the mortar emplacement throw back a grenade that hits one of the Soldiers. Roll the D10, and count down the column of Soldiers, from front to back: the grenade strikes the Soldier in that position, automatically inflicting a Serious Wound. In addition, it inflicts a wound to the Soldier in front of and behind this man (if any).
If there are fewer Soldiers remaining in the raiding party than the number rolled (eg: the roll was a 6 and there are only 5 soldiers left) the grenade misses, and no one is wounded. If prisoners are with the party, the Soldier targeted may spend 1 Luck to have the grenade land on a prisoner, instead. The prisoner is killed, and no Soldiers are wounded. If none of the Soldiers has grenades (or if the player would rather do this, instead) each Soldier must attempt a Difficult Fight or Shoot action. On a failure, the Soldier takes 1 wound. On a botch, the mortar crew throws another grenade; roll as above to determine who it hits. Resolve enemy grenade throws immediately after each botch result, before any other Soldiers attempt an action.
Once all actions have been resolved, the hex has been cleared.
15.7 Pillbox
Pillboxes are concrete bunkers at ground level that provide shelter for the enemy during artillery bombardments, as well as allowing them to shoot through narrow openings in the walls.
Soldiers with grenades may attempt a Very Difficult Throw action to toss a grenade into the pillbox through one of the narrow openings in its walls. If the throw is successful, the enemy inside the pillbox are all killed, and the pillbox has been cleared. On a failure, the Soldier takes 1 wound. On a botch, special rules come into play (see “6.1 Bag of Grenades” in the “6. Equipment” section).
If none of the Throws was successful (or if the raiders don’t have grenades) they must storm the pillbox, instead. Each Soldier in the raiding party who did not throw a grenade must attempt a Very Difficult Fight or Shoot action. On a failure, the Soldier takes 1 wound. On a botch, the Soldier takes 2 wounds. Once all actions have been resolved, the hex has been cleared.
15.8 Trench Section
Trenches consisted of straight stretches of trench, alternating with “traverses” – portions of trench set at an angle to the main trench line, to break up the trench line and prevent enemies from shooting down its length. Trench raiders typically cleared the enemy out of trenches by tossing grenades past the traverse, into the next straight section of trench.
Soldiers with grenades may attempt a Difficult Throw action to bomb the trench. On a successful roll, the trench has been cleared.
On a failed roll, nothing happens. On a botch, special rules come into play (see the “6.1 Bag of Grenades” in the “6. Equipment” section).
If the trench is not cleared using grenades, each Soldier who did not throw a grenade must attempt an Average Fight or Shoot action. On a failure, the Soldier takes 1 wound. On a botch, the Soldier takes 2 wounds.
Once all actions have been resolved, the hex has been cleared.
16.Returning to the Lines
Once the Objective has been accomplished, the player has two options. If a shorter game is desired, the player may immediately skip down to the “17. End of Game” section. Or, for a complete game, the player may choose to have the raiding party continue playing until the raiders have reached their own trenches. If the second option is chosen, the rules below apply.
Raiding parties were under orders to return to the precise spot in their trench line that the party set out from (the jumping off point, indicated on the map by a British Flag), so as not to be mistaken for the enemy.
The raiding party may return to their trenches at any point, but if the trench hex they enter is not the jumping off point, the raiding party will be fired upon by their own sentries.
If there is an Officer or NCO in the raiding party, either of these Soldiers (but not both) may attempt an Average Command roll to call out to the sentries in an effort to convince them that the raiding party is friendly. On a success, the raiding party reaches the trench lines without being fired upon. On a failure or botch, the raiding party is fired upon.
If the raiding party is fired upon, the first Soldier in the party must attempt an Average Speed action to hurl himself out of the way. Failure means the Soldier takes 1 wound. On a botch, the Soldier is shot dead.
The raiding party then reaches the trench lines.
Sometimes, a raiding party might suffer significant losses, prompting them to return to their own lines without completing their objective. Or they might decide that the objective is simply unattainable. A player may abort a raid at any time, but at a penalty. After an aborted raid, there are no Luck Increases and no Mentioned in Dispatches results.
17.End of Game
Once the game ends, several matters need to be resolved.
17.1 Medical Aid
Wounded raiders who made it back to their own trench lines were sent to field dressing stations to be patched up. The more serious cases were sent on to hospital, either in France or back in Britain. But first, they had to survive long enough to be treated.
Once back within their trenches, Soldiers with nothing more serious than a Light Wound are patched up and returned to the lines; they can be used in the next game.
Each Soldier who suffered a Serious Wound, however, must roll on the table below, to determine if he survives. Depending upon the wound location, the Soldier might die, or be so seriously wounded that he will never fight again (the wound is a “Blighty” and he is sent back home to recover), or eventually return to duty after all of his wounds have been patched up (Soldier is playable next game).
Roll separately for each Serious Wound suffered. Continue rolling until either all of the Serious Wounds have been accounted for, or until the first “Dies” or “Sent Home” result.
Medical Aid (D6)
Location of Serious Wound Soldier Dies Sent Home Patched Up
Head 1, 2, 34, 5 6
Hand n/a 1, 23, 4, 5, 6
Arm 12, 34, 5, 6
Chest 1, 23, 45, 6
Leg 12, 34, 5, 6
Foot n/a 1, 23, 4, 5, 6
Incapacitated wounded who are being carried back to the trench lines should first resolve whether they survived the journey (see “9.4 Carrying Wounded Back”) before rolling on the Medical Aid table.
17.2 Blinded men
Make a D6 roll for each Soldier who was blinded to see if they recover their sight and are able to return to the lines.
Blinded Men (D6)
Permanently blinded / sent homeSight Recovered 1, 2 3, 4, 5, 6
17.3 Men Left Behind
Make a D6 roll for each Soldier who was left behind by the raiding party. Soldiers who were incapacitated when left behind roll on the second column.
Men Left Behind (D6)
D6 Die Roll Incapacitated Result
11–2 The Soldier was killed and is no longer available for campaign play.
23–4 The Soldier was captured and is no longer available for campaign play.
3–45–6
5–6
The Soldier made it back to his trench lines but suffered an additional wound; roll to determine the location and severity of the wound as normal (see “9. Wounds”).
The Soldier made it safely back to the trench lines without any additional wounds.
18.Campaign Play
Soldiers who survive a raid may be sent out again on subsequent raids. Between raids, they may be re-equipped as the player sees fit (but they must each start the next raid with the Equipment that is mandatory for Soldiers of their type).
Soldiers who collected souvenirs may set them aside.
Any Soldiers who were lost are replaced with fresh men. Luck Increases
Soldiers who survive a raid are a bit more experienced than they were before. This is represented by increasing the Soldier’s Luck by 1. This is done each time the Soldier survives a trench raid. Luck cannot increase beyond 10.
Mentioned in Dispatches
The player should keep track of any Soldiers who are “Mentioned in Dispatches.” If they survive, these Soldiers increase their Luck by 2, instead of by 1, each time they receive this distinction. Luck cannot increase beyond 10.
New Soldiers
When creating a new Soldier for the campaign, players may distribute 25 points between the Stats (Speed, Strength, Courage, Command, Shoot, Fight, Throw, Luck) as they see fit. The minimum a Stat can be is 2, and the maximum it can be is 5, before any bonus dice for Special Skills are added.
A raiding party must always have one Officer and one NCO, but may include whatever mix of Riflemen, Bombers and Carriers the player deems appropriate. While trench raids historically were sometimes undertaken by much larger groups, the maximum number of Soldiers a raiding party may include in the game is 10 men.
The Five-Game Campaign
As the war stagnated into trenches along the western front, Field Marshall Sir John French, commander of the British Expeditionary Force, proposed in February 1915 that the army conduct “local attacks on a comparatively small scale.” These, he said, would “relieve monotony and improve the moral(e) of our troops, while they have a corresponding detrimental effect on the moral(e) of the enemy’s troops and tend in a variety of ways to their exhaustion and general disquiet.”
At first, it was recommended that each division carry out at least one raid per week. By the winter of 1916-17, that was upped to two raids per week.
Trench Raid spans the period when trench raiding was most prominent, from early February 1915, to the start of the German Spring Offensive of March 1918, which broke the stalemate on the Western Front.
The game assumes each division conducted one raid per week in 1915 and 1916, and two raids per week in 1917 and 1918. Rounding up slightly, that’s a total of 230 raids.
The characters the player creates are part of a BEF infantry company – one of the 48 companies that make up a division. Dividing the 230 total raids by this number and rounding up, the company the characters belong to could expect to be required to conduct a total of five raids over the course of the war. It is thus recommended that a Trench Raid campaign should be five games long.
Once these five games have been concluded, the player should tally up a campaign score as follows:
z 10 points per completed Objective
z 5 points per Soldier who survives all five raids (wasn’t killed, captured, or sent home with a wound)
z 2 points per replacement Soldier (added any time after Game 1) who survives the final raid (wasn’t killed, captured, or sent home with a wound)
z 2 points each time a Soldier is Mentioned in Dispatches (individual Soldiers may be mentioned more than once; add 2 for each mention of that Soldier)
Each successful raid was an important contribution to the war effort. As such, there are no hard and fast brackets for “success” or “failure”. Players should use these scores as a benchmark to measure the success of their future raiding campaigns, aiming to improve with each run.
Note: All “until the end of the game” effects (ex: the Courage penalty from Mutilated Corpses) end when the raid ends. They do not endure through the entire campaign.
19. Sample Trench Raid
Objective: Take out enemy sniper
Report written by: Sgt. Fred Dubbins, NCO
Turn 1: We set off from jumping off point. Area immediately in front of the lines is blocked by barbed wire. Someone bloody well forgot to open it for us! Pvt. Harris cut the wire.
Turn 2: Mustard gas. Luckily none of the men suffered blisters.
Turn 6: Found six friendly wounded. Too many to carry; we will report their location once we return to our lines.
Turn 9: Yet more barbed wire to cut. Pvt. Adlum nearly steps on an unexploded shell.
Turn 11: Chlorine gas! Pvt. Adlum didn’t bring his mask, in favor of body armor, which doesn’t protect him – serious chest wound. He bravely carries on.
Turn 13: We find a gas mask. Pvt. Adlum drops his club and takes the mask.
Turn 14: Enemy dog. No one has the heart to shoot it. We let it go.
Turn 15: Another unexploded shell. Pvt. Bull neatly sidesteps it.
Turn 16: We capture two enemy stretcher bearers.
Turn 17: Small crater filled with rats. Pvt. Adlum is bitten – light wound to leg.
Turn 18: Souvenirs tempt the men. Pvt. Adlum drops his bag of grenades to pick one up. Pvt. Winter drops his club to also pick up a souvenir. Pvt. Smith is about to drop his rifle, but luckily comes to his senses. I tell Winter and Smith they will face disciplinary action, once we return to our lines.
Turn 19: We find an enemy listening post just 5 hexes from our lines. It’s occupied by four Fritzies, all awake. In the resulting
