THE GREAT WAR AT SEA 1914-18


AH: Austria-Hungary
BB: Battleships (Dreadnoughts)
BC: Battlecruisers
BMP: Bonus Movement Phase
BMT: Bonus Movement Table
CP: Central Powers (Player)
D6: One six-sided die
2d6: Two six-sided dice
EP: Entente Powers (Player)
ET: Engagement Table
LR: Long Range
MP: Movement Point(s)
PD: Pre-Dreadnought squadrons
S/Sq: Ships/squadrons
TRM: Turn Record Marker
U-Boat: German Submarine
Vessels: Same as S/Sq
VP: Victory Point(s)
VPT: Victory Point Track
The Kaiser’s High Seas Fleet is a simple game inspired by John Edwards’ War at Sea, published by Jedko Games in 1975. Veteran players will recognize some of the original concepts. However, as this is a World War I game, there are some significant differences.
This is a two player game in which one player represents the Central Powers (CP) consisting of Germany, Austria-Hungary and the Ottoman Empire. The other represents the Entente Powers (EP) consisting of Great Britain, France, Italy, and Russia. The USA is neutral until Turn 7, when it joins the Entente. Portugal and Greece are always neutral.
The primary units depicted are Battleships (Dreadnoughts), the capital ships of the time, with some supporting Pre-Dreadnoughts. Auxiliary vessels are not represented.
The objective is to score as many Victory Points (VP) as possible at the end of each turn. These are marked on the Victory Point Track (VPT) during the Area Control Phase. The player whose marker is on the track is ahead in points. At the end of the July/December 1918 turn, the player whose marker is showing wins the game. If the marker is at 0, the EP wins but the CP has gained a ‘moral’ victory.
Victory Point & Turn Markers


The map depicts the European theatre of war with its associated countries, ports, mine fields and areas in which ships and U-boats are deployed. Sea areas regulate the movement of ships and ultimately determine control and VP.
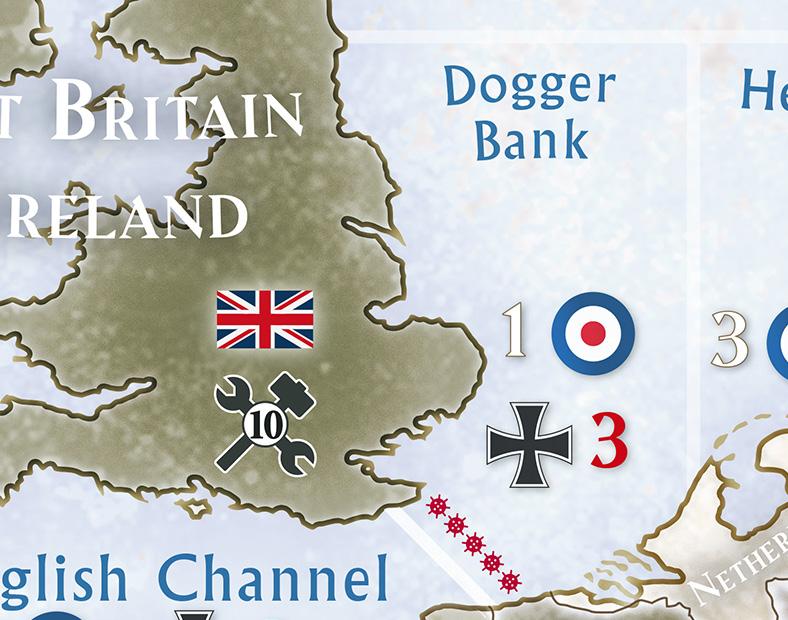
4.1 Most sea areas contain two numbers which determine the VP awarded to the player who controls the area, at the end of the turn. The number adjacent to the Allied symbol indicates how many points are awarded to the EP. The number adjacent to the Iron Cross performs the same function for the CP. Some areas have only one number.

Example: If the North Sea is controlled by the EP, he is awarded 1 VP. If the CP controls it, he is awarded 3 VP.
Note: The EP is expected to control the North Sea so, if he were to lose it, the effect on British commerce would be disastrous!
4.2 Mines

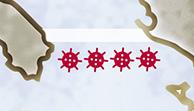
Areas depicting mines come into play after Turn 1. Ships and squadrons (S/Sq) crossing an enemy mine field during their Movement Phase cause the player to consult the Mine Combat Table (11.2)
Pre-Dreadnoughts can never cross an enemy mine field.
4.3 Repairs
The ‘wrench’ symbols represent ports where damaged ships can be repaired and new ships arrive as reinforcements. The Relevant Port lists on the Shipyard displays provide a brief recap of which ports can be used by each side. For a more in-depth list, see the back of this rulebook.
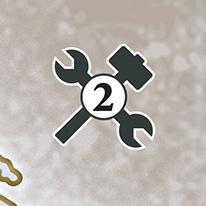
The number on the wrench symbol indicates its repair capacity, which is the total number of Hit points (damage) that can be removed from vessels in a single turn. Neutral ports, where only the EP can repair damaged ships, are also shown. Some neutral ports have ‘zero’ repair capacity. The EP may choose to return ships to these ports to improve their positioning for the following turn.
◆ 1 Map Board
◆ 292 Counters
◆ 2 Task Force Charts
◆ 1 Charts & Tables Aid, 2 Surface Combat + Shipyard Boards
◆ 6 Six-sided dice
◆ This Rules Manual
5.1 Ship counters are colour-coded by nation:
Grey: Germany
White: Austria-Hungary
Yellow-green: Ottoman Empire
Red: Great Britain
Blue: France
Green: Italy
Brown: Russia
Olive green: United States
5.2 Counters also display a variety of information essential to game play.





➢ Ships with no squadron designation can choose to attach themselves to a squadron. This may remain the same or be a different squadron each turn.
➢ Unlike other ships, U-Boats and the British Submarine unit do not have Fire or Defence Factor.
Dice to roll for merchant shipping attacks



5.3 Pre-Dreadnoughts can never engage in any form of combat, unlike individual surface ships.
Note: U-boats and the submarine do not represent individual vessels but rather the ‘capability’ or the ‘anti-shipping’ power a player projects into an area.

➢ The CP ship, Goeben, is placed in Austria-Hungary (18.1).

5.4 Information Counters

➢ The Yavuz Sultan Selim enters at the end of Turn 1 only if the Goeben enters Constantinople on Turn 1.
Hit markers indicate how much damage a ship has received either in combat or as a result of Mines.
6.4 Russia, Italy, France and Austria-Hungary cannot move their surface units until Turn 2. The Austro-Hungarian U-Boat is exempt from this rule.




Break Off markers indicate a ship has enough damage to force it to retire from a battle.
Sunk markers indicate that a ship has received a number of hits EQUAL to its Defense Factor and, as a consequence, has been sunk and removed from the game. (This is different from the original John Edwards design.)
Control markers indicate which side is awarded VP for the area.
The Turn Record Marker (TRM) always indicates the current turn.
Each player sorts his S/Sq counters by nationality and places them on his respective Task Force Chart , along with the Room 40 chit for the EP (18.4)
6.1 Those with a turn entry number can be placed on the Task Force Chart or set aside, as they enter play on that turn.
6.2 Both players place their Squadron markers (including PreDreadnoughts) in their respective countries. The Entente player receives one British submarine counter at the set up and the Central Powers player receives one U-Boat counter.
Note: The British 5th Battle Squadron is not available until Turn 3, since this is the earliest turn in which it can be created, according to rule 8.2.
6.3 Ships, not in squadrons, are placed in their respective countries. In addition:
➢ The British ships Indefatigable, Indomitable and Inflexible are placed in Malta.
6.5 Mine fields are not active on Turn 1.
6.6 The TRM is placed on Turn 1 and the Sequence of Play is followed.
A) Mutual Reinforcement Phase
Each player consults his Task Force Chart and places his ships at ports of their nation, on their turn of entry. (17.0)
B) Mutual Repair Phase
Each player repairs damaged vessel(s) and flips those counter(s) to indicate they cannot move this turn.
C) EP Movement Phase*
The EP moves his S/Sq and places his Submarine. (9.9, 6th bullet)
D) CP Movement Phase
The CP moves his S/Sq, places his U-Boat(s) (9.9), and may place his Scouting Squadron on Great Britain to initiate a Coastal Raid. (10.1)
E) EP Bonus Movement Phase*
The EP attempts to move his S/Sq one more area. Battlecruisers can attempt to move one or two areas.
F) CP Bonus Movement Phase
The CP attempts to move his S/Sq one more area. Battlecruisers can attempt to move one or two areas.
G) Combat Phase (11.0)
a) U-Boat(s) and the Submarine resolve their attacks (11.3) . U-Boats can attack merchant shipping and/or surface vessels, while the Submarine unit can attack only surface vessels.
b) If friendly and enemy S/Sq are in the same area, both sides must roll on the Engagement Table (ET) to determine how many S/ Sq of each side actually engage. This could result in no battle taking place (11.9)


H) Area Control & VP Phase
Control markers are added as applicable and VP awarded and recorded. (13.5)
I) Return to Port Phase
All S/Sq, U-Boats and the Submarine return to the closest friendly port matching their nationality. All control markers are removed. Watch out for mine fields, Squadrons and individual ships DO NOT get a free movement through a mine field.
Exception: The EP may choose to return units to a neutral port if it is the closest option. This allows the EP to strategically position units for future turns and is the reason for 0-repair capacity ports such as Rhodes.
J) Turn Record Phase
The TRM is advanced to the next turn.
*See 9.10 for rules on British Strategic Movement.
The use of Squadron markers allows players to move fewer counters rather than stacks of ships, thus reducing counter clutter. British, German and USA ships are assigned to specific squadrons, as noted on their respective Task Force Chart. They also confer a significant advantage with regard to combat, as seen in 11.8. For these reasons, their use is not optional.
Note: Players are urged to utilize their Task Force Charts and place ships on their respective Squadron Box.
8.1 Ships are permanently assigned to their squadrons located on their Task Force Charts. They cannot be detached or reassigned to another squadron. The single exception is rule 8.2
Ships with no squadron designation (“Unattached”) can choose to attach themselves to a squadron. This may remain the same or be a different squadron each turn.
8.2 The German Scouting Squadron, the British Battle Battlecruiser Squadron and the 5th Squadron are the only ones that can detach ships for independent movement. However, they can never voluntarily detach ships if doing so were to reduce the squadron to 2 ships or less. There must be at least three ships to use a squadron marker.
8.3 Due to battle damage, if a squadron is reduced to only one or two ships, the Squadron Marker is immediately removed, temporarily, from the map board. The remaining ships remain in the area where the squadron was removed. When the squadron is again composed of at least three ships, it can be returned to the board and the ships once again placed on the Squadron Charts. Note: Due to this rule and the limited size of the German 2nd Squadron, it does not have its own Squadron Marker.
Historical Note: Ships were reassigned to different squadrons, but it was not done frivolously. They were always assigned according to their individual firepower, armour and speed.
8.4 When the U.S. 6th Squadron arrives, it is placed in the United


States. In the Return to Port Phase, depending on where the squadron is located, it can return to Great Britain or the USA.
8.5 Pre-Dreadnought Squadrons
8.6 Pre-Dreadnoughts (PD) never engage in combat. If they are in the same area as non-PD enemy ships, they simply remain in place.
8.7 After all movement phases have occurred, if Pre-Dreadnoughts are in the same area as enemy Pre-Dreadnought(s), the PD are instantly removed from the area and return to their closest friendly port.
8.8 If PD are alone in an area, they control it.
8.9 When only PD of both sides share an area, neither controls it.
8.10 PD control an area if only a U-Boat or submarine is present.
9.1 A player is not obliged to move any S/Sq; movement is voluntary.
9.2 The initial move of any S/Sq is always to the sea area adjacent to its port of origin. The British player may choose to instead use British Strategic Movement (9.10), but units moved in this way cannot move again into another sea area.
9.3 The presence of enemy S/Sq does not block friendly forces from moving into or through the area. (This is a change for the original War at Sea.)
During the Bonus Movement Phase (BMP), S/Sq can attempt to move into one additional area. The British 5th Battle Squadron and all Battlecruisers of both sides can attempt to move into one or two additional areas.


➢ The EP announces which S/Sq will be attempting to move one or two spaces extra. He rotates these units to distinguish them from those not utilizing Bonus Movement.
➢ Just before rolling on the Bonus Movement Table (BMT) for each ship and squadron individually, the EP identifies the specific area to where each S/Sq is attempting to move.
The CP now performs the BMP phase using these same two steps.
9.5 A dice result of 5 or 6 is successful; a result of 1-4 and the unit stays where it is. Whether the units are attempting to move one or two areas, only one roll is made.
9.6 Bonus Movement Table

9.7 After Turn 1, any S/Sq is subject to Mine Combat if it crosses into a sea area blocked by enemy mines (11.1).
9.8 U-Boats & the Submarine Unit
All U-Boats and the Submarine unit are placed, not moved, into sea areas, with a maximum of one per area. They are not subject to the effect of mines.
9.9 U-Boat & Submarine Placement

ONLY unit in the space DOES score 1 VP as long as he did not roll on the Merchant Shipping Table that turn. The LR U-Boat, and all U-Boats for that matter, can roll on the table for points OR go for control if they meet the requirement. They cannot do both.
➢ The EP places the British submarine in any sea area, except the Black Sea.
9.10 British Strategic Movement
Strategic Movement can be used to move up to three ships, together or separately, from friendly port to friendly port. The limitations of the Baltic and Black Seas must still be respected. If moved in this manner this counts as their move for that turn and ships that moved cannot remain in a Sea Area, they must end their turn at a friendly or neutral port.
9.11 This manoeuvre can be used in 7.0 Phase C or Phase E, but not both. Ships performing this manoeuvre do not roll on the BMT. This counts as their move for the turn.
9.12 Restrictions in the Baltic Sea
Only the following can operate here:
➢ CP U-Boats
➢ British units (submarine included)
➢ German ships


The CP places his U-Boats, one per sea area in accordance with the restrictions below.
➢ The Austro-Hungarian U-Boat is placed in the Eastern Mediterranean, the Adriatic, or the Aegean.
➢ Only one German U-Boat can ever be placed in the Eastern Mediterranean, the Adriatic, the Aegean or the Black Sea. This U-Boat must return to Austria-Hungary, not the German Empire.
➢ U-Boats can be placed in the Western Approaches beginning on Turn 2.
➢ The rest of the German U-Boats can be placed in any other sea area according to their turn of entry.
➢ Only the Long Range U-Boat can be placed in sea areas marked ‘Long Range’. The long range U-Boat, which finds itself as the


➢ Russian ships (can never leave)
9.13 Restrictions in the Black Sea

Only the following can operate here:
➢ British Battlecruisers
➢ Yavuz Sultan Selim (Ottoman ship)


➢ Russian ships (can never leave)


9.14 The Yavuz Sultan Selim can enter the Aegean Sea and with Bonus Movement, the Adriatic, the Eastern and Western Mediterranean. It still must return to Constantinople in the Return to Port Phase.


9.15 Starting on Turn 6, the CP 2nd Squadron Pre-Dreadnoughts can move only into the Baltic. For additional restrictions on Allied Navy movement, see 16.0.
As an alternative to taking control of sea areas, the CP can execute raids against coastal towns in Great Britain or Merchant Ships.
10.1
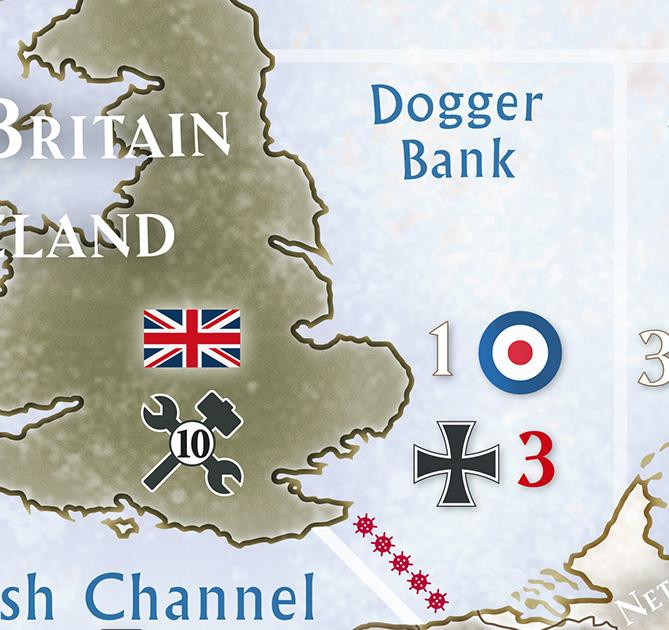
During his Movement Phase, the CP places his Scouting Squadron directly onto Great Britain. (Yes, just do what is says, place it there)
10.2 If the EP’s 3rd Battlecruiser Squadron is in the Dogger Bank, he can stack it directly on top of the CP Scouting Squadron. (Again, just do what it says)
10.3 If the squadrons are stacked, they must engage in a standard three Round Battle in the Combat Phase. By the end of the third round, if the CP has not been forced to retreat, he is awarded 2 VP.
10.4 If the 3rd Battlecruiser Squadron is not in the Dogger Bank, or the EP decides not to contest the coastal raid, the CP is awarded 1 VP.
10.5
The CP can choose one or two Battlecruisers from his Scouting Squadron, temporarily trumping Rule 8.2. It/they can move up to three sea areas in the Standard Movement Phase. No Bonus Move is performed.
10.6 At the end of the Combat Phase, if the raiding CP ships remain in the area with no enemy surface vessels present, the CP rolls on the Merchant Shipping Table (11.5)
10.7 If EP ships are in the area, there must be at least one round of combat. No Battle Turn Away is allowed (12.7).
Hint: The EP would do well to keep some Battlecruisers in areas where raiders can reach.
There are four types which must be performed in the following order:
1. Mine Combat (Movement Phase)
2. U-Boat vs Merchant Shipping *
3. U-Boat/Submarine vs Capital Ship *
4. Surface Combat
*Note: Individual U-Boat units can attack surface vessels or Merchant shipping but they cannot attack both in the same turn. British submarines can attack only surface vessels (14.3.).
Note: VP are instantly recorded on the VPT when they are awarded.
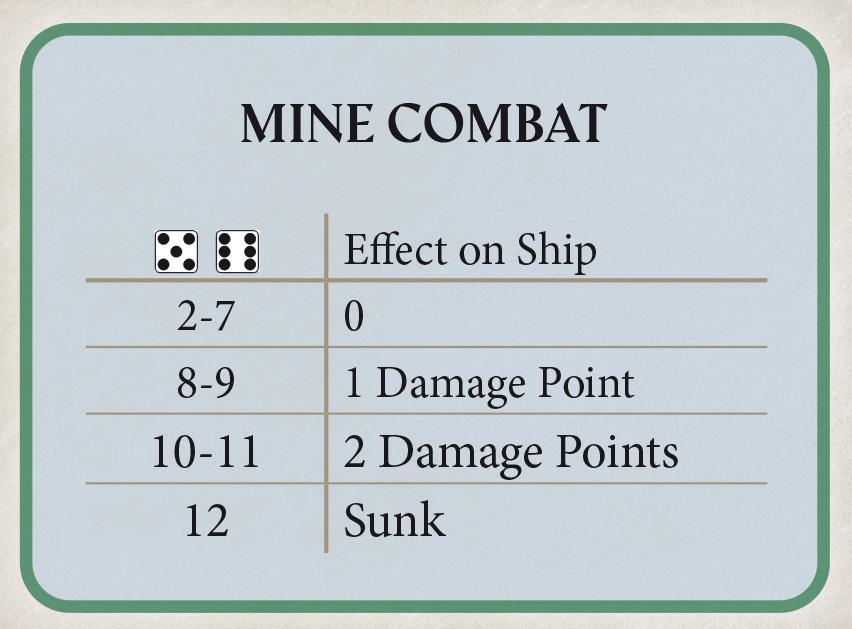
Mine combat occurs whenever S/Sq move across enemy mine fields. For each ship, 2d6 are rolled and the Mine Combat Table is consulted. Any damage causes the ship to be placed at the closest friendly port and its move is over.
11.2 Mine Combat Table
11.3 U-Boat vs Merchant Shipping
U-Boats attack merchant ships via the Merchant Shipping Table (11.5)
Remember: There are no physical merchants ships in the game since the Merchant Shipping Table is used to show the effect U-Boats had on the British economy.
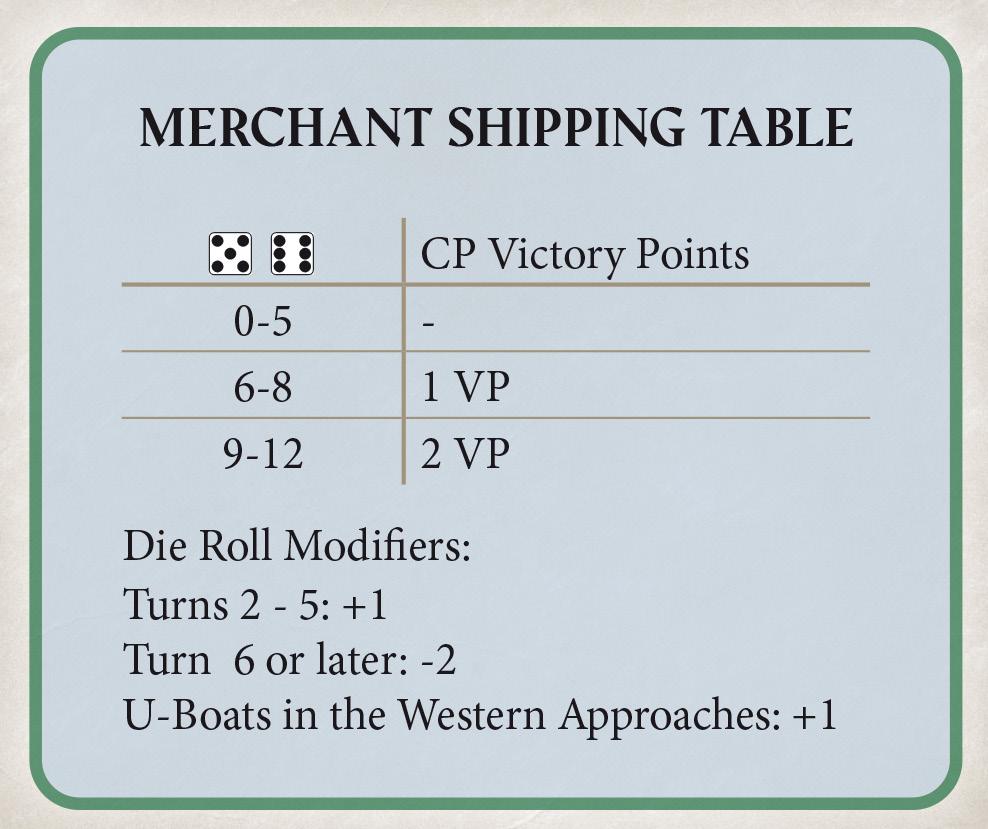
11.4 For each attacking U-Boat counter in an area, regardless of enemy units, a 2d6 are rolled and the Merchant Shipping Table is consulted. The die roll modifiers for both the turn and location must be taken into account. The result indicates the number of VP awarded to the CP and are immediately recorded on the VPT.


11.5 Merchant Shipping Table
11.6 U-Boat/Sub vs Capital Ship
This takes place before surface combat. The player in control of the submarine or U-Boat rolls a D6 and only if the result is ‘6’, one hit is assigned to a randomly chosen ship in the area. Once hit, it is placed immediately at the closest friendly port.
11.7 Surface Combat
The core of the game is Dreadnought vs Dreadnought. It determines control of a sea area for VP. Dreadnoughts that are sunk yield 1 VP at the end of the game.
11.8 When Dreadnoughts of both sides share the same area during the Combat Phase, battle may occur depending on the Engagement Table result.
11.9 Engagement Table
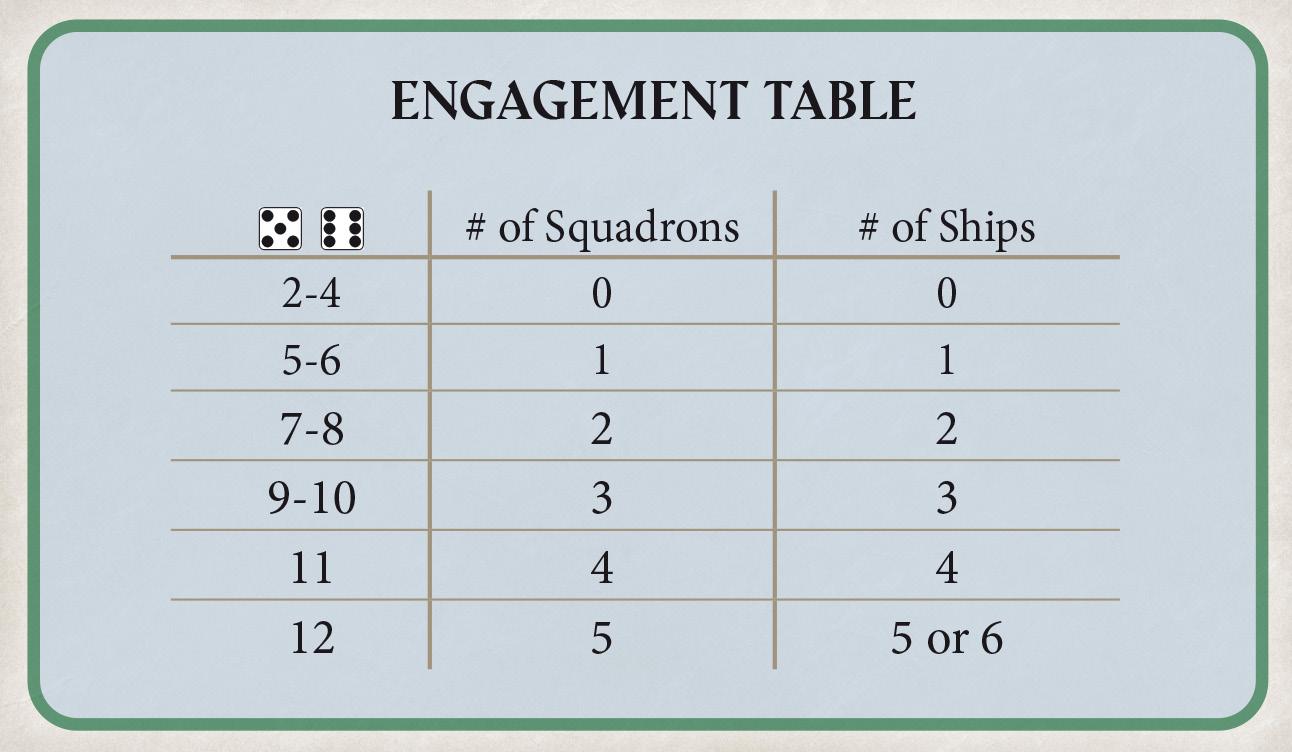
Each player rolls on the ET. It is possible a battle may not occur if either player rolls a ‘0 result. It is also possible that only some S/ Sq will be involved. The Engagement Table determines how many S/Sq actually engage, including none at all, but the player decides which ships participate (Exception: 18.4) (See 8.0)
11.10 If a player has only ships or only squadrons, he rolls once on the ET. If a Squadron Marker has been removed from play due to diminished strength, the remaining 1-2 ships are treated as individual Ships on this table.
11.11 If a player has a mixture of Ships and Squadrons, he rolls twice on the ET; once for the ships and once for the squadrons.
11.12 If there are multiple areas of combat, the CP decides the order of resolution.
Players roll on the ET (11.9)
If one side rolls ‘0’ on the ET then no combat is possible since it is assumed the S/Sq did not sight each other Otherwise, players set up their S/Sq according to Rule 11.14, Step 2. Players engage in combat for a maximum of three rounds. Players determine who controls the area after all combat and retreats have taken place.
Note: This could occur if neither side is forced to retreat nor voluntarily withdraws. If both still have ships in the Area nobody controls the Area.
Step 1: Both players roll 2d6 on the ET to see how many S/Sq will deploy for battle. This could result in no battle.
Step 2: Should battle ensue, the EP lines up his ships on the row of spaces at the top of the Ship Yard display, placing ships in order of their Fire Factor with the highest rating going in the rightmost space and the lowest factor in the leftmost space.
Step 3: The CP performs the same procedure as in Step 2 using his own Ship Yard display, lining up the ship with the highest Fire Power factor in the leftmost space and the lowest factor in the rightmost space.
Note: This should result in the ships with the highest Fire Factor facing off against each other (see 19.0). For solitaire play, use the German Shipyard Display which includes a battle row for each side.
When one player has more ships than the other, their battle line extends beyond the enemy ships, but only the first extra ship is allowed to fire on the last ship in the enemy line. Any remaining ships are still deployed but not allowed to fire in this round
Step 4: Players engage in a Surface Combat Round, with each ship rolling a number of dice equal to its Fire Factor. Ships of both sides must fire at the enemy ship directly opposite (Exception: First extra ship). Combat is simultaneous, so a ship that is hit still fires back with no effect on its firing


ability. For each “6” result, a Hit marker is placed on the enemy vessel. This process continues down the line until each ship has fired and has recorded damage. (The Fire markers will be handy here to help mark where on the line the ships have already fired.)
Steps 1-4 Constitute a Combat Round
Step 5:
➢ When a ship receives 1 hit less than its Defence Factor, a Break Off marker is placed on it. After having fired, it is placed at the closest friendly port.
➢ Ships that have been sunk are set aside to be evaluated for VP at the end of the game.
Step 6: Players determine if there will be a Second Round of Combat (or a Third, as the case may be).
➢ If both desire a Second Round of Combat, it occurs. Proceed to Step 7.
➢ If both do not want a Second Round of Combat, it does not occur. Proceed to Step 10.
➢ If one player has Sunk or Break Off markers on all of his ships, there is no Second Round. Proceed to Step 10.
➢ If one wants to Disengage, players follow the Disengagement & Pursuit Procedure. (12.0)
Step 7: If a Second Round of Combat is to occur any ships that have broken off or have been sunk will have created a gap in the line. Each player slides all his ships to the right (or left, as the case may be) to have each ship engage a new opposing ship.
Note: It is through this rearrangement that some excess ships, not having engaged in combat, may now participate.
Step 8: Players now engage in a Second Round of Combat with each ship firing at its opposite, as in Round One (Or a Third, as the case may be.).
Step 9: Combat ends when one of these three events occurs:
➢ All ships on one side have Break Off or Sunk markers. Proceed to Step 10.
➢ A player decides to Disengage. (See 12.0)
➢ Combat has lasted three rounds. Proceed to Step 10.
Step 10:
➢ Ships with Hit markers are returned to the closest friendly port. Hit markers can be removed in the Repair Phase. Proceed to Step 11.
➢ Break Off markers on ships in friendly ports are removed at no cost. Proceed to Step 11.
➢ If combat ends after three rounds with no Break Off or Sunk
markers placed, all units remain in space. Proceed to Step 11.
Step 11: Players proceed to the Area Control & Victory Phase (13.5).
➢ Hit - For every 6 die roll result, 1 Hit marker is placed on the enemy ship.
➢ Break Off - When the number of Hit markers reaches one less than the ship’s Defence Factor, it is marked with a Break Off marker.
➢ A ship with a Break Off marker can still fire in the current round with no ill effect.
➢ There is no Pursuit Fire against any ship with a Break Off marker (12.6)
Note: The marker is only a reminder that the ship must retire from combat after the current round.
➢ Sunk - When the number of Hit markers equals or exceeds a ship’s Defence Factor, it sinks and is set aside to be evaluated for VP at the end of the game.
Disengagement occurs when a player voluntarily retires all his ships after the first or second round of combat. It is different from Break Off, which is a forced retreat of individual ships due to damage. After ships have disengaged and Pursuit Fire has been resolved, combat is over.
12.1 The CP always states first if he is disengaging. Then the EP does so.
Remember: Battle Turn Away (12.7).
Pursuit occurs after Disengagement. Both sides fire one last time, using only one die per ship. Fire Factors are ignored.
12.3 Before Pursuit Fire is initiated, both sides must rearrange their lines if ships have been sunk or have broken off.
12.4 The disengaging side is the retreating player while the other is the pursuing player.
12.5 If the player decides not to pursue, there is neither Pursuit Fire nor return fire and combat ends. The retreating player returns to the closest friendly port.


12.6 Pursuit Fire Procedure
A) Players remove ships with Break Off markers and ships that have been sunk.
B) Players rearrange their ships.
C) All ships use a single die rather than their Fire Factor.
D) There is only one Battle Round E) Combat results are simultaneous.
F) After Combat resolution, retreating ships return to the closest friendly port.
G) Players proceed to the Area Control & Victory Point Phase.
12.7 Battle Turn Away
Only German ships can exercise this manoeuvre and only when the flagship, Friedrich der Grosse, is present. The entire fleet is allowed to perform the disengagement for ‘free’, after at least one combat round. There is no Pursuit Fire.
13.1 Victory Point Track (VPT)
The VPT is located at the bottom of the map board. It is divided into two colours: red for the EP and grey for the CP. In the middle is 0 with numbers from 1 to 10 on either side.
13.2 Victory Point Marker
The Victory Point Marker is double-sided: one side for representing the EP, the other the CP. It is used on the corresponding coloured side of the VPT by the player who is currently ahead in VP. The VPT is dynamic, always showing who is ahead at any given time.
13.3 Scoring Victory Points
The VP marker is moved immediately during the Combat Phase as VP are scored (Example: Merchant Shipping Table).
13.4 The U-Boat war is simulated by rolling on the Merchant Shipping Table in the Combat Phase . The CP rolls once for each U-Boat in each area. The table indicates how many VP are immediately scored
Remember: Points above 10, or below 0, are ignored. This is important for game balance.
13.5 Area Control Phase
If a player has at least one surface vessel in the area and no enemy surface vessels present, he places his control marker in the area. A U-Boat or submarine presence is ignored.
13.6 Ships with a Damage marker never control an area and return to the closest friendly port at the end of a battle.
13.7 If there are no surface ships in an area but there is a U-Boat, a CP Control marker is placed.
13.8 If both sides have ships in the area, neither is in control and no markers are placed.
13.9 If a previously controlled area becomes vacated, the Control marker is removed.
13.10 VP scored for each area equals the number beside the players’ respective graphic symbol.
Each player totals his VP from all the areas he controls. Then, players subtract the lower from the higher, obtaining the difference. The difference is added to (or subtracted from) the number of the lead player, already recorded on the VPT.
Example 1: The VP marker is currently at +2 in favour of the EP. In this turn, the EP gets 9 VP and the CP 6 VP. Players subtract the lower score from the higher and the result is 3 in favour of the EP. These are added to the existing VP on the track to end the turn at 5 VP for the EP.
Example 2: The VP marker is currently at +2 in favour of the CP. In this turn, the CP gets 6 VP and the EP 9. Players subtract the lower score from the higher and the result is 3’in favour of the EP. These are subtracted from the existing VP on the track to end the turn at +1 for the EP.
13.12 Although VP are added/subtracted from turn to turn, all points exceeding 10, or less than 0, are ignored.
13.13 After all VP are scored on the VPT, all control markers are removed from the board.


At the end of 1918, a player scores 1 VP for every enemy Dreadnought and Battlecruiser he sunk. All other vessels are ignored for VP. The player with the most VP wins.


The submarine unit and U-Boats do not represent individual boats nor historical flotillas but rather a nation’s ability to concentrate its undersea power.
14.1 Additional U-Boats are available for the CP during the Reinforcement Phase of Turns 2 - 5 inclusive.
14.2 U-Boats and the British submarine are never destroyed nor removed.
14.3 The British submarine can only attack surface ships. U-Boats can attack surface vessels and merchant ships. However, the same unit cannot attack both in the same turn.
14.4 Mine Combat Resolution
Mine Combat takes place during a player’s Movement Phase and is resolved the instant S/Sq move across an enemy mine barrier. The Mine Combat Table is consulted for the result. (11.2)
Damaged ships can be repaired at any port of that ship’s nationality during the Mutual Repair Phase (7.0-B). (Exception: 15.4)
15.1 The number below each port represents its Repair Capacity. This is the total amount of damage or Hit points that can be removed each turn.
15.2 After a ship has been repaired, its counter can be flipped as a reminder it cannot move that turn. It is flipped back after all movement has been resolved.
Note: Ships with Hit markers should be placed on their respective Shipyard Boards, reducing counter clutter even more.
Most times ships are repaired in their home countries but if they are not, place the ships on the port where the are being repaired.
15.3 Damaged ships cannot leave port; they must be repaired before moving.
15.4 Damaged EP ships can be repaired in neutral ports (if they have the capacity); CP ships cannot.
15.5 Damaged CP ships returning to a neutral port are interned by the neutral power and permanently removed. No VP are scored (This was a back up rule and never occurred during play testing).
15.6 Ships cannot return consecutively to the same neutral port. If they do, they are automatically interned and removed from the game.
Both players have allies with navies of their own which are also restricted to particular sea areas.
16.1 Italian and Austro-Hungarian navies can move only into the Adriatic, Eastern Mediterranean and Aegean. Clarification: Italian units CAN move directly into the Eastern Mediterranean, but are still restricted to that sea and/or the Adriatic and Aegean.
16.2 French navies can move only into the South Atlantic, the Azores, and the Western Mediterranean.
Historical Note: Although French and Italian navies were capable of movement throughout the Mediterranean, the EP decided to split the areas of operation to reduce confusion.
16.3 Russian ships, based in St. Petersburg, can move only into the Baltic. Those based in Sevastopol can move only into the Black Sea.
16.4 After Turn 1, Russian, French, Austro-Hungarian, and Italian ships must roll a D6 for each unit before it moves. A 5 or 6 result allows it to move; any other result immobilizes it for the turn.
16.5 After Turn 6, all Russian ships must remain in port and cannot move.
Note: This simulates the Russian Revolution which immobilized the entire Russian Navy.
16.6 If the CP decides to keep the Goeben in Austria-Hungary on Turn 1, it can operate in the Adriatic and, with Bonus Movement, the Eastern and Western Mediterranean, and the Aegean.
16.7 On Turn 7, the U.S. enters the conflict. Its navy can move only into the North Atlantic, the Western Approaches, and the North Sea. It can use Great Britain as a friendly port.


The Order of Appearance Charts are consulted to see where and when new units are added. Arriving units with an assigned squadron on their counters are placed in the matching squadron box. If their Squadron Marker is currently out of play, they are placed on the stack with the remaining 1-2 ships from their squadron. If this brings the stack strength up to 3+ ships, move the stack to the squadron box and replace it on the board with the appropriate Squadron Marker. See 8.0 and 11.10 for an explanation of why this change is important for combat purposes.
18.1 Only on Turn 1 can the Goeben do a special ‘free’ move to Constantinople. If it does, it is removed and replaced with the Ottoman Battlecruiser, Yavuz Sultan Selim, (“Harsh Sultan Selim”; the Goeben renamed).
18.2 If the Goeben remains in Austria-Hungary, it moves like any other CP Battlecruiser subject to the Entente mine field if it leaves the Adriatic Sea on Turn 2 or later.
18.3 On Turn 6 and thereafter, the CP 2nd Squadron (PD) can move only into the Baltic.
18.4 Room 40 Intelligence
The EP has a special chit which can be played only once to give his fleet an advantage in battle.
18.5 It can be expended instead of rolling on the Engagement Table in an area where enemy S/Sq are present.
18.6 Expenditure of the chit allows the EP to utilize every squadron of his fleet located in the chosen area of battle. Once expended, it is removed from the game.
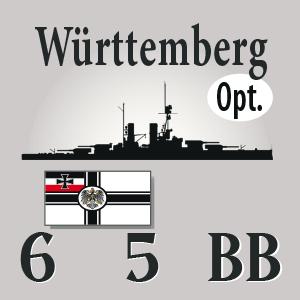
The two German Dreadnoughts, Württemberg and Sachsen, are optional vessels. The Württemberg, although launched in 1917, did not engage any enemy forces. The Sachsen was never actually completed. Both vessels have been included should players wish to use them.
The two fire markers are used as a ‘mnemonic’ device by each player when ‘firing’ ships in combat. As each ship fires place the marker behind the ship as a reminder where in the line the last die roll was made. After the ship fires move the marker down to the next ship that is firing.




For the purposes of illustration and clarity, all counters are presented facing the same way. During play, the opposing player sits at the top of the illustration with his counters facing him on his Ship Yard Display. Note: the approach below is followed for solitaire play using the German Ship Yard display and utilizing both battle rows.
It is Turn 3. The EP is in the Dogger Bank area with the 1st and 2nd Squadrons and the 3rd Battlecruiser Squadron. The CP has only his 3rd Squadron. Both will roll on the Engagement Table to see which squadrons will engage (if any).
The EP rolls an 8, meaning only 2 of his available 3 squadrons can engage in the ensuing battle. He decides to use his 1st Squadron and his 3rd Battlecruiser Squadron. Although the CP has only one squadron, he must still roll on the ET because rolling a 2 - 4 would result in 0, meaning there would be no battle.
The EP arranges the ships of his most powerful squadron, (in terms of Fire Factor), right to left, with the highest Fire Factor on the right and the others in descending order. He continues this procedure with his other squadrons, to the left of the already arranged squadron.

In the illustration, the EP most powerful ship, the Marlborough, is first in line and the rest continue in order by descending Fire Factor. The CP arranges his ships in exactly the same manner, except beginning on his left.

CP: 7 vessels
EP: 8 vessels
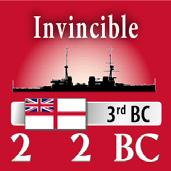
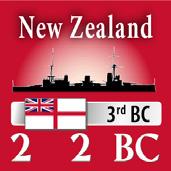
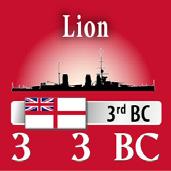

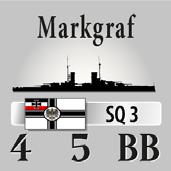
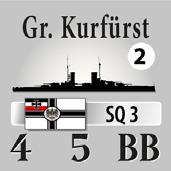
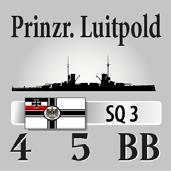

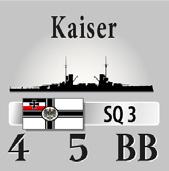
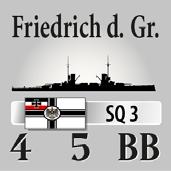
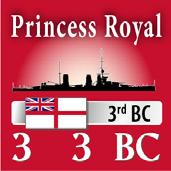
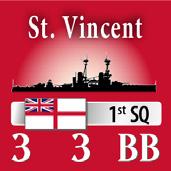
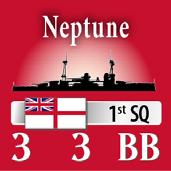

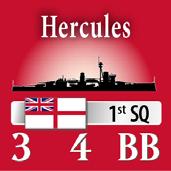

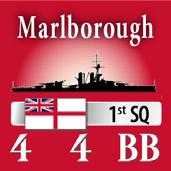
When the lines are set up, both sides will have their most powerful ships engaging each other. Below, the Marlborough will be firing on the Friedrich der Grosse and vice versa.
Note that the Lion is the one extra ship which will fire on the König. Firing will be simultaneous and damage markers placed, if necessary, on ships after both have fired.


The illustration below shows the situation after all ships have fired and appropriate markers placed. The CP received 4 hits while the EP received 6. The Collingwood, having received 2 hits (which is 1 less than its Defence Factor) is marked with a Break Off marker. If a Second Round of Combat occurs, the Collingwood cannot participate.


CP: 7 vessels
EP: 8 vessels




The CP always states first if his fleet wants to Disengage. He decides to fight a Second Round and now the decision passes to the EP. Even though the Collingwood has been forced to Break Off, the EP decides to engage. He must rearrange his battle line because the Collingwood’s absence has caused a gap. He moves every ship on the left of the gap, one space to the right. Now, most ships will have a new target. In addition, the New Zealand, not engaged at all in Round 1, has now moved up and can fire on the König.

CP: 7 vessels
EP: 8 vessels


The illustration below shows the damage after both sides have fired. Since Friedrich der Grosse is present, the CP is able to use Battle Turn Away. The CP inflicted hits on the EP but took quite a few in exchange. The CP decides to use Battle Turn Away ending the engagement, with no Pursuit Fire. The CP squadron returns to the German Empire. The EP leaves his undamaged ships in the Dogger Bank giving him 1 VP in the Area Control Phase.
CP: 7 vessels
EP: 8 vessels




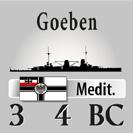
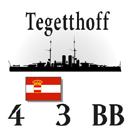
In this example, it is turn 1 and three British Battlecruisers encounter the Tegetthoff and the Goeben in the Eastern Mediterranean. Both sides roll on the Engagement Table and both are allowed to engage with all vessels. Since the Goeben did not flee to Turkey, it was not replaced by the Yavuz Sultan Selim, and is free to move into the Western and Eastern Mediterranean, the Adriatic and Aegean Seas.
CP: 2 vessels
EP: 3 vessels
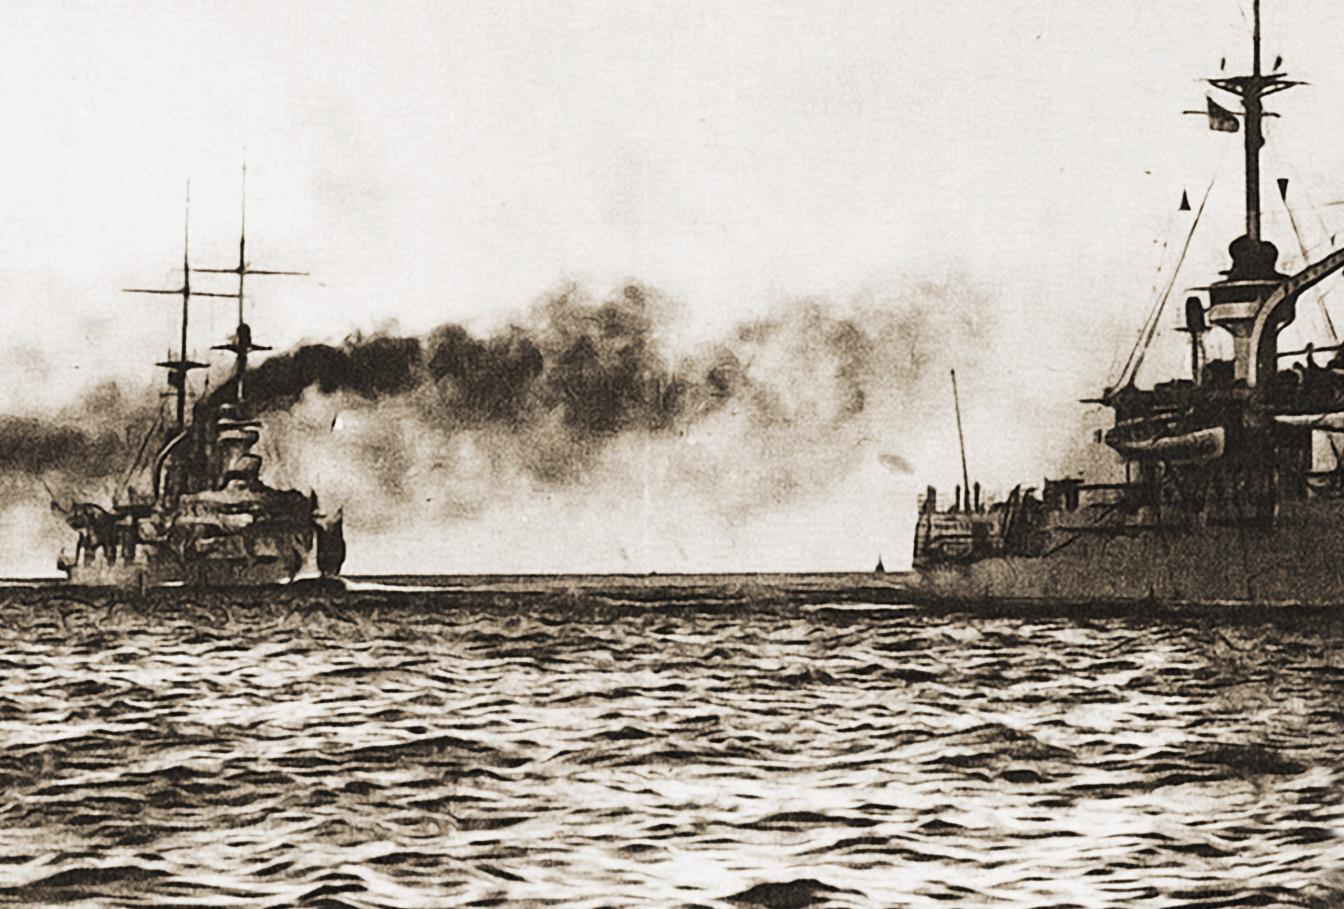
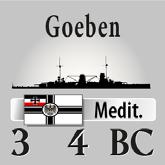
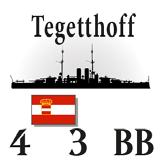

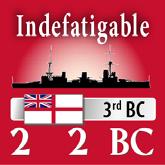

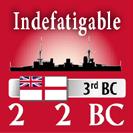
Even though the CP has only two ships, the Tegetthoff must be placed first in the line. For the EP, ship placement does not matter, because every ship is equal. This will be a close battle, since the CP will be rolling 7 dice against the EP’s 6. British Battlecruisers are ‘thin skinned’ with very low Defence Factors. Damage against them could be critical! Although each side inflicted only 1 hit, it is far more serious for the EP. Indomitable has to Break Off and return to Malta/Egypt. If the EP decides to stay another round, he would be rolling only 4 dice against the CP’s 7. In Royal Navy tradition, the EP decides to stay and fight a Second Round. The odds are against him, but right or wrong, the decision has been made. The Tegetthoff will roll 4 dice against Indefatigable’s 2. The Goeben will roll 3 dice against Inflexible’s 2.




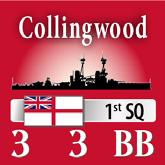


The British fight a valiant battle inflicting 1 hit on the Goeben, but receive 1 hit on the Indefatigable, forcing it to Break Off. Now we have the makings of a potential disaster. The British could fight another round, but the odds would be even more against them. Although damage does not affect firing, they would have only 2 dice against the CP’s 7.


In the picture below, the EP chooses Disengagement which reduces the firepower of both sides to only one die per ship.
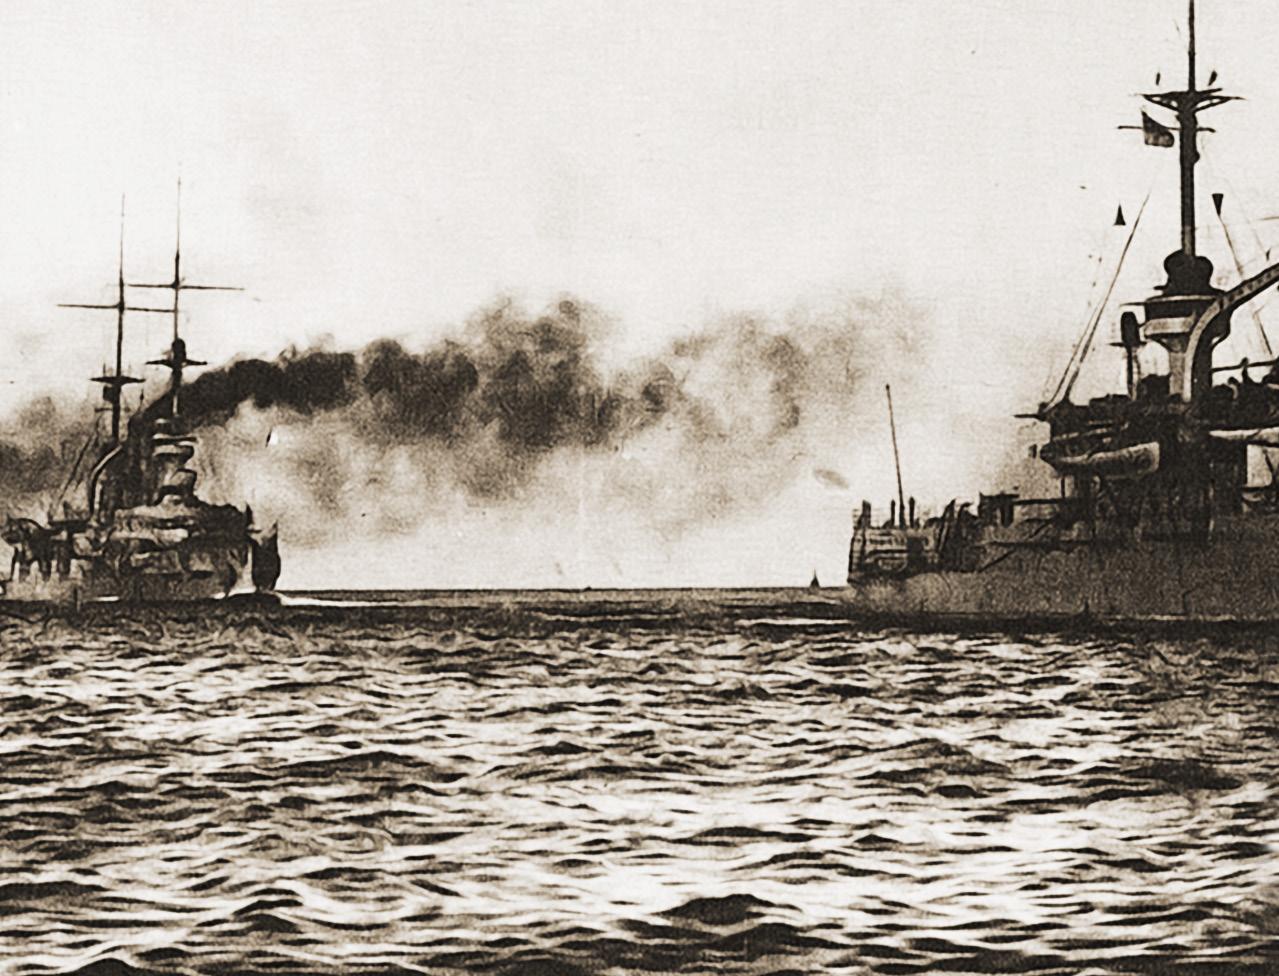


The Tegetthoff hits the Inflexible, causing it to Break Off. Both the Goeben and the Inflexible miss. The battle is now over. All ships must return to the closest friendly port.


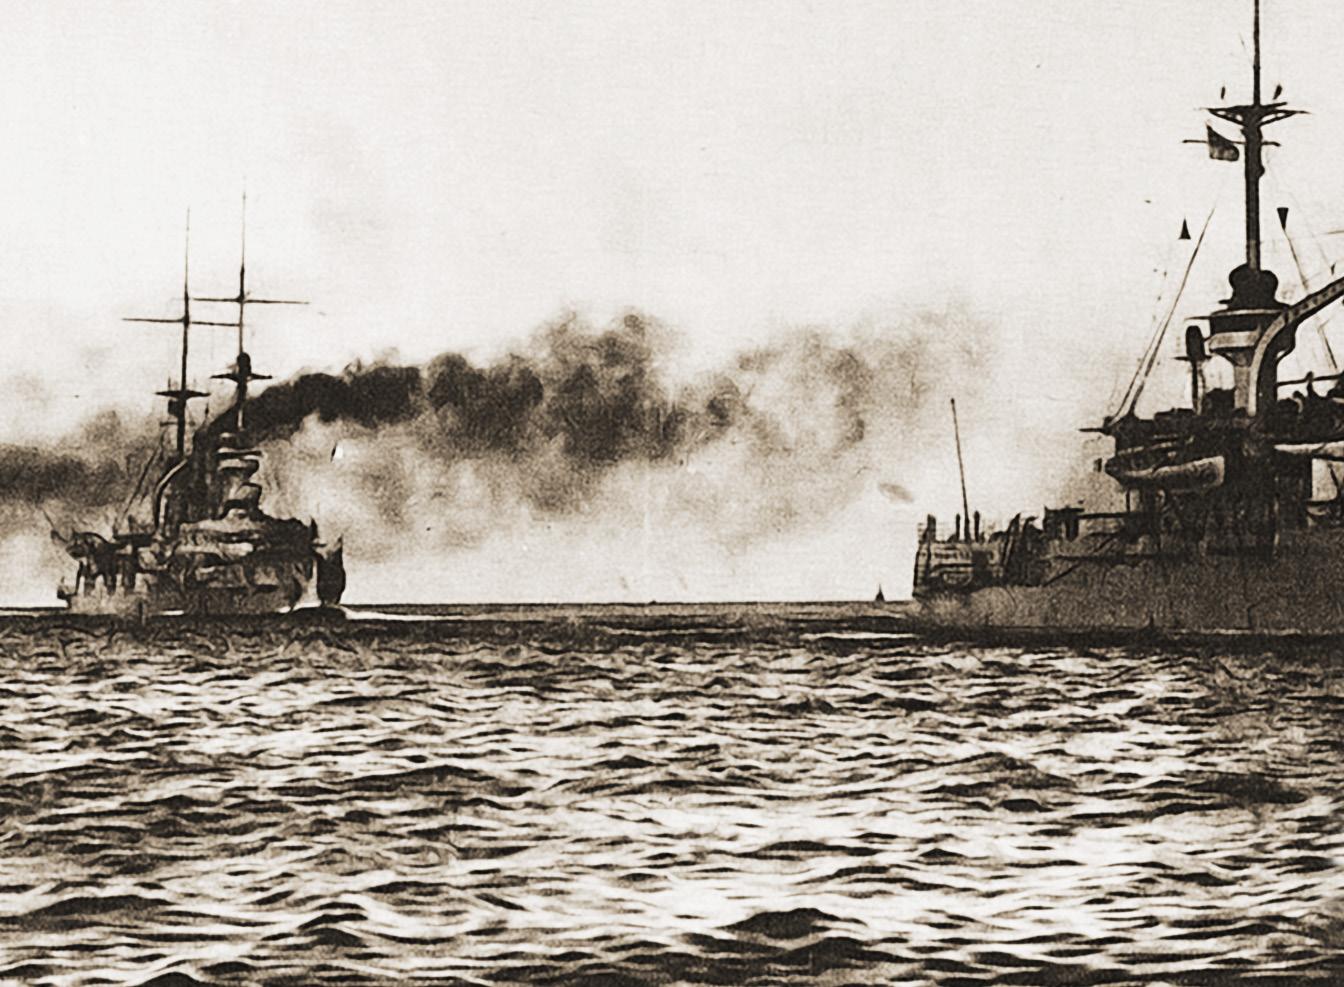
The strategic situation has been altered, with neither side controlling the Eastern Mediterranean. This is because all damaged ships must return to their closest friendly port. The Goeben and the Tegetthoff return to Austria-Hungary. The Inflexible and the Indefatigable can return to Malta, or they could split up with one of them going to Egypt. This would actually be more efficient because Malta can repair only 1 damage point.
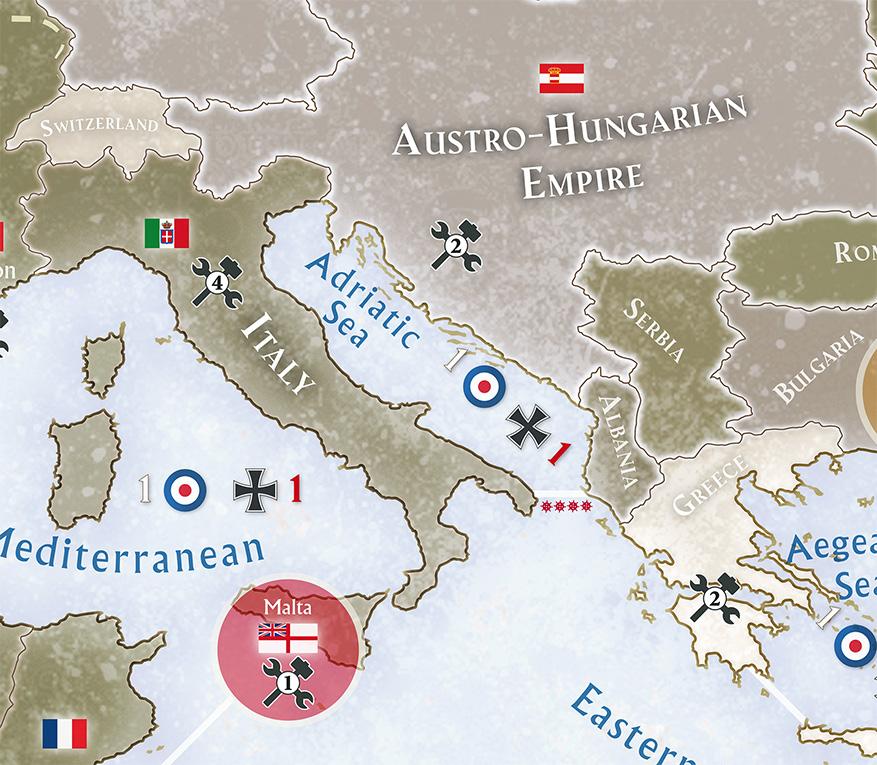





Ships being repaired are unable to move in the turn of repair. Therefore ALL of the ships in the example above will be unable to move on Turn 2. For the CP, the situation is simpler as he can repair both ships; however, they also cannot move this turn.


John Edwards’ War at Sea (WAS), published by Jedko games in 1975, has had a remarkably successful publishing history, having been reprinted at least six times by four different publishers. Compass Games plans to do a reprint in the near future and so the tradition continues.
Although this simple World War II game has undeniably been a success, I was never a big fan. The Germans did not have a large fleet to challenge the Allies and so I thought too many concessions had been made to make the game balanced.
I always thought the system was far better suited to World War I. I was surprised nobody had taken on the project.
Nine years ago, Blue Iguana Games tackled the subject and came very close to ‘getting it right’. But, the now defunct company was never able to publish and the project faded away.
It was this failure that caused me to develop my own ideas on the subject, while keeping to the spirit of John Edwards’ original design. The objective was to create a game in which players could roll a lot of dice, have some fun and, all the while, have a decent respect for history.
The Kaiser’s High Seas Fleet is certainly not the last word on World War I strategic naval combat. As far as I know, to date, no single design has tried to cover all of World War I at sea.
I thought it was time to adjust some of the combat systems and add a more historical dimension to the original design of 46 years ago. In addition, the gaming hobby of today is far more advanced and the gaming community more sophisticated.
In the original game, it was quite common to roll a bunch of dice and witness ships being sunk all over the place. Considering that battleships were almost never sunk by gunfire alone, I felt this aspect needed some fine tuning.
In my version ships can be sunk but more often than not will be forced to Break Off long before.
Other ‘little things’ bothered me about the original. The fact that any ship in a battle line could fire at any other enemy ship made no sense to me. This was not appropriate for World War I, where fleets moved in long lines covering several nautical miles. It was simply not possible for ships engaged at the rear of the line to fire at enemy ships not directly opposite them.
I thought the simplest method was to line up the opposing ships in a battle line and have the ships fire at their opposite number. In World War I, this is what Dreadnoughts did and it made perfect sense. To be sure, it is a basic system, but more historically correct.
I thought ‘Break Off’ and ‘Pursuit’ also needed some adjustment. The pursuit of a fleet is no easy matter and far beyond the system War at Sea produces. In essence, it was not possible in a pursuit to bring all of a fleet’s guns to bear against a retreating enemy. This is exactly what Commodore Jellicoe discovered in the Battle of Jutland when pursuing the German High Seas Fleet.
This game cuts down the amount of ‘firing’ that occurs when one fleet wants to engage and the other does not.
In closing, I recognize War at Sea is very popular and it was not my intention to build an entirely new World War I naval game. I felt the basic system could be adapted to World War I and yet be easily identified with the original.
In this, I hope to have succeeded.
Gilbert Collins
February 7, 2021
Entente Player
Time is on your side. If you play a careful methodical game, you should win. Unless you have managed to get yourself into a disastrous battle, by the end of the game you will have the preponderance of naval power. You have many allies. Be aware of the ‘Merchant Raider’ strategy available for ships in the CP Scouting Squadron.
Great Britain has the largest navy in the game but she also has a world empire to protect. Don’t spread your squadrons too thin nor splinter off too many Battlecruisers. The navies of France, Italy and Russia are on your side. Use them to gain the precious points in the North and South Atlantic, freeing up units of the Royal Navy. True, these allies are not 100% reliable because they move on the whim of a die roll, but if you deploy them wisely each turn, they are a huge asset.
The size of the CP Battlecruiser Squadron is fixed and although you outnumber them, make sure your 3rd Battlecruiser Squadron is at least the size of theirs. Be aware of Turn 1, when the minefields that close the English Channel have not been laid. Pre-Dreadnoughts can be used to take ‘low hanging fruit’ in the west, where CP squadrons must use Bonus Movement to reach.
One thing you are going to have to live with is the U-Boat Campaign against merchant shipping. In short, there isn’t anything you can do about it. This is simulated by the Merchant Shipping Table highly favouring the CP in the early stages of the war, but gets progressively worse. This is an abstract way of showing how convoys, the invention of the depth charge and other anti-submarine inventions came into being. It may seem surprising that U-Boats are never sunk or destroyed. Of course they are, but German production is always able to equal or exceed losses. The number of U-Boats slowly rises and stabilizes.


For the first years of the war, the EP may experience a ‘point deficit’ and it may appear as if the CP player is ‘winning’. The EP player has to ‘grin and bear it’ and wait until his overwhelming resources come into play, especially after Turn 7 when the U.S. Navy is available. If you can ‘wait it out’ and not make any major mistakes, EP superior naval resources and your ‘repair capacity’ should eventually overwhelm the CP.
Although the Central Powers had the German High Seas Fleet, it was really a toy of the German Kaiser. The Germans had never defined what the fleet was expected to do beyond to ‘challenge the British Fleet’. In game terms, this is reflected in where the fleet ‘can and cannot go’. Basically the High Seas Fleet cannot move beyond the English Channel or the North Sea. This is because Germany has no naval infrastructure to support a navy beyond German waters; unlike the British, who do.
Thus, in game terms, the High Seas Fleet is limited to moving into only four areas. Fortunately, three of those areas are high yielding in points and the CP player should try to take control of those areas for as many turns as possible. Unfortunately, the EP player is going to make sure those areas are covered by superior forces. If anything is written in stone it is this: The High Seas Fleet must never engage the entire Grand Fleet for any length of time.
If the Germans had any naval strategy, it was to catch a portion of the Grand Fleet with their entire High Seas Fleet. It was only under these ideal conditions that they could hope to ever defeat the British fleet.
As previously mentioned, the Merchant Shipping Table is the CP’s source of ‘free points’ for the entire war. Keep in mind that the point score can never go beyond 10, so if a U-Boat has the opportunity to attack a Dreadnought, it can be considered. Deploy your U-Boats to gain every point you can since it is ‘points’ that win the game.
Another source of points is the Coastal Raids by the Scouting Squadron. But even here, you must be careful. Getting into an extended battle with British Battlecruisers that may outnumber you is not optimum strategy. Even if you ‘win’ the battle and your Battlecruisers are damaged they are unable to ‘sail’ on the next turn.
Another source of points is the attack on Merchant Shipping by surface raiders. However, this is also risky, because Bonus Movement is involved. A failed Bonus Move could leave you in the same area with a British Squadron. If the surface raiders are ‘found’ on the Engagement Table, it could get ugly.
Good Luck!
If any game parts are missing or damaged, please contact the publisher:
Compass Games LLC
PO Box 271
Cromwell, CT 06416 USA
Phone: (860) 301-0477
E-Mail: support@compassgames.com
Online game support is available. Visit us here: https://compassgames. com
You can also use the URL or QR code below to reach Compass Games online: https://linktr.ee/compassgames

Designer : Gilbert Collins
Developers: Matthew Collins, Michael Hadwick, Harry Martin
Editing and Proof Reading: Gilbert Collins, Paula De Pauli, Michael Neubauer
Original Map Design: Matthew Collins
Completed Map, Graphics, Counters: Knut Grünitz
Play Testers: Matthew Collins, Michael Hadwick, Robert Hammond, Harry Martin
Research: Gilbert Collins, Michael Hadwick, Harry Martin
Rules: Gilbert Collins
Vassal Module: Robert Hammond


Entente
◊ Great Britain: Great Britain, Gibraltar, Malta, Egypt
◊ USA: USA
◊ France: Brest, Toulon
◊ Russia: St. Petersburg/Petrograd, Sewastopol
◊ Italy: Italy
Central Powers
◊ Germany: German Empire
◊ Austria-Hungary: Austro-Hungarian Empire
◊ Turkey: Constantinopole
◊ Portugal
◊ Rhodes
◊ Greece
