Rules of Play
A Solitai Solitair e Tank Comb ank Combat Game t by Gr
e gor y M. Smith
[8.2]

[1.0] Introduction
The British Army found itself licking its wounds after Dunkirk, but the entry of the Italians into the war opened another front – North Africa. At first, the British were triumphant and swept the Italians back toward Tripoli. However, early in 1941, the Germans entered the fight, and many see-saw battles occurred in the next 18 months. The Axis, with secure supply lines, might have taken out the British completely – but this was not to be. Malta, the “unsinkable aircraft carrier” of the Mediterranean, proved a massive thorn in their side. Just as the British had generally superior armor compared to the Italians, so were the Germans generally superior with their Panzer III and IV tanks until the arrival of the M3 “General Grant” lend-lease tanks. With nebulous supply, General Erwin Rommel still made a name for himself. Another general would come to prominence in North Africa as well – Bernard Montgomery.
British Tank Ace is a solitaire, tactical level game that places you in command of a British or lend-lease tank during World War II in the North Africa, Italy, or European Theater of Operations, or in a combined campaign across multiple Theaters. You will make the tactical decisions a tank commander faced and control the actions of your crew, while trying to survive.
You will be assigned missions to attack, defend, or conduct movement to contact depending on the current tactical situation. As time progresses and players survive, they may use the experience gained to improve their odds of success by purchasing skills. As their prestige increases, they may request improved versions of the tanks available at the time when they suffer the loss of their previous tank. Awards and promotions help to narrate the player’s eventual goal - to survive the war and help defeat Nazi Germany by winning battles in the North African desert and in the heart of Europe.
Players will find it extremely challenging to survive an entire tour from June 1940 to April 1943 or to April 1945, at which time the game ends. You will start with one of the tank models available to the British Army at start of the game, but as your fame and prestige rise, more advanced tanks will be available to choose from.
The rules are numbered and presented in sets of major sections, each section divided into numerous major and secondary cases. The rules cross–reference other rules using (parentheses), so for example you will see, “This is limited by the tank commander’s available commands, which is normally two per Combat Round (exception: Synergy Skill, 7.7)” meaning case 7.7 is related to this rule. The rules of this game have been arranged both for ease of comprehension on
first reading and for ease of reference later.
Online game support is available. There are several options to choose from:
Visit us on the Web: https://compassgames.com
Contact us by email: sales@compassgames.com
You can also use the URL or QR code to reach Compass Games online: https://linktr.ee/compassgames

General customer service and game parts support are provided by Compass Games.
We also recommend you visit the official game discussion topic on ConsimWorld for game support, to read after action reports, and to share your play experience with others. You will find the British Tank Ace game topic by visiting talk.consimworld.com and navigating to the Western Front individual game discussion area.
Throughout the rules you will see numerous indented sections such as this one. These sections are filled with examples, clarifications, play hints, design notes, and other assorted wisdom in order to help ease you along. Additionally, game charts are normally referred by letter and number in [square brackets] in the rules to assist you in identifying them.
[2.0] How to Play the game
Object of the Game
The object of the game is to conduct numerous missions as the commander of a British tank crew and accomplish your assigned missions. The success of each mission is reflected by the total number of enemy ground forces destroyed and terrain gained or held, depending on the mission. Successful missions may lead to promotion and advancement—and the possible award of medals up to the Victoria Cross. You will face relentless risks as each mission becomes more hazardous as you drive back and forth across North Africa, Italy, and Europe. The ultimate success you achieve rests considerably on the decisions you make while conducting these missions during the course of your career.
Overall victory level is determined at the end of the game based on the number of successful missions you conduct (which can also be determined posthumously if you are killed in action).
The key game components used to facilitate play are the various Tank Display Mats, which reflect the status of your tank and crew, with areas to track your ammunition and vehicle status as well. Other key components include the Battle Board and the Mission Log Sheet to track the activity and success of each. The various Player Aid Cards are used to resolve other game functions.
General Overview
In general, play revolves around conducting numerous mission assignments and resolving combat as part of those missions. Upon completion of each mission, you assess the success achieved by consulting your Mission Log Sheet, which may result in a promotion or award for yourself. Between missions you may check if you have become eligible to command a more advanced type of tank. You may also need time to recuperate from any personal injury before being able to conduct your next mission, or may have to sit out a mission while your battalion refits from battle losses.
Conducting Missions
Your Tank Display Mat shows the overall status of your tank as you conduct missions. When conducting missions, your tank marker is placed on the Battle Board, fighting the enemies to your front and flanks, until they have been defeated or you are destroyed or withdraw.
Typically, missions involve attacking enemy forces, or assaulting dug in enemy forces. At times you will be forced to defend. For each mission you will decide what enemy forces to engage, and hopefully defeat, or at what point you need to withdraw. You will also record all enemy forces you engage during combat on the Mission Log Sheet, noting whether you damaged or destroyed them.
End of Mission
As you conduct combat, you will inflict and possibly receive damage. At the end of each mission, you will scavenge the battlefield for trophies, refit your tank, receive any awards earned, and receive replacement crewmen if required. You can also check to see if a more advanced type of tank is available. Convalescence due to wounds received may delay your next mission. If you have experience points to spend, you may do it at this time to buy new skills for your crew.
End Game
Once all mission assignments have been carried out through April 1943, (or April 1945) the game ends. The game also immediately ends should you be killed in action. Whether you survive until your final mission or not at the end of April 1943 (1945), tally the total number of mission victories to determine your level of victory achieved. Typically, to record
an entire career, you will want to note all enemies destroyed or damaged, your final rank, and any awards achieved. Of course, if you have been killed, any accolades and results are recognized posthumously.
[3.0] Game Equipment
[3.1] Tank Display MaTs
The eleven double-sided Tank Display Mats (22 different tanks) provided correspond to each tank type available to the player. Six of the mats are used in North Africa, five mats are for tank types used in Italy and Europe. This mat helps track the status of your tank and systems, including available weapons and ammunition at your disposal. Select the appropriate Tank Display Mat corresponding to the tank type you have selected for play. This mat is the centerpiece when conducting game play and carrying out missions. The mat’s use is explained in the appropriate rules section.

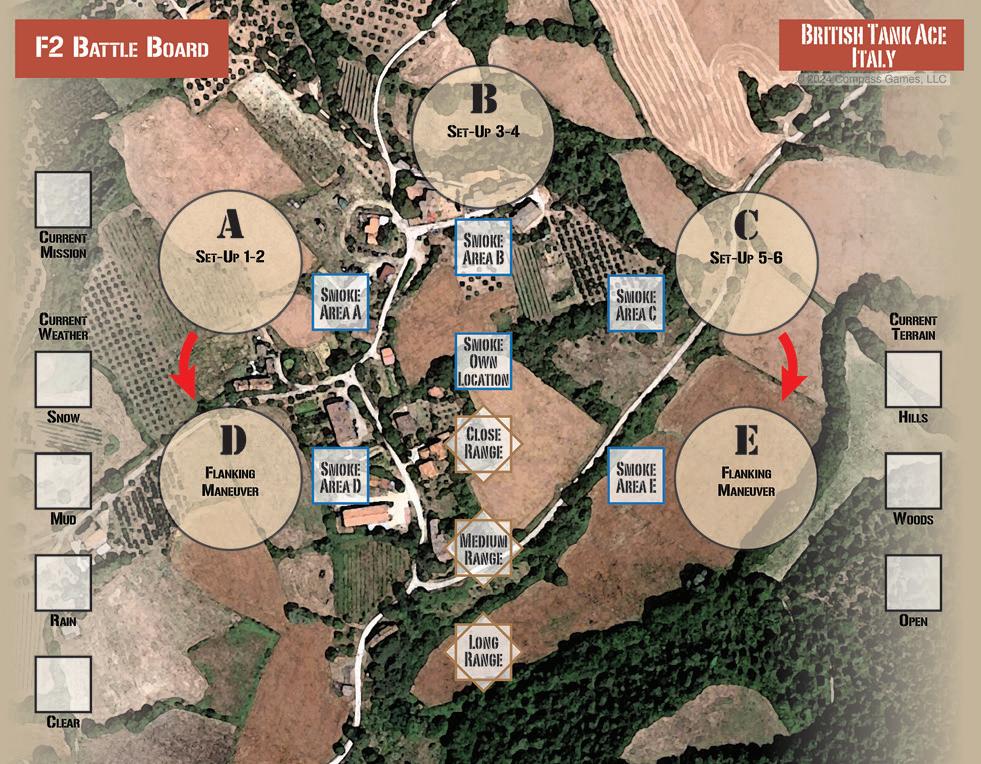
[3.2] BaTTle BoarD
The Battle Board is used to resolve combat against enemy forces and is typically set beside your Tank Display Mat during play. The use of this board is explained in the appropriate rules section. There are three Battle Boards, one each for North Africa, Italy, and Europe.
[3.3]
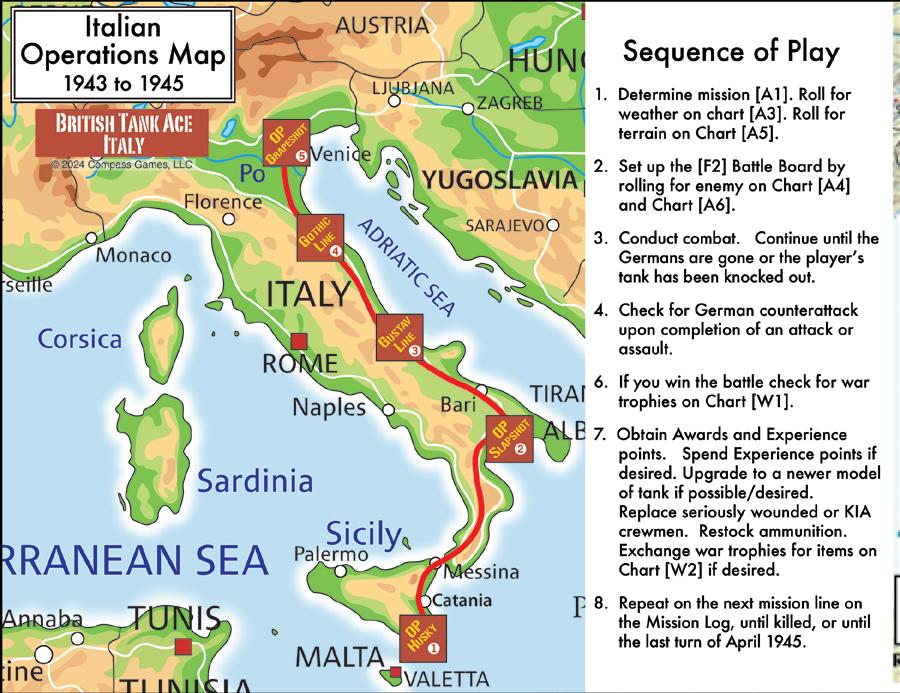
operaTions Map
The Operations Map is used to track any active Major Events. The player will sometimes participate in a Major Event, and success will earn extra Experience Point credit. It also has an abbreviated Sequence of Play to assist players. There are three displays, one each for North Africa, Italy, and Europe.
[3.4]
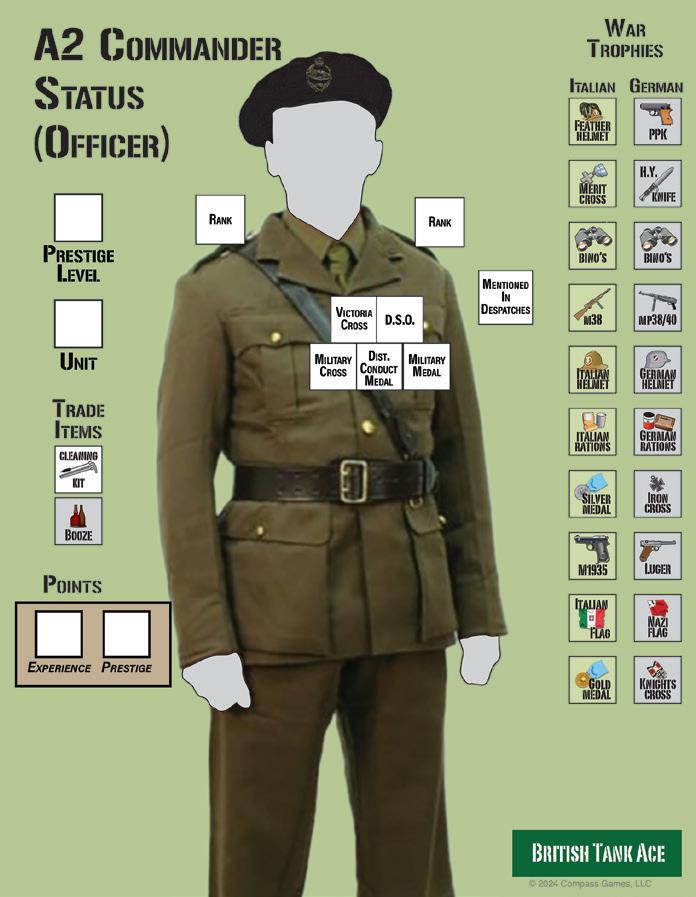
CoMManDer sTaTus CharT
The Commander Status Chart [A2] is used to track your unit, awards, Experience Points, and your tank commander’s current Prestige Level, which is used to determine tank upgrade options. One side is the NCO display, while the Officer display is on the reverse. This chart is used in all theaters.
[3.5]
The playing pieCes
There are three die-cut sheets with playing pieces included with British Tank Ace. These playing pieces are referred to as markers (or counters) and are placed on the appropriate display to track the status of your tank and crew, rewards, skills, special events and more. Markers are provided for individual tanks, ammo rounds, random events, and the status of your commander, crew, and systems.
Note: some extra markers (damage markers & generic infantry with no printed ML, for example)—have been printed as spare parts should any become missing or damaged.
[3.5.1] How to Read the Markers
The British Tank Ace counter mix provides markers to track a variety of status conditions and resources, as well as markers used in battle resolution. These markers may include information, such as die-roll modifiers, to facilitate play. An explanation of each marker type is explained below.
[3.5.2] Game Markers
Friendly Tanks:

The various tank markers correspond to the model of tank you have selected or have upgraded to, and are placed on the Battle Board to track the progress of your assigned mission. Each of the tank markers lists its corresponding type.
Rank:
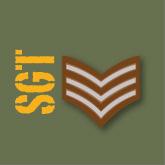
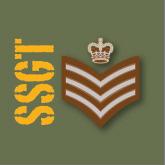

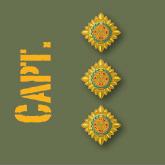
Eight enlisted Rank markers and six Officer Rank markers (two markers for each of the seven ranks) are provided to track your promotion level. These are placed on Chart [A2]. Two of the enlisted ranks are optional, for use with crew ranks if desired (see rule 10.6).
Medals & Awards:
Various awards may be bestowed on you based on your career success. Although mainly for historical interest, the major game impact is that most of them raise your Prestige Level, an important game mechanic that allows you to gain priority and choice when upgrading to new tank types as they become available.


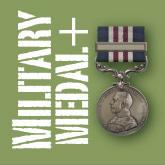

Some of the medals in the game are only for NCOs, and some just for Officers. Each award has a description of the restrictions and requirements for earning them. However, it is possible to have NCO awards on an officer’s display, if the player started as an NCO and was promoted to 2LT.
Crew Skills:
As you gain experience, another key game mechanic is the improvement of your commander by the purchase of skills. These skills have a direct impact on your combat capabilities and survival. Your commander begins the game with one Experience Point, granted for having graduated from the Armoured Fighting Vehicles School (Bovington). Different skills have
different costs to purchase. Depending on how well training at Bovington went (Chart [F1]), you may have markers that will reduce the purchase cost of some of these skills.
Armaments:

Damage:

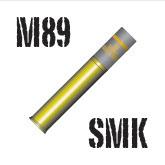
There are ammo markers that represent single main gun rounds. Machine gun ammunition is two-sided, showing either “1” or “2” ammo points. It is tracked in the regard that although unlimited, the machine guns must still be reloaded.
Damage markers are provided to track damage to tracks, weapons, radios, and any possible damage to other systems. These markers are only placed on your Tank Display Mat when damage occurs. Gun jams, while not technically damage, have their own markers.
Crew Status:
Map Markers:


Status markers are provided to track severity of injury or KIA results.
Markers are provided for the Battle Board to represent the current weather, the current mission, and your assigned unit.

Enemy Units:
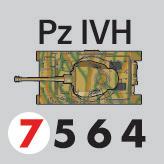
Enemy units include tanks, recon vehicles, infantry (INF) units, etc. They include important game information – a number in red in the lower left-hand section of the counter indicates it can fire armor piercing (AP) rounds on the Main Gun/AT (Anti-Tank) Chart with that value for penetration. The three numbers in black at the bottom of armored counters represent their armor value for the Turret Front, Hull Front, and Sides in that order.
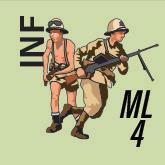

Enemy INF comes in several grades, with differing ML ratings (Morale Level). The ML rating is used to determine if an INF unit actually fires an Anti-tank rifle or Panzerfaust (depending on the theatre) given the chance. The front is full strength and the backside of the counter has a yellow stripe to indicate reduced strength. Pictured here are the front and back (reduced) sides of an Italian INF unit.


Enemy AT guns do not have armor values, as they are considered soft targets. They do have an AP value in red, which is their penetration.
Enemy armored cars normally fire machineguns, but many versions are armed with a 2cm cannon (20mm). These can possibly penetrate your tank with a lucky hit on Chart [B3]. The letters MG on the counter indicate the unit fires on the High Explosive/ Machine gun (HE/MG) attack chart.
[3.6] CharTs anD TaBles
Eleven two-sided and one single-sided Player Aid Cards are provided to facilitate game play and resolve game functions. The functions of these charts and displays are explained in the appropriate rules section. Specific charts and tables are referenced by their identification in [square brackets]. When a die roll is called for, each table specifies the die roll combination necessary. This is normally 1d6, a single 6-sided die; 2d6, which is 2 six-sided dice added together, or 1d10, a single ten-sided die.
DRMs: Throughout the game players will find references to “DRM” – this stands for “Die (or Dice) Roll Modifier.” This is a number that affects the outcome of a die (or dice) roll up or down. DRMs may create values outside the range of results given on a table. In these cases treat the lowest value on a table as covering “X or less” and the highest value covering “Y or more.”
[3.7] The Mission log sheeT
The Mission Log Sheet is used to record information for each game session and the results of battles. Feel free to photocopy these sheets as needed. Notice that there are different log sheets for North Africa, Italy, and Europe, as you should obviously use the appropriate sheet as your progress in the game requires. Mainly due to the supply situation in North Africa, and due to the lower tempo of operations overall in Italy, there are fewer missions per month in those two theaters as compared to Europe.
[3.8] gaMe sCale
Each mission is conducted in a day, with sometimes a follow–up mission that must be conducted immediately (a Counterattack after an Attack or Assault). Select markers represent individual tanks, other vehicles, infantry platoons, damage, and ammunition.
[3.9] parTs invenTory
A complete game of British Tank Ace includes the following components:
Three full-color counter sheets
Eleven Player Aid Cards (2-sided)
One Player Aid Card, (1-sided)
Eight Sequence of Play cards
Eleven Tank Display Mats (2-sided)
Three Battle Boards (2-sided)
Three Operations Maps (1-sided)
Three Mission Log Sheet pads
Two 6-sided dice and one 10-sided die
One Rules Booklet with Designer’s Notes
One Game box
If any parts are missing or damaged, please contact our licensed publisher:
Compass Games LLC, PO Box 271, Cromwell, CT 06416 USA
Phone: (860) 301–0477
E–Mail: support@compassgames.com
Note on game terminology: The game is conducted by “Missions” but these are sometimes referred to as “Battles.” The terms are interchangeable in the game.
[4.0] Game Setup
General Rule
You must first choose to play either the North Africa Game (40-43), Italy Game (43-45) or the Europe Game (44-45). (See rule [10.5] for a combined game). These different games have different friendly and enemy tanks, Operations Maps, Battle Boards, and charts. Simply set aside the unused game components. Game setup consists of putting your tank commander and crew through the Armoured Fighting Vehicles School at Bovington (see rule 4.6) by referring to Chart [F1] and performing all actions listed there. Then, select a starting tank and rolling randomly for a tank division to be part of, or select your tank type and unit, prepare your Mission Log Sheet, and place the corresponding Tank Display Mat in front of you for initial marker placement prior to conducting your first mission. You should also have the Battle Board [F2] set nearby, as it will be referenced when resolving engagements against enemy forces.
[4.1]
sTarT DaTe
[4.1.1] Your first mission will be in June 1940, July 1943 or June 1944 unless you choose to start at a different time. (Those three months are the starting months for North Africa, Italy, and Europe respectively).
[4.1.2] You may choose a newer type of tank when it becomes available, but only if you have a sufficient Prestige Level that allows you to use it. A player’s Prestige Level increases with awards and promotions.
[4.2] prepare Mission log sheeT
[4.2.1] Prepare a narrative of your tank career by recording the following information in the header of the Mission Log Sheet:
Nickname: This is the nickname you choose for your commander, although in reality, it is normally chosen “for him” by his unit or crew due to a funny incident or a similarity to his real name. You may do this right away or wait for a mission or two to choose something appropriate.
Tank Name: You may choose to name your tank.
Note: the tank’s name and the player’s nickname have no impact on game play other than building a narrative around your career to enhance your game session or after-action reports. You could name yourself “Wardaddy” and your tank “Fury” for example, but that wouldn’t be very creative, not to mention the wrong country.
[4.2.2] The Mission Log Sheet is used to capture information about each mission, including the enemy vehicles and other forces you have encountered and/or destroyed, any wounds received, and experience gained and awards gained.
[4.2.3] Each month on the North Africa Mission Log Sheets or the Italy Mission Log Sheets consists of four missions – this is the number of main operations your unit will be involved in during the month. In Europe, except for June 1944, this is eight missions per month. Some missions will be missed due to refit, getting a new tank, serious wounds, etc.
Note: in other games of the series (and in Europe) there are more missions per month. This time scale is somewhat abstracted, in that in reality, you might fight seven battles in a single week, one after the other. Or there may be a week or several weeks spent waiting on fuel and supplies while higher command forms a plan. Or your unit may be held in reserve. Believe it or not, there can be significant down time during combat, and this was especially true in North Africa (and Italy) due to the precarious supply situation for both sides. Regardless of this somewhat artificial framework, it is needed to regulate game play. Players should just keep in mind that over all, it generally more or less works out.
[4.2.4] Eighteen markers are provided to represent the unit (tank division or smaller unit) you are part of. This has no play impact in the basic game, but serve to give additional historical flavor to the game. Choose randomly, or simply pick your historical favorite. The marker is placed on Chart [A2]. Besides divisions, additional markers have been provided for specific brigades and regiments.
[4.3]
Tank Display MaT seTup
[4.3.1] Place in front of you the Tank Display Mat that corresponds to the type of tank you have selected (see example on the following page). You will be referencing this display often while conducting missions to record the status of your tank.


[4.3.2] Place the following markers on your Tank Display Mat:
1. Place the Turret Facing marker on the Center Box.
2. Place a Buttoned Up or Open (exposed) side on the commander’s marker box on your selected Tank Display Mat. Do the same for the driver and assistant driver. This is your choice. Regardless of their status, the loader and gunner are always assumed to be operating Buttoned-Up (7.3.2).
3. Place the Tank marker in the Open Country Box, or in the Hull Down box if the mission is Defense.
4. Place the appropriate Ammunition markers in the armaments section of your Display Mat (rule 4.4). Once all ammunition markers are placed on the Display Mat, choose any single ammo marker from those on the mat and place it in the Loaded Round box. You will note in the example illustration on this page that a “WP” ammo marker was selected and placed in the box.
5. Before the first mission of the game, you may spend your experience point (your commander starts the game with one for having graduated from Tank School). If you do so, place the purchased skill on the Tank Display Mat, if you can afford one. If not, the Experience Point is saved for future use.


In the example above, the player chose to start with an open hatch. He has placed his main gun and MG ammunition on the mat and a WP round in main gun, loaded and ready. He has placed an AP round in the 37mm secondary gun. He has placed his Turret facing forward. His tank marker is on “Open Country.” He is now ready to start his first mission.
[4.4] aMMuniTion
Commentary: World War 2 tanks normally carried a huge amount of ammunition – the A13 Cruiser tank had, for example, 87 rounds of main gun and 3750 rounds for the machine guns. Therefore, machine gun ammunition is tracked by determining whether or not reloading is required. The same holds true for the main gun – what matters is if the ammunition is readily available in the Ready Rack or must be pulled from stowage. Some types of main gun round are limited. Once they have been all fired, they are no longer available in a mission. The limited ammo types are Armor Piercing Capped (APC), Armor Piercing Capped Ballistic Capped (APCBC), Armor Piercing Discarding Sabot (APDS), Armor Piercing Composite Rigid (APCR), Smoke, Hexachloroethane-Base Initiating (HCBI) (smoke), White Phosphorous (WP), and Canister (anti-personnel). Armor Piercing (AP), and High Explosive (HE) rounds are considered unlimited for game purposes. In some tanks, ammo that is normally limited (APCBC, for example) may actually
be standard and therefore unlimited. The different tank mats will list which ammunition is limited for that particular tank.
Not all tanks can fire all the various types of ammunition. Each tank mat will specify what can be used.
Procedure:
1. Consult the initial Ammunition Load information next to each weapon on your tank.
2. For machine guns, select a total number of ammunition markers that adds up to the ammunition points on the display. When these markers are gone, the machine gun is considered to be out of ammo and must be reloaded. There is no limit to the amount of times reloading can occur during a battle. For example, if this number is “4”, then it means two markers will be placed on the “2” ammo side. Place these markers next to the appropriate weapon(s). Each time you fire your machine guns, one ammo point is expended per system firing.
3. For the main gun (and 37mm secondary gun if present) place one ammunition marker of your choice in the “loaded” box. Then place ammunition markers, one per box, on the Ready Rack display (note: any type of ammunition usable in the Main Gun may be placed in the Ready Rack; they can be all the same type or “mix and match” as desired). This is the ammunition readily available to be reloaded during a battle. Once the Ready Rack is empty, ammunition must be pulled up from stowage or taken off the turret racks. It takes a combat turn to reload four rounds into the Ready Rack while the loader does nothing else (exception: Adrenaline Rush, rule 7.7). Alternately, if the Ready Rack is currently empty and the play so desires, the Loader can load one round of any available type directly to the Main Gun (bypassing the Ready Rack). You cannot have more than the listed amount of limited main gun ammunition (HCBI, WP, Canister, etc). loaded in various places in the tank (Exception: you may exceed ammo limits by trading for the special ammunition with War Trophies).
4. Some tanks have a 2” smoke mortar, operated by the Loader, fired out of the top left of the turret. Its ammunition is limited to only three uses per mission, and therefore starts with a “2” and a “1” ammo markers. It places a Smoke 2 marker in front of the tank.
5. WP (White Phosphorous) rounds are unique in that they roll to hit vehicles on the B1 Chart, but place smoke in addition to possibly destroying the vehicle. Notice only the M3 Grant and Sherman tanks (but not the Firefly) have this ammunition available. Regardless of a hit or miss, a Smoke 2 marker is placed in the target’s area.
6. Important note on ammunition: Different tanks might have the same generic type of ammunition (for example, APCBC) but in one tank, it might be a standard round (with penetration accounted for on the mat) and in another type, it may be of limited availability with +1 penetration. This is correct: they are different rounds for different guns at different times of the war. Check the tank mats carefully to understand what ammo you have an unlimited (in game terms) supply of, versus what ammo is limited.
[4.5] Changing Tanks
You may change your tank at the end of each mission to a newer type, if one is available by date and if you have a sufficient Prestige Level to command it. You are not required to upgrade tanks. However, if you do, it costs you Prestige Points (not Prestige Level) to upgrade to a different type of tank. It costs one Prestige Point to upgrade to a newer tank if you’ve lost your old one due to combat. It costs two Prestige Points if you want to upgrade to a newer type of tank and your current tank is still battle-worthy. If you lose your tank due to combat, you may always simply replace it for free for the next battle with the same type as was lost.
[4.6] BovingTon Tank sChool
Players will prepare their crew by attending the tank training at the Armoured Fighting Vehicles School, Bovington. Tank training is accomplished by rolling on Chart [F1]), gaining certain benefits to game play or skill cost reductions if successful in each section of training. The tank commander (only) will also choose between several optional choices to see if extra time in physical training will give him a better chance to survive wounds, or if extra time spent studying will give him a better knowledge of the tanks he is expected to command, or perhaps he will spend extra time building relationships with well-connected friends or family members, leading to possible future benefit. After performing all training checks per Chart [F1], the player is ready to begin.
Benefits earned in Tank School for a specific crewman (say, for example, -1 to the purchase of Gunnery Skill for the gunner) are lost if that specific crewman dies or leaves the crew before the skill is purchased.
[4.7]
Major evenTs

There are nine Major events for a North African campaign (brown colored counters), five Major events for an Italian campaign (terracotta colored counters), and seven Major Event markers for a European campaign (green colored counters) that will be placed on the appropriate Operations Map. Place before the first mission of the listed month for the event. If you roll for a Major Event on Chart [A1], you are participating directly in
this event, and may gain a full experience point if the mission is a success. These Major Events are listed by a number in parentheses on the [A1] chart after a mission. It is possible to roll a Major Event that is not yet active. For example, in August 1940 you might roll for the Sidi Barani Major Event, but that marker is not yet active until September. If this happens, treat it as no effect, and just conduct the listed mission. Major Events can only be activated once, so remove the marker after participating in one. It is also possible to never roll a Major Event mission while it is active, in which case it simply expires and is removed from the Operations Map.
The nine Major Events for North Africa are:
1. Sidi Barani
2. Operation Compass
3. Operation Sonnenblume
4. Operation Brevity
5. Operation Battleaxe
6. Operation Crusader
7. Gazala
8. 1st El Alamein
9. 2nd El Alamein
The five Major Events for Italy are:
1. Operation Husky
2. Operation Slapstick
3. Gustav Line
4. Gothic Line
5. Operation Grapeshot
The seven Major Events for Europe are:
1. Operation Epsom
2. Operation Goodwood
3. Operation Bluecoat
4. Operation Market-Garden
5. Operation Infatuate
6. Operation Clipper
7. Operation Veritable
Note: You will sometimes miss a Major Event. It might seem illogical to not have a tank unit fighting in Operation Crusader, for example. However, this doesn’t mean you didn’t actually participate. It just means your unit served on a flank mission or in a supporting capacity instead of in the “heart” of the operation.
[4.8] prepare CoMManDer sTaTus

You will start the game as either a Sergeant (if an NCO) or a 2nd Lieutenant (if an officer). Place your starting rank on Chart A2 , on the appropriate side, and also place a “1” marker on your experience point track, to represent the point earned at Bovington.
[4.9] Major TheaTers
Players have multiple options when playing British Tank Ace when it comes to the length of the game and the starting point. The basic game options are:
1. North Africa game: Start in North Africa in June 1940 and end the game there in April 1943.
2. Italy game: Start in Italy in 1943 with a Prestige Level of 1 and end the game there in April 1945.
3. Europe game: Start in Europe in June 1944 (D-Day) with a Prestige Level of 2 and end the game there in April 1945.
See Optional Rule 10.5 for combined-game options.
[5.0] How to Win the Game
General Rule
A full game consists of completing numerous missions up to and through April 1943 (or 1945). The game will end early if you are killed in action. While the results of each mission may result in promotion and awards, overall victory level is determined at the end of play based on the successful missions.
[5.1]
enDing The gaMe
[5.1.1] The game ends upon completion of your final mission in April 1943 (or 1945) —no missions are conducted after the end of April 1943 if playing just the North Africa game (or 1945 if Italy, Europe or full game).
[5.1.2] If it is determined after calculating missed time due to injuries that your next mission would commence after April 1943 (or 1945), the game ends.
[5.1.3] The game immediately ends if you are killed in action, regardless of the date.
[5.1.4] Once the game has ended, you can determine victory.
[5.2]
DeTerMining viCTory
[5.2.1] I would assume most players will usually enjoy topping their previous performances when playing the game. As a solitaire experience, it’s more about the journey than the
destination. However, for those who wish a general historical “yardstick” for their efforts, I offer these victory conditions:
Defeat:
0–4 missions completed successfully.
You have failed to adequately defeat the Nazi threat to humanity. After the war you return to a war–weary nation, assuming you are alive.
Draw:
5–10 missions completed successfully.
You have bloodied the defending Germans, but they have stymied your efforts long enough such that most of Germany, to include all of Berlin, falls under an Iron Curtain.
Marginal Victory:
11–20 missions completed successfully.
You have enjoyed success as a tank commander. Your crew is thankful they are alive, and your commander respects your abilities.
Substantial Victory:
21–30 missions completed successfully.
You are considered a leading tank expert and valued combat leader. You have gained the respect of your peers, your unit, and commanders. You are often mentioned in the nation’s papers and are requested to make appearances to boost morale at the home front.
Decisive Victory:
31+ missions completed successfully.
You are the scourge of the Axis and the pride of the entire British Army. Your legendary exploits place you at the top of all tank commanders and you were mentioned prominently in Nazi newspapers as a devil in human form. Your peers are amazed at your steel nerves and combat abilities. You retire peacefully after the war in London.
[5.2.2]

[5.2.3]
Tank Commander Death
Should you be killed in action you still (posthumously) determine your victory level.
Combined Game
The numbers of successful missions listed above apply to either a North African, Italian, or European career. However, they should be doubled in the case you are playing a combined game (North Africa and either Italy or Europe, sequentially, together, etc. See 10.5).
[6.0] Sequence of Play
[6.1] DeTerMine your Mission

Determine your mission by rolling on the Mission Chart [A1] on the appropriate column. Roll for weather on chart [A3], which has certain combat effects. Roll for terrain on Chart [A5], which will also have combat effects. Place any current Major Event markers on the Operations Map. (The first North Africa one is for Sidi Barani, the first for Italy is Operation. Husky, and the first for Europe is Operation. Epsom). Remove any expired Major Event markers.
[6.2] seT up The BaTTle BoarD

Set up the [F2] Battle Board by rolling for enemy forces on Chart [A4]. Roll to see what type of enemy units are present. “2 T”, for example, means 2 Tanks. Roll 1d10 on the tank column. Both tanks will be the same type rolled. Repeat this procedure if you have rolled any R (Recon), SPG (Self Propelled Guns) and AT (Anti-tank guns). W means a Truck carrying an INF unit, and HT means a Half-track that carries an INF unit. INF is simply an INF unit without transport. Allocate these forces to the Battle Board by rolling 1d6 for each enemy unit and then place them in Areas A, B, or C as appropriate. Roll on Chart [A6] to determine the quality of the enemy troops and therefore their morale rating. The range always starts at long (exceptions: during a Dust Storm, the range always starts at Close. In Europe, Bocage and Urban terrain cause the battle to start at Close, and Forest causes the battle to start at Medium). You only roll once for INF quality – they are assumed to all be from the same unit, and therefore are the same quality. You only roll once for Dug-in status if necessary, as well. They are either all dug-in, or not. (Exception: INF that dismount from trucks or half-tracks are not considered dug-in).
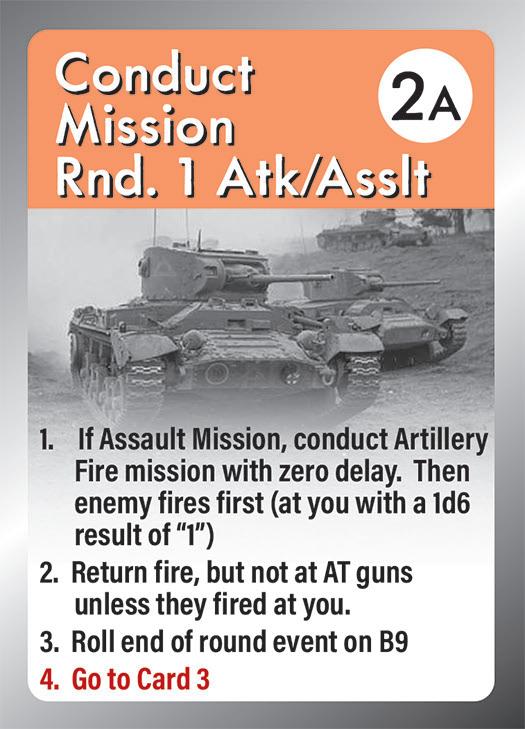
Combat is conducted in Combat Rounds. Conduct actions with your tank as part of your company by giving commands to your crew. This is limited by the tank commander’s available commands, which are normally two per combat round (exception: Synergy Skill, 7.7). Enemy units always have one action. Some actions are taken automatically by crewmembers without the need for a command, such as loading the main gun, clearing a stoppage (machine gun jam) or bailing out of the tank should it be penetrated. Combat is sequential in that your tank gets to move and/or fire first each round (exception: during an attack or assault, the Axis forces fire first in the first combat round only). The rest of your company is considered to be fighting alongside you, albeit abstractly.
[6.3] infanTry


Infantry (also called “INF” in the game) start a mission by dismounting if mounted, but this is their only action on the first Combat Round (both the vehicle and the INF). This is true even if they are defending. Half-tracks then can fire machine guns and become a separate unit starting in the next round. Trucks only stay on the Battle Board for one Combat Round. If not destroyed by the end of the first round, they are considered to have withdrawn and are removed from play at the start of the second round. If a truck or half-track is destroyed before the INF unit can dismount in the first combat round, the INF unit is considered also destroyed, and is not placed. INF can suffer losses and/or suppression. After the first loss, flip the INF unit to its reduced side (with the yellow bar across the center). After the second loss, remove it from the Battle Board. Suppression of INF units reduces the effectiveness of their ability to fire. Enemy INF may fire on the HE/ MG table at medium and long ranges to force you to button up, or may possibly fire on the INF vs. Tanks/ Antitank Grenades Chart (or Panzerfaust Chart) [B4] if you are at close range to them.
Sometimes INF will start a battle dug-in (which gives them a favorable drm when fired at). However, dug-in status does not apply to INF dismounting from trucks or half-tracks, even in a defense. Think of them as late arrivals.
INF that engage you at medium or long range fire directly on the [B2] chart, and are not much of a threat, as they can only get a “B” (button) result. At close range, however, they fire on the [B4] chart, and may possibly fire antitank weapons at you if they pass their Morale Check (ML versus 1d6).
Note: Infantry do not fight to the death, as they are not mindless robots. Removing an INF unit from the map does not mean you have killed all of them. What it does mean, however, is you have killed or wounded enough of that unit to render them combat ineffective, and the survivors have decided they need to reposition, withdraw, or else cease resistance and surrender.
[6.4] vehiCles

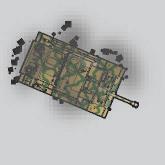
Enemy vehicles come in several varieties. There are tanks, SPGs (self–propelled guns), recon vehicles, half–tracks, and trucks. They can be outright destroyed by main gun fire, but sometimes are also abandoned and removed from the Battle Board in that manner.
SPGs are turretless armored vehicles that provide anti-tank and infantry support. If hit in the “turret” that armor value actually represents their upper front armor.
[6.5] CoMBaT rounDs
Continue with rounds of combat until the Axis have all been removed from the Battle Board or the player’s tank has been knocked out. The side holding the field at the end is the victor, and will result in a successful mission or a failure for your commander. Conceptually, the notional unit you are part of might be doing well, but if your vehicle is knocked out, it is still a mission failure for the player, even if it would probably have been a “win” for the British.
[6.6]
axis CounTeraTTaCks
If conducting an attack or an assault, check for Axis counterattack upon completion. If that occurs due to a 1d6 roll of six, the mission continues (without a chance for resupply). Set up the Battle Board again, with the Axis attacking and the British now considered to be in defense. The weather and terrain do not change. Skill markers do not reset. If your tank is destroyed, do not check for a counterattack (even if it occurs, you won’t be participating, as you are either wounded or dead, or have withdrawn what remains of your crew). This counterattack counts as another mission for experience point purposes, but does not get a row on the Log Sheet (as it occurs immediately). However, it combines the number of destroyed enemy units with the first mission for awards purposes.
[6.7]
CheCk for War Trophies

[6.8]
If you have remained on the battlefield (by winning) you may check for war trophies by consulting Chart [W1]. Roll on either the Italian column or the German column as appropriate.
aWarDs anD experienCe

Obtain Awards and Experience points. Spend Experience points if desired. Upgrade to a newer model of tank if possible/desired. Replace seriously wounded or KIA crewmen. Restock ammunition. Exchange war trophies for items on Chart [W2] if desired.
[6.9]
nexT Mission
Repeat this process on the next mission line on the Mission Log, until killed, or until the last turn of April 1943 (or 1945 for a Italian or European or combined game).
[6.10]
sequenCe of play CarDs
The game includes a set of eight Sequence of Play cards. These are not intended to replace the rulebook, but should be considered a handy reference to keep play on track. Players are encouraged to use them until familiar with the sequence of play (or for as long as desired) but their use is optional.
[7.0] Combat
[7.1] Mission Types
Players will receive one of five different missions to execute, as explained below.
[7.1.1]
Movement to Contact

This mission is to gain contact with the enemy. The enemy INF, excepting those arriving via truck or half-track, are considered to be dug-in on a starting 1d6 roll of 3-6. Enemy vehicles in areas A and C will move forward to flanking positions D and E (if possible) on the first Axis turn. This does not occur if they target you (they fire instead) and does not occur if they are unloading troops.
[7.1.2]
Attack

Enemy forces are defending terrain. INF, excepting those arriving via truck or half-track, are considered to be Dug-In. Enemy vehicles (except Trucks) will not move. Enemy forces fire first only in the first combat round; after the enemy fires first, the player conducts a normal combat round. Possible enemy counterattack at mission completion. Half-tracks do not fire as they are unloading troops.
[7.1.3] Assault

Enemy forces are defending prepared positions. INF, excepting those arriving by truck or halftrack, are considered to be Dug-In, enemy vehicles are considered to be Hull Down. The player receives one Field Artillery Fire Mission to start the mission, which is executed without delay. Enemy vehicles (except Trucks) will not move. Following the Field Artillery Fire Mission, Enemy forces fire first (only in the first combat round); after the enemy fires first, the player conducts a normal combat round. Enemy half-tracks do not fire in the first round as they are unloading troops. Possible enemy counterattack at mission completion.
[7.1.4]
Defense
Enemy forces are attacking your position. Enemy forces in areas A and C will move forward to flanking positions D and E (if possible) on the first Axis turn. This does not occur if they target you (they fire instead), and does not occur if they are Trucks or Half-tracks unloading troops. At the end of each Combat Round, decrease the range marker until it becomes close range unless you started at close range due to bocage (Europe) or Dust Storm (North Africa). If AT units are rolled for the enemy, remove them and replace them with an equal number of SPGs if possible. It only takes a single backwards move to end a mission in the defense if you choose.
[7.1.5] REFIT
This is not a mission per se, rather more of a “non-mission.” Your unit has been halted to absorb new replacements and equipment, possibly to wait for fuel or resupply, etc. Write “Refit” on the Mission Log then roll another mission on the next line. It does count as a successful mission for all purposes, however.
[7.1.6] No Battle
This is not a mission per se, rather another sort of “nonmission.” Your unit has been halted. It is possible you are conserving supplies, waiting for other units, etc. Write “No Battle” on the Mission Log then roll another mission on the next line. Unlike “Refit,” a “No Battle” does not count as a successful mission for any purpose. (A “Refit” gains you experience, a “No Battle” does not).
[7.2] general CoMBaT proCeDures.
Combat is resolved in Combat Rounds for each mission after the battle board is set up. These Combat Rounds follow the following sequence:
1. Degrade smoke from previous Combat Rounds. (Smoke 2 markers flip to become Smoke 1, Smoke 1 markers are removed).

Reduce Call For Fire (CFF) markers from previous rounds (a CFF-3 marker becomes a CFF2 marker, etc). A CFF-1 marker becomes an Arty or Mortar CFF Marker, and is placed on a random enemy unit (if a mortar) or hits the entire area (if artillery). Remove suppression markers from last round.
Each round check to see if you are now the target of any enemy units on the Battle Board. They will begin targeting and engaging you on a roll of 1. If you roll a 1 with a 1d6, you are now that enemy unit’s target, if they are not already engaged with you.
Note: Your tank is the exact type of target AT guns, Tanks, and SPGs are supposed to engage, hence the check. INF will also fire at you with their squad machinegun on Chart [B3] to attempt to button you up. There are other friendly tanks and forces fighting with you, but you will eventually draw your share of fire, even if you are not actively engaging those forces.
2. Resolve CFF if a marker is on an enemy unit (for a mortar) or attack every unit in the area (with artillery). (See rule [7.6]).

3. Conduct actions by having the tank commander issue commands. Commands are decided upon and issued sequentially. Normally this is two commands per Combat Round, but if the commander possesses and has activated the “Synergy” skill, he may give three
commands. Commands are not given to the Loader (if the tank has one) during main gun firing, as he operates automatically when a command is given to the gunner. Think of those two crewmen as a team. They only operate independent of each other during Ready Rack reloading, and coaxial machine gun firing. The following commands can be given by the tank commander:
A. Fire at a target. The gunner will fire the loaded main gun round at the desired target, whatever that round happens to be. The loader, as part of this command, then loads a new or different round.

Ammo Round Expenditure: Note that a fire action involves firing a SINGLE ammo round at a SINGLE enemy target. It is not possible to fire multiple ammo rounds during a single Fire action (Exception: See M3 Grant, below).
Alternately, you may have the gunner fire the coaxial machine gun at an INF, a wheeled vehicle, or AT gun target. This requires no assistance by the loader, so it may be done while the loader is doing something else like filling the Ready Rack, for example.
Note: The coaxial machine gun was sighted in, and aligned with, the tank’s main gun, and operated by the gunner instead of firing the main gun.
Tanks with no designated loader (to wit: the Crusader III and the Valentine Mk II) can only fire the main gun ONCE per Combat Round, regardless of remaining commands.
On Charts B1 & B2 the +1 penalty for Firer Buttoned applies to all Main Gun and Coaxial MG firing if the Commander is Buttoned (not the Gunner, who has no hatch). Hull (bow) machineguns suffer the penalty on Chart B2 if the operating crew is Buttoned, which is not related to the Commander’s status.

B. Fire again at the same target. This gains an accuracy bonus of -1 for previous target (due to sensing of the first round’s impact). This bonus carries over to the next Combat Round if the first command of the next Combat Round is to fire again at that target. It never improves to greater than -1, and is lost if some other action occurs in between firing.

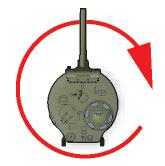
If the turret facing had to change, only one round can be fired at the target this Combat Round (a turret facing forward can only hit targets in Area B; facing left can hit targets in Areas A and D; and facing right can hit targets in Areas C and E). The turret can move all the way from left to right with one command to fire. If the turret facing had to change, the coax MG is restricted to firing once this round, just like the main gun.
Historical note: The term “sensing,” refers to the commander’s judgment of the location of a fired round’s impact in relation to the actual target, if the target was not hit. Based on “sensing” he can have the gunner adjust fire up, down, left or right as needed. This makes subsequent rounds fired by a tank against a target more accurate.
Game note: This bonus, unfortunately, also applies to Axis tanks and AT guns.

HCBI and M89 (smoke) rounds from the main gun place a Smoke 2 marker on the area being fired at (A through E). WP rounds also place a Smoke 2 marker, but also have combat effects. AP, APC, APDS, APCBC and APCR rounds are considered ineffective against AT gun and INF targets.
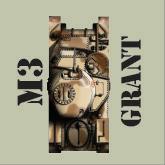
For the M3 Grant tank (only) you may have both main guns fire at the same target with a single command. Alternately, you may spend a command for each and have them fire at two different targets. It is your choice.
The main gun will never be empty. The new round is reloaded automatically as part of the fire command. In the event the Ready Rack is empty, you load the round of your choice.
If the Ready Rack is empty, only ONE main gun fire command may be given per Combat Round, regardless of how many commands the tank commander has left.
C. Reload the Ready Rack. This command to the loader causes him to load four rounds (six if he possesses and uses his “Adrenaline Rush” skill) into the Ready Rack each Combat Round, and do nothing else. He will continue to do this without another command until the Ready Rack is full or he is interrupted by a command to fire the Main Gun (7.2.3 A) or Rotate the Turret (7.2.3 P).
D. Move forward. This command causes the driver to advance. Reduce the range from Long to Medium or Medium to Short. You cannot advance closer than short range. Immobilization may occur after movement. Check on Chart [B5]. As part of the move, execute a free Angle the Hull action (F). if desired.
E. Move to Hull Down. This command causes the driver to try to find a hull down position nearby. The range does not change unless the player desires to. This may or may not be successful, depending on the terrain. The skill “Eye for Terrain” gives a benefit. Immobilization may occur after movement. Check on

Chart [B5]. As part of the move, execute a free Angle the Hull action (F). if desired.
If the player changed the range as part of this action, he makes a second immobilization check.

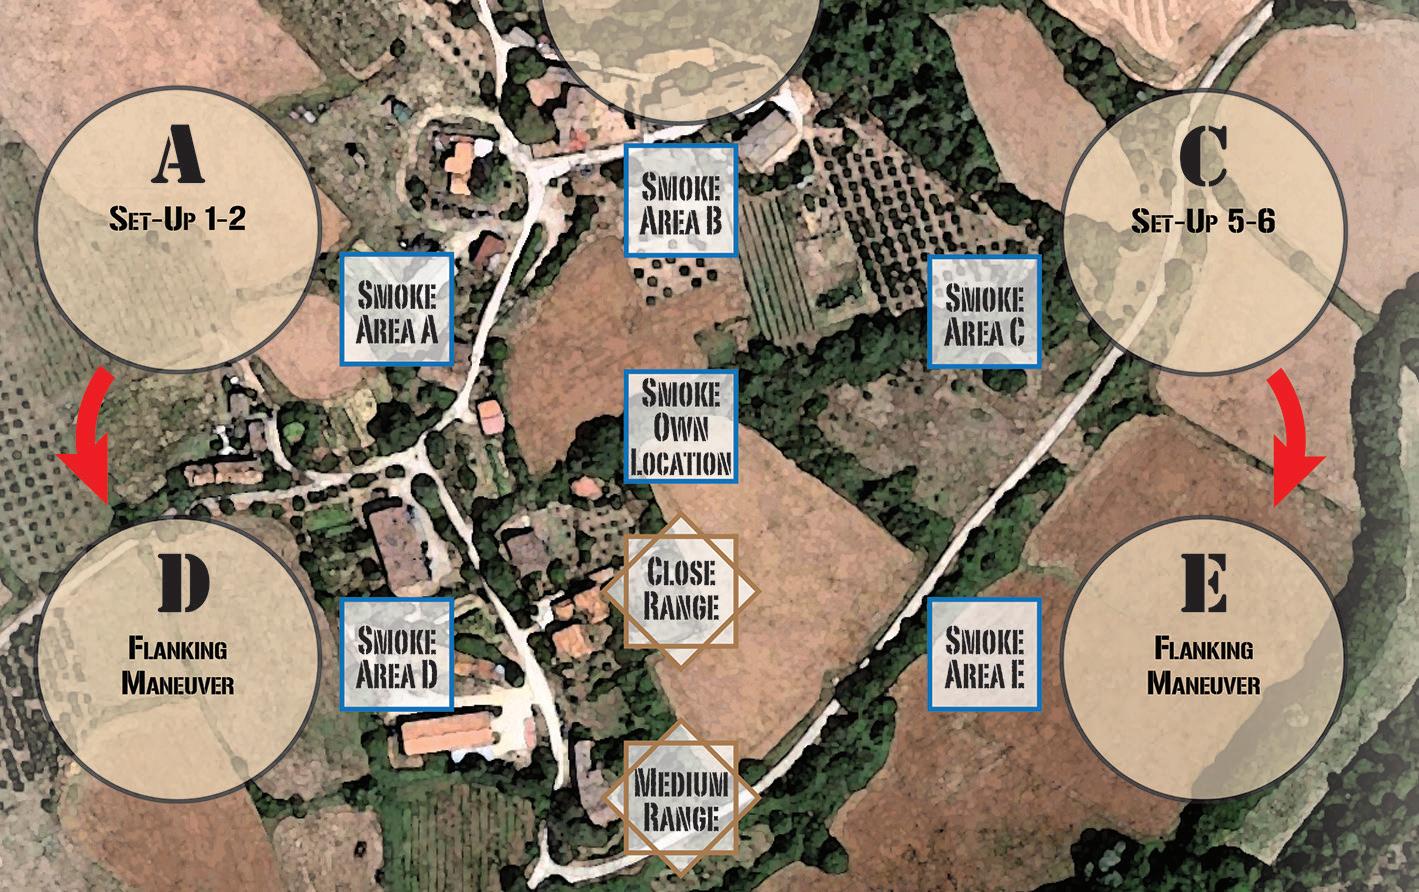
F. Angle the Hull. This command causes the driver to spin the tank’s hull toward a different enemy area (A, B or C) from which it is currently facing. A tank facing to area A will receive flanking fire from any enemy in areas C and E. A tank facing toward area C will receive flanking fire from any enemy in areas A and D. Changing the hull facing allows you to fire at different areas with the bow machine gun. Facing toward area A allows you to shoot the bow machine gun to A and D. Facing toward area C allows you to shoot the bow machine gun at areas C and E. Move your tank marker on the Battle Board to show the current orientation of the hull. Immobilization may occur after movement. Check on Chart [B5].
The turret orientation to the hull does NOT change. If the turret is facing B and the hull is facing B, then if you angle the hull to face A, now both are facing A. If the turret is already facing A and the hull is facing B, if you angle the hull to A, the turret is now facing D, etc.
Note: it is possible, if the turret has already changed facing to area D or E, to have the turret face backwards when angling the hull (for example, if the turret is facing D but they hull is facing A and you angle the hull to D, the turret is now facing to the left rear of the Battle Board). This is permitted, but realize the main gun or coax cannot fire at any targets while pointed to the left of D (or right of E) any incoming fire that hits the turret will use the side armor value for penetration resolution.
G. Move backward. This command causes the driver to withdraw. Increase the range from Close to Medium, or from Medium to Long. If already at Long range, this command ends the mission in defeat. Immobilization may occur after movement. Check on Chart [B5]. As part of the move, execute a free Angle the Hull action (F). if desired. If the mission is Defense, you may choose when moving backward to end the mission or not anytime you back up. If you choose to keep fighting the range increases.
H. Fire Hull (Bow) MG. This command tells the hull (bow) machine gunner or assistant driver to open fire on a target. It must be to a target at the same direction the hull is facing. For the Cruiser Mk I (A9) this fires both forward machine guns. There are no range modifiers when firing machineguns.

I. Fire the commander’s MG. This command is given to himself by the commander, in effect. You cannot be buttoned to perform this fire as this is the machinegun mounted outside the tank. It can fire in any direction, regardless of current hull/turret orientation.

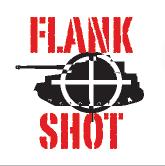
J. Move for a Flank shot. This is dangerous, in that your tank will be exposed to a flank shot itself from any enemy that shoots at it from the non-targeted area during the enemy’s next chance to fire (only). However, all shots this round (only) against the target you are maneuvering against will be a flank shot. Place a “flank shot” marker on your intended target. The range does not change unless the player desires it (check for Immobilization on Chart B5 if range does change). The shot will go against the enemy vehicle’s side (or side turret), which is the third armor value on the counter. Normally you will only have one shot, but if the commander has the skill “Synergy” you could fire twice depending on available ammo.
K. Fire 2” Smoke Mortar or Fire Smoke Grenades (A13 Cruiser only). This command is given to the loader of tanks so equipped. Place a Smoke 2 marker at your location on the Battle Board.

L. Call for Fire. The tank commander may use a command to call for fire support. This will either be mortars or artillery. Place a CFF marker on an area corresponding to the type of fire available per rule 7.6. Only tank commanders with an operational command radio are allowed to call for fire (1st Lieutenants or Captains).

M. Button Up. The tank commander may use a command to button up (close any or all hatches). Flip Open Markers to their Buttoned side. Although buttoned crew are now immune to small arms fire, the tank operates less effectively when firing. Sometimes a player will be forced to button up from INF fire or artillery (which can engage your tank on the HE/MG Attack Chart [B2]). If a player is unbuttoned and receives a “B” result from such fire on Chart [B2], he must button up and potentially roll for a wound for each unbuttoned crew member (refer to Chart [B7]).
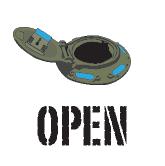
N. Unbutton. The tank commander may use a command to order any or all hatches to open up. Flip Buttoned Markers to their Open side. The crewmen operating from open hatches are now vulnerable to small arms fire, but operate more effectively.
O. Switch Rounds. This command makes the loader unload the currently loaded main gun round and switch it with a round in the Ready Rack. This may be desirable if the current round in the main gun would be inappropriate or ineffective.
P. Rotate Turret. This command makes the gunner point the turret at a different area than it currently is pointing at. The loader may not reload the Ready Rack in the same round this has been ordered.

Some actions by the crew require no commands: reloading machine gun ammunition, bailing out of a penetrated tank, clearing a stoppage (a jammed machine gun), or loading the main gun (the gunner does this as part of a fire command to the gunner). MGs cannot fire (7.2.3 A, H, I) when out of ammo or jammed. Crewman assigned to the MG automatically reload or clear a jam unless the commander orders that crewman to do something else that turn.
Alternately, if the enemy has been reduced to a single INF unit, they are considered to withdraw or surrender and the mission ends.
Note: Withdrawal from the battle board in an operational vehicle, besides mission failure, results in no experience gain and a +1 DRM to your next promotion attempt (DRMs may accumulate.)
[7.3] speCifiC CoMBaT siTuaTions anD DefiniTions
Certain concepts peculiar to armored operations and tank combat need some explanation as how they relate to the game and game play.
[7.3.1] Hull Down

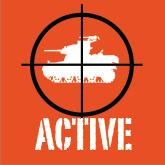
4. Enemy forces will now fire or move. Roll 1d6 for each enemy unit each round: On a roll of “1” they will target your tank (including INF units). Otherwise, they are busy fighting the other forces with you. Your tank is also automatically targeted by any enemy unit you yourself have shot at (placing HCBI or M89 smoke does not elicit a response). Therefore, it is best not to target multiple enemies, as only the ones you have shot at will engage you (unless they roll a “1” in a combat round). When conducting an attack or an assault, the enemy fires first in the first Combat Round. They will fire second in all subsequent Combat Rounds, however. Enemy vehicles starting in Areas A or C will move to areas D or E, respectively, unless the player’s mission is an Attack or an Assault, in which case they will not move. Once an enemy unit starts engaging you, it does not stop until it is destroyed or withdraws. All enemy forces fire once per round, however, they do benefit from a -1 drm if they had fired at you in the previous round.
5. The final step of a combat round is the Event Check, Chart [B9]. Process any results. You are now ready to cycle back to step 1 above and start a new combat round. Skip this step if all enemy forces have been removed or destroyed.
Note: this prevents a highly unlikely, although possible, endless supply of Axis reinforcements.
6. A Mission is considered over if all enemy forces have been destroyed or removed from the Battle Board, or if your tank is destroyed, or if you have withdrawn from the Battle Board.
A tank can position itself by using terrain (normally sloping terrain, or a fold in the ground, or a slight hill) so that only the turret, roughly, is visible to the enemy. This is known as being “hull down.” The advantage is that if struck by the enemy, the shell will hit the turret front armor, which is (usually) thicker than the hull. Additionally, the tank itself presents a smaller target, since the hull is masked by terrain. This is why there is a +1 drm “to hit” on chart B1 for hull down targets. If a Hull Down vehicle is hit, do not roll for hit location on Chart B3; any frontal hit is to the turret armor.
Players may start hull down in defense missions, as you are assumed to have had time to find a good spot. You may also attempt to gain “hull down” status by using the Move to Hull Down command to your driver. Hull down status is lost if the tank does any movement command other than “Angle the Hull.”
[7.3.2]
Buttoned Up

A tank commander can operate with closed hatches by looking out the vision blocks, but this greatly reduces his ability to see the tactical situation and command the tank. The driver and assistant driver may also operate buttoned up, but it degrades their performance, which is why there is a penalty for operating buttoned up. On the flip side, they are immune to small arms and artillery while buttoned. Regardless of their status, the other crew (loader and gunner) are always assumed to be operating buttoned up. A player should start the mission by deciding on either a buttoned up or open status for his driver, assistant driver, and commander.
A driver who is buttoned up receives a -1 drm per chart B5. An assistant driver who is buttoned up receives a +1 drm to his MG fire per chart B2.

A commander may use a command to make any/ all hatches go to buttoned up status. If the tank receives a “B” or “IMM” result everyone must button up who currently isn’t, and those crew must roll to see if they are wounded (1d6 roll of 1-2 means they must check on the B7 Wound Chart).
All enemy vehicles start unbuttoned, and if buttoned, remain so for the duration of the mission.
Note: British tank commanders took many casualties due to operating unbuttoned. The Israeli tank commanders operated almost exclusively unbuttoned during the Six-Day and October wars, and they suffered the lion’s share of tank crew casualties because of it. They felt the increased effectiveness of the tank was worth the risk. Creighton Abrams, of the American 37th Tank Battalion, was also well known for operating unbuttoned in World War Two. Sometimes discretion is the better part of valor, however, and think twice about staying unbuttoned in a situation where you may take a lot of MG fire or 2cm fire from recon vehicle.
[7.3.3] Frontal and Flanking Fire

The optimal shot you can take against an enemy tank is against its flank (side armor). The thickest armor on a tank is generally the front turret and front hull. In fact, several of the German vehicles cannot be penetrated by the British guns to the front barring a miracle lucky hit. An enemy tank or vehicle that moves to areas D or E is considered to be vulnerable to a flank shot in the first Combat Round you fire at it (unless they shoot at you first). After that, they are assumed to have moved to face your tank. You may also attempt to gain a flanking position by movement against any enemy vehicle in any area (7.2.3-J), but this is only in effect for the rest of that combat round.
The player’s tank can be angled to the left, right, or be facing forward, just like the turret. Tanks angled to the right take flank fire from areas A and D. Tank hulls angled to the left take flank fire from areas C and E. Tanks facing forward take flank fire from areas D and E. The same flanking penalties apply to the turret, so it matters if an incoming round hits the hull or turret if they are facing in different directions. An incoming shot could possibly hit side armor against the hull or frontal armor if it hits the turret; for example, if the turret is pointed toward the shot but the hull is not.
Enemy SPGs did not have turrets. If an SPG is immobilized it can no longer fire at you once you move. Furthermore, if you flank it, it remains flanked the rest of the mission.



[7.3.4] AT Gun Spotting Restriction
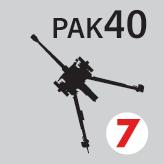
The Axis were reasonably adept at hiding their AT guns. In any mission, you are not allowed to target an AT gun on the first Combat Round, unless it has fired on your tank first (which might happen in an Attack or Assault, as the Axis fires first in the first round for those missions). However, starting in the second Combat Round, you may target any AT gun, because it is assumed they fired at SOMEBODY in the first round, even if it wasn’t you.
[7.3.5] Smoke Effects

Smoke is a two-edged sword – while it lessens the accuracy of incoming fire, it also lessens the accuracy of outgoing fire. Smoke affects ALL fire into, or out of, the area in which it is located. At the start of each Combat Round it degrades one level (Smoke 2 becomes Smoke 1; Smoke 1 is removed). If you smoke an enemy area, those units will suffer a negative drm when firing, but any enemy units in other areas will not be affected. If you smoke your own area, ALL enemy units suffer a negative drm firing at you, but you also suffer a negative drm firing at anybody in any area.
You do not have to roll to “hit” with a smoke round. Simply place a “Smoke 2” marker in the target area.
There may be an instance where you place smoke in an enemy location and the enemy reduces the range (you are defending and they move closer). In that case, the smoke is removed instead of being reduced, as they have moved past it. This also applies to smoke in your location, if you reduce the range by moving up. Notice that flanking moves by the enemy does not reduce range.
White Phosphorous (WP) is a unique round in that it combines an HE effect (incendiary, technically) with a smoke effect. After determining the damage from a WP round, place a Smoke 2 marker in the area.
Smoke cannot be increased above level “2” (by continuously firing smoke rounds, for example).
Note: Smoke is best used judiciously. The best use is probably to buy time, allowing you to restock your Ready Rack, for example. Think twice before firing it or using the loader’s 2” smoke discharger (mortar).
[7.3.6]
Firepower Rating and Penetration

[7.3.7]
A tank’s “Firepower” rating on the Tank Display Mat is the Penetration value used on Chart B3. This may be modified by range (+1 or -1 depending if it’s short range or long range).
Specific Ammunition Effects and Limitations
Some rounds have specific effects (or no effects) based on the type of target. These are:


HE rounds do not affect enemy tanks/SPGs, but cause the enemy to button up. Place a marker next to a vehicle that is hit by HE to indicate it is Buttoned Up (+1 to hit you on Chart B1).
Canister rounds do not roll to hit, and receive a -1 drm on Chart [B2] when used against Trucks, INF or AT targets at close range (only). They are ineffective against all other targets. Canister is also ineffective against all targets at medium and long range.
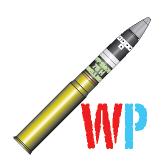
WP rounds always place a Smoke 2 marker in an area, but a hit against a tank or SPG destroys it with an additional 1d6 roll of “1.” (The crew thinks they are on fire and abandon their vehicle). A WP hit against a tank or SPG will also cause it to button up, just like a regular HE round.

AP, APC, APCBC, APCR, and APDS rounds have no effect whatsoever against INF and AT targets.
Tank main gun fire rolls to hit on B1, then applies results on B3 if against vehicles. Against AT/INF targets, only HE or WP have an effect per the chart’s note. AP and HCBI have no casualty effects against INF or AT targets. All MG, mortar, canister rounds, and artillery fire roll directly on Chart B2.
There are NO range effects for machinegun fire – only for main gun fire.
[7.3.8]
Shock and Interior Fragmentation

If the player’s tank is hit but not penetrated by a main gun or AT round that has less penetration than his armor, the crew is subject to “Shock.” The commander loses an action, assuming he has any left this round. If not, the commander receives a “Shock” marker and will lose the first action of the next Combat Round.
Spalling (interior fragmentation caused by shock waves that flake armor off the inside of the tank) may occur in addition to “Shock” when hits fail to penetrate.
Spalling occurs on a 1d6 roll of “1” if you are hit and penetration is equal to your armor value. It occurs on a 1d6 roll of “1-2” if you are hit but not penetrated (due to lucky rolling) while the penetation value is greater than your armor value. If it occurs, Spalling wounds a crewman.
If Spalling occurs, roll 1d6 to determine which crewman is injured:
1-2 Commander
3 Gunner1
4 Loader2
5 Driver
6 Assistant Dr iver3
1 For M3 Grant, roll 1d6, 1-3: 37mm, 4-6: 75mm
2 For A30 roll 1d6, 1-3: Loader, 4-6: Co-Loader
3 Use also for Hull- or Bow-Gunner position; for A9, roll 1d6, 1-3: Left MG, 4-6: Right MG
Roll to determine the wound on the [B7] Wound Chart. A hit to a crew position not present is treated as “no effect.”
Shock applies to enemy tanks and SPGs, but not spalling. Artillery and mortar fire do not cause shock or spalling. 2cm weapons (typically recon vehicles) do not cause spalling, but can cause shock.
[7.3.9] Limited Arc of Fire for the M3 Grant

The M3 main gun (75mm) was located in a sponson in the hull front, and had a limited arc of traverse. As such it may only fire at targets in the area at which the tank’s hull is currently pointed. For example, if the hull is pointed straight ahead, the 75mm can only fire at targets in Area B, etc.
[7.3.10] INF Morale

The INF provided in the game have a morale rating of 3, 4, or 5. This is used only to determine if the unit passes a morale check when firing AT weapons at your tank.
[7.4] Tank/vehiCle DaMage/inf losses
A “DE” result means a vehicle is immediately destroyed. If this is your tank, roll for crew survival on the Fire/Bail Out Chart [B6]. Your next mission is lost (similar to a “REFIT” mission) in that you don’t roll for a mission on that line of the Mission Log Sheet. It is considered to be spent getting a new tank and/or crewmen.
When a vehicle or AT gun target is destroyed, flip the marker over, write down the type of target and circle it on the Mission Log Sheet. INF is damaged when flipped but
removed from the board when destroyed. When removed, INF is recorded on the Mission Log Sheet.
Note: Unlike some currently popular video games, tanks do not suffer damage bit by bit, until finally destroyed. Normally, there are two outcomes: In the first, a round will bounce, or fail to penetrate, resulting in typically no or limited cosmetic external damage. The second outcome is more lethal: if a round does penetrate, the results are generally catastrophic, and at a minimum, all crew members will be injured. This is not completely the result of the round itself causing damage upon entering the vehicle. The tank’s armor that occupied the space of the penetration hole liquefies and fragments, splashing and bouncing around inside the tank, causing fires, injuries, and sometimes explosions.
Enemy vehicles are normally destroyed by direct AP fire penetrating their armor. However, Recon vehicles and halftracks may also be destroyed by HE fire, and possibly by WP. Finally, trucks are destroyed by ANY result on any fire chart - even just a suppression - other than a miss or stoppage.
INF units can suffer suppression, which reduces their ability to attack, and also numeric results, which are step losses. An INF unit that takes a “1+S” result, for example, flips to its reduced side and is also suppressed. A second numeric result removes a reduced INF from play. INF units, therefore, have two steps, and may possibly be destroyed outright by a “2” result.
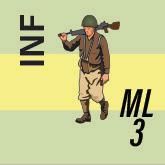
INF units that are suppressed and receive a second suppression in the same Combat Round also receive a step loss in addition to other results. A “1+S” result against an already suppressed INF unit would therefore eliminate it. An “S” result against a full strength suppressed INF flips it to its reduced side and it is still suppressed.
A second suppression against an AT unit has no additional effect.
[7.4.1]
Mission End
A player may abort his mission at any time, but this results in mission failure. This is accomplished by tank movement from long range to off the Battle Board (or, if he chooses, a move backwards in a Defense mission). Alternately, a mission may end due to all enemy forces having been removed from the Battle Board, or due to your tank having been destroyed, or you have abandoned your tank.
[7.4.2]
Crew Injury
The game tracks wounds for the entire crew. Each injury will result in lost time or in extreme cases, medical retirement or death (and the game ends if this was the commander).
Unbuttoned crew may possibly be injured from a “B” result on Chart [B2] or [B3]. A 1d6 roll of 1-2 indicates a check is required on the Wound Chart [B7]. Crew may also be
wounded from spalling (rule 7.3.8).
Three results may happen from injury: Light Wound (LW), Serious Wound (SW), or Killed in Action (KIA). Each time a crewman is wounded, check on the Wound Chart [B7] for the severity.
Unlike some games, additional wounds do not “add up.” Only the most severe wound is tracked.
[7.4.3]
Injury Duration and Effects

LW: The effect is that the commander loses one command per Combat Round and cannot use any skills he might have. Other crewman cannot use skills if lightly wounded. No lost missions in time. The LW is removed at the start of the next mission.
Note: Unlike other games, where you might have to sit out a mission while healing, this is the British Army and there’s a war on. Lightly wounded personnel get to display a “stiff upper lip” and drive on.

SW: If this occurs to the commander, since you are still in combat, you should consider withdrawing immediately. At the end of each Combat Round in which a crewman is seriously wounded, roll 2d6. A result of 11 or 12 means that crewman is now DOW (Died of Wounds). After the mission has ended, roll on the Serious Wound Chart [C2] for resolution. During combat, a seriously wounded crewman cannot perform any functions. If this is the commander, the gunner will temporarily take over with one command point per Combat Round. A hospital stay is required for any crewman who is out for eight or more missions. You will receive a new crewman to replace him. Replacement crewmen attend Bovington Armoured Vehicles School but only perform those activities that directly relate to their position on the tank. If it is the tank commander, you lose your old tank and will receive a new tank with all new crew when you are released. This tank will be the latest model available (or your choice) that you have the ability to command from a Prestige standpoint. You do not earn experience while recovering from a Serious Wound.
A SW driver cannot drive. The tank is immobilized for the rest of the Combat Round while another crewman takes over (if desired) who can then not perform their normal duties. It may be advantageous to NOT replace the driver.
A SW assistant driver cannot fire the bow machinegun. A SW loader cannot perform any duties, and the tank cannot fire for one round until another crew takes over his position. A SW gunner cannot fire, and the tank cannot fire for one round. Afterwards, the tank can fire 1 round per Combat Round, with the Tank Commander firing. He gives the fire command to himself in essence, and is considered buttonedup as he is down in the gunner’s seat.
Additionally, SW crew cannot bailout of a DE tank (burning or not). The only way for them to survive the mission is to win, or you voluntarily abandon your vehicle (other crew pull him out) or withdraw from the battle board.
SW personnel who are not lost to a hospital are replaced by a temporary crewman until they return. This temporary crewman does attend Bovington, but is removed when the original crewman returns. Additionally, the Synergy Skill (if present) is lost but is regained when the original crewman returns.

KIA: If the tank commander is KIA, the game ends at that point. Other crew-members who are KIA are replaced and any skills they may have had are lost. Obviously, KIA crewmen cannot perform duties.
New crewmen who are replacing KIA or SW crew get to roll for training at the Armoured Fighting Vehicles School first (just the sections that apply to them).
[7.4.4]
Stoppages

The machine guns in the game are susceptible to stoppages (gun jams) during firing. An “ST” result on chart B2 means a machine gun has suffered a stoppage. Place a “Gun Jam!” marker on the affected weapon. It must be cleared by the assistant driver (Bow MG), gunner (Coaxial MG) or commander (.50 caliber) before it can fire again. This clearing occurs automatically but takes an action (in time), similar to reloading. Stoppages do not apply to the main gun or Axis weapons.
[7.4.5]
Immobilization

Becoming immobilized is a tanker’s worst nightmare, usually because tanks need to move to be at their most effective, not to mention you are now a stationary target for the rest of the battle. Unlike certain video games where you can press a button and be instantly repaired, a thrown track can sometimes take hours to fix, and at a minimum, 15-20 minutes if you’re lucky enough to be able to “walk it back on.” Immobilization in the game can also represent road wheel/drive sprocket/return roller damage, which can involve significant repairs.
After a battle in which you were immobilized, roll 1d6:
1-2: You miss the next mission for repairs
Enemy vehicles that are immobilized must check for bailout for every subsequent main gun round that you hit it with regardless of penetration, assuming you don’t destroy it outright. On a 1d6 roll of “1” an immobilized enemy vehicle’s crew will bail out, and the player receives credit for a destroyed vehicle.
“IMM” results against a hull down vehicle are treated as “no effect” instead. However, Shock (7.3.8) will still occur (as the round hit but did not penetrate).
[7.4.6] Abandoning your tank
You may voluntarily abandon your tank. All crew check for a wound (from possible small arms or other enemy fire) similar to a “B” result – on a 1d6 “1-2“ that crewman is wounded. You will receive a +1 drm to your next promotion attempt unless your tank was immobilized.
Note: Why do this? If immobilized and facing numerous or extremely dangerous enemy forces, it might be a good move. Notice that command takes a dim view of the abandonment of functional equipment.
[7.5] WeaTher effeCTs

The weather for each mission on the Weather Chart [A3]. The weather will likely degrade your mobility (mud and rain increase the chances of bogging down) as well as firing (rain and dust storms also affect firing, similar to a Smoke 1 marker).
Note: The effects of weather are obviously abstracted a bit to keep the game playable, but the main considerations are covered.
[7.6] Call for fire

Indirect Fire Support comes from a Call For Fire given by the tank commander, which requires one of his commands for the Combat Round. This requires an No. 19 Wireless command radio, which is only present in the tanks of 1st Lieutenants and Captains. The Call For Fire (CFF) can be a request for one of two types of indirect fire:


Mortars: Place a CFF 2 marker on an area. When it is executed, conduct an HE attack(s) with a -1 drm against a random enemy unit in that area.
Field Artillery: Place a CFF 4 marker on an area. When it is executed, conduct an HE attack(s) with a -3 drm against each enemy unit in that area.
An Assault Mission (not an Attack) starts with a bonus Field Artillery fire mission that commences the battle, after forces are set up for both sides and before the start of the first Combat Round. This does not require a radio (somebody else is requesting it for you in this case).
It is possible for an airstrike to get called in at random. Select a target that receives an HE attack against it with a -4 drm. If a “2” or less is rolled, the target is also destroyed, even if it was an SPG or tank.
Enemy vehicles are buttoned with a “B” result and they remain buttoned for the rest of the mission. It is possible they may become immobilized as well.
Players are limited to calling for either two mortar missions or one artillery mission per Mission. (There is only so much fire support available). The “free” Field artillery CFF for an Assault, or a Field Artillery CFF purchased with a Prestige Point, do not count against this limit.
It is also possible enemy indirect fire will target you from the Event Check or a Random Event. If this occurs, it is resolved immediately on Chart [B2] with either a -1 drm (mortars) or a -3 drm (field artillery). The main effect will be to button your tank up, although this will also cause you to be wounded if you are operating with an open hatch. Field artillery will also immobilize your vehicle with a “B” result.
As an exception to the normal call for fire requirement of a command radio, a player may spend a Prestige Point before starting a mission and receive a Field Artillery CFF, which is resolved immediately on the first Combat Round. This is in addition to the bonus Field Artillery for an Assault Mission, in which case you would resolve two Artillery CFFs to start.
You must have a command radio (in other words, be a 1LT or CPT in rank) to be able to barter for and use an “extra” mortar mission. This is unlike the “free” artillery mission that comes with an Assault, because in that case the mission is pre-planned.
Note: Hollywood aside, indirect fire was almost completely ineffective against tanks, barring a miraculous direct hit, although the larger rounds could immobilize tanks by destroying the tracks and suspension with a close miss.
[7.7] CreW skills
The skill system should be considered the heart of the game. A player may increase his crew’s skills during the course of the game to improve his crew’s combat effectiveness. For every three missions completed (regardless of success or failure) the crew gains an Experience Point, which the player may spend to “buy” skills. Missions that are skipped due to injury, tank repair, or other reasons, do not count toward gaining experience points. The skills cost different amounts of experience points to purchase. The Skill Effects Listing Chart [B8] gives a summary of all the skills and costs, with the full explanation below in the rules. Most skills can only be used once per mission, and should be flipped to the “USED” side after use. This will be reset upon starting the next Mission.
Important note: A “Refit” mission does count toward earning experience points. A “No Battle” mission (which occurs in Italy) does not.
Some discounts to the purchase price of skills may be earned at Bovington during the Armoured Fighting Vehicles School. These are for Weapons Maintenance, Expert, Eye for Terrain, and Gunnery. If the skill discount marker is available and that skill is purchased, the discount marker is removed and replaced by the actual skill marker. Notice that the Weapons Maintenance skill costs one point: If you get that skill cost reduction marker, you may trade it in immediately for the Weapons Maintenance Skill.
If you participate in a Major Event by successfully rolling for one that is currently active on the Operations Map, and you succeed in the mission, you receive one full Experience Point. In essence, success in a Major Event mission gives you the same credit as if you had completed three missions. If you fail, you just receive the normal credit for having completed a single mission. You may only participate in a Major Event once, so remove the marker from the map if this happens.
The player starts the game with one Experience Point for graduating from tank school.
The skills confer various benefits during game play, as listed below. The cost to buy each skill is listed after the skill name in parentheses.
Skills:

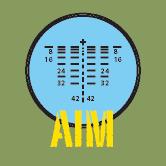
GUNNERY (4) – This skill gives the gunner a -1 drm to the “to hit” dice roll for the main gun on Chart [B1], and -1 to the HE/Machine gun Attack Chart [B2]. This skill is always active.
AIM (2) – There are three results on the [B3] Main Gun/AT Penetration Chart listed as “IMM**.” Normally an immobilized result, the Aim Skill converts these results into “DE” results due to skillful aiming at a weak point on the target. This skill is always active.

SIXTH SENSE (1) – The commander has developed an uncanny sense of impending danger. Once per mission, after receiving fire (but before checking for a wound) he is considered to button up before any incoming fire arrives if he chooses.

EXPERT (3) – A commander may become an “expert” in his current series of tank: This skill allows the player to re-roll one of his attacks or “to hit” rolls, if desired, once per mission. He must use the results of the new roll, even if it does less damage or even misses. This skill applies to ONLY the specific tank series for which it was purchased.
The series of tanks are:
Infantry tanks (Matilda, Valentines, Churchill)
Cruiser tanks (A9, A10, A13, Crusaders)
US Lend-Lease (Grant, Stuart, Shermans)
Cromwell (Cromwell, A30, A34)

SYNERGY (2) (1) – A commander may, once per mission, issue three commands instead of two in a Combat Round. A player loses this skill if any of the crew are killed or seriously wounded and sent to the hospital. Costs one Experience Point to re-buy this skill if lost, but it cannot be re-bought until the player earns at least one new Experience Point (exception: the “Booze” war trophy). This represents the “synergy” of a crew finally working together in harmony.
“The whole is greater than the sum of the parts.” - Aristotle. A tank crew that has worked and fought together long enough learns to anticipate commands and operates at a higher level of efficiency.


LEADERSHIP (1) – This skill allows the tank commander a –1 DRM to all promotion attempts.
EYE FOR TERRAIN (2) – This skill allows the driver to receive a +1 drm to the Immobilization Chart [B5] and a +1 drm to the Hull Down Chart [B5a]. This skill is always active.
ADRENALINE RUSH (1) – This skill allows a loader to load six rounds into the Ready Rack instead of just the normal four, once per mission.
WEAPONS MAINTENANCE (1) – This skill allows a crew member to ignore the first (only) Stoppage (Jammed Weapon) result from firing his machine gun per mission. This skill is specific to the crew member: The gunner’s skill applies to the coaxial machine gun, the assistant driver’s skill applies to the bow machine gun, and the loader’s skill applies to the commander’s machine gun.
[7.8] enD of CoMBaT rounD evenT CheCk
An Event Check occurs at the end of each Combat Round by rolling on the Chart [B9] Event Check. This event’s effects can range from very good to very bad. Often, nothing will happen at all (a “dash” result). The first 12 (only) rolled during the event check triggers a Random Event instead of the listed event, 9.0).
Chart B9 Note: Although the GE Arty stands a very good chance of a “B” result, your tank is only IMM on a result of an adjusted roll of “0” or less. Notice that mortars never immobilize, only “B” if they hit.
[7.9] exaMple of play
The following text show an example of play using basic rules:
Combat Procedures Example

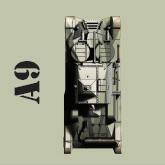
It’s Jun 1940. Rolling a “8” on chart [A1] means you are conducting an Attack. You roll a “9” for weather on Chart [A3] and a “6” for the terrain on Chart [A5], so your A9 Cruiser I tank is conducting an Attack in Open Terrain with Clear weather. Your tank commander (2nd lieutenant) and driver’s hatches are open. Both hull machine gunners, driver and loader are buttoned-up. Your loader has pre-loaded AP (as that is the only round available for the 2-pounder). Turret orientation is to the front. Your tank will start at long-range. Since it is an Attack, the enemy acts and fires first in the first round.


You roll 2d6 for Enemy units on Chart [A4] and roll an “8” on the first column, corresponding to the date of June 1940 (1 T + 1 INF). Now, roll 1d10 on the bottom of A4 for the tank unit. You roll a “6” in the tank column (M13/40) but as it is not yet December, this defaults down to the M11/39. Next step is to place the units on F2. You roll 1d6 for the tank unit (die roll of 3: Area B) and 1d6 for the INF (die roll of 6: Area C). Lastly, roll 1d6 on Chart A6 for the INF unit’s morale. This may come into play if the INF attack at close range with an antitank rifle (Chart B4). Because it’s an attack, you don’t roll to see if the INF is dug-in – they automatically have that status. Place a dug-in marker next to the INF unit.
Next, roll 1d6 to see if the enemy has detected and targeted you. The tank rolls a “1” and the INF rolls a “5”. Bad news as the M11/39 sees you and will engage. Worse, he fires first in the first round, as you are attacking. Normally the enemy acts second each combat round.
Now the enemy acts. To determine if the tank gets a hit, roll on 2d6 on Chart B1. There are no modifiers that apply, so you roll a “5”, which results in a “Hit”. That’s not good. Go to Chart B3 and roll 1d6 to see if the hit is a turret or a hull hit. You roll a “4”, which means your hull is hit. But did the round penetrate? The M11/39 gun penetration number is “4” straight up. It is “-1” for long range but that is still a “3.” The penetration of “3” versus your tanks front armor of “2” means you will roll on the PEN>Armor column of Chart [B3]. This means you refer to the third column, but your luck changes (sort of) and you roll a “3”, which means you’ve lost a track and are immobilized. This beats the hell out of being destroyed outright, however.
The INF has not detected you so no activity from them. To end the Combat Round, roll on Chart B9. Your luck has improved considerably as you roll a “11”, which means you
can “DE one random Axis Vehicle.” The notional tank to your left flank targeted the M11/39 when he fired on you. Notice you do not get credit for a destroyed tank, but you will get credit for a successful mission. You live to fight another day. As per rule [7.2.6], the lone remaining INF unit decides to reposition and withdraws.
What happens to your tank and the crew? The area is clear of enemy units so we roll 1d6 (7.4.5). You check for a counterattack (per rule 6.6) but roll at 1d6 “4” so there is no counterattack. You roll a “5” which means your crew and the unit maintenance team repaired the tank in time for your unit’s next mission. You check Chart W1 for War Trophies. Rolling 2d6, you get a “10” which means one of your crew found a Beretta M1935 Pistol, a highly prized souvenir. Place it on your Commander Status Chart [A2] as it will come in handy in a future trade for something useful. Finally, you will now conduct the after-mission activities of rule 6.7
[8.0] Awards, Promotions, Prestige, Trophies
[8.1]
aWarDs
The various awards in the game are representative of the major awards given to British Army personnel during World War II. Each award confers one Prestige Point to a player (and also raises his prestige level by one), which he may spend at his convenience to upgrade to a newer tank or obtain an old crewman after his release from the hospital. Awards also have an “Award Number.” If qualifying for an award, a player must then roll 1d6 equal to, or greater than, the Award Number, in order to actually receive the award.
Historical Note: It would be nice if all heroic deeds were properly documented and rewarded, but sadly, that was not the reality (and still isn’t to this day). Many actions deserving of a medal for valor go unrecognized, lost in the shuffle, or just unwitnessed or unrecorded by anyone. C’est la guerre.
[8.1.1]
MENTIONED IN DESPATCHES

Not a uniform award per se, but acknowledgment of military gallantry or heroism, published in the London Gazette. It is given to players who destroy two enemy vehicles (of any type) and/or AT guns during a mission. The award confers a Prestige Point.
Award Number = 3
[8.1.2]
MILITARY MEDAL
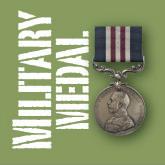
This is awarded to the tank commander who destroys or immobilizes three enemy vehicles and/or AT guns during a single battle. The first award confers one Prestige Point. Only noncommissioned officers (Sergeants) are eligible for this award.
Award Number = 4
[8.1.3] MILITARY CROSS

This is awarded to the tank commander who destroys or immobilizes three enemy vehicles and/or AT guns during a single battle. The first award (only) confers one Prestige Point. Only officers are eligible for this award.
Award Number = 4
[8.1.4]
DISTINGUISHED CONDUCT MEDAL

This is awarded to the tank commander who destroys four enemy vehicles and/or AT guns during a battle and completes his mission. The first award confers one Prestige Point. Only noncommissioned officers (Sergeants) are eligible for this award.
Award Number = 5
[8.1.5] DISTINGUISHED SERVICE ORDER

This is awarded to the tank commander who destroys four enemy vehicles and/or AT guns during a battle and completes his mission. The first award confers one Prestige Point. Only Captains are eligible for this award.
Award Number = 5
[8.1.6] DISTINGUISHED SERVICE ORDER (with 1st or 2nd BAR)

This is awarded to a tank commander who destroys four tanks/SPGs in a single battle and completes his mission. If not yet in possession of the DSO, this defaults to that award instead. Each award (DSO with 1 bar, DSO with 2 bars) confers a Prestige Point.
Award Number = 5
[8.1.7]
VICTORIA CROSS

This is awarded to a tank commander who destroys six vehicles and/or antitank guns in a single battle, while having received a wound during said battle. This award confers a Prestige Point each time it is earned.
Award Number = 6 (However, if not received, you then get to roll for the DSO or DCM (if appropriate))
[8.1.8]
AWARD LIMITATIONS
Players will only achieve one award per mission for heroism. This means that, although the criteria for several awards might be met at the same time, only the higher award will be received.
[8.1.9] MULTIPLE AWARDS
Players may earn the same award multiple times, but these do not grant additional Prestige Points or any game play benefits, with the exception of the Victoria Cross and the DSO, which gives an additional Prestige Point for each bar.
[8.2] proMoTions

Players start as a 2nd Lieutenant, if officer, and a Sergeant, if an NCO. Higher rank allows for a command wireless set (radio), which impacts the ability to call in fire support. Rank has no other game impact, but also adds to the role-playing aspect of the game and serves as an additional metric of performance. It is recommended players start as a Sergeant.
[8.2.1]
Ranks
The tank commander’s possible ranks are: NCO


OFFICER


FIRST RANK: Sergeant – the lowest rank of a tank commander.
SECOND RANK: Staff Sergeant – normally a troop (platoon) sergeant.
period went.
Staff Sergeants who are promoted switch to the officer side as a 2nd Lieutenant (in effect, they have received a battlefield commission). This will require you to flip Chart [A2] over to the Officer side.
[8.3] presTige poinTs anD presTige level
British Tank Ace uses the concepts of “Prestige Points” and an overall “Prestige Level.” These two concepts are related, but serve different purposes. As a player’s Prestige Level increases, newer and more advanced types of tanks will be available for use. Prestige Points can be used to upgrade to newer tanks.
[8.3.1] Prestige Points
Each time a player receives an award he receives a Prestige Point. Keep track of your current total of points on Chart [A2]. You also receive a Prestige Point for each promotion. Prestige Points may be spent on the following items:
1 Point: Upgrade to a newer tank. This requires your current tank to have been destroyed or damaged beyond repair (written off). If a newer type of tank is not available yet, or a player wishes to save his points, he will simply receive a replacement tank of the exact type he just lost for free.
FIRST RANK: 2nd Lieutenant – the rank of a troop (platoon) leader, who commands his own tank.
SECOND RANK: 1st Lieutenant – the rank of the squadron (company) XO, who commands his own tank which is equipped with a No. 19 Wireless command radio.
THIRD RANK: Captain – the rank of the squadron (company) commander, who still commands his own tank. It is equipped with a No. 19 Wireless command radio. It is the highest rank available in the game.
[8.2.2] Promotion Mechanics
The first promotion attempt is made after the 6th month of service and the second attempt after the 12th month of service (and so on).
Promotion to the next higher rank occurs on a successful 1d6 roll of 1-4, with the following modifiers:
-2 For possessing the Victoria Cross (every promotion attempt).
-1 Per award of the DSO during the period.
-1 For possession of the Leadership skill.
A player may have multiple modifiers depending on how the
2 Points: Upgrade to a newer tank. Normally crews stayed in their tanks as long as they were operational. By spending 2 points you can circumvent this policy and get a newer model of tank, if one is available. (You would do this if you are still in an operational, but older model).
You can only upgrade to particular type of tank if your current Prestige Level is high enough to allow you to command it. (See 8.3.2 below).
2 points: Request a previous crewman’s return. (This is for use when a skilled crewman was lost to the hospital due to a serious wound). Spend the points when the crewman is scheduled to be released and add him back to your crew the next mission.
1 point: Receive a +1 drm to an Award Number roll (see rule [8.1]).
If a player upgrades to a tank that holds fewer crew than his current tank, they lose their choice of excess crew.
[8.3.2] Prestige Level
A player’s Prestige Level starts at zero. Every time a player receives a Prestige Point, his Prestige Level increases by one. It never decreases. Unlike Prestige Points, which can be saved and spent as desired, the Prestige Level is your overall Prestige within your unit. Your Prestige Level can only
increase as the game progresses - it never decreases even if you spend all your Prestige Points. A Prestige Level of “5” is the maximum and once reached it no longer needs to be tracked. It is the highest level needed to request any tank. Prestige Points, however, can still be earned (and spent) even if you are currently at level 5 Prestige.
[8.4] War Trophies
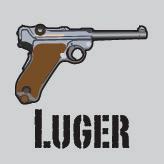
At the end of any mission in which you retain the battlefield, you may scrounge around and look for war trophies. Roll 2d6 to see if one of your crew has found something of value. These items may be kept for sentimental purposes, or traded to someone in supply or support for an item that has a game function to assist you. Chart [W2] lists the items available and their cost. You do not get any “rebates” when purchasing an item. For example, if you possess 2 items worth 2 points each, you may trade them for an item worth 3, but you will not get a point back. You may collect multiples of the same item (and in fact, will almost always do so until you start spending them). You are not required to trade them at any time.
The Synergy skill can be restored if lost by use of the “Booze” trade item, which is then expended. The Weapons Cleaning Kit remains in effect until the end of a mission in which any gun jams occur (which it prevents). However, at the end of that mission, the Kit is considered to have been used up and another one must be traded for by the Player if he wishes that effect again.
If your tank is lost, all trophies you have collected are lost.
Historical Note: This is a time-honored tradition dating back to the dawn of time, and hence the phrase, “to the victor goes the spoils.” Support troops and supply troops normally didn’t get into direct combat; hence Luger pistols, medals, flags, etc. were normally in high demand and these troops would be very eager to trade for them. As a personal note, I regret not being able to bring home an AK-47, but the rules had changed for my war. C’est la Guerre.
[9.0] Random Events
During the Event Check at the end of each Combat Round, it is possible a Random Event will occur. These range from very good to very bad. Only one random event can occur per mission. The first 12 rolled during an Event Check becomes a random event instead of the Minefield event. Any subsequent 12 rolled will be the Minefield event (or no event, as the Minefield can only occur once per mission as well). The minefield event does not occur if your vehicle is immobilized when it is called for. Some random events are processed immediately, while others require a marker to keep track as they may trigger on the next or possibly some other future mission.
[10.0] Optional Rules
[10.1] MulTi–player
Despite the fact that British Tank Ace is designed as a solitaire game, it can be played cooperatively or competitively by two or more players.
[10.2] CooperaTive play
Two players (or more) can fight in the same unit, and assist each other. One player should roll for a mission, weather, terrain, and enemy troop quality. All players will be using that setup. All players will roll for enemy forces separately, however, and setup their Battle Boards. The Battle Boards are considered to be adjacent physically, but the players are assumed to be in different platoons of the same company. If one player eliminates all the forces on his Battle Board, he may begin firing on the 3 areas closest to his side on an adjacent Battle Board. To wit, if the player on the left has no more Axis forces to engage, he may help the player next to him by engaging forces on the other Battle Board in Areas A, B, and D. The right-side player, once free, may engage forces on the other Battle Board in Areas B, C, and E. This firing is automatically considered flank shots on the Combat Round the assisting player first shoots.
Either player may call in artillery or mortar missions to assist the other player, but only if both players possess a No. 19 Wireless command radio to coordinate it.
All players must succeed if any is to succeed in a mission, so even if all Axis forces are eliminated, if any tank has been lost, the mission is a failure. If one of the players is hospitalized (or killed), he rolls up a replacement tank commander who fills in. When the player’s first commander gets out of the hospital, he must choose one to continue with. The unused commander is considered reassigned (unavailable for the rest of the campaign).
[10.3] CoMpeTiTive play
Two (or more) players can fight in the same or different units, and compete for the best score. When it comes time for return fire from enemy forces, the opposing player can roll the dice for the Axis Forces. If you choose to play in the same unit, the rules from [10.2] apply, so to a degree, you want to help your opponent, but the winner of competitive play is the player who ends up with the most vehicle/AT kills at the end of the game. First tie-breaker is highest award. [10.4] inCreaseD ThreaT TargeTing
Enemy units you have not yet engaged check to target you each turn and do so on a 1d6 roll of “1.” With this optional rule, after you have eliminated any enemy unit with your tank’s fire (not an event check) this increases to a 1d6 “1-2” as you are now seen as a greater threat.
[10.5]
CoMBineD gaMe
The combined game options are:
1. Italy-Europe game: Start the Italy game as described, but leave Italy by May 1944 and conclude with the Europe game.
2. Mediterranean Theater game: Start in North Africa, go to Italy in 1943 and finish the war there in 1945.
3. North Africa-Europe game: Play the North Africa game, then “time jump” from May 1943 to Europe and finish the war there in 1945.
4. All-Theater game: Play the North Africa game, then start the Italy game, but leave Italy no later than May 1944 and conclude with the Europe game.
When playing a combined game, the player resets their Prestige Level to “1” with each Theater transfer, then gets a new tank in 1943 or 1944 depending on where they went (their choice, but one that is available to them with date availability and Prestige Level restrictions in mind). This new tank does not cost any Prestige Points. The player then rolls for a mission on the appropriate chart (A1) and begins the next segment of the combined game.
[10.6] CreW ranks
Players may track the ranks of their crew members, at a cost of more record-keeping. Crew begin at the following ranks:
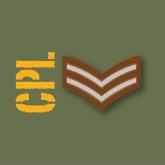
Gunner: Corporal

Driver: Lance Corporal
Radio Op/Loader/Asst. Driver: Trooper (lowest rank - no insignia on sleeve at all).
Every time you are considered for promotion, roll for each crewman. On a 1d6 roll of 4-6 (with no modifiers) they obtain the next higher rank. The two ranks above corporal are Sergeant (three chevrons) and Staff Sergeant (3 chevrons and a crown). Crewmen that reach the rank of Staff Sergeant leave the tank (they get their own tank in the unit) and are replaced by a brand-new crewman. Replacement crewmen attend Bovington Armoured Vehicles School but only perform those activities that directly relate to their position on the tank.
[10.7] CreW aWarDs

Players may track the awards for their other crew members, at a cost of more record-keeping. The tank commander, upon receiving a MC, may request and receive a MM for his gunner(s). He may request an MMs for the rest of the crew also, but at the cost of one Prestige Point. If awarded a DCM or DSO, the rest of his crew are all automatically Mentioned in Despatches. Finally, if awarded the VC, the rest of his crew are automatically awarded MMs.
[10.8] ChurChill “CroCoDile” Tanks

Players may wish to play the “Crocodile” version of the Churchill VII tank. To do this, place the “Flame” marker on the Assistant Driver hatch, as the bow machinegun is replaced by the flame weapon. The 75mm main gun and coax are retained. The flame weapon can be fired once per combat round (and no other weapons can be fired). It can only be fired in the direction the hull is pointing, similar to how a bow machinegun fires. It has unlimited shots (in game terms). It fires with a -2 drm on the HE/MG chart [B2]. Finally, if it gets a “B” result against any vehicle, that vehicle is DE (it is abandoned by the crew). It can only be fired against targets at close range. If the Crocodile receives a “DE” result, the fire check on chart B6 has a +2 drm. A Crocodile cannot back up unless the trailer is ditched, which make the flamethrower inoperable for the rest of the mission.
[10.9] opTional iMMoBilizaTion

Players may notice there is a left and right track box on the tank mats, but an IMM result only happens once. This optional rule allows players to utilize both tracks. When taking an IMM, roll 1d6. A 1-3 result is the left track is hit, a 4-6 indicates the right track. Place the IMM marker on the appropriate box. Should a player’s tank receive another IMM result (since the status is currently IMM, this would have to be from direct fire or artillery, not from movement obviously) roll again. If IMM track is hit again, there is no effect. If the other track gets hit, place an IMM marker on that side of the tank mat. This indicates that repairs will automatically result in missing the next mission, no die roll required.
[10.10] open-ToppeD eneMy vehiCles
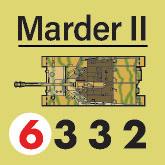
Some Axis SPGs were open-topped and more vulnerable to HE, machine-gun, and indirect fire. These are shown with an underline of the vehicle name. When engaging these vehicles with HE rounds or CFF, use the HT column on Chart B2 when checking for results, rather than the Tank/SPG column.
Game Credits
GAME DESIGN: Gregory M. Smith
GAME ARTISTS: Nadir Elfarra, Vincent Bourguignon
COVER ART: Matt White
PLAYTESTING: Dennis Canning, Glenn Saunders, Brett Grimmond, Nigel Hodge
RULES EDITING: Brittani-Pearl Eaton-Koch
Designer’s Notes
I was approached by Lee Smith to create an updated version of the old Avalon Hill classic, “Patton’s Best.” After digging out my old copy from the basement, and having reviewed the game, I was certain I could make a tactical solitaire tank game, but I was also certain it would only superficially resemble “Patton’s Best.” American Tank Ace was that result.
I don’t like to count my chickens before they hatch, but after seeing the response of players to the test version of that game, I felt that the system definitely had promise and decided to do more in the series. So, British Tank Ace was born. I was definitely excited to do a game featuring vehicles that, normally, just don’t get a lot of “love” in war-gaming –the early British cruiser tanks such as the A9, A10, and A13 (not to mention the Italian vehicles).
Part of the design process involves limiting the scope of the project to something manageable. Initially, I was just going to cover the North African Campaign, but quickly realized that I’d probably receive a lot of abuse for not covering Europe and Italy. However, I also realized I could do North Africa and jump to Italy or Europe, and have a manageable game -almost three games in one, essentially. Even so, this added a lot of components – not only are you initially fighting the Italians, but then also the German in the Afrika Korps. In Europe, the Germans have a whole different group of equipment. However, after consulting with Compass, they talked me into packaging all the theaters into a single box. (In reality, there are three different games here: North Africa, Italy, and Europe). It was actually quite easy to marry them together, if wanted, and if a shorter game is desired, any of them can be played singly. I was happy how that all turned out.
I’ve attempted to keep the historical accuracy despite the abstraction of certain events. It was a very difficult design for a variety of reasons. Land combat involves a large number of elements. Tactical land combat even more so. Ask any Advanced Squad Leader player. :) Furthermore, there are a lot of details that can be put into armor versus penetration. Not only is the armor of different thicknesses in various places on the tank, but the angling of the armor can also be critical in increasing the chances of a bounce. There is some painful mathematics in what the effective thickness of the armor really is based on angles, which also affects the chances of a bounce. Add to that there is upper hull
armor, lower hull armor, upper side armor lower side armor, turret armor, gun mantlet armor (typically, all different thicknesses, and at different angles). I have made some abstractions by letting the players hit the hull, or the turret, or the side/rear. What really matters, though, is whether you can penetrate or not. This is reflected in the charts and I feel it adequately covers the reality without getting too far down into the weeds. Someone might argue, “but I might have hit his lower front instead of his upper front hull,” to which I would say, “this is why we roll dice.”
Another area I mostly abstracted out was spotting. Tanks are not subtle weapons. They are noisy, large machines and when they shoot, a pretty impressive fireball comes out of the end of the gun tube. Although Patton’s Best featured spotting, I felt it really was not worth the trouble for what it added, which was not much. You quickly pick up on enemy fire in combat. However, the testers felt it appropriate that you couldn’t fire on AT guns in the first round, unless they fire on your tank first. So that made sense. AT guns were usually pretty well camouflaged by all nationalities.
I decided early on that the “Armoured Fighting Vehicles School” would be a lot of fun, having pioneered the idea in “Defending America.” It gives the player some early decisions that will affect his entire career, and decisions are always good in a solitaire game. Another fun addition was the concept of scrounging around after a fight to pick up “war trophies.”
Players will wonder why I included the Matilda, Valentine, and Churchill tanks, as they were technically “Infantry” tanks versus the other “Cruiser” tanks, but they played a significant role in all the theaters and essentially served the same purpose at times, despite the Infantry Tank designation.
As with many of my games, the heart of the game in my mind is the skill system. Decisions on purchasing skills will greatly affect your survival and combat effectiveness. Spend your points wisely.
However, unlike many of my games, there are many more tactical decisions than usual. AT guns, tanks, and SPGs are a huge threat. Infantry, thankfully, not so much, unless they are within Antitank Rifle range. The Italians tanks can normally be dealt with, but the German tanks almost always can kill you – even from the front. Your gun, typically, can only penetrate the side armor of the larger German tanks. You must decide who, and when, to engage, and decide when you need smoke cover. Ammunition can also be a problem in a longer battle, not that you’ll ever run out per se, but that your Ready Rack will be depleted and your rate of fire will decrease. Fortunately, in most British tanks the 2-pounder ammunition is fairly small, and your Ready Rack therefore fairly large, so ammunition in those vehicles shouldn’t be a huge concern.
This design is a bit unusual in that it combines both very realistic and totally abstracted combat routines. The impact of the fact you are not alone in the battle is mainly represented by the end of round “Event Check.” The impact of other friendly forces had to be represented somehow, and I chose the “Event Check” to account for them. I think I have done
so in a way that does not bog down play excessively, while still accounting for it. In reality you should not ever be fighting alone in a tank.
As an Armor Officer for 20 years in the U.S. Army, I’m really not sure why I’ve avoided doing tank games for so long. I do have some personal experience, having participated in tank battles in 1991. It’s possible I found submarines and aircraft more interesting – heck, I knew a lot about tanks already, and half the fun for me is learning new things. But I’m glad I finally decided to do some tank games, and I hope you enjoy this one.
Tank Unit Notes

7st Armoured Division. The “Desert Rats.”
Fought in North Africa starting in 1940 against the Italians. It was one of the main armored units for the British and took part in basically every major battle there. Later in the war, fought in Italy, then landed in Normandy shortly after the invasion and fought in France and Germany.

3rd and 4th County of London Yeomanry. These regiments were amalgamated in 1944 as the “3/4 CLY” but during North Africa served as two sister regiments in the 22nd Armoured Brigade. In 1943 they were one of the first units that transitioned to Sherman tanks.

11th Hussars (“Prince Albert’s Own”). A cavalry regiment, it started the North African campaign in Egypt in 1940. Assigned to the 7th Armoured Division, it fought in almost every major action, and stayed with the 7th Armoured Division in Italy and Europe.
2nd Armoured Brigade. As part of the BEF in 1940, this unit lost all its equipment during Dunkirk. Reformed, it was sent to North Africa in November 1941 as part of the 7th Armoured Division, where it fought in numerous battles.
1st Canadian Armoured Brigade. This was one of the two Canadian independent Armoured Brigades. It served mainly in the Italian front, landing on the toe of Italy in September 1943. In 1944 it helped break the Winter (Gustav) defensive line.
2nd Canadian Armoured Brigade. This unit supported the 3rd Canadian Infantry Division during the D-Day landings at Juno Beach, and continued to fight in the Normandy campaign and all the way V-E Day. It mainly was equipped with Shermans.

1st Army Tank Brigade. Like the 2nd Armoured Brigade, this unit fought in France in 1940, but lost all of its equipment during the Dunkirk
evacuation. Re-equipped with Valentine tanks, it was sent to North Africa where it fought numerous actions, such as Crusader, Bardia, and El Alamein.

22nd Armoured Brigade. This was a major subunit of the 7th Armoured Division. It fought in almost all the major battles in North Africa, and was equipped at times with Crusaders and Grant tanks. It stayed with the 7th Armoured Division in Italy and Europe.
1st Royal Tank Regiment. The 1st RTR fought in North Africa starting with A9 tanks and was part of the siege of Tobruk. They moved to the 7th Armoured Division (as part of the 22nd Armoured Brigade) after El Alamein and stayed with the 7th Armoured for the remainder of the war.
3rd Royal Tank Regiment. The 3rd RTR had its roots in the First World War, fought near Calais in 1940, went to Greece in 1941, fought in North Africa, and was returned to Britain for refit. It participated in Normandy and beyond.

4th/7th Royal Dragoon Guards. The 4th/7th landed on D-Day with the 50th Division at Gold Beach, fighting in numerous major battles to include the Falaise Gap and Market-Garden.
The 11th Armoured Division. This division holds the dubious distinction of having lost 124 tanks in just two days during Operation Goodwood. After refitting, it continued to fight in Europe for the rest of the war, securing the British right flank during Market-Garden.
The 15th/19th The King’s Royal Hussars. This unit served as the reconnaissance unit for the 11th Armoured Division.
Guards Armoured Division. Landing in France a week after D-Day, the Guards Armoured Division fought in Operation Goodwood, and later led the XXX Corps attack during Operation MarketGarden. Held in reserve during the Battle of the Bulge, it encountered hard fighting during Operation Veritable. After the war it was converted into an infantry division.


13th/18th Royal Hussars (Queen Mary’s Own). This unit fought as part of the 27th Armoured Brigade on D-Day at Sword Beach; in late July 1944 transferred to the 8th Armoured Brigade. Sherwood Rangers Yeomanry. Tracing their heritage back to 1794, the Sherwood Rangers Yeomanry fought in most of the armored actions of WWII for the British, to include Crete and
North Africa. On D-Day it was equipped with DD Shermans and Firefly tanks, and fought in Market-Garden and on into Germany.
Polish 1st Armored Division. Formed in Scotland in 1942 from Polish soldiers who had escaped from the Continent, it had 18,000 soldiers at its peak strength. It fought in Normandy in August 1944 and continued to fight as part of the British 21st Army Group (and specifically with the First Canadian Army). They were equipped with mainly Sherman and Cromwell tanks.
British Tank Notes
NORTH AFRICA:

Cruiser Mk I (A9) The first of the Cruiser tanks, it probably should have been called an “Infantry tank” due to its low speed (25mph top, 15 mph cross-country). It was reasonably wellarmed for the time, with a 2-pounder main gun and 3 machineguns, two of which were in separate turrets in the front of the hull. This required a crew of six. The armor was extremely thin, making it vulnerable to antitank rifles and even the weakly armed Italian M11/39.
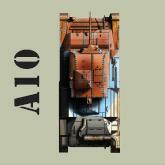
Cruiser Mk IIA (A10) The A10 had the same main gun as the A9, but the twin hull machineguns were replaced by a single bow gun. It had only slightly better armor. The machine guns were the first “BESA” guns, which used the same ammunition as German machineguns (7.92mm). This turned out to be useful in North Africa. It was regarded as another “stop-gap” design while work proceeded on better tanks.

Cruiser Mk IV (A13 Mk II) The A13 Mk II was an up-armored version of the A13 with a standard 2- pounder main gun and either a Vickers or a BESA coaxial machinegun. The hull machinegun was removed, reducing the crew to just four. Top speed was 30 miles per hour.

Matilda The Matilda Infantry Tank was exceptionally slow but this was due to the heavy armor of up to 78mm in the front and 60mm on the sides. This heavy armor earned it the nickname “Queen of the Desert” as it completely dominated all the Italian weapons and vehicles in 1940. The arrival of the German 88mm FlaK gun (used in the AT role) put an end to its dominance in North Africa.
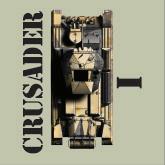
Crusader I (A15 Mk II) The Crusader tanks were to become of the early mainstays of the British in North Africa. The first model brought back a hull machinegun, but retained the 2-pounder. It was still outmatched by the German Pz III tanks in most regards.

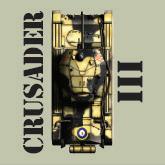
Crusader II (A15 Mk II) The next major upgrade to the Crusader series eliminated the hull machinegun but had increased frontal armor.
Crusader III (A15 Mk II) This version of the Crusader had a major gun upgrade, from the 2-pounder (40mm) to the 6-pounder (57mm). Unfortunately, this necessitated the removal of the loader due to turret space issues, forcing the commander to load and give fire commands to the gunner. It also had slightly better armor than the Crusader II.

Valentine Mk II One of the key tanks for the British, it was diesel engine equipped rather than gasoline. It featured a 2-pounder main gun and a BESA coaxial machinegun. Of note was the fact it had heavier armor than the other British tanks in the desert. There was no loader and therefore only a 3 man crew.
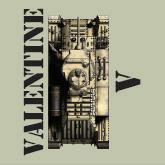

Valentine Mk V The Valentine Mk V differed from the Mk II in that the turret had been enlarged to allow for a loader for the 2-pounder, improving its combat efficiency overall.
M3 Grant (Lend-lease Lee) The M3 Grant’s arrival in North Africa was somewhat of a “game changer” as the British finally had a 75mm armed tank to challenge the Germans. It was tall and large, however, due to the design which featured the primary main gun (the 75mm) mounted in a limited traverse sponson, with a small turret on top of the tank housing the secondary main gun (a 37mm). Several machineguns rounded out the arsenal.
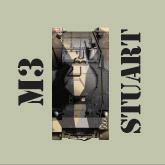
M3 Stuart (Lend-lease M3 light tank) Known as the “Honey” due to its mechanical reliability, the 37mm main gun left a lot to be desired. It was roughly as good as the 2-pounder, although both were essentially underpowered for this stage of the war.

Sherman II (Lend-lease M4A1) This all-cast hull was the version sent to the 8th Army in North Africa, about 270 appeared in time in October of 1942 to participate in Montgomery’s El Alamein offensive. With a 75mm main gun in a rotating turret, it matched pretty much all German vehicles of the time, and over-matched the Italians.
ITALY/EUROPE:
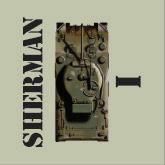

Sherman I (Lend-lease M4) This was the British name for the stock U.S. production M4, identical in all ways to the U.S. M4. 2,096 were supplied to the British during the war.
Sherman II (Lend-lease M4A1) This was another Lend-Lease vehicle, per the above note. 942 were supplied in all (including the ones sent to North Africa).
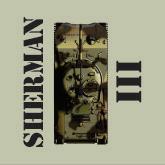
Sherman III (Lend-lease M4A2) This version of the Sherman was always intended for shipment to allies, and over 5,000 were delivered to the British, making it the second most numerous model supplied to the UK. It was not much different than the M4, but did have a diesel engine.

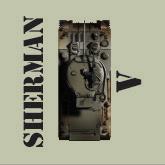
Sherman IIA (Lend-lease M4A1(76)) Over 1,300 of these were supplied to the UK, and it was equivalent to the M4A1(76) in all regards.
Sherman V (Lend-lease M4A4) This tank was another model strictly designated for export and not used by U.S. forces. Over 7,100 were supplied to the British, making it the most numerous model of Sherman for them. It was similar to the M4A2 but had slightly better armor.

Sherman VC “Firefly” (M4A4 conversion) Arguably the most famous of the British Shermans, the Firefly mated the 17 pounder (roughly 77mm) gun with the Sherman tank. At the start of the Normandy campaign, it was the only Allied tank that could easily penetrate most German tanks, to include the Panther and Tiger. As such, it gained quite the reputation and was in high demand, although limited supplies usually meant only one Firefly was allocated per troop. The 17 pounder gun was mated with several models of Sherman, but the overwhelming majority were M4A4 conversions. To make room for the larger ammo, the bow machine gun and assistant driver were removed.

Churchill VII (Infantry tank) The Churchill VII was a good news, bad news tank. The good news was, the armor was extremely thick, even for 1944. The bad news was that it mounted a main gun that had problems penetrating the best German tanks, being the 75mm QF (Quick Firing). It was adapted to many different roles, to include a successful flamethrower tank (the Crocodile) although the heavy armor made it slow.
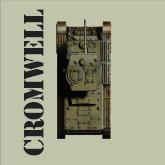
Cromwell The Cromwell was probably the best overall British tank of the war, from the perspective of numbers built and all-round decent capabilities. It was fast, had reasonable armor, but a slightly underpowered gun (the 75mm QF). Still, it was a very good tank, comparable to Shermans.

A30 Challenger The Tiger and Panther threat caused the British to try and rush a 17 pounderequipped tank into service, but the A30 was deployed later to the Continent due to a lack of deep wading equipment (it had to wait for the Mulberry ports, delaying it until July). In the meantime, the Firefly had shown itself capable of the task. Regardless, despite a rough start, the A30 eventually became preferred over the
Firefly as it was faster and more maneuverable.
A34 Comet The Comet was another 17-pounder project that came about as an upgrade to the Cromwell. Fast and armed with the deadly 17-pounder, it arrived late in the war but still saw active service starting in December 1944.
Selected Bibliography
Chamberlain, Peter and Doyle, Hilary L. “Encyclopedia of German Tanks of World War Two.” Arms and Armour Press, 1993. (Revised Edition). Superb reference of all German tanks and other vehicles. The “bible” for the German side of things.
Chamberlain, Peter and Ellis, Chris. “British and American Tanks of World War Two.” Cassell & Co, 2000. Probably the “bible” for the British side of things, to include the lend-lease Shermans. Fantastic reference. Originally printed in 1969 by Arms and Armour Press.
Chamberlain, Peter and Gander, Terry. “Weapons of the Third Reich.” Doubleday and Company, Inc., 1979. This reference covers anti-tank guns, small arms, mortars, artillery, panzerfaust, and a host of other things. It includes lots of information on captured weapons pressed into use by the Germans. Another great reference.
Crisp, Robert. “Brazen Chariots.” W.W. Norton & Company, 2005. First printed in the US in 1960, this is probably one of the best personal accounts from the British side on armored warfare in the desert. A classic and must-read for anyone interested in the North Africa Campaign.
Hunnicutt, R.P. “Sherman: A History of the American Medium Tank.” Presidio Press, 1978. Pretty much everything you needed to know about Sherman tank production. Although a little light on operational use, it is covered. The technical information is a gold mine, however, and there are photos galore. Useful for information on the Sherman II (aka the M4A1).
Hunnicutt, R.P. “Stuart: A History of the American Light Tank.” Presidio Press, 1992. Pretty much everything you needed to know about the Stuart light tank. Similar in layout to the Sherman book.
Dr. F.M. von Senger und Etterlin. “German Tanks of World War II: The Complete Illustrated History of German Armored Fighting Vehicles 1926-1945.” A&W Visual Library, 1969. Translated from the German, it serves as a nice complement to Chamberlain’s “Encyclopedia of German Tanks.” Tons of information, charts, and pictures.
U.S. War Department. “Handbook on German Military Forces.” Louisiana State University Press, 1990. This book is a reprint of a government handbook printed in March 1945. Dated and with some errors, it is still fascinating.
Zukas, Jonas A. “High Velocity Impact Dynamics.” WileyInterscience Publishing, 1990. For the serious engineers/ mathematicians who are truly interested in what happens when an armor-piercing round pierces armor, this lays it out. Extremely technical, not to mention expensive. I don’t own it, or even pretend to understand it, but I’ve seen parts of it. I just found it interesting such books even exist, to be honest.
[6.7] 12 Churchill “Crocodile” Tanks [10.8] 26 COMBAT [7.0] 13 Combat Procedures Example [7.9] 22 Combat Rounds [6.5] 12 Combined Game [5.2.3, 10.5] 11,25 Commander Status Chart [3.4] 5 Competitive Play [10.3] 25 Conduct Actions [7.2 #3] 13

