1 minute read
proto 2

proto 3

Advertisement
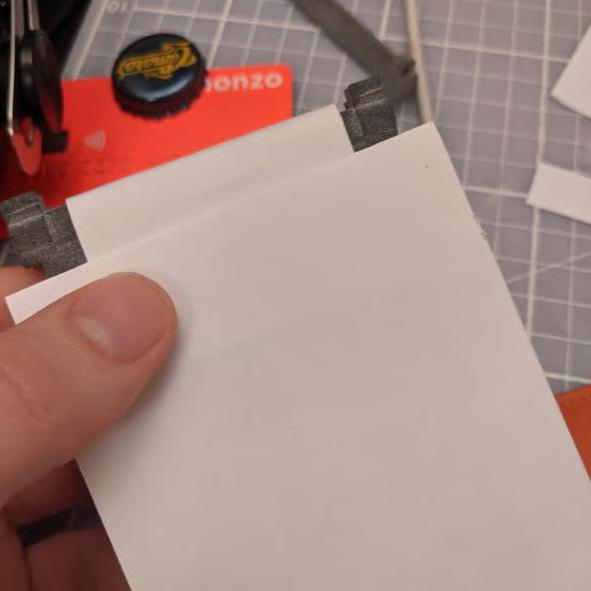
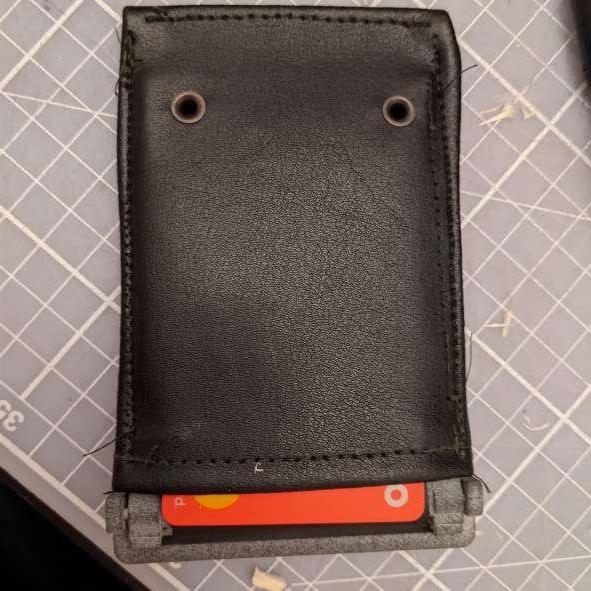
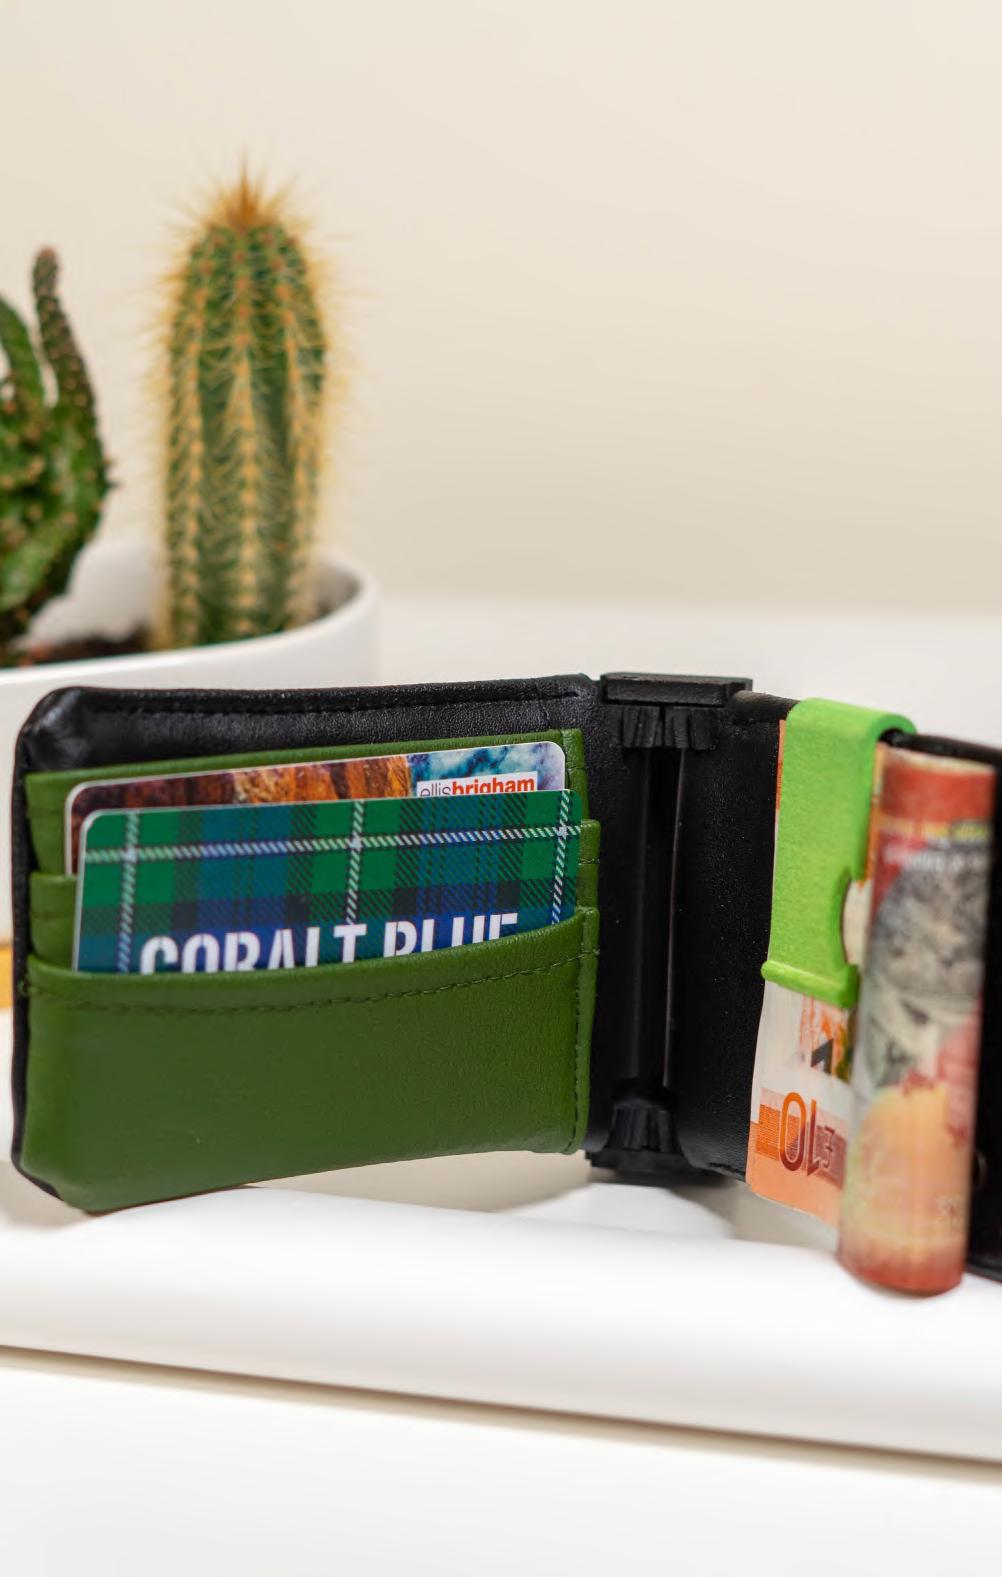
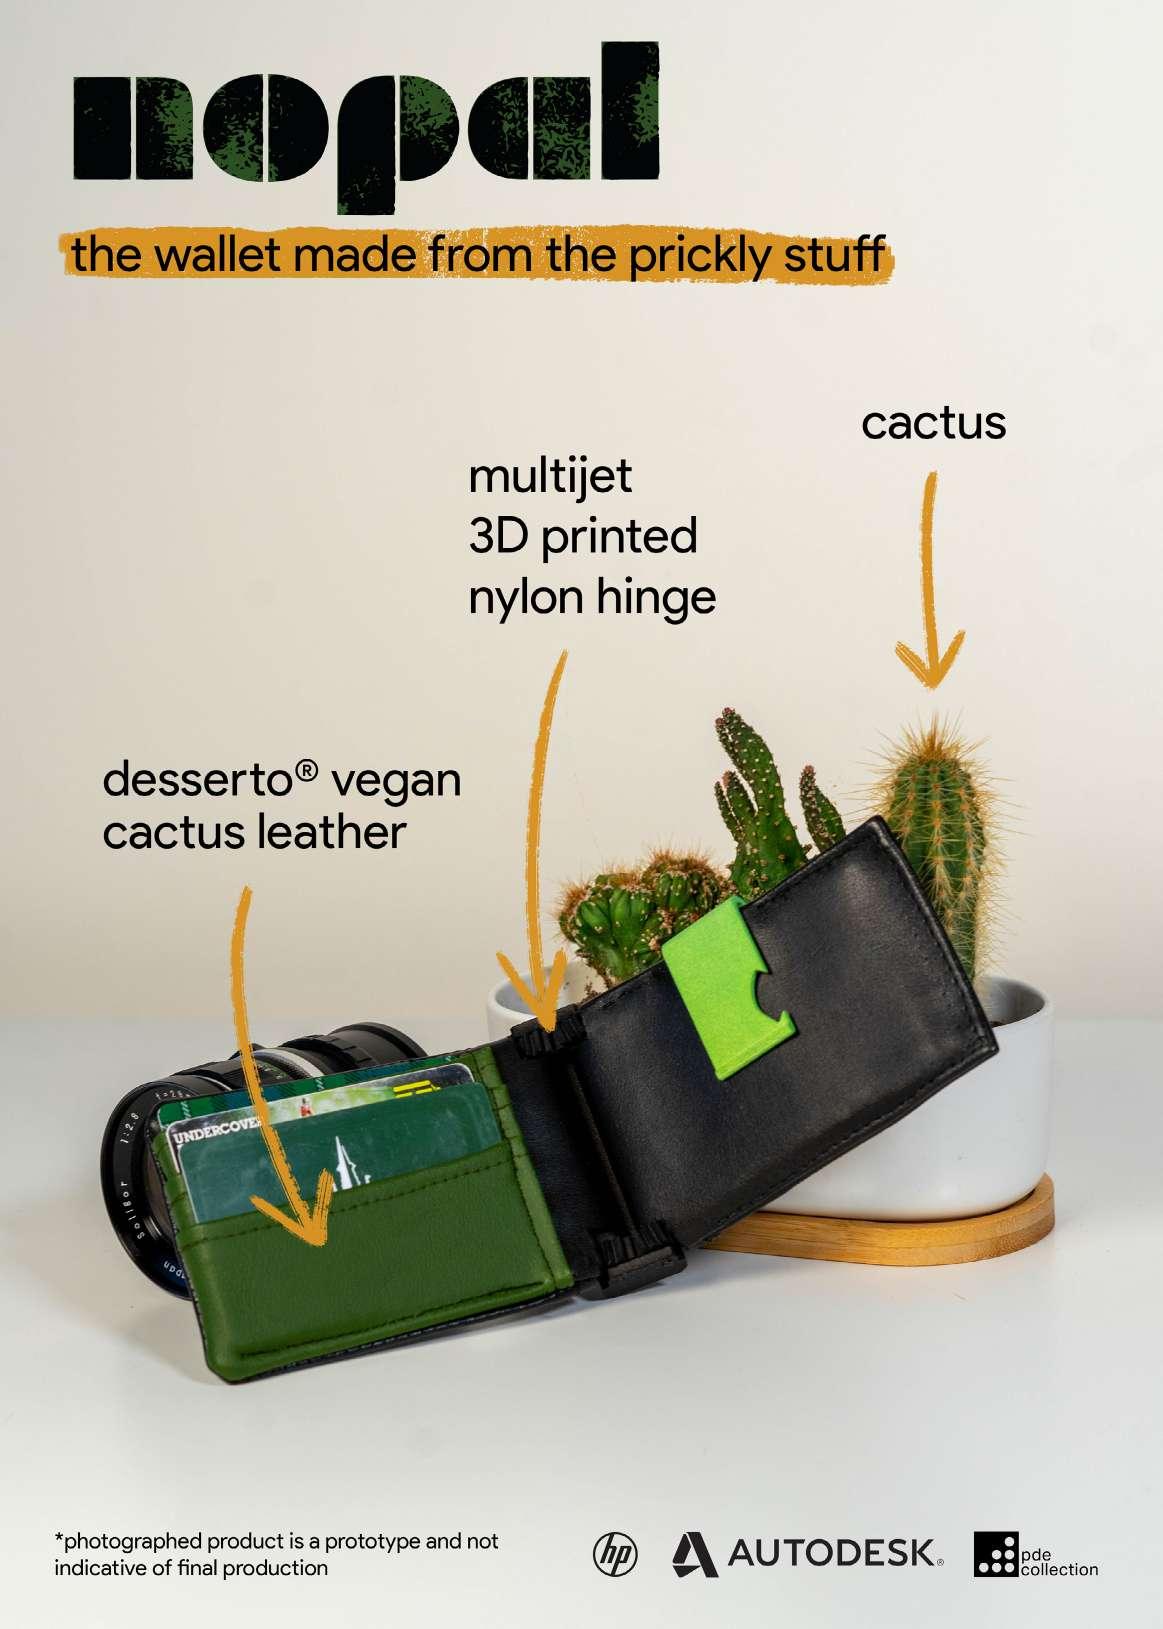
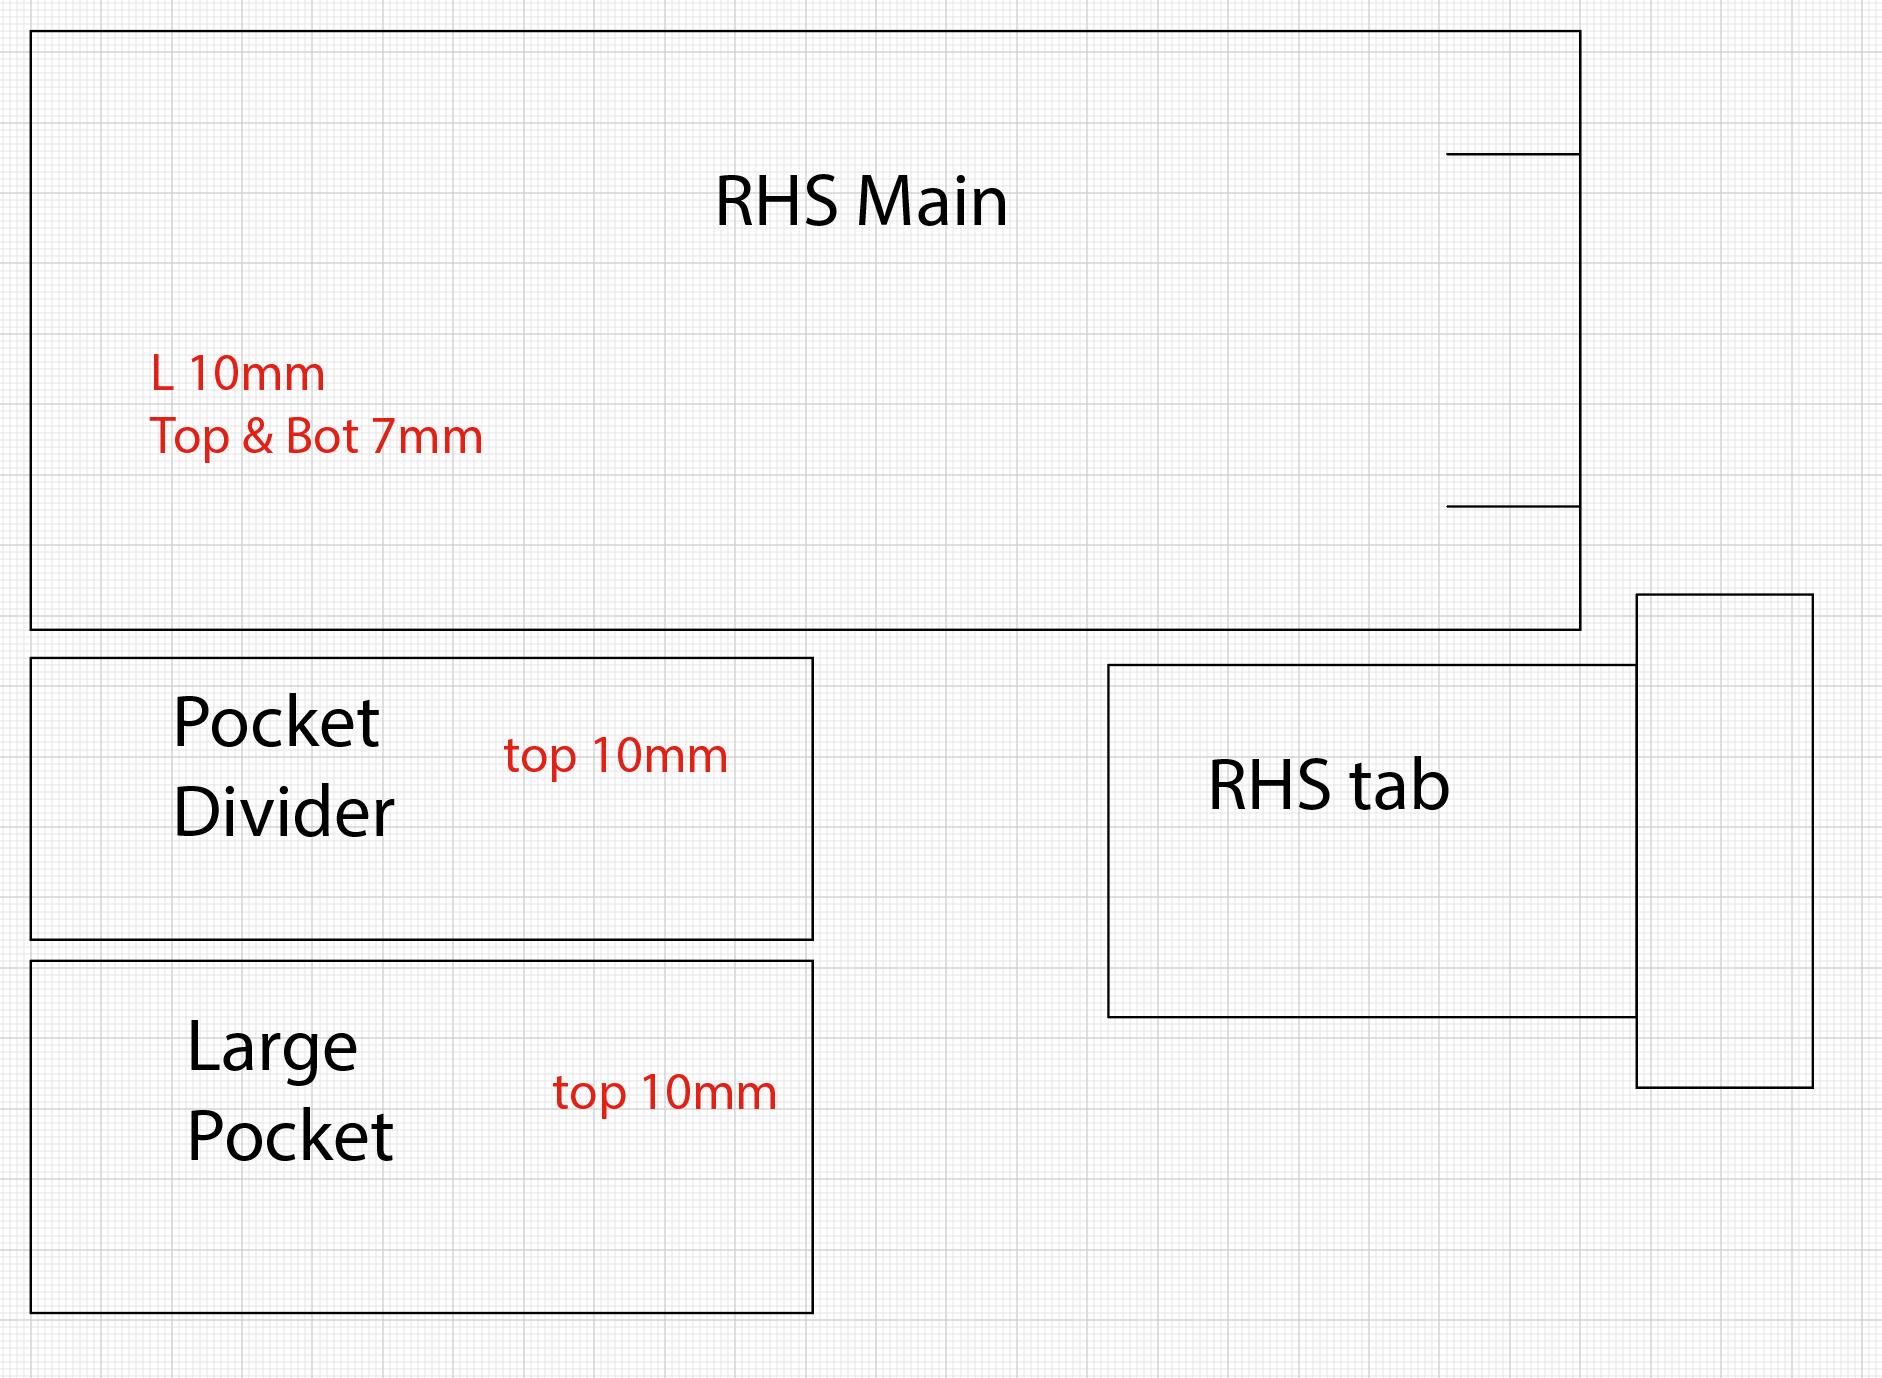
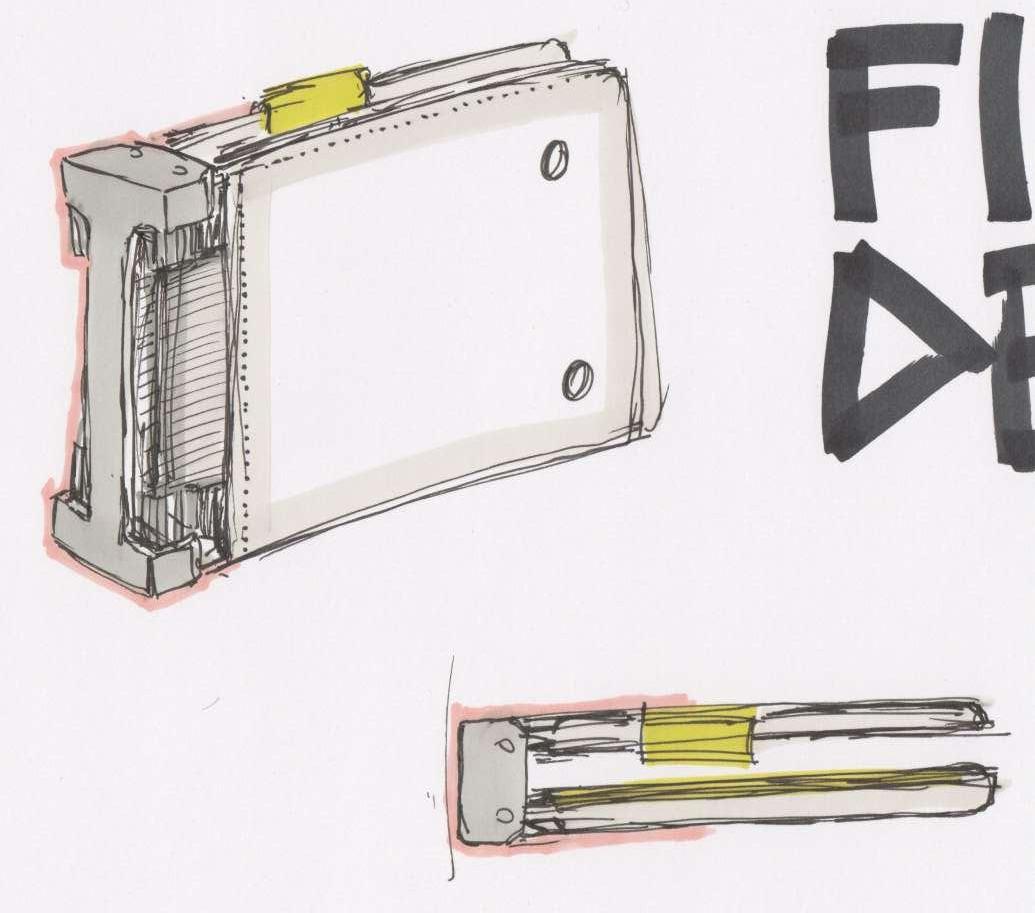
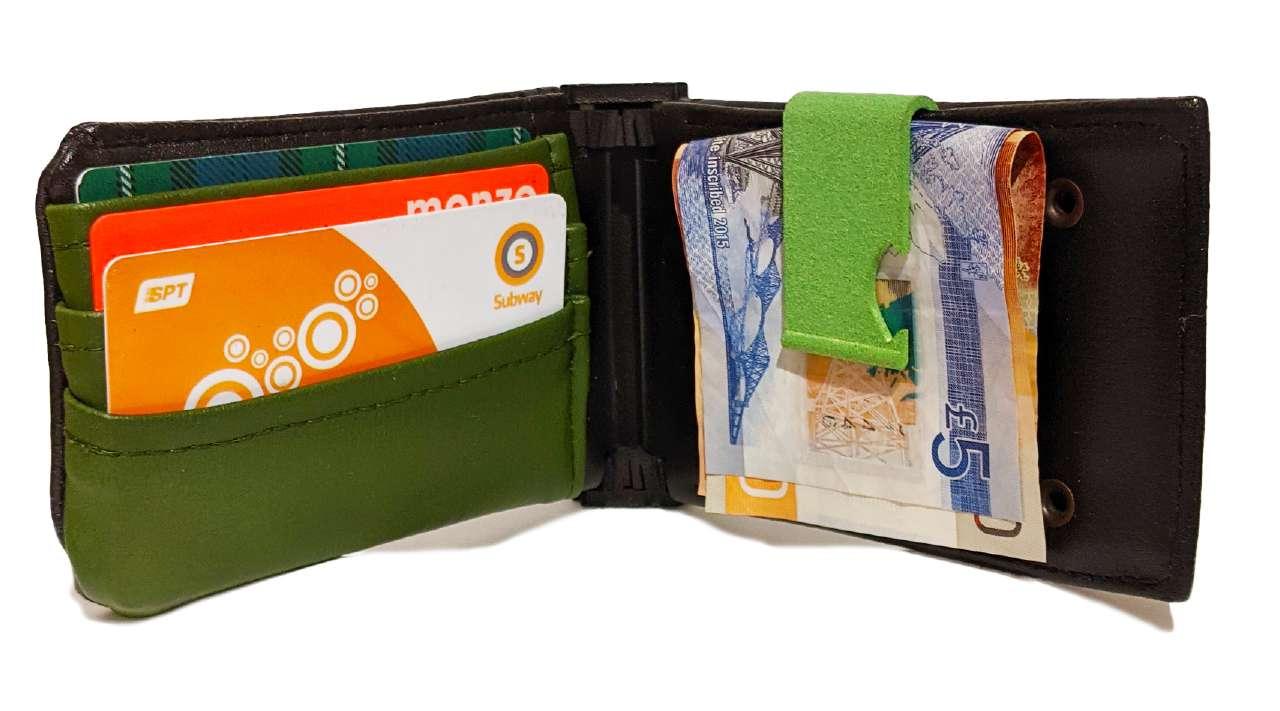
In this prototype I was keen to explore the way that the desserto material bonds and interacts with the PA12 printed by HP. I looked at using rivets to join the desserto to itself through a drilled hole in the PA12. This worked really well, however the rivets were still becoming dented when joined. To rectify this I phoned my mother and borrowed a fabric rivet tap and punch set. This problem went away when I used the proper tools for the job. However, using rivets still left a distinct gap between the desserto fabric and the PA-12, which at this point in the project was unsightly due to the difference in colour. This though was a cloud with a silver lining. By creating gaps , i had made places that were perfect for holding cards. If I used this as a feature, I could expand the functionality of the wallet, and increase capacity without needing to sew more layers into the internal card pockets. In order to make these pockets more usable i used a tab system, with the desserto stiff folding over the back of the PA12 and tucking back into itself. This made the motion of inserting and retrieving a card much nicer, as the desserto stiff had a tighter grip on the card than the PA12. A problem I encountered when connecting the RHS of the wallet to the housing was the pegs I had made did not fit in the holes. This was due both to me including a too tight tolerance during the design phase as well as the holes not being cleared of powder at HP. I attempted to counter this using small dowels that I carved into shape and hammered in. This worked surprisingly well.