1 minute read
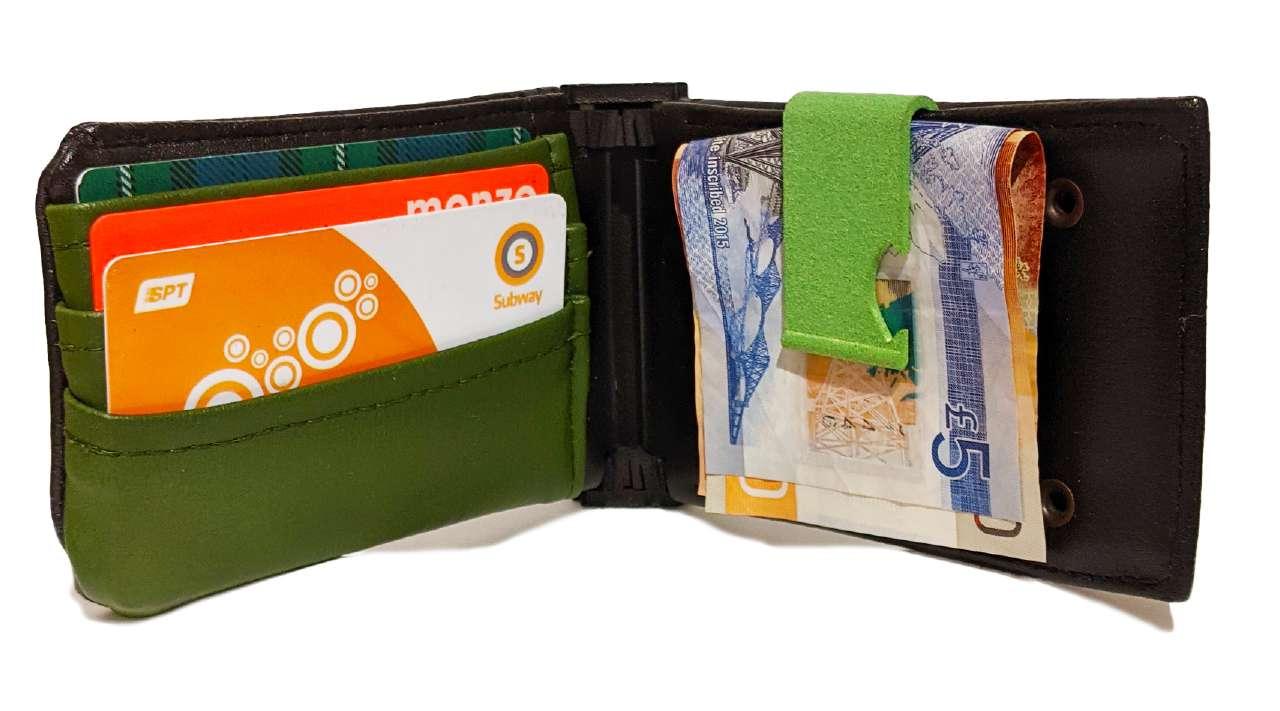
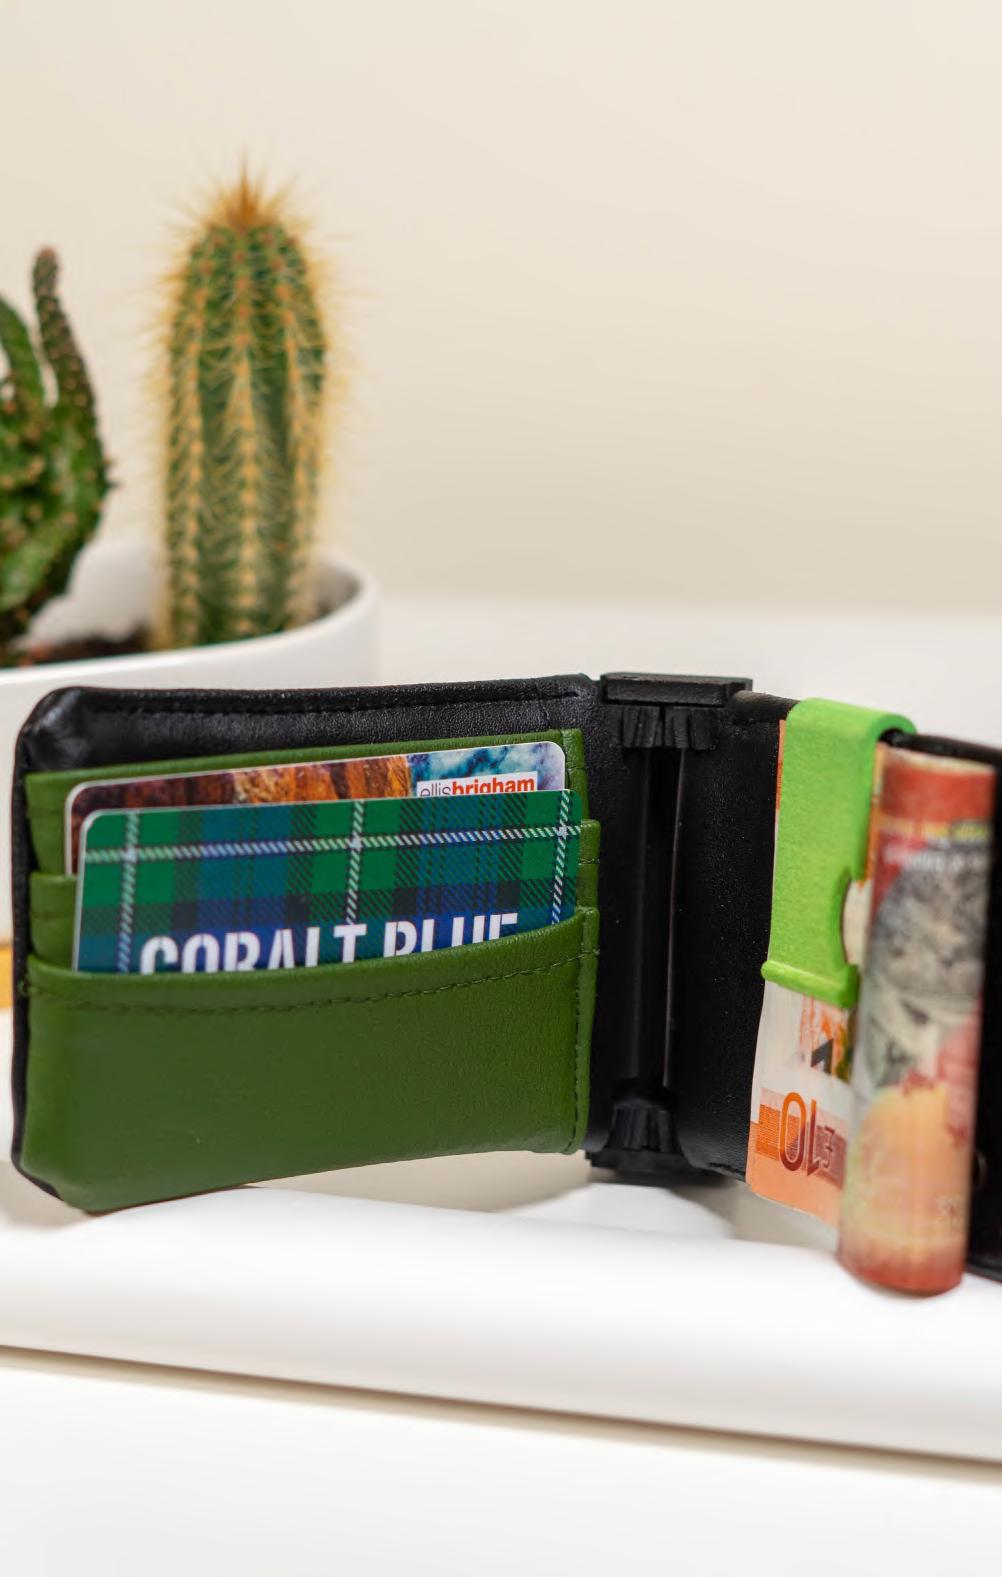
final design

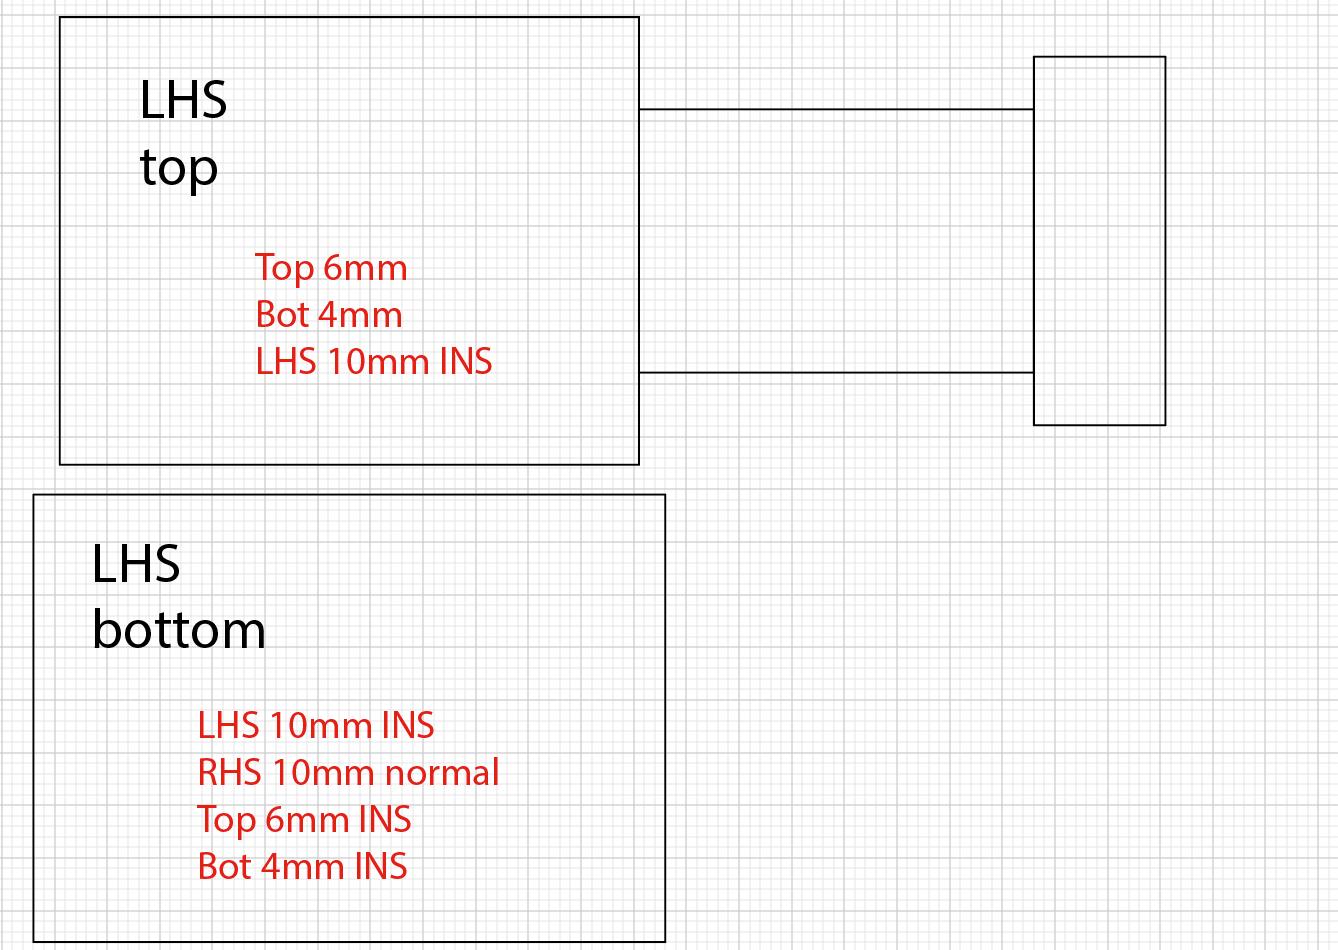
final pattern
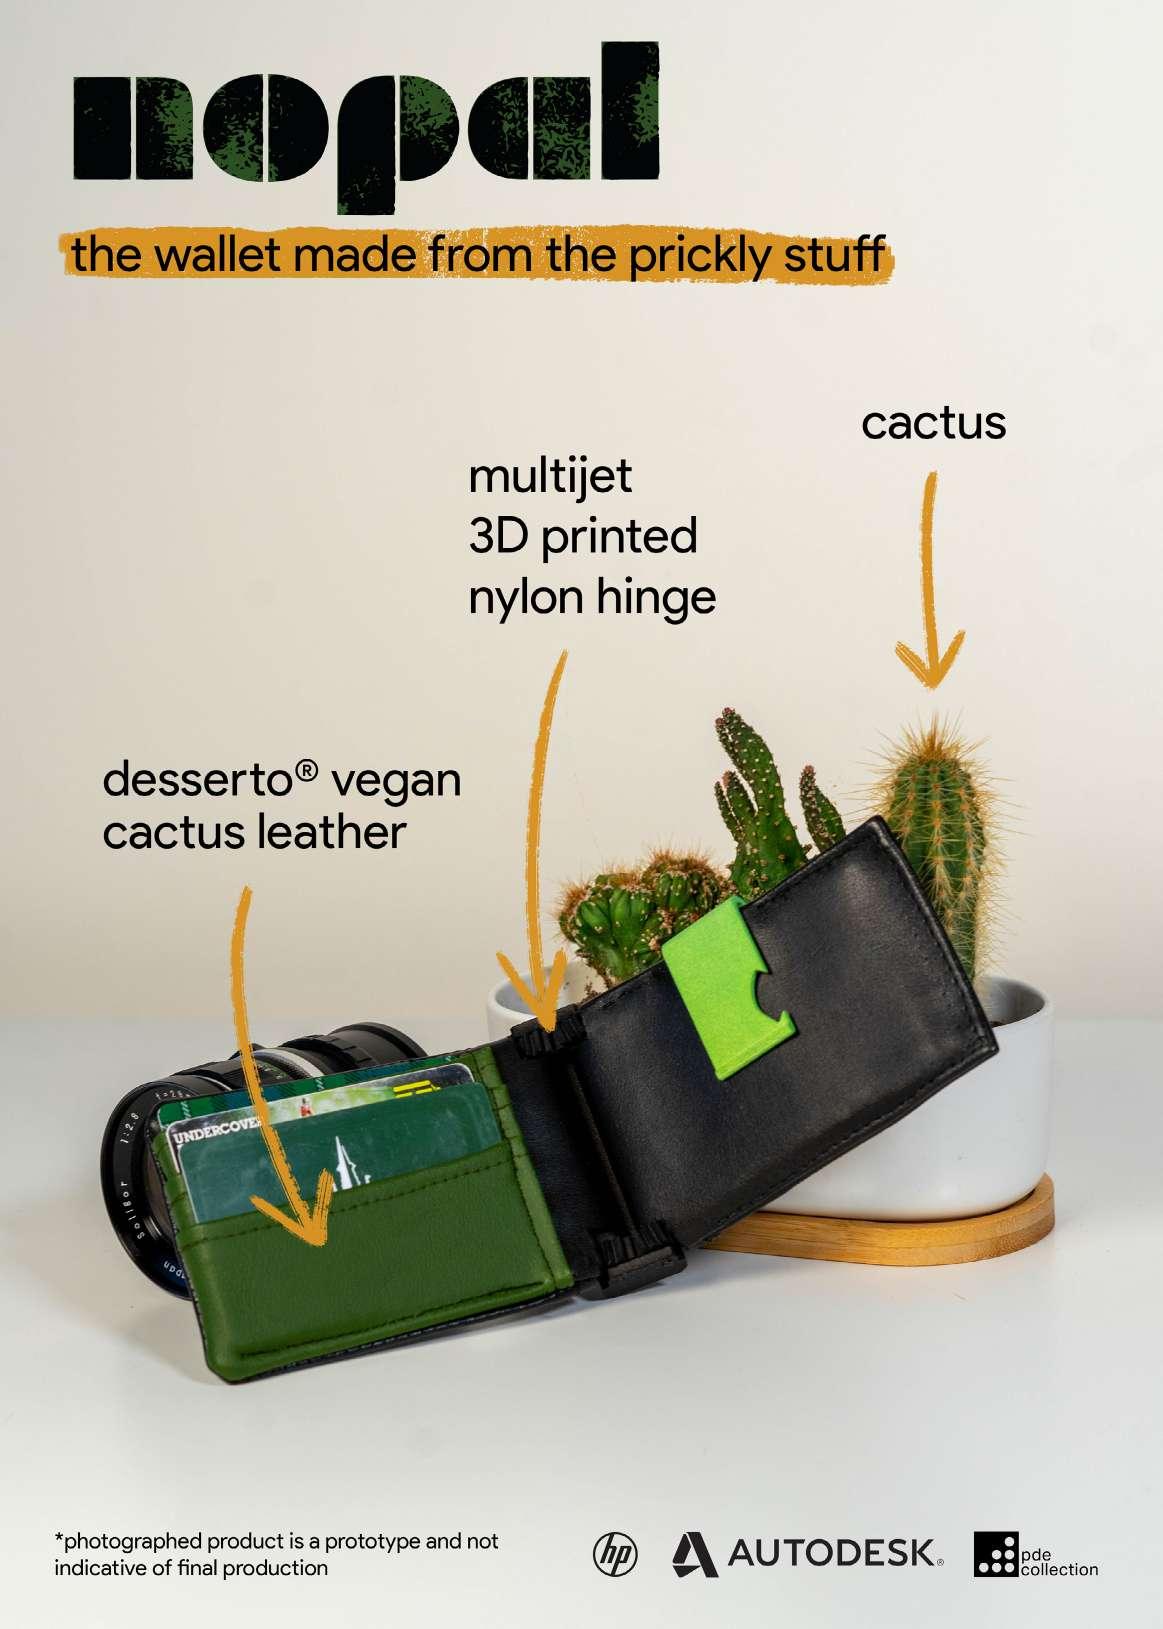
I created my final design for the wallet sides on illustrator, and printed them on A4, cut them out and used them to trace and cut my final materials. This imposed some challenges as some of my shapes were larger than I could print. In order to counter this, I printed in multiple parts and used alignment lines to make sure I could reassemble with the same alignment as on illustrator. To reassemble after cutting I used masking tape. The final design was an iteration of prototypes 4 and 5, with a different tab length. As well as this, I outlined the seam widths on each blank for reference when sewing in order to make sure I was consistent between the LHS and RHS. As previously said, it would have been useful for these patterns to be cut from a more durable material than printer paper, as this would allow them to not get damaged when tracing and cutting. During the cutting of material, I managed to only need to recut these once, however I think that I would have been able to mark and cut quicker and easier if the templates had a noticeable thickness to them.
Advertisement