
Installation Manual FRC 500
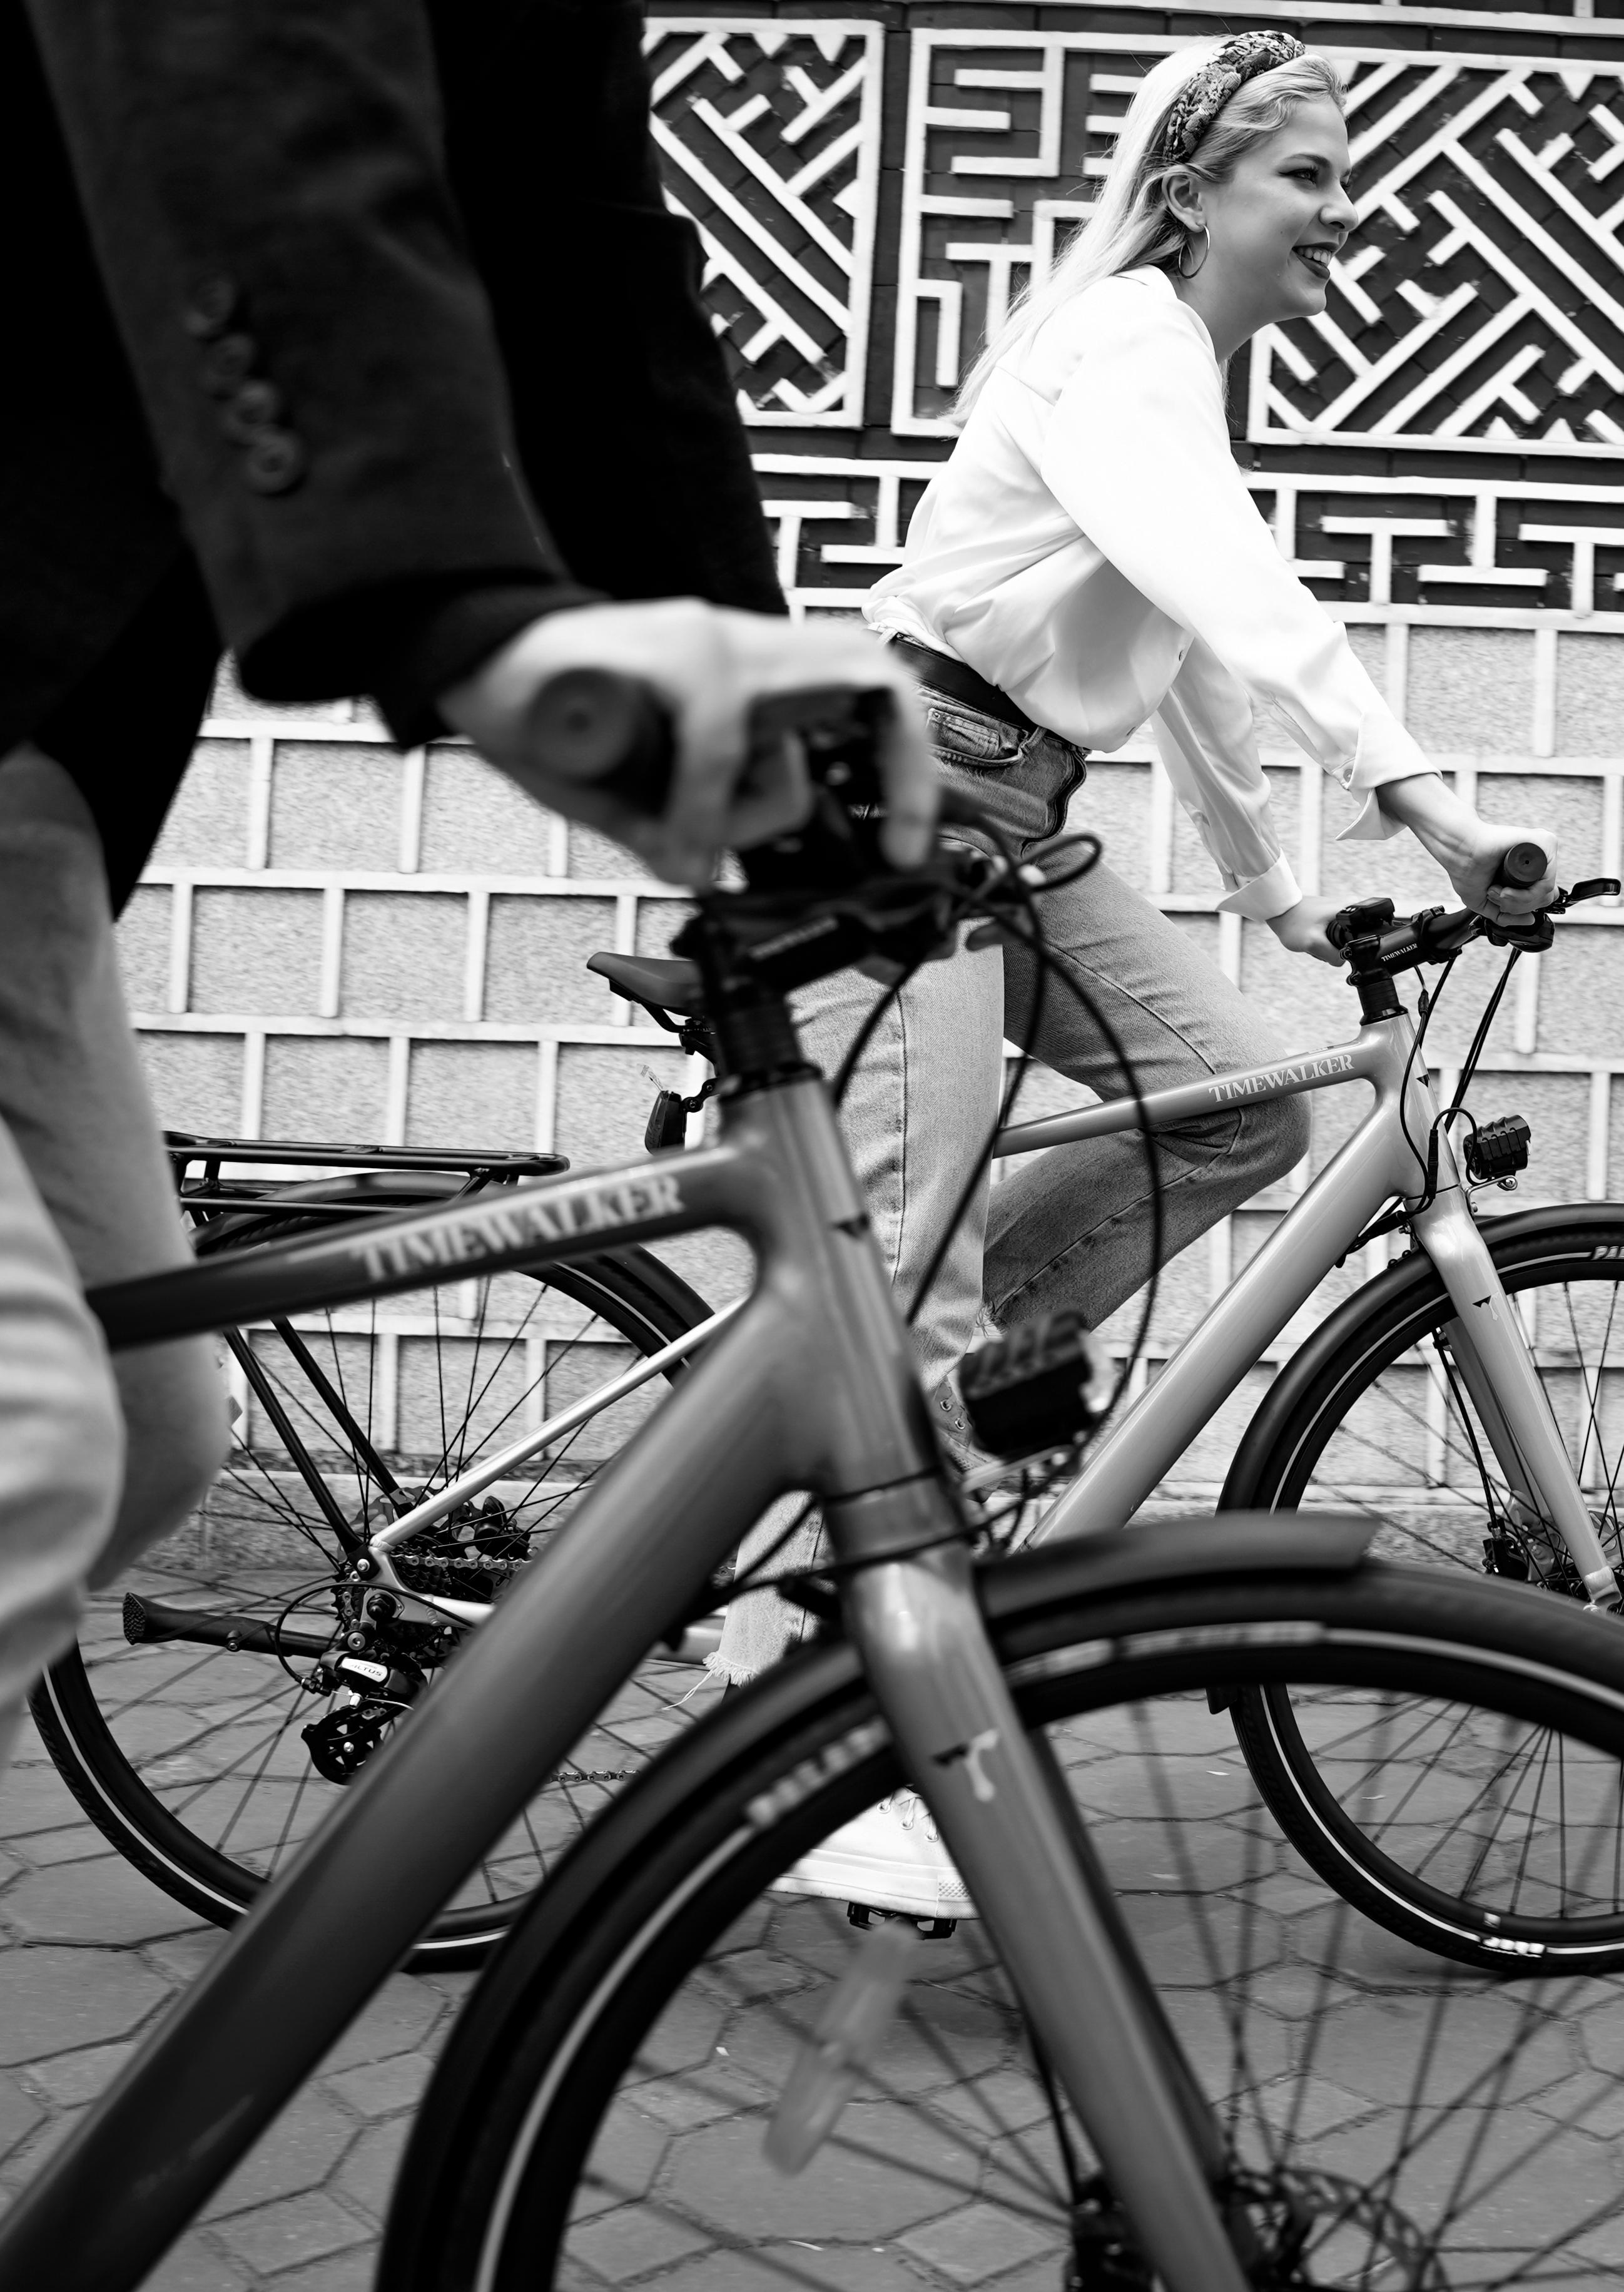
More than being a futuristic e-bike, Timewalker Ebike has set the mission of “ sustainable development ” for the community, society, and environment. We desire to spread the power of the cycling community so that people cycle more, live close to nature, and reduce CO2 emissions to protect the environment.
Cycling is beneficial for your health and fitness, but if we want to become carbon neutral, we need to use bikes to the fullest extent possible. By choosing to ride a Timewalker e-bike instead of a car to get to the gym, the supermarket, work, or anywhere else you need to go, you may make a little contribution to your lifestyle’s carbon neutrality.
For the most efficient, safe, and long-lasting usage of your new Timewalker e-bike, make sure you read this manual thoroughly before you begin riding.
Let’s enjoy the feeling of comfort and free riding and contribute to protecting this planet together!

(1) Remove the bicycle and accessories from bike box
(2) Take off all packaging
(3) Keep the boxes for further use

Bike Box
Accessories Box
2 boxes (Accessories and Charger)


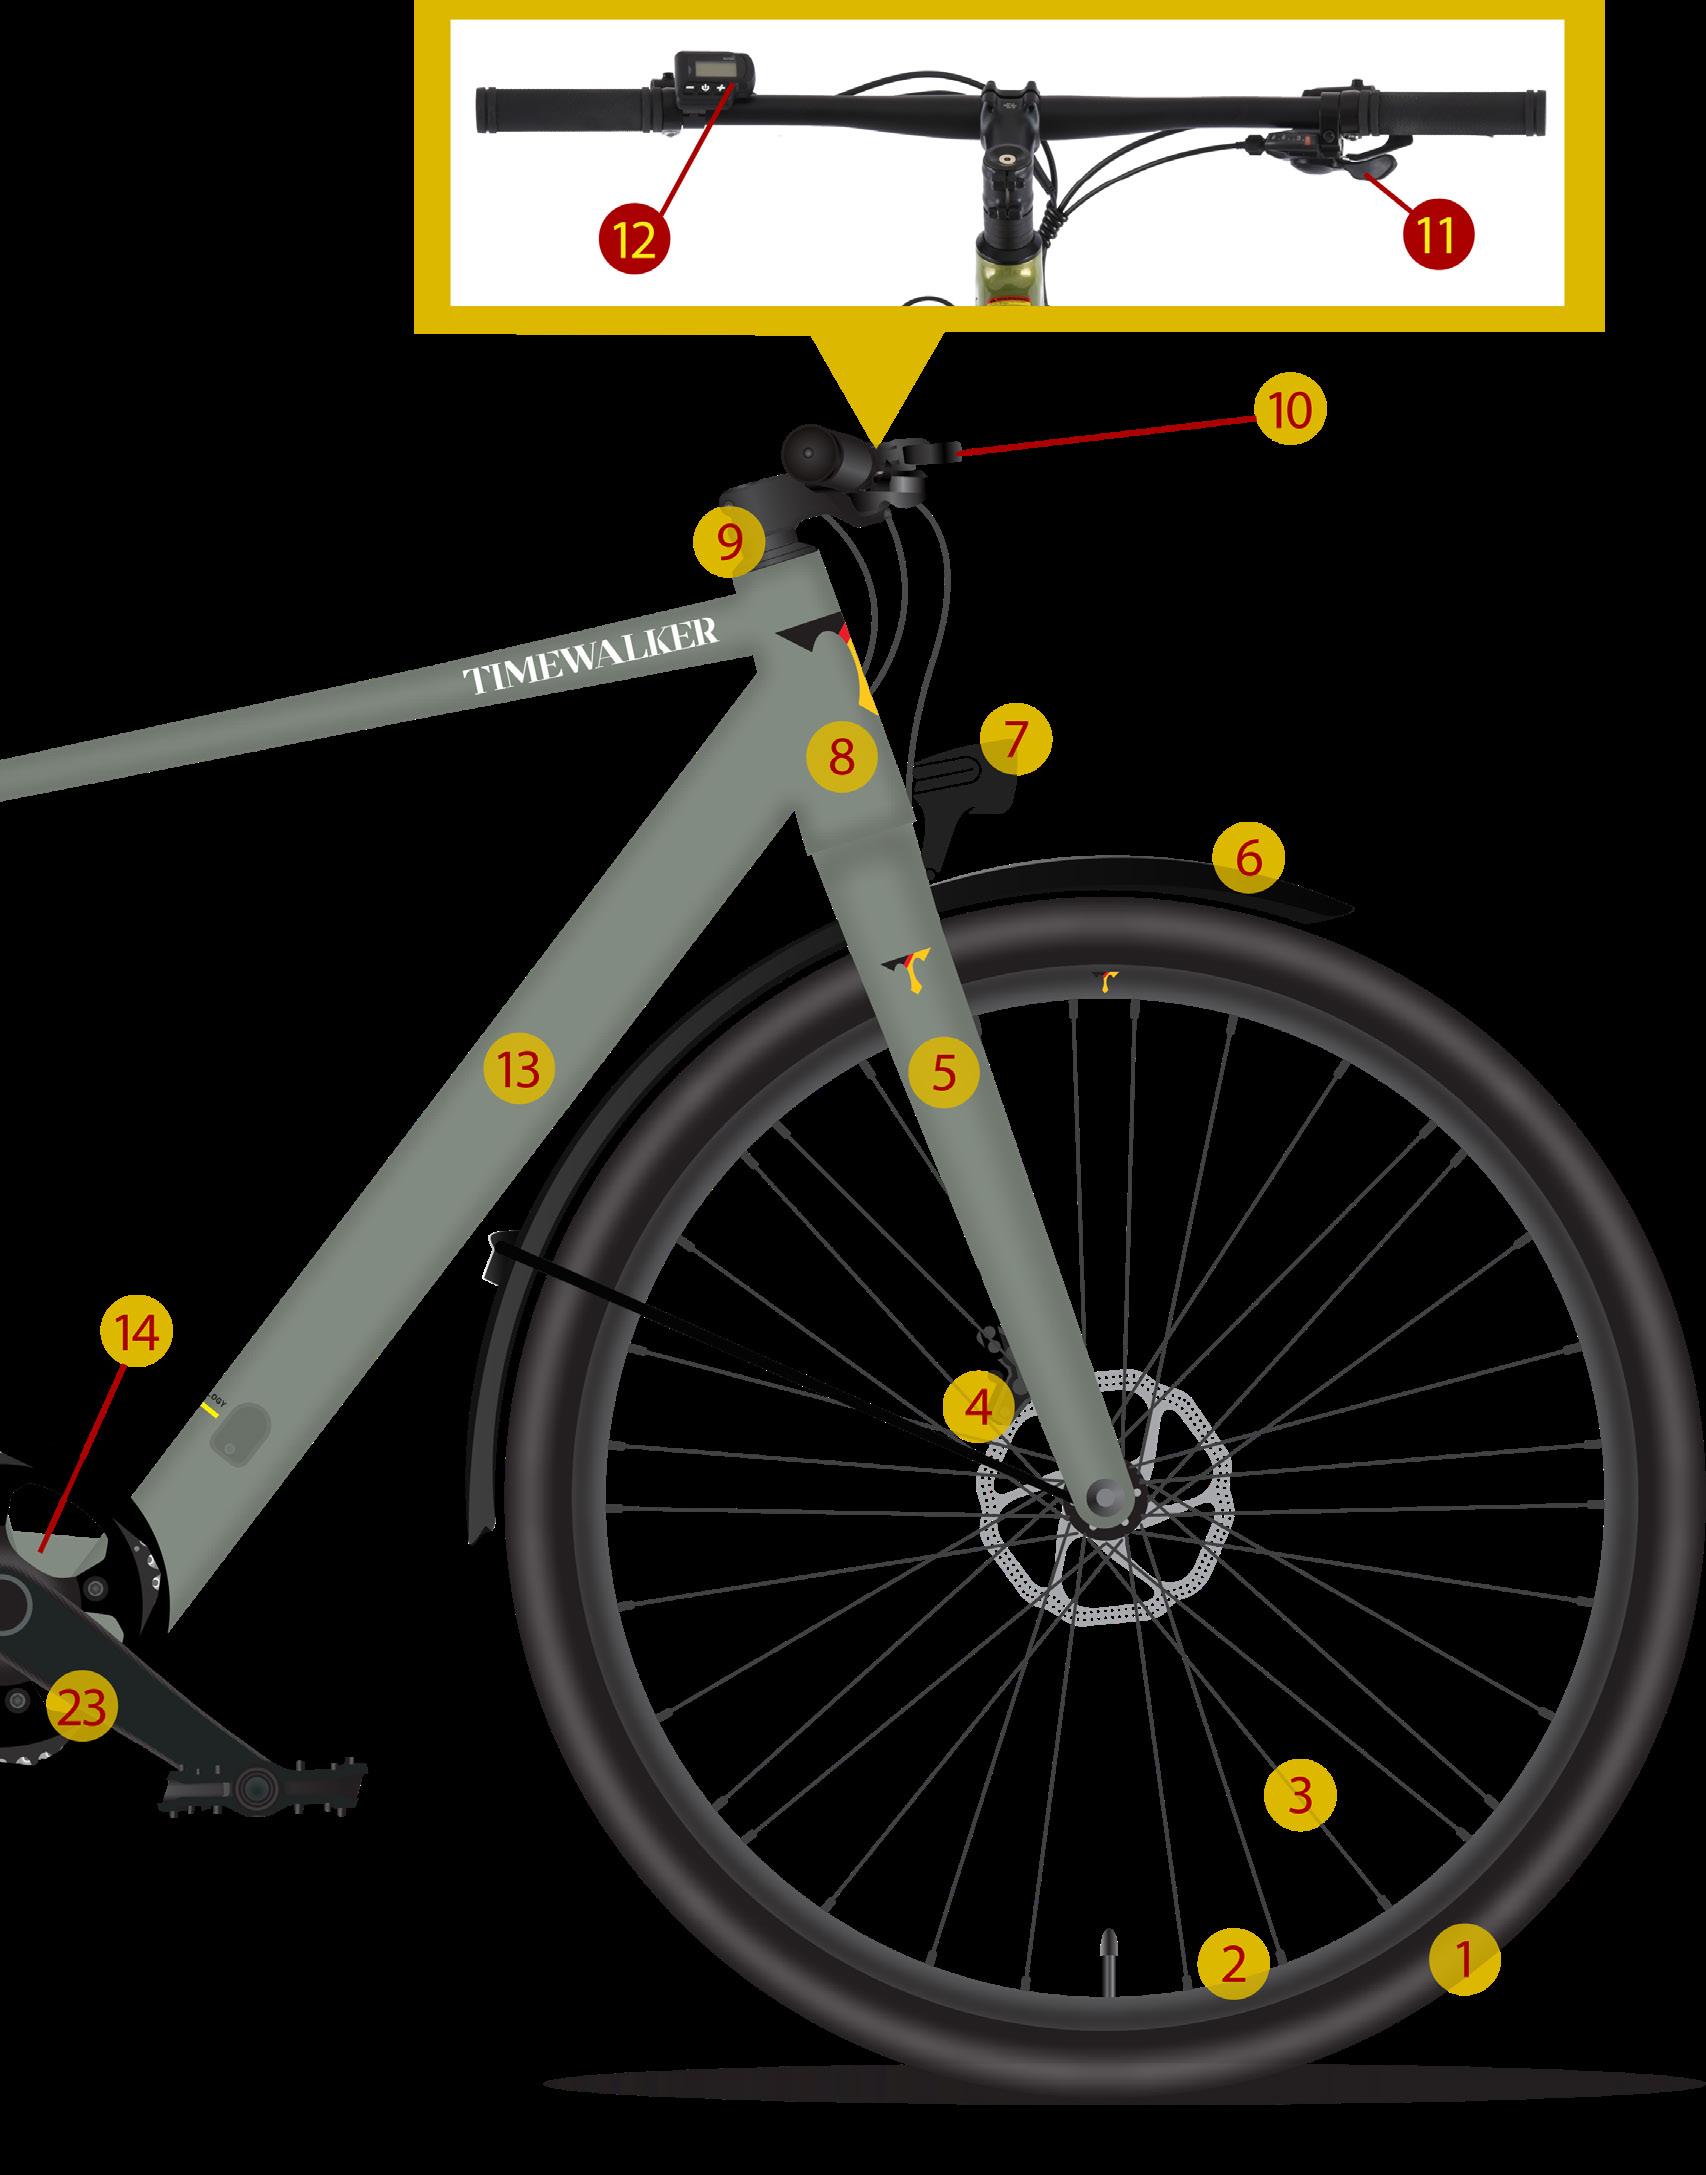
(1) Turn the front light around so that it is facing upward.
(2) Secure the light’s installation bolt.
Secure the front part of the light’s installation bolt with the screwdriver.
Tighten the rear nut clockwise with a 10mm wrench.
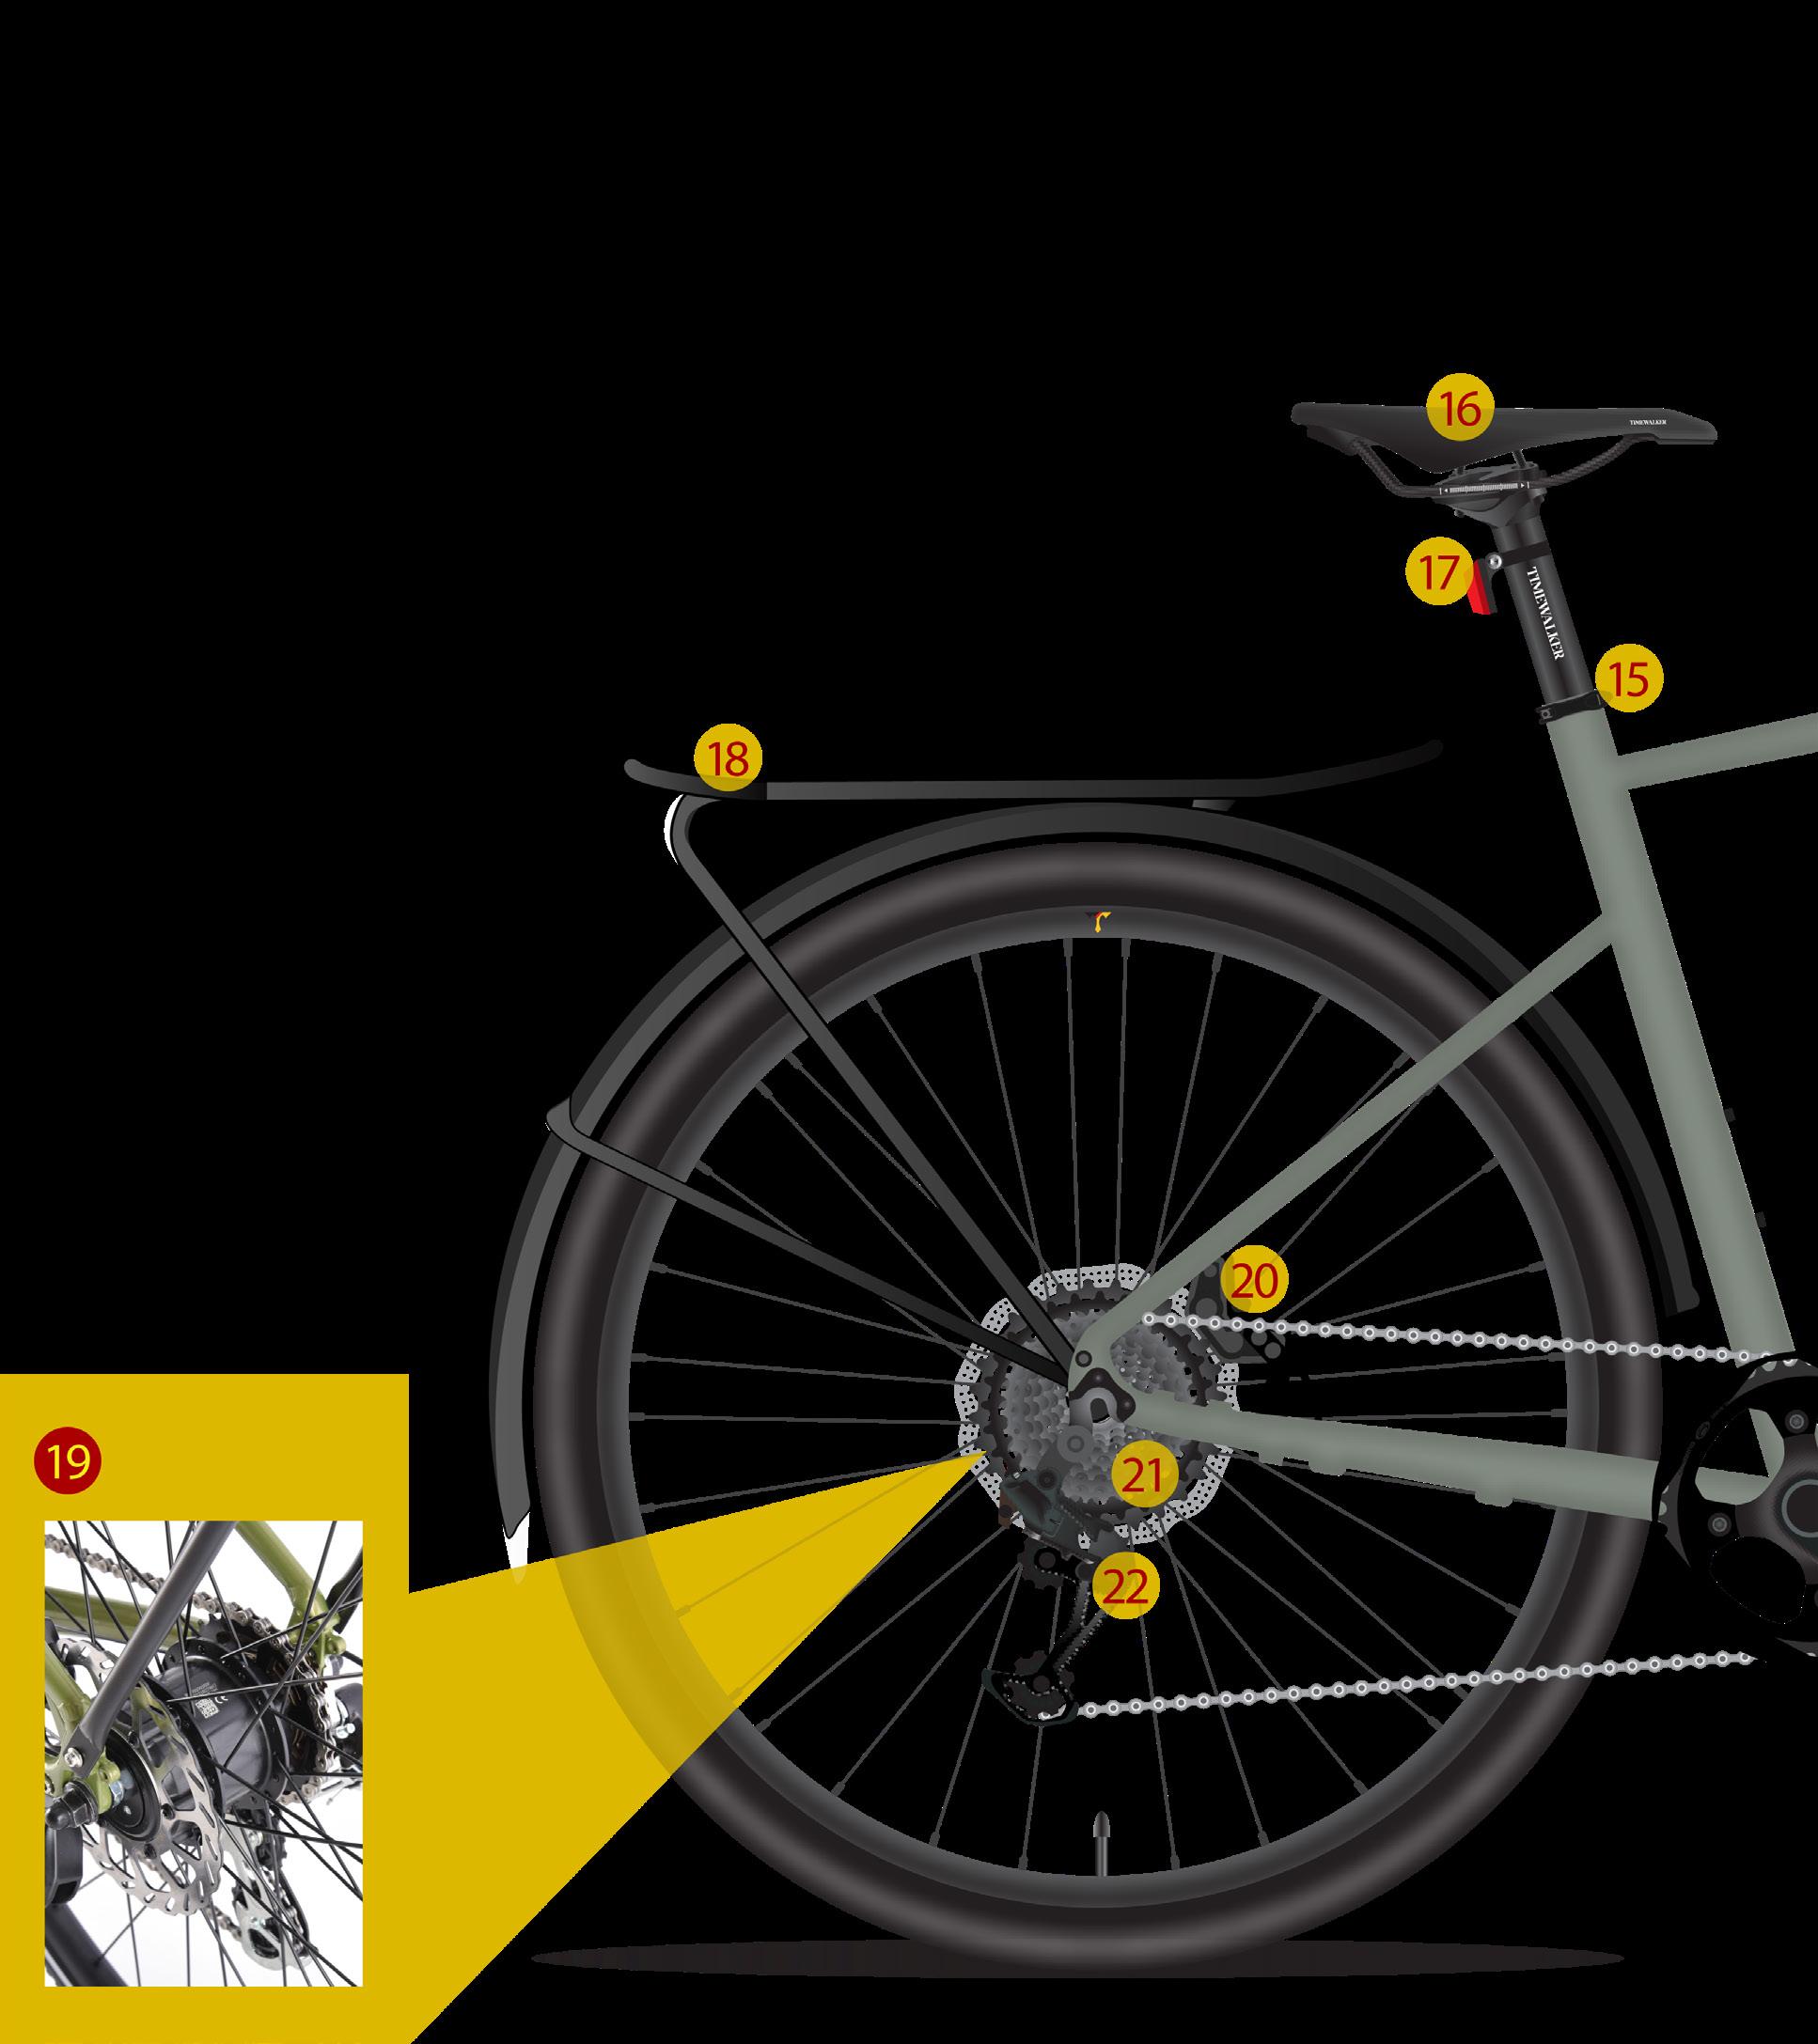
Tighten the bolt in the centre of the light with a 4mm hex key
 4mm Hex Key 5mm Hex Key
10mm Wrench 15mm Wrench
4mm Hex Key 5mm Hex Key
10mm Wrench 15mm Wrench
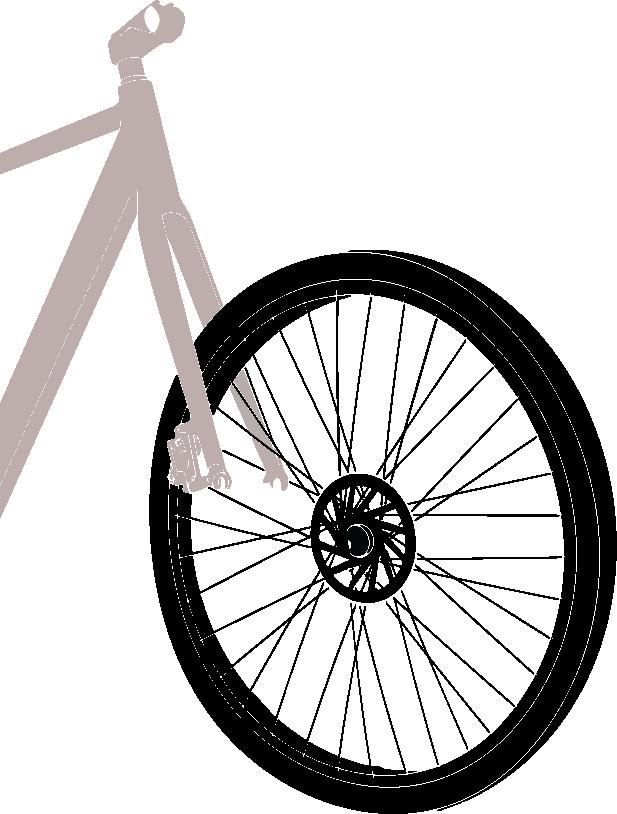
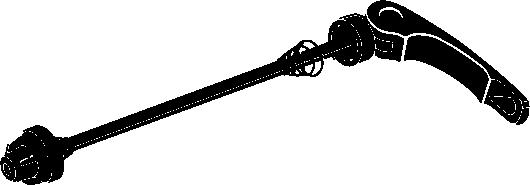
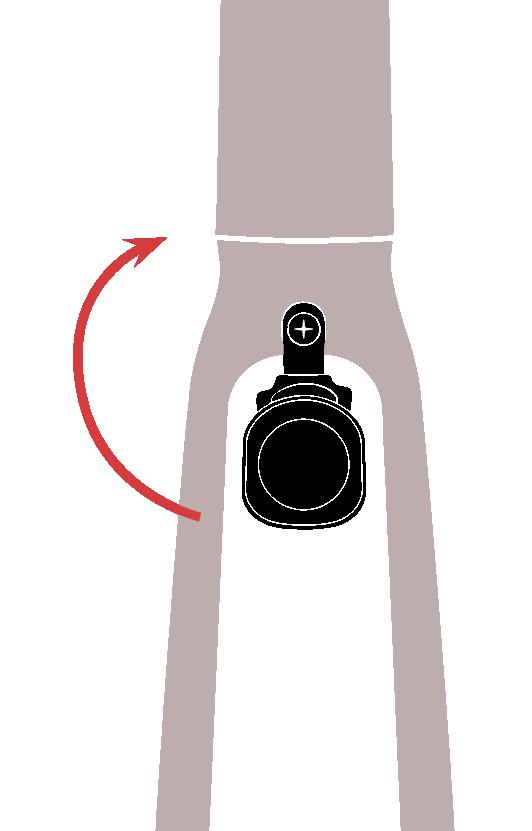
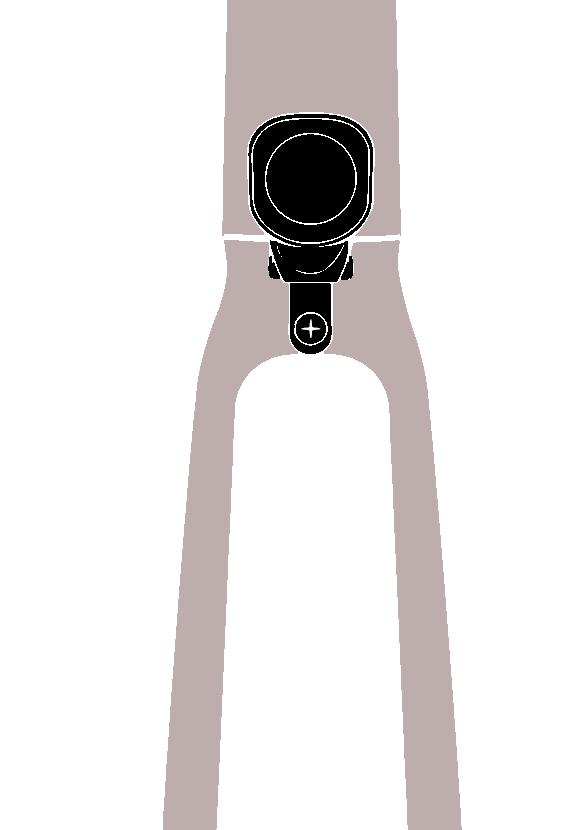
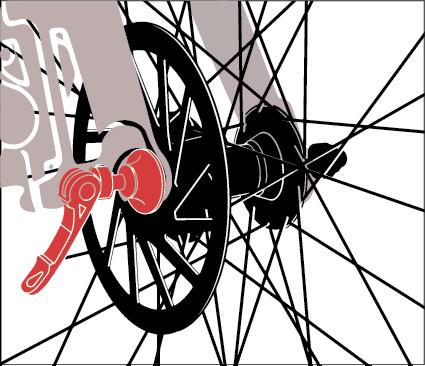
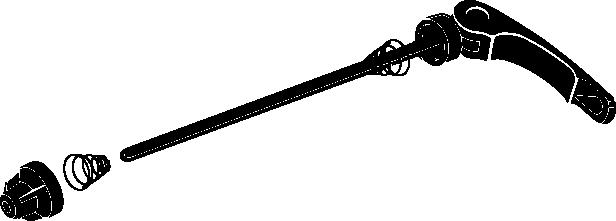
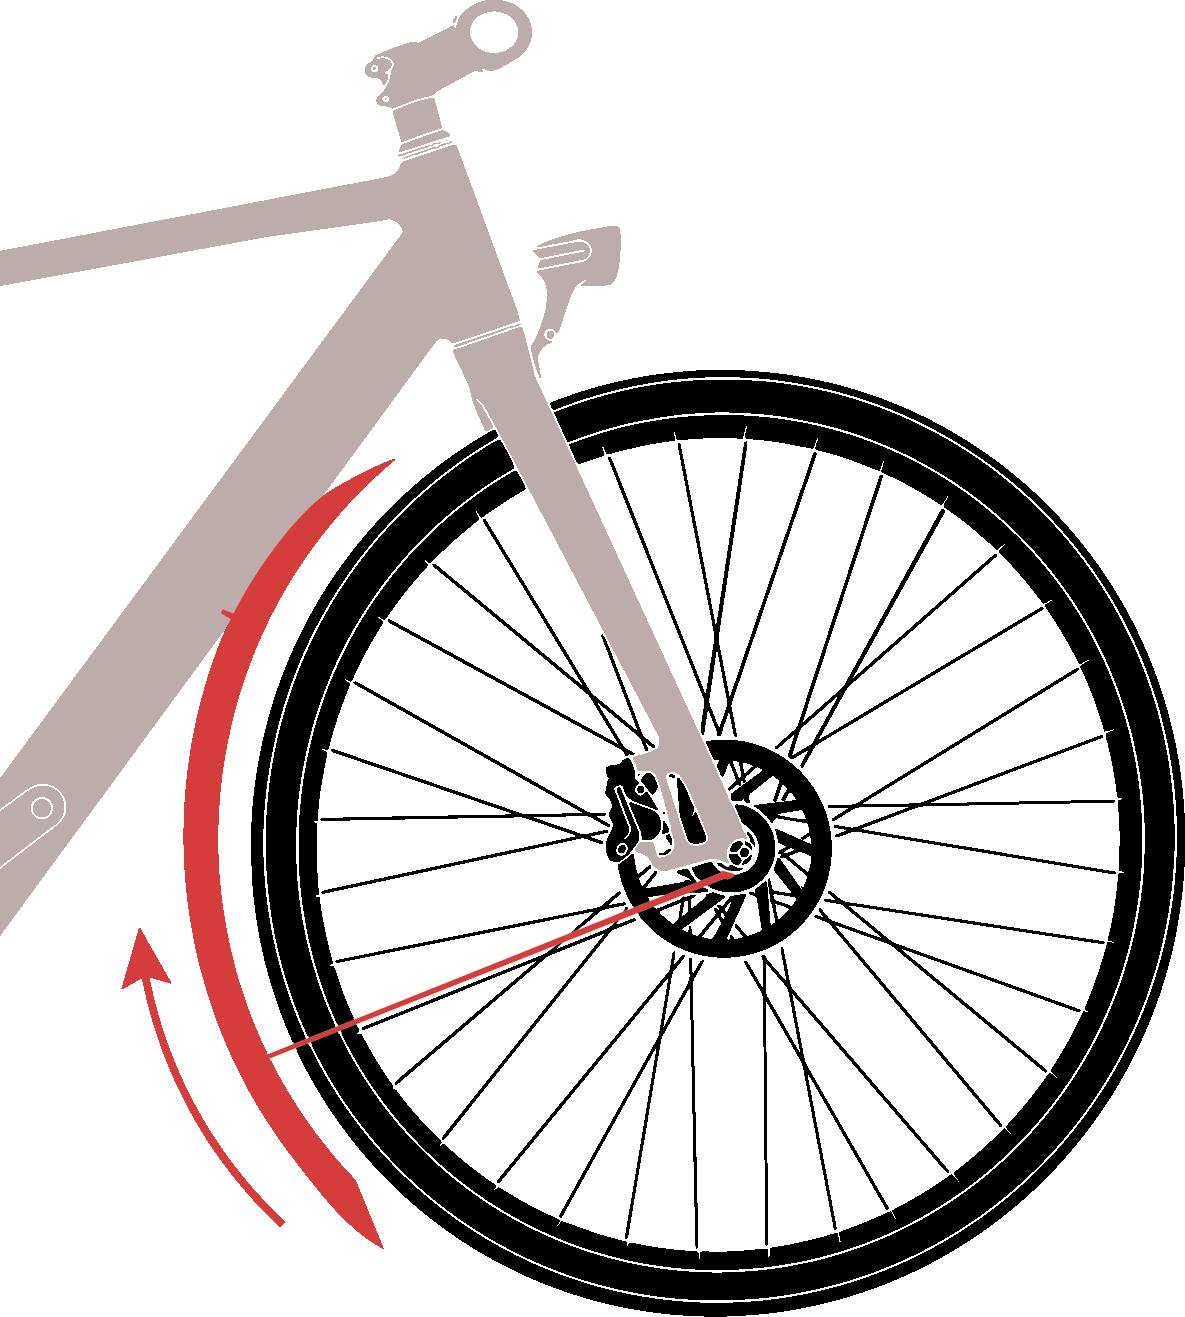
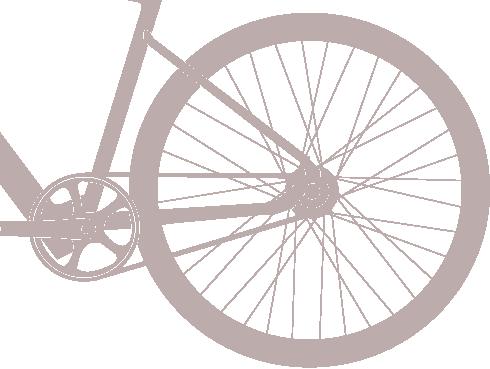
(1) Open the quick-release lever and securely install the front wheel. Remove the nut and one spring from the axle. Insert the skewer with the quick release lever on the left-hand side of the wheel, this will be the side with the disc brake rotor.
Then, reinstall the spring with the small end first and screw on the nut roughly two turns.
(2) Install the wheel into the fork dropouts, ensuring the brake rotor goes easily into the calliper on disc brake bikes.

(3) Use one hand to open and hold the quick release, with the other hand tighten the nut clockwise.
(4) Use your palm to push down on the fast release lever while maintaining a firm grip on the front fork with your fingers. To fully tighten the lever, you need to take considerable force.
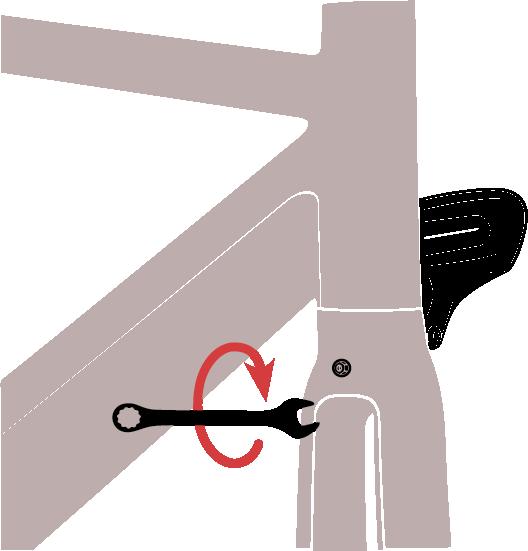
(1) (2) (3)(1) Thread the mudguard between the forks, so it sits just on top of the tyre on the front wheel.
(2) Next, using the bracket attached to the front mudguard, secure it in place.
(3) Secure it to the forks with the bolts provided: On disc brake, use the brake calliper hole on the left of the fork. On the other side, use the eyelets at the bottom of the fork.
If the tyre rubs against the mudguard, then you can make fine adjustments by lengthening or shortening the stays. Ensure that you tighten all bolts before setting off.
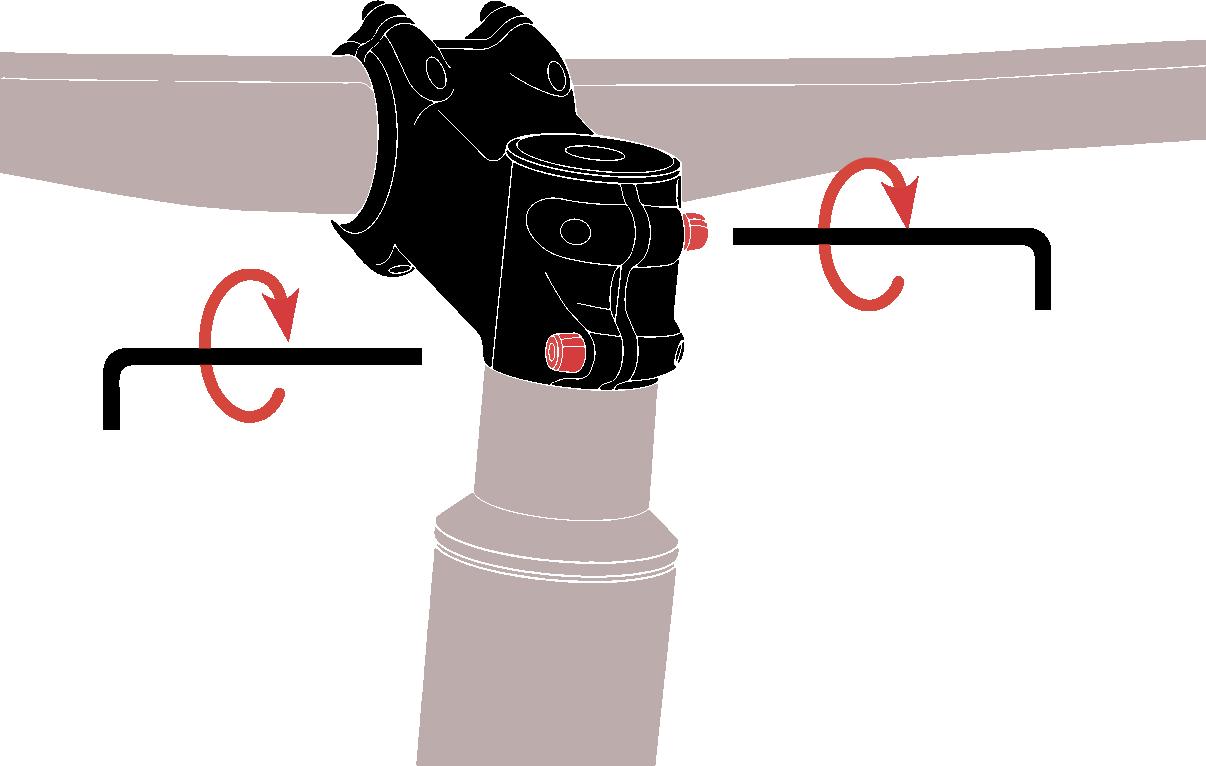
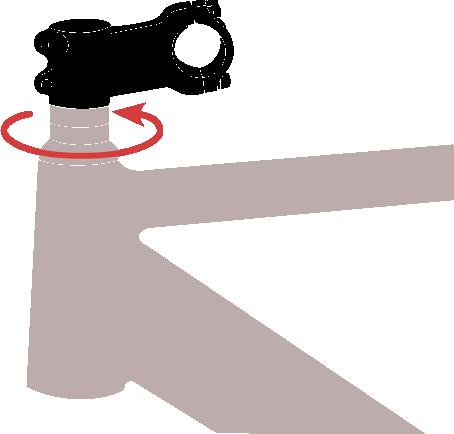
(1) Hold the head tube in one hand and rotate the stem toward the front with the other hand.
(2) Turn the two bolts on the stem clockwise with a 4mm hex key to secure them.
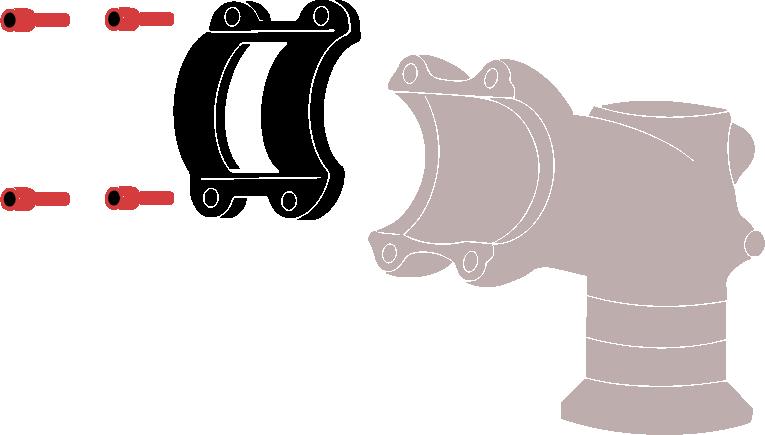
(1) Use a 4mm hex key to unscrew the 4 handlebar clamp bolts by turning counterclockwise.
4mm Hex Key 5mm Hex Key
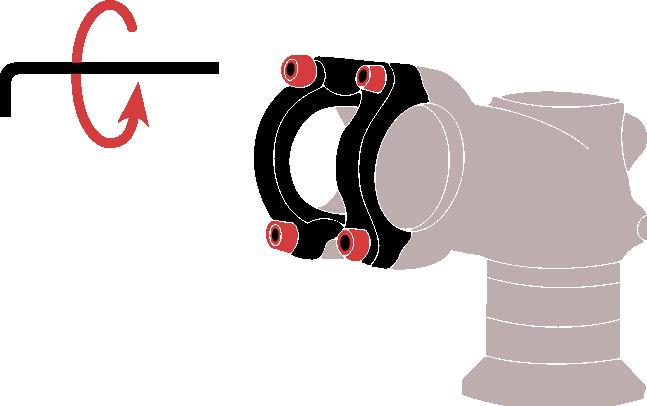
(2) Place the handlebar in a proper position so that the “cross symbol” is in the center.
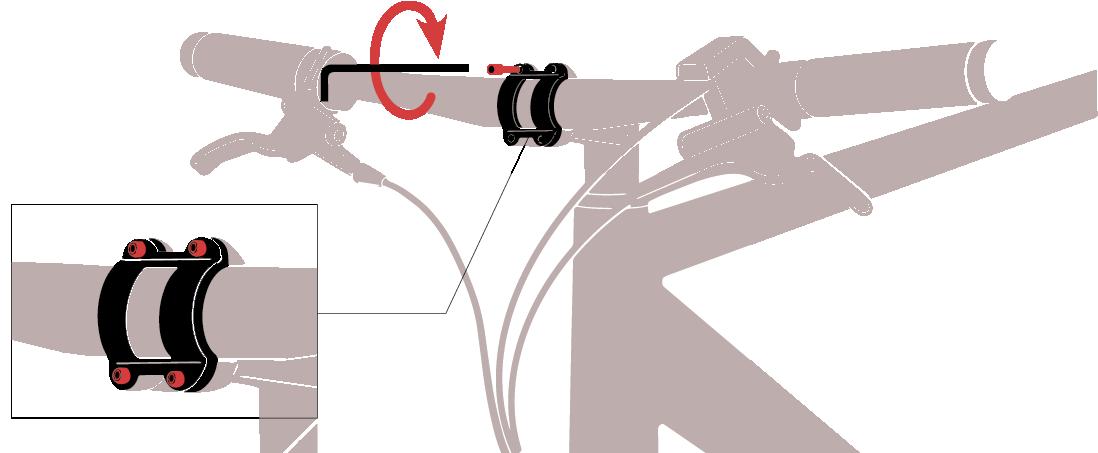
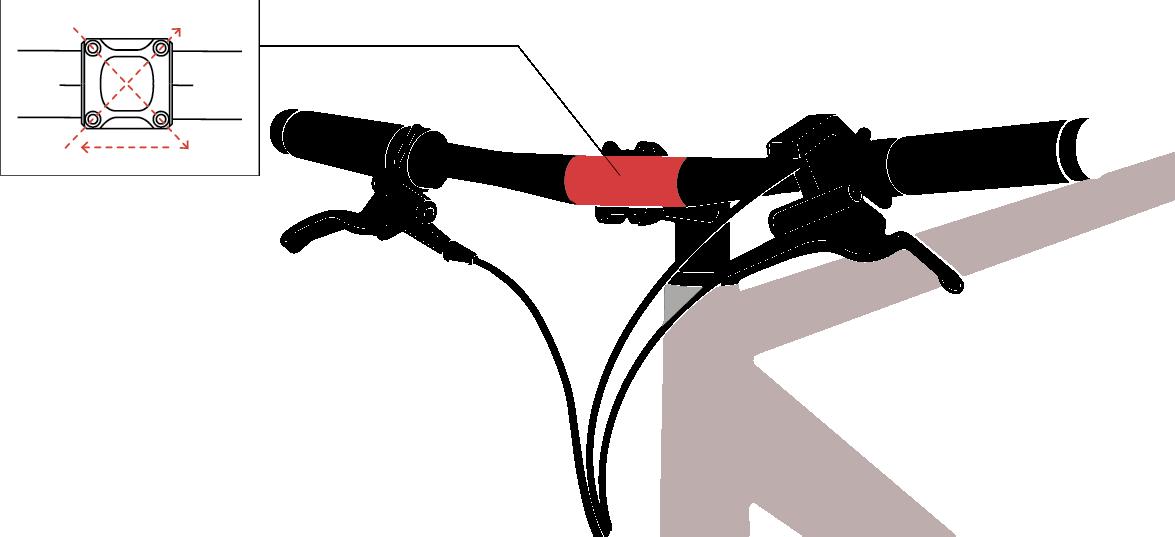
(3) Using a 4mm hex key, turn the four bolts clockwise to install them.
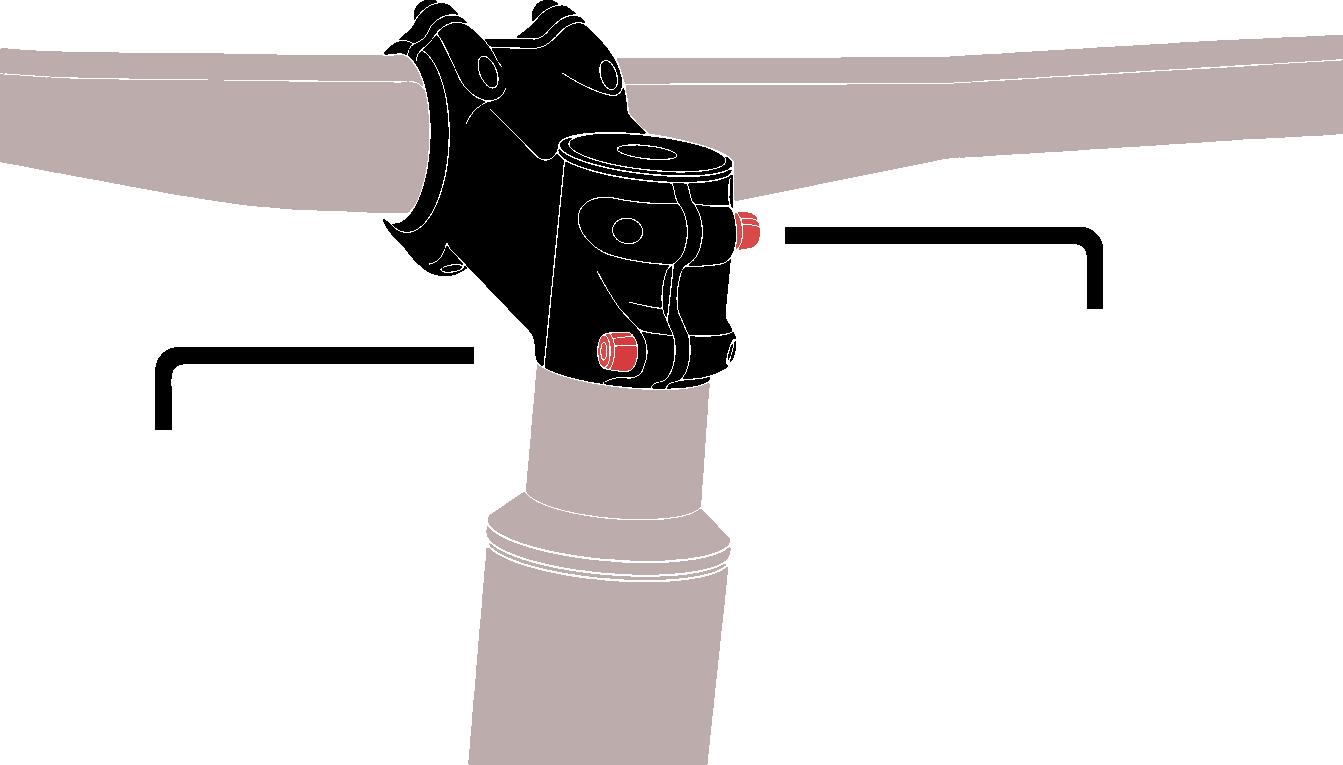
* Loosen the stem bolts and align the handlebar if it is not perpendicular to the front wheel. After the handlebar is in place and the bolts are in the proper positions, tighten the bolts.

(1) Loosen the bolts of the brake caliper with a 5mm hex key, so it can be moved slightly
(2) Hold down the front brake lever, then tighten the bolts on the brake caliper with a 5mm hex key.
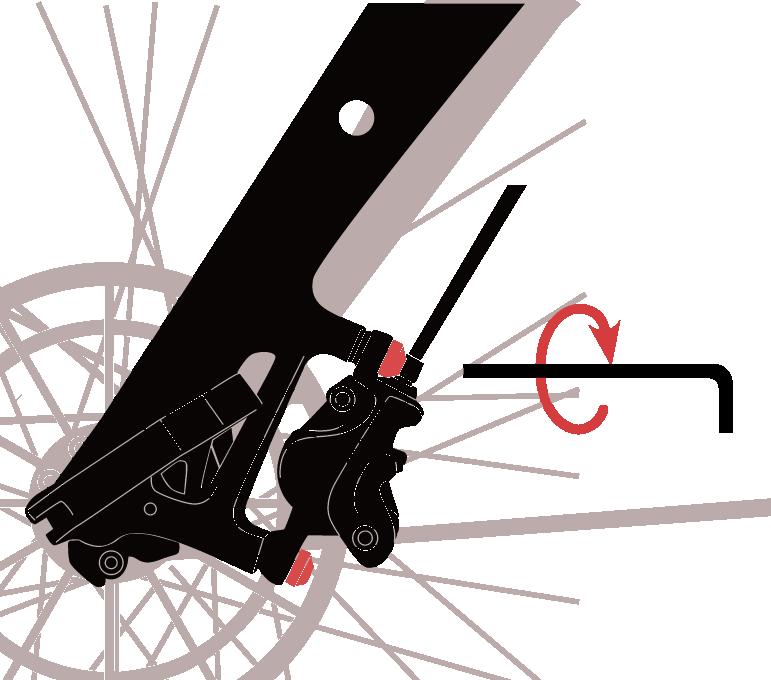
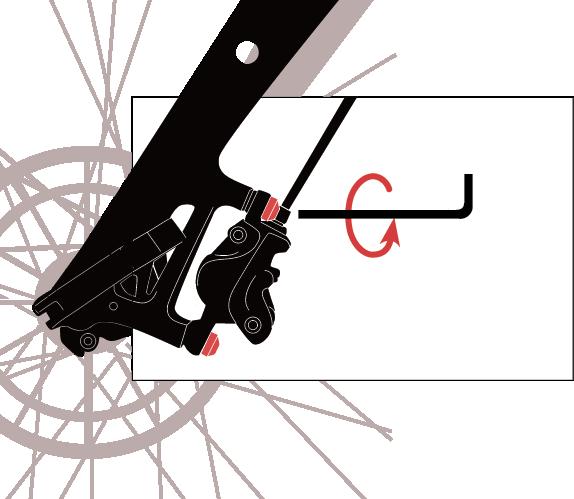
(3) Spin the front wheel to check if there is friction noise.
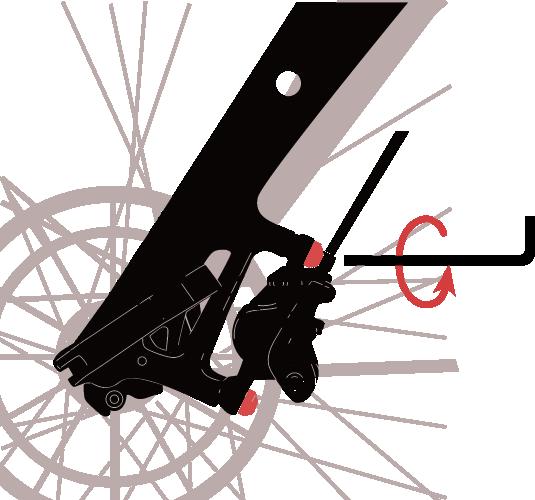
* If there is friction noise, please loosen the bolts on the brake caliper and manually move the brake caliper so that the brake disc is centered ( similar to Step (2))
5mm Hex Key
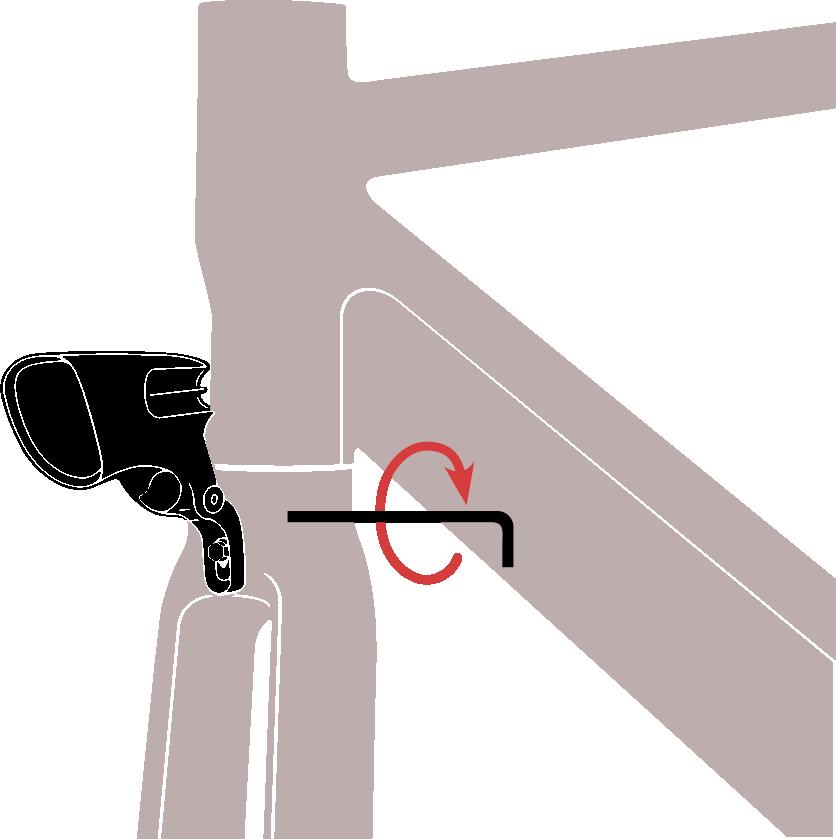
(1) Open the quick-release seatpost clamp and loosening the adjustment nut in other side
(2) Put the seatpost into the seat tube, twist the seat to raise or lower the post as needed to the desired height. Hold the quick-release lever in place and tighten the bolt. Once the bolt is tight, close the lever.
(3) Loosen the bolt in the rear lights, then secure the rear light to the seatpost with that bolt.
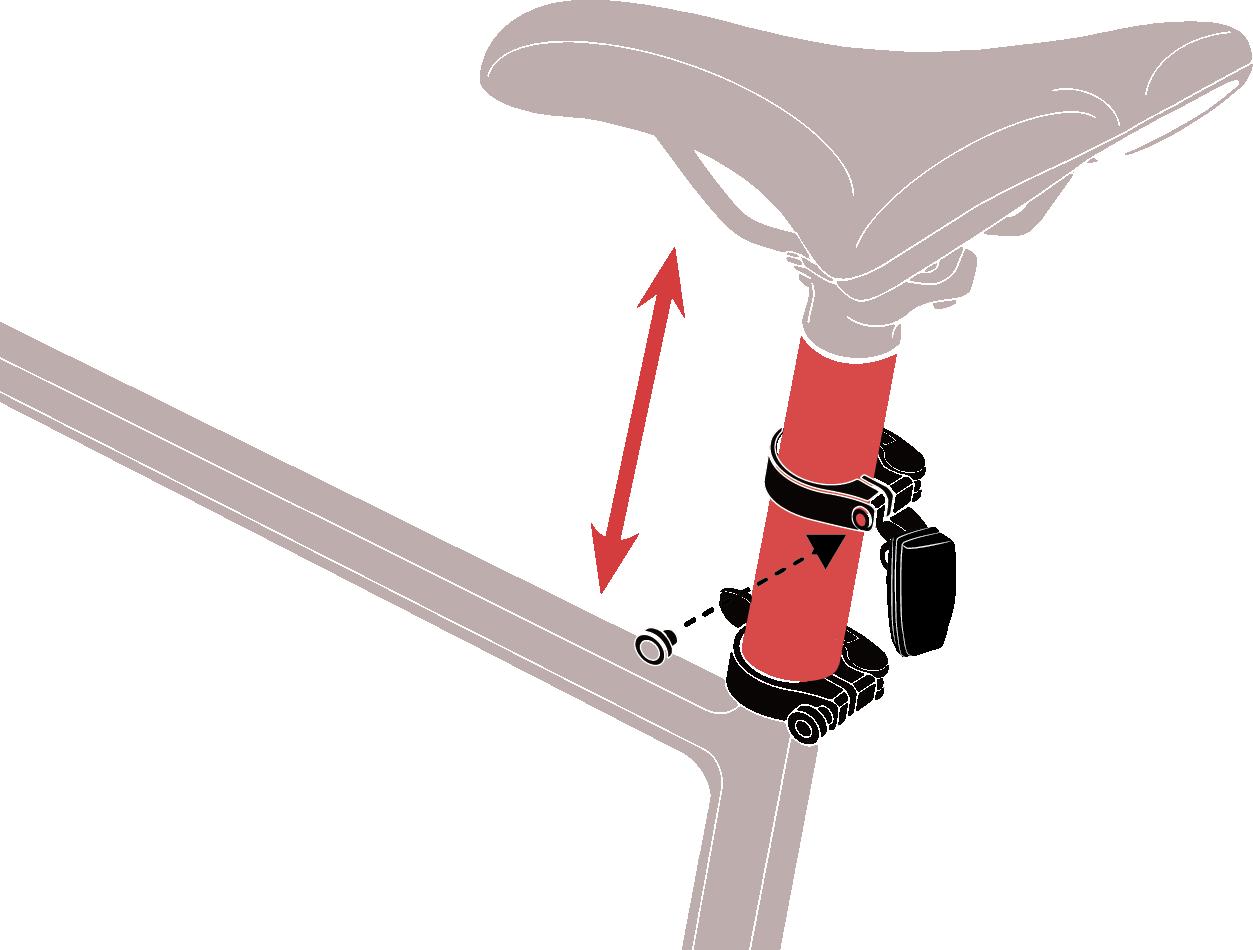
Before using the light, please open the rear light and remove the insulation.

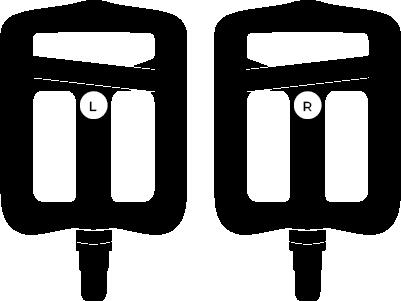
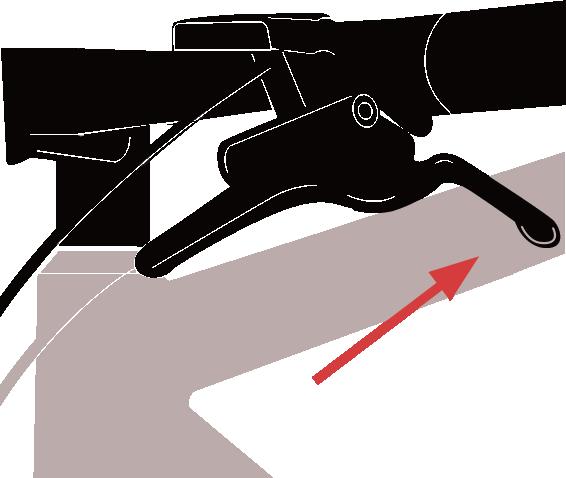
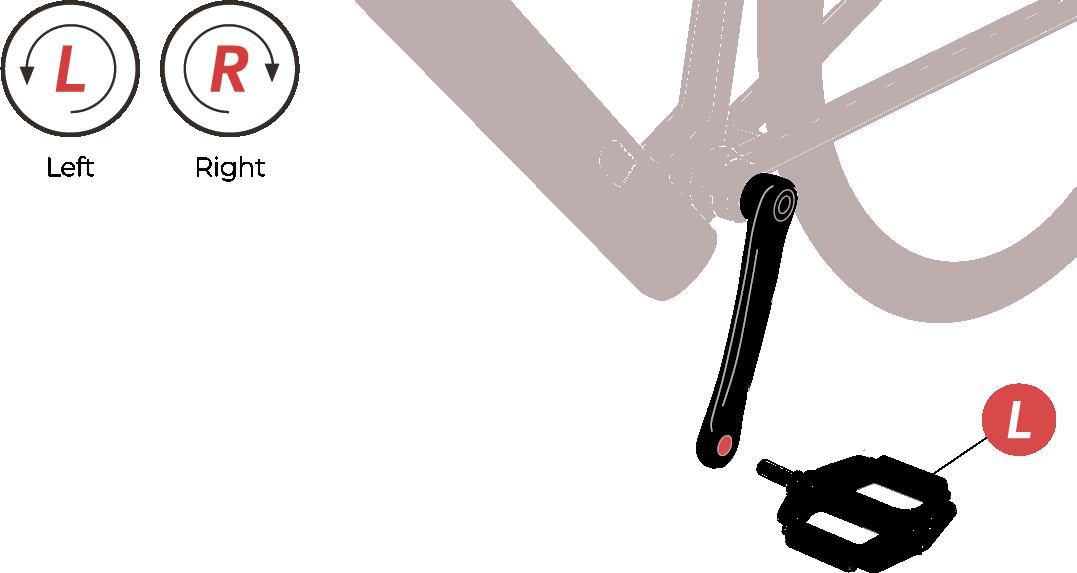
(1) The pedals are labeled “R” (Right) and “L” (Left).
(2) Manually install the left pedal by rotating counterclockwise with a 15mm wrench.
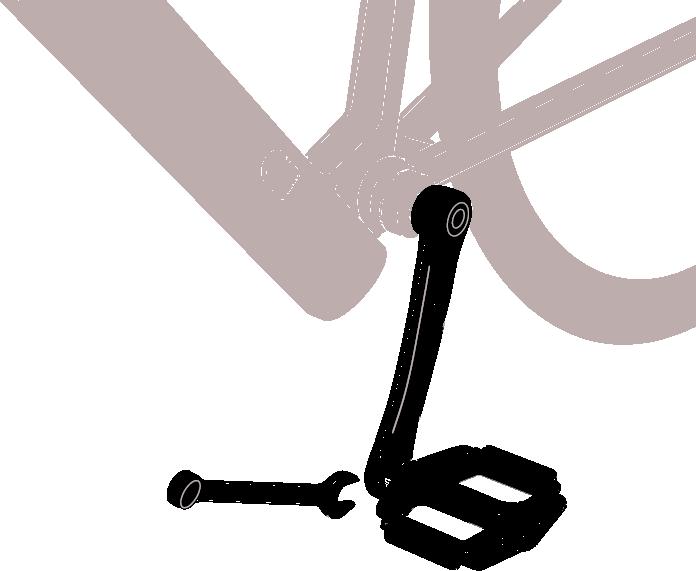
(3) Manually install the right pedal by rotating clockwise with a 15mm wrench.
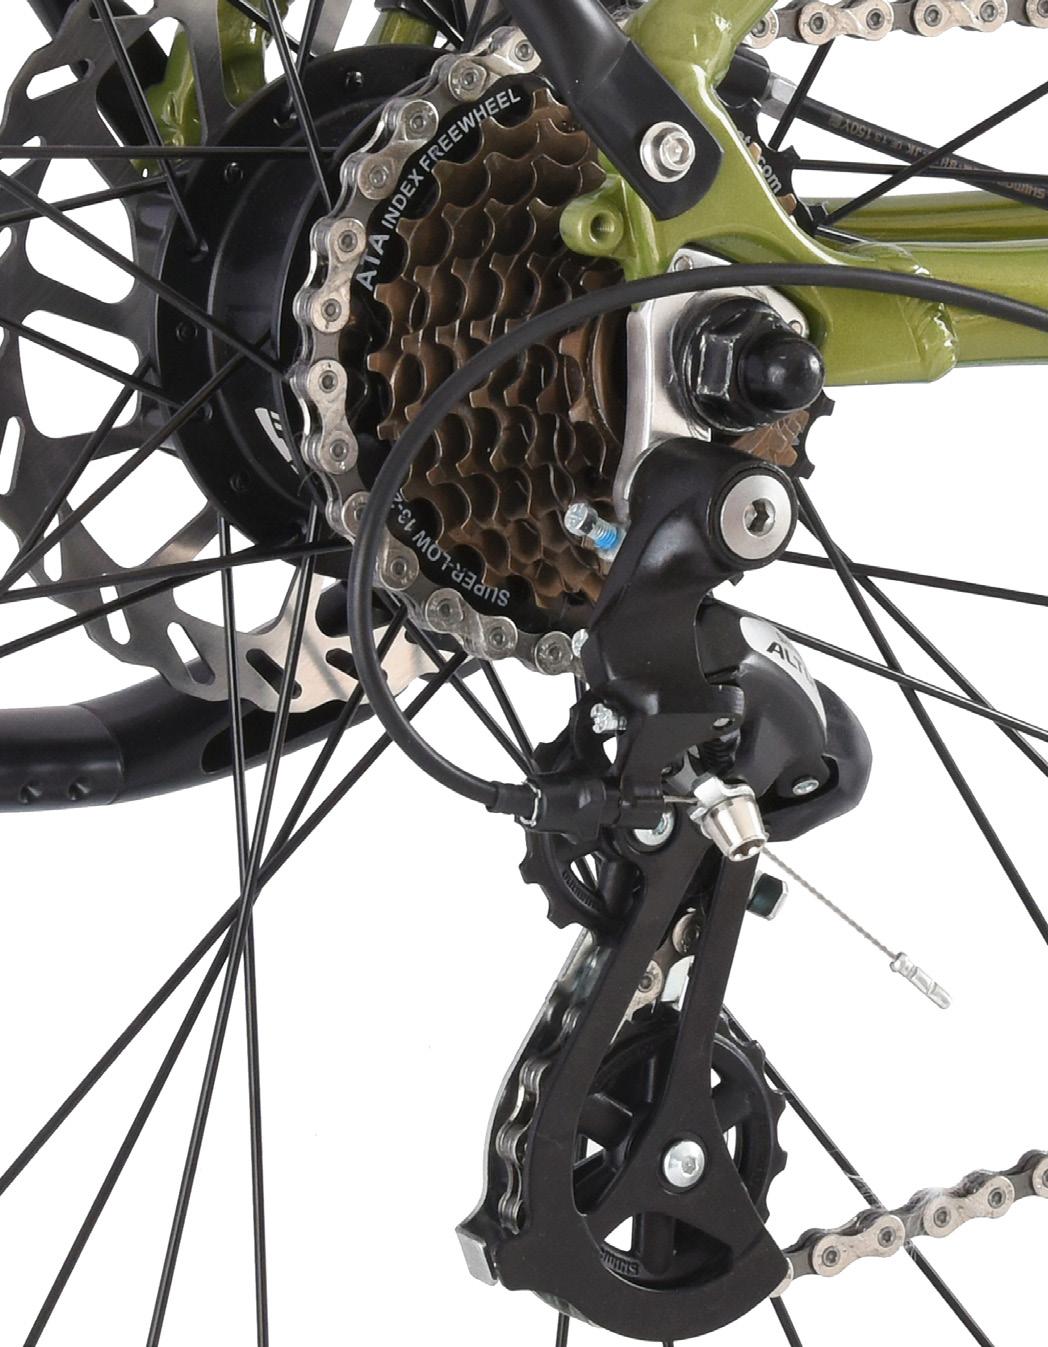
(1) Adjust L limit screw and H limit screw :
H: Small chainring high-speed adjustment
L: Large chainring low-speed adjustment
• To place the guide pulley to precisely beneath the smallest gear, use the “H” screw to adjust.
Smallest Gear
“H” Screw
*Adjust “H” limit screw

• To prevent the chain from falling or creating noise, move the shifting lever to the low side and make necessary adjustments with the “L” screw.
Biggest Gear
*Adjust “L” limit screw

(2) Set the shifting lever to the top position, take up slackness in the cable and tighten the cable fixing nut
Cable Adjusting Bolt Unit
Cable Fixing Bolt Unit
* This is just a basic alignment guide. When you receive e-bike, if you have hard problems or want to make advanced adjustments, you should contact the shop where you bought e-bike for advice.
“L” Screw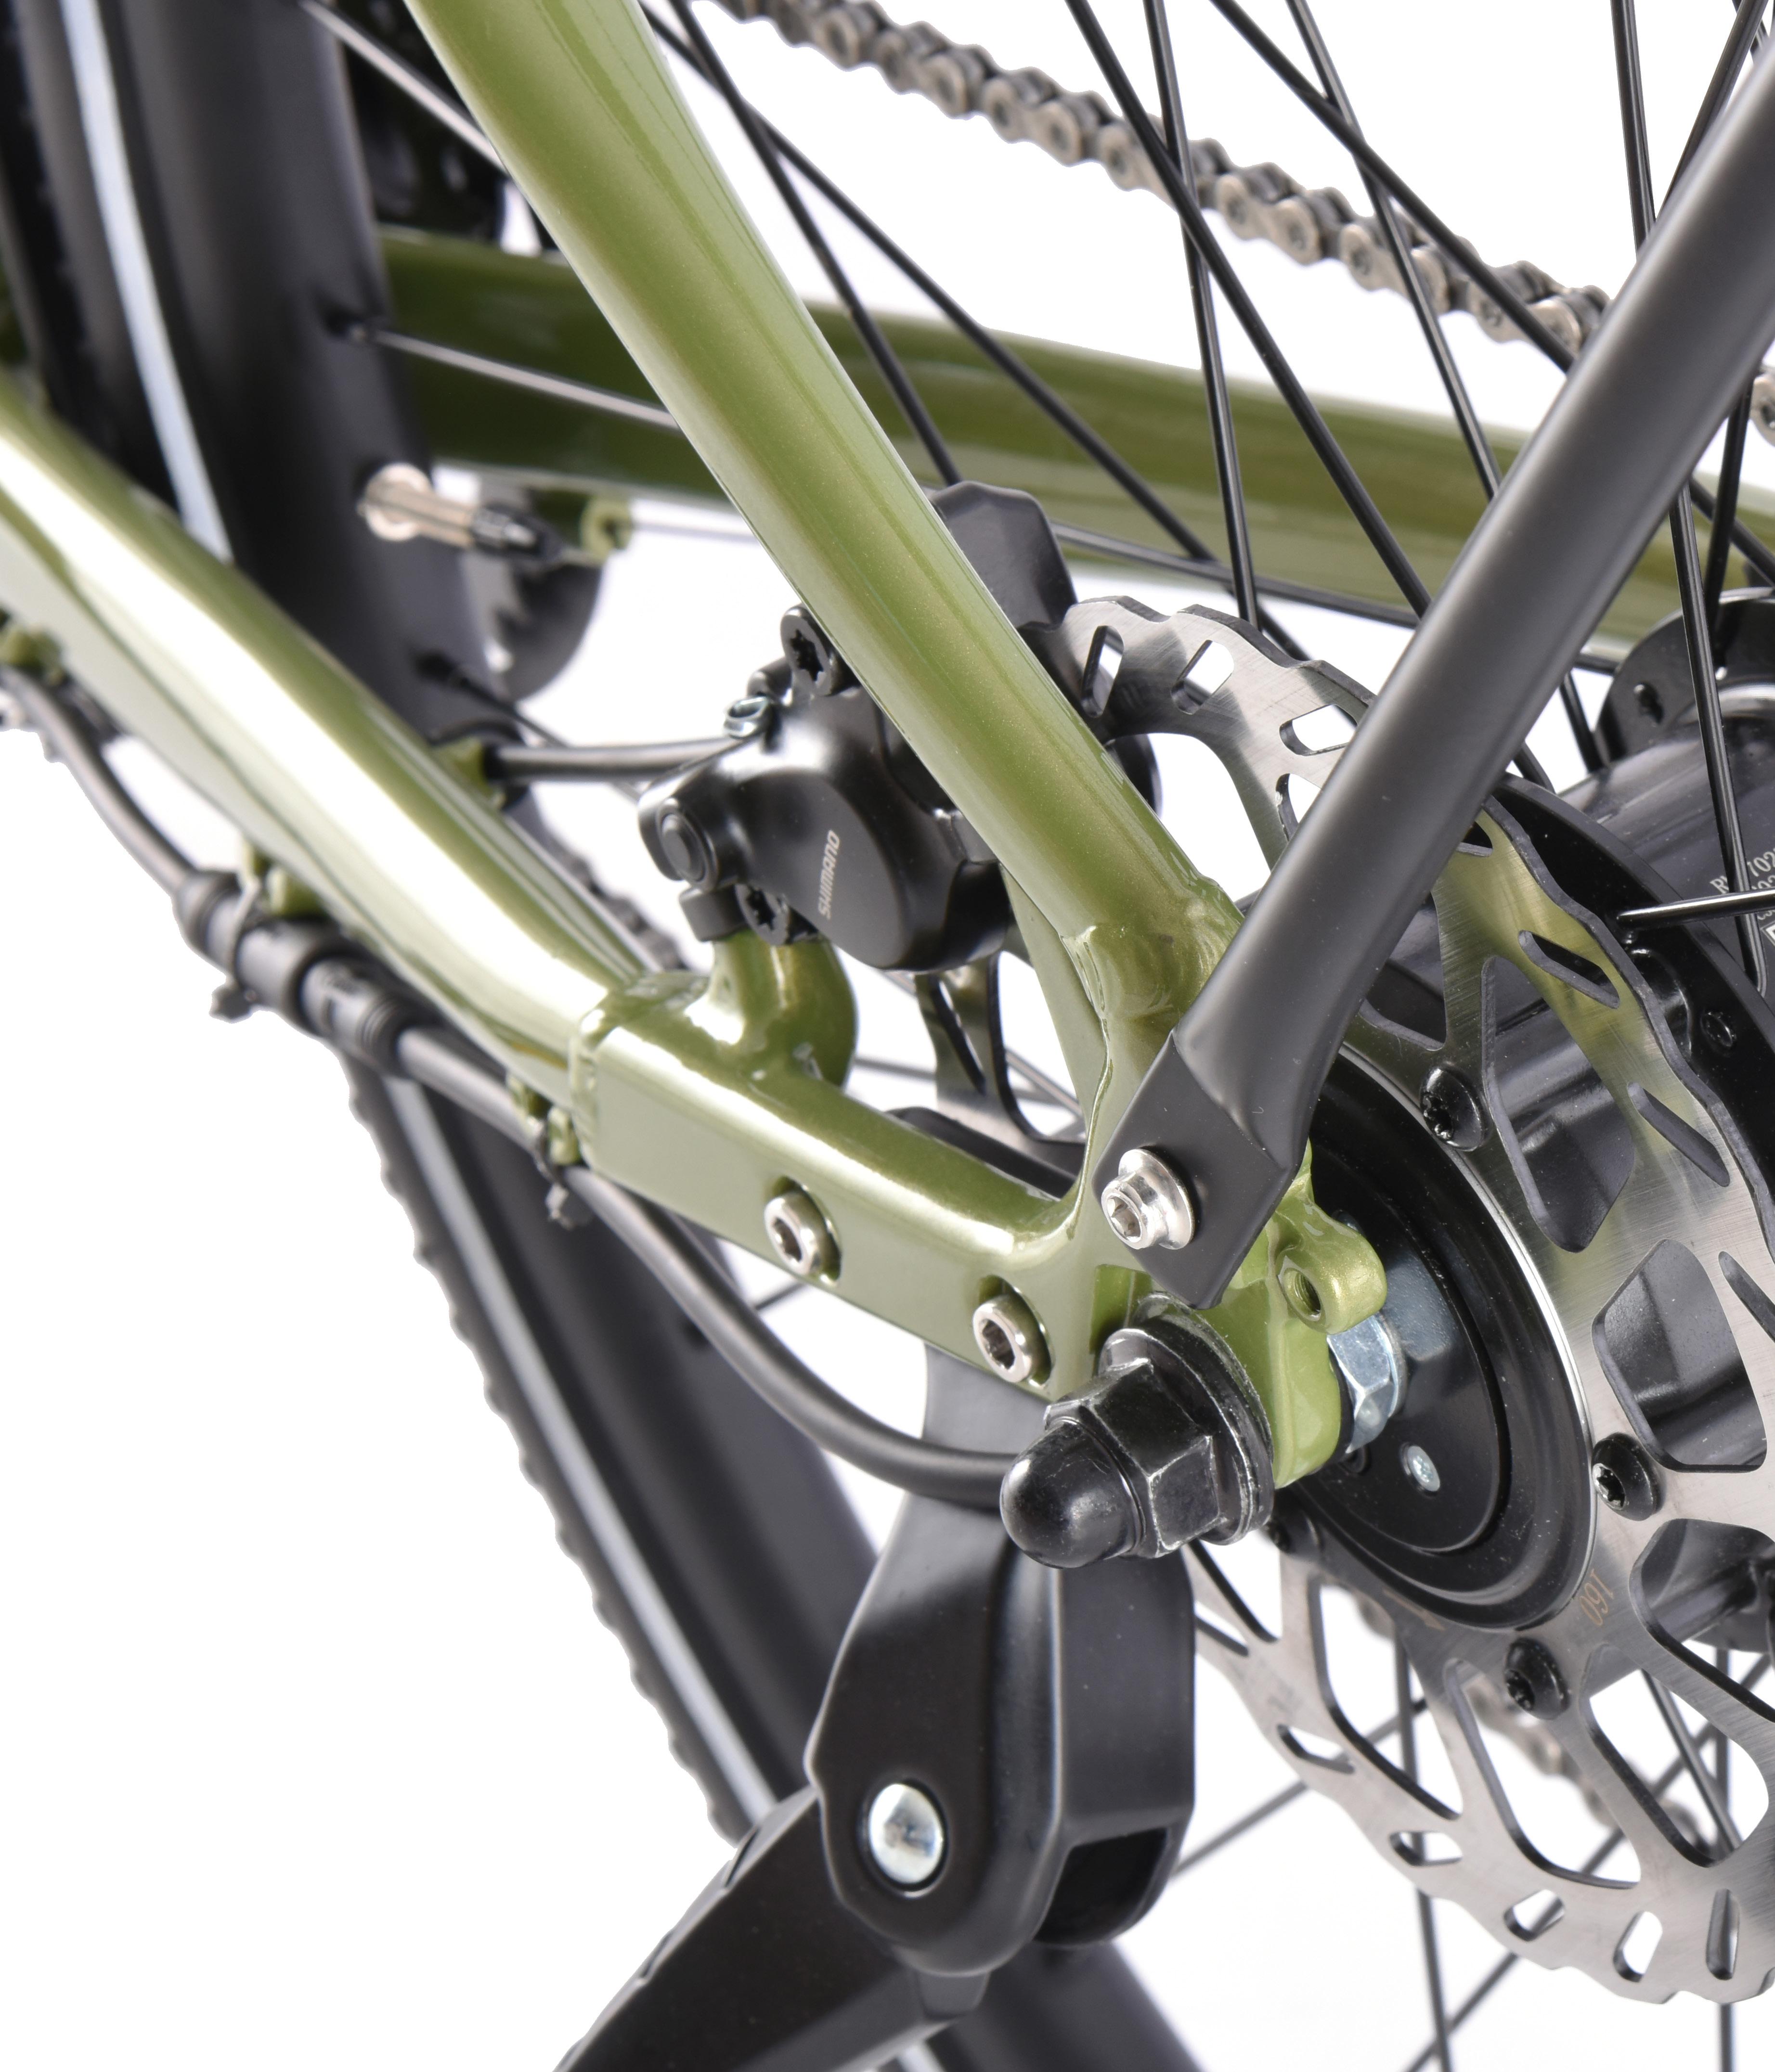
E-bike battery sits in the frame and can be charge directly with the bike
Battery 1.1
Please follow the guidelines below to ensure a longer battery life and to protect it from damage:
(1) If you notice that the power has dropped to 5% on the LCD while cycling, please charge the battery quickly.
(2) Making sure the battery is fully charged before a long trip.
(3) Please charge the battery at least once a month when it’s not in use to avoid affecting the battery’s lifespan.

The battery can be charged by the AC, the switch is not necessary to be turned on.
(1) Open the charging socket, securely connect the charger’s output connector into the battery before connecting its main cable to an accessible AC outlet.
(2)To complete charging, first unplug the charger’s input plug from the AC outlet, then unplug the battery pack’s charger output plug. Finally, secure the lid over the battery pack’s charging port.
To show that charging is beginning, the LED on the charger turns red. You can finish the battery charge when it turns green.
Our intelligent e-bikes are programmed to start with the electric assistance after rotation of the chain wheel.
(1) Do not use the bike in flood waters or thunderstorm. Do not immerse the electric parts in water. Otherwise, the electric components may be damaged.

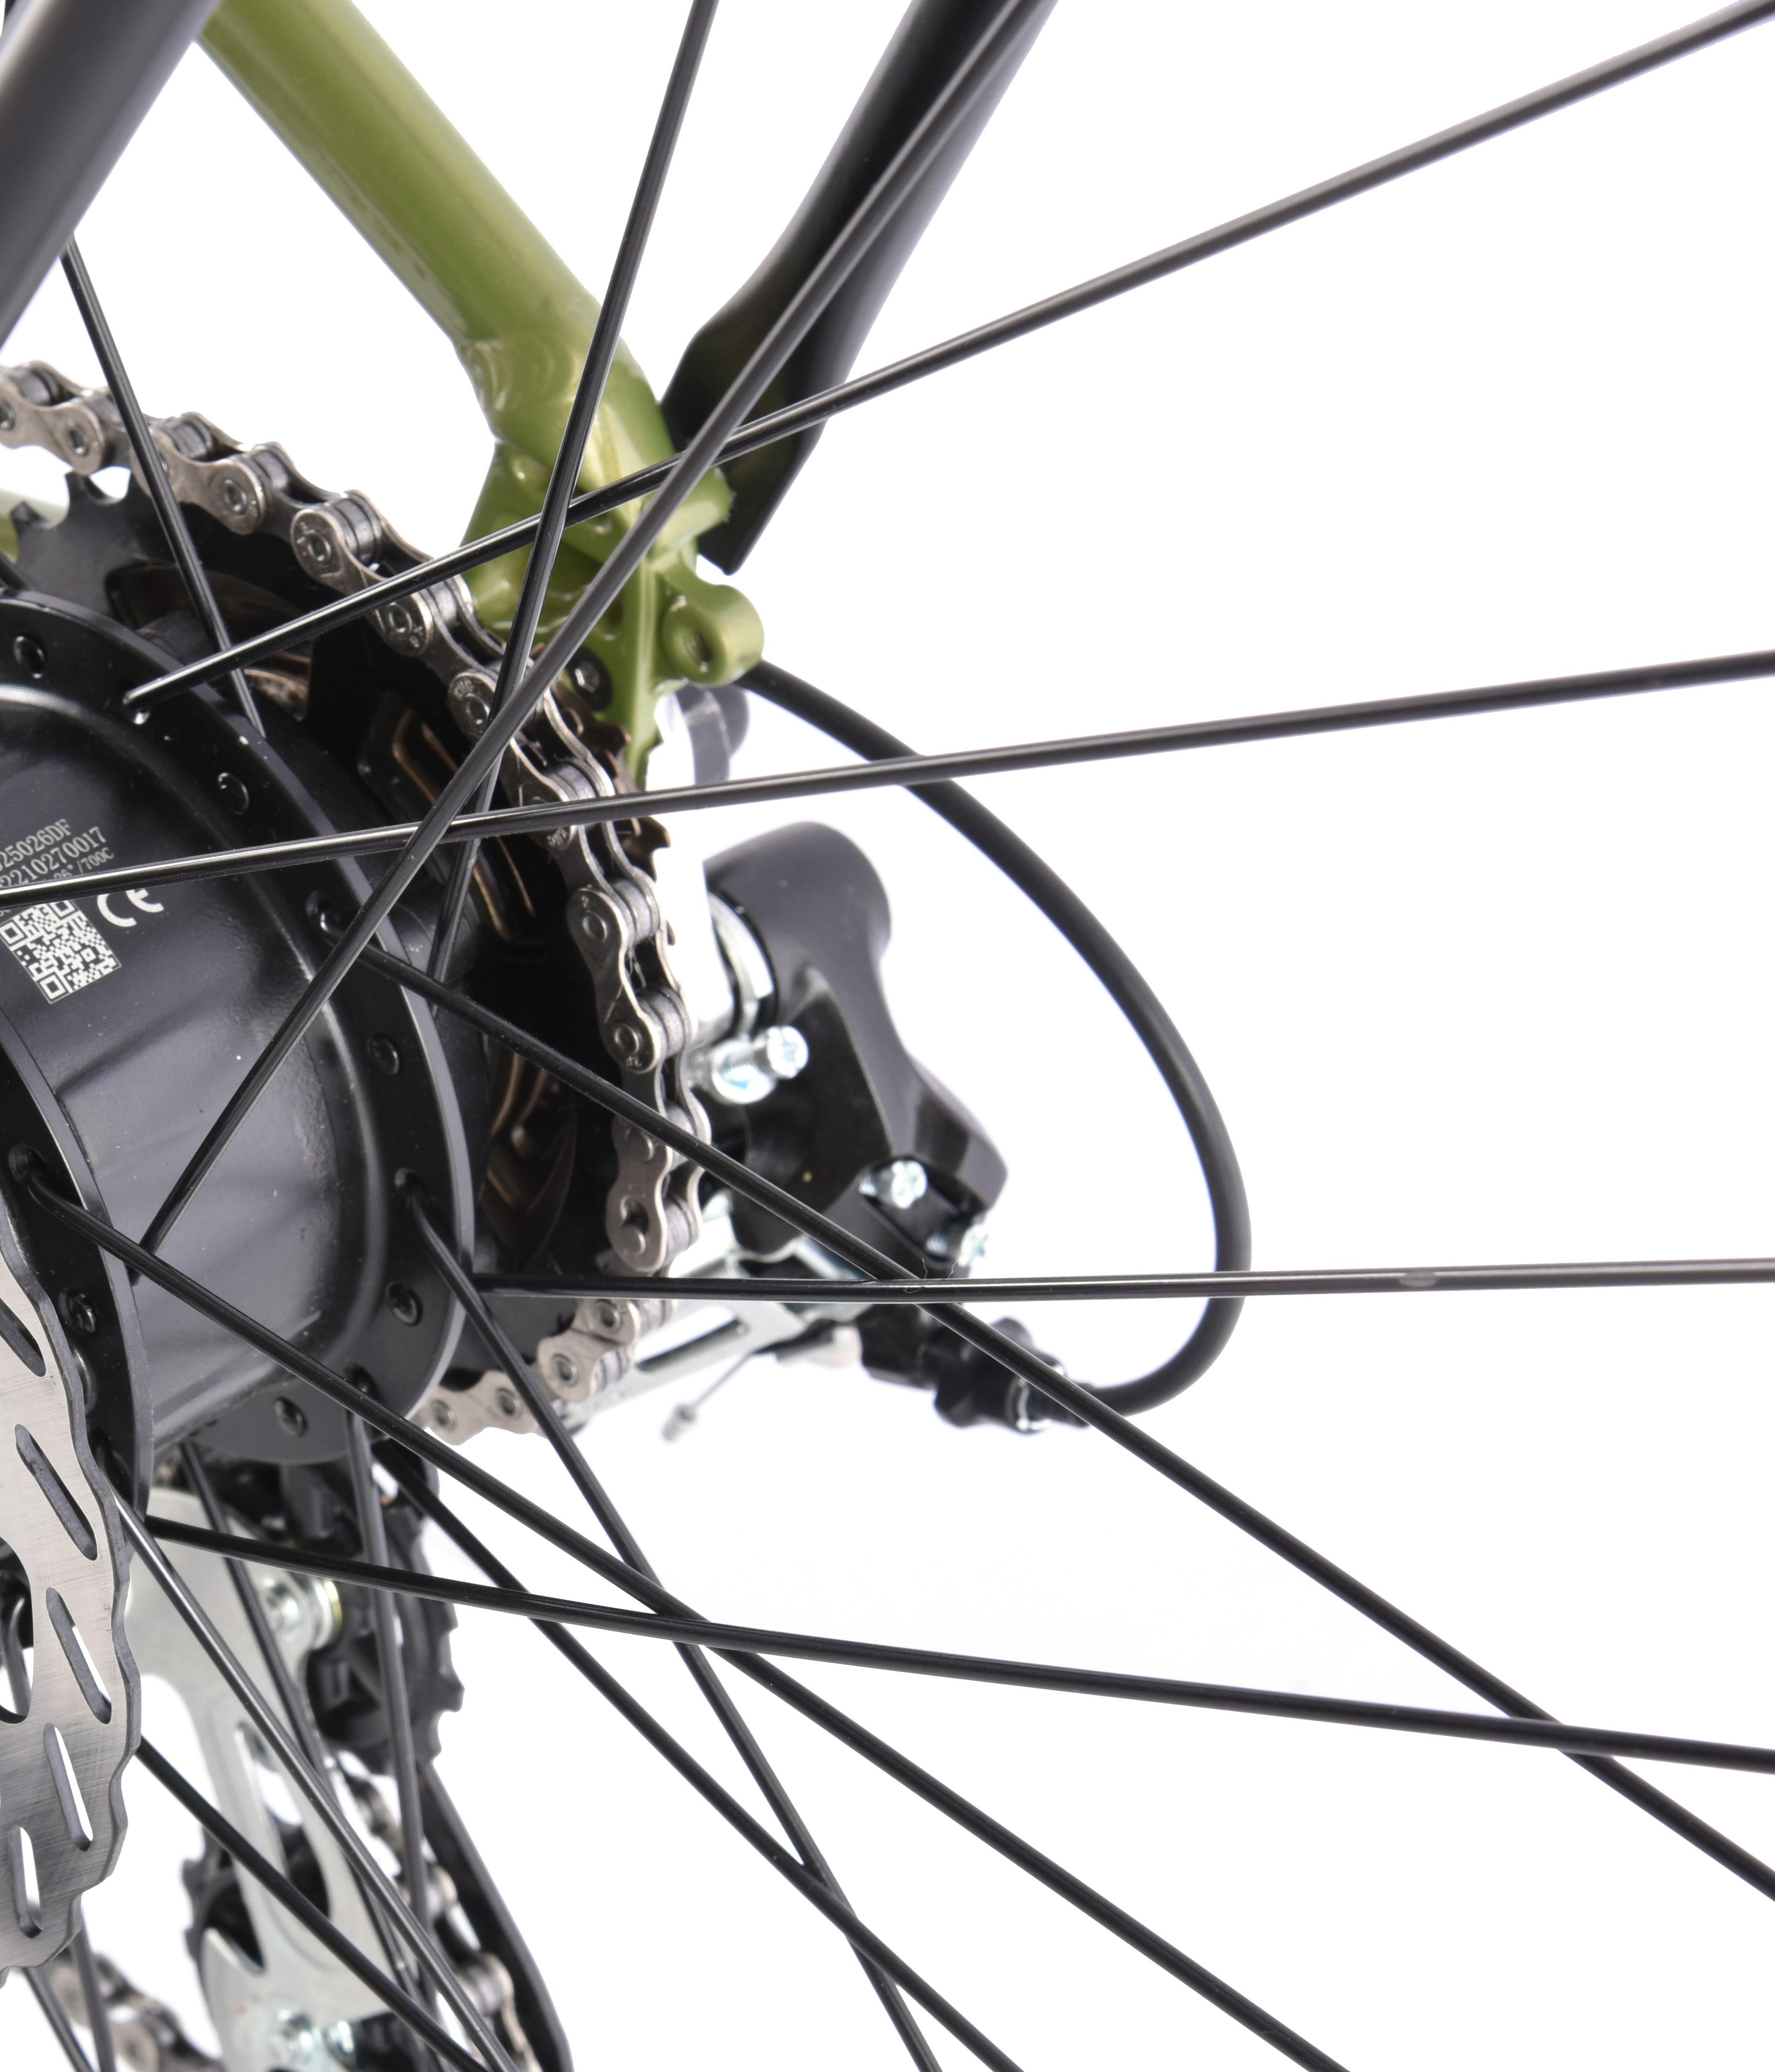
(2) Avoid any strong and direct impact on the Electric hub motor.
(3) Check the screws on each side of the hub motor regularly and tighten them if they appear to be a bit loose.
(4) It is necessary to check the cable connection to the motor.
Rear Hub Motor with Torque SensorThere are three buttons ( Q , + , - ) on the KD58C display that represent functions respectively: ON/OFF, UP and DOWN.
Hold down the power button (Q) for 2 seconds to start. Likewise, hold (Q) button for 2s again, the E-bike system will be switched off.
The e-bike system will be turned off after 10 minimus of being parked.
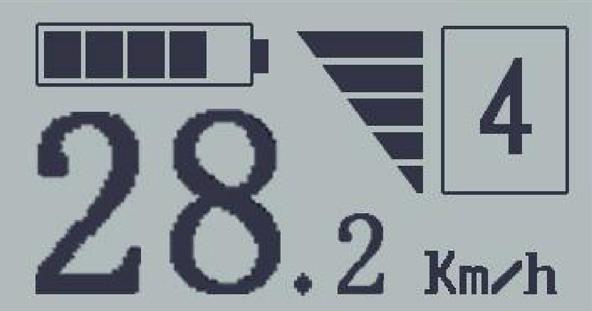
After the E-bike system is switched on, the display shows current speed by default. To change the indicating information, press (Q) to show in turn: Current Speed (Km/h) – Trip Distance (Km) – ODO(Km) – Trip Time (Hour) – Average Speed (Km/h) – Max Speed (Km/h). Each state will display for 2 seconds and then automatically returns to current speed interface.
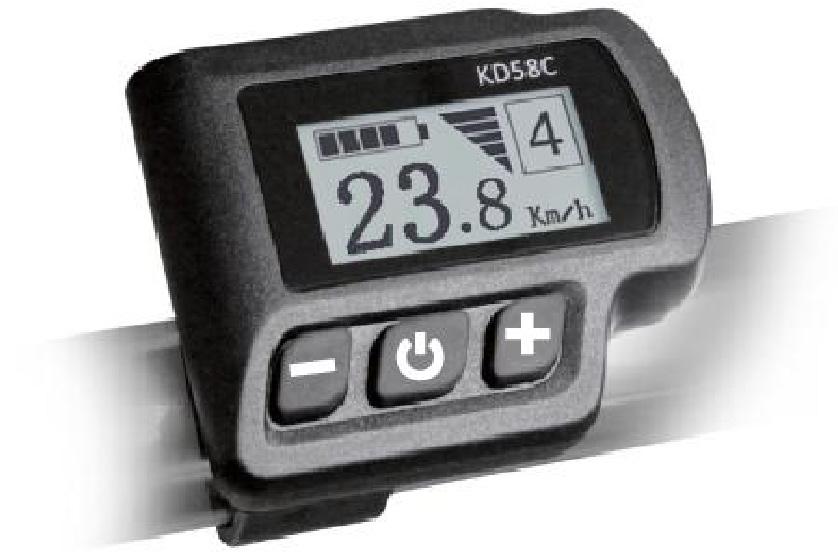


Press the (+) and (-) keys simultaneously for approximately 2 seconds to access the general menu.
Press the (+) or (-) button to choose setting items, press the (Q) to confirm the corresponding settings.

To clear the trip distance, press the (+) or (-) button and select YES or NO. To save a modified setting, press (Q) button and and the display will show “OK” before returning to the general settings interface.
The default unit is km.

To change the unit, press (+) or (-) until the desired setting is displayed. To save a modified setting, press (Q) button and and the display will show “OK” before returning to the general settings interface.

To change the wheel diameter settings, press (+) or (-) until the desired value is displayed. To save a modified setting, press (Q) button and and the display will show “OK” before returning to the general settings interface.


To change the limited speed settings, press (+) or (-) until the desired value is displayed. To save a modified setting, hold (Q) for 2s and the display will show “OK.” before returning to the general selection settings interface.
* Limited speed range is 12Km/h to 40Km/h. The default value is 25Km/h. When the running speed is faster than limited speed, the E-bike system will be switched off automatically.
Each bar represents a voltage value. 5 bars voltage values must be entered one by one. For example, VOL 1 is the first bar voltage value, the default value is 31.5V. To set battery power bar, press (+)/(-) to increase or decrease the number. To store a changed setting and access the second bar, press the Q button. By analogy, after 5 bars voltages values are entered, hold Q for 2 s to confirm and return to the previous menu.
! Please refer to the BATTERY VOLTAGE CHART.

On the first layer of menu, press the (+) and (-) keys simultaneously for approximately 2 seconds to access the specific set.
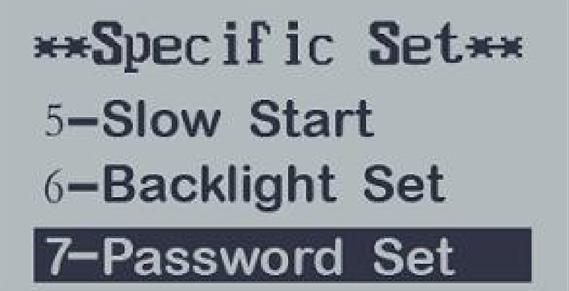
Press the (+) or (-) button to choose the personalized parameter settings items, then press the (Q) button to enter the corresponding settings interface.
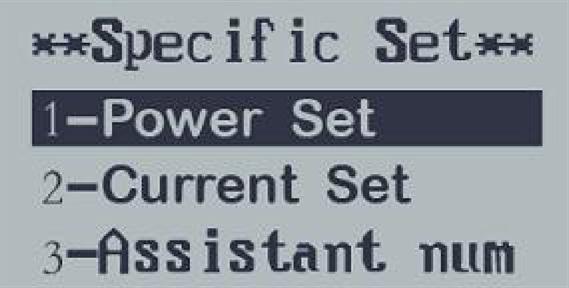


In assist level settings, there are 8 modes for your choice: 0-3, 1-3, 0-5, 1-5, 0-7, 1-7, 0-9, 1-9. The default value is 0-5.

To select the mode of assist level, press (+) or (-) until the desired assist level mode is displayed. To save a modified setting, and access the PAS ratio settings page, press the (Q) button and the display will show “OK” before returning to the general settings interface.
To modify the value of PAS ratio can meet bikers’ different requirements. For example, the range is “45-55 percent” for PAS level 1, ratio value can be modified and the default is 50 percent. Press (+) or (-) to increase or decrease the number.
Press the (Q) button to confirm and move to the next PAS level ratio settings. Level 9 is the maximum. After all PAS ratios are input, hold (-) button to confirm and return to Specific Set interface.
To change controller over-current cut settings, press the (+) or (-) button to increase or decrease the value of the current.
To save a modified setting, press the (Q) button and then return to previous menu.

Assistant num represents PAS sensitivity settings. The sensitivity value is “5” to “24”.
To store a changed setting, press (Q) button and then return to previous menu. To change PAS sensitivity settings, press (+) or (-) button to choose the desired sensitivity value.
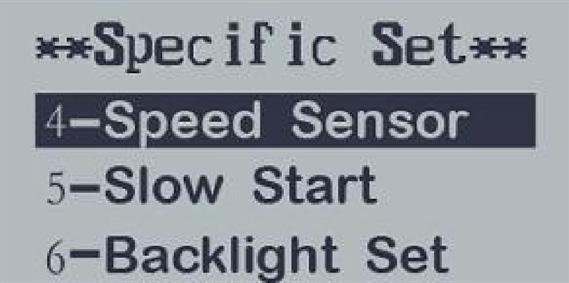

To change speed sensor settings, press (+) or (-) button to choose the quantity of magnet heads (the range is from 1 to 15). To save a modified setting, press the (Q) button and then return to previous menu.

The range is 1-4 seconds, 4 is the slowest. The default value is 1.
To change slow start up settings, press (+) or (-) button to change the value. To save a modified setting, press the (Q) button and then return to previous menu.

Level “1” is the lowbrightness, Level “3” is high brightness. The default level is 2.
To modify the backlight brightness, press (+) or (-) button to choose the desired brightness. To save a modified setting, press the (Q) button and then return to previous menu.


P2:0000 represents power-on password settings. The default is 1212. Press (+) or (-) to modify the value, press (Q) to confirm digit one by one until 4-digit password is completed. Then press (Q) to access power-on password enable settings interface, otherwise stay still in the password input state.
Press (+) or (-) button to choose Disable or Enable, press (Q) button to confirm. The default is Enable. If you choose Enable, press (Q) button to enter Power-on Password Modify interface, otherwise exit the power-on password settings interface. Do not change the password to avoid forgetting the new one.
Press (Q) button to confirm the input, hold (Q) button for 2s to save the settings, and then exit the current settings. To cancel the operation without saving the settings data, hold down (-) button for 2s, and then return to previous menu.
Display will automatically exit the settings state if there are no operations for one minute.
dEF means recover default settings. Press both (+) and (Q) button for 2s to confirm. Press (+) or (-) button to choose YES or NO. When it is YES, the display shows dEF-00 at the same time, and then return to general display state. The default value is NO.

Check the nuts and bolts
Check the front wheel
Check the brakes
Check the tire pressure
Adjust the seatpost
Please check before your first ride and tighten these nuts again after riding 200km. After that, repeat the checks every 1000km or every 600km in complex road conditions.
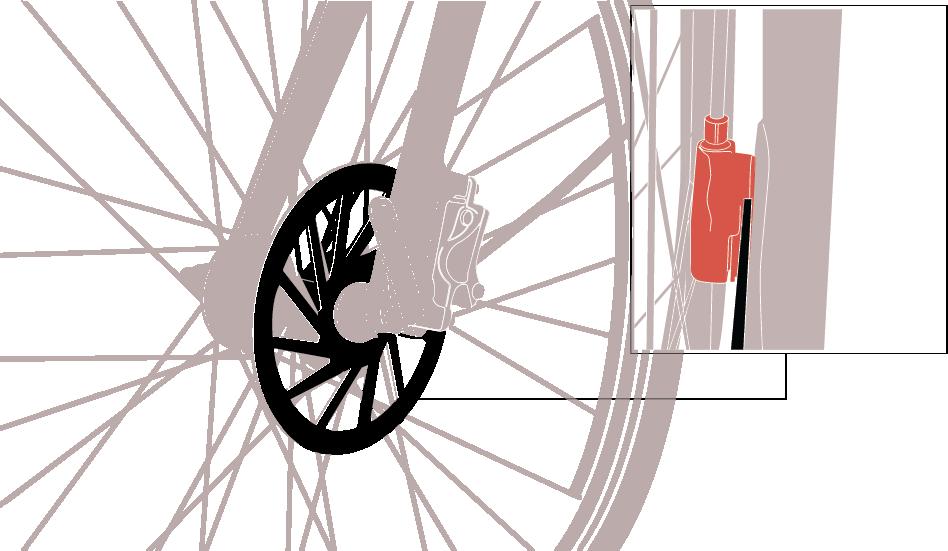
Before every ride, it is important to check the condition of the front wheel. Check to see that the quick-release lever is firmly locked by opening and closing it.
Make sure that the brake lever, the brake caliper, and the brake disc are securely attached.
Please go to the nearest shop if you feel the braking power is insufficient.

Please pump up the tires to 50 to 75 psi before your first ride.
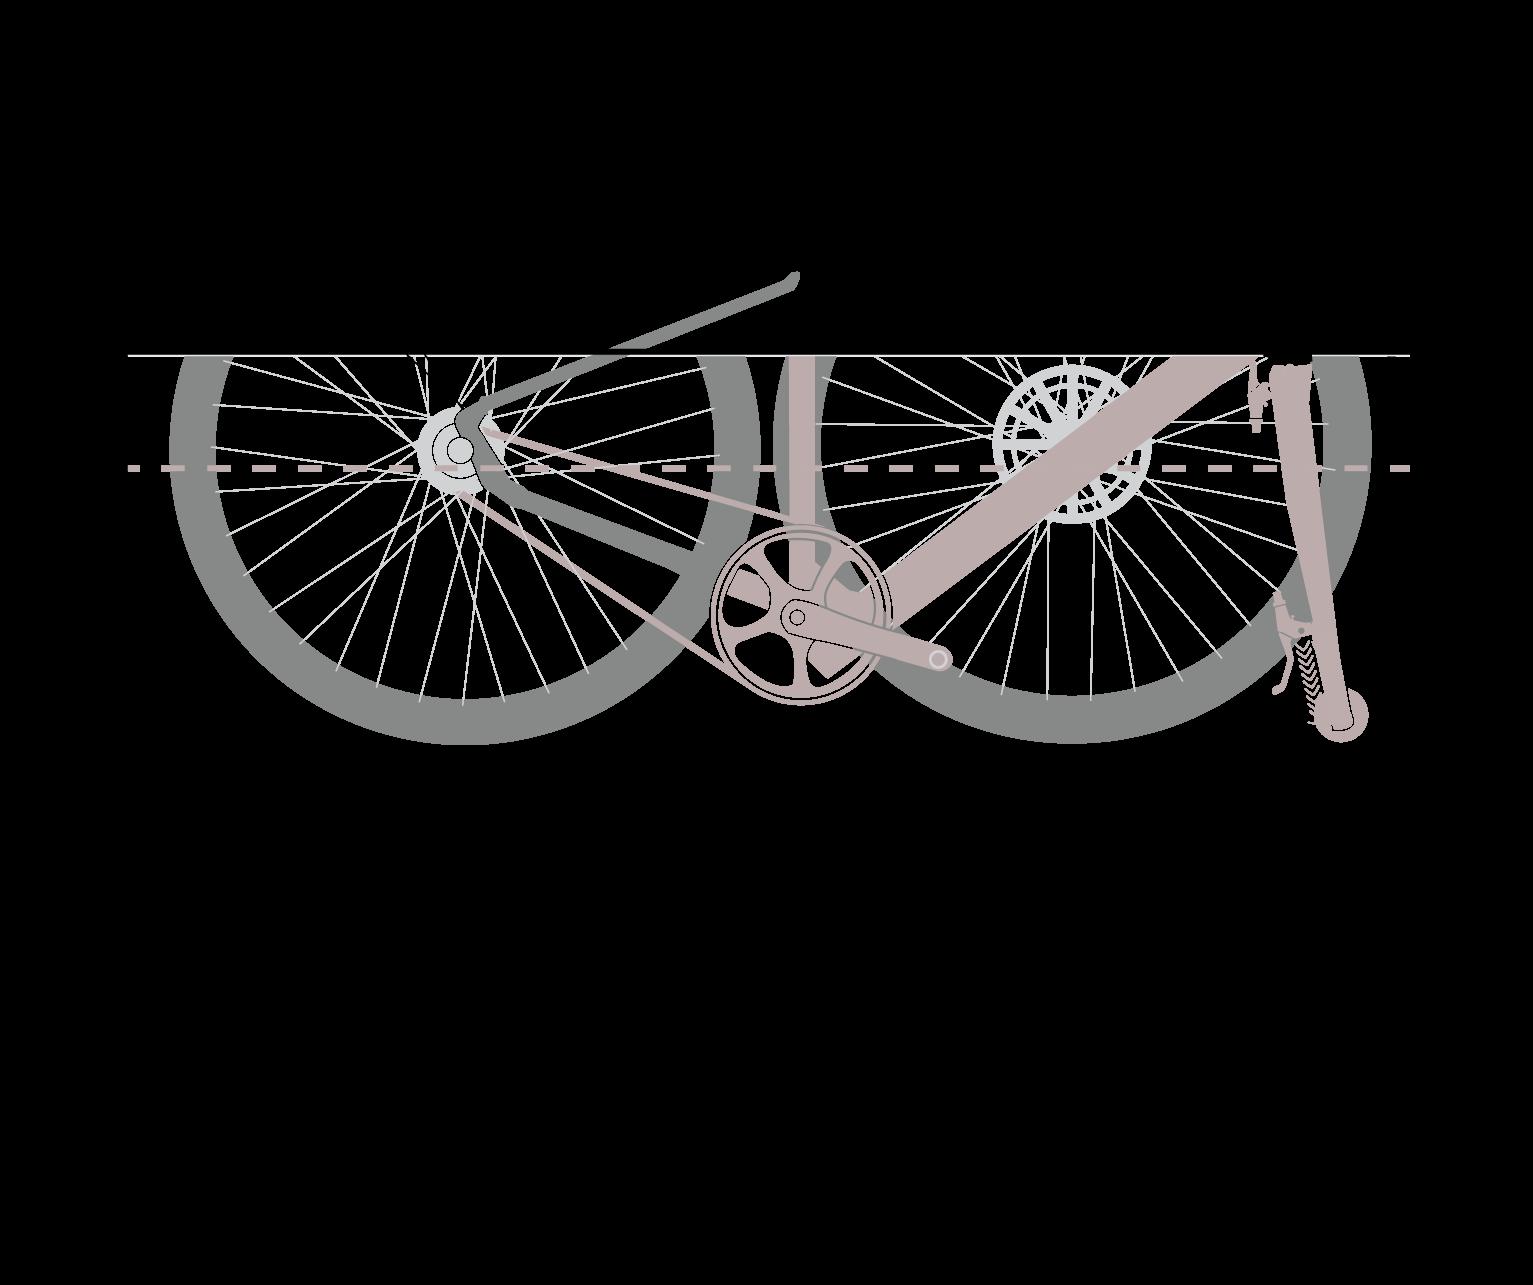
If everything is set up correctly, the seatpost should be at hip level. When you’re at the correct saddle height, your leg is straight, but without overextending your knee.
Do not allow the seatpost to extend beyond the minimum insertion mark.
Charge the battery
Remember to fully charge the battery before your first ride. For safety reasons, your electric bicycle will not be sent completely charged.
• Maintaining your e-bike in good condition requires regular cleaning.
• Preventing the buildup of dirt will keep the moving components functioning efficiently and noisefree.
• Clean your e-bike on a regular basis with clear or soapy water. Both the display and the motor are waterproof
• If your e-bike has mud on it, let it dry before cleaning it with a cleaning brush and some soapy water.
• Please clean the e-bike before storing it away for a long period of time. Do not use a water hose to clean the e-bike.
• The lifetime of a battery can be significantly increased with proper care and storage.
• Only use the charger provided by TIMEWALKER.
• Please charge the battery at a temperature of 20°C to 25°C in a dry environment.
• Overcharging or discharging the battery is not recommended. We recommend using a charge/discharge cycle with a state of charge between 10% and 90%.
• Please charge the battery to 50%-70% capacity before storing the e-bike for an extended period of time.
• The battery should be charged/discharged at least once every three months. Please charge the battery at least once a month when it’s not in use to avoid affecting the battery’s lifespan.
• Temperature has an effect on lithium-ion batteries, so don’t be worried if performance decreases on colder days. When the weather warms up, your TIMEWALKER e-bike will regain full performance.
• We recommend storing the e-bike in an environment with temperatures ranging from 0°C to 25°C and humidity levels ranging from 45% to 85%.
• Fill the tires to 50%-60% of the required tire pressure.
• Do not expose your e-bike directly to rain or sunlight.
• Maintain the battery properly by cleaning it frequently.
• Be sure to check the bike’s brakes, tire pressure, bolt tightness, battery charge, and tire pressure before reusing it.
It’s necessary to always keep the bolts tight. Please kindly refer to page [Check before your first ride] for information on how often to inspect the bolts and the procedure to do so.
• We recommend regular brake maintenance. For the greatest stopping power, they need to be cleaned and adjusted.
• As a result of wear and tear, the brakes may slowly lose effectiveness. When you notice ineffective stopping power, we recommend that you get your brakes tested, repaired, or replaced as needed by specialists.
• The brake levers should be firm when squeezed. The handlebars and the brake levers must never touch each other.
• Check the brake disc and caliper on a regular schedule. The brake disc and brake caliper should be free of any dirt or oil.
• Regularly check the condition of the brake hoses, and if you find any damage or wear, get professional assistance.
Please check every 2-3 months or every 1000 km of riding. The e-bike should undergo routine professional checks with the help of trusted local bike shops. Check the following components: The effectiveness of the brakes.
The bolts at important places, particularly the five bolts that surround the crankset. The deterioration of the cartridge headset, the bearing of the front wheel hub, pedal connection points, the tire’s tread, walls, and outer housing. The internal connection of all the essential electrical parts.
• Always wear a bike helmet that meets the local laws and regulations.
• When using the e-bike, follow local transportation laws and regulations.
• Keep your feet on the pedals when riding.
• Pay attention while using the e-bike.
• Keep a safe distance from other vehicles.
• Do not ride your e-bike in inclement weather or when you are exhausted.
Please slow down when riding because braking is more difficult when it’s raining.
• Ride carefully.
• Check the quality of the front and rear lights, as well as the reflective strips on the side of the wheels.
• Do not use your clothes or luggage to block the front and rear lights or the reflective strips.
• We highly recommend you wear reflective clothing when riding at night.
• Do not tamper with any e-bike’s components. The users are responsible for any harm brought on by tampering with any components.
• Avoid adding accessories or making alterations to your bike that will void the warranty.
• The maximum weight capability for the e-bike is 120 kg, and the maximum carrying capacity for the rear rack is 18 kg. It is not designed to transport either passengers or cargo. Please do not attach child seats or cargo carriers
• Avoid hanging any large or heavy items from your e-bike’s handlebars, such as bags, umbrellas, long strings, and bands...
• Avoid wearing skirts or raincoats while riding your e-bike. There is a risk of being entangled in the wheels or the drive system.
• Be careful when cycling in sloppy or wet conditions.
• Avoid riding too fast on slope or rough terrain.
• Avoid riding under the impact of alcohol, drug or any other intoxicants.
• Avoid prolonged overloading of the motor.
• Avoid placing the e-bike close to strong magnetic fields.
• Avoid using the e-bike for any activity that could endanger your or others’ lives or property.
• For your safety, avoid touching the disc brake after braking since it warms up during the braking process.
When we sell an e-bike to you, we test it thoroughly as part of the build process so you can be confident that it is in as perfect a condition as it can be with no evident defects. Here is a general summary of what is usually covered by your warranty.
1. There is a defect in the materials or workmanship
2. The cause of the change in the product is not due to wear and tear or ageing
3. The damage was not caused by use of the bike for anything other than the intended purpose (for recreation).
4. Please send claims under this warranty directly to TIMEWALKER and proof of purchase is required.
5. A warranty is provided to the original owner and ceases upon transfer to another party. A proof of purchase will be required in the event of a claim.
1. Damage caused by improper use or force majeure
2. Damage that results from improper or insufficient care, repairs, customizations and alterations.
3. Accidental damage or other external effects, or the consequent damage caused by an accident
4. Damage resulting from competitive or commercial use
5. Special fittings, accessories, or non-standard components, including changing the software from the manufacturer’s settings
6. All parts are subject to function-related wear and tear, including but not limited to: Tire, Tube, Brake Pads, Cables, Grips, Saddles, Chain, Spoke, Battery/Controller housing (depletion of capacity to 60% is acceptable within the first two years)...
When we sell an e-bike to you, we test it thoroughly as part of the build process so you can be confident that it is in as perfect a condition as it can be with no evident defects. Here is a general summary of what is usually covered by your warranty.
Shifter, Front derailleur, Rear derailleur (crack, Gear function / noise)
Electric Part (Motor function, Display, Battery Function / range, )
Frame Rims, Hubs, Cranket, Brake Shifter
6 YEARS
1 YEAR
1 YEAR
6 MONTHS
Address:
Phone:
Name:
Address:
Phone:
Product model(s):
Name Color:
Frame:
Groupset:
Brake:
Date of Purchase:
Thanks for choosing us! We appreciate the opportunity to serve you. Have a safe and wonderful experience with TIMEWALKER!
Please contact TIMEWALKER dealer for warranty!
To lodge a complaint, please contact us through any of the following methods:
Phone: 0967259805
Email: sales@timewalkerbike.com
Website: timewalkerbike.com
CHECK BEFORE YOUR FIRST RIDE
MAINTENANCE
SAFETY CAUTIONS AND WARNINGS
WARRANTY
timewalkerbike.com


