4 minute read
Pricing at the Order Level

Adjusting price at the order level willl affect all lines on the quote equally and allow changes to the bottom line details.
1. In the main screen of the quote select “Edit Pricing Details”.
2. If you’ve set Default Terms for your account or if you applied a Customer Record with Default Terms, they will automatically populate the pricing summary. If there are no default price records being used, the summary will only calculate cost.


3. You can decide how you want to set your pricing, whether it be margin, markup, etc. The method you use is determined by your personal preference.
4. After selecting the preferred method, the Pricing Summary will adjust the options to reflect your preference.


5. You can now populate all fields that you want to employ in your quote. Most common items are margin/markup and any appliable tax rate.
6. Additional items that you may wish to use include Shipping and Handling or Other Charges. These items are optional and subject to personal preference.
7. As you make your changes, you will see the complete breakdown calculation on the right side of the screen. In this case, the line will reflect a price of $978.75. The bottom of the quote will detail the $53.83 for tax, $25.00 for Shipping and Handling and the $5.00 Fuel Surcharge for a bottom line total of $1,062.58
8. See the section on Printing Quotes for options for how pricing items will appear on the quote.

Pricing at the Line Level
Adjusting price at the line level will affect only the line that you’re changing and does not include bottom line details. Line level pricing will override the order level pricing based on the print function selected.
1. After creating a line, under the “Edit Pricing Details” link, at the top right, select “Adjust Line Pricing” to make changes for a specific line.
2. Your discount from list and any order level pricing that is in place on the quote will be reflected in the Adjust Price window.

case, we will offer the customer an additional 5% off of this line only.
Expired Quotes
Why is my quote expired?
1. All quotes in the Configurator expire 90 days from when the quote was entered.
2. Once a quote surpasses 90 days, it expires, however; it can be copied to a new quote and the information is not lost.
Identifying an Expired Quote
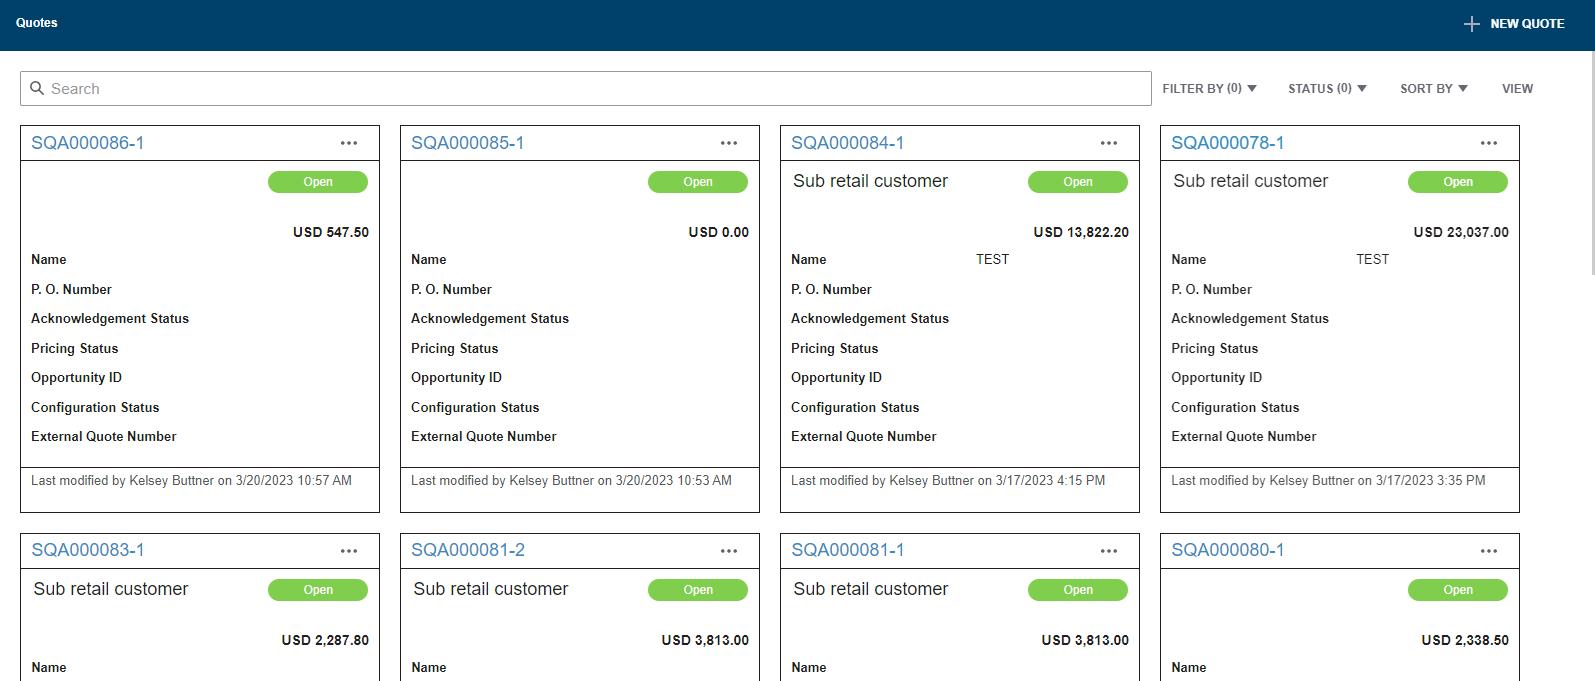
1. When a quote has expired, it will show a status of Expired in the Quote screen.
2. All options to place the order or change the details will be unavailable on an expired quote. You may still print the quote, however; it will indicate that it has expired and the pricing is not guaranteed to be accurate.
Recovering an Expired Quote

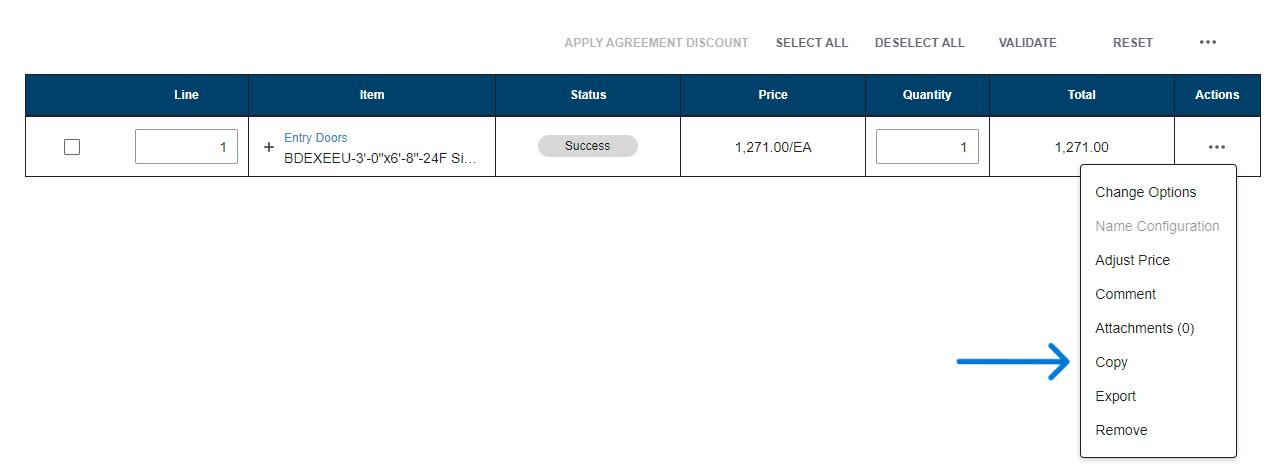
1. In order to copy an expired quote you have to be on the main quote search page. You will click the three dots to the right of the quote and select “Copy”. You will then be redirected to a new quote.
2. After selecting Copy, you will notice that the lines will be noted with a warning sign under the “Status” tab. The pricing will indicate “Requires Review”.
3. Select “Validate” to allow the system to rerun the options and calculate current price. The line status will then change to “Success” to confirm that the line has been validated.
4. The copy will be given a new quote number and will be valid for 90 days from the date it was created.
View/Print/Share Quotes
Objective: View, print and/or share a quote with a customer.
View/Print/Share Quotes
1. While in a completed quote, click the “Print” dropdown at the top right of the screen and select “Generate Document”.

2. Make selections for how you want the quote to appear. (You will need to scroll to see all selections.)

3. While the selections are subject to user preference, it is particularly important to select the correct price option to ensure you are sharing the appropriate information.
IMPORTANT – Anytime there are no markup/margins set at any level, the quote will show dealer cost when selling price is selected. Always include a customer, order or line level price set up when providing a quote to a customer.
None – No pricing will appear on the quote.
Dealer Cost – Will show dealer cost.
MSRP – Will show full list price with no mark up or discount applied.
Selling (Line Level) – Will show dealer sell price, including all mark ups or discounts applied to the line. If nothing applied at the line level, it would use order level pricing. If no order level pricing applied, it will show customer record pricing.
Selling (Order Level) – Will show order level pricing. If no order level pricing applied, will show customer record pricing.
Selling (Totals Only) – Uses lowest level pricing and only shows order total (no individual line totals).
Selling (MSRP) – Uses full list price as basis and includes lowest level discount to arrive at a final sell price.
4. If any Header, Terms, Pricing or Line notes were included on the quote, select the appropriate boxes to allow the notes to appear on the quote as desired.

View Quote
1. To view only, once the appropriate “Print Options” are selected, click on “Print” then select “Generate Document” and scroll all the way to the bottom and select "Preview”.
2. Once in PDF format, the quote can be saved in PDF for printing or e-mailing. Direct print and e-mail options to follow.

Print Quote
1. To send directly to a printer, once the appropriate “Print Options” are selected, follow the steps provided to preview a quote. Once that PDF document is open, at the top right corner, you will find a printer icon. Select that to continue with your printer options then hit print.
2. Depending on your system, this may take you directly to your printer or may go to PDF format. Check with your system administrator for details.
E-Mail Quote
1. To e-mail directly from Configurator, once the appropriate “Print Options” are selected, click on “E-Mail Document”.
2. Enter the e-mail address of the recipient.
3. User’s return address will automatically populate the From field.

4. Subject line will default to the quote number, however; user can change this as desired.
5. User can also type a message to accompany the quote.
6. Once all items are ready, select “Send” to release the e-mail. A message will appear confirming that the e-mail was sent successfully.