

What Is Logic Pro X?
Logic Pro X is a complete Digital Audio Workstation that you can use for every aspect of music creation: Recording, Songwriting, Making Beats, Arranging, Editing, Mixing, & more. It includes a massive collection of instruments, effects, loops and samples, providing a complete toolkit to create amazingsounding music. Any type of music project, from a simple recording of yourself singing to composing complex multi- track drum recordings and even film scores, it can all be done in Logic Pro X.
 Prepared by
Eddie Grey
Here is Logic Pro’s GUI (Graphical User Interface)
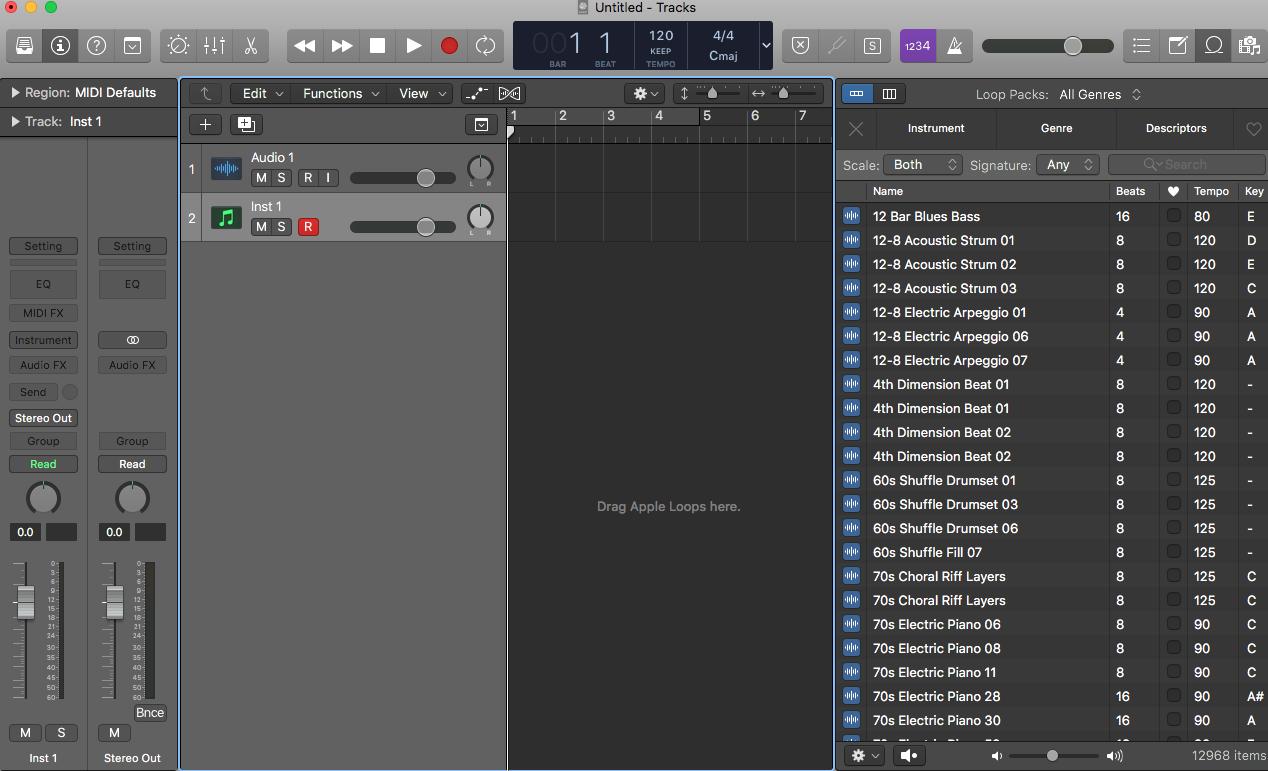
The Tracks area contains the primary features such as the Inspectors, Library, Editors, Project Notes, Loop Browser, etc.

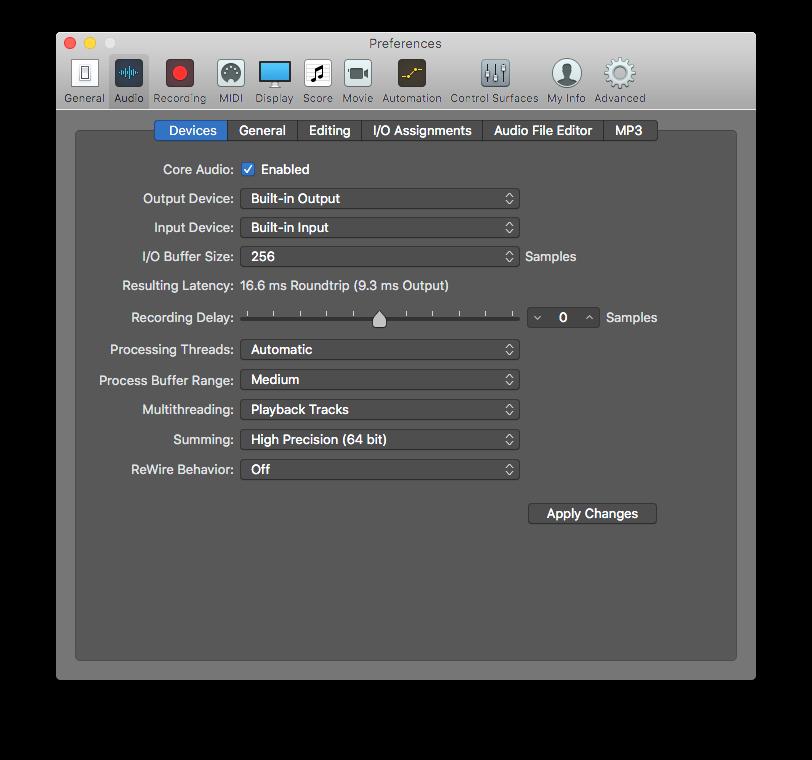
Let’s go to Logic’s Preferences by going to Logic Pro X>Preferences. Go to the Audio Icon and select your Audio Interface in the Output Device area. Set your I/O Buffer Size to 256-512. This setting will help with playback performance and Latency. We will discuss latency at length as we continue our training. Click on the Apply Changes button.

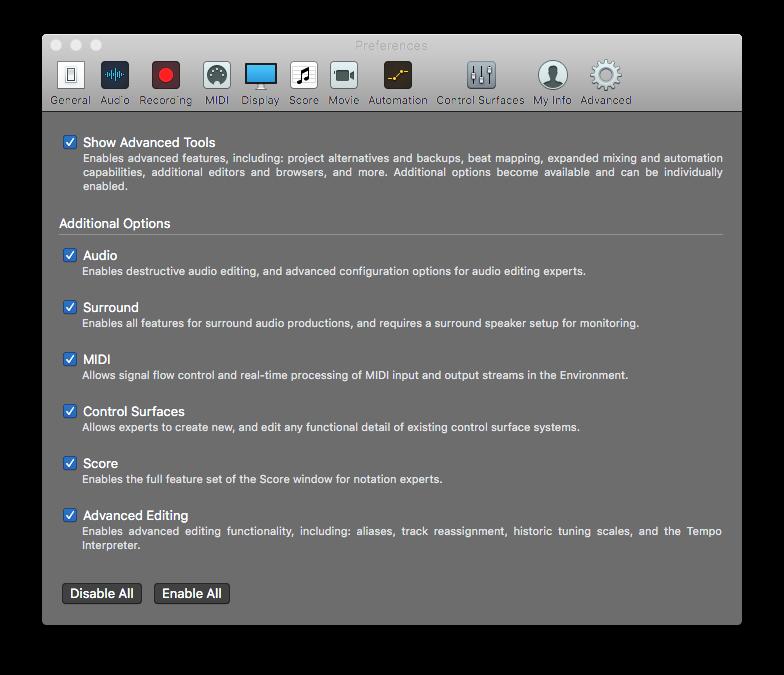
The main window is organized into different areas to help you focus on different aspects of your project, such as Recording, Arranging, and Mixing. Buttons in the control bar show or hide different areas of the application. It is a good idea to spend time familiarizing yourself with the



At the very top of the Tracks Area is the control bar, which includes Transport controls for Project Playback & Recording. In the center of the control bar is the LCD, where you can view the current playhead position, sample rate, set the project tempo (BPM), key, and time signature.
Logic Pro windows include:

Tracks area: Record audio and MIDI regions, add Apple Loops and other media files, and arrange the regions to build your project. This is the center of Logic’s mainframe in which everything else is built around.
Control bar: Includes transport controls you use to record and control playback of your project. You also have buttons to show and hide the different areas of Logic Pro. It is important to understand that you can customize the control bar to meet your specific workflow needs.
Toolbar: Here you can find Logic’s most often used key commands indicated by the various icons. Key commands will become central to your workflow. You can show and hide the toolbar to optimize available screen space.
Inspector: A crucial part in understanding Logic is the Inspector. It displays and edits the parameters of the selected regions that are in focus. There are many inspectors in Logic Pro.
Smart Controls: Parameters that are pre-assigned & set up in a simple way. These controls allow you to quickly modify the sound of the current patch.

Mixer: Displays the channel strips for each track in your project, as well as aux tracks, output, and master channel strips. You can add and edit plug -ins in the Audio Inserts as well as create groups and VCA’s.
Editors: There are various Editors in Logic Pro, including the Audio Track Editor, Piano Roll Editor, Score Editor, Step Sequencer Editor, and Drummer Editor (along with others). These editors allow you to make precise changes to individual regions and tracks as well.
Note Pad: Here you can access, view, and edit project notes specific to the Track and also create notes for the Project as a whole.
Loop Browser: The Apple Loops library allows you to search and preview loops and add them to your project seamlessly. You can now include 3rd party “Untagged Loops”.
Browsers: You can view the audio files in your project in the Project Audio Browser, add audio and movie files from the Media Browser, browse your system and connected storage devices using the All Files Browser.
The control bar has a group of buttons called the Transport Controls. These buttons allow you to play, rewind, forward & record. They are responsible for playback and they also navigate the project’s playhead, ruler, and cycle areas.
Start playback by Clicking the Play button the Space bar Stop playback by Clicking the Stop button


We also have a phenomenal feature called “Capture Recording”. There are 2 things you can do with it.
1. While the playhead is moving, perform the Midi Part and when you stop the playback you can retrieve the performance by hitting the button above or use the key command shift+R. You do not have to hit the record button.
2. New to 10.5 is playing the Midi part in Stop Mode (playback not moving) and when you are finished playing use the key command (shift+R). This will create a Midi region to what you played in the workspace.
The Musical Time ruler shows units of time in bars, beats, divisions and ticks. It is located above the tracks area. The playhead extends from the top to the bottom of the Tracks area, and moves from left to right as the project plays. In effect, it shows you what is currently playing in the project.

At the top of the playhead you will find a yellow strip called the cycle region aka the locators. The Cycle Region can be used for composing, practicing a part before recording, recording multiple takes, merging recording, etc. Turn it off and on by hitting the key command = C.
Time to add tracks to the project. You can use the + button in the toolbar as illustrated above or use the key command Option+CMD+N.
A dialogue window opens up prompting you to select a track. You can choose - Audio, Midi, or Drummer There are 2 other options but we will not need those for now. Click Create. The new track appears in the Tracks area, and the Library opens on the left.

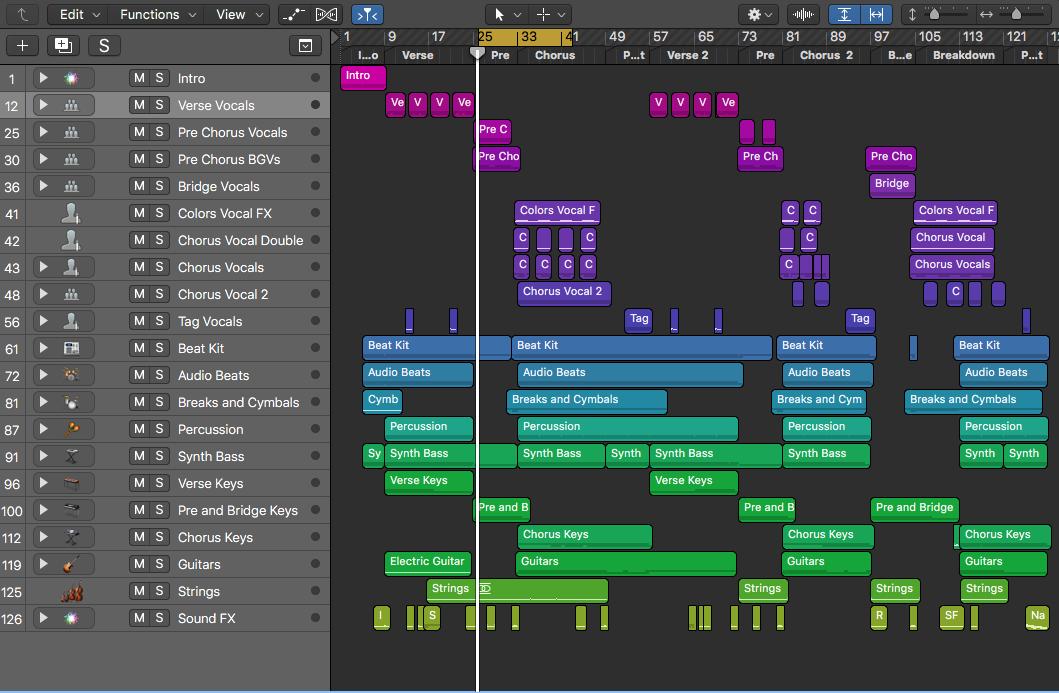
A Logic Pro project can include the following track types:

Audio tracks: Contains audio regions from loops, samples, Apple Loops, imported audio files, and live recordings.
Sofware instrument tracks: Contains MIDI recordings from software instrument recordings, software instrument Apple Loops, and imported MIDI files.
Drummer tracks: A unique kind of track that generates rhythmic ideas. It behaves like a software instrument track, but with no MIDI input (you cannot record a part in).
The Track Header is located to the left of the individual tracks, it shows the individual tracks name and icon. Track headers also contain controls that you can use to mute, solo, and adjust the volume level and pan position of the track, You can control the track in other ways as this area too is also customizable.


When you create a track, you choose the track type, input format (mono or stereo), and output. You can also add plug -ins which manipulate the sound of the track. Moreover, you can also group multiple tracks together. These are called Track Stacks. They are best utilized to organize projects with high track counts, and simplify the creation of audio subgroups for related tracks. There are 2 different types of Track Stacks, designed for different situations. They are called:
- Summing Stacks: ideal for processing and treating the various tracks as a group. For example, we can add an amplifier plug -in to the Drum Group and get the entire drum set to sound like it is coming out of a speaker cabinet.
- Folder stacks: these are strictly organizational in nature and do not affect routing.
Let’s select a software instrument track and scroll through the library to find an instrument or patch.
When choosing a patch, the left inspector channel strip shows the patch name, the instrument (for software instrument patches) and FX plug -ins. To display presets for a plug -in in the Library, click the space immediately to the left of the plug -in on the left inspector channel strip (reference the arrow in the image). A blue disclosure triangle should move alongside the plug -in. To choose a different Patch, select the patch name again to return the view to the Library.

The Inspectors:
The inspectors in Logic Pro give you an “inside look” and allow you to edit parameters for regions, tracks, and other items. The parameters displayed depend on the type of item selected. Click the Inspector button in the control bar (or press i).
Region inspector: View and edit playback parameters, including transposition and quantization, for selected regions. Region parameters affect the playback of regions, but don’t alter the data in the region itself. If you change region parameters while the project is playing, you hear the changes immediately.


Track inspector: View and edit various track parameters, including transposition, velocity, and delay. All regions on the track are affected by the track
Inspector channel strips: The left channel strip is the channel strip for the selected track. The right channel strip shows the output for the left channel strip by default, but can also show an aux used by the left channel strip (if one exists). You can adjust the level, pan, sends, and inserts, change effects, and control audio routing for these channel strips without opening the Mixer.
Mixer
The Mixer shows the channel strips for every track in your project, including auxiliary and output channel strips, and the master channel strip. This makes it easy to see and adjust relative levels and pan (balance) positions. You can also add effects, mute and solo tracks, use busses and sends to control the signal flow, and use groups to control multiple channel strips.
Channel strips: Use to process audio or MIDI information that is routed from tracks.
Channel strip controls: Adjust the level and other aspects of the audio signal played through the channel strip.
View buttons: Use to switch between Single, Tracks, and All views, limiting the Mixer view to channel strips required for the task at hand (key command = Shift+X)

Filter buttons: Use this to limit the channel strips displayed in the Mixer to specific types.
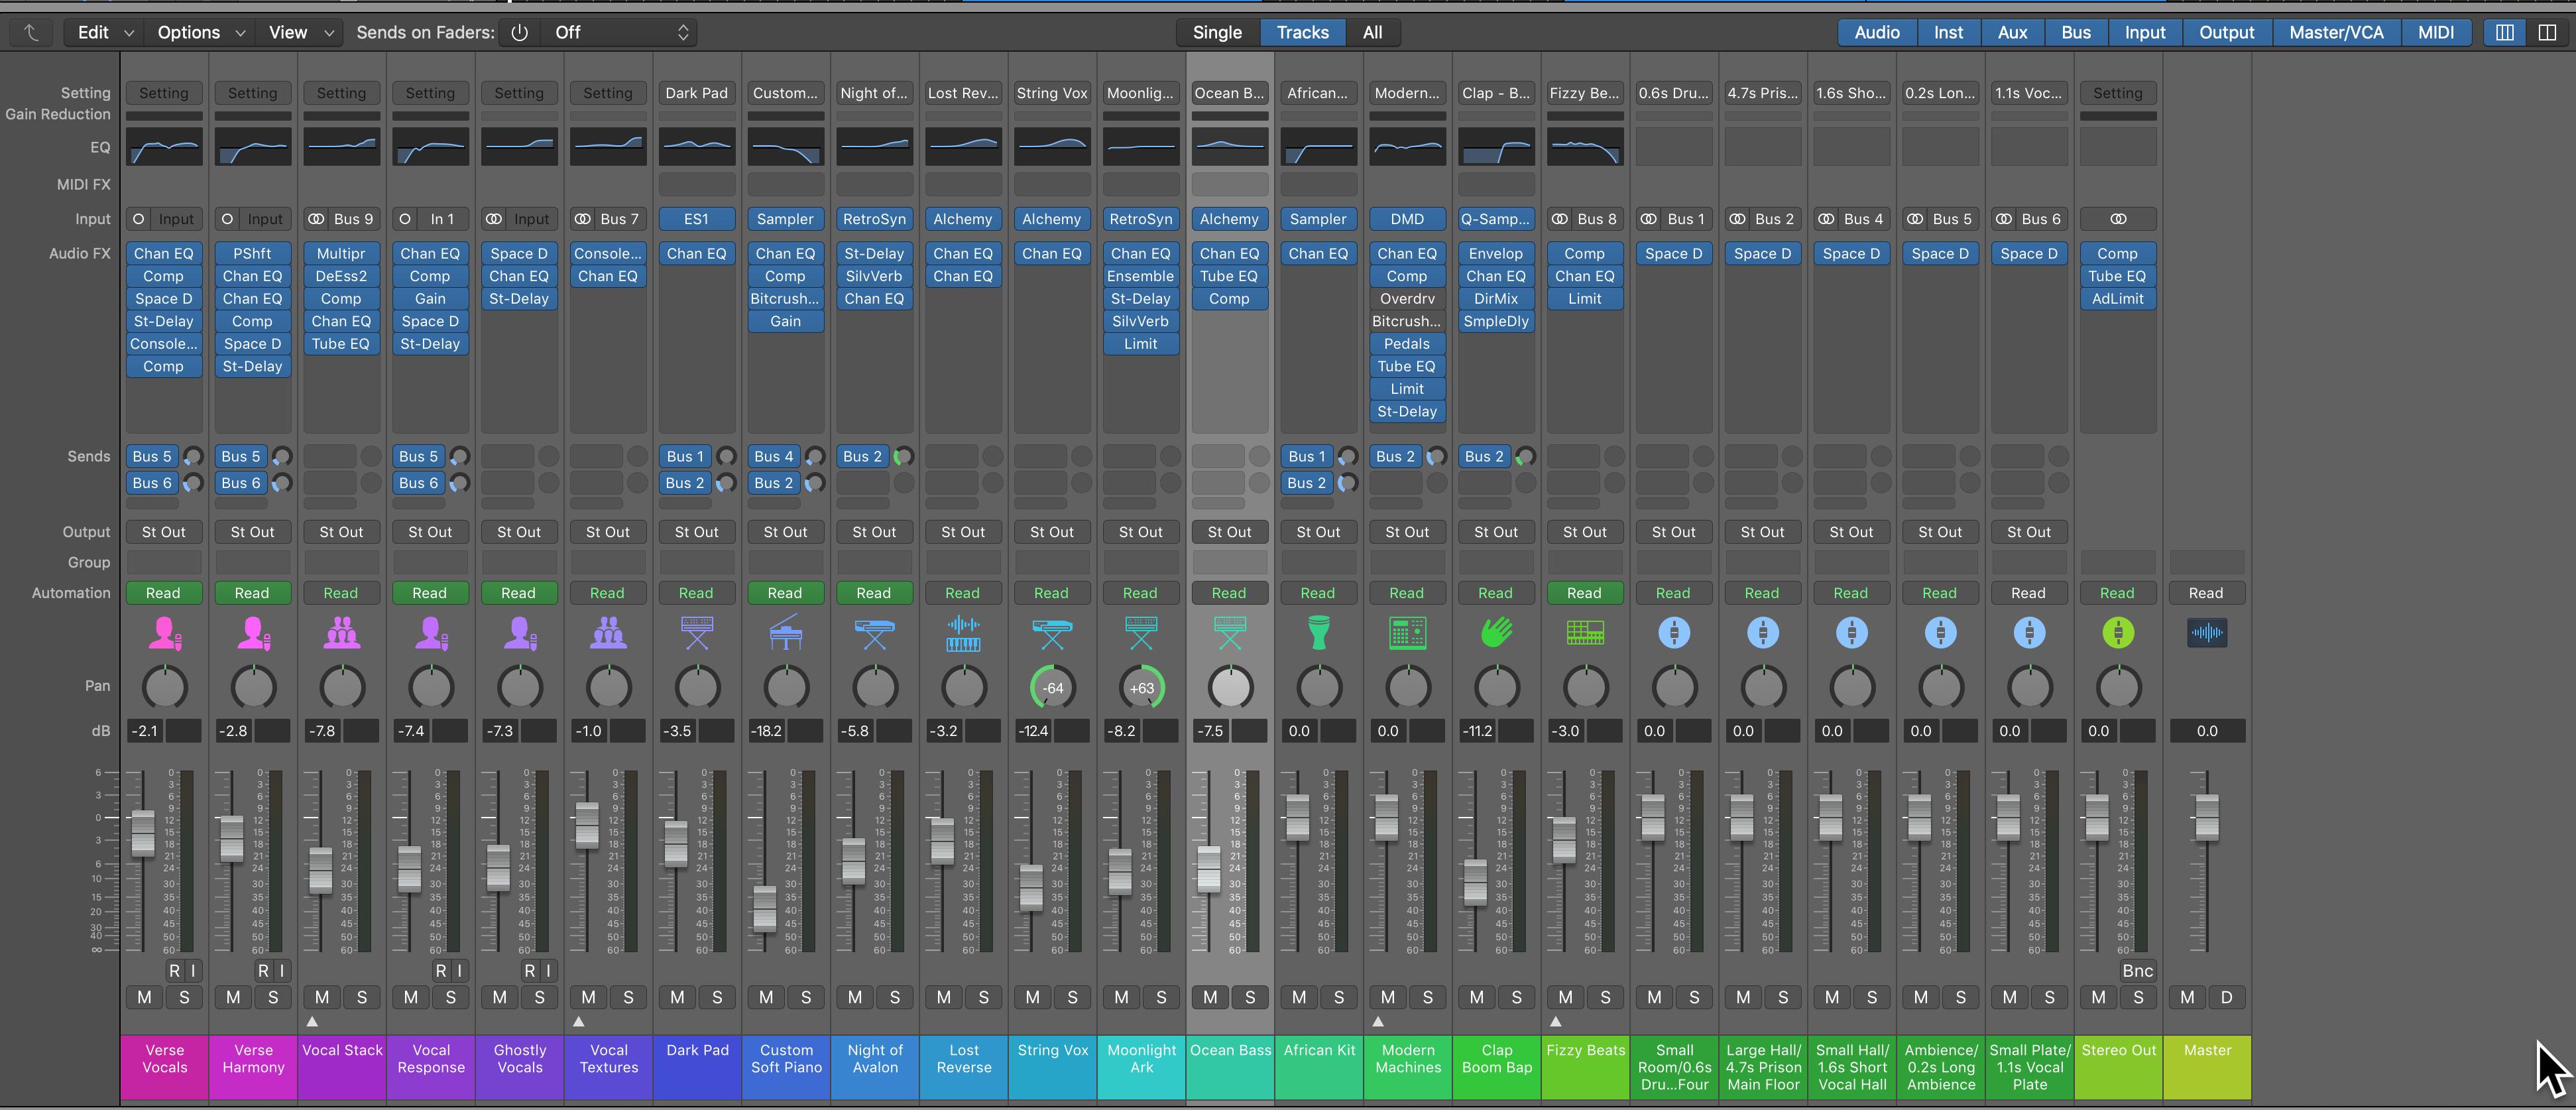
Open the Mixer by clicking the Mixer button in the control bar (or press X).
Smart Controls
Smart Controls let you quickly view and adjust the most important parameters of the selected track without opening the Mixer or individual plug -in windows. Each Smart Control features a set of screen controls. Adjusting a single screen control can modify one or more channel strip or plug -in parameters for that track. Click the Smart Controls button in the control bar or choose View > Show Smart Controls or hit the key command (b). The Smart Control window is also customizable.
Note Pads
Click the Note Pads button in the control bar. You can create, view, and edit notes for a project or each track in the Notes pane. Each project can contain one (1) set of project notes but each track that appears in the Tracks area can have its own set of track notes as well. These can also be reflected in the mixer if you customize the mixer settings.

Loop Browser

The Loop Browser makes it easy to find Apple Loops and add them to your project. You can browse for loops or search using various criteria, preview matching loops, and add them to your project by dragging them into the Tracks area. These loops will conform to the current Key & Tempo of the song.
Browsers
The Project Audio Browser shows the audio files used in the project, and displays an overview of the regions derived from each audio file. The Media Browser, you can find and import songs from your iTunes library, movies from your Movies folder, and Garage Band projects into a Logic Pro project. Use all Files Browser to locate all file types that can be used in a Logic Pro project.
Tools Overview
Logic Pro provides tools for a variety of editing tasks and other functions. Tools menus are available in the Tracks area, various editors (including the Piano Roll, Audio Track, Audio File, Score, and Step Editors), and the Environment. Some tools are common to all working areas, while others are available only in some working areas. When you choose a tool from the Tools menu, the pointer changes to show the chosen tool.
Opens Tool Menu: Select the Left/Right Cursor Tool or simply press T in the Tracks area. When the Tool menu is open, you can also use the key shown next to a tool to select it.
Logic’s default tool is the Pointer. You can use the Pointer tool to: Select events, regions, or other items by clicking them. Move items by Option-dragging). by grabbing the bottom-right or bottomleft corner and dragging).
Loop regions (by grabbing the upper-right corner and dragging).

Pencil tool
Use the Pencil tool to add new regions or events. You can also select, drag, loop, and alter the length of regions or events using the Pencil tool. In the Score Editor, you can use the Pencil tool to add dynamic markings, accents, and other symbols to notes.
Eraser tool

Use the Eraser tool to delete selected regions or events. When you click a region or event with the Eraser tool, all of the currently selected regions or events are . The Eraser tool can also region or event by clicking it.
The Text tool is used to name regions and other items. This can be helpful to write down chord progressions on regions. Alternately, you can also write mixing notes on the regions that you can refer to later.
Scissors tool
The Scissors tool is used to split regions and events, allowing individual sections to be copied, moved, or deleted.
Glue tool
Use the Glue tool to join selected regions or events into a single region or event.You can also hit the key command (CMD+J) to join regions.
Solo tool
Click and hold a region with the Solo tool to listen to the selected region or event apart from the rest of the project. Moving the mouse horizontally also scrubs any events the pointer touches.
Mute tool
Click an event or region with the Mute tool to silence it. You can unmute the region or event by clicking it a second time with the Mute tool. If multiple regions or events are selected, the mute state of the clicked region or event applies to all selected regions or events.
Zoom tool
Use the Zoom tool to zoom in by dragging over regions or other material, or over an empty part of the Tracks area. To revert to the normal zoom level, click the window background with the Zoom tool, or click while holding Control-Option. You can also access the Zoom function by pressing and holding Control-Option, regardless of which tool is active. When the pointer is over an empty part of the Tracks area, Piano Roll Editor, Score Editor, or Step Editor, you can access the Zoom function by pressing and holding Option.
Flex tool
Use the Flex tool for quick access to fundamental Flex editing functionality, without having to turn on Flex view in the Tracks area.
Quick Help
You can view a brief description of windows, controls, and other elements of the Logic Pro interface without leaving the app or interrupting your workflow. You can view Quick Help either next to the pointer or in a movable floating window. Great for Beginners!!!
To view Quick Help in the inspector, open the inspector, then choose Help > Quick Help.
Download Additional Content
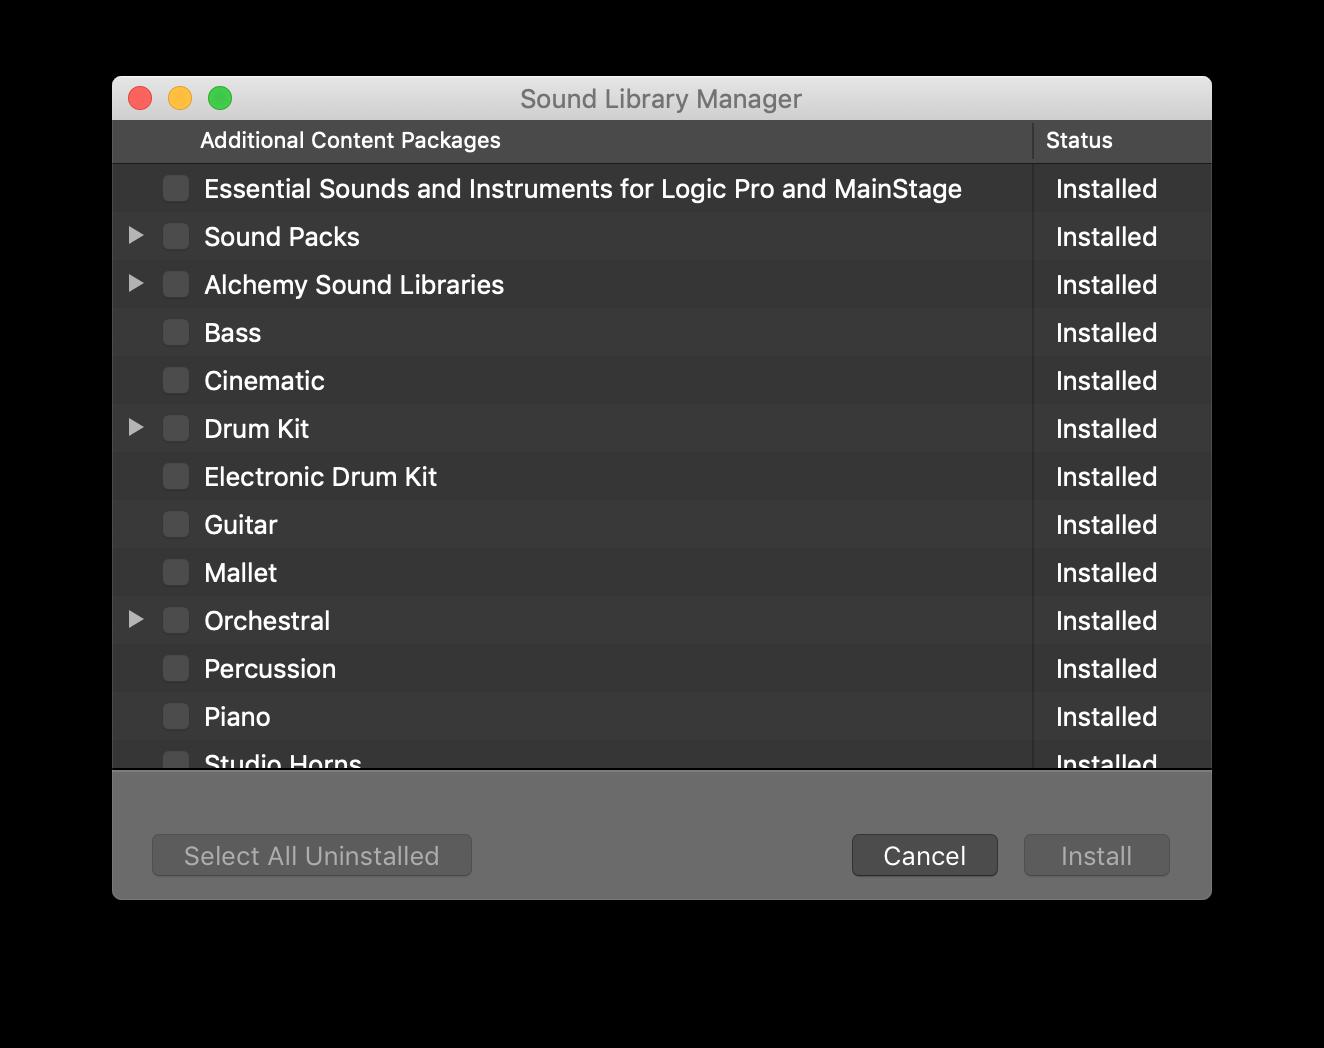
Logic Pro features an extensive Sound Library of Apple Loops, patches, drum kits, and other content that you can use in your projects. When you install Logic Pro, essential sounds and instruments are included as part of the installation. Additional content is available to download after the installation is complete.

Saving Projects

When you save a project in Logic Pro, your recordings and all the changes you make are saved with the project.
Logic Pro auto- saves your work so that you don’t lose important changes if the application quits unexpectedly. Logic shows a dialog when you reopen the project, asking if you want to use the autosaved version. If you choose not to, Logic Pro opens the last manually saved version of the project.

When saving, Logic will give you 2 ways to save your Files. You can:

Project Package: Project assets are copied to the project package, or are referenced from another location, depending on which asset types are selected in the Save dialog. All of your files will exist inside of this “package”. In order to access the actual files, you will have to Ctrl+Click (Right Click), the Package and open up “Show Package Contents"
Folder Package: This if the preferred method as all your files are found under one roof. It is simply more organized and safer than a Project Package.
Additional Methods of Saving:
Save a Project as a Template
Choose File > Save As Template, enter a name. In the Project Chooser, click My Templates to view and access templates you have created. Templates are good for efficiency especially if you need to work quickly. You can have a “Hip Hop” Template or an “Indie Rock” template ready to go. I also like using Templates to set up FX (via Aux and Sends) so those creative decisions do not have to be made later in the process. How many reverbs and delays can you use anyhow?
Alternative Versions of a Project

You can create alternative versions of a project, each with a unique name and different settings. Alternatives are saved as part of the project and share the same assets. Alternatives for the current project appear in the File > Alternatives submenu.
Each time you save a project by choosing File > Save (or pressing Command-S), a backup of the current project alternative is saved (up to ten backups per alternative).
Choose File > Project Alternatives > New Alternative.
Enter a unique name for the alternative, then click Done
To rename the alternative: Click
To delete the alternative: Click
Making Your Own Beats Using Apple Loops
Apple Loops come with Logic. These are royalty free loops that you can use in you project that automatically time stretch to the tempo of your song! You can audition by clicking on the name of the Apple Loop and it will play along in time and in key. You can audition the loop in its original key or in the project key as well.

In total, there are over 26,000 Loops contained in the Apple Loops Library you have downloaded all of the Sound Library into the Tracks area.
There are 4 types of Loops:
1. Audio Loops
2. Midi Loops


3. Drummer Loops
4. Pattern Loops
Audio Loops have a waveform image. You can’t edit the MIDI or change the source. You can however, chop up the loop with your scissors, place them where you want them and use FX to manipulate the sound. It’s fair to say that your hands are much more tied using audio
MIDI Loops with a note in them, Logic will create a new track and load up the instrument for you after you drag and drop. Using Midi loops gives you the advantage of changing the note content and changing the software instrument at will.
Drummer Loops can customize to fit your project. You can only add Drummer Loops to an existing Drummer track if it's of the same type (Acoustic, Electronic, or Percussionist). If you drag the Drummer Loop to a track played by a different drummer, Logic Pro automatically creates a new Drummer track with the drummer assigned to that loop. Drummer is really a Midi track in disguise. You can convert the Drummer to Midi by right clicking and choosing Convert> Convert to Midi Region.

Pattern Loops


There is a new kind of Loop and it is called a Pattern Loop. It is directly tied to the new Step Sequencer in Logic that allows you to create, edit, and manage the step sequences called “Pattern Regions”. I like to think of it as a new format that we can use to make music.


This is not another kind of instrument. Pattern Regions can be used with any software instruments track. While it does make it easier to input notes (as opposed to the midi editor), it does have a bit of a learning curve.
To start, use the Pattern Loops and look at the Step Sequencer (key command = e). Listen to the part and begin editing by adding and removing notes. From here, I want you to select the Pattern Browser and select a Bass, Drum, or Melodic Pattern.

Now, we will select attributes to edit within the pattern. Among them we have Velocity, Gate, Tie, Note, Octave, Loop Start/End, Note Repeat, Chance, Start Offset, Step Rate, and Skip.
Select the “Edit Mode Selector” button and choose velocity. Now you can change the velocity values of the selected notes. Use “Note Repeat” to create stutter/glitch effects and use “Tie” to string together the individual steps (good when forming chords and sustained notes).
You can quantize, or automatically align, the timing of individual MIDI notes in the Piano Roll Editor. This is useful when regions in the track contain the right notes, but are not perfectly in time or aligned with the project. When you quantize the timing, items are adjusted to the selected note value. You can quantize the timing of regions with drums, single-note instruments, and chordal or polyphonic instruments. You can now quantize Audio as well using Flex-Time.
The Time Quantize controls quantize notes and other items non-destructively, for playback only. The original timing is never lost, and can be recalled by setting the value to off. Double-click a region in the software instrument track that you want to quantize to open it in the Piano Roll Editor. From the Time Quantize pop-up menu, choose the note value you want to use to quantize the timing of the selected items. To set the degree of quantization, drag the Strength slider left or right. To set the degree of swing, drag the Swing slider left or right.
It is time to apply what you have learned. Have fun doing what you love. Thank you for reading.
