
5 minute read
Inserting Content


Tomove a 3D design into a 2D LayOut presentation, you simply insert the SketchUp model into LayOut. You can insert all sorts of content, including SketchUp models, images, and text, to describe your design. Any inserted content can be lightly edited in LayOut, or seamlessly sent to a program more suited for editing the specific file, while maintaining the dynamic link. In this chapter, you will insert and edit all of LayOut’s insertable entities.
Working W i T h Ske T chU P Mo D el S
Advertisement
Hands down, the most important file you’ll insert into LayOut is the SketchUp file (.skp). The dynamic link between a SketchUp file and a LayOut presentation allows more than one person to work on a project. For example, someone could work on the text while someone else works on the presentation. By presenting your 3D model as 2D drawings and diagrams, you will be able to accurately and efficiently describe your designs and ideas.
new layout Presentation
To begin your new LayOut presentation, follow these steps:
1. Open LayOut and start a new presentation. Select the BIC_11x17 Landscape - Linear title block that you created in the last chapter, or you can choose any title block you want.
2. Within the Layers Inspector, unlock and set the current layer to DRAWINGS. Anything that you insert into SketchUp will typically be assigned to this layer.
Inserting The File
To insert the SketchUp file, follow these steps:
1. Click on the File drop-down menu and select Insert. This launches the Open dialog box.
2. Navigate to the Class Files folder for this chapter and select the BIC_Denver Row House.skp file.
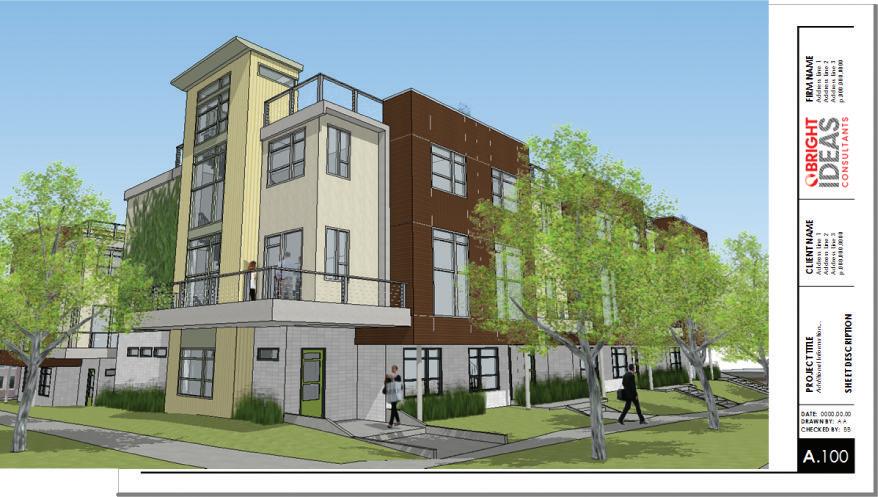
3. Click on the Open button at the bottom-right corner of the dialog box. The SketchUp model will be inserted into a viewport in your LayOut presentation (Figure 14.1).
Assigning a Scene
The new viewport will be set to Last Saved View. This is the camera view that was shown when your model was last saved. Every time you save your SketchUp model, the Last Saved
View will change. It is always best to assign a static view, or scene, to the viewport. To assign a scene in the SketchUp Model dialog, follow these steps:
1. Using the Select tool, select the viewport.
2. In the SketchUp Model Inspector, set the Viewport Scene to LO_Perspective 01 and the Rendering setting to Hybrid.
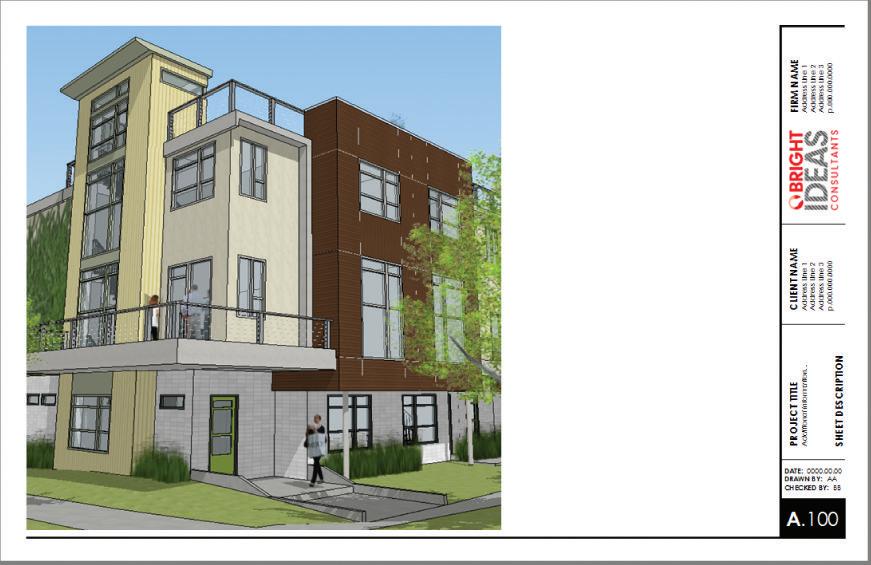
3. Using the Select tool, expand the viewport so that it encompasses most of the presentation area on the page (Figure 14.2).
4. If Auto-Render is off, render the models manually by right-clicking on the presentation background and choosing Render Models on Page.
clipping Mask
A clipping mask lets you control what part of an object you see. This is helpful when you’re cropping viewports and images in LayOut. Clipping masks work with images and SketchUp model viewports. Just follow these steps:
1. Activate the Rectangle tool and encourage inferences from the top-right and bottom-left corners of the title block. Click once to start the rectangle where the inference lines converge.
2. Move your cursor away from the start point to draw a shape covering the portion of the viewport you want to see (Figure 14.3).

To edit a clipping mask, double-click on the masked viewport/image with the Select tool. Use the Select tool to move and scale the clipping mask shape. Sometimes it is easier to just right-click on the clipped object, choose Release Clipping Mask, and then edit the shape and re-create the clipping mask.
TIP Use any of the Drawing tools to create a shape for clipping. The final clipping mask shape must be one complete shape, not a group or collection of shapes. Use the Split and Join tools to finalize a complex clipping mask shape.
editing the Model
A SketchUp model can be opened directly from LayOut, which will create a seamless link between SketchUp and LayOut. To enhance your design and see the results within your presentation immediately, follow these steps:
1. Right-click on the viewport and choose Edit in SketchUp.
2. Make your changes to the SketchUp model.
3. Close the model and save it.
4. All of the viewports linked to that model will be updated when the file is saved. If Auto-Render is off, you will need to render the viewports manually.
Working W i T h iMA ge S
Images provide another level of information and complement the style of visual information. You can insert all sorts of images, including locator maps from Google Earth or Google Maps, project photographs, watermarks, and other diagrams.
Inserting Images
LayOut offers the option to insert images as .jpg or .png files. A .png file contains an alpha or transparency layer. This transparency gives you the ability to create watermarks without having to create elaborate clipping masks in LayOut. To insert an image, just follow these steps:
1. Click on the File drop-down menu and choose Insert.
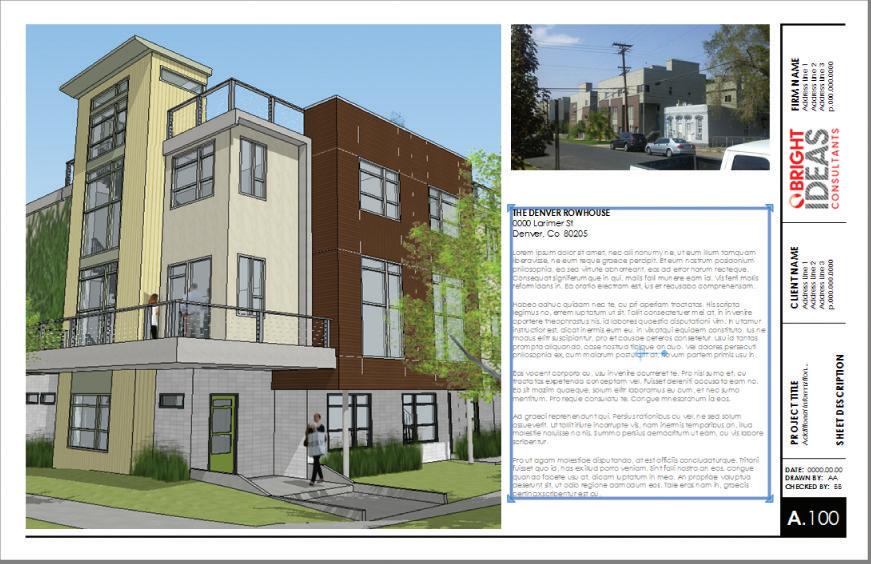
2. Navigate to the Class Files folder and select the BIC_01 - Site Context.jpg file. Click the Open button at the bottom-right corner of the dialog.
3. Using the Select tool, scale and reposition the image on the presentation area as shown in Figure 14.5. When scaling, be sure to use a corner grip and hold the Shift key to lock the aspect ratio.
Editing Images
The Edit Image command allows you to work seamlessly between LayOut and your favorite image editor. Use an image editor to touch up photos, and crop, scale, and resize images. Just follow these steps:
1. Right-click on an image and choose Open with Photoshop, or whatever image editor you assigned in Chapter 6, “The Professional’s SketchUp Environment.”

2. Modify the image within your image editor.
3. Close and save the file.
4. The image automatically updates in LayOut. If it does not update immediately, rightclick on the image and choose Update Reference.
Working W i T h Te XT
Insert text into a presentation to explain the graphics and include details such as schedules, notes, and drawing lists. The dynamic link enables the text to be edited in a word processor, which will have additional helpful features such as spellcheck.
inserting Text
You can insert text as a .txt file or an .rtf file. You can’t save visual text properties (such as colors, fonts, and formatting) in a .txt file, which limits its usefulness as an import. An .rtf file can store all of the visual properties you apply to text. Once you have created your text in a word processor, you can save the file as an .rtf file and insert into LayOut. Just follow these steps:
1. Click on the File drop-down menu and choose Insert.
2. Navigate to the Class Files folder for this chapter and select the Denver Rowhouse Description.rtf file.
3. Click on Open.
4. Reposition and scale the text as desired. See Figure 14.6.
TIP you can export spreadsheets to .txt files and then import them into layout, although your formatting options will be limited in layout. Typically, the best solution is to build spreadsheet-type graphics in layout. See the “Schedules” section in chapter 20, “construction Documents.”
editing Text
The text is now part of your presentation, but you can still edit it with your favorite word processing program. To edit text outside of LayOut, follow these steps:
1. Right-click on the text and choose Edit Text.
2. Modify the text in the default text editor.
3. Close the file and save your changes. You will see the text update within LayOut.
TIP When you double-click on text and edit in layout, you will break the dynamic link between the inserted file and the layout text. There is no way to relink edited text without reinserting the original file.
c h APT er Poin TS
☑ Right-click on any linked content to open with the external editor set in Chapter 6 “The Professional’s SketchUp Environment.”
☑ Editing text within LayOut breaks the dynamic link. Typically, editing the bulk of your text in a word processor and then inserting that text into LayOut works best. Once it’s inserted, make all of your final text edits in LayOut.
☑ You can manage all of your inserted content, or references, within the Document Setup c References dialog. From there, you can relink, unlink, and edit in an assigned external program.


