Note: A Membrane Change Tutorial is available for online viewing at www.sentec.com/tv/v0.
Inserting Sensor into Membrane Changer 1. Verify that the sensor is clean before changing its membrane. If necessary, carefully wipe off any residue from is o pr the sensor’s surface (including op 70 an % ol membrane, housing, groove and cable) with 70% isopropanol (for other approved cleaning agents refer to www.sentec.com/ifu).
1
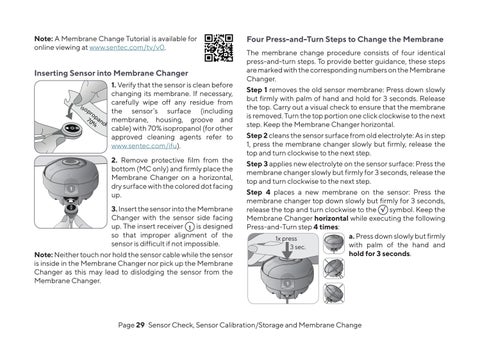
2. Remove protective film from the bottom (MC only) and firmly place the Membrane Changer on a horizontal, dry surface with the colored dot facing up. 3. Insert the sensor into the Membrane Changer with the sensor side facing up. The insert receiver 1 is designed so that improper alignment of the sensor is difficult if not impossible.
Note: Neither touch nor hold the sensor cable while the sensor is inside in the Membrane Changer nor pick up the Membrane Changer as this may lead to dislodging the sensor from the Membrane Changer.
Four Press-and-Turn Steps to Change the Membrane The membrane change procedure consists of four identical press-and-turn steps. To provide better guidance, these steps are marked with the corresponding numbers on the Membrane Changer. Step 1 removes the old sensor membrane: Press down slowly but firmly with palm of hand and hold for 3 seconds. Release the top. Carry out a visual check to ensure that the membrane is removed. Turn the top portion one click clockwise to the next step. Keep the Membrane Changer horizontal. Step 2 cleans the sensor surface from old electrolyte: As in step 1, press the membrane changer slowly but firmly, release the top and turn clockwise to the next step. Step 3 applies new electrolyte on the sensor surface: Press the membrane changer slowly but firmly for 3 seconds, release the top and turn clockwise to the next step. Step 4 places a new membrane on the sensor: Press the membrane changer top down slowly but firmly for 3 seconds, release the top and turn clockwise to the √ symbol. Keep the Membrane Changer horizontal while executing the following Press-and-Turn step 4 times: a. Press down slowly but firmly 1x press with palm of the hand and 3 sec. hold for 3 seconds. 1
1
1 1
Page 29 . Sensor Check, Sensor Calibration/Storage and Membrane Change