
MONORAIL and AMS
Profiled linear guideways and integrated measuring systems
Product catalog
5 MONORAIL
5.4 Accessories
5.4.1
5.4.2
6 MONORAIL BM
6.6.3
8 MONORAIL BZ
9 MONORAIL AMS 3B
10 MONORAIL AMS 4B


MONORAIL MR
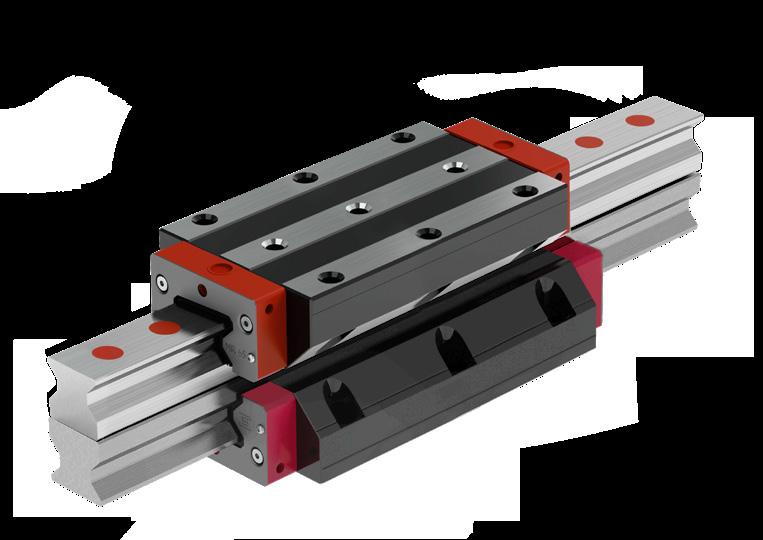
(Fig. 1) High rigidity, great dynamic and static load carrying capacity, outstanding running smoothness and the total enclosure of the carriage are the main features of the MONORAIL guideway. These properties result in higher machining rates while enhancing geometrical accuracy and surface quality of the machined workpieces. Our highly rigid MONORAIL provides improved vibration behavior, smaller vibration amplitudes and thus extends tool life.
More than two decades of experience in the construction and application of rollertype frictionless guideways, with >11 million carriages successfully deployed in the field, and the latest technologies in product development and serial production: all of this has been incorporated into the latest generation of MR 4S carriages for even greater customer benefit. The MONORAIL MR is a frictionless guideway that is costeffective for the user and meets the requirements of modern mechanical engineering.
MONORAIL BM
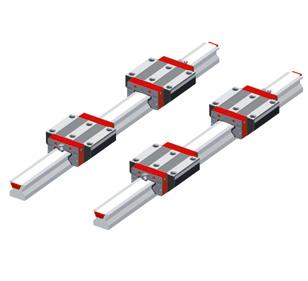
(Fig. 2) SCHNEEBERGER‘s MONORAIL BM ball guideway features excellent dynamic properties and many commercial benefits. Designed with a small number of cleverly arranged components, it provides for excellent running properties due to the small number of transitions in the ball tracks, which lead to very quiet running, low pulsation and low friction as well as high travel speeds. The use of a trapezoidal rail section results in an extremely rigid guideway coupled with a substantial reduction in servicing time as additional wipers can be changed without dismantling the carriage. Complete sealing of the carriage guarantees maximum reliability coupled with a long service life. This robust and economical guideway rounds off SCHNEEBERGER‘s range of products for industrial applications with high demands on speed, reliability and consistant running properties.
MONORAIL BM WR / BM SR
(Fig. 3) SCHNEEBERGER‘s MONORAIL BM WR / BM SR systems are linear bearings made from corrosion-resistant steel and based on the MONORAIL BM ball profile guideway. They have been specially developed to meet requirements that are beyond the limits of what conventional coatings on linear bearings can cope with. This is often the case, for example, in processes where corrosion has a negative impact on conveying the products. The MONORAIL BM WR/ BM SR also features the proven characteristics of the MONORAIL BM, such as excellent running properties, high travelling speed and a long service life.
MONORAIL BZ
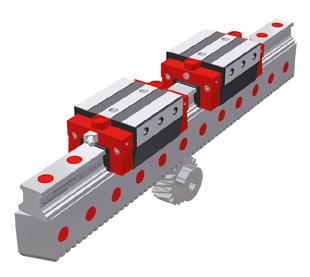
(Fig. 4) SCHNEEBERGER‘s MONORAIL BZ systems are high-precision linear guide systems with integral rack drive, based on the company‘s proven MONORAIL BM profile guideways with balls. The benefits resulting from the integration of a profile guideway and an extremely precise rack drive mainly come into their own in the handling and automation industries, in laser and water-jet cutting tools as well as in woodworking machines. Outlay on the production of machine beds, the installation and alignment of the guideway and gearing are substantially reduced. Single piece rail systems are available up to a length of 6 metres. The design of the MONORAIL BZ provides for superb operating characteristics, high load-bearing capacity and rigidity together with a long service life thanks to the use of the tried-and-tested MONORAIL BM profile guideway and to the high transmittable forces, smooth running and optimum positioning accuracy offered by ground, hardened and precise helical gearing of superlative quality.
Fig. 1
Fig. 2
Fig. 3
Fig. 4

AMS 3B
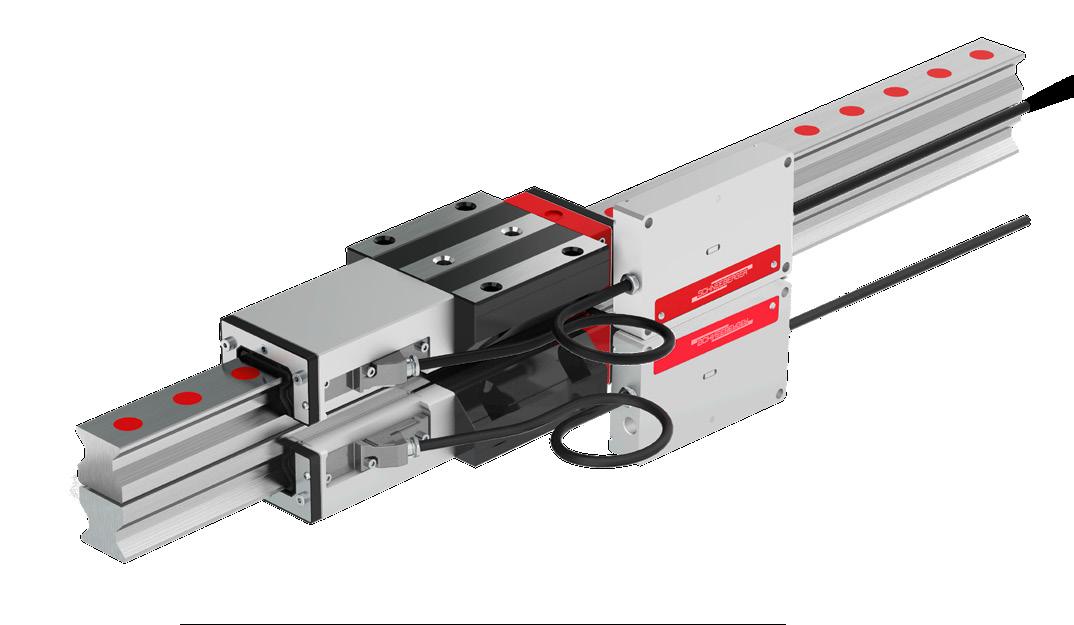
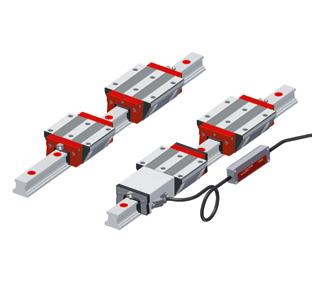
(Fig. 5) The MONORAIL AMS 3B is an integrated magneto-resistive measuring system for absolute distance measurement based on the MONORAIL MR roller profile guideway. This results in the provision of a compact axis with linear measurement and guidance specially for machine tool applications. No additional assembly or adjustment of the measuring system is required, which is reflected by cost savings in machine design, manufacture and servicing. The accuracy and process reliability of the machine are also improved. The sturdy housing for the read-head has a complete wiper system consisting of longitudinal and cross wipers, which provide optimum protection for the measuring system. AMS 3B is available in both analog and digital versions.
The AMSA 3B analog version has a voltage interface of 1 Vpp for connection to all standard control systems, and forms the basis for the AMSD 3B digital version. The profile rails are thus identical and are compatible with both versions. The AMSD 3B version has an incremental, digital interface and a range of reading head options that permit different resolutions and allow the system to be adapted to control systems with different input frequencies.
AMS 4B
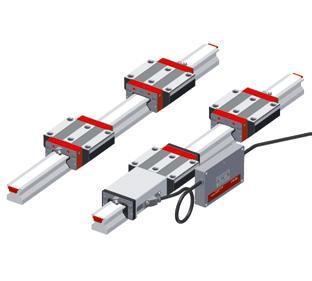
(Fig. 6) The MONORAIL AMS 4B is an integrated magneto-resistive measuring system for distance measurement based on the MONORAIL BM ball profile guideway. In measuring terms, the AMS 4B is the same as the AMS 3B; it offers the same performance in terms of assembly, cost savings, accuracy and process reliability. AMS 4B products are preferred for use in applications that make major demands on travelling speed and require good resistance to acceleration and vibration.
AMSABS
(Fig. 7) The MONORAIL AMSABS is an integrated magneto-resistive measuring system for distance measurement with an absolute interface. The AMSABS 3B is based on the MONORAIL MR roller profile guideway, while the AMSABS 4B is based on the MONORAIL BM ball profile guideway. New features have been added to the proven benefits of the AMS products. These simplify the use of distance measuring systems in industrial environments. Because of the absolute nature of the measuring system for distance measurement, there is no longer any need for a reference run after switching on. This saves time, and thus saves costs. In addition, redundancy of information processing increases operational reliability. SCHNEEBERGER provides an absolute interface with various cable lengths to connect it with the SSI, SSI+SinCos, FANUC, Mitsubishi and Siemens Drive CliQ® controllers.
AMSABS 3L
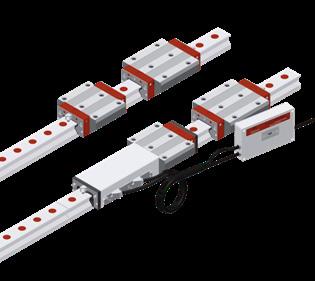
(Fig. 8) The MONORAIL AMSA 3L is an integrated magneto-resistive measuring system for distance measurement based on the MONORAIL MR roller profile guideway with an analog voltage interface. It is SCHNEEBERGER‘s newest product, and is designed for use with very long axes. The AMSA 3L is made possible by the very precise construction of the measuring rails, in both mechanical and measuring terms. The special design of the rail joints, combined with the AMSA 3L reading head, means that it is possible to travel across the joints and to make the measuring axes as long as you wish.
Other features of the AMSA 3L include fully interchangeable individual rails, carriages and reading heads, and reading heads with integrated electronics. A special production process also ensures that AMSA 3L components are widely available around the world. The AMSA 3L has an analog voltage interface of 1 Vpp for connection to all standard control systems.
Fig. 5
Fig. 6
Fig. 7
Fig. 8
1.1 Features of the MONORAIL system

1.1.1 O-geometry
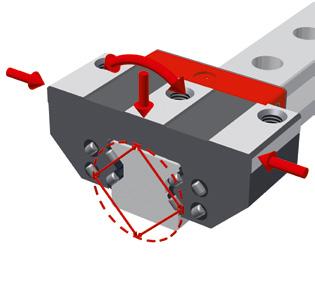
(Fig. 9) Large internal spacings of the load carrying surfaces are implemented with what is called an O-arrangement of the guideway. In conjunction with roller tracks that are offset by 90°, this achieves a uniform and high absorption of forces from all directions and provides high moment rigidity.
1.1.2 Roller with a convex ‘barrel’ profile
(Fig. 10) Linear guideways have a significant influence on the overall rigidity of a machine tool. With roller MONORAIL MR, the demonstrably high degree of rigidity is achieved by using rollers, with a convex profile, as rolling elements and the optimized cross-sections of the carriage and the rail.
Compared with a ball guide, a roller guide has a flat and much larger contact area, which results in a far greater load carrying capacity.
The barrel shape enables the contact surface to adjust to the particular load and provides a smooth transition from the load zone to the unloaded recirculation area. This results in a significant reduction in wear since it avoids edge loading coupled with minimum roller friction.
1.1.3 Ball with 2-point contact
(Fig. 11) The MONORAIL BM is a modern, 4-row ball guide with O-geometry. Even when preloaded and under load, a ball that is in the load zone only contacts the track contour of the rail and the carriage at two diametrically opposed points. Compared to a guide with 4-point contact, the precision fit of the tracks to the ball provides significantly greater load carrying capacity. Friction is minimised as the balls roll more or less without any differential slip, which results in smooth, even running.
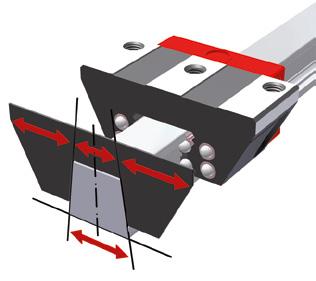
1.1.4 Trapezoidal rail profile
(Fig. 12) The trapezoidal rail profile meant it was possible to optimize the carriage cross sections and the connection of the base surface of the rail to the sub-structure to achieve the highest possible rigidity. This rail profile enables easy servicing since additional wipers can be replaced directly on the rail without any complicated removal of the carriage.
Fig. 9
Fig. 10
Fig. 11
Fig. 12
1.1 Features of the MONORAIL system



1.1.5 In one piece up to 6 metres long
(Fig. 13) SCHNEEBERGER offers guiderails for all its products in single piece lengths of up to six metres. As a result, fewer butt joints between rails are required on long guideways. This not only simplifies assembly work, but also offers improved accuracy and extends the service life of the system.
1.1.6
Through-hardened carriages
(Fig. 14) The steel body of the carriage is a critical element if a machine is to have a long service life with a constant level of precision. In order to satisfy these high demands, even under extreme loads and without any plastic deformation of the carriage throughout its entire period of use, SCHNEEBERGER uses high-grade bearing steels in which not just the running surfaces, but the complete carriage body are hardened. Even when subjected to loads exceeding their recommended levels, MONORAIL carriages maintain their specification as no plastic deformation can occur.
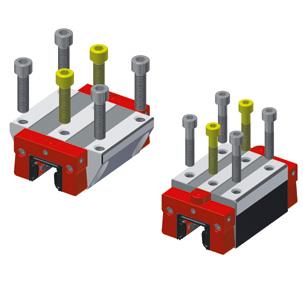
1.1.7 6 attachment holes per carriage
(Fig. 15) When a carriage is is subjected to tensile forces, the rigidity achieved is largely dependent on the way that it is connected to its surrounding structure. In order to achieve the maximum degree of rigidity, all SCHNEEBERGER carriages have six threaded fixing holes in the top of the carriage.
1.1.8
Unique running characteristics
(Fig. 16) Particular attention was focused on the run-in area of the rollers from the unloaded to the loaded zone. This area was geometrically balanced to provide very smooth operation, i.e. minimum travel pulsation, pitch movement and noise for both low and high speed motion
Fig. 14
Fig. 15
Fig. 16
1.1 Features of the MONORAIL system
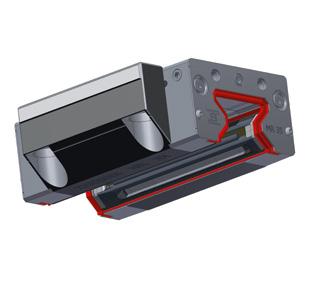

1.1.9 Complete sealing
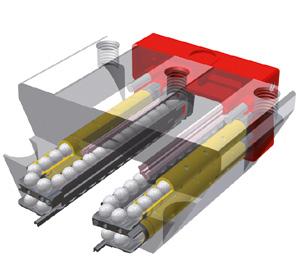
(Fig. 17) MONORAIL carriages are equipped as standard with twin-lipped cross wipers on the ends and top and bottom longitudinal wipers. Together with additional sealing of the gaps between the front plate and the steel body, these provide an exceptionally efficient sealing system. The ingress of dirt is therefore effectively prevented and lubrication losses are reduced to a minimum, which results in a significant increase in service life. Correct function of the wipers is improved even further by the smooth, ground surface of all sides of the rail. SCHNEEBERGER also offers various solutions to close the rail fixing holes perfectly flush.
1.1.10 Rolling element recirculation parts made of synthetic material
(Fig. 18) The return passage of the rolling elements has a substantial influence on the running properties of the carriage. For this reason, all SCHNEEBERGER products are fitted with synthetic recirculation parts. Apart from the reduction in noise, the synthetic components have been designed to form an additional reservoir of lubricant. The additional lubricant can substantially extend the service life of the carriage.
1.1.11 Versatile lubrication connection
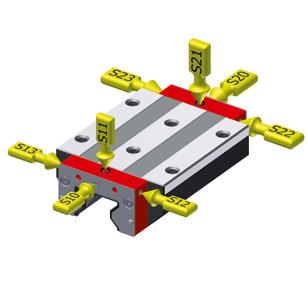
(Fig. 19) Carriages have a range of lubrication connections (on both sides on the front face, at the sides and on top) that can be prepared for connection to a lubrication supply in line with customers’ specifications. This allows the connection of the lubrication supply to be connected in the best way to suit the type of lubrication and the specific installation involved. Where oil lubrication for special installation positions is required, both sides of the carriage can also be independently supplied with lubricant.
1.1.12 Visible configuration of the lubricant distribution
(Fig. 20) The visible configuration rules out any possibility of confusion. In standard lubricant distribution (black pin is visible), all four running surfaces have a lube connection. The lubricant is distributed on all tracks in the front plate and redirection units.
In separate lubricant distribution (gray pin is visible), two lube connections are used, which supply the right and left tracks separately.
Fig. 17
Fig. 18
Fig. 19
Fig. 20
1.1 Features of the MONORAIL system


1.1.13
Replaceable wipers
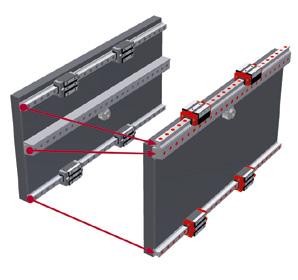
(Fig. 21) The cross wiper is mounted as a separate element in the front plate housing and can be removed in an axial direction once the front panel has been removed. A hinge in the center of the wiper allows it to be deformed without being destroyed, and removed via the guideway. This ensures that the wiper can be replaced easily and without removing the carriage. A new wiper can be exchanged between two carriages with no any problem.
1.1.14 Front panel made of stainless steel
(Fig. 22) The front panel covers the red front plate and is firmly connected to the body by four screws. The outside of the front plate is therefore protected against environmental influences. The front panel also gives the front plate greater stability and the cross wiper is protected against damage. The front panel ensures precise attachment of accessories, such as additional wipers or lubrication plates.
1.1.15
Pressure-tight lubrication channels
(Fig. 23) The lubricator is firmly connected to the front plate by ultrasonic welding. As a result, pressure-tight lubrication channels are formed inside the components. The lubricant applied through the lube connection can get to the rolling elements and lubrication reservoirs safely and precisely, even at high pressures. This therefore ensures that the lubricant is sufficiently distributed, even when the carriage is static.
1.1.16 Integral racks
(Fig. 24) Rack systems offer a high-grade gear rack that is integated into the guiderail. Single piece rail lengths of 6 metres and the possibility to butt joint rails means very long traverse lengths can be achieved with a high degree of accuracy. Integral construction reduces the amount of manufacturing, assembly and logistics compared with a system with a separate rack, which results in substantial cost savings. It is now possible to construct a machine axis, that used to require three precision support surfaces with only two. It is no longer necessary to do any time consuming alignment work between the guide system and the rack.
Fig. 21
Fig. 22
Fig. 23
Fig. 24
1.1 Features of the MONORAIL system
1.1.17 Integrated linear scales
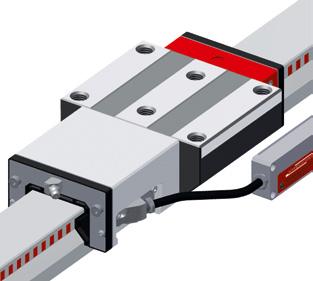
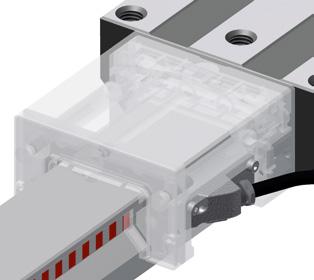
(Fig. 25) Combining a high-precision linear encoder with a MONORAIL guide rail results in an integrated measuring system that is simple to install without the need for any seperate assembly or adjustment work. This provides cost-savings in the design, manufacture and maintenance of equipment. With its integrated systems, SCHNEEBERGER supplies solutions that offer a substantial reduction in complexity when constructing machine axes with direct linear scale systems.
1.1.18 Magneto-resistive measuring principle
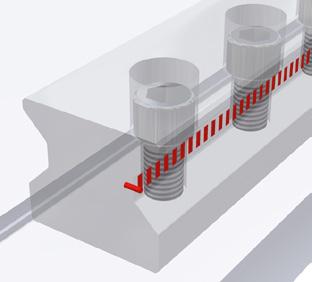
(Fig. 26) The sensor is based on a specially adapted magneto-resistive measuring process. If any relative movement occurs between the sensor and the measuring scale, the change in field strength results in an easily measurable change in electrical resistance. Any interference caused by temperature, superimposed magnetic fields, displacement and ageing is minimised due to the bridge circuit. The sensing head works continuously, which ensures that the function of the sensor is not affected by any particles. The sensing process operates so well that no adjustment work is necesary after service exchange of a measuring head.
1.1.19 Position measurement close to the process
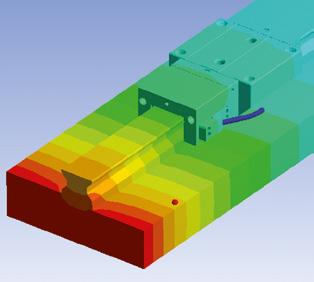
(Fig. 27) A good thermal connection between the measuring system and the bed of the machine is provided, firstly, by the extensive connection of the guiderail to the integral measuring scale and, secondly, by the rigid attachment of the guiderail to the bed of the machine. The benefit of this is that changes in the temperature of the bed of the machine are transferred directly to the measuring system. The good thermal interconnection between the measuring standard, the guiderail and thus the bed of the machine means that these machines do not require any reference points or temperature sensors to achieve excellent process stability.
1.1.20 Thermal expansion like steel
(Fig. 28) The magnetic measuring scale is installed in a groove in the rail section. Use of a specially adapted ferromagnetic material ensures that the longitudinal expansion of the scale, caused by thermal influences, is identical to the expansion of the steel bed of a machine.
The measuring standard is firmly attached at both ends to the guide rail and has exactly the same rate of expansion as the guide rail. No compensation for temperature is therefore required when machining steel parts.
Fig. 25
Fig. 26
Fig. 27
Fig. 28
1.1 Features of the MONORAIL system


1.1.21
One reading head for all sizes
(Fig. 29) The measuring scale is positioned identically on all rail sizes, meaning a single reading head can be used for all sizes of the product group concerned. The measuring scale is fixed very robustly in the rail and any effect of wear is taken by the reading head slider. All reading heads can be used on all models of rail supplied. These 3 points mean that only a small service stock of reading heads is needed to support a high volume of installations. The new generation of reading heads offer increased waterproofness to IP68 and are made of rust-resistant materials. The connections between parts are also resistant to chemical substances. This ensures that SCHNEEBERGER AMS products retain their proven characteristics even in areas where they are constantly exposed to water,aggressive cooling lubricants or other emulsions.
1.1.22 Protected measuring scale
(Fig. 30) Following production, the integral measuring scale is protected from mechanical damage and magnetic interference by an extremely hard, non-magnetic cover strip.Using a special manufacturing process, the strip is laser welded to the rail which reliably protects the measuring scale from the effects of coolants and wear and tear.Measuring scales are consequently extremely robust and reliable.
1.1.23
Supply of complete axis sets
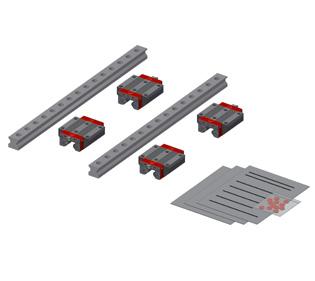
(Fig 31) If required, SCHNEEBERGER products can be supplied as sets. This means that customers receive complete rail and carriage sets built up and checked to their requirements. The protection required is also adapted to suit individual requirements. Assembly by the customer is therefore limited to essential tasks such as aligning the systems to the surrounding structure, assembling the carriages, connection to the drive elements and lubrication system as well as hooking up the sensor system connection to the control system.
Fig. 29
Fig. 30
Fig. 31


2.1 Features and options


2.1.1

Accuracy classes

(Fig. 32) The four accuracy classes allow the user to select both the guiderails and the carriages in line with specific application and design requirements. Accuracy classes define the running accuracy of the rails and determine the dimensional tolerances of the carriages.

Highly accurate

Very accurate
Accurate
Standard


2.1.2
Dimensional tolerances
(Fig. 33) MONORAIL carriages and rails are manufactured independently of each other, both to very tight tolerances, and are therefore completely interchangeable. This means that any carriage can be used on any rail of the same size without any influence on the preload level because the preload is determined by the rolling elements of the carriage. For the dimensional differences between any carriages on any rail, the values from column one of the following table are applicable.
Accuracy classes
Tolerances between carriages and rails
Measured at the middle of the carriage and in any rail position
Values only valid up to 1 m rail length
Max. difference in measurement between the carriage on a rail when products are delivered as a system (rails with carriages)
Measured at the middle of the carriage and at the same rail position
The parameters are doubled for ball products and products delivered individually
Max. dimensional difference of the carriages between 2 or more rails, standard
Measured at the middle of the carriage and at the same rail position
Fig.
Fig.
Fig.
Fig.
2.1 Features and options
2.1.3 Matched carriages
All the carriages in a set are fitted one behind another on a production norm, and their top and side joint surfaces are ground smooth. Then the main dimensions A and B2 are measured on a test rail, and the carriages would then be paired up. There are two quality levels of carriage matching.
2.1.4 Matched rails
With "matched rails", we search the data to find suitable rails with similar characteristics. The criterion used for the selection process is the maximum difference in the run-off over the rail length, the so-called pairing tolerance. The range of all run-off reports for matched rails lies within this tolerance. Matched rails are available in four quality levels.
2.1.5 Running accuracy
The run-out accuracy of the carriages can be either linear or a wave-shaped within the tolerance limits. The maximum permissible deviation is defined by the accuracy class of a rail. The actual tolerance is determined from the above diagram as a function of rail length and accuracy class. Example: L 3 = 2000 mm with G2 accuracy gives a tolerance of 0.015 mm.

Matching carriages
Accuray classes

2.1.6 Straightness
(Fig. 36) To install profile guideway sections efficiently, it is essential to know the longitudinal degree of straightness and the curvature of a rail. As the rail section guideways are flexible components, they can deform longitudinally due to their own weight. Deformation can also be caused by the manufacturing process. In order to meet customers' installation requirements, rail straightness is optimised during manufacture. In addition to standard tolerances for rail deformation, SCHNEEBERGER offers special tolerances and / or inspection reports to a specific customer requirement.
Legth [mm]
SCHNEEBERGER
Fig. 36
2.1 Features and options
2.1.7
Preload classes
The roller guideways are preloaded to enable them to work free of play under different load conditions. Basically, while preloading increases the rigidity of the guideway, it also affects operational life and increases the push force. SCHNEEBERGER guideways are available in various preload classes to address specific application requirements. The preload classes are dependent on the dynamic loading capacity C.
Operating conditions
Very low-friction guideways for uniform loads, minimum vibrations
Characteristics
Low-friction guideways for uniform loads, slight vibrations
For high rigidity, medium, changing loads and vibrations
For highest rigidity, high impact / shock loads and vibrations, strongly changing, high loads and torques
2.1.8
Reference sides
(Fig. 37) Dependent on installation conditions of the products, the reference sides (attachment side) of the carriages and the section rails must be stated when placing an order.
A drawing of the products is the basis for this. R1 means below or right, R2 means top or left.
Reference bottom
Reference top
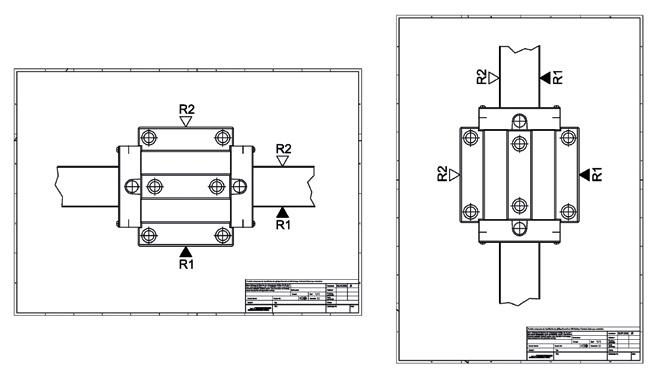
Fig. 37
2.1 Features and options
2.1.9 Lubrication connections
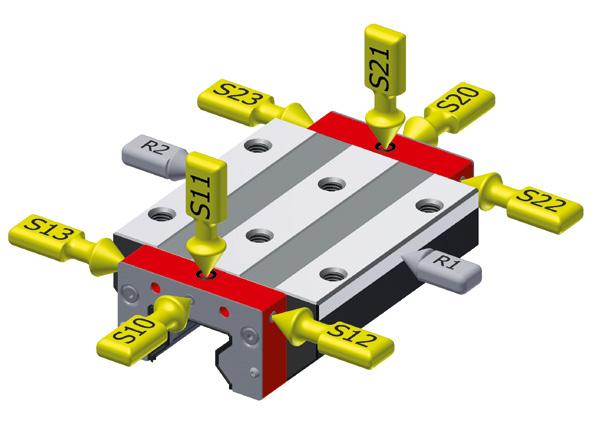
(Fig. 38) Front plates and carriage bodies have a wide range of options for lubrication connection. It is therefore possible to optimise the lubrication supply to the carriage to meet structural design. Either a lubricating nipple or a central lubrication system can be screwed into each connection. As standard, all four tracks are lubricated through one connection.
2.1.10 Separate carriage lube connections for specific mounting positions
(Fig. 39) As a special feature for certain installation positions, SCHNEEBERGER systems provide for the independant lubrication of both sides of a carriage (S32, S42). This enhances the lubrication of the guideway and thus the service life of the machine.
Position of lubrication connection is defined with line of sight to the location side R1 in accordance with the picture.

Left center
Right center
Top left
Top right
Lower left side
Lower right side
Upper left side
Upper right side
Left side
Right side
S10 + S12 + S13 + S20 + S22 + S23
locked using threaded pins
S32 + S33 + S42 + S43 locked using threaded pins (only feasible for MR)
For AMS with position of the housing P1:
S10 + S12 + S13 locked using threaded pins
For AMS with position of the housing P3:
S20 + S22 + S23 locked using threaded pins
2.1 Features and options
2.1.11
Lubrication as delivered condition
The carriages fitted to guideways can be supplied with a wide variety of lubricants according to the demands of the application, storage life and the final type of lubrication. For applications that provide continuous lubrication during installation and operating phases, oiling with oil (LN) or a light application of grease (LG) are enough. A full application of grease (LV) is recommended for applications with manual lubrication.
Oil protect
Grease protect
Full greasing
2.1.12 Friction
Push force is an important value within the system properties of a guideway. In the case of profile guideways, this is largely dependent on the friction of the sealing system. There is also friction from rolling contact and sliding friction when changing direction and returning.
Application specific frictional forces, such as the type of lubrication, the amount of external load as well as speed, are also present.
To minimize friction, SCHNEEBERGER profile guideways are manufactured with special plastics. To adjust friction from seals, sealing systems are available which have been adjusted to the application.
2.1.13 Coating
For applications where special corrosion protection is necessary, such as in cleanroom applications or due to high levels of humidity or when increased wear resistance of the surface is required, MONORAIL carriages and rails are available in hard-chrome plated versions.
The main advantages of applying this electroplated coating are:
• Excellent corrosion protection
• Very good wear resistance and surface load bearing capacity
• Smooth and good emergency running characteristics due to its micropearl structure
• Exceptional adhesion
• Consistent depth of coating
Please note that holes, threads and operating elements are not chrome-plated.
None
Hard chromium
2.2 Accessories for lubrication
2.2.1 Grease nipples
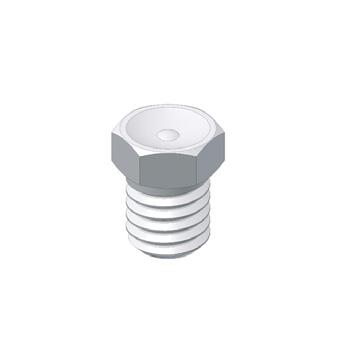
Grease nipple SN 3-T Flush type grease nipple M3

Grease nipple SN 6-T Flush type grease nipple M6
Grease nipple SN 6 Hydraulic-type grease nipple straight

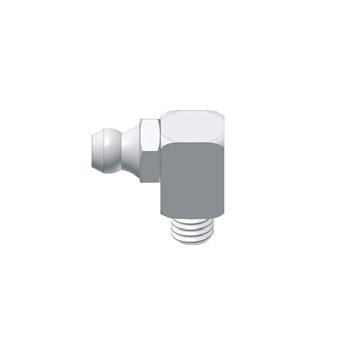
Grease nipple SN 6-90 Hydraulic-type grease nipple 90°
Grease nipple SN 6-45 Hydraulic-type grease nipple45°
2.2.2 Lubrication adapters
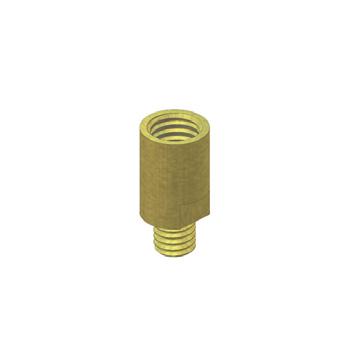
Lubrication adapter SA 6-RD-M8x1 Lubrication adapter M8 round-head
• the carriage
• the guide rail
• the connecting structure

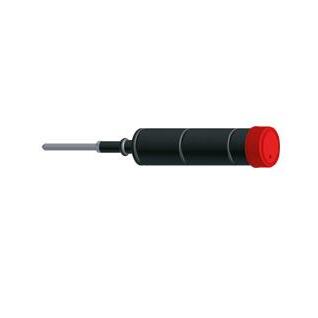
Grease gun SFP-T3 Grease gun for SN3-T and SN6-T
There are products having grease nipples, which can not be removed in the application. During rotation, this results in a collision between the grease nipple and:
In this case, the carriage must be removed from the guide rail to replace the grease nipple.
Lubrication adapter SA 6-6KT-M8x1 Lubrication adapter M8 hexagon head
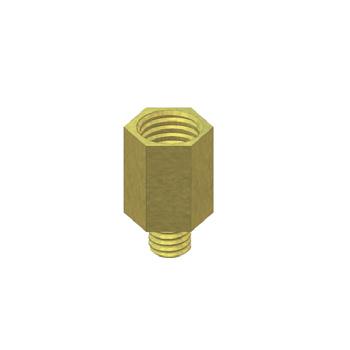


Lubrication adapter SA 6-6KT-G1/8 Lubrication adapter G1/8 hexagon head
2.2 Accessories for lubrication
2.2.3 Pipe connection
Swivel screw connection SV 6-M6-L
Swivel screw connection M6 long (aluminum sealing)
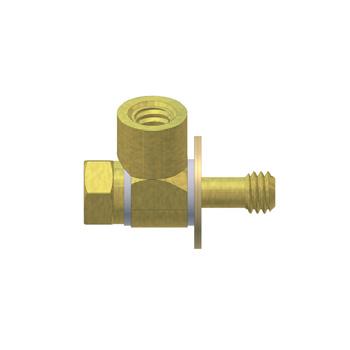
Swivel screw connection SV 6-M6
Swivel screw connection M6 (aluminum sealing)
Swivel screw connection SV 6-M8
Swivel screw connection M8 (aluminum sealing)
2.2.4 Hose connection
Screw-in connection SA 3-D3
Screw-in connection M3
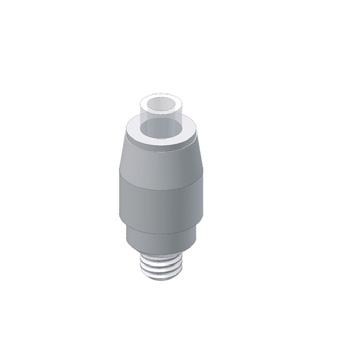
Swivel screw connection SV 6-D4-SW9
Swivel screw connection for hose connection 4mm

Screw-in connection SA 6-D4-RD
Screw-in connection M6
Swivel screw connection SV 6-M8-L
Swivel screw connection M8 long (aluminum sealing)

Swivel screw connection SV 3-D3
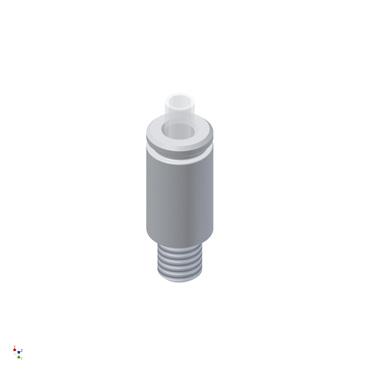
Swivel screw connection SV 6-D4-SW10
Swivel screw connection for hose connection 4mm

Swivel screw connection for hose connection 3mm
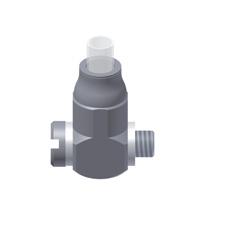
Swivel screw connection SV 6-D4-I
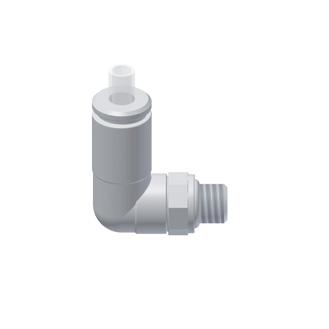
Swivel screw connection for hose connection 4mm
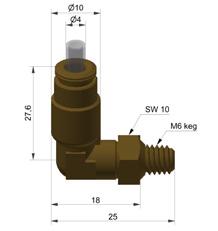
General area of application under normal conditions of use
Higher values are permissible, but are dependent on the type of carriage, lubrication, position when installed, pretension and load.
We recommend storage in packaging that corresponds to the original condition. High humidity and extreme temperatures and temperature fluctuations must be avoided. Otherwise there is a risk of condensation, corrosion and possibly separation of the grease into thickener and oil.
Materials
Rail
Roller bearing steel, hardened surfaces
Carriage Roller bearing steel, fully hardened
Rolling element
Synthetic parts
Safety instructions!
Roller bearing steel, fully hardened
POM, PAPA, TPU injection moulded
Caution: Carriages can come loose from the guide rail if they are overloaded, inadequately lubricated or improperly serviced.
Appropriate design and technical safety measures need to be taken by the user, which prevent separation of carriage and guide rail in case of an error (e.g. due to loss of rolling element). A possible variant in a design measure is a safety clamp around the guide rail. The specifications of professional associations, relevant guidelines and standards for the application in question must also be observed.
Special characteristics
The product concept for BZ MONORAIL guides provides for the manufacture of one-piece section rail guides with integral racks up to 6 metres in length. These one-piece modules can be linked together to make axes of any length.
A prerequisite for this is that the butt transition joints are machined in a process specially developed for this purpose. The individual parts are installed and aligned using fixtures that are available separately.
Special cross-members are available for the safe transportation of the long individual rails. These aluminium trusses are designed to remain attached to the component while the toothed rail is installed and aligned and only finally removed after the latter has been finally fixed in place. This ensures that the rack can be safely transported, fitted and aligned without suffering any deformation.
In comparison to other screwed systems, BZ has a large number of connections between the rack and the guide rail thanks to the use of BM MONORAIL guides with fixing holes spaced half the normal distance apart. This means that very high lateral forces can be absorbed and compact designs with a high power density are possible. For details see SCHNEEBERGER application catalog
Tooth quality
SCHNEEBERGER MONORAIL BZ guideways are fitted with integral racks. The gearing used is specially designed for machine tool applications. 19°31'42'' helical gearing using module 2.5 and module 2.0 is employed to reduce noise and to achieve smooth running. Dependent on customers’ requirements, the teeth can be formed in two different qualities
For details see SCHNEEBERGER application catalog.
Order code:
DIN quality 5, hardened and ground -Q5H-
DIN quality 6, soft, milled -Q6S-
Comparison with other drive systems
Compared with other drive solutions used for linear movements, rack drives with BZ MONORAIL offer a number of benefits. Where ball screws are concerned, these are a way of implementing several independent movements on a guide system.
BZ MONORAIL has a superior drive rigidity, which is independent of the length of the axis and independent of temperature thanks to the modular style of construction.
The rack elements are partially exchangeable when worn.
Accurately machined section rail guides and exceptionally precise rack segments result in a very smooth running pinion. The preload of the drive system thus remains constant along the full length and does not change in operation over time. In combination with suitable motors or gearboxes, self-locking vertical drives can be implemented in the event of power failure.
In comparison to linear motors, BZ MONORAIL systems represent an economical and simple alternative that offers a high degree of efficiency. They are the ideal solution when machining a wide range of materials on long axes and in the face of adverse operating conditions.
General technical data
General technical data q.v. chapter 2.1 Technical Data Guiding


4.1.1 How the measuring scale is made
(Fig. 40) The measuring strip contains two magnetic tracks: the fine incremental track with alternate N & S poles spaced at 200 µm intervals, and the reference track to determine the absolute position. The reference track can either have distance coded marks, marks set at regular intervals or even with only a single reference mark.
The measuring strip is fully integrated into the rail section. It is manufactured by first grinding a slot (1) into the finished rail section into which a strip of magnetic material (2) is inserted. This magnetic material is ground and magnetised (3). To protect the scale, a through hardened cover strip, that is magnetically permeable is used and welded to the rail (4).
4.1.2 Magneto-resistive position sensor
(Fig. 41) A relative movement between the sensor and the scale, results in a change in field strength in the magneto-resistive material leading to a change in electrical resistance that can be easily measured. The electrical circuitry of the Wheatstone bridge sensor elements means that interference from fluctuations in temperature, ageing and magnetic interference fields are kept to a minimum.
Two sinusoidal shaped signals with a 90° phase shift are obtained from the incremental magnetisation as a result of the arrangement of the sickle-shaped sensor elements. To improve accuracy, the signals from 104 individual elements, in line with the direction of measurement, are averaged. As the structure of the sensor is adapted to the magnetic division period, the influence of magnetic interference is heavily suppressed.
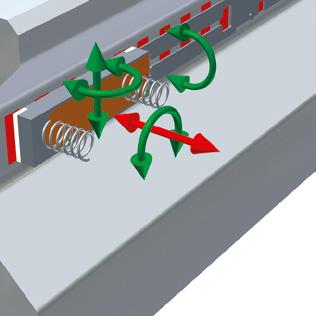
4.1.3 Positional independency of the sensor
(Fig. 42) All accuracy determining properties of the measuring signals (phase, differences in amplitude, harmonic wave characteristics, etc.) are anchored within the sensor. Therefore, even major deviations in position and twisting of the sensor do not lead to any reduction in signal quality: "The circuit remains stable."
The direct benefits are a simple exchange of the measuring head without any need for adjustment, enhanced resistance against vibration and shock as well as a wide tolerance band for the operation of the measuring heads.
Fig. 40
Fig. 41
Fig. 42
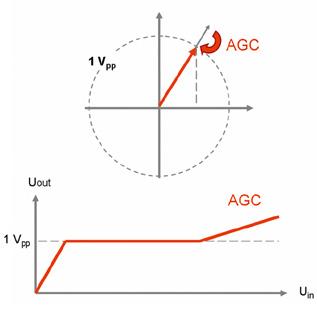
4.1.4 Operating method of automatic gain control (AGC)
(Fig. 43) The current amplitude (represented by the periodic signals) is continually determined in the electronic measuring system. In the event of any deviations, the amplitude is adjusted. Therefore, a standard output signal is provided even in exceptional cases (installation errors, external errors or removal of the slider).
4.1.5 Reference point identification
(Fig. 44) The second track carries the AMS reference marks to determine the absolute position and reference the system. The accuracy of the reference points is decisive for the machine's zero or home position. A reference point is represented by three magnetic reference markers on the reference point magnetisation. The rising and falling flanks of the reference impulse each represent one piece of reference information. The third piece of reference information is redundant and is employed to increase the operational reliability of the reference point identification system. This operating principle thus suppresses any magnetic interference and, in dubious circumstances, does not provide a reference signal whenever any interference is encountered.
Fig. 43
Fig. 44
4.2 Features and options
4.2.1 Magnetization
(Fig. 45) AMS MONORAIL products are available with different reference marks that are surface-engraved by a laser. The illustration shows the position of the measuring carriage when registering the first reference mark.
Fig. 45

Detail X:
Measuring lenght LM=L3-10-L9
Rail lenght L3
Measuring lenght LM=L3-10-L9
Rail lenght L3
Sign for standard magnetization, TR50
Reference marks every 50 mm
Sign fo distance coding, TD20, TD50
Reference top TR50 TD50
AMS with 50mm reference mark grid.
AMS with distance coded reference marks
Reference marks spaced at 50.2/49.8/50.4/49.6/50.6/49.4/../../... mm.
Reference points, 50mm pattern
Distance code, 50mm pattern
Reading head position and attachment sides
In the order designation, SCHNEEBERGER denotes the attachment position of the reading head, the position of the scale and the reference sides of rail and carriage as they are shown in the drawing above. For drawings in portrait format, the drawing shown must be rotated counter-clockwise by 90°. The following information must be included when placing an order:
Attachment side of the rail and scale position:
Reference bottom, scale bottom
Reference bottom, scale top
Reference top, scale bottom
Reference top, scale top
Reading head position:
External (mounting) housing right, reading head top
External (mounting) housing left, reading head bottom
Attachment side of carriage:
Reference bottom
Interface TSU / TSD
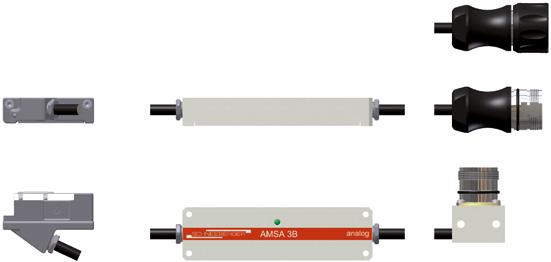
(Fig. 46) 12 pole round plug with union nut and female thread
Cable length: 3m

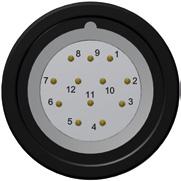
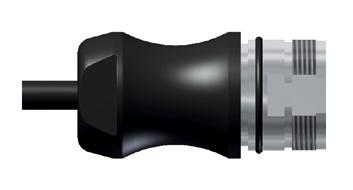
Interface TRU / TRD
(Fig. 47) 12 pole round plug with male thread
Cable length: 3m
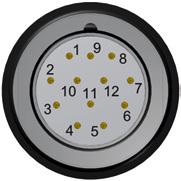
Interface TRH
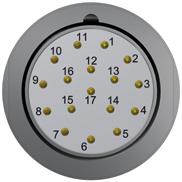
(Fig. 48) 17 pole round plug with male thread
Cable length: 3m

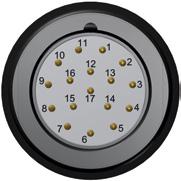
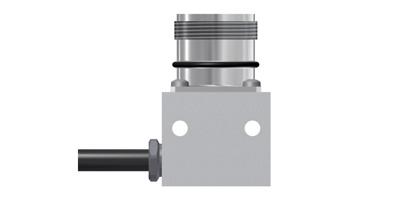
Interface TMU / TMD
(Fig. 49) 12 pole round plug built in a mounting base
Cable length: 0,3m

Interface TMH
(Fig. 50) 17 pole round plug built in a mounting base
Cable length: 0,3m

Interface TDC
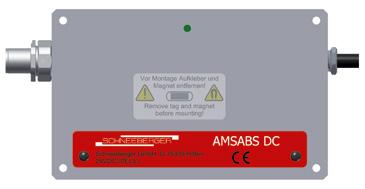
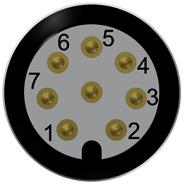
(Fig. 51) 8 pole round plug with male thread built into the electronics housing
4.3 Read head interfaces
Terminal layout
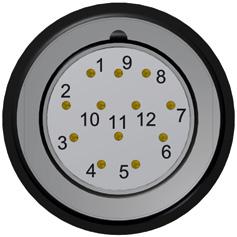
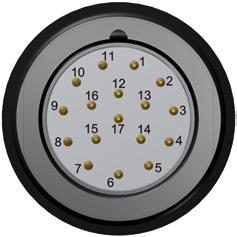

Interfaces TSU / TRU / TMU
Contact Signal Signaltype
Interfaces TSD / TRD / TMD
Signal Signaltype
1 -Ua2 - Cosine - Ua2 A quad B signal
2 +5V Sensor Supply voltage feed back +5V Sensor Supply voltage feed back
3 +Ua0 Reference signal +Ua0 Reference signal synchronized
4 -Ua0 Reference signal - Ua0 Reference signal synchronized
5 +Ua1 + Sine +Ua1 A quad B signal
6 -Ua1 - Sine - Ua1 A quad B signal
7 -Uas NC - Oas Error signal active low, minimum duration 20 ms
8 +Ua2 + Cosinue + Ua2 A quad B signal
9 - NC - NC
10 0V (GND) Supply voltage OV (GND) Supply voltage
11 0V Sensor Supply voltage feed back 0V Sensor Supply voltage feed back
12 +5 V Supply voltage +5 V Supply voltage
TRH / TMH / TSH (Interface SSI / Fanuc / Mitsubishi)
Contact Signal
1 1,2 +5V sensor
Signal type
Supply voltage feedback
2 - NC
3 - NC
4 1,3 0V sensor
Supply voltage feedback
5 - internal parameterisation
6 TxD internal parameterisation
7 1,2 +5V to 24V
Supply voltage
8 +CLK + Pulse
9 -CLK - Pulse
10 1,3 0V (GND)
Supply voltage 11 - inner screen
12 +Ua2 + Cosine
13 - Ua2 - Cosine
14 +DATA + Data
15 +Ua1 + Sine
16 - Ua1 - Sine
17 - DATA - Data
¹ If the controller is not using the line for supply voltage feedback, lines 1 and 7 and lines 4 and 10 can be combined to reduce the voltage drop or to permit longer cable lengths.
2 The contacts 1 and 7 are interconnected on the AMS side
3 The contacts 4 and 10 are interconnected on the AMS side
Interface TDC
Contact Signal
1 +24 V
2 (TXD for service only)
3 RXP
4 RXN
5 GND (0V)
6 TXN
7 TXP
8 (RXD for service only)
Function
Power supply (positive)
Communication with service program
Received data +
Received data -
Power supply (negative)
Sent data -
Sent data +
Communication with service program
Fig. 53
Fig. 52
Fig. 54
4.3 Read head interfaces
TSU/TRU/TMU analog voltage interfaces
(Fig. 55) The signals are shown inverted according to differential gain. The incremental signals are displaced by exactly 90° in their phasing. The levels after differential gain of the incremental signals and of the reference signals are 1 +/- 0.1 Vpp. The incremental signals supply valid values between 0.6 Vpp and 1.2 Vpp. On production standards, the reference pulse is set symmetrically to the intersection of sine and cosine (at 45°). The width and the phasing of the reference pulse is limited as shown in the illustration. On the receiver side, the precision of the reference mark can thus be increased by the additional use of the incremental information. This interface works with all standard control systems that support a 1 Vpp voltage interface.
TSD/TRD/TMD digital interfaces
(Fig. 56) The incremental signals A+, A-, B+, B- and the reference signals R+, R- transmit the data complementary according to RS 422. The illustration shows the positive signals. The levels of the individual signals are:
High > 2,5 V Low < 0,5 V
Rise and fall times are less than 20 ns. The minimum signal distances can be calculated from the maximum output frequency. The downstream electronics must be able to process the maximum output frequency without any problems.
Option ZN: The reference pulse is strictly synchronised with the incremental signals.
Option ZF: The reference pulse is extended to 550 µs +/- 50 µs. This option is used with evaluation electronics that cannot process multiple short-term reference impulses
The following combinations of interpolation factor, maximum output frequency and reference impulse implementation are available for all reading head interfaces.
-010-80-ZN 5 μm, interpolation 10x, max. output frequency 8 MHz
-050-80-ZN 1 μm, interpolation 50x, max. output frequency 8 MHz
-250-80-ZN 0,2 μm, interpolation 250x, max.output frequency 8 MHz
-010-80-ZF 5 μm, interpolation 10x, max. output frequency 8 MHz
-050-80-ZF 1 μm, interpolation 50x, max. output frequency 8 MHz
-250-80-ZF 0,2 μm, interpolation 250x, max. output frequency 8 MHz
Order code:
-010-80-ZN- interpolation 10fach, max. output frequency 8 MHz, reference impulse standard
Absolute interfaces TRH / TMH / TSH
(Fig. 57) The absolute information can be transferred via fully digital interfaces, or via hybrid ones. In the case of the fully digital SSI interface, the first channel (+pulse) sends a clock signal from the receiver to the measuring system; the second channel (+data) simultaneously sends the absolute position values from the measuring system to the sequential electronics unit. Another example is the fully digital “Fanuc Serial Interface”. The motor controller simply sends a request signal (REQ), rather than a pulse. From this, the measuring system calculates the clock rate, which it uses to send the position data and the supplementary data (SD) to the receiver.
The SSI+SinCos hybrid interface only sends the digital absolute initial position when it is switched on, and from then on it sends incremental additional 1 Vpp signals. The SSI interface can be connected to any commercial controller with an SSI interface. The “Fanuc Serial Interface” is designed for a Fanuc controller, and the SSI+SinCos interface is designed for a Siemens controller.
Fig. 55
Fig. 56
Fig. 57
head interfaces
Absolute interface TDC

(Fig. 58) The absolute information of the measuring system is transmitted via the Drive CliQ® communication interface, which is a real-time serial interface for bidirectional data transfer with Siemens controllers. The connection of the measuring system is suitable for safety-oriented applications and facilitates the use of the SAFETY INTEGRATED functions that are available for the Siemens SINAMCS and SINUMERIK controllers. The system meets the requirements for functional safety according to IEC 61508-1:2010.
®Drive CLiQ is a registered trademark of Siemens
4.4 Accessories - Cables
KAO 12
(Fig. 59) Connecting cable, 12 pole, socket with female thread - plug with female thread
For read head:
Order code: KAO 12-xx (xx = length in m)
Available lengths: 3, 5, 10, 15 and 20m
Order example: KAO 12-5
KAO 13
(Fig. 60) Connecting cable, 12 pole, socket with female thread - open ends
For read head:
Order code: KAO 13-xx (xx = length in m)
Available lengths: 3, 5, 10, 15 and 20m
Order example: KAO 13-5
KAO 14
(Fig. 61) Extension cable, 12 pole, socket with male thread - plug with female thread
For read head:
Order code: KAO 14-xx (xx = length in m)
Available lengths: 3, 5, 10, 15 and 20m
Order example: KAO 14-5
KAO 15
(Fig. 62) Extension cable, 12 pole, socket with female thread - plug with male thread
For read head:
Order code: KAO 15-xx (xx = length in m)
Available lengths: 3, 5, 10, 15 and 20m
Order example: KAO 15-5
KAO 16
(Fig. 63) Connecting cable, 12 pole, socket with female thread - FANUC plug
For read head:
Order code: KAO 16-xx (xx = length in m)
Available lengths: 3, 5, 10, 15 and 20m
Order example: KAO 16-5
KAO 20
(Fig. 64) Connecting cable, 17 pole, single shield, socket with female thread – FANUC plug
For read head:
Order code: KAO 20-xx (xx = length in m)
Available lengths: 3, 5, 10, 15 and 20m
Order example: KAO 20-5
KAO 23
(Fig. 65) Connecting cable, 17 pole, double shield, socket with female thread – open ends
For read head:
Order code: KAO 23-xx (xx = length in m)
Available lengths: 3, 5, 10, 15 and 20m
Order example: KAO 23-5
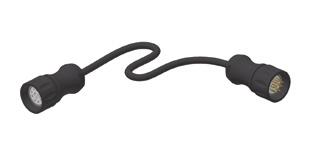
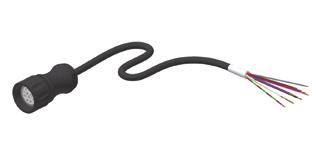
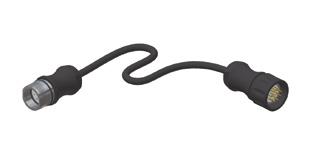

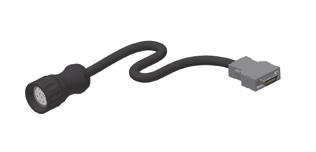


Fig. 59
Fig. 60
Fig. 61
Fig. 62
Fig. 63
Fig. 64
Fig. 65
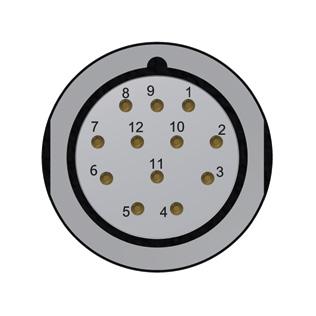

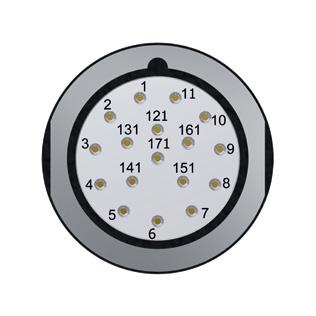
Interfaces TRU / TMU
Contact Signal Signaltype
Open ends
Color of the cables
1 -Ua2 - Cosine pink
2 +5V Sensor Supply voltage feed back blue
3 +Ua0 Reference signal red
4 -Ua0 Reference signal black
5 +Ua1 + Sine brown
6 -Ua1 - Sine green
7 -Uas NC purple
8 +Ua2 + Cosinue gray
9 - NC -
10 0V (GND) Supply voltage white / green
11 0V Sensor Supply voltage feed back white
12 +5 V Supply voltage brown / green
Interfaces TRD / TMD
Contact Signal Signaltype
Open ends
Color of the cables
1 - Ua2 A quad B signal pink
2 +5V Sensor Supply voltage feed back blue
3 +Ua0 Reference signal synchronized red
4 - Ua0 Reference signal synchronized black
5 +Ua1 A quad B signal brown
6 - Ua1 A quad B signal green
7 - Oas Error signal active low, minimum duration 20 ms purple
8 + Ua2 A quad B signal gray
9 - NC -
10 OV (GND) Supply voltage white / green
11 0V Sensor Supply voltage feed back white
12 +5 V Supply voltage brown / green
Interfaces TRH / TMH
Contact Signal Signal type
Open ends
Color of the cables
1 +5V sensor Supply voltage feedback blue
2 - NC -
3 - NC -
4 0V sensor Supply voltage feedback white
5 - Internal parameterisation -
6 TxD Iinternal parameterisation -
7 +5V to 24V Supply voltage brown / green
8 +CLK + Pulse gray
9 -CLK - Pulse pink
10 0V (GND) Supply voltage white / green
11 - Inner screen -
12 +Ua2 + Cosine brown
13 - Ua2 - Cosine green
14 +DATA + Data red
17 - DATA - Data black Terminal layout connection cable KAO 23 Terminal layout connection cable KAO 13
15 +Ua1 + Sine purple
16 - Ua1 - Sine yellow
Fig. 66
Fig. 67
Fig. 68






AMSA 3L
4 x through bore for M3 screws
System properties
Material measure
Signal period
Magnetically hard periodic N-S graduation
Working temperature 0 °C - +70 °C
Working environment
Protection class IP 68 (IP 67 for AMSABS 3L)
Transportation temperature -20 °C - +70 °C
Storable under the following storage conditions 3 years
Storage conditions
0° - 40° storage temperature < 75% humidity No chemical gases, vapors or liquids
Accuracy at the butt joint
Resolution
Hysteresis
Interface
Analog; 1 Vpp Digital; Quadratur signals RS 422 with reference and error signals; Reference pulse width 90° or 500 µs Supply
Interface Digital; TSS cycle synchronous serial interface (SSI); TF1 FANUC Serial Interface; TM1 Mitsubishi Serial Interface
Hybrid; Cycle synchronous serial and analogue interface 1 Vpp Siemens Drive CliQ® communications protocol Hybrid; Cycle synchronous serial and analogue interface 1 Vpp; TF1 FANUC Serial Interface
4.7 Order code and examples
Rails, carriages and accessories are always denoted by separate order codes. This also applies to different versions of rails and carriages.
The order codes for individual rails, carriages and accessories are in the data section of this catalogue from section 3 on. An attempt has been made here to code all versions by position in order to reduce the error rate in the ordering procedure.
Please use the following order schedule for orders that are to be supplied as a system:
Order code for MONORAIL systems
Set consisting of:
/ n x S
/ n x W
/ n x W (optional)
/ n x S (optional)
/ n x W (optional)
/ n x Z
NB
S = complete order code for a rail
W = complete order code for a carriage
Z = complete order code for an accessory
"/" = indicates everything that belongs to a set in an order
n = number, indicates products of the same type
Rails and carriages are assigned according to the order of the order items, i.e. first rail at the top, then the carriages of the first rail from left to right, then the second rail below with the carriages from left to right and so on. Cf order example 2.
This means that - if rail types and carriage types are different in the order placed - the carriages are always immediately below the relevant rail and in the sequence from left to right.

Set consisting of:
/ 2 x MR S 35-N-G1-KC-R1-918-19-19-CN
/ 4 x MR W 35-B-G1-V3-R1-CN-S10-LN
/ 2 x MRK 35 (50 pieces)
/ 8 x ZCV 35
/ 4 x SN 6-45
2 identical rails each with 2 identical carriages, accessories (additional wipers) can be clearly allocated due to the number.
Plugs for the rails are always supplied unfitted.
Example 1: Order without a layout sketch - same types of component
4.7 Order code and examples
Example 2: Order without a layout sketch - different types of component
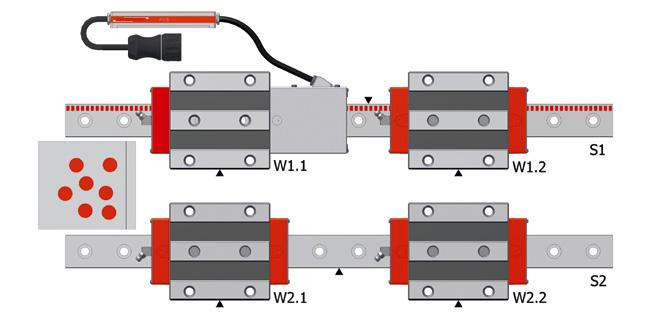
Set consisting of:
/ 1 x AMSA 3B S 35-N-G1-KC-R22-918-19-19-CN-TR50 (S1)
/ 1 x AMSA 3B W 35-B-P1-G1-V3-R1-CN-S10-LN-TSU (W1.1)
/ 1 x MR W 35-B-G1-V3-R1-CN-S10-LN (W1.2)
/ 1 x MR S 35-N-G1-KC-R1-918-19-19-CN (S2)
/ 2 x MR W 35-B-G1-V3-R1-CN-S10-LN (W2.1 + W2.2)
/ 2 x MRK 35 (50 Stück)
/ 4 x SN 6-45
Example 3: Order according to customer's layout sketch - different components

Set consisting of:
/ 1 x MR S 35-ND-G1-KC-R1-2478-19-19-CN (Teillängen L3 = 999mm/1479mm)
/ 1 x MR W 35-B-G1-V3-R2-CN-S13-LN
/ 1 x MR W 35-B-G1-V3-R2-CN-S23-LN
/ 1 x MR S 35-ND-G1-KC-R2-2478-19-19-CN (Teillängen L3 = 999mm/1479mm)
/ 1 x MR W 35-B-G1-V3-R1-CN-S12-LN
/ 1 x MR W 35-A-G1-V3-R1-CN-S12-LN
/ 1 x MR W 35-B-G1-V3-R1-CN-S22-LN
/ 5 x MRK 35 (125 Stück)
/ 4 x ZCV 35
/ 5 x SN 6
Important:
2 different rails and 2 different carriage types, uniform lubrication accessories, allocation and sequence of rails and carriages acc. to the sequence of the items in the order.
2 different rails, 2-part in each case, 5 different carriages. The rails, carriages and accessories are impossible to allocate clearly without a layout sketch.
Apart from the order designation, further information is required for the troublefree order processing of special versions of MONORAIL systems. For this purpose, the order must include a layout sketch containing the following information:
• Part-lengths and the sequence of the segments for multipart rails
• Carriage type and position in the event of different carriage types on one rail
• Position of additional wipers, lubricating panels and lubricating accessories
Example 1: Order a AMSABS 3L – Systems
AMSABS 3L W 35 - A

AMSA 3L S35
AMSA 3L S35
AMSABS 3L S 35 - P0
An AMSABS 3L - rail line, Assignment and sequence of rails and cars according to sequence of positions in the order.
Set consisting of: / 2x AMSA 3L S 35 –N –G1 –KC –R22 -3000 –CN –TR40 / 1x AMSABS 3L 35 –N –G1 –KC –R22 -3000 –CN –P0 / 1x AMSABS 3L W 35 –A –P1 –G1 –V3 –R2 –CN –S49 –LN –TMH –TS3
• The system needs an AMSABS 3L S-P0 rail for referencing. This can be placed on any position within the rail line, where reachable by the measuring carriage AMSABS L W.
• All rails have the same system length.
• All rails are prepared for butt joint on both sides.
Configuration sheet for above example:
Please note the following pointers to ensure that your MONORAIL guideways remain in peak working condition throughout their service life:
All SCHNEEBERGER products are precision components that are appropriately protected and packaged at the factory for the purpose of transport. Systems must therefore be protected from vibrations, shock and humidity when being transported and stored.
Please note the pointers on transport and installation that accompany the measuring systems.
Installation of the guideways and the covering of the holes in the rails must be carried out by qualified staff. Please refer to the Download section of www.schneeberger.com for pointers on installation.
Guideways must be adequately supplied with a lubricant that is suited to their movements and load profile as well as to the conditions under which they are expected to operate. If necessary, please contact a lubricant supplier, who will be pleased to advise you on the choice of the correct lubricant. Recommendations will also be found at www.schneeberger.com.
Prior to use, the compatibility of coolants and lubricants must be checked and verified by the user in order to preclude any detrimental effect(s) on the guideway. To protect them from dirt, hot metal chips and any direct contact with coolants, guideways should have covers fitted or be appropriately positioned.
If contact with dirt or coolant is anticipated in the course of machining operations, the fitting of additional wipers to the products is necessary. The long-term serviceability of these components must be assured by amended service intervals. Please refer to www.schneeberger.com for pointers on these products.
If the guideway gets into contact with hot chips an additional use of wipers is recommended. For further information please visit www.schneeberger.com.
The wipers on the ends as well as the additional wipers fitted to MONORAIL carriages must be examined at regular intervals for wear and tear and replaced if necessary.


Exceptional rigidity, high dynamic and static load-carrying capacities, outstanding smooth running and a fully sealed carriage are the main features of the MONORAIL MR Roller Guideway. Specifically designed for machine tools, these properties result in higher machining rates plus enhanced geometrical accuracy and surface quality of the machined component. The exceptional all-round rigidity of the products and the method of connection with the surrounding structure provide improved vibration behaviour at lower amplitudes therefore extending tool life.
The MONORAIL MR 4S carriages have a new design. The product remains compatible as a complete system (carriage and guideway). Carriages in the 4S design, as well as previous carriage designs, can be operated on the guide rails, which have remained unchanged by the new carriage design. The accessories have been modified and can be used for 4S carriages as well as previous carriage designs. Underpinned by key design changes such as new redirection units (gray) for low-pulsation running, improved lubricant distribution with less leakage, a more robust front plate with stainless steel plates and with four screw fastenings, replaceable cross wipers, and optimized longitudinal and cross wipers for even better sealing.

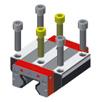


Features of System MONORAIL MR
Product overview MR Rails
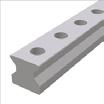
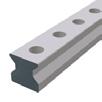
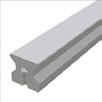


Buildsizes / Rail build forms
Size
Available accessories for MR Rails
Left




Lower
5.3 Technical data and options
5.3.1 MR Size 25
MR S 25 Drawings

MR W 25 Drawings
Clearance for end piece assembly
MR W 25 Rigidity diagram

MR W 25 Load rating

5.3 Technical data and options
MR 25 Dimensions and capacities


B1: Rail width
J1: Rail height
L3: Rail length max.
L4: Spacing of fixing holes
L5/L10: Position of first/last fixing hole
Rail weight, specific (kg/m)
Available options for MR S 25


A: System height
B: Carriage width
B2: Distance between locating faces
C1: Position of center front lube hole
C3: Position of lateral lube hole
C4: Position of lateral lube hole
C7: Position of top lube hole
J: Carriage height
L: Carriage length
La: Cross wiper spacing*
L1: Exterior fixing hole spacing
L2: Interior fixing hole spacing
L6: Steel body length
N: Lateral fixing hole spacing
O: Reference face height
Capacities and weights
C0: Static load capacitiy (N)
C100: Dynamic load capacity (N)
M0Q: Static cross moment capacity (Nm)
M0L: Static longitud. moment capacity (Nm)
MQ: Dyn. cross moment capacity (Nm)
ML: Dyn. longitud. moment capacity (Nm)
Carriage weight (kg)
* Required to determine the rail length from the projected travel distance
Available options for MR W 25
5.3 Technical data and options
5.3.2 MR Size 30
MR S 30 Drawings
MR W 30 Drawings MR W 30 Rigidity diagram


5.3 Technical data and options
MR 30 Dimensions and capacities


B1: Rail width
J1: Rail height
L3: Rail length max.
L4: Spacing of fixing holes
L5/L10: Position of first/last fixing hole
Rail weight, specific (kg/m)
Available options for MR S 30


A: System height
B: Carriage width
B2: Distance between locating faces
C1: Position of center front lube hole
C3: Position of lateral lube hole
C4: Position of lateral lube hole
C7: Position of top lube hole
J: Carriage height
L: Carriage length
La: Cross wiper spacing*
L1: Exterior fixing hole spacing
L2: Interior fixing hole spacing
L6: Steel body length
N: Lateral fixing hole spacing
O: Reference face height
Capacities and weights
C0: Static load capacitiy (N)
C100: Dynamic load capacity (N)
M0Q: Static cross moment capacity (Nm)
M0L: Static longitud. moment capacity (Nm)
MQ: Dyn. cross moment capacity (Nm)
ML: Dyn. longitud. moment capacity (Nm)
Carriage weight (kg)
* Required to determine the rail length from the projected travel distance
Available options for MR W 30
5.3 Technical data and options
5.3.3 MR Size 35
MR S 35 Drawings
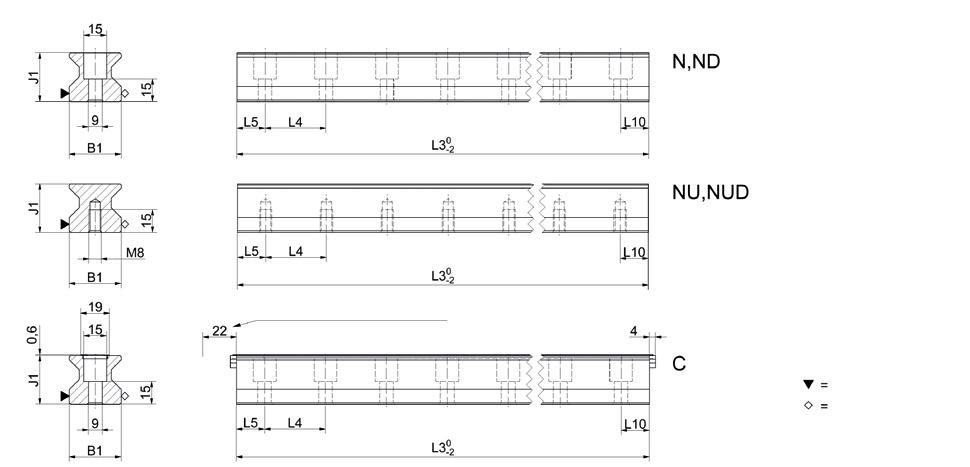
MR W 35 Drawings
Clearance for end piece assembly
Locating side Marked side
Locating side
MR W 35 Rigidity diagram
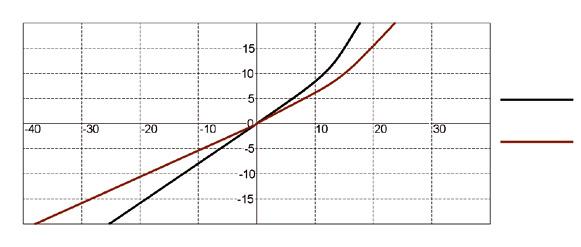
W 35 Load rating

5.3 Technical data and options
MR 35 Dimensions and capacities


B1: Rail width
J1: Rail height
L3: Rail length max.
L4: Spacing of fixing holes
L5/L10: Position of first/last fixing hole
Rail weight, specific (kg/m)
Available options for MR S 35


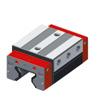


A: System height
B: Carriage width
B2: Distance between locating faces
C1: Position of center front lube hole
C3: Position of lateral lube hole
C4: Position of lateral lube hole
C7: Position of top lube hole
J: Carriage height
L: Carriage length
La: Cross wiper spacing*
L1: Exterior fixing hole spacing
L2: Interior fixing hole spacing
L6: Steel body length
N: Lateral fixing hole spacing
O: Reference face height
Capacities and weights
C0: Static load capacitiy (N)
C100: Dynamic load capacity (N)
M0Q: Static cross moment capacity (Nm)
M0L: Static longitud. moment capacity (Nm)
MQ: Dyn. cross moment capacity (Nm)
ML: Dyn. longitud. moment capacity (Nm)
Carriage weight (kg)
* Required to determine the rail length from the projected travel distance
Available options for MR W 35
5.3.4 MR Size 45
MR S 45 Drawings
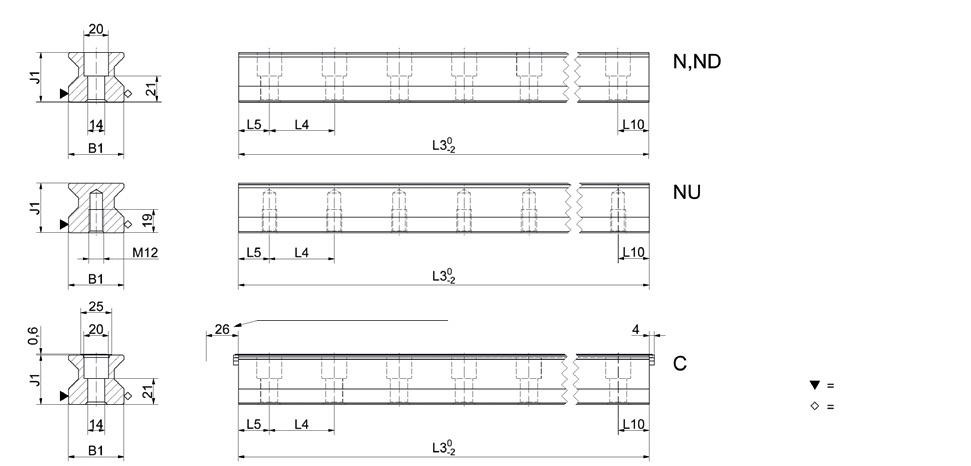
MR W 45 Drawings
Clearance for end piece assembly


MR
5.3 Technical data and options
MR 45 Dimensions and capacities


B1: Rail width
J1: Rail height
L3: Rail length max.
L4: Spacing of fixing holes
L5/L10: Position of first/last fixing hole
Rail weight, specific (kg/m)
Available options for MR S 45


A: System height
B: Carriage width
B2: Distance between locating faces
C1: Position of center front lube hole
C3: Position of lateral lube hole
C4: Position of lateral lube hole
C7: Position of top lube hole
J: Carriage height
L: Carriage length
La: Cross wiper spacing*
L1: Exterior fixing hole spacing
L2: Interior fixing hole spacing
L6: Steel body length
N: Lateral fixing hole spacing
O: Reference face height
Capacities and weights
C0: Static load capacitiy (N)
C100: Dynamic load capacity (N)
M0Q: Static cross moment capacity (Nm)
M0L: Static longitud. moment capacity (Nm)
MQ: Dyn. cross moment capacity (Nm)
ML: Dyn. longitud. moment capacity (Nm)
Carriage weight (kg)
* Required to determine the rail length from the projected travel distance
Available options for MR W 45
5.3.5 MR Size 55
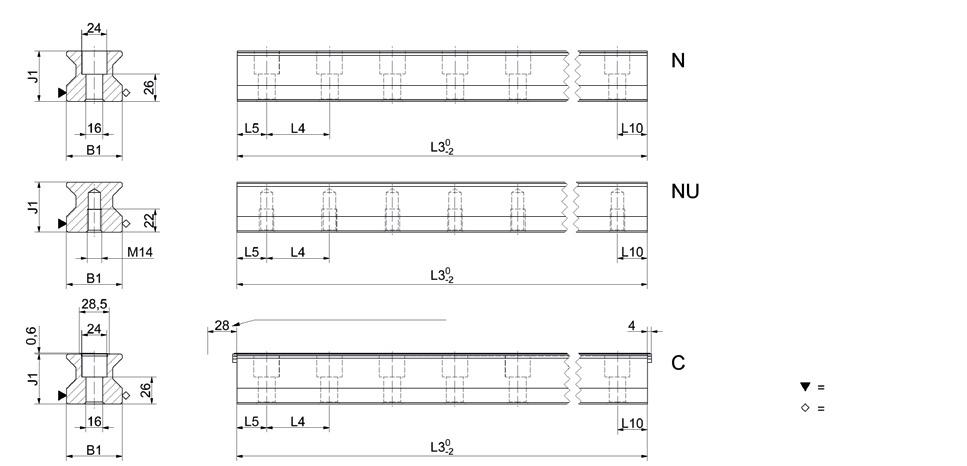
MR W 55 Drawings
MR S 55 Drawings MR W 55 Rigidity diagram
Clearance for end piece assembly
Locating side Marked side
O-ring O-ring
side


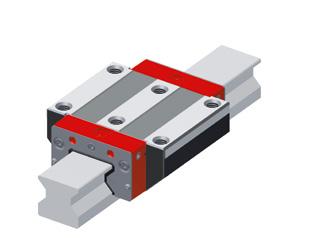
5.3 Technical data and options
MR 55 Dimensions and capacities


B1: Rail width
J1: Rail height
L3: Rail length max.
L4: Spacing of fixing holes
L5/L10: Position of first/last fixing hole
Rail weight, specific (kg/m)
Available options for MR S 55




A: System height
B: Carriage width
B2: Distance between locating faces
C1: Position of center front lube hole
C3: Position of lateral lube hole
C4: Position of lateral lube hole
C7: Position of top lube hole
J: Carriage height
L: Carriage length
La: Cross wiper spacing*
L1: Exterior fixing hole spacing
L2: Interior fixing hole spacing
L6: Steel body length
N: Lateral fixing hole spacing
O: Reference face height
Capacities and weights
C0: Static load capacitiy (N)
C100: Dynamic load capacity (N)
M0Q: Static cross moment capacity (Nm)
M0L: Static longitud. moment capacity (Nm)
MQ: Dyn. cross moment capacity (Nm)
ML: Dyn. longitud. moment capacity (Nm)
Carriage weight (kg)
* Required to determine the rail length from the projected travel distance
Available options for MR W 55
5.3 Technical data and options
5.3.6 MR Size 65
MR S 65 Drawings

MR W 65 Drawings
Clearance for end piece assembly
Locating side Marked side
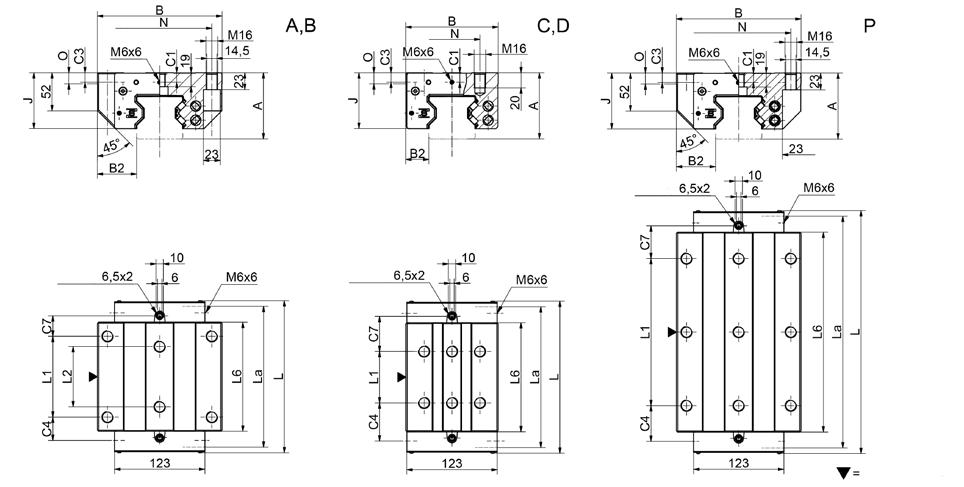

O-ring
O-ring
O-ring
MR W 65 Rigidity diagram MR W 65 Load rating
5.3 Technical data and options
MR 65 Dimensions and capacities


B1: Rail width
J1: Rail height
L3: Rail length max.
L4: Spacing of fixing holes
L5/L10: Position of first/last fixing hole
Rail weight, specific (kg/m)
Available options for MR S 65


A: System height
B: Carriage width
B2: Distance between locating faces
C1: Position of center front lube hole
C3: Position of lateral lube hole
C4: Position of lateral lube hole
C7: Position of top lube hole
J: Carriage height
L: Carriage length
La: Cross wiper spacing*
L1: Exterior fixing hole spacing
L2: Interior fixing hole spacing
L6: Steel body length
N: Lateral fixing hole spacing
O: Reference face height
Capacities and weights
C0: Static load capacitiy (N)
C100: Dynamic load capacity (N)
M0Q: Static cross moment capacity (Nm)
M0L: Static longitud. moment capacity (Nm)
MQ: Dyn. cross moment capacity (Nm)
ML: Dyn. longitud. moment capacity (Nm)
Carriage weight (kg)
* Required to determine the rail length from the projected travel distance
Available options for MR W 65
5.3 Technical data and options
5.3.7 MR Size 100
MR S 100 Drawings

Locating side Marked side
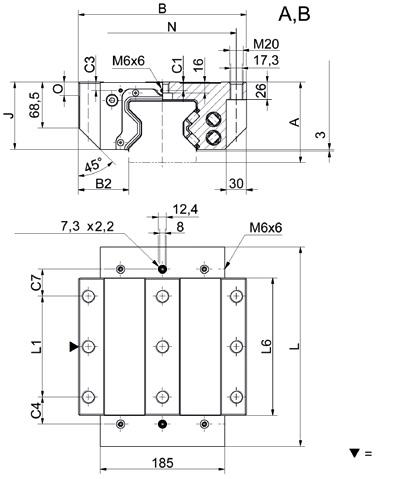
MR W 100 Drawings
Locating side


MR W 100 A
MR W 100 B
MR W 100 Rigidity diagram MR W 100 Load
5.3 Technical data and options
MR 100 Dimensions and capacities

B1: Rail width
J1: Rail height
L3: Rail length max.
L4: Spacing of fixing holes
L5/L10: Position of first/last fixing hole
Rail weight, specific (kg/m)
Available options for MR S 100

A: System height
B: Carriage width
B2: Distance between locating faces
C1: Position of center front lube hole
C3: Position of lateral lube hole
C4: Position of lateral lube hole
C7: Position of top lube hole
J: Carriage height
L: Carriage length
L1: Exterior fixing hole spacing
L2: Interior fixing hole spacing
L6: Steel body length
N: Lateral fixing hole spacing
O: Reference face height
Capacities and weights
C0: Static load capacitiy (N)
C100: Dynamic load capacity (N)
M0Q: Static cross moment capacity (Nm)
M0L: Static longitud. moment capacity (Nm)
MQ: Dyn. cross moment capacity (Nm)
ML: Dyn. longitud. moment capacity (Nm) Carriage weight (kg)
Available options for MR W 100
5.4
5.4.1 MR Rails accessories
Accessories
Plugs:
Plastic plugs
Brass plugs
Steel plugs
Cover strips:
Cover strip (spare part)
Securing band for cover strip (spare part)
End piece for cover strip (spare part)
Assembly tools:
Installation tool for steel plugs
Hydraulic cylinder for MWH
Installation tool for cover strip
5.4.2 MR Carriages accessories
Accessories
Additional wipers:
Additional wipers Viton
Metal wiper
Bellows:
Bellows
Adapter plate for bellows (spare part)
End plate for bellows (spare part)
Assembly rails:
Assembly rail
Lubrication plates:
Lubrication plate
Front plates:
Cross wiper (spare part)
Lube nippels:
Hydraulic-type grease nipple straight
Hydraulic-type grease nipple 45°
Hydraulic-type grease nipple 90°
Flush type grease nipple M3
Flush type grease nipple M6
Grease gun for SN 3-T und SN 6-T
Lube adapters:
Lubrication adapter M8 round-head
Lubrication adapter M8 hexagon head
Lubrication adapter G1/8 hexagon head
Straight screw-in connection M3
Straight screw-in connection M6
Swivel screw connection for pipe d=3 mm
Swivel screw connection for pipe d=4 mm
Swivel screw connection M6
Swivel screw connection M6 long
Swivel screw connection M8
Swivel screw connection M8 long
SN 6
SN 6-45
SN 6-90
SN 3-T
SN 6-T
SFP-T3 SN 6 SN 6-45 SN 6-90
SA 6-RD-M8x1
6-T SFP-T3 SN 6 SN 6-45 SN 6-90
SA 6-RD-M8x1
6-T SFP-T3
SA 6-RD-M8x1
SA 6-6KT-M8x1
SA 6-6KT-G1/8
6 SN 6-45
6-90
6-T SFP-T3
SA 6-RD-M8x1
SA 6-6KT-M8x1
SA 6-6KT-G1/8
SN 6
SN 6-45 SN 6-90
SN 6-T
SFP-T3
SA 6-RD-M8x1
SA 6-6KT-M8x1
SA 6-6KT-G1/8
SN 6
SN 6-45
SN 6-90
SN 6-T
SFP-T3
SA 6-RD-M8x1
SA 6-6KT-M8x1
SA 6-6KT-G1/8
SN 6
SN 6-45
SN 6-90
SN 6-T
SFP-T3
SA 6-RD-M8x1
SA 6-6KT-M8x1
SA 6-6KT-G1/8
SA 3-D3
SA 6-D4-RD
SV 3-D3
SV 6-D4-I
SV 6-M6
SV 6-M6-L
SV 6-M8
SV 6-M8-L
SA 6-D4-RD
SV 6-D4-I
SV 6-M6
SV 6-M6-L
SV 6-M8
SV 6-M8-L
SA 6-D4-RD
SV 6-D4-I
SV 6-M6
SV 6-M6-L
SV 6-M8
SV 6-M8-L
SA 6-D4-RD
SV 6-D4-I
SV 6-M6
SV 6-M6-L
SV 6-M8
SV 6-M8-L
SA 6-D4-RD
SV 6-D4-I
SV 6-M6
SV 6-M6-L
SV 6-M8
SV 6-M8-L
SA 6-D4-RD
SV 6-D4-I
SV 6-M6
SV 6-M6-L
SV 6-M8
SV 6-M8-L
SA 6-D4-RD
SV 6-D4-SW9
SV 6-D4-SW10
SV 6-D4-I SV 6-M6
SV 6-M6-L
SV 6-M8
SV 6-M8-L
5.4
5.4.3


Plastic plugs
(Fig. 69) MRK plastic plugs are used as a low-cost method of closing off the rail attachment holes. They can be fitted manually with fairly simple tools. Plastic plugs are recommended for use with protected axes or in environments with low levels of contamination, e.g. handling.
Quantity supplied: Pack of 25 pcs.
Order code: MRK xx
xx = Size, sample order: 6 x MRK 65
Brass plugs
(Fig. 70) Brass plugs are used in applications with increased contamination or external temperature influences, e.g., in the case of chip impact or whenever a smooth and gap-free rail surface is required.
A hydraulic MWH fitting tool is recommended for correct installation.
Order code: MRS xx
xx = Size, sample order: 48 x MRS 65
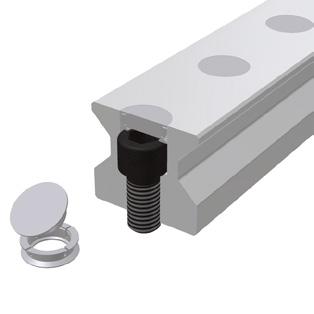
Steel plugs
(Fig. 71) Made of stainless steel, the two-part steel plugs are suitable for applications with greater demands on the mechanical stability of rail surfaces, e.g. when mechanical loads are higher or in open chip spaces. They combine the advantages of simple and very precise installation and a high degree of mechanical stability.
Function:
The clamping ring lies loosely on the screw head in the hole in the rail. When the slightly conical plug is pressed in, the ring is expanded to establish a positive frictional connection between the plug and the hole in the rail.
When fitted, the plug is flush with the rail surface where it ensures that the wipers operate to the optimum degree and have an optimum service life.
A hydraulic MWH fitting tool is necessary for correct installation.
Order code: MRZ xx
xx = Size, sample order: 48 x MRZ 65
Fig. 69
Fig. 70
Fig. 71
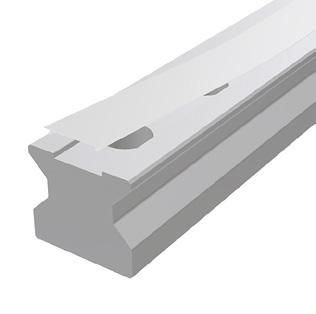
Cover strip (spare part)
(Fig. 72) A SCHNEEBERGER MAC cover strip combines technical functionality with simple handling and neat appearance. Made of stainless spring steel, the strip is suitable for demading applications with increased contamination or external temperature influences.
It provides the following advantages:
• Reliable fixing along the length as it is clipped into a special groove
Additional fixing of the ends of the strips using locking parts (EST xx-MAC)
• Very robust thanks to the substantial thickness of the material
• The strip free top surface of the rail can be used to support covers
• Can be fitted and removed several times
Protection of the wipers during installation as the rail holes are recessed in the groove
• Available in any length up to 30m
When ordering guide rails with cover strips, they are included in the scope of supply.
Order code: MAC xx-yy
xx = Size, yy = Rail length in mm, sample order: 1 x MAC 65-4320
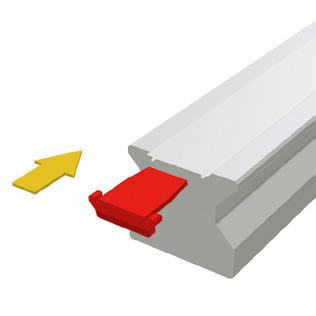
End piece for cover strip (spare part)
(Fig. 73) EST end pieces are used to close the ends of MAC cover strips. To do this, these plastic parts are inserted on both ends of the rail into the gap under the cover strip. Their special design prevents the ends of the cover strip from lifting and reduces the danger of injury on the sharp edges of the cover strip.
Order code: EST xx-MAC
xx = Size, sample order: 2 x EST 65-MAC
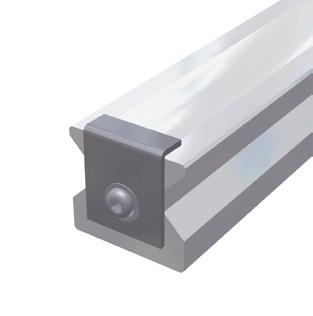
Securing band for cover strip (spare part)
(Fig. 74) The BSC securing band for cover strips is used to secure the ends when mechanical loads are high. To do this, the protruding band ends are cut off at right angles and burr-free, and a fastening thread is fitted to the front face of the rail. Securing bands are used in applications with high vibration levels, with rails in open chip spaces, with rail lengths of less than 600 mm or for vertical fitting and the subsequent risk that EST endpieces could fall out.
The securing band also covers the ends of the cover strips and reduces the risk of injury on the sharp corners of the ends.
Order code: BSC xx-MAC
xx = Size, order example: 2 x BSC 65-MAC
Fig. 72
Fig. 73
Fig. 74
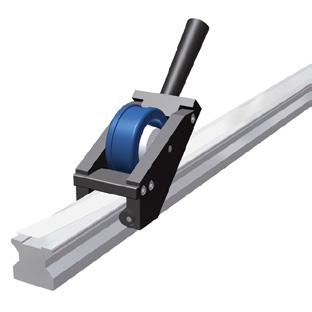
Installation tool for cover strip
(Fig. 75) A MWC fitting tool is used to simplify the fitting of an MAC cover strip. At the same time, it ensures that the cover strip sits securely in the rail groove without any gaps.
Order code: MWC xx
xx = Size, sample order: 1 x MWC 65
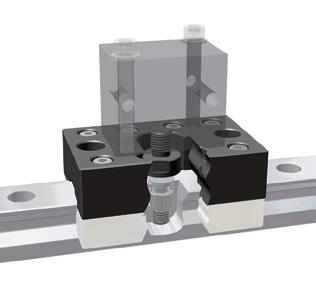
Installation tool for steel plugs MRZ and brass plugs MRS
(Fig. 76) The MWH installation tool is used to hydraulically press in the two-part steel plugs MRZ and brass plugs MRS. It consists of a size-dependent sliding shoe and pressing stamp. The size-independent hydraulic cylinder MZH is required to complete the installation tool. For assembly, the sliding shoe and the pressing stamp are bolted to the hydraulic cylinder.
Order code: MWH
Sample order: 1 x MWH 65
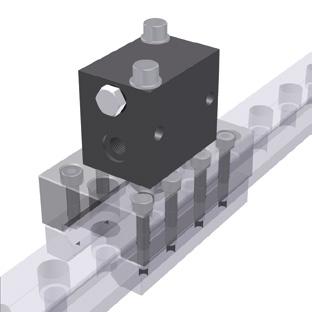
Hydraulic cylinder for MWH
(Fig. 77) An MZH hydraulic cylinder is a single-action block cylinder used to create the required insertion force. A standard hydraulic unit that provides the pressure required for the insertion process is connected to the 1/4“ threaded connection. The hydraulic cylinder fits all sizes of MWH fitting tool and must be ordered separately.
Order code: MZH
Sample order: 1 x MZH
Fig. 75
Fig. 76
Fig. 77
5.4.4 MR Carriages accessory details
xx = Size, sample order: 2 x ZCV 65 5.4
Additional wiper Viton®
(Fig. 78) ZCV additional wipers provide extra protection of the carriages in heavily contaminated environments. Made of Viton® (fluoroelastomer), they are suitable for use with aggressive coolants.
As their flexibility allows them to be pushed over the rail cross section, retrofitting is possible without the need to remove the carriage from the rail. ZCV wipers can also be used in combination with ASM metal wipers.
Order code: ZCV xx

Metal wiper
(Fig. 79) The ASM metal wipers made of stainless steel are used when large, loose particles of dirt on the guideway need to be removed. The radial gap between the wiper and guideway is narrower than in the MR-4S front panel and is therefore designed in such a way that the particles cannot get stuck.
The metal wipers are particularly effective when combined with additional ZCV wipers.
Order code: ASM xx
xx= Size, sample order: 1 x ASM 65
Fig. 78
Fig. 79
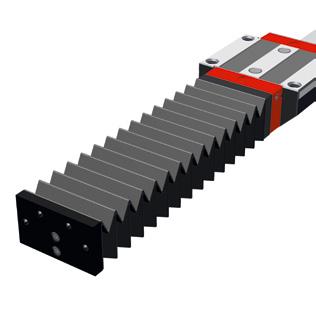
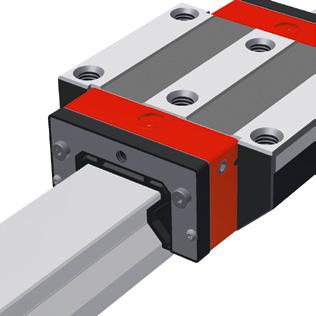
Bellows
(Fig. 80) Standard bellows are available for MONORAIL sizes MR 25 – MR 65, the purpose of which is to provide additional protection against dust and water splashes. The bellows are made of synthetic fabric coated on both sides with plastic. The bellows cover the entire length of the rail and their cross section matches the faceplate of the carriage. The external dimensions of the carriage are thus not exceeded by the bellows.
Installation is simple and takes little time. A ZPL adapter plate is required to attach the bellows to the carriage. The adapter plate is screwed to the front plate of the carriage using a central screw. An EPL end plate is screwed to the end face of the rail. The bellows are fastened by two rivets to both the adapter plate and the front plate. Retrofitting can only be realised with induction hardened rails as the rail ends have to be drilled for the attachment of the EPL end plates.
When ordering a guideway with bellows, the fixing holes for the end plates are arranged in the rails.
Order code: FBM xx-yy
xx = Size, yy = Number of folds, sample order: 1 x FBM 65-137
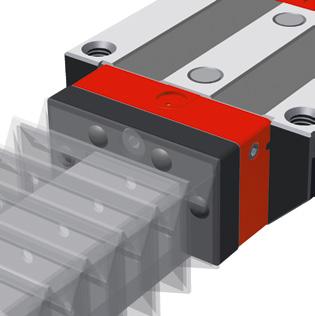
Adapter plate for bellows (spare part)
(Fig. 81) The adapter plate is used to attach the bellows to the carriage and is included with every order for bellows. It is made of black anodized aluminium. On an MR 25 size, the adapter plate is also used for a lateral lubrication connection.
The outer contour of the adapter plate corresponds to that of the carriage front plate, the bellows and the end plate. The central fastening screw is included in the scope of supply.
Order code: ZPL xx
XX = Size, sample order: 2 x ZPL 65
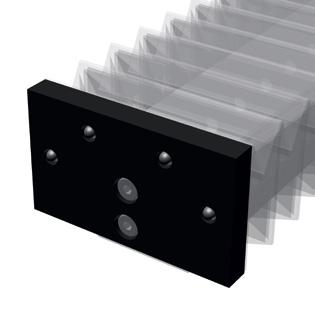
End plate for bellows (spare part)
(Fig. 82) Made of black anodized aluminium, the end plate is used to attach the bellows to the end of the rail. It is included with every order for a set of bellows.
The attaching holes must be drilled in the rail if the bellows are to be retrofitted. For this reason, we recommend the use of induction-hardened rails for retrofits.
The external dimensions of the end plate correspond to that of the carriage front plate, the bellows and the adapter plate. Both fastening screws are supplied with the end plate.
Order code: EPL xx
xx = Size, sample order: 2 x EPL 65
Fig. 80
Fig. 81
Fig. 82

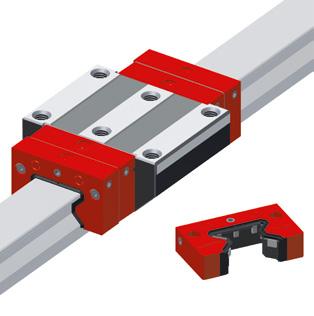
Assembly rail
(Fig. 83) The assembly rail is required when a carriage has to be removed from the rail and then reinstalled during the installation of the MONORAIL
It is advisable to leave the assembly rail in the carriage to protect the rollers against contamination.
If necessary, the two internal carriage attaching screws can be fitted and tightened through the two holes in the assembly rail.
Order code: MRM xx
xx = Size, sample order: 1 x MRM 65
Lubrication plate
(Fig. 84) An SPL lubrication plate is used wherever long lubrication intervals are required. Thanks to its integral oil reservoir, the rolling elements are supplied with an automatic and uniform supply of lubrication over an extended period.
It is ideally used in dry and clean environments as in handling technology or on the ancillary axes of machine tools.
The advantages are:
• Assured supply of lubrication in any installation position
• Long lubrication intervals of up to 5,000 km or 12 months according to use
• Refill apertures closed with screws
• Reduced outlay on lubrication and accessories
• Low environmental impact thanks to minimum consumption of lubricant
• Wipers have a long service life as oil is also supplied to the top surface of the rail
For maximum travel distances without re-lubrication, the lubrication plates are always used in pairs and the carriages are given an additional filling of grease. The lubrication plates have the same dimensions as the carriage front plates and are installed in front of these. Retrofitting is possible.
Additional ZCV wipers must be provided in applications in which particles of dirt can come into contact with the guideways.
Order code: SPL xx-MR
xx = Size, sample order: 2 x SPL 65-MR
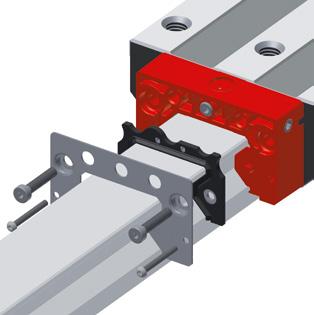
Cross wiper (spare part)
(Fig. 85) The double-lipped cross wipers are subject to natural abrasive wear and must therefore be checked regularly and replaced if necessary. To do this, the front panel is loosened and removed from the front plate. The wiper can then be removed and replaced.
Order code: QAS xx-STR
xx = Size, sample order: 1 x QAS 65-STR
Fig. 83
Fig. 84
Fig. 85
Individual guide rails and carriages are ordered in accordance with the order codes described below.
Q.v. chapter 2.1 and chapter 5.4 for the order key for accessories.
Separate order codes are used in each case for rails, carriages and accessories. This also applies to different versions of rails and carriages.
All guide components are supplied individually as standard. If required, SCHNEEBERGER can also supply rails and carriages incl. assembled accessories as complete systems. Please note the ordering instructions in chapter 4.7 if this applies.
Order code for MR Rails
Straightness
Reference side
Rail length L3
Position of first fixing hole L5
Position of last fixing hole L10
Coating
NB
Q.v. chapter 3.1 to 3.3 for an overview of types, details of shapes, available options and accessories.
Q.v. chapter 2 for a description of the options.
If possible, standard lengths are preferred for L3 rail length.
These are calculated with the table values in chapter 5.3 using the following formula: L3 = n x L4 + L5 + L10 L3max.
Standard L5 / L10 = ( L4 / 2 ) - 1,5
Order code for MR Carriages
Quantity
Coating
Lube connection
Lubrication as delivered condition
NB
Q.v. chapter 5.1 to 5.4 for an overview of types, details of shapes, available options and accessories. Q.v. chapter 2 for a description of the options.
When ordering version 4S MR carriages, „(4S)“ is added to the end of the order code.
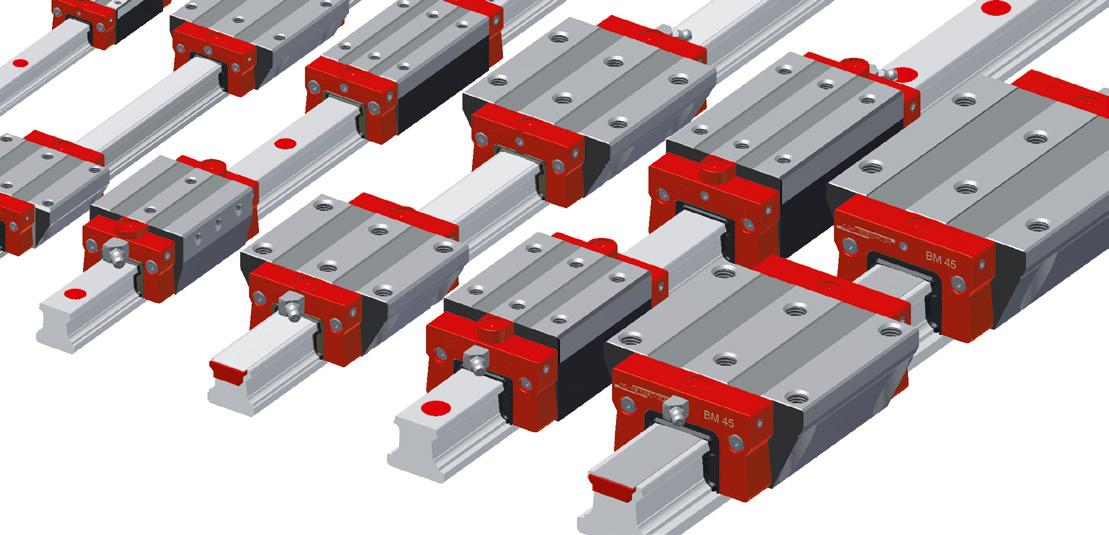


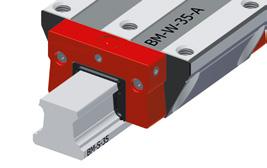


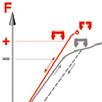
Features of System MONORAIL BM
Very good dynamic characteristics and superb economy are the distinguishing features of the MONORAIL BM ball guideway. Thanks to the small number of transitions in the ball tracks, this novel design with its low number of optimally designed components provides outstanding running characteristics, which are distinguished by smooth running, low pulsation, reduced friction values and high travelling speeds.
The trapezoidal rail section guideway results in a highly rigid guideway and also substantially reduces the amount of maintenance required since parts subject to wear can be replaced without the need to dismantle the guideway. Complete sealing of the carriages is a guarantee of unparalleled reliability matched by a long service life. This robust and versatile guideway thus ideally complements the MONORAIL MR roller guideway.


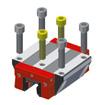


Screwable from above
Screwable from below
Small assembly effort
Highly accurate mounting without lateral locating surface
single-part system
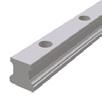
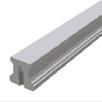

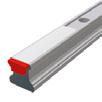
Product overview BM Carriages


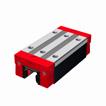
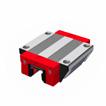
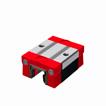
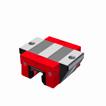
/ Carriage
BM W
BM W 20-
BM W 25-
BM W 30-
BM W 35-
BM W 45-
Features
Screwable from above
Screwable from below
Screwable from the side
For high loads and moments
For medium loads and moments
For limited installation space
options for BM Carriages
Lube connections
Left center
Right center
Top left
Top right
Lower left side
Lower right side
6.3.1 BM Size 15
BM S 15 Drawings
BM W 15 Drawings
Clearance for end piece assembly
BM W 15 Rigidity diagram BM W 15 Load rating


6.3 Technical data and options
BM 15 Dimensions and capacities

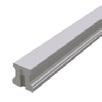
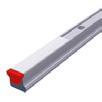
B1: Rail width
J1: Rail height
L3: Rail length max.
L4: Spacing of fixing holes
L5/L10: Position of first/last fixing hole
Rail weight, specific (kg/m)
Available options for BM S 15


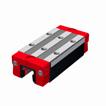
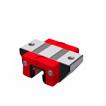

A: System height
B: Carriage width
B2: Distance between locating faces
C1: Position of center front lube hole
C3: Position of lateral lube hole
C4: Position of lateral lube hole
C7: Position of top lube hole
J: Carriage height
L: Carriage length
L1: Exterior fixing hole spacing
L2: Interior fixing hole spacing
L6: Steel body length
N: Lateral fixing hole spacing
O: Reference face height
Capacities and weights
C0: Static load capacitiy (N)
C100: Dynamic load capacity (N)
M0Q: Static cross moment capacity (Nm)
M0L: Static longitud. moment capacity (Nm)
MQ: Dyn. cross moment capacity (Nm)
ML: Dyn. longitud. moment capacity (Nm)
Carriage weight (kg)
Available options for BM W 15
6.3 Technical data and options
6.3.2 BM Size 20
BM W 20 Drawings BM W 20 Rigidity diagram
BM S 20 Drawings Load F [kN]
Clearance for end piece assembly
[μm] = Locating side = Marked side Locating side


6.3 Technical data and options
BM 20 Dimensions and capacities


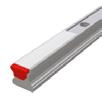
B1: Rail width
J1: Rail height
L3: Rail length max.
L4: Spacing of fixing holes
L5/L10: Position of first/last fixing hole
Rail weight, specific (kg/m)
Available options for BM S 20

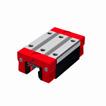


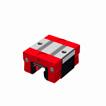
A: System height
B: Carriage width
B2: Distance between locating faces
C1: Position of center front lube hole
C3: Position of lateral lube hole
C4: Position of lateral lube hole
C7: Position of top lube hole
J: Carriage height
L: Carriage length
L1: Exterior fixing hole spacing
L2: Interior fixing hole spacing
L6: Steel body length
N: Lateral fixing hole spacing
O: Reference face height
P: Connecting thread (MxL)
Capacities and weights
C0: Static load capacitiy (N)
C100: Dynamic load capacity (N)
M0Q: Static cross moment capacity (Nm)
M0L: Static longitud. moment capacity (Nm)
MQ: Dyn. cross moment capacity (Nm)
ML: Dyn. longitud. moment capacity (Nm)
Carriage weight (kg)
Available options for BM W 20
6.3.3 BM Size 25
BM S 25 Drawings
BM W 25 Drawings
Clearance for end piece assembly O-ring O-ring O-ring O-ring
= Locating side = Marked side
Locating side
BM W 25 Rigidity diagram

BM W 25 Load rating


6.3 Technical data and options
BM
25 Dimensions and capacities


B1: Rail width
J1: Rail height
L3: Rail length max.
L4: Spacing of fixing holes
L5/L10: Position of first/last fixing hole
Rail weight, specific (kg/m)
Available options for BM S 25
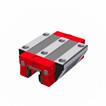

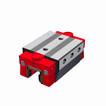

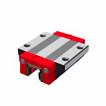


A: System height
B: Carriage width
B2: Distance between locating faces
C1: Position of center front lube hole
C3: Position of lateral lube hole
C4: Position of lateral lube hole
C7: Position of top lube hole
J: Carriage height
L: Carriage length
L1: Exterior fixing hole spacing
L2: Interior fixing hole spacing
L6: Steel body length
N: Lateral fixing hole spacing
O: Reference face height
P: Connecting thread (MxL)
Capacities and weights
C0: Static load capacitiy (N)
C100: Dynamic load capacity (N)
M0Q: Static cross moment capacity (Nm)
M0L: Static longitud. moment capacity (Nm)
MQ: Dyn. cross moment capacity (Nm)
ML: Dyn. longitud. moment capacity (Nm)
Carriage weight (kg)
Available options for BM W 25
6.3.4 BM Size 30
BM W 30 Drawings
BM S 30 Drawings Load
Clearance for end piece assembly
BM W 30 Rigidity diagram BM W 30 Load rating


6.3 Technical data and options
BM 30 Dimensions and capacities

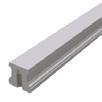

B1: Rail width
J1: Rail height
L3: Rail length max.
L4: Spacing of fixing holes
L5/L10: Position of first/last fixing hole
Rail weight, specific (kg/m)
Available options for BM S 30
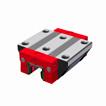

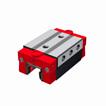



A: System height
B: Carriage width
B2: Distance between locating faces
C1: Position of center front lube hole
C3: Position of lateral lube hole
C4: Position of lateral lube hole
C7: Position of top lube hole
J: Carriage height
L: Carriage length
L1: Exterior fixing hole spacing
L2: Interior fixing hole spacing
L6: Steel body length
N: Lateral fixing hole spacing
O: Reference face height
P: Connecting thread (MxL)
Capacities and weights
C0: Static load capacitiy (N)
C100 Dynamic load capacity (N)
M0Q: Static cross moment capacity (Nm)
M0L: Static longitud. moment capacity (Nm)
MQ: Dyn. cross moment capacity (Nm)
ML: Dyn. longitud. moment capacity (Nm)
Carriage weight (kg)
Available options for BM W 30
6.3 Technical data and options
6.3.5 BM Size 35
BM W 35 Drawings
Clearance for end piece assembly
Locating side Marked side

BM W 35 Rigidity diagram
BM S 35 Drawings Load
BM W 35 Load rating
Locating side


6.3 Technical data and options
BM 35 Dimensions and capacities

B1: Rail width
J1: Rail height
L3: Rail length max.
L4: Spacing of fixing holes
L5/L10: Position of first/last fixing hole
Rail weight, specific (kg/m)
Available options for BM S 35



A: System height
B: Carriage width
B2: Distance between locating faces
C1: Position of center front lube hole
C3: Position of lateral lube hole
C4: Position of lateral lube hole
C7: Position of top lube hole
J: Carriage height
L: Carriage length
L1: Exterior fixing hole spacing
L2: Interior fixing hole spacing
L6: Steel body length
N: Lateral fixing hole spacing
O: Reference face height
Capacities and weights
C0: Static load capacitiy (N)
C100: Dynamic load capacity (N)
M0Q: Static cross moment capacity (Nm)
M0L: Static longitud. moment capacity (Nm)
MQ: Dyn. cross moment capacity (Nm)
ML: Dyn. longitud. moment capacity (Nm)
Carriage weight (kg)
Available options for BM W 35
6.3.6 BM Size 45
BM S 45 Drawings
BM W 45 Drawings
Clearance for end piece assembly
BM W 45 Rigidity diagram
Locating side
Locating side Marked side
BM W 45 Load rating
δ [μm]
δ [μm]
Deformation
Deformation


Compressive load
Compressive load Tensile load
Load F [kN]
Load F [kN]

C/C0
O-ring
O-ring
6.3 Technical data and options
BM 45 Dimensions and capacities
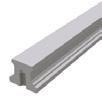
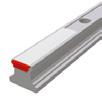
B1: Rail width
J1: Rail height
L3: Rail length max.
L4: Spacing of fixing holes
L5/L10: Position of first/last fixing hole
Rail weight, specific (kg/m)
Available options for BM S 45


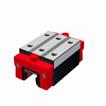

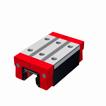
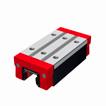
A: System height
B: Carriage width
B2: Distance between locating faces
C1: Position of center front lube hole
C3: Position of lateral lube hole
C4: Position of lateral lube hole
C7: Position of top lube hole
J: Carriage height
L: Carriage length
L1: Exterior fixing hole spacing
L2: Interior fixing hole spacing
L6: Steel body length
N: Lateral fixing hole spacing
O: Reference face height
Capacities and weights
C0: Static load capacitiy (N)
C100 Dynamic load capacity (N)
M0Q: Static cross moment capacity (Nm)
M0L: Static longitud. moment capacity (Nm)
MQ: Dyn. cross moment capacity (Nm)
ML: Dyn. longitud. moment capacity (Nm)
Carriage weight (kg)
Available options for BM W 45
6.4 Accessories Overview
BM Rails Accessories overview
Accessories
Plugs:
Plastic plugs
Cover strips:
Cover strip (spare part)
Securing band for cover strip (spare part)
End piece for cover strip (spare part)
Assembly tools:
Installation tool for cover strip
BM Carriages Accessories overview
Accessories
Additional wipers:
Additional wipers Viton
Metal wiper
Bellows:
Bellows
Adapter plate for bellows (spare part)
End plate for bellows (spare part)
Assembly rails:
Assembly rail
Lubrication plates:
Lubrication plate
Front plates:
Cross wiper for front plate (spare part)
Smooth-running wipers with front plate
Lube nippels:
Hydraulic-type grease nipple straight
Hydraulic-type grease nipple 45°
Hydraulic-type grease nipple 90°
Flush type grease nipple M3
Flush type grease nipple M6
Grease gun for SN 3-T und SN 6-T
Lube adapters:
Lubrication adapter M8 round-head
Lubrication adapter M8 hexagon head
Lubrication adapter G1/8 hexagon head
Straight screw-in connection M3 Swivel screw connection for pipe d=4 mm
Swivel screw connection M3
Swivel screw connection M6
Swivel screw connection M6 long
Swivel screw connection M8
Swivel screw connection M8 long
QAS 15-STB QL 15-STB QAS 20-STB QL 20-STB QAS 25-STB QL 25-STB QAS 30-STB QL 30-STB QAS 35-STB QL 35-STB QAS 45-STB QL 45-STB
SN 6
SN 6-45
SN 6-90
SN 3-T
SFP-T3
SA 3-D3
SV 3-D3
SN 3-T SN 6-T SFP-T3
SA 6-RD-M8
SA 3-D3
SV 6-D4-SW9
SV 6-D4-SW10
SV 6-D4-I
SV 3-D3
SV 6-M6
SV 6-M6-L
SV 6-M8
SV 6-M8-L
SN 6 SN 6-45 SN 6-90
SN 6-T SFP-T3
SA 6-RD-M8
SA 3-D3
SV 6-D4-SW9
SV 6-D4-SW10
SV 6-D4-I
SV 6-M6
SV 6-M6-L
SV 6-M8
SV 6-M8-L
SN 6 SN 6-45
SN 6-90SN 6-T SFP-T3
SA 6-RD-M8
SA 6-6KT-M8
SA 6-6KT-G1/8
SA 3-D3
SV 6-D4-SW9
SV 6-D4-SW10
SV 6-D4-I
SV 6-M6
SV 6-M6-L
SV 6-M8
SV 6-M8-L
SN 6
SN 6-45
SN 6-90SN 6-T SFP-T3
SA 6-RD-M8
SA 6-6KT-M8
SA 6-6KT-G1/8
SA 3-D3
SV 6-D4-SW9
SV 6-D4-SW10
SV 6-D4-I
SV 6-M6
SV 6-M6-L
SV 6-M8
SV 6-M8-L
SN 6 SN 6-45 SN 6-90SN 6-T SFP-T3
SA 6-RD-M8
SA 6-6KT-M8
SA 6-6KT-G1/8
SA 3-D3
SV 6-D4-SW9
SV 6-D4-SW10
SV 6-D4-I
SV 6-M6
SV 6-M6-L
SV 6-M8
SV 6-M8-L
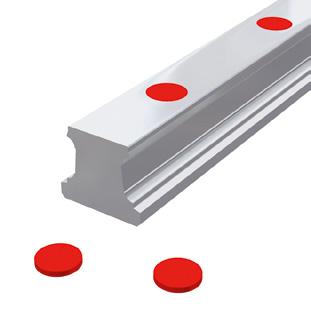

6.5.1 Plastic plugs
(Fig. 86) BRK plastic plugs are used as a low-cost method of closing off the rail attachment holes. They can be fitted manually with fairly simple tools. Plastic plugs are recommended for use with protected axes or in environments with low levels of contamination, e.g. handling.
Quantity supplied: Pack of 25 pcs
Order code: BRK xx
xx = Size, sample order: 3 x BRK 35 (75 pcs)
6.5.2 Cover strip (spare part)
(Fig. 87) A BAC cover strip combines technical functionality with simple installation and neat appearance.
Made of stainless spring steel, the strip is suitable for demanding applications with enhanced mechanical and thermal loading.
It provides the following advantages:
Reliable fixing along the length as it is clipped into a special groove
Additional fixing of the ends of the strips using locking parts (EST xx-BAC)
Very robust due to the substantial thickness of the material
Can be fitted and removed several times
Protection of the wipers during installation as the rail fixing holes are recessed in the groove
In any length up to 30 m available
When ordering guide rails with cover strips, they are included in the scope of supply.
Order code: BAC xx-yy
xx = Size, yy= Rail length in mm, sample order: 1 x BAC 35-4560
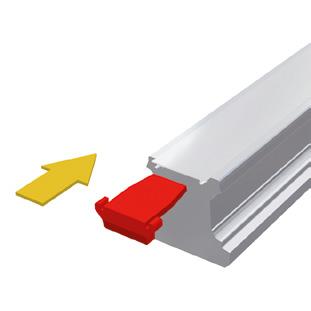
6.5.3 End piece for cover strip (spare part)
(Fig. 88) EST end pieces are used to close the ends of BAC cover strips. To do this, these plastic parts are inserted on both ends of the rail into the gap under the cover strip. Their special design prevents the ends of the cover strip from lifting and reduces the danger of injury on the sharp edges of the cover strip.
Order code: EST xx-BAC
xx = Size, sample order: 2 x EST 35-BAC
Fig.
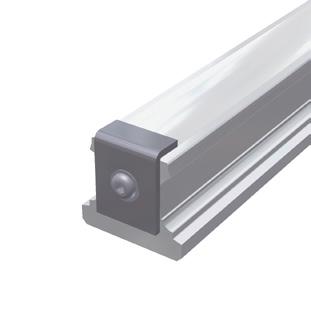

6.5.4 Securing band for cover strip (spare part)
(Fig. 89) The BSC securing band for cover strips is used to secure the ends when mechanical loads are high. To do this, the protruding band ends are cut off at right angles and burr-free, and a fastening thread is fitted to the front face of the rail. Securing bands are used in applications with high vibration levels, with rails in open chip spaces, with rail lengths of less than 600 mm or for vertical fitting and the subsequent risk that EST endpieces could fall out.
The securing band also covers the ends of the cover strips and reduces the risk of injury on the sharp corners of the ends.
Order code: BSC xx-MAC
xx = Size, order example: 2 x BSC 65-MAC
6.5.5 Installation tool for cover strip
(Fig. 90) A BWC fitting tool is used to simplify the fitting of an MAC cover strip. At the same time, it ensures that the cover strip sits securely in the rail groove without any gaps.
Order code: BWC xx
xx = Size, sample order: 1 x BWC 35
Fig. 89
Fig. 90
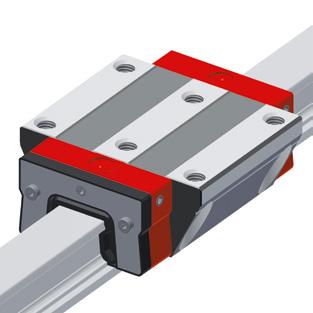
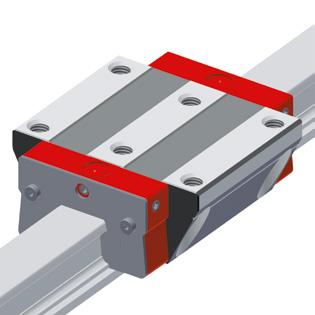
6.6.1 Additional wiper Viton
(Fig. 91) ZBV additional wipers provide additional protection of the carriages in heavily contaminated environments. Made of Viton® (fluoroelastomer), they are also suitable for use with aggressive coolants. Since they can be pushed over the rail cross section due to their flexibility, retrofitting is possible without any need to remove the carriage from the rail. ZBV wipers can also be used in combination with ABM metal wipers.
Order code: ZBV xx
xx = Size, sample order: 2 x ZBV 35
6.6.2 Metal wiper
(Fig. 92) Made of stainless steel, ABM metal wipers are used to protect the sealing lips of carriages and additional wipers against hot metal chips. Large and loose dirt particles are pushed away and cannot get jammed due to the controlled dimension of the gap with the rail. Specially adapted types are available for rails using AMS measuring systems. Metal wipers are ideally used in combination with ZBV additional wipers.
Order code: ABM xx
xx= Size, sample order: 1 x ABM 35
Fig. 91
Fig. 92
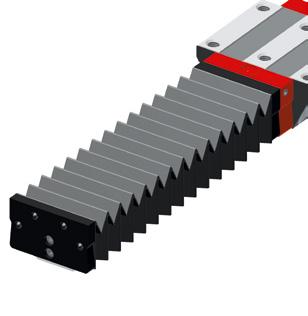
6.6.3 Bellows
(Fig. 93) A standard FBB bellows is available for MONORAIL sizes BM 20 – BM 45, the purpose of which is mainly to provide additional protection against dust and water splashes. The bellows are made of synthetic fabric coated on both sides with plastic. The bellows cover the entire length of the rail profile matching the relevant faceplate of the carriage. The external dimensions of the carriage are not exceeded by the bellows.
Installation is simple and takes little time. A ZPB adapter plate is required to attach the bellows to the carriage. The adapter plate is screwed to the front plate of the carriage using a central screw. An EPB end plate is screwed to the end face of the rail. The bellows are fastened by two rivets to both the adapter plate and the front plate.
The required adapter and end plates, attachment screws and rivets are supplied with each order for a complete set of bellows. The attachment holes for the end plate are also prepared in the rail when a guideway with bellows is ordered.
Order code: FBB xx-yy
xx = Size, yy = Number of folds, sample order: 1 x FBB 35-146
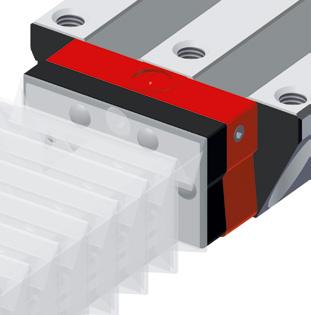
6.6.4 Adapter plate for bellows (spare part)
(Fig. 94) A ZPB adapter plate is used to attach FBB bellows to the carriage and is included with every order for a bellows. It is made of black anodized aluminium. The outer contour of the adapter plate corresponds to that of the carriage front plate, the bellows and the end plate. The central fastening screw is included in the scope of supply.
Order code: ZPB xx
xx = Size, sample order: 2 x ZPB 35
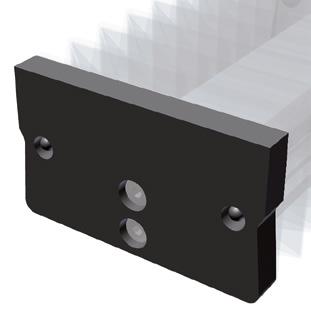
6.6.5 End plate for bellows (spare part)
Made of black anodized aluminium, an EPB end plate is used to attach the FBB bellows to the end of the rail. It is included with every order for a set of bellows. The attachment holes must be drilled in the rail if the bellows are to be retrofitted. For this reason, we recommend the use of induction-hardened rails for retrofits. The outer contour of the end plate corresponds to that of the carriage front plate, the bellows and the adapter plate. Both fastening screws are supplied with the end plate.
Order code: EPB xx
xx = Size, sample order: 2 x EPB 35
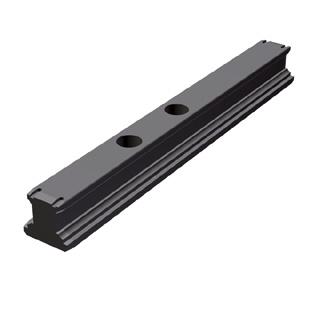
6.6.6 Assembly rail
(Fig. 96) An MBM assembly rail is required when a carriage has to be removed from the rail and then reinstalled during the installation of the MONORAIL guideway. It is advisable to leave the assembly rail in the carriage to protect the balls against contamination. If necessary, the two internal carriage attaching screws can be fitted and tightened through the two holes in the assembly rail.
Order code: MBM xx
xx = Size, sample order: 1 x MBM 35
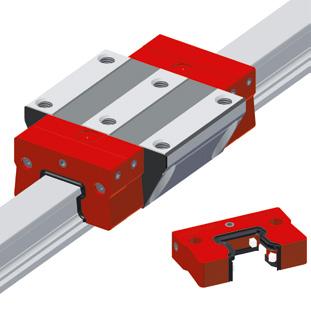
6.6.7 Lubrication plate
(Fig. 97) An SPL lubrication plate is used wherever long lubrication intervals are required. Thanks to its integral oil reservoir, the rolling elements are supplied with an automatic and uniform supply of lubrication over an extended period. It is ideally used in dry and clean environments as in handling technology or on the ancillary axes of machine tools.
The advantages are:
• Assured supply of lubrication in any installation position
• Long lubrication intervals of up to 5,000 km or 12 months according to use
• Refill apertures closed with screws
• Reduced outlay on lubrication and accessories
• Low environmental impact thanks to minimum consumption of lubricant
• Wipers have a long service life as oil is also supplied to the top surface of the rail
For maximum travel distances without re-lubrication, the lubrication plates are always used in pairs and the carriages are given an additional filling of grease. The lubrication plates have the same dimensions as the carriage front plates and are installed in front of these. Retrofitting is possible. Additional ZBV wipers must be provided in applications in which particles of dirt can come into contact with the guideways.
Order code: SPL xx-BM xx = Size, sample order: 2 x SPL 35-BM

6.6.8 Cross wiper for front plate (spare part)
(Fig. 98) QAS twin-lip cross wipers, integrated into the end plate, seal the carriage at the ends, thus preventing the ingress of dirt and the loss of lubricant.
As the cross wipers are subject to normal wear, they must be examined regularly and replaced if necessary.
Order code: QAS xx-STB
xx = Size, sample order: 1 x QAS 35-STB
Fig. 96
Fig. 97
Fig. 98
Individual guide rails and carriages are ordered in accordance with the order codes described below.
Q.v. chapter 2.1 and chapter 6.5 for the order key for accessories.
Separate order codes are used in each case for rails, carriages and accessories. This also applies to different versions of rails and carriages.
All guide components are supplied individually as standard.
If required, SCHNEEBERGER can also supply rails and carriages incl. assembled accessories as complete systems. Please note the ordering instructions in chapter 4.7 if this applies.
Order code for BM Rails
Quantity
Rail
Type
Accuracy
Straightness
Reference side
Rail length L3
Position of first fixing hole L5
Position of last fixing hole L10
Coating
NB
Q.v. chapter 6 for an overview of types, details of shapes, available options and accessories.
Q.v. chapter 2.1 for a description of the options.
If possible, standard lengths are preferred for L3 rail length.
These are calculated with the table values in chapter 4.2 using the following formula: L3
Order code for BM Carriages
Quantity
Accuracy
Preload
Reference side
Coating
Lube connection
Lubrication as delivered condition
NB
Q.v. chapter 6.2 to 6.3 for an overview of types, details of shapes, available options and accessories.
Q.v. chapter 2.1 for a description of the options.


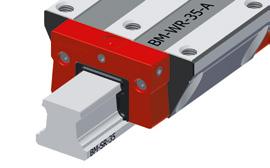
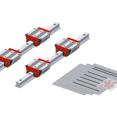

The MONORAIL BM WR/SR systems are linear guides made from corrosion-resistant steel, and are based on the MONORAIL BM ball profiled linear guideway. They were developed specially for specifications which would exceed the requirements of ordinary coatings for linear guideways. This is the case when the performance of the product is impaired by corrosion during processes.
In applications such as machines for foodstuffs, medical technology and cleanrooms MONORAIL BM WR/SR products ensure that the operation of linear axes is clean, accurate, long-term and free of problems.
Furthermore, the MONORAIL WR/SR has the same tried and tested properties of the MONORAIL BM, such as the most effective operating characteristics, high travel speeds and a long operating life.


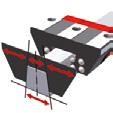


Features of System MONORAIL BM WR / BM SR
Buildsizes / Rail build forms
Size 15
Size 20
Size 25
Size 30
Size 35
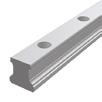
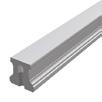
ND standard, through hardened NUD with tapped holes at the bottom, hrough hardened
BM SR 15-ND BM SR 15-NUD
BM SR 20-ND BM SR 20-NUD
BM SR 25-ND BM SR 25-NUD
BM SR 30-ND BM SR 30-NUD
BM SR 35-ND BM SR 35-NUD
Features
Screwable from above
Screwable from below
Small assembly effort Available options for BM SR Rails Details see chapter 2
Available accessories for BM SR Rails Details see chapter 5.3 Plugs
see chapter
7.2 Product overview BM WR
Product overview BM WR Carriages

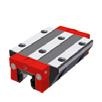


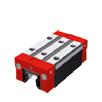

Buildsizes / Carriage build forms Size
Size
Features
Screwable from above
Screwable from below
For high loads and moments
For medium loads and moments
For limited installation space
Available options for BM WR Carriages
Lube connections
Left center
Right center
Top left
Top right
Lower left side
Lower right side
Available accessories for BM WR Carriages
Additional
7.3.1 BM SR Size 15
BM SR 15 Drawings
= Anschlagseite
= Beschriftungsseite
BM WR 15 Drawings
Anschlagseite
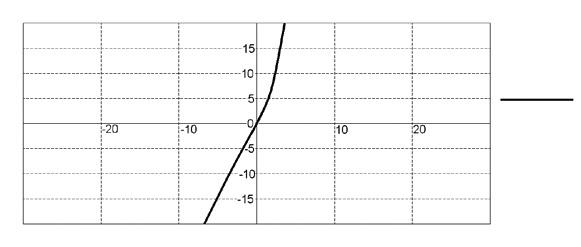

7.3 Technical data and options
BM 15 Dimensions and capacities
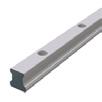

B1: Rail width
J1: Rail height
L3: Rail length max.
L4: Spacing of fixing holes
L5/L10: Position of first/last fixing hole
Rail weight, specific (kg/m)
Available options for BM SR 15


A: System height
B: Carriage width
B2: Distance between locating faces
C1: Position of center front lube hole
C3: Position of lateral lube hole
C4: Position of lateral lube hole
C7: Position of top lube hole
J: Carriage height
L: Carriage length
L1: Exterior fixing hole spacing
L2: Interior fixing hole spacing
L6: Steel body length
N: Lateral fixing hole spacing
O: Reference face height
Capacities and weights
C0: Static load capacitiy (N)
C100 Dynamic load capacity (N)
M0Q: Static cross moment capacity (Nm)
M0L: Static longitud. moment capacity (Nm)
MQ: Dyn. cross moment capacity (Nm)
ML: Dyn. longitud. moment capacity (Nm)
Carriage weight (kg)
Available options for BM WR 15
7.3.2 BM SR Size 20
BM SR 20 Drawings
= Anschlagseite
= Beschriftungsseite
BM WR 20 Drawings
Anschlagseite
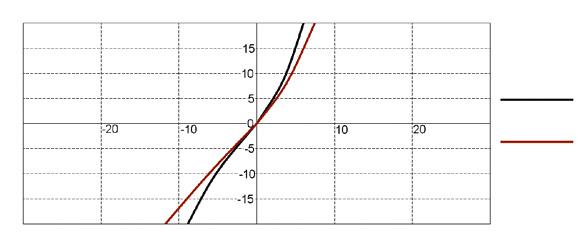

7.3 Technical data and options
BM 20 Dimensions and capacities


B1: Rail width
J1: Rail height
L3: Rail length max.
L4: Spacing of fixing holes
L5/L10: Position of first/last fixing hole
Rail weight, specific (kg/m)
Available options for BM SR 20
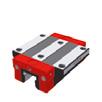
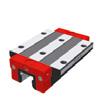

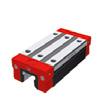
A: System height
B: Carriage width
B2: Distance between locating faces
C1: Position of center front lube hole
C3: Position of lateral lube hole
C4: Position of lateral lube hole
C7: Position of top lube hole
J: Carriage height
L: Carriage length
L1: Exterior fixing hole spacing
L2: Interior fixing hole spacing
L6: Steel body length
N: Lateral fixing hole spacing
O: Reference face height
Capacities and weights
C0: Static load capacitiy (N)
C100: Dynamic load capacity (N)
M0Q: Static cross moment capacity (Nm)
M0L: Static longitud. moment capacity (Nm)
MQ: Dyn. cross moment capacity (Nm)
ML: Dyn. longitud. moment capacity (Nm)
Carriage weight (kg)
Available options for BM WR 20
7.3 Technical data and options
7.3.3 BM SR Size 25
BM SR 25 Drawings
BM WR 25 Drawings
Anschlagseite
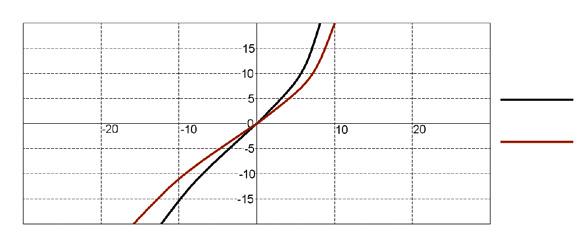
= Anschlagseite
Locating side
Marked side
= Beschriftungsseite

7.3 Technical data and options
BM 25 Dimensions and capacities


B1: Rail width
J1: Rail height
L3: Rail length max.
L4: Spacing of fixing holes
L5/L10: Position of first/last fixing hole
Rail weight, specific (kg/m)
Available options for BM SR 25




A: System height
B: Carriage width
B2: Distance between locating faces
C1: Position of center front lube hole
C3: Position of lateral lube hole
C4: Position of lateral lube hole
C7: Position of top lube hole
J: Carriage height
L: Carriage length
L1: Exterior fixing hole spacing
L2: Interior fixing hole spacing
L6: Steel body length
N: Lateral fixing hole spacing
O: Reference face height
Capacities and weights
C0: Static load capacitiy (N)
C100: Dynamic load capacity (N)
M0Q: Static cross moment capacity (Nm)
M0L: Static longitud. moment capacity (Nm)
MQ: Dyn. cross moment capacity (Nm)
ML: Dyn. longitud. moment capacity (Nm)
Carriage weight (kg)
Available options for BM WR 25
7.3 Technical data and options
7.3.4 BM SR Size 30
BM SR 30 Drawings Locating side
BM WR 30 Drawings
BM WR 30 Rigidity diagram

= Anschlagseite
= Anschlagseite
= Beschriftungsseite
WR 30 Load rating


7.3 Technical data and options
BM 30 Dimensions and capacities


B1: Rail width
J1: Rail height
L3: Rail length max.
L4: Spacing of fixing holes
L5/L10: Position of first/last fixing hole
Rail weight, specific (kg/m)
Available options for BM SR 30


A: System height
B: Carriage width
B2: Distance between locating faces
C1: Position of center front lube hole
C3: Position of lateral lube hole
C4: Position of lateral lube hole
C7: Position of top lube hole
J: Carriage height
L: Carriage length
L1: Exterior fixing hole spacing
L2: Interior fixing hole spacing
L6: Steel body length
N: Lateral fixing hole spacing
O: Reference face height
Capacities and weights
C0: Static load capacitiy (N)
C100: Dynamic load capacity (N)
M0Q: Static cross moment capacity (Nm)
M0L: Static longitud. moment capacity (Nm)
MQ: Dyn. cross moment capacity (Nm)
ML: Dyn. longitud. moment capacity (Nm)
Carriage weight (kg)
Available options for BM WR 30
7.3 Technical data and options
7.3.5 BM SR Size 35
MR S 35 Drawings
= Anschlagseite
= Beschriftungsseite
MR W 35 Drawings


7.3 Technical data and options
BM
35 Dimensions and capacities

B1: Rail width
J1: Rail height
L3: Rail length max.
L4: Spacing of fixing holes
L5/L10: Position of first/last fixing hole
Rail weight, specific (kg/m)
Available options for BM SR 35
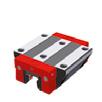
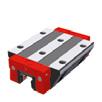
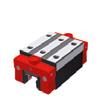
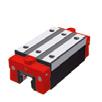
A: System height
B: Carriage width
B2: Distance between locating faces
C1: Position of center front lube hole
C3: Position of lateral lube hole
C4: Position of lateral lube hole
C7: Position of top lube hole
J: Carriage height
L: Carriage length
L1: Exterior fixing hole spacing
L2: Interior fixing hole spacing
L6: Steel body length
N: Lateral fixing hole spacing
O: Reference face height
Capacities and weights
C0: Static load capacitiy (N)
C100: Dynamic load capacity (N)
M0Q: Static cross moment capacity (Nm)
M0L: Static longitud. moment capacity (Nm)
MQ: Dyn. cross moment capacity (Nm)
ML: Dyn. longitud. moment capacity (Nm)
Carriage weight (kg)
Available options for BM WR 30
7.4
Accessories - Overview
BM SR Rails accessories overview
Accessories
Plugs:
Plastic plugs
BM WR Carriages accessories overview
Accessories
Additional wipers:
Additional wipers Viton
Metal wiper
Bellows:
Bellows
Adapter plate for bellows (spare part)
End plate for bellows (spare part)
Assembly rails:
Assembly rail
Lubrication plates:
Lubrication plate
Front plates:
Cross wiper for front plate (spare part)
Corrosion resistant grease nipples:
Hydraulic-type grease nipple straight M3
Hydraulic-type grease nipple straight M6
Hydraulic-type grease nipple 45°
Hydraulic-type grease nipple 90°
Grease gun for SN 3-T und SN 6-T
Lube adapters:
Straight screw-in connection M3
Straight screw-in connection M6
Swivel screw connection for pipe d=3 mm
Swivel screw connection for pipe d=4 mm
Swivel screw connection M8 long
Other lubrication systems upon request
SFP-T3
SN 6-45-V2A
SN 6-90-V2A SFP-T3
SN 6-45-V2A SN 6-90-V2A SFP-T3
6-V2A SN 6-45-V2A
SN 6-90-V2A SFP-T3
SN 6-V2A
SN 6-45-V2A
SN 6-90-V2A SFP-T3 SA 3-D3
SV 3-D3
Individual guide rails and carriages are ordered in accordance with the order codes described below.
Q.v. chapter 2.1 and chapter 7.4 for the order key for accessories.
Separate order codes are used in each case for rails, carriages and accessories. This also applies to different versions of rails and carriages. All guide components are supplied individually as standard. If required, SCHNEEBERGER can also supply rails and carriages incl. assembled accessories as complete systems. Please note the ordering instructions in chapter 4.7 if this applies.
Order code for BM SR Rails
Reference side
Rail length L3
Position of first fixing hole L5
Position of last fixing hole L10
Coating
NB
Q.v. chapter 7.1 to 7.3 for an overview of types, details of shapes, available options and accessories.
Q.v. chapter 2 for a description of the options. If possible, standard lengths are preferred for L3 rail length. These are calculated with the table values in chapter 7.3 using the following formula:
Order code for BM WR Carriages
Coating
Lube connection
Lubrication as delivered condition
NB
Q.v. chapter 7.1 to 7.4 for an overview of types, details of shapes, available options and accessories.
Q.v. chapter 2 for a description of the options.
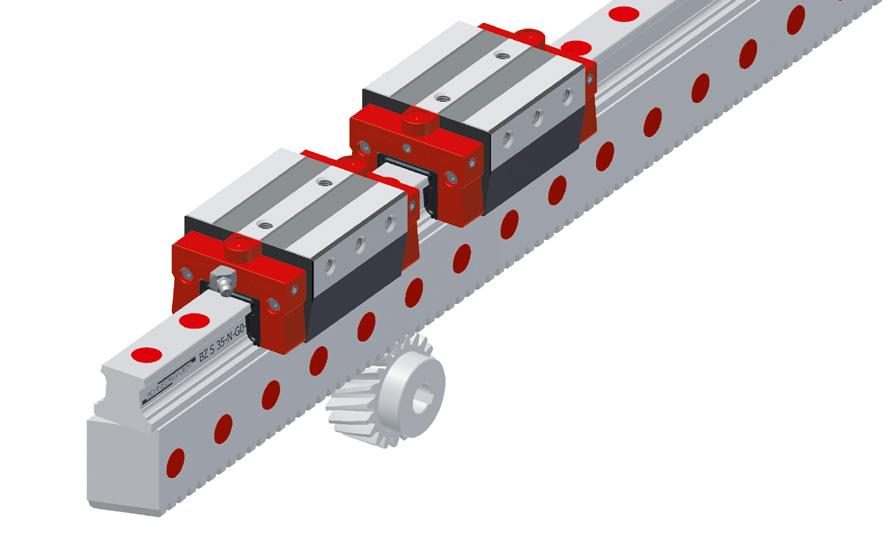
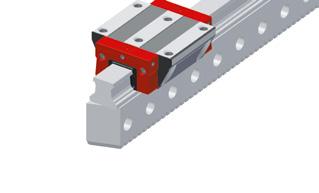


Features of System MONORAIL BZ
With its BZ MONORAIL , SCHNEEBERGER offers linear guide systems that extend the characteristic properties of the company’s BM MONORAIL profile rail guides to include the advantages of an integral and high-precision rack drive.
Customers gain the following decisive benefits: One-piece system up to 6000 mm long
• High-quality gear rack (hardened and ground)
• Cost savings of up to 25% due to reduced outlay on manufacturing and assembly
• Superlative operating properties, high load carrying capacity and a long service life based on our proven MONORAIL linear guides
• Oriented towards customer requirements due to the large number of carriage types available with BM ball guides and a comprehensive range of accessories and customised gear types and grades.


Product overview BZ Rails

standard, half pitch
Buildsizes / Rail build forms
Size 25
Size 35
Features
Screwable from the side
Good accessibility of the fixing screws
Great single-part system length
BZ S 25-NX BZ S 35-NX
Available options for BZ Rails
Toothing quality Reference side
Q6, smooth, milled
Q5, hard, ground
Available accessories for BZ Rails
Plugs Pinions
Coating
Ref. at bottom Reef. on top None Hard chromium
Others
Buildsizes / Carriage build forms
Size 25
Size 35
Besondere Eigenschaften
Screwable from above
Screwable from below
Screwable from the side
For high loads and moments
For medium loads and moments
For limited installation space


Lube connections
Left center
Right center
Top left
Top right
Lower left side
Lower right side
Additional
Upper left side
Upper right side
Left side
Right side
8.3.1 MONORAIL BZ Size 25
BM S 25 Drawings
BM W 25 Drawings


8.3 Technical data and options
BZ 25 Dimensions and capacities

B1: Rail width
J1: Rail height
L3: Rail length max.
L4: Spacing of fixing holes
L5/L10: Position of first/last fixing hole
m: Modul
α Helix angle
Rail weight, specific (kg/m)
Available options for BZ S 25


A: System height
B: Carriage width
B2: Distance between locating faces
C1: Position of center front lube hole
C3: Position of lateral lube hole
C4: Position of lateral lube hole
C7: Position of top lube hole
J: Carriage height
L: Carriage length
L1: Exterior fixing hole spacing
L2: Interior fixing hole spacing
L6: Steel body length
N: Lateral fixing hole spacing
O: Reference face height
Capacities and weights
C0: Static load capacitiy (N)
C100: Dynamic load capacity (N)
M0Q: Static cross moment capacity (Nm)
M0L: Static longitud. moment capacity (Nm)
MQ: Dyn. cross moment capacity (Nm)
ML: Dyn. longitud. moment capacity (Nm)
Carriage weight (kg)
Available options for BM W 25
8.3 Technical data and options
8.3.2 MONORAIL BZ Size 35
BM S 35 Drawings
BM W 35 Drawings
Locating side Marked side Locating


BM W 35 Rigidity diagram
BM W 35 Load rating
O-ring
O-ring
O-ring
8.3 Technical data and options
BZ 35 Dimensions and capacities

B1: Rail width
J1: Rail height
L3: Rail length max.
L4: Spacing of fixing holes
L5/L10: Position of first/last fixing hole
m: Modul
Available options for BZ S 35



A: System height
B: Carriage width
B2: Distance between locating faces
C1: Position of center front lube hole
C3: Position of lateral lube hole
C4: Position of lateral lube hole
C7: Position of top lube hole
J: Carriage height
L: Carriage length
L1: Exterior fixing hole spacing
L2: Interior fixing hole spacing
L6: Steel body length
N: Lateral fixing hole spacing
O: Reference face height
Capacities and weights
C0: Static load capacitiy (N)
C100: Dynamic load capacity (N)
M0Q: Static cross moment capacity (Nm)
M0L: Static longitud. moment capacity (Nm)
MQ: Dyn. cross moment capacity (Nm)
ML: Dyn. longitud. moment capacity (Nm)
Carriage weight (kg)
Available options for BM W 35
8.4 Accessories Overview
Accessories
Plugs:
Plastic plugs
Pinions::
Pinion with through bore
Pinion with through bore and with keyway
Pinion with shaft
Pinion with shaft and with keyway
Others:
Lubricating pinion
Pinion hub for lubricating pinion
Assembly fixture for BZ systems
Accessories
Additional wipers:
Additional wipers Viton
Metal wiper
Bellows: Bellows
Adapter plate for bellows (spare part)
End plate for bellows (spare part)
Assembly rails:
Assembly rail
Lubrication plates:
Lubrication plate
Front plates:
Cross wiper for front plate (spare part)
Lube nippels:
Hydraulic-type grease nipple straight
Hydraulic-type grease nipple 45°
Hydraulic-type grease nipple 90°
Flush type grease nipple M3
Flush type grease nipple M6
Grease gun for SN 3-T und SN 6-T
Lube adapters:
Lubrication adapter M8 round-head
Lubrication adapter M8 hexagon head
Lubrication adapter G1/8 hexagon head
Straight screw-in connection M3
Straight screw-in connection M6
Swivel screw connection for pipe d=3 mm
Swivel screw connection for pipe d=4 mm
Swivel screw connection for pipe d=4 mm
Swivel screw connection M6
Swivel screw connection M6 long
Swivel screw connection M8
Swivel screw connection M8 long
BZ S 25 BZ S 35
BRK 25 BRK 35
BZR 25-...
BZR 25-...-K
BZR 25-S-...
BZR 5-S-...-K
BZR 25-L-...-K
BZR 25-LN
BZM 25-.....
BZR 35-...
BZR 35-...-K
BZR 35-S-...
BZR 5-S-...-K
BZR 35-L-... BZR 35-LN BZM 35-.....
BM W 25 BM W 35
ZBV 25 ABM 25 ZBV 35 ABM 35
FBB 25 ZPB 25 EPB 25 FBB 35 ZPB 35 EPB 35
MBM 25 MBM 35
SPL 25-BM SPL 35-BM
QAS 25-STB QAS 35-STB
SN 6
SN 6-45
SN 6-90
6-T
SFP-T3 SN 6 SN 6-45 SN 6-90
SA 6-RD-M8x1
SN 6-T SFP-T3
SA 6-RD-M8x1
SA 6-6KT-M8x1
SA 6-6KT-G1/8
SA 6-D4-RD
SV 6-D4-SW9
SV 6-D4-SW10
SV 6-M6
SV 6-M6-L
SV 6-M8
SV 6-M8-L
Other lubrication connections on request
SA 6-D4-RD
SV 6-D4-SW9
SV 6-D4-SW10
SV 6-M6
SV 6-M6-L
SV 6-M8
SV 6-M8-L
BZ Rails accessories overview
BM Carriages accessories overview
8.5 BZ Rails accessory details
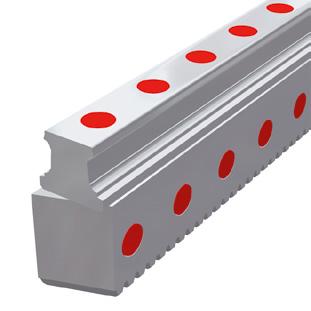
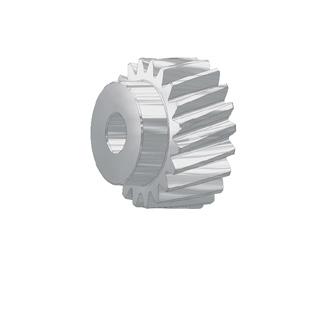


8.5.1 Plastic plugs
(Fig. 99) If required, the attachment holes on the sides of BZ rails can be closed with BRK plastic plugs. However, this is not essential as the holes are located outside the carriage’s area of movement.
Scope of supply: Pack of 25 pcs
Order code: BRK xx xx = Size, sample order: 3 x BRK 25 (75 pcs)
8.5.2 Pinion with through bore (Fig. 100) The pinion has hardened and ground helical teeth in quality 6. The bore is soft and can be machined by customers to suit their individual requirements. This pinion is also available with a keyway (see next paragraph).
For dimensions, please refer to the BZR xx columns in the table of dimensions.
Order code:
Size 25: BZR 25-2.0-20-S6
Size 35: BZR 35-2.5-20-S6
8.5.3 Pinion with through bore and keyway (Fig. 101) This pinion is similar to the pinion with a through bore but also has a keyway to specification DIN 6885-A to facilitate its attachment to a drive shaft. For dimensions, please refer to the BZR xx-K columns in the table of dimensions.
Order code:
Size 25: BZR 25-2.0-20-S6-K
Size 35: BZR 35-2.5-20-S6-K
8.5.4 Pinion with shaft
(Fig. 102) This pinion with hardened and ground helical teeth in quality 6 has a plain shaft. This is left unhardened to permit subsequent machining. This pinion is also available with a keyway (see next paragraph).
For dimensions, please refer to the BZR xx-S columns in the table of dimensions.
Order code:
Size 25: BZR 25-S-2.0-20-S6
Size 35: BZR 35-S-2.5-20-S6
Fig. 99
Fig. 100
Fig. 101
Fig. 102
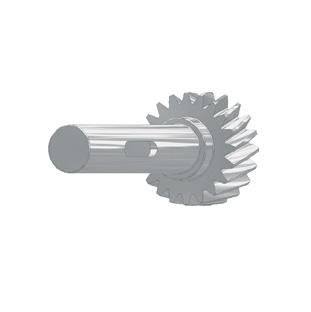

Dimension table pinions
8.5.5 Pinion with shaft and keyway
(Fig. 103) This pinion is similar to the pinion with a shaft, but also has a keyway to specification DIN 6885-A for attachment. For dimensions, please refer to the BZR xx-S-K columns in the table of dimensions.
Order code:
Size 25: BZR 25-S-2.0-20-S6-K
Size 35: BZR 35-S-2.5-20-S6-K
Measure A und A‘
Fig. 103
Fig. 104


8.5.6 Lubricating pinion
(Fig. 105) Felt lubricating pinions are available to lubricate the racks. These can be supplied with oil either manually or with an automatic lubrication system.
Order code:
Size 25: BZR 25-L-2.0-16-S
Size 35: BZR 35-L-2.5-16-S
8.5.7 Pinion hub for lubricating pinion
(Fig. 106) Pinion hubs are used in combination with lubricating pinions. Lubricating oil can be fed through the hub to the felt pinion through via a special arrangement of lubricating channels.
Order code:
Size 25: BZR 25-LN
Size 35: BZR 35-LN
8.5.8 Assembly fixture for BZ systems
(Fig. 107) An assembly fixture is available for the alignment of butt-jointed BZ rails. It consists of a rack segment designed to match BZ teeth. During assembly, the segment is inserted into the racks on both sides of the butt joint which connects and aligns them precisely.
Order code:
Size 25: BZM 25-2.0-7-S5
Size 35: BZM 35-2.5-6-S5
Fig. 105
Fig. 106
Fig. 107
Individual guide rails and carriages are ordered in accordance with the order codes described below. All MONORAIL BM carriages can be used with BZ rails. Q.v. chapter 2.1 , chapter 6.4 and 8.4 for the order key for accessories. Separate order codes are used in each case for rails, carriages and accessories. This also applies to different versions of rails and carriages. All guide components are supplied individually as standard. If required, SCHNEEBERGER can also supply rails and carriages incl. assembled accessories as complete systems. Please note the ordering instructions in chapter 4.7 if this applies.
Order code for BZ Rails
Quantity
Rail
Size
Toothing quailty
Reference side
Rail length L3
Position of first fixing hole L5
Position of last fixing hole L10
Coating
NB
Q.v. chapter 8.1 to 8.3 for an overview of types, details of shapes, available options and accessories.
Q.v. chapter 2 for a description of the options. If possible, standard lengths are preferred for L3 rail length. These are calculated with the table values in chapter 8.2 using the following formula: L3 = n x L4 + L5 + L10 L3max.
Order code for BM Carriages
Quantity
Carriage
Size
Type
Accuracy
Preload
Reference side
Coating
Lube connection
Lubrication as delivered condition
NB
Q.v. chapter 8.1 to 8.3 for an overview of types, details of shapes, available options and accessories.
Q.v. chapter 8.2 for a description of the options.

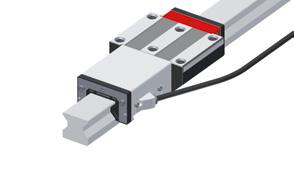
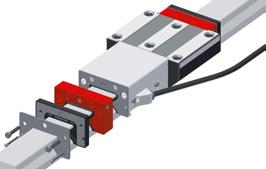
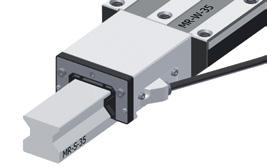


Features of System MONORAIL AMS 3B
SCHNEEBERGER’s MONORAIL AMS 3B is an integrated measuring system for distance measurement for use on all protected machine tool axes with high demands on system precision. Mechanically the AMS 3B is based on SCHNEEBERGER’s MONORAIL MR roller guide with lengths up to 6 metres. The integration of the measurement system allows very compact axes to be put together.
A digital interface with a range of different resolutions for different maximum speeds, and an analog 1Vpp (200 µm signal period) interface are available as interfaces with the control system. Reference marks can be set at 50mm intervals or distance coded.
Different options for carriage lubrication and sealing permit the best possible degree of adaptation to application requirements. The easily interchangeable reading head is identical for all sizes.
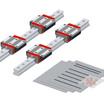
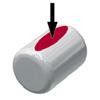


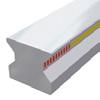
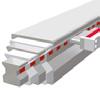



9.1 Product overview AMS 3B rails
Product overview AMS 3B Rails

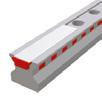
Buildsizes / Rail build form Size
AMS 3B S 30-N
AMS 3B S 35-N AMS 3B S 35-C
AMS 3B S 45-N AMS 3B S 45-C
S
Features
Screwable from above
Screwable from below
Small assembly effort
Great single-part system length
Available options for AMS 3B Rails
Magnetization
50 mm Raster
20 mm Code
50 mm Code
Available accessories for AMS 3B Rails
Plugs Cover strips Assembly tools
scale bottom Ref.bottom, scale bottom Ref.top, scale bottom
Ref.top, scale top
9.2 Product overview AMS 3B Carriages
Product overview AMS 3B Carriages


Features
Screwable from above
Screwable from below
Screwable from the side
For high loads and moments
For medium loads a. moments
For limited installation space
Available options for AMS 3B Carriages
Accuracy Preload
Reading head position
Right top
Note: P2 / P4 on request
Lube connections at P1
Left center
Top left
Lower left side
Upper left side
S10+S12+S13
locked using threaded pins
Left bottom
Lube connections at P3
Right center
Top right
Lower right side
Upper right side
S20+S22+S23 locked using threaded pins
Available accessories for AMS 3B Carriages
Additional wipers
Metal wiper Bellows Lube nippels
Lubrication Interface
Oil protect Grease protect Full greasing
Assembly rails Lube adapters
TMU, analog, 0.3m
TRU, analog, 3m
TSU, analog, 3m
TMD, digital, 0.3m
TRD, digital, 3m
TSD, digital, 3m
Lubrication plates Cables
9.3.1 AMS 3B Size 25
AMS 3B S 25 Drawings
AMS 3B W 25 Drawings
Clearance for end piece assembly
Marked side
AMS 3B W 25 Rigidity diagram

3B W 25 Load rating

9.3 Technical data and options
AMS 3B Size 25 Dimensions and capacities
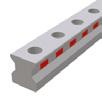
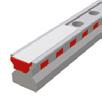
B1: Rail width
J1: Rail height
L3: Rail length max.
L4: Spacing of fixing holes
L5/L10: Position of first/last fixing hole Rail weight, specific (kg/m)
Available options for AMS 3B S 25


A: System height
A1: Half width of housing on opposite side
A2: Half width of housing on reading head side
A3: Projection of reading head
B: Carriage width
B2: Distance between locating faces
C1: Position of center front lube hole*
C3: Position of lateral lube hole
C4: Position of lateral lube hole
C7: Position of top lube hole
J: Carriage height
L1: Exterior fixing hole spacing
L2: Interior fixing hole spacing
L9: Carriage length with housing
L11: Housing length
L13: Total length measuring carriage
Lw: Inner carriage body length
N: Lateral fixing hole spacing
O: Reference face height
Capacities and weights
C0: Static load capacitiy (N)
C100: Dynamic load capacity (N)
M0Q: Static cross moment capacity (Nm)
M0L: Static longitud. moment capacity (Nm)
MQ: Dyn. cross moment capacity (Nm)
ML: Dyn. longitud. moment capacity (Nm)
Carriage weight (kg)
Available options for AMS 3B W 25
9.3.2 AMS 3B Size 30
AMS 3B S 30 Drawings
AMS 3B W 30 Drawings
AMS 3B W 30 Rigidity diagram

3B W 30 Load rating


9.3 Technical data and options
AMS 3B Size 30 Dimensions and capacities

B1: Rail width
J1: Rail height
L3: Rail length max.
L4: Spacing of fixing holes
L5/L10: Position of first/last fixing hole Rail weight, specific (kg/m)


A: System height
A1: Half width of housing on opposite side
A2: Half width of housing on reading head side
A3: Projection of reading head
B: Carriage width
B2: Distance between locating faces
C1: Position of center front lube hole*
C3: Position of lateral lube hole
C4: Position of lateral lube hole
C7: Position of top lube hole
J: Carriage height
L1: Exterior fixing hole spacing
L2: Interior fixing hole spacing
L9: Carriage length with housing
L11: Housing length
L13: Total length measuring carriage
Lw: Inner carriage body length
N: Lateral fixing hole spacing
O: Reference face height
Capacities and weights
C0: Static load capacitiy (N)
C100: Dynamic load capacity (N)
M0Q: Static cross moment capacity (Nm)
M0L: Static longitud. moment capacity (Nm)
MQ: Dyn. cross moment capacity (Nm)
ML: Dyn. longitud. moment capacity (Nm)
Carriage weight (kg)
Available options for AMS 3B S 30 * Required to determine the rail length from the projected travel distance
Available options for AMS 3B W 30
9.3.3 AMS 3B Size 35
AMS 3B S 35 Drawings
AMS 3B W 35 Drawings
Clearance for end piece assembly
AMS 3B W 35 Rigidity diagram

Locating side Marked side = Locating side
3B W 35 Load rating

9.3 Technical data and options
AMS 3B Size 35 Dimensions and capacities


B1: Rail width
J1: Rail height
L3: Rail length max.
L4: Spacing of fixing holes
L5/L10: Position of first/last fixing hole
Rail weight, specific (kg/m)
Available options for AMS 3B S 35


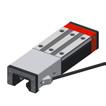
A: System height
A1: Half width of housing on opposite side
A2: Half width of housing on reading head side
A3: Projection of reading head
B: Carriage width
B2: Distance between locating faces
C1: Position of center front lube hole*
C3: Position of lateral lube hole
C4: Position of lateral lube hole
C7: Position of top lube hole
J: Carriage height
L1: Exterior fixing hole spacing
L2: Interior fixing hole spacing
L9: Carriage length with housing
L11: Housing length
L13: Total length measuring carriage
Lw: Inner carriage body length
N: Lateral fixing hole spacing
O: Reference face height
Capacities and weights
C0: Static load capacitiy (N)
C100: Dynamic load capacity (N)
M0Q: Static cross moment capacity (Nm)
M0L: Static longitud. moment capacity (Nm)
MQ: Dyn. cross moment capacity (Nm)
ML: Dyn. longitud. moment capacity (Nm)
Carriage weight (kg)
Available options for AMS 3B W 35
9.3 Technical data and options
9.3.4 AMS 3B Size 45
AMS 3B S 45 Drawings
AMS 3B W 45 Drawings
Clearance for end piece assembly
Locating side Marked side
AMS 3B W 45 Rigidity diagram

AMS 3B W 45 Load rating

9.3
Technical data and options
AMS 3B Size 45 Dimensions and capacities


B1: Rail width
J1: Rail height
L3: Rail length max.
L4: Spacing of fixing holes
L5/L10: Position of first/last fixing hole
Rail weight, specific (kg/m)
Available options for AMS 3B S 45


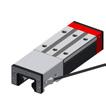
A: System height
A1: Half width of housing on opposite side
A2: Half width of housing on reading head side
A3: Projection of reading head
B: Carriage width
B2: Distance between locating faces
C1: Position of center front lube hole*
C3: Position of lateral lube hole
C4: Position of lateral lube hole
C7: Position of top lube hole
J: Carriage height
L1: Exterior fixing hole spacing
L2: Interior fixing hole spacing
L9: Carriage length with housing
L11: Housing length
L13: Total length measuring carriage
Lw: Inner carriage body length
N: Lateral fixing hole spacing
O: Reference face height
Capacities and weights
C0: Static load capacitiy (N)
C100: Dynamic load capacity (N)
M0Q: Static cross moment capacity (Nm)
M0L: Static longitud. moment capacity (Nm)
MQ: Dyn. cross moment capacity (Nm)
ML: Dyn. longitud. moment capacity (Nm)
Carriage weight (kg)
Available options for AMS 3B W 45
9.3.5 AMS 3B Size 55
AMS 3B S 55 Drawings
AMS 3B W 55 Drawings
Clearance for end piece assembly
Locating
AMS 3B W 55 Rigidity diagram

3B W 55 Load rating


9.3 Technical data and options
AMS 3B Size 55 Dimensions and capacities
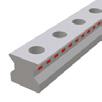
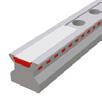
B1: Rail width
J1: Rail height
L3: Rail length max.
L4: Spacing of fixing holes
L5/L10: Position of first/last fixing hole
Rail weight, specific (kg/m)
Available options for AMS 3B S 55


A: System height
A1: Half width of housing on opposite side
A2: Half width of housing on reading head side
A3: Projection of reading head
B: Carriage width
B2: Distance between locating faces
C1: Position of center front lube hole*
C3: Position of lateral lube hole
C4: Position of lateral lube hole
C7: Position of top lube hole
J: Carriage height
L1: Exterior fixing hole spacing
L2: Interior fixing hole spacing
L9: Carriage length with housing
L11: Housing length
L13: Total length measuring carriage
Lw: Inner carriage body length
N: Lateral fixing hole spacing
O: Reference face height
Capacities and weights
C0: Static load capacitiy (N)
C100: Dynamic load capacity (N)
M0Q: Static cross moment capacity (Nm)
M0L: Static longitud. moment capacity (Nm)
MQ: Dyn. cross moment capacity (Nm)
ML: Dyn. longitud. moment capacity (Nm)
Carriage weight (kg)
Available options for AMS 3B W 55
Required to determine the rail length from the projected travel distance
9.3.6 AMS 3B Size 65
AMS 3B S 65 Drawings
AMS 3B W 65 Drawings
Clearance for end piece assembly
AMS 3B W 65 Rigidity diagram AMS 3B W 65 Load rating


9.3 Technical data and options
AMS 3B Size 65 Dimensions and capacities
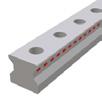
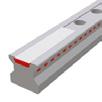
B1: Rail width
J1: Rail height
L3: Rail length max.
L4: Spacing of fixing holes
L5/L10: Position of first/last fixing hole
Rail weight, specific (kg/m)
Available options for AMS 3B S 65


A: System height
A1: Half width of housing on opposite side
A2: Half width of housing on reading head side
A3: Projection of reading head
B: Carriage width
B2: Distance between locating faces
C1: Position of center front lube hole*
C3: Position of lateral lube hole
C4: Position of lateral lube hole
C7: Position of top lube hole
J: Carriage height
L1: Exterior fixing hole spacing
L2: Interior fixing hole spacing
L9: Carriage length with housing
L11: Housing length
L13: Total length measuring carriage
Lw: Inner carriage body length
N: Lateral fixing hole spacing
O: Reference face height
Capacities and weights
C0: Static load capacitiy (N)
C100: Dynamic load capacity (N)
M0Q: Static cross moment capacity (Nm)
M0L: Static longitud. moment capacity (Nm)
MQ: Dyn. cross moment capacity (Nm)
ML: Dyn. longitud. moment capacity (Nm)
Carriage weight (kg)
Available options for AMS 3B W 65
* Required to determine the rail length from the projected travel distance
9.4 Accessories Overview
Accessories
Plugs:
Plastic plugs
Brass plugs
Steel plugs
Cover strips:
Cover strip (spare part)
End piece for cover strip (spare part)
Assembly tools:
Installation tool for steel plugs
Hydraulic cylinder for MWH
Installation tool for cover strip
Accessories
Additional wipers:
Additional wipers Viton
Metal wiper
Bellows:
Bellows
Adapter plate for bellows (spare part)
End plate for bellows (spare part)
Assembly rails:
Assembly rail
Lubrication plates:
Lubrication plate
Front plates:
Cross wiper (spare part)
Lube nippels:
Hydraulic-type grease nipple straight
Hydraulic-type grease nipple 45°
Hydraulic-type grease nipple 90°
Flush type grease nipple M3
Flush type grease nipple M6
Grease gun for SN 3-T und SN 6-T
Lube adapters:
Lubrication adapter M8 round-head
Lubrication adapter M8 hexagon head
Lubrication adapter G1/8 hexagon head
Straight screw-in connection M3
Straight screw-in connection M6
Swivel screw connection for pipe d=3 mm
Swivel screw connection for pipe d=4 mm
Swivel screw connection for pipe d=4 mm
Swivel screw connection M6
Swivel screw connection M6 long
Swivel screw connection M8
Swivel screw connection M8 long
Cables:
Connecting cable, 12-pole
Connecting cable, 12-pole
Extension cable, 12-pole
Extension cable, 12-pole
Connecting cable, 12-pole
FBM 25 ZPL 25 EPL 25
SN 6
SN 6-45
SN 6-90
SN 3-T
SN 6-T
SFP-T3
SA 6-RD-M8x1
SA 3-D3
SA 6-D4-RD
SV 3-D3
SV 6-M6
SV 6-M6-L
SV 6-M8
SV 6-M8-L
KAO 12-X
KAO 13-X
KAO 14-X
KAO 15-X
KAO 16-X
SN 6
SN 6-45
SN 6-90
SN 6-T SFP-T3
SA 6-RD-M8x1
SA 6-D4-RD
SV 6-M6
SV 6-M6-L
SV 6-M8
SV 6-M8-L
SN 6
SN 6-45
SN 6-90
SN 6-T SFP-T3
SA 6-RD-M8x1
SA 6-6KT-M8x1
SA 6-6KT-G1/8
SA 6-D4-RD
SV 6-M6
SV 6-M6-L
SV 6-M8
SV 6-M8-L
12-X
13-X
14-X
15-X
SN 6
SN 6-45 SN 6-90
SN 6-T SFP-T3
SA 6-RD-M8x1
SA 6-6KT-M8x1
SA 6-6KT-G1/8
SA 6-D4-RD
SV 6-M6
SV 6-M6-L
SV 6-M8
SV 6-M8-L
16-X KAO 12-X KAO 13-X KAO 14-X KAO 15-X KAO 16-X
SN 6
SN 6-45
SN 6-90
SN 6-T SFP-T3
SA 6-RD-M8x1
SA 6-6KT-M8x1
SA 6-6KT-G1/8
SA 6-D4-RD
SV 6-M6
SV 6-M6-L
SV 6-M8
SV 6-M8-L
KAO 12-X
KAO 13-X
KAO 14-X
KAO 15-X
KAO 16-X
SN 6
SN 6-45
SN 6-90
SN 6-T SFP-T3
SA 6-RD-M8x1
SA 6-6KT-M8x1
SA 6-6KT-G1/8
SA 6-D4-RD
SV 6-D4-SW9
SV 6-D4-SW10
SV 6-M6
SV 6-M6-L
SV 6-M8
SV 6-M8-L
AMS 3B Carriages accessories overview
AMS 3B Rails accessories overview
9.5 Order key Analog
Individual guide rails and carriages are ordered in accordance with the order codes described below.
AMS 3B carriages consist of guide carriage, casing and reading head. All MONORAIL MR carriages can also be used with AMS 3B rails. Q.v. chapter 2.2 and chapter 5.4 for the order key for accessories.
Separate order codes are used in each case for rails, carriages and accessories. This also applies to different versions of rails and carriages.
All guide components are supplied individually as standard, i.e. unassembled.
If required, SCHNEEBERGER can also supply rails and carriages assembled incl. accessories as complete systems. Please note the ordering instructions in chapter 4.8 if this applies.
The order code for the AMS 3B systems is made up of two groups. For the AMS system with an anolog interface, the code is AMSA. The AMS system with a digital interface is referred to as AMSD.
Order code for AMSA 3B Rails
Quantity
Rail
Type
Accuracy
Straightness
Reference side
Rail length L3
Position of first fixing hole L5
Position of last fixing hole L10
Coating
Magnetization
NB
Q.v. chapter 9.1 to 9.3 for an overview of types, details of shapes, available options and accessories.
Q.v. chapter 2 for a description of the options.
If possible, standard lengths are preferred for L3 rail length.
These are calculated with the table values in chapter 9.2 using the following formula: L3
Order code for AMSA 3B Carriages
Quantity
Carriage Size
Type
Reading head position
Accuracy
Preload
Reference side
Coating
Lube connection
Lubrication as delivered condition
Interface
NB
Q.v. chapter 9.1 to 9.3 for an overview of types, details of shapes, available options and accessories.
Q.v. chapter 2 for a description of the options.
Order code for AMSA 3B Reading head (spare part)
1x SMA 3B -MU
Quantity
Reading head
Interface
NB
Q.v. chapter 2 for a description of the options.
9.6 Order key Digital
Order code for AMSD 3B Rails
Quantity
Rail
Size
Type
Accuracy
Straightness
Reference side
Rail length L3
Position of first fixing hole L5
Position of last fixing hole L10
Coating
Magnetization
NB
Q.v. chapter 9.1 to 9.3 for an overview of types, details of shapes, available options and accessories.
Q.v. chapter 2 for a description of the options.
If possible, standard lengths are preferred for L3 rail length.
These are calculated with the table values in chapter 9.2 using the following formula: L3 = n x L4 + L5 + L10 L3max.
Standard L5 / L10 = ( L4 / 2 ) - 1,5
Order code for AMSD 3B Carriages
Quantity
Carriage
Size
Type
Reading head position
Accuracy
Preload
Reference side
Coating
Lube connection
Lubrication as delivered
condition
Interface
Interpolation
Frequency
Reference pulse
NB
Q.v. chapter 9.1 to 9.3 for an overview of types, details of shapes, available options and accessories.
Q.v. chapter 2 for a description of the options.
Order code for AMSD 3B Reading head (spare part)
Quantity
Reading head
Interface
Interpolation
Frequency
Reference pulse
NB
Q.v. chapter 2 for a description of the options.

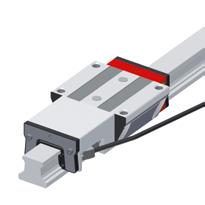
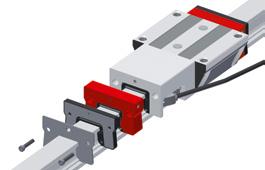


Features of System MONORAIL AMS 4B
SCHNEEBERGER’s MONORAIL AMS 4B is an integrated measuring system for distance measurement for use on all protected machine tool axes with lower machining forces and high demands on system precision. Mechanically the AMS 4B is based on SCHNEEBERGER’s MONORAIL BM ball guide with lengths up to 6 metres. The integration of the measurement system allows very compact axes to be put together.
A digital interface with a range of different resolutions for different maximum speeds, and an analog 1Vpp (200 µm signal period) interface are available as interfaces with the control system. Reference marks can be set at 50mm intervals or distance coded. Different options for carriage lubrication and sealing permit the best possible degree of adaptation to application requirements. The easily interchangeable reading head is identical for all sizes.


Product overview AMS 4B Rails

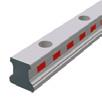
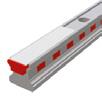
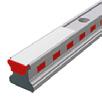
Buildsizes / Rail build forms
Features
Screwable from above
Small assembly effort
Great single-part system length
For the support of metal covers
Available options for AMS 4B Rails
Magnetization
50 mm Raster
20 mm Code
50 mm Code
Available accessories for AMS 4B Rails
Plugs Cover strips Assembly tools
Ref.top, scale bottom
Ref.top, scale top
10.2 Product overview AMS 4B Carriages
Product overview AMS 4B Carriages

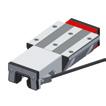
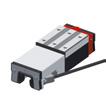
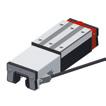

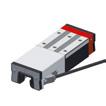
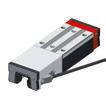
Buildsizes / Carriage build forms
Features
Screwable from above
Screwable from below
Screwable from the side
For high loads and moments
For medium loads and moments
For limited installation space
Available options for AMS 4B Carriages Accuracy
Lube connections
Left center
Right center
Top left
Top right
Lower left side
Lower right side
Reading head position
Right top
Left bottom
Upper left side
Upper right side
Left side
Right side Oil protect Grease protect Full greasing
P1: S10+S12+S13 locked using threaded pins
P3: S20+S22+S23 locked using threaded pins
Available accessories for AMS 4B Carriages
Additional wipers
Metal wiper Bellows Lube nippels
Assembly rails
Lube adapters
analog, 0.3m TRU, analog, 3m TSU, analog, 3m TMD, digital, 0.3m TRD, digital, 3m TSD, digital, 3m
Lubrication plates
Cables
10.3 Technical data and
10.3.1 AMS 4B Size 15
AMS 4B S 15 Drawings
Clearance for end piece assembly
AMS 4B W 15 Drawings
Locating side Marked side
AMS 4B W 15 Rigidity diagram

4B W 15 Load rating


10.3 Technical data and options
AMS 4B Size 15 Dimensions and capacities
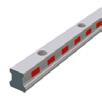
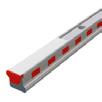
B1: Rail width
J1: Rail height
L3: Rail length max.
L4: Spacing of fixing holes
L5/L10: Position of first/last fixing hole Rail weight, specific (kg/m)
Available options for AMS 4B S 15


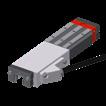
A: System height
A1: Half width of housing on opposite side
A2: Half width of housing on reading head side
A3: Projection of reading head
B: Carriage width
B2: Distance between locating faces
C1: Position of center front lube hole*
C3: Position of lateral lube hole
C4: Position of lateral lube hole
C7: Position of top lube hole
J: Carriage height
L1: Exterior fixing hole spacing
L2: Interior fixing hole spacing
L9: Carriage length with housing
L11: Housing length
L13: Total length measuring carriage
Lw: Inner carriage body length
N: Lateral fixing hole spacing
O: Reference face height
Capacities and weights
C0: Static load capacitiy (N)
C100: Dynamic load capacity (N)
M0Q: Static cross moment capacity (Nm)
M0L: Static longitud. moment capacity (Nm)
MQ: Dyn. cross moment capacity (Nm)
ML: Dyn. longitud. moment capacity (Nm)
Carriage weight (kg)
Available options for AMS 4B W 15
10.3
Technical
data and options
10.3.2 AMS 4B Size 20
AMS 4B S 20 Drawings
AMS 4B W 20 Drawings
Locating side Marked side
AMS 4B W 20 Rigidity diagram

AMS 4B W 20 Load rating


10.3 Technical data and options
AMS 4B Size 20 Dimensions and capacities
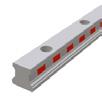
B1: Rail width
J1: Rail height
L3: Rail length max.
L4: Spacing of fixing holes
L5/L10: Position of first/last fixing hole
Rail weight, specific (kg/m)
Available options for AMS 4B S 20
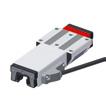
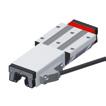

A: System height
A1: Half width of housing on opposite side
A2: Half width of housing on reading head side
A3: Projection of reading head
B: Carriage width
B2: Distance between locating faces
C1: Position of center front lube hole*
C3: Position of lateral lube hole
C4: Position of lateral lube hole
C7: Position of top lube hole
J: Carriage height
L1: Exterior fixing hole spacing
L2: Interior fixing hole spacing
L9: Carriage length with housing
L11: Housing length
L13: Total length measuring carriage
Lw: Inner carriage body length
N: Lateral fixing hole spacing
O: Reference face height
Capacities and weights
C0: Static load capacitiy (N)
C100: Dynamic load capacity (N)
M0Q: Static cross moment capacity (Nm)
M0L: Static longitud. moment capacity (Nm)
MQ: Dyn. cross moment capacity (Nm)
ML: Dyn. longitud. moment capacity (Nm)
Carriage weight (kg)
Available options for AMS 4B W 20
10.3 Technical data and
10.3.3 AMS 4B Size 25
AMS 4B S 25 Drawings
AMS 4B W 25 Drawings
Clearance for end piece assembly
AMS 4B W 25 Rigidity diagram

AMS 4B W 25 Load rating

10.3 Technical data and options
AMS 4B Size 25 Dimensions and capacities


B1: Rail width
J1: Rail height
L3: Rail length max.
L4: Spacing of fixing holes
L5/L10: Position of first/last fixing hole
Rail weight, specific (kg/m)
Available options for AMS 4B S 25



A: System height
A1: Half width of housing on opposite side
A2: Half width of housing on reading head side
A3: Projection of reading head
B: Carriage width
B2: Distance between locating faces
C1: Position of center front lube hole*
C3: Position of lateral lube hole
C4: Position of lateral lube hole
C7: Position of top lube hole
J: Carriage height
L1: Exterior fixing hole spacing
L2: Interior fixing hole spacing
L9: Carriage length with housing
L11: Housing length
L13: Total length measuring carriage
Lw: Inner carriage body length
N: Lateral fixing hole spacing
O: Reference face height
Capacities and weights
C0: Static load capacitiy (N)
C100: Dynamic load capacity (N)
M0Q: Static cross moment capacity (Nm)
M0L: Static longitud. moment capacity (Nm)
MQ: Dyn. cross moment capacity (Nm)
ML: Dyn. longitud. moment capacity (Nm)
Carriage weight (kg)
Available options for AMS 4B W 25
10.3.4 AMS 4B Size 30
AMS 4B S 30 Drawings
AMS 4B W30 Drawings
AMS 4B W 30 Rigidity diagram

AMS 4B W 30 Load rating

10.3 Technical data and options
AMS 4B Size 30 Dimensions and capacities
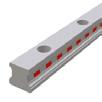
B1: Rail width
J1: Rail height
L3: Rail length max.
L4: Spacing of fixing holes
L5/L10: Position of first/last fixing hole
Rail weight, specific (kg/m)
Available options for AMS 4B S 30


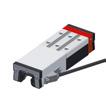
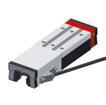
A: System height
A1: Half width of housing on opposite side
A2: Half width of housing on reading head side
A3: Projection of reading head
B: Carriage width
B2: Distance between locating faces
C1: Position of center front lube hole*
C3: Position of lateral lube hole
C4: Position of lateral lube hole
C7: Position of top lube hole
J: Carriage height
L1: Exterior fixing hole spacing
L2: Interior fixing hole spacing
L9: Carriage length with housing
L11: Housing length
L13: Total length measuring carriage
Lw: Inner carriage body length
N: Lateral fixing hole spacing
O: Reference face height
Capacities and weights
C0: Static load capacitiy (N)
C100: Dynamic load capacity (N)
M0Q: Static cross moment capacity (Nm)
M0L: Static longitud. moment capacity (Nm)
MQ: Dyn. cross moment capacity (Nm)
ML: Dyn. longitud. moment capacity (Nm)
Carriage weight (kg)
Available options for AMS 4B W 30
10.3 Technical data and options
10.3.5 AMS 4B Size 35
AMS 4B S 35 Drawings
AMS 4B W35 Drawings
4B W 35 Rigidity diagram
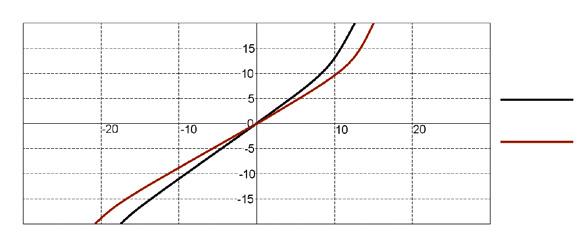
AMS 4B W 35 Load rating

AMS
10.3 Technical data and options
AMS 4B Size 35 Dimensions and capacities
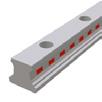
B1: Rail width
J1: Rail height
L3: Rail length max.
L4: Spacing of fixing holes
L5/L10: Position of first/last fixing hole
Rail weight, specific (kg/m)
Available options for AMS 4B S 30


A: System height
A1: Half width of housing on opposite side
A2: Half width of housing on reading head side
A3: Projection of reading head
B: Carriage width
B2: Distance between locating faces
C1: Position of center front lube hole*
C3: Position of lateral lube hole
C4: Position of lateral lube hole
C7: Position of top lube hole
J: Carriage height
L1: Exterior fixing hole spacing
L2: Interior fixing hole spacing
L9: Carriage length with housing
L11: Housing length
L13: Total length measuring carriage
Lw: Inner carriage body length
N: Lateral fixing hole spacing
O: Reference face height
Capacities and weights
C0: Static load capacitiy (N)
C100: Dynamic load capacity (N)
M0Q: Static cross moment capacity (Nm)
M0L: Static longitud. moment capacity (Nm)
MQ: Dyn. cross moment capacity (Nm)
ML: Dyn. longitud. moment capacity (Nm)
Carriage weight (kg)
Available options for AMS 4B W 35
10.3 Technical data and options
10.3.6 AMS 4B Size 45
AMS 4B S 45 Drawings
AMS 4B W 45 Drawings
Clearance for end piece assembly
Locating side Marked side
AMS 4B W 45 Rigidity diagram

AMS 4B W 45 Load rating

C/C0
10.3 Technical data and options
AMS 4B Size 45 Dimensions and capacities
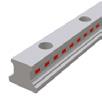

B1: Rail width
J1: Rail height
L3: Rail length max.
L4: Spacing of fixing holes
L5/L10: Position of first/last fixing hole
Rail weight, specific (kg/m)
Available options for AMS 4B S 45
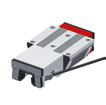

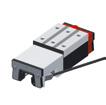

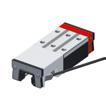
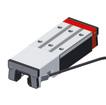
A: System height
A1: Half width of housing on opposite side
A2: Half width of housing on reading head side
A3: Projection of reading head
B: Carriage width
B2: Distance between locating faces
C1: Position of center front lube hole*
C3: Position of lateral lube hole
C4: Position of lateral lube hole
C7: Position of top lube hole
J: Carriage height
L1: Exterior fixing hole spacing
L2: Interior fixing hole spacing
L9: Carriage length with housing
L11: Housing length
L13: Total length measuring carriage
Lw: Inner carriage body length
N: Lateral fixing hole spacing
O: Reference face height
Capacities and weights
C0: Static load capacitiy (N)
C100: Dynamic load capacity (N)
M0Q: Static cross moment capacity (Nm)
M0L: Static longitud. moment capacity (Nm)
MQ: Dyn. cross moment capacity (Nm)
ML: Dyn. longitud. moment capacity (Nm)
Carriage weight (kg)
Available options for AMS 4B W 45
10.4 Accessories Overview
Accessories
Plugs:
Plastic plugs
Cover strips:
Cover strip (spare part)
End piece for cover strip (spare part)
Assembly tools:
Installation tool for cover strip
Accessories
Additional wipers:
Additional wipers Viton
Metal wiper
Bellows:
Bellows
Adapter plate for bellows (spare part)
End plate for bellows (spare part)
Assembly rails:
Assembly rail
Lubrication plates:
Lubrication plate
Front plates:
Cross wiper for front plate (spare part)
Lube nippels:
Hydraulic-type grease nipple straight
Hydraulic-type grease nipple 45°
Hydraulic-type grease nipple 90°
Flush type grease nipple M3
Flush type grease nipple M6
Grease gun for SN 3-T und SN 6-T
Lube adapters:
Lubrication adapter M8 round-head
Lubrication adapter M8 hexagon head
Lubrication adapter G1/8 hexagon head
Straight screw-in connection M3
Straight screw-in connection M6
Swivel screw connection for pipe d=3 mm
Swivel screw connection for pipe d=4 mm
Swivel screw connection for pipe d=4 mm
Swivel screw connection M6
Swivel screw connection M6 long
Swivel screw connection M8
Swivel screw connection M8 long
Cables:
Connecting cable, 12-pole
Connecting cable, 12-pole
Extension cable, 12-pole
Extension cable, 12-pole
Connecting cable, 12-pole
SN 3-T
SFP-T3
SA 3-D3
SV 3-D3
SN 6
SN 6-45
SN 6-90
SN 3-T
SN 6-T SFP-T3
SA 6-RD-M8x1
SN 6 SN 6-45 SN 6-90
SN 6-T SFP-T3
SA 6-RD-M8x1
SN 6 SN 6-45 SN 6-90
SN 6-T SFP-T3
SA 6-RD-M8x1
SA 6-6KT-M8x1
SA 6-6KT-G1/8
SN 6 SN 6-45 SN 6-90
SN 6-T SFP-T3
SA 6-RD-M8x1
SA 6-6KT-M8x1
SA 6-6KT-G1/8
SN 6
SN 6-45
SN 6-90SN 6-T SFP-T3
SA 6-RD-M8x1
SA 6-6KT-M8x1
SA 6-6KT-G1/8
KAO 12-X
KAO 13-X
KAO 14-X
KAO 15-X
KAO 16-X
SA 3-D3
SA 6-D4-RD
SA 3-D3
SV 6-D4-SW9
SV 6-D4-SW10
SV 6-M6
SV 6-M6-L
SV 6-M8
SV 6-M8-L
KAO 12-X
SA 6-D4-RD
SV 6-D4-SW9
SV 6-D4-SW10
SV 6-M6
SV 6-M6-L
SV 6-M8
SV 6-M8-L
SA 6-D4-RD
SV 6-D4-SW9
SV 6-D4-SW10
SV 6-M6
SV 6-M6-L
SV 6-M8
SV 6-M8-L
12-X
13-X
14-X
15-X
16-X
SA 6-D4-RD -
SV 6-D4-SW9
SV 6-D4-SW10
SV 6-M6
SV 6-M6-L
SV 6-M8
SV 6-M8-L
KAO 12-X
KAO 13-X
KAO 14-X
KAO 15-X
KAO 16-X
SA 6-D4-RD
SV 6-D4-SW9
SV 6-D4-SW10
SV 6-M6
SV 6-M6-L
SV 6-M8
SV 6-M8-L
KAO 12-X
KAO
AMS 4B Rails accessories overview
AMS 4B Rails accessories
10.5 Order key Analog
Individual guide rails and carriages are ordered in accordance with the order codes described below.
AMS 4B carriages consist of guide carriage, casing and reading head. All MONORAIL BM carriages can also be used with AMS 4B rails. Q.v. chapter 2 and chapter 6.4 for the order key for accessories. Separate order codes are used in each case for rails, carriages and accessories. This also applies to different versions of rails and carriages. All guide components are supplied individually as standard, i.e. unassembled.
If required, SCHNEEBERGER can also supply rails and carriages assembled incl. accessories as complete systems. Please note the ordering instructions in chapter 2.4 if this applies. The order code for the AMS 4B systems is made up of two groups. For the AMS system with an anolog interface, the code is AMSA. The AMS system with a digital interface is referred to as AMSD.
Order code for AMSA 4B Rails
Quantity
Rail
Accuracy
Straightness
Reference side
Rail length L3
Position of first fixing hole L5
Position of last fixing hole L10
Coating
Magnetization
NB
Q.v. chapter 10.1 to 10.3 for an overview of types, details of shapes, available options and accessories. Q.v. chapter 2 for a description of the options. If possible, standard lengths are preferred for L3 rail length. These are calculated with the table values in chapter 10.2 using the following formula: L3 = n x L4 + L5 + L10 L3max.
Order code for AMSA 4B Carriages
Quantity
Carriage Size
Type
Reading head position
Accuracy
Preload
Reference side
Coating
Lube connection
Lubrication as delivered condition
Interface
NB
Q.v. chapter 10.1 to 10.3 for an overview of types, details of shapes, available options and accessories.
Q.v. chapter2 for a description of the options.
Order code for AMSA 3B Reading head (spare part) 1x SMA 4B -MU
Quantity
Reading head
Interface
Order code for AMSD 4B Rails
Quantity
Rail Size
Type
Accuracy
Straightness
Reference side
Rail length L3
Position of first fixing hole L5
Position of last fixing hole L10
Coating
Magnetization
NB
Q.v. chapter 10.1 to 10.3 for an overview of types, details of shapes, available options and accessories. Q.v. chapter 2 for a description of the options. If possible, standard lengths are preferred for L3 rail length.
These are calculated with the table values in chapter 10.2 using the following formula: L3 = n x L4 + L5 + L10 L3max.
Order code for AMSD 4B Carriages
Quantity
Carriage
Size
Type
Reading head position
Accuracy
Preload
Reference side
Coating
Lube connection
Lubrication as delivered
condition
Interface
Interpolation Frequency
Reference pulse
NB
Q.v. chapter 10.1 to 10.3 for an overview of types, details of shapes, available options and accessories.
Q.v. chapter 2 for a description of the options.
Order code for AMSD 4B Reading head (spare part)
Quantity
Reading head
Interface
Interpolation Frequency
Reference pulse
NB
Q.v. chapter 2 for a description of the options.
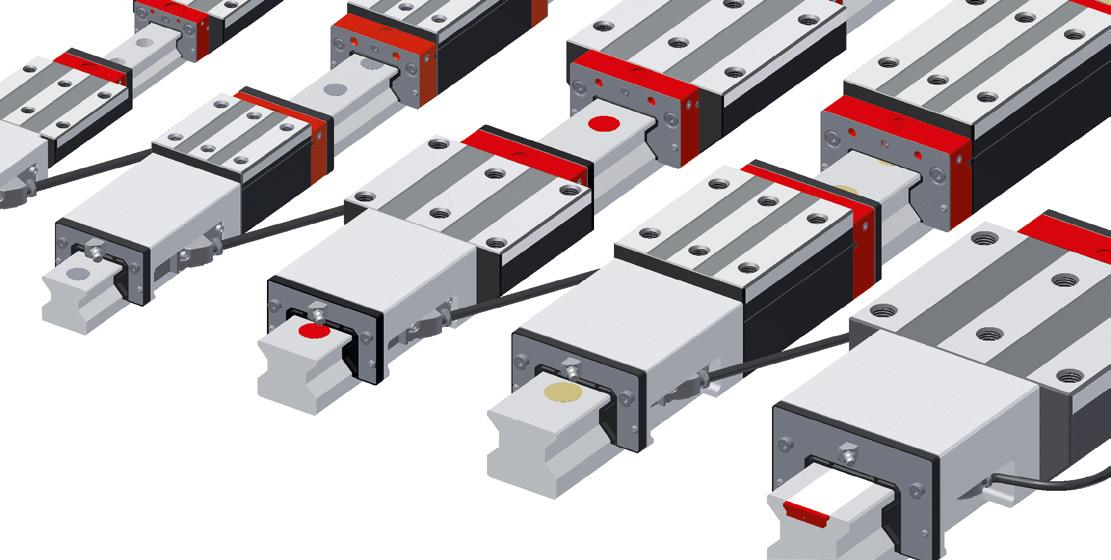
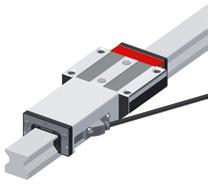
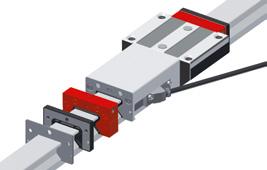


Features of System MONORAIL AMSABS 3B
With the MONORAIL AMSABS 3B, SCHNEEBERGER provides an integrated measuring system for absolute distance measurement for use in automation engineering, mechanical handling technology and machine tool engineering, whereby high force absorption and precise distance measurements are required in small assembly spaces. From a mechanical point of view, the AMSABS 3B is based on the MONORAIL MR roller guide up to a length of 6m. The distance measurement system’s compact housing facilitates the construction of highly compact axes.
SCHNEEBERGER provides an absolute interface with various cable lengths to connect it with the SSI, SSI+SinCos, FANUC, Mitsubishi and Siemens Drive CliQ® controllers.
Various options regarding lubrification and sealing of the measuring carriages mean that optimal adjustments can be made to the requirements of the application. The easily exchangeable reading head is identical and replaceable for all sizes.


Buildsizes / Rail build forms
Screwable from above
Small assembly effort
Small assembly effort
Great single-part system length Product overview AMSABS 3B Rails


AMSABS 3B S 25-N AMSABS 3B S 25-C
AMSABS 3B S 30-N
AMSABS 3B S 35-N AMSABS 3B S 35-C
AMSABS 3B S 45-N AMSABS 3B S 45-C
AMSABS 3B S 55-N AMSABS 3B S 55-C
AMSABS 3B S 65-N AMSABS 3B S 65-C
Available options for AMSABS 3B Rails
Ref.bottom, scale top
Ref.top, scale bottom
Ref.top, scale top Available accessories for AMSABS 3B Rails Plugs Cover strips
Product overview AMSABS 3B Carriages Available
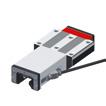
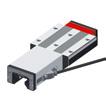


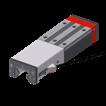
Lube connections at P1
Left center
Top left
Lower left side
Upper left side
S10+S12+S13
locked using threaded pins
Lube connections at P3
Right center
Top right
Lower right side
Upper right side
S20+S22+S23
locked using threaded pins
Available accessories for AMS 3B Carriages
Additional wipers Metal wiper Bellows Lube nippels
11.3.1 AMSABS 3B Size 25
AMSABS 3B S 25 Drawings
AMSABS 3B W 25 Drawings
Clearance for end piece assembly
AMSABS 3B W 25 Rigidity diagram

Locating side
Marked side = Locating side
AMSABS 3B W 25 Load rating

11.3 Technical data and options
AMSABS 3B Size 25 Dimensions and capacities
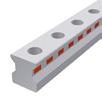
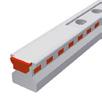
B1: Rail width
J1: Rail height
L3: Rail length max.
L4: Spacing of fixing holes
L5/L10: Position of first/last fixing hole
Rail weight, specific (kg/m)
Available options for AMSABS 3B S 25

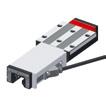
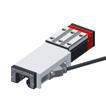
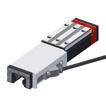
A: System height
A1: Half width of housing on opposite side
A2: Half width of housing on reading head side
A3: Projection of reading head
B: Carriage width
B2: Distance between locating faces
C1: Position of center front lube hole*
C3: Position of lateral lube hole
C4: Position of lateral lube hole
C7: Position of top lube hole
J: Carriage height
L1: Exterior fixing hole spacing
L2: Interior fixing hole spacing
L9: Carriage length with housing
L11: Housing length
L13: Total length measuring carriage
Lw: Inner carriage body length
N: Lateral fixing hole spacing
O: Reference face height
Capacities and weights
C0: Static load capacitiy (N)
C100: Dynamic load capacity (N)
M0Q: Static cross moment capacity (Nm)
M0L: Static longitud. moment capacity (Nm)
MQ: Dyn. cross moment capacity (Nm)
ML: Dyn. longitud. moment capacity (Nm)
Carriage weight (kg)
Available options for AMSABS 3B W 25
11.3 Technical data and options
11.3.2 AMSABS 3B Size 30
AMSABS 3B S 30 Drawings
AMSABS 3B W 30 Drawings
AMSABS 3B W 30 Rigidity diagram

AMSABS 3B W 30 Load rating


11.3 Technical data and options
AMSABS 3B Size 30 Dimensions and capacities

B1: Rail width
J1: Rail height
L3: Rail length max.
L4: Spacing of fixing holes
L5/L10: Position of first/last fixing hole
Rail weight, specific (kg/m)
Available options for AMSABS 3B S 30


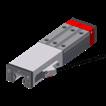
A: System height
A1: Half width of housing on opposite side
A2: Half width of housing on reading head side
A3: Projection of reading head
B: Carriage width
B2: Distance between locating faces
C1: Position of center front lube hole*
C3: Position of lateral lube hole
C4: Position of lateral lube hole
C7: Position of top lube hole
J: Carriage height
L1: Exterior fixing hole spacing
L2: Interior fixing hole spacing
L9: Carriage length with housing
L11: Housing length
L13: Total length measuring carriage
Lw: Inner carriage body length
N: Lateral fixing hole spacing
O: Reference face height
Capacities and weights
C0: Static load capacitiy (N)
C100: Dynamic load capacity (N)
M0Q: Static cross moment capacity (Nm)
M0L: Static longitud. moment capacity (Nm)
MQ: Dyn. cross moment capacity (Nm)
ML: Dyn. longitud. moment capacity (Nm)
Carriage weight (kg)
Available options for AMSABS 3B W 30
11.3 Technical data and options
11.3.3 AMSABS 3B Size 35
AMSABS 3B S 35 Drawings
AMSABS 3B W 35 Drawings
Clearance for end piece assembly
AMSABS 3B W 35 Rigidity diagram

Locating side Marked side =
AMSABS 3B W 35 Load rating

11.3 Technical data and options
AMSABS 3B Size 35 Dimensions and capacities


B1: Rail width
J1: Rail height
L3: Rail length max.
L4: Spacing of fixing holes
L5/L10: Position of first/last fixing hole
Rail weight, specific (kg/m)
Available options for AMSABS 3B S 35


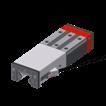
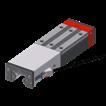
A: System height
A1: Half width of housing on opposite side
A2: Half width of housing on reading head side
A3: Projection of reading head
B: Carriage width
B2: Distance between locating faces
C1: Position of center front lube hole*
C3: Position of lateral lube hole
C4: Position of lateral lube hole
C7: Position of top lube hole
J: Carriage height
L1: Exterior fixing hole spacing
L2: Interior fixing hole spacing
L9: Carriage length with housing
L11: Housing length
L13: Total length measuring carriage
Lw: Inner carriage body length
N: Lateral fixing hole spacing
O: Reference face height
Capacities and weights
C0: Static load capacitiy (N)
C100: Dynamic load capacity (N)
M0Q: Static cross moment capacity (Nm)
M0L: Static longitud. moment capacity (Nm)
MQ: Dyn. cross moment capacity (Nm)
ML: Dyn. longitud. moment capacity (Nm)
Carriage weight (kg)
Available options for AMSABS 3B W 35
11.3.4 AMSABS 3B Size 45
AMSABS 3B S 45 Drawings
AMSABS 3B W 45 Drawings
Clearance for end piece assembly
AMSABS 3B W 45 Rigidity diagram

AMSABS 3B W 45 Load rating

11.3 Technical data and options
AMSABS 3B Size 45 Dimensions and capacities

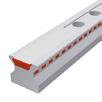
B1: Rail width
J1: Rail height
L3: Rail length max.
L4: Spacing of fixing holes
L5/L10: Position of first/last fixing hole
Rail weight, specific (kg/m)
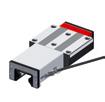

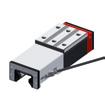
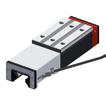

A: System height
A1: Half width of housing on opposite side
A2: Half width of housing on reading head side
A3: Projection of reading head
B: Carriage width
B2: Distance between locating faces
C1: Position of center front lube hole*
C3: Position of lateral lube hole
C4: Position of lateral lube hole
C7: Position of top lube hole
J: Carriage height
L1: Exterior fixing hole spacing
L2: Interior fixing hole spacing
L9: Carriage length with housing
L11: Housing length
L13: Total length measuring carriage
Lw: Inner carriage body length
N: Lateral fixing hole spacing
O: Reference face height
Capacities and weights
C0: Static load capacitiy (N)
C100: Dynamic load capacity (N)
M0Q: Static cross moment capacity (Nm)
M0L: Static longitud. moment capacity (Nm)
MQ: Dyn. cross moment capacity (Nm)
ML: Dyn. longitud. moment capacity (Nm)
Carriage weight (kg)
Available options for AMSABS 3B S 45 * Required to determine the rail length from the projected travel distance
Available options for AMSABS 3B W 45
11.3 Technical data and options
11.3.5 AMSABS 3B Size 55
AMSABS 3B S 55 Drawings
AMSABS 3B W 55 Drawings
Clearance for end piece assembly
AMSABS 3B W 55 Rigidity diagram

AMSABS 3B W 55 Load rating


11.3 Technical data and options
AMSABS 3B Size 55 Dimensions and capacities

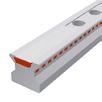
B1: Rail width
J1: Rail height
L3: Rail length max.
L4: Spacing of fixing holes
L5/L10: Position of first/last fixing hole
Rail weight, specific (kg/m)


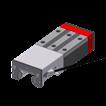

A: System height
A1: Half width of housing on opposite side
A2: Half width of housing on reading head side
A3: Projection of reading head
B: Carriage width
B2: Distance between locating faces
C1: Position of center front lube hole*
C3: Position of lateral lube hole
C4: Position of lateral lube hole
C7: Position of top lube hole
J: Carriage height
L1: Exterior fixing hole spacing
L2: Interior fixing hole spacing
L9: Carriage length with housing
L11: Housing length
L13: Total length measuring carriage
Lw: Inner carriage body length
N: Lateral fixing hole spacing
O: Reference face height
Capacities and weights
C0: Static load capacitiy (N)
C100: Dynamic load capacity (N)
M0Q: Static cross moment capacity (Nm)
M0L: Static longitud. moment capacity (Nm)
MQ: Dyn. cross moment capacity (Nm)
ML: Dyn. longitud. moment capacity (Nm)
Carriage weight (kg)
Available options for AMSABS 3B S 55 * Required to determine the rail length from the projected travel distance
Available options for AMSABS 3B W 55
11.3 Technical data and options
11.3.6 AMSABS 3B Size 65
AMSABS 3B S 65 Drawings
AMSABS 3B W 65 Drawings
Clearance for end piece assembly
AMSABS 3B W 65 Rigidity diagram

AMSABS 3B W 65 Load rating


11.3 Technical data and options
AMSABS 3B Size 65 Dimensions and capacities
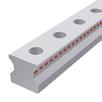
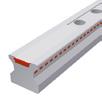
B1: Rail width
J1: Rail height
L3: Rail length max.
L4: Spacing of fixing holes
L5/L10: Position of first/last fixing hole
Rail weight, specific (kg/m)
Available options for AMSABS 3B S 65

A: System height
A1: Half width of housing on opposite side
A2: Half width of housing on reading head side
A3: Projection of reading head
B: Carriage width
B2: Distance between locating faces
C1: Position of center front lube hole*
C3: Position of lateral lube hole
C4: Position of lateral lube hole
C7: Position of top lube hole
J: Carriage height
L1: Exterior fixing hole spacing
L2: Interior fixing hole spacing
L9: Carriage length with housing
L11: Housing length
L13: Total length measuring carriage
Lw: Inner carriage body length
N: Lateral fixing hole spacing
O: Reference face height
Capacities and weights
C0: Static load capacitiy (N)
C100: Dynamic load capacity (N)
M0Q: Static cross moment capacity (Nm)
M0L: Static longitud. moment capacity (Nm)
MQ: Dyn. cross moment capacity (Nm)
ML: Dyn. longitud. moment capacity (Nm)
Carriage weight (kg)
Available options for AMSABS 3B W 65
11.4 Accessories Overview
AMSABS 3B Rails accessories overview
Accessories
Plugs:
Plastic plugs
Brass plugs
Steel plugs
Cover strips:
Cover strip (spare part)
End piece for cover strip (spare part)
Securing band for cover strip (spare part)
Assembly tools:
Installation tool for steel plugs
Hydraulic cylinder for MWH
Installation tool for cover strip
AMSABS 3B Carriages accessories overview
Accessories
Additional wipers:
Additional wipers Viton
Metal wiper
Bellows:
Bellows
Adapter plate for bellows (spare part)
End plate for bellows (spare part)
Assembly rails:
Assembly rail
Lubrication plates:
Lubrication plate
Front plates:
Cross wiper for front plate (spare part)
Lube nippels:
Hydraulic-type grease nipple straight
Hydraulic-type grease nipple 45°
Hydraulic-type grease nipple 90°
Flush type grease nipple M3
Flush type grease nipple M6
Grease gun for SN 3-T und SN 6-T
Lube adapters:
Lubrication adapter M8 round-head
Lubrication adapter M8 hexagon head
Lubrication adapter G1/8 hexagon head
Straight screw-in connection M3
Straight screw-in connection M6
Swivel screw connection for pipe d=3 mm
Swivel screw connection for pipe d=4 mm
Swivel screw connection for pipe d=4 mm
Swivel screw connection M6
Swivel screw connection M6 long
Swivel screw connection M8
Swivel screw connection M8 long
SN 6
SN 6-45
SN 6-90
SN 3-T
SN 6-T SFP-T3
SA 6-RD-M8x1
SA 3-D3
SA 6-D4-RD
SV 3-D3
SN 6 SN 6-45 SN 6-90
SN 6-T SFP-T3
SA 6-RD-M8x1
SA 6-D4-RD
SV 6-M6
SV 6-M6-L
SV 6-M8
SV 6-M8-L
SN 6 SN 6-45 SN 6-90
SN 6-T SFP-T3
SA 6-RD-M8x1
SA 6-6KT-M8x1
SA 6-6KT-G1/8
SA 6-D4-RD
SV 6-M6
SV 6-M6-L
SV 6-M8
SV 6-M8-L
SN 6 SN 6-45 SN 6-90
SN 6-T SFP-T3
SA 6-RD-M8x1
SA 6-6KT-M8x1
SA 6-6KT-G1/8
SA 6-D4-RD
SV 6-M6
SV 6-M6-L
SV 6-M8
SV 6-M8-L
SN 6
SN 6-45 SN 6-90
SN 6-T SFP-T3
SA 6-RD-M8x1
SA 6-6KT-M8x1
SA 6-6KT-G1/8
SA 6-D4-RD
SV 6-M6
SV 6-M6-L
SV 6-M8
SV 6-M8-L
65-STR
SN 6 SN 6-45 SN 6-90
SN 6-T SFP-T3
SA 6-RD-M8x1
SA 6-6KT-M8x1
SA 6-6KT-G1/8
SA 6-D4-RD
SV 6-D4-SW9
SV 6-D4-SW10
SV 6-M6
SV 6-M6-L
SV 6-M8
SV 6-M8-L
Individual guide rails and carriages are ordered in accordance with the order codes described below.
AMSABS 3B carriages consist of guide carriage, casing and reading head. All MONORAIL MR carriages can also be used with AMSABS 3B rails. Q.v. chapter 2 and chapter 5.4 for the order key for accessories.
Separate order codes are used in each case for rails, carriages and accessories. This also applies to different versions of rails and carriages. All guide components are supplied individually as standard, i.e. unassembled.
If required, SCHNEEBERGER can also supply rails and carriages assembled incl. accessories as complete systems. Please note the ordering instructions in chapter 4.8 if this applies.
Order code for AMSABS 3B Rails
Quantity
Rail Size
Type
Accuracy
Straightness
Reference side
Rail length L3
Position of first fixing hole L5
Position of last fixing hole L10
Coating
Type of magnetisation
NB
Q.v. chapter 11.1 to 11.3 for an overview of types, details of shapes, available options and accessories.Q.v. chapter 2 for a description of the options.
If possible, standard lengths are preferred for L3 rail length. These are calculated with the table values in chapter 11.2 using the following formula: L3 = n x L4 + L5 + L10 L3max.
Order code for AMSABS 3B Carriages
Quantity
Carriage
Size
Type
Reading head position
Accuracy
Preload
Reference side
Coating
Lube connection
Lubrication as delivered condition
Interface
Configuration
NB
Q.v. chapter 11.1 to 11.3 for an overview of types, details of shapes, available options and accessories.Q.v. chapter 11.2 for a description of the options. For detailed information about current configuration options for the interfaces, please visit our website at www.schneeberger.com.
Order code for AMSABS 3B Reading head (spare part)
Quantity
Reading head
Interface
Configuration
NB
Q.v. chapter 2 for a description of the options.
1x SABS XB -MH -TS1
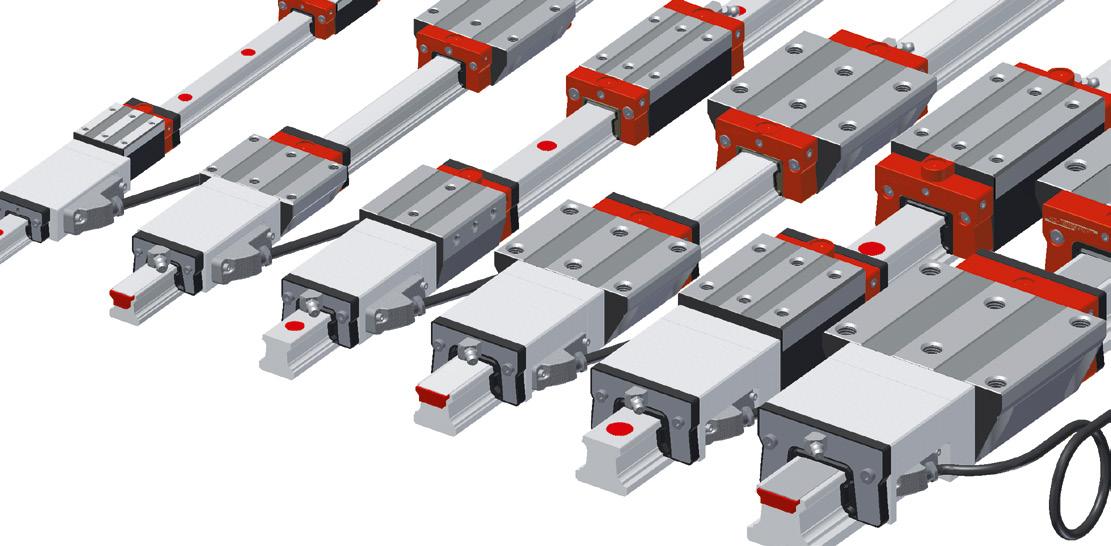
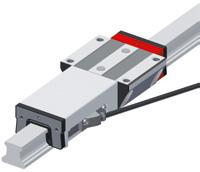


With the MONORAIL AMSABS 4B, SCHNEEBERGER provides an integrated measuring system for absolute distance measurement for use in automation engineering, mechanical handling technology and machine tool engineering, whereby high force absorption and precise distance measurements are required in small assembly spaces. From a mechanical point of view, the AMSABS 4B is based on the MONORAIL BM roller guide up to a length of 6m. The distance measurement system’s compact housing facilitates the construction of highly compact axes.
SCHNEEBERGER provides a fully digital interface with various cable lengths in order to connect it with the SSI, SSI+SinCos, FANUC, Mitsubishi and Siemens Drive CliQ® controllers.
Various options regarding lubrification and sealing of the measuring carriages mean that optimal adjustments can be made to the requirements of the application. The easily exchangeable reading head is identical and replaceable for all sizes.


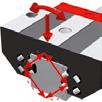

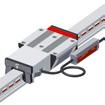


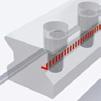

Features of System MONORAIL AMSABS 4B
Product overview AMSABS 4B Rails


Screwable from above
Small assembly effort
Great single-part system length
For the support of metal covers
Available options for AMSABS 4B Rails
Available accessories for AMSABS 4B Rails
Plugs Cover strips Assembly tools 12.1 Product overview AMSABS 4B rails


Ref.bottom, scale top
Ref.top, scale bottom
Ref.top, scale top
Product overview AMSABS 4B Carriages
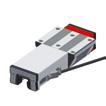




Screwable from above
Screwable from below
Screwable from the side
For high loads and moments
For medium loads a. moments
For limited installation space
Lube connections
Left center
Right center
Top left
Top right
Lower left side
Lower right side
Reading head position
Right top
Left bottom
Upper left side
Upper right side
Left side
Right side
S10+S12+S13 locked using threaded pins
S20+S22+S23 locked using threaded pins
12.3
12.3.1 AMSABS 4B Size 15
AMSABS 4B S 15 Drawings
Clearance for end piece assembly
AMSABS 4B W 15 Drawings
Locating side
Marked side
AMSABS 4B W 15 Rigidity diagram

AMSABS 4B W 15 Load rating


12.3 Technical data and options
AMSABS 4B Size 15 Dimensions and capacities


B1: Rail width
J1: Rail height
L3: Rail length max.
L4: Spacing of fixing holes
L5/L10: Position of first/last fixing hole
Rail weight, specific (kg/m)
Available options for AMSABS 4B S 15
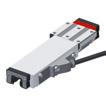

A: System height
A1: Half width of housing on opposite side
A2: Half width of housing on reading head side
A3: Projection of reading head
B: Carriage width
B2: Distance between locating faces
C1: Position of center front lube hole*
C3: Position of lateral lube hole
C4: Position of lateral lube hole
C7: Position of top lube hole
J: Carriage height
L1: Exterior fixing hole spacing
L2: Interior fixing hole spacing
L9: Carriage length with housing
L11: Housing length
L13: Total length measuring carriage
Lw: Inner carriage body length
N: Lateral fixing hole spacing
O: Reference face height
Capacities and weights
C0: Static load capacitiy (N)
C100: Dynamic load capacity (N)
M0Q: Static cross moment capacity (Nm)
M0L: Static longitud. moment capacity (Nm)
MQ: Dyn. cross moment capacity (Nm)
ML: Dyn. longitud. moment capacity (Nm)
Carriage weight (kg)
Available options for AMSABS 4B W 15
12.3 Technical data and options
12.3.2 AMSABS 4B Size 20
AMSABS 4B S 20 Drawings
AMSABS 4B W 20 Drawings
AMSABS 4B W 20 Rigidity diagram

AMSABS 4B W 20 Load

12.3 Technical data and options
AMSABS 4B Size 20 Dimensions and capacities

B1: Rail width
J1: Rail height
L3: Rail length max.
L4: Spacing of fixing holes
L5/L10: Position of first/last fixing hole
Rail weight, specific (kg/m)
Available options for AMSABS 4B S 20

A: System height
A1: Half width of housing on opposite side
A2: Half width of housing on reading head side
A3: Projection of reading head
B: Carriage width
B2: Distance between locating faces
C1: Position of center front lube hole*
C3: Position of lateral lube hole
C4: Position of lateral lube hole
C7: Position of top lube hole
J: Carriage height
L1: Exterior fixing hole spacing
L2: Interior fixing hole spacing
L9: Carriage length with housing
L11: Housing length
L13: Total length measuring carriage
Lw: Inner carriage body length
N: Lateral fixing hole spacing
O: Reference face height
Capacities and weights
C0: Static load capacitiy (N)
C100: Dynamic load capacity (N)
M0Q: Static cross moment capacity (Nm)
M0L: Static longitud. moment capacity (Nm)
MQ: Dyn. cross moment capacity (Nm)
ML: Dyn. longitud. moment capacity (Nm)
Carriage weight (kg)
Available options for AMSABS 4B W 20
12.3 Technical data and options
12.3.3 AMSABS 4B Size 25
AMSABS 4B S 25 Drawings
Clearance for end piece assembly
AMSABS 4B W 25 Drawings
AMSABS 4B W 25 Rigidity diagram

AMSABS 4B W 25 Load rating

12.3 Technical data and options
AMSABS 4B Size 25 Dimensions and capacities


B1: Rail width
J1: Rail height
L3: Rail length max.
L4: Spacing of fixing holes
L5/L10: Position of first/last fixing hole
Rail weight, specific (kg/m)
Available options for AMSABS 4B S 25


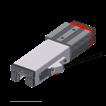

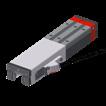
A: System height
A1: Half width of housing on opposite side
A2: Half width of housing on reading head side
A3: Projection of reading head
B: Carriage width
B2: Distance between locating faces
C1: Position of center front lube hole*
C3: Position of lateral lube hole
C4: Position of lateral lube hole
C7: Position of top lube hole
J: Carriage height
L1: Exterior fixing hole spacing
L2: Interior fixing hole spacing
L9: Carriage length with housing
L11: Housing length
L13: Total length measuring carriage
Lw: Inner carriage body length
N: Lateral fixing hole spacing
O: Reference face height
Capacities and weights
C0: Static load capacitiy (N)
C100: Dynamic load capacity (N)
M0Q: Static cross moment capacity (Nm)
M0L: Static longitud. moment capacity (Nm)
MQ: Dyn. cross moment capacity (Nm)
ML: Dyn. longitud. moment capacity (Nm)
Carriage weight (kg)
Available options for AMSABS 4B W 25
12.3.4 AMSABS 4B Size 30
AMSABS 4B S 30 Drawings
AMSABS 4B W 30 Drawings
AMSABS 4B W 30 Rigidity diagram
AMSABS 4B W 30 Load rating 12.3 Technical


12.3 Technical data and options
AMSABS 4B Size 30 Dimensions and capacities

B1: Rail width
J1: Rail height
L3: Rail length max.
L4: Spacing of fixing holes
L5/L10: Position of first/last fixing hole
Rail weight, specific (kg/m)
Available options for AMSABS 4B S 30

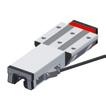
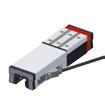
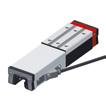


A: System height
A1: Half width of housing on opposite side
A2: Half width of housing on reading head side
A3: Projection of reading head
B: Carriage width
B2: Distance between locating faces
C1: Position of center front lube hole*
C3: Position of lateral lube hole
C4: Position of lateral lube hole
C7: Position of top lube hole
J: Carriage height
L1: Exterior fixing hole spacing
L2: Interior fixing hole spacing
L9: Carriage length with housing
L11: Housing length
L13: Total length measuring carriage
Lw: Inner carriage body length
N: Lateral fixing hole spacing
O: Reference face height
Capacities and weights
C0: Static load capacitiy (N)
C100: Dynamic load capacity (N)
M0Q: Static cross moment capacity (Nm)
M0L: Static longitud. moment capacity (Nm)
MQ: Dyn. cross moment capacity (Nm)
ML: Dyn. longitud. moment capacity (Nm)
Carriage weight (kg)
Available options for AMSABS 4B W 30
12.3.5 AMSABS 4B Size 35
AMSABS 4B S 35 Drawings
= Locating
AMSABS 4B W 35 Drawings
AMSABS 4B W 35 Rigidity diagram

AMSABS 4B W 35 Load rating

12.3 Technical data and options
AMSABS 4B Size 35 Dimensions and capacities

B1: Rail width
J1: Rail height
L3: Rail length max.
L4: Spacing of fixing holes
L5/L10: Position of first/last fixing hole
Rail weight, specific (kg/m)
Available options for AMSABS 4B S 35

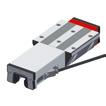
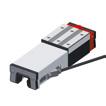
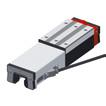


A: System height
A1: Half width of housing on opposite side
A2: Half width of housing on reading head side
A3: Projection of reading head
B: Carriage width
B2: Distance between locating faces
C1: Position of center front lube hole*
C3: Position of lateral lube hole
C4: Position of lateral lube hole
C7: Position of top lube hole
J: Carriage height
L1: Exterior fixing hole spacing
L2: Interior fixing hole spacing
L9: Carriage length with housing
L11: Housing length
L13: Total length measuring carriage
Lw: Inner carriage body length
N: Lateral fixing hole spacing
O: Reference face height
Capacities and weights
C0: Static load capacitiy (N)
C100: Dynamic load capacity (N)
M0Q: Static cross moment capacity (Nm)
M0L: Static longitud. moment capacity (Nm)
MQ: Dyn. cross moment capacity (Nm)
ML: Dyn. longitud. moment capacity (Nm)
Carriage weight (kg)
Available options for AMSABS 4B W 35
12.3.6 AMSABS 4B Size 45
AMSABS 4B S 45 Drawings
12.3 Technical data and options = Locating side
AMSABS 4B W 45 Drawings
AMSABS 4B W 45 Rigidity diagram

Locating side
AMSABS 4B W 45 Load rating

12.3 Technical data and options
AMSABS 4B Size 45 Dimensions and capacities


B1: Rail width
J1: Rail height
L3: Rail length max.
L4: Spacing of fixing holes
L5/L10: Position of first/last fixing hole
Rail weight, specific (kg/m)
Available options for AMSABS 4B S 45


A: System height
A1: Half width of housing on opposite side
A2: Half width of housing on reading head side
A3: Projection of reading head
B: Carriage width
B2: Distance between locating faces
C1: Position of center front lube hole*
C3: Position of lateral lube hole
C4: Position of lateral lube hole
C7: Position of top lube hole
J: Carriage height
L1: Exterior fixing hole spacing
L2: Interior fixing hole spacing
L9: Carriage length with housing
L11: Housing length
L13: Total length measuring carriage
Lw: Inner carriage body length
N: Lateral fixing hole spacing
O: Reference face height
Capacities and weights
C0: Static load capacitiy (N)
C100: Dynamic load capacity (N)
M0Q: Static cross moment capacity (Nm)
M0L: Static longitud. moment capacity (Nm)
MQ: Dyn. cross moment capacity (Nm)
ML: Dyn. longitud. moment capacity (Nm) Carriage weight (kg)
Available options for AMSABS 4B W 45
12.4 Accessories Overview
AMSABS 4B Rails accessories overview
Accessories
Plugs:
Plastic plugs
Cover strips:
Cover strip (spare part)
End piece for cover strip (spare part)
Securing band for cover strip (spare part)
Assembly tools:
Installation tool for steel plugs
AMSABS 4B S 15
4B S 20
4B S 25
4B S 30
4B S 35
4B S 45 BRK 15 BRK 20 BRK 25 BRK 30 BRK 35 BRK 45 BAC 15 EST 15-BAC BSC 15-BAC
AMSABS 4B Carriages accessories overview
Accessories
Additional wipers:
Additional wipers Viton
Metal wiper
Bellows:
Bellows
Adapter plate for bellows (spare part)
End plate for bellows (spare part)
Assembly rails:
Assembly rail
Lubrication plates:
Lubrication plate
Front plates:
Cross wiper for front plate (spare part)
Lube nippels:
Hydraulic-type grease nipple straight
Hydraulic-type grease nipple 45°
Hydraulic-type grease nipple 90°
Flush type grease nipple M3
Flush type grease nipple M6
Grease gun for SN 3-T und SN 6-T
Lube adapters:
Lubrication adapter M8 round-head
Lubrication adapter M8 hexagon head
Lubrication adapter G1/8 hexagon head
Straight screw-in connection M3
Straight screw-in connection M6
Swivel screw connection for pipe d=3 mm
Swivel screw connection for pipe d=4 mm
Swivel screw connection M6
Swivel screw connection M6 long
Swivel screw connection M8
Swivel screw connection M8 long
45 ZPB 45 EPB 45 MBM 15 MBM 20 MBM 25 MBM 30 MBM 35 MBM 45
SN 3-TSFP-T3
SN 6
SN 6-45
SN 6-90
SN 3-T
SN 6-T SFP-T3
SN 6 SN 6-45
SN 6-90SN 6-T SFP-T3
SN 6
SN 6-45 SN 6-90SN 6-T SFP-T3
SN 6 SN 6-45 SN 6-90SN 6-T SFP-T3
SN 6 SN 6-45 SN 6-90SN 6-T SFP-T3
SA 3-D3
SA 3-D3
SA 6-RD-M8
SV 6-D4
SV 6-M6
SV 6-M6-L
SV 6-M8
SV 6-M8-L
SA 6-RD-M8
SV 6-D4
SV 6-M6 SV 6-M6-L SV 6-M8 SV 6-M8-L
6-RD-M8
SA 6-6KT-M8
SA 6-6KTG1/8
SV 6-D4
SV 6-M6
SV 6-M6-L
SV 6-M8
SV 6-M8-L
SA 6-RD-M8
SA 6-6KT-M8
SA 6-6KTG1/8
SV 6-D4
SV 6-M6
SV 6-M6-L
SV 6-M8
SV 6-M8-LSA 6-RD-M8
SA 6-6KT-M8
SA 6-6KTG1/8
SV 6-D4
SV 6-M6
SV 6-M6-L
SV 6-M8
SV 6-M8-L
Individual guide rails and carriages are ordered in accordance with the order codes described below.
AMSABS 4B carriages consist of guide carriage, casing and reading head. All MONORAIL BM carriages can also be used with AMSABS 4B rails. Q.v. chapter 2 and chapter 6.4 for the order key for accessories. Separate order codes are used in each case for rails, carriages and accessories. This also applies to different versions of rails and carriages. All guide components are supplied individually as standard, i.e. unassembled.
If required, SCHNEEBERGER can also supply rails and carriages assembled incl. accessories as complete systems. Please note the ordering instructions in chapter 2.4 if this applies.
Order code for AMSABS 4B Rails
Quantity
Rail Size
Type
Accuracy
Straightness
Reference side
Rail length L3
Position of first fixing hole L5
Position of last fixing hole L10
Coating
Type of magnetisation
NB
Q.v. chapter 12.1 to 10.3 for an overview of types, details of shapes, available options and accessories. Q.v. chapter 2 for a description of the options. If possible, standard lengths are preferred for L3 rail length. These are calculated with the table values in chapter 12.2 using the following formula: L3 = n x L4 + L5 + L10 L3max.
Order code for AMSABS 4B Carriages
Quantity
Carriage
Size
Type
Reading head position
Accuracy
Preload
Reference side
Coating
Lube connection
Lubrication as delivered condition
Interface
Configuration
NB
Q.v. chapter 12.1 to 10.3 for an overview of types, details of shapes, available options and accessories.
Q.v. chapter 2 for a description of the options. For detailed information about current configuration options for the interfaces, please visit our website at www.schneeberger.com
Order code for AMSABS 4B Reading head (spare part)
Quantity
Reading head
Interface
Configuration
NB
Q.v. chapter 2 for a description of the options.
1x SABS XB -MH -TS1
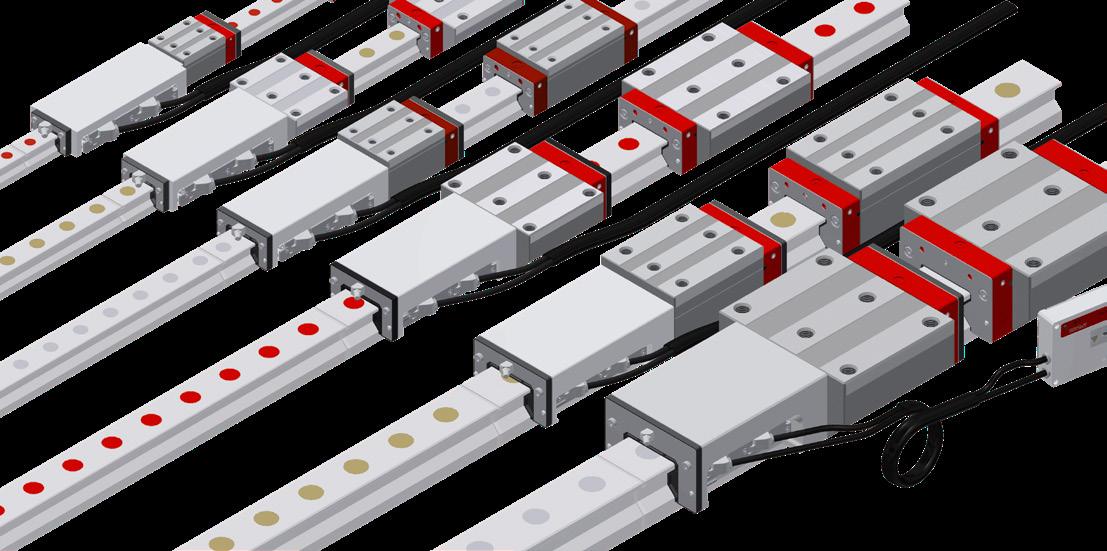

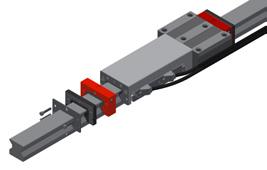


Features of System MONORAIL AMSABS 3L
With MONORAIL AMSABS 3L SCHNEEBERGER provides an integrated absolute distance measuring system especially for the design of long axes with high requests on system accuracy. Mechanically the AMSABS 3L is based on the SCHNEEBERGER roller guideway MONORAIL MR. The particular realization of the rail butt joints in combination with the AMSABS 3L reading head enables to run over joints an to build absolute coded measuring axes of any length. For the controller the absolute interfaces SSI, SSI+1Vpp and Fanuc are available with different cable lengths. Various lubrication and sealing options for the measuring carriages enable optimum adaption to the requirements of the application. The simply changeable reading head is identic for all sizes.




Product overview AMSABS 3L Rails

Screwable from above Large system lengths
Available options for AMSABS 3L Rails
Available accessories for AMSABS 3L Rails
Plugs Assembly tools End pieces for AMS
Product overview AMSABS 3L Carriages




Buildsizes / Carriage
Features
Screwable from above
Screwable from below
For high loads and moments
For high loads and moments
For medium loads a. moments
For confined installation conditions
Available options for AMSABS 3L Carriages
Lube connections
Left center
Right center
Top left
Top right
Lower left side
Lower right side
Reading head position
Right top
Left bottom
Upper left side
Upper right side
Left side
Right side
P1: S10+S12+S13 locked using threaded pins
P3: S20+S22+S23 locked using threaded pins
Available accessories for AMSABS 3L Carriages
Additional wipers Metal wiper Assembly rails Lube adapters Lubrication
13.3 Technical data and options
13.3.1 AMSABS 3L Size 25
AMSABS 3L S 25 Drawings
AMSABS 3L W 25 Drawings AMSABS 3L W 25 Rigidity diagram
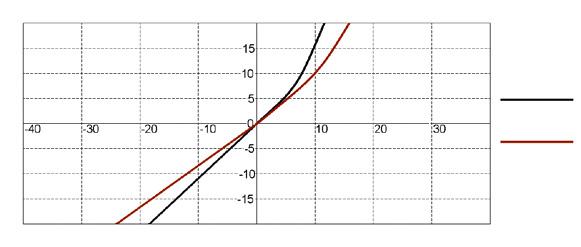

13.3 Technical data and options
AMSABS 3L Size 25 Dimensions and capacities

B1: Rail width
J1: Rail height
L3: Rail length
L3‘: System length
S: Gap size
L4: Spacing of fixing holes
L5/L10: Position of first/last fixing hole
Rail weight, specific (kg/m)
Available options for AMSABS 3L S 25





A: System height
A1: Half width of housing on opposite side
A2: Half width of housing on reading head side
A3: Projection of reading head
B: Carriage width
B2: Distance between locating faces
C1: Position of center front lube hole*
C3: Position of lateral lube hole
C4: Position of lateral lube hole
C7: Position of top lube hole
J: Carriage height
L1: Exterior fixing hole spacing
L2: Interior fixing hole spacing
L9: Carriage length with housing
L11: Housing length
L13: Total length measuring carriage
Lw: Inner carriage body length
N: Lateral fixing hole spacing
O: Reference face height
Capacities and weights
C0: Static load capacitiy (N)
C100: Dynamic load capacity (N)
M0Q: Static cross moment capacity (Nm)
M0L: Static longitud. moment capacity (Nm)
MQ: Dyn. cross moment capacity (Nm)
ML: Dyn. longitud. moment capacity (Nm)
Carriage weight (kg)
Available options for AMSABS 3L W 25
13.3.2 AMSABS 3L Size 30
AMSABS 3L S 30 Drawings
AMSABS 3L W 30 Drawings
AMSABS 3L W 30 Rigidity diagram

AMSABS 3L W 30 Load rating



13.3 Technical data and options
AMSABS 3L Size 30 Dimensions and capacities

B1: Rail width
J1: Rail height
L3: Rail length
L3‘: System length
S: Gap size
L4: Spacing of fixing holes
L5/L10: Position of first/last fixing hole
Rail weight, specific (kg/m)
Available options for AMSABS 3L S 30



A: System height
A1: Half width of housing on opposite side
A2: Half width of housing on reading head side
A3: Projection of reading head
B: Carriage width
B2: Distance between locating faces
C1: Position of center front lube hole*
C3: Position of lateral lube hole
C4: Position of lateral lube hole
C7: Position of top lube hole
J: Carriage height
L1: Exterior fixing hole spacing
L2: Interior fixing hole spacing
L9: Carriage length with housing
L11: Housing length
L13: Total length measuring carriage
Lw: Inner carriage body length
N: Lateral fixing hole spacing
O: Reference face height
Capacities and weights
C0: Static load capacitiy (N)
C100: Dynamic load capacity (N)
M0Q: Static cross moment capacity (Nm)
M0L: Static longitud. moment capacity (Nm)
MQ: Dyn. cross moment capacity (Nm)
ML: Dyn. longitud. moment capacity (Nm)
Carriage weight (kg)
Available options for AMSABS 3L W 30
13.3 Technical data and options
13.3.3 AMSABS 3L Size 35
AMSABS 3L S 35 Drawings
AMSABS 3L W 35 Drawings
AMSABS 3L W 35 Rigidity diagram


13.3 Technical data and options
AMSABS 3L Size 35 Dimensions and capacities

B1: Rail width
J1: Rail height
L3: Rail length
L3‘: System length
S: Gap size
L4: Spacing of fixing holes
L5/L10: Position of first/last fixing hole
Rail weight, specific (kg/m)
Available options for AMSABS 3L S 35


A: System height
A1: Half width of housing on opposite side
A2: Half width of housing on reading head side
A3: Projection of reading head
B: Carriage width
B2: Distance between locating faces
C1: Position of center front lube hole*
C3: Position of lateral lube hole
C4: Position of lateral lube hole
C7: Position of top lube hole
J: Carriage height
L1: Exterior fixing hole spacing
L2: Interior fixing hole spacing
L9: Carriage length with housing
L11: Housing length
L13: Total length measuring carriage
Lw: Inner carriage body length
N: Lateral fixing hole spacing
O: Reference face height
Capacities and weights
C0: Static load capacitiy (N)
C100: Dynamic load capacity (N)
M0Q: Static cross moment capacity (Nm)
M0L: Static longitud. moment capacity (Nm)
MQ: Dyn. cross moment capacity (Nm)
ML: Dyn. longitud. moment capacity (Nm)
Carriage weight (kg)
Available options for AMSABS 3L W 35
13.3.4 AMSABS 3L Size 45
AMSABS 3L S 45 Drawings
AMSABS 3L W 45 Drawings
AMSABS 3L W 45 Rigidity diagram

Locating side
AMSABS 3L W 45 Load rating

13.3 Technical data and options
AMSABS 3L Size 45 Dimensions and capacities

B1: Rail width
J1: Rail height
L3: Rail length
L3‘: System length
S: Gap size
L4: Spacing of fixing holes
L5/L10: Position of first/last fixing hole
Rail weight, specific (kg/m)
Available options for AMSABS 3L S 45


A: System height
A1: Half width of housing on opposite side
A2: Half width of housing on reading head side
A3: Projection of reading head
B: Carriage width
B2: Distance between locating faces
C1: Position of center front lube hole*
C3: Position of lateral lube hole
C4: Position of lateral lube hole
C7: Position of top lube hole
J: Carriage height
L1: Exterior fixing hole spacing
L2: Interior fixing hole spacing
L9: Carriage length with housing
L11: Housing length
L13: Total length measuring carriage
Lw: Inner carriage body length
N: Lateral fixing hole spacing
O: Reference face height
Capacities and weights
C0: Static load capacitiy (N)
C100: Dynamic load capacity (N)
M0Q: Static cross moment capacity (Nm)
M0L: Static longitud. moment capacity (Nm)
MQ: Dyn. cross moment capacity (Nm)
ML: Dyn. longitud. moment capacity (Nm)
Carriage weight (kg)
Available options for AMSABS 3L W 45
13.3.5 AMSABS 3L Size 55
AMSABS 3L S 55 Drawings
AMSABS 3L W 55 Drawings
AMSABS 3L W 55 Rigidity diagram

AMSABS 3L W 55 Load rating



13.3 Technical data and options
AMSABS 3L Size 55 Dimensions and capacities

B1: Rail width
J1: Rail height
L3: Rail length
L3‘: System length
S: Gap size
L4: Spacing of fixing holes
L5/L10: Position of first/last fixing hole
Rail weight, specific (kg/m)
Available options for AMSABS 3L S 55


A: System height
A1: Half width of housing on opposite side
A2: Half width of housing on reading head side
A3: Projection of reading head
B: Carriage width
B2: Distance between locating faces
C1: Position of center front lube hole*
C3: Position of lateral lube hole
C4: Position of lateral lube hole
C7: Position of top lube hole
J: Carriage height
L1: Exterior fixing hole spacing
L2: Interior fixing hole spacing
L9: Carriage length with housing
L11: Housing length
L13: Total length measuring carriage
Lw: Inner carriage body length
N: Lateral fixing hole spacing
O: Reference face height
Capacities and weights
C0: Static load capacitiy (N)
C100: Dynamic load capacity (N)
M0Q: Static cross moment capacity (Nm)
M0L: Static longitud. moment capacity (Nm)
MQ: Dyn. cross moment capacity (Nm)
ML: Dyn. longitud. moment capacity (Nm)
Carriage weight (kg)
Available options for AMSABS 3L W 55
13.3 Technical data and options
13.3.6 AMSABS 3L Size 65
AMSABS 3L S 65 Drawings
AMSABS 3L W 65 Drawings
Locating side
AMSABS 3L W 65 Rigidity diagram AMSABS 3L W 65 Load rating
[μm]


13.3 Technical data and options
AMSABS 3L Size 65 Dimensions and capacities

B1: Rail width
J1: Rail height
L3: Rail length
L3‘: System length
S: Gap size
L4: Spacing of fixing holes
L5/L10: Position of first/last fixing hole
Rail weight, specific (kg/m)
Available options for AMSABS 3L S 65
A: System height
A1: Half width of housing on opposite side
A2: Half width of housing on reading head side
A3: Projection of reading head
B: Carriage width
B2: Distance between locating faces
C1: Position of center front lube hole*
C3: Position of lateral lube hole
C4: Position of lateral lube hole
C7: Position of top lube hole
J: Carriage height
L1: Exterior fixing hole spacing
L2: Interior fixing hole spacing
L9: Carriage length with housing
L11: Housing length
L13: Total length measuring carriage
Lw: Inner carriage body length
N: Lateral fixing hole spacing
O: Reference face height
Capacities and weights
C0: Static load capacitiy (N)
C100: Dynamic load capacity (N)
M0Q: Static cross moment capacity (Nm)
M0L: Static longitud. moment capacity (Nm)
MQ: Dyn. cross moment capacity (Nm)
ML: Dyn. longitud. moment capacity (Nm)
Carriage weight (kg)
Available options for AMSABS 3L W 65
AMSABS 3L Rails accessories overview
Accessories
Plugs:
Plastic plugs
Brass plugs
Steel plugs
Assembly tools:
Assembly tool for AMSABS 3L
Installation tool for steel plugs
Hydraulic cylinder for MWH
End pieces:
End piece for AMSABS 3L rails
AMSABS 3L Carriages accessories overview
Accessories
Additional wipers:
Additional wipers Viton
Metal wiper
Bellows:
Bellows
Adapter plate for bellows (spare part)
End plate for bellows (spare part)
Assembly rails:
Assembly rail
Lubrication plates:
Lubrication plate
Front plates:
Cross wiper (spare part)
Lube nippels:
Hydraulic-type grease nipple straight
Hydraulic-type grease nipple 45°
Hydraulic-type grease nipple 90°
Flush type grease nipple M3
Flush type grease nipple M6
Grease gun for SN 3-T und SN 6-T
Lube adapters:
Lubrication adapter M8 round-head
Lubrication adapter M8 hexagon head
Lubrication adapter G1/8 hexagon head
Straight screw-in connection M3
Straight screw-in connection M6
Swivel screw connection for pipe d=3 mm
Swivel screw connection for pipe d=4 mm
Swivel screw connection M6
Swivel screw connection M6 long
Swivel screw connection M8
Swivel screw connection M8 long
SN 6
SN 6-45
SN 6-90
SN 3-T
SN 6-T
SFP-T3
SA 6-RD-M8x1
SA 3-D3
SA 6-D4-RD
SV 3-D3
SV 6-M6
SV 6-M6-L
SV 6-M8
SV 6-M8-L
SN 6
SN 6-45 SN 6-90
6-T SFP-T3 SN 6 SN 6-45 SN 6-90
SN 6-T SFP-T3 SN 6
SN 6-45 SN 6-90
SN 6-T SFP-T3
SA 6-RD-M8x1
SA 6-RD-M8x1
SA 6-RD-M8x1
SN 6
SN 6-45
SN 6-90
SN 6-T SFP-T3
SA 6-RD-M8x1
SN 6
SN 6-45
SN 6-90
SN 6-T SFP-T3
SA 6-RD-M8x1
SA 6-D4-RD
SV 6-M6
SV 6-M6-L
SV 6-M8
SV 6-M8-L
SA 6-6KT-M8x1
SA 6-6KT-G1/8
SA 6-D4-RD
SV 6-M6
SV 6-M6-L
SV 6-M8
SV 6-M8-L
SA 6-6KT-M8x1
SA 6-6KT-G1/8
SA 6-D4-RD
SV 6-M6
SV 6-M6-L
SV 6-M8
SV 6-M8-L
SA 6-6KT-M8x1
SA 6-6KT-G1/8
SA 6-D4-RD
SV 6-M6
SV 6-M6-L
SV 6-M8
SV 6-M8-L
SA 6-6KT-M8x1
SA 6-6KT-G1/8
SA 6-D4-RD
SV 6-D4-SW9
SV 6-D4-SW10
SV 6-M6
SV 6-M6-L
SV 6-M8
SV 6-M8-L
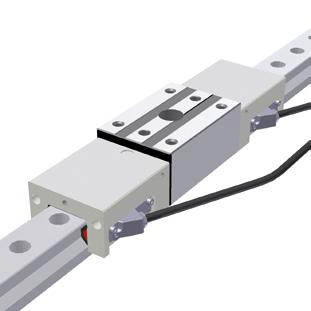
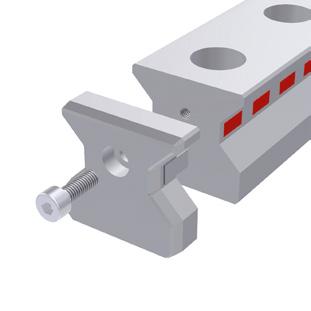
Assembly tools
(Fig 108) The MWM3L assembly tool is intended for the phase-locked assembly of the AMSABS 3L rails. It consists of a size-dependent guide carriage, two mounting housings and two reading heads for registering the phase. Furthermore, the MWM assembly tool contains the display software for calibrating measurements and the assembly and start-up instructions.
Order code: MWM 3L xx
xx = size, ordering example: 1 x MWM 3L 55
End pieces
(Fig 109) The AMSABS 3L concept allows the rails to be separated according to the desires of the customer for the first and last rail segments of a set of rails. After separation, the EST 3L end pieces prevent the masking tape on the measuring element from detaching. The end pieces may be used on both sides, and are attached using a central screw in the front drill holes.
Order code: EST 3L xx
xx = size, ordering example: 1 x EST 3L 55
Mounting kit spacer plate
The MDB 3L spacer plate is used to fill the gap that occurs when mounting AMSABS 3L rails. The scope of delivery includes a set of spacer plates in different thicknesses.
Order code: MDB 3L xx
xx = size, ordering example: 1x MDB 3L 55
Analogously, this product is available in an incremental version (AMSA 3L). The incremental version of the product has, among other things, the following: different characteristics: 0,0625µm
Schnittstelle: Analog, 1Vss
Supply voltage: 5V +/- 0,25V
Maximum speed: 1m/s
Fig. 108
Fig. 109
SCHNEEBERGER MONORAIL AMSABS 3L is a measuring system for measuring lengths > 6 m. Please refer to the respective customer drawing or order text for the configuration and composition of the components. The measuring system consists of various segments. The absolute code is designated TA2. Example of an order text:
1 x AMSABS 3L S 35-N-G1-KC-R22-9000-20-20-CN-TA2
The individual segments
TLS = 1 x 2999,5 (AMSABS 3L S 35-N-G1-KC-R22-2999,5-CN-P0) 2 x 2999,5 (AMSA 3L S 35-N-G1-KC-R22-2999,5-CN-TR40)
Individual guide rails and carriages are ordered in accordance with the order codes described below. AMSABS 3L carriages consist of guide carriage, casing and reading head. All MONORAIL MR carriages can also be used with AMSABS 3L rails. Q.v. chapter 2 and chapter 3.3 for the order key for accessories. Separate order codes are used in each case for rails, carriages and accessories. This also applies to different versions of rails and carriages. All guide components are supplied individually as standard, i.e. unassembled. If required, SCHNEEBERGER can also supply rails and carriages assembled incl. accessories as complete systems. Please note the ordering instructions in chapter 5.8 if this applies.
Order code for AMSABS 3L Rails
Quantity
Rail
Size
Type
Accuracy
Straightness
Reference side
Rail length L3
Coating
Coding
N.B
Q.v. chapter 13.1 to 13.3 for an overview of types, details of shapes, available options and accessories. Q.v. chapter 2 for a description of the options.
Order code for AMSABS 3L Carriages
Quantity
Carriage Size
Type
Reading head position
Accuracy
Preload
Reference side
Coating
Lube connection
Lubrication as delivered condition
Interface
Configuration
NB
Q.v. chapter 13.1 to 13.3 for an overview of types, details of shapes, available options and accessories.
Q.v. chapter 2 for a description of the options.
For detailed information about current configuration options for the interfaces, please visit our website at www.schneeberger. com
Order code for AMSABS 3L Reading head (spare part) 1x SABS 3L -MH -TS3
Quantity
Reading head
Interface
Configuration
NB
Q.v. chapter 2 for a description of the options.
