3 minute read
DIGIt Challenge: Double smoke


DOuBLE SMOkE
CLAuDE TREW LRpS
I am a member of Horndean Camera Club in Hampshire. The club has a couple of subgroups, one being the Creative Group. Once a month we are challenged with a photographic project. One of them was on the topic of ‘Smoke’. For me this was a very interesting project. Following the instructions given, I soon started taking some smoke photos. The results were very variable as it was more challenging than I first thought, but I eventually managed to capture some images I felt I could carry on working with.
The shoot (in darkness)
The instructions given were as follows (written by the Group Tutor, Mike Parry). 1 Camera (preferably on a tripod) set to manual exposure of f/11 at 1/250s’ with an ISO 100 and camera on manual focus. If possible, save as a RAW file to allow greater control of the final image, 2 Fix flash gun at right angle to the smoke and connect by a flash cable or remote flash trigger. (I used a Godox remote flash trigger). 3 Ensure a black background (card) covers the likely drift of the smoke. 4 Manual focus camera on the incense stick prior to taking shots. (I preferred a normal candle as it produced more smoke). A table lamp opposite the flash may assist in focusing on the incense stick. Auto focus could be used first and then switch off. 5 Set flash to 1/16 th power, or similar, to prevent over exposure. 6 Check first result for sharp focus and correct exposure on the camera LCD. 7 Modify camera settings, plus distances between camera and smoke, flash and smoke and background to find the combinations that works best for you. But keep a small aperture (for greater depth of field) and a low ISO.
8 Take lots and lots of images, the smoke trails will change constantly and the focus will not always be right. 9 Take a break from the fumes and try reshooting on subsequent sessions.
Editing the photo(s) in photoshop
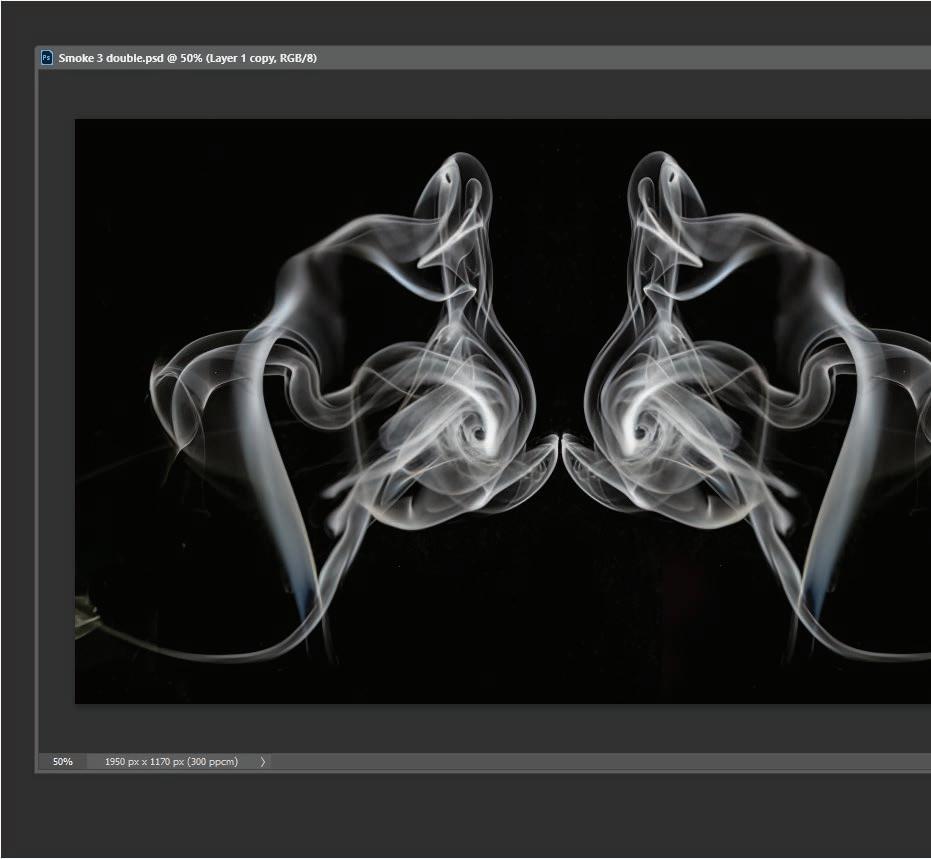
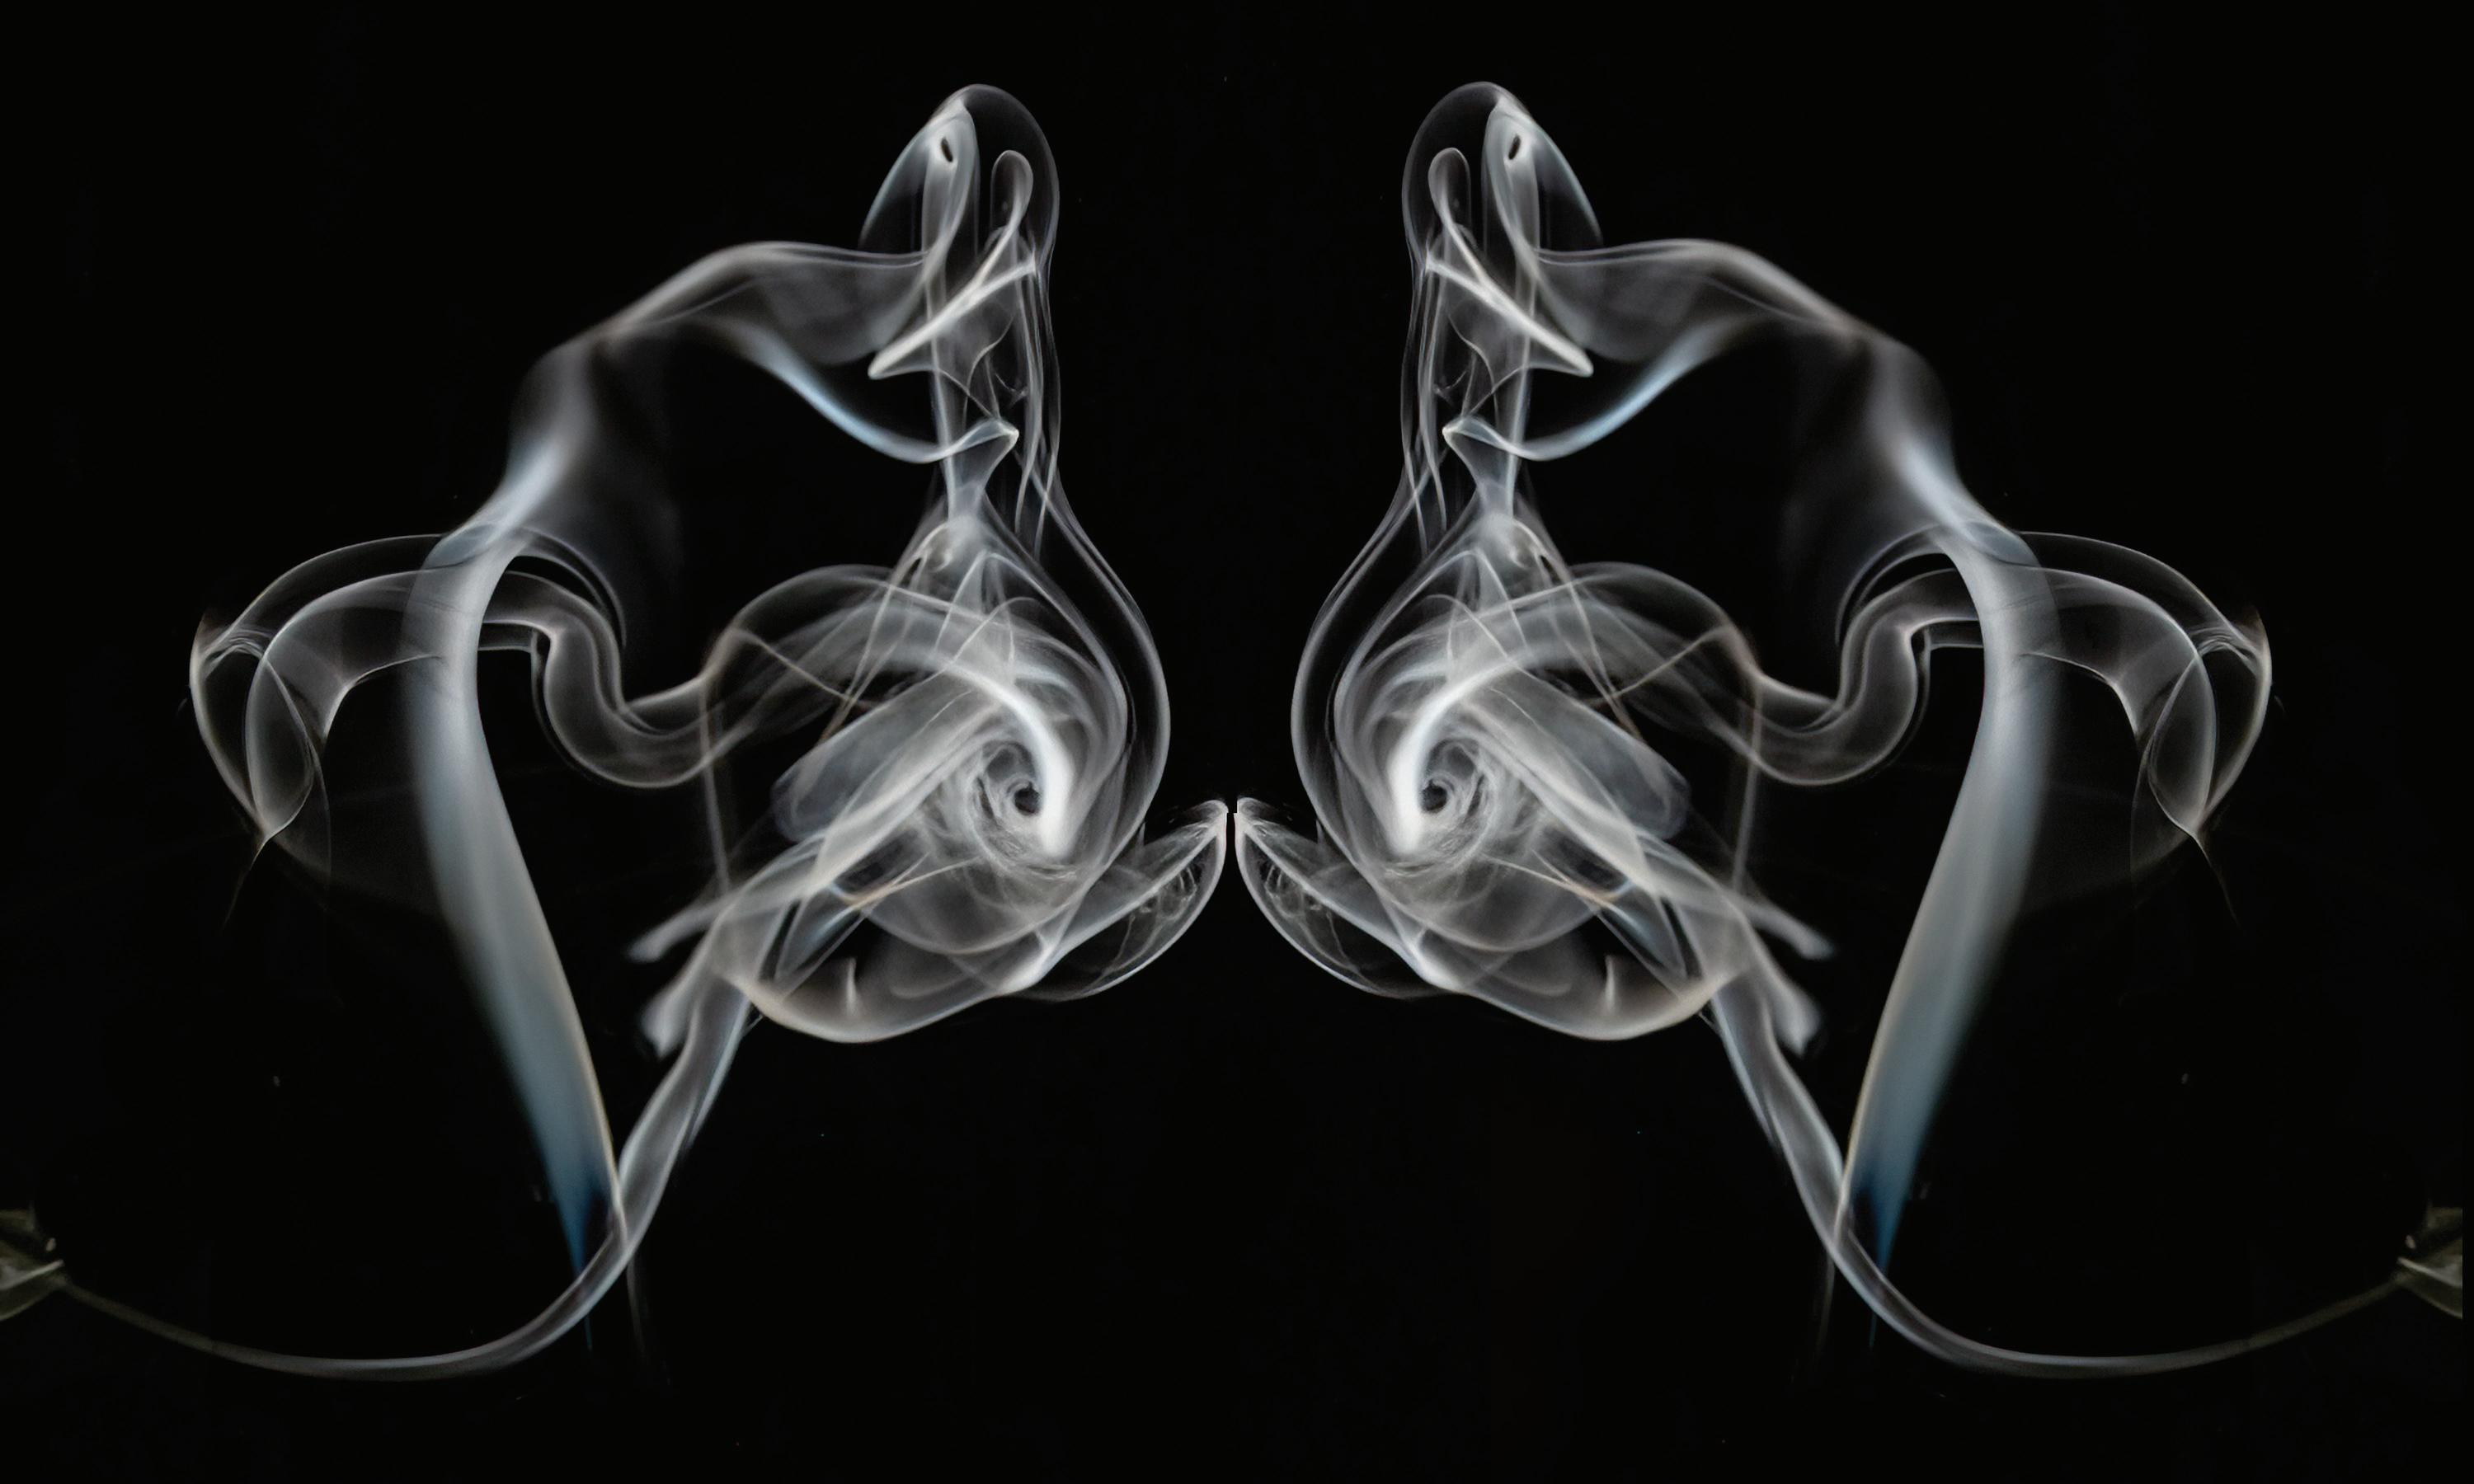
Once I was happy with the results, I was asked to choose one (or more) of my best photos and to finesse it to create a final image. I tried a variety of techniques, for example, by adding false colours, making
montages with other images, experimenting with more than one photo using various blending modes, flipping the photo to create two or four symmetry or whatever I could think of. Also, I had to ensure that the background was entirely black using levels or curves. For the photo chosen for this article, I decided to keep it in black and white, to duplicate and flip it once to have two heads looking at each other. I know that everyone will see something different in the same image but for me the smoke image looked like a fish head. Here is the process I used in Photoshop for the final image. • Crop the image into a square format. • Delete the candle and some of the smoke I didn’t want. • Darken the back background using Levels. • Run Topaz Denoise as the image was very noisy due to the dark room. • Create a new document in Photoshop with a black background twice the size of the squared original image. • Duplicate the image (control or command J), then free transform (control or command T), flip it horizontally and reposition it so that the two ‘noses’ were levelled and nearly touching. • Use the black brush (set to a soft edge) to tidy up the line between the two images. I was very pleased with the final image l
See moRe
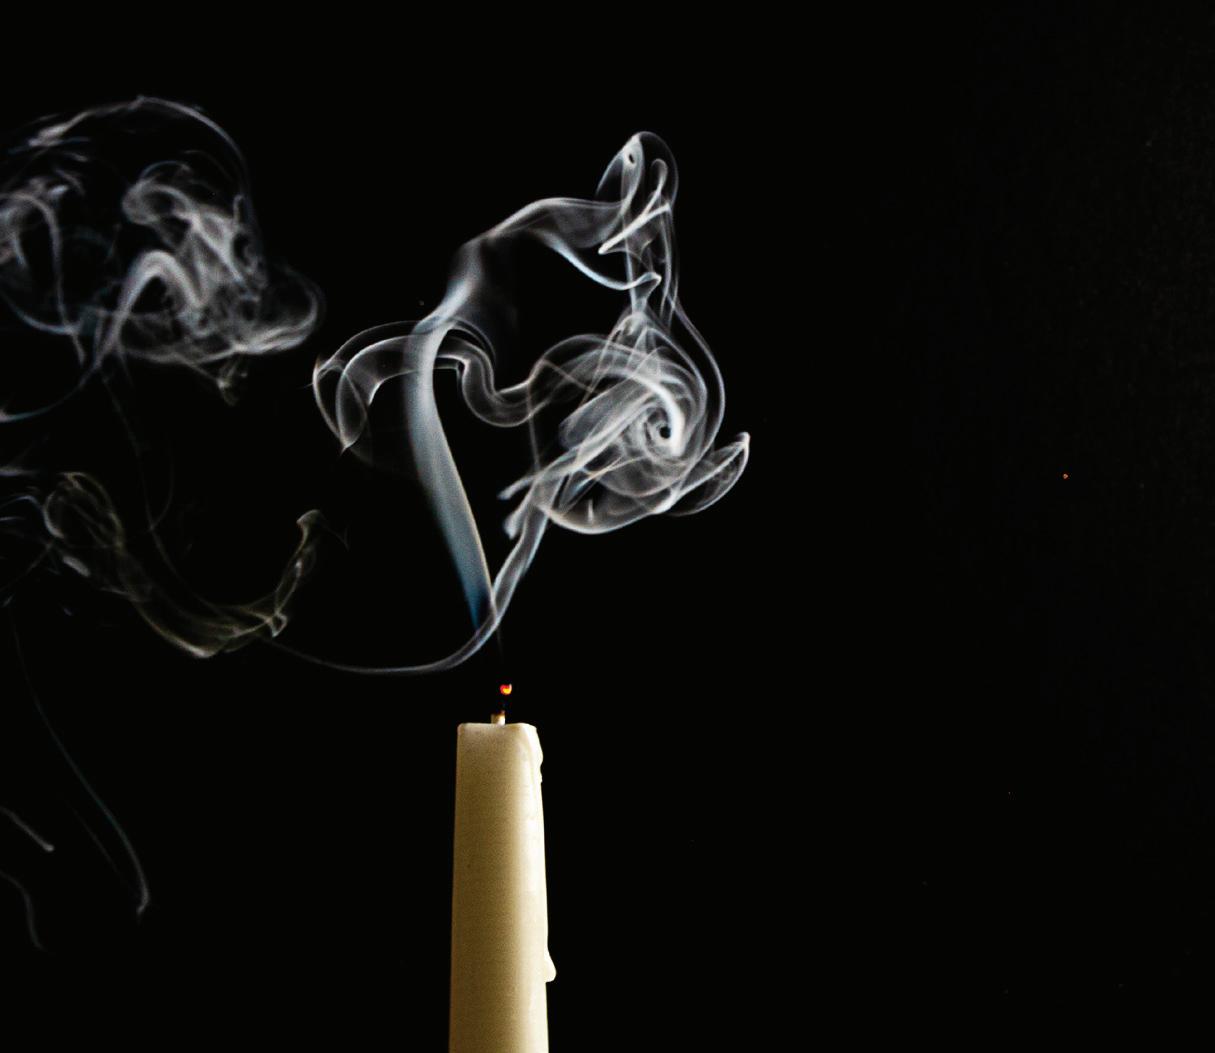
The original smoke image
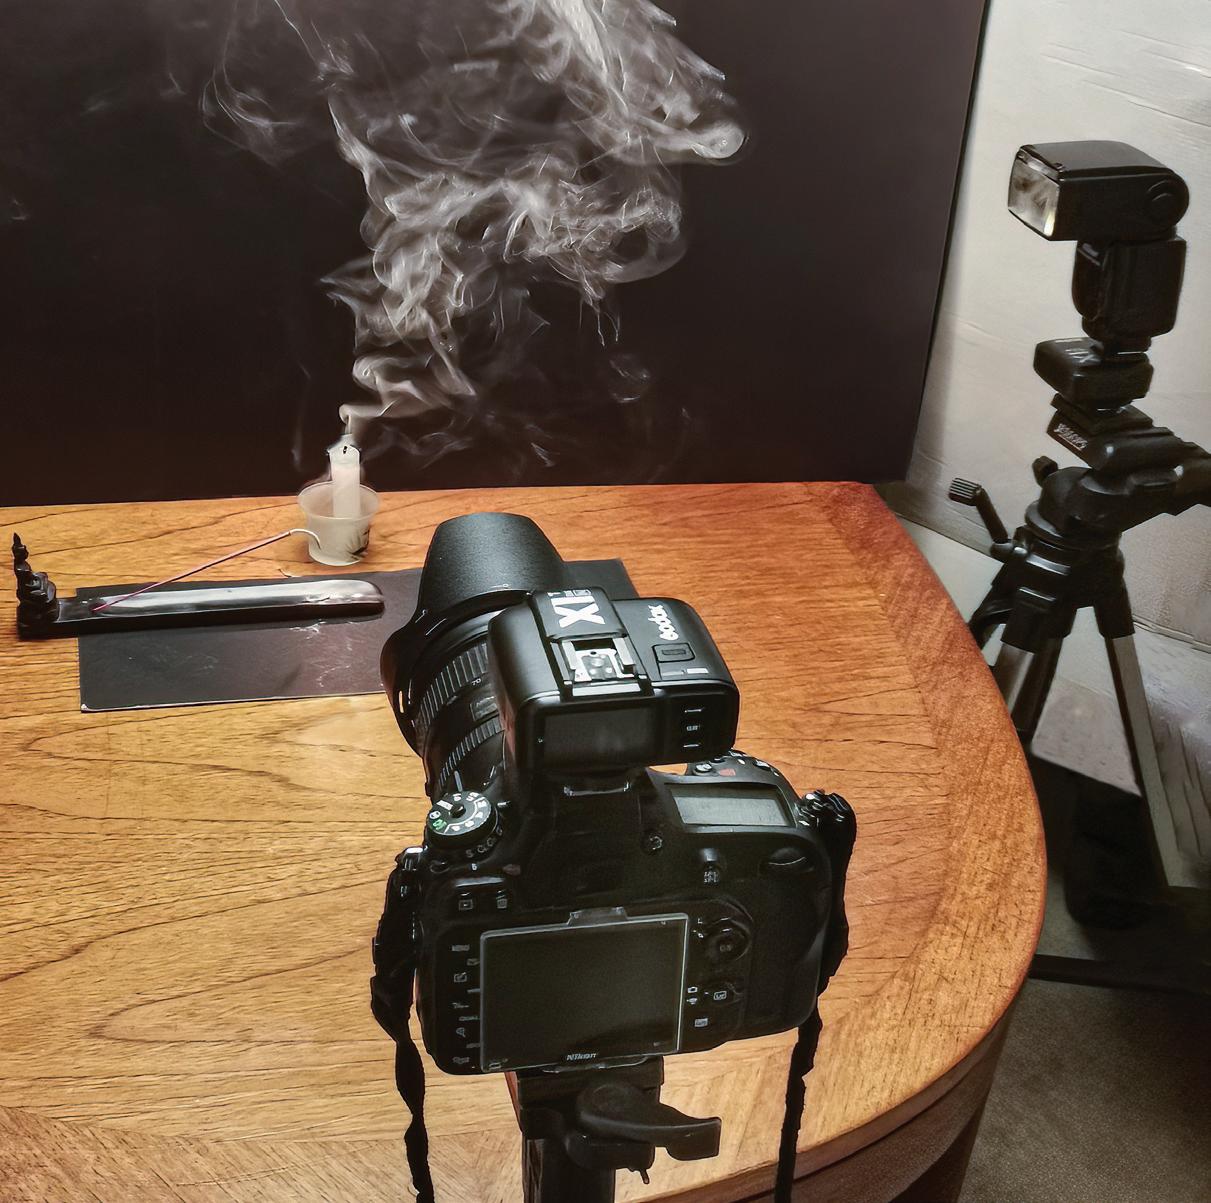
The shooting set-up