12 minute read
Affinity vs. Photoshop


CelIa henDerson lrPs
Are you thinking about changing your image editing software from photoshop to Affinity? What are the considerations, what will be the same, what will be different, what might I gain and what might I lose?
I’m sure you will have heard of Affinity Photo and Photoshop. Both are raster-based photo editing applications (in other words, they work with pixels). The cost of anything these days is a big consideration - Photoshop is subscription based at around £10 per month, whereas Affinity is a one-time purchase of about £50. Neither application has a dedicated photo file manager - Photoshop users will often use Adobe Lightroom or Adobe Bridge for these organisation tools, whereas Affinity users will need to rely on third party photo management software. Throughout this article, note the coloured borders to identify Affinity or Photoshop screenshots.
Interface
First impressions when opening Affinity and Photoshop are that they have a similar interface and workspace. They both have menu options, a customisable toolbar on the left and panels on the right. When any tool is selected both Affinity and Photoshop display either a Context or Options toolbar at the top of the interface. Affinity does however have an additional customisable static toolbar below the menus.

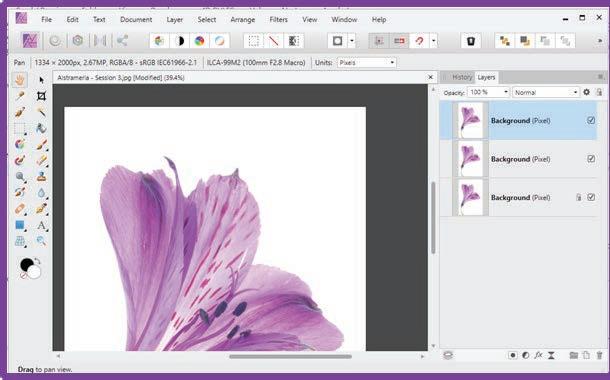
Photoshop interface
RAW processing
When it comes to RAW processing, both applications can process RAW files, although the workflow differs - in Photoshop when a RAW file is opened, it is loaded into Camera Raw before the file is opened in Photoshop and we have the option to save the raw edits as XMP sidecar files alongside the original files. When opening a RAW file in Affinity the application will open the Develop Persona workspace. This workspace allows you to make edits on the RAW image in readiness for further editing. My research suggests that processing raw files in Affinity can be slower than the Adobe Camera Raw plug in.
The tools
Let’s start with the tools down the left-hand side. Photoshop users will immediately notice that by default, the Foreground and Background controls are missing from the Affinity tools. To display these, select View | Customise Tools… this shows all tools available to be dragged into the Tools. However, the Foreground and Background control will only be displayed by setting the Number of Columns for the toolbar to 2 and exiting from the customise tools. This control now works in the same way as Photoshop by triggering the Colour Picker when clicked on. That main toolbar across the top can also be customised.
The panels
In Affinity, the panels are known as Studio Panels and are also accessed from View | Studio. Those of you who have spent years customising your Photoshop workspace to open with all the tools and panels in just the right place, you can achieve this in Affinity by creating your own workspaces from View | Studio Presets …
personas
But there is a difference with the workspaces - Affinity uses Personas. Five personas to be precise - accessed from the top left of the toolbar - Photo persona (for image editing); Liquify Persona (squidging, squashing, meshing and distorting); Develop Persona – for developing RAW files; Tone Mapping Persona (when working with HDR) and the Export Persona (for outputs and exporting to other file formats).

Affinity Personas As you select a different Persona, Affinity will change the display of the current workspace so tools, toolbars, panels and menu options will change. I’ll take you on a walkthrough in just a moment but want to point out some of the tools in Affinity which I really do like.
Save the history
When you save a file in Affinity you can save the history and all the editing steps - although this makes the file size larger, it is a great way
to be able to continue editing an image, just select File | Save History with document. Affinity also has a history branching option - if you go back through the history panel to a point in time and then add another action, the step in the history panel will display a branching symbol, thus enabling multiple variations of the editing process.
Live Brush preview
And anyone that knows me will know I love brushes - Affinity has a great selection of brushes and of course you can import more brushes, including Photoshop brushes, but the best bit is Live Brush preview – so you can see what the brush stroke is going to look like before you apply it. And the Brush tools and settings are all in one dialog box. Just click the More button on the Brushes context toolbar …

Affinity Brush Controls and Settings
Walkthrough
And now I’ll take you on that walk through to demonstrate the comparison between the two applications. When I’m running Photoshop workshops I do an exercise called ‘The Alstroemeria Challenge’ whereby we start with the ‘before’ image, modify the canvas size, work with multiple layers, apply rotation transforms, add layer masks, change the layer blend mode and do a bit of cloning to achieve the ‘after’ image. These are the steps we will follow: • Open the RAW file, make basic adjustments and load the file into the image editing processor. • Increase the canvas size. • Create duplicate layers. • Apply rotation transforms. • Adjust layer opacity. • Add layer masks. • Create a Stamp Layer. • Apply a touch of cloning. • Embed a second image with a texture. • Blend two layers. • Save the output. Open the RAW file, make some basic adjustments, and load the file into the image editing processor Opening a RAW file directly within the application is the same in both Photoshop and Affinity. Select File | Open or (Control+O) and locate image. This is where you encounter the first difference. Affinity loads the image into its Develop Persona; Photoshop loads the image into the Adobe Camera Raw workspace. Both offer tools and panels dedicated to processing RAW Files. Once the edits have been completed, exiting the RAW processor is slightly different - Affinity requires you to commit your changes by clicking the Develop button in order to exit the Develop Persona and load the image into the Photo Persona to continue making adjustments. Photoshop’s Adobe Camera Raw offers four choices - Open, Open as (Smart) Object, Open as Copy and Done. All ‘Open’ options load
Before The alstroemeria Challenge
After


Affinity Develop


the image into the Photoshop workspace.
Increase the canvas size
Both applications offer Crop tool with Context/Options bar where standard ratios, rule of thirds overlay grid and straighten options can be selected. If you use the Image | Canvas size command in Photoshop the equivalent is found in Affinity under Document | Resize Canvas … where the anchor point and measurements can be entered
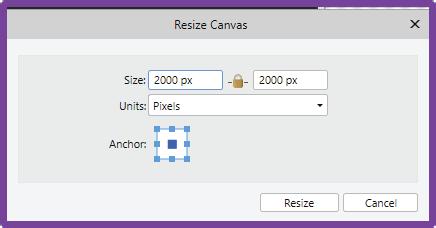
Affinity Canvas Resize What I did miss was the option to be able to set my Canvas extension colour and there is no Content Aware Fill choice on the Crop context toolbar. Content Aware Fill is achieved with the Affinity InPainting tool - similar to Photoshop, it is found on the Edit menu in both the Fill command and as a separate command. I did consider using the Magic Wand tool to fill in the transparent pixels created due to the canvas extension - the Magic Wand tool is known as the Flood Tool in Affinity.
Create duplicate layers
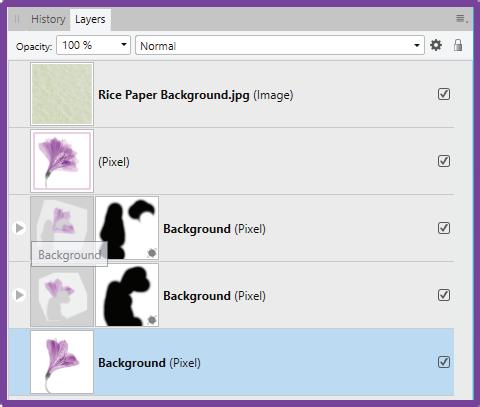
The object of the exercise is to create several layers of the same image, each layer is rotated by a few degrees to the left or right and the opacity of each layer reduced. This creates the illusion of petals with transparency. So, my next task is to duplicate the Background layer twice - Control+J keyboard shortcut is the same, or a right click on the layer and select Duplicate. The Layer panel has checkmarks instead of visibility eyes to toggle visibility on and off. Layers are also clearly shown as pixel or image layers (shown in brackets) - the Layer mask, Adjustment layer and Layer effects buttons are the same, as are the Grouping, add new transparent layer and Delete layer buttons. The two new buttons are going to be useful - Live Filters and Edit all Layers


Layers in Affinity
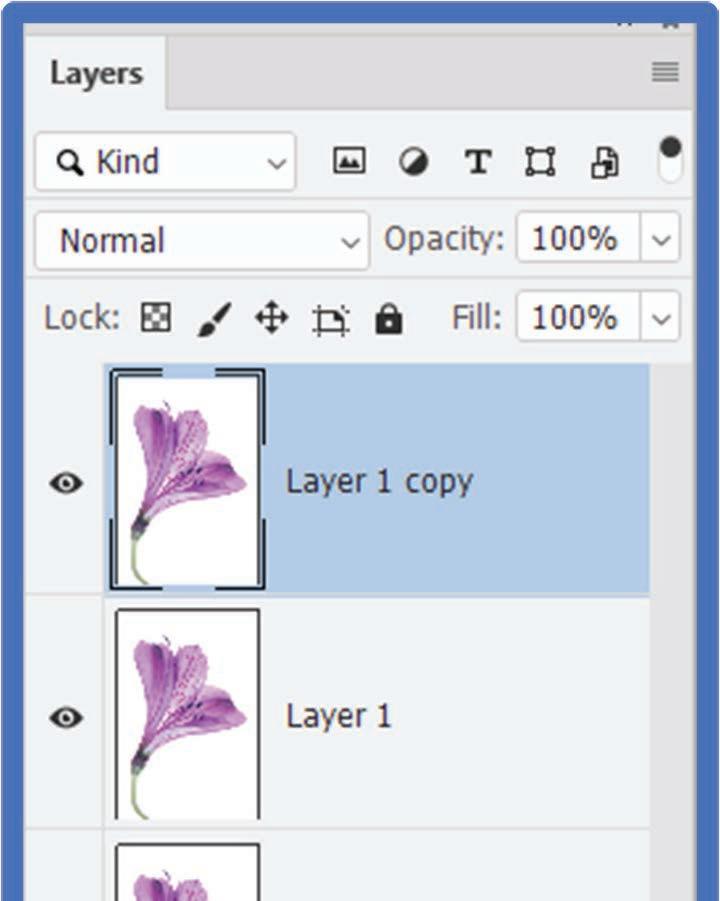
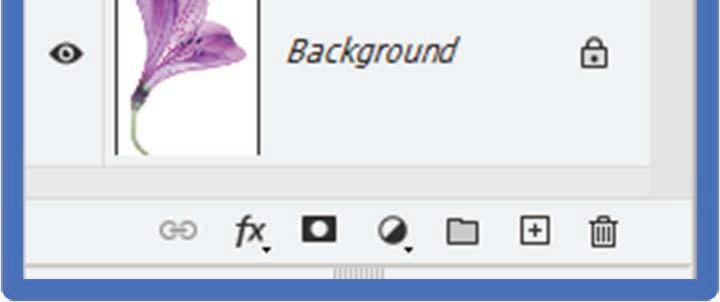
Layers in Photoshop
Apply rotation transforms
Now we have the multiple layers, we are ready to rotate the layers. In Affinity there is no equivalent Free Transform (Control+T) in fact Control+T brings up the character panel. Affinity have combined the move and transform tools together. Click the Move Tool and the Context Toolbar displays both transform and alignment tools. The selection area displays handles to guide resizing, rotation, skewing. Rotate the top layer a few degrees to the left. Rotate the middle layer a few degrees to the right. Set the opacity of each layer to 60%.

Affinity Move tool Controls
Adjust layer opacity
Adjust the opacity of the fill layer is still above the layer’s panel - just the blend modes and opacity sliders have been switched.
Add layer mask
Rotating the layers will create the effect, but it will be necessary to mask out the duplicated stems and the centre of the flower. Adding layer masks is similar to Photoshop - select the layer and click the New Layer Mask - but now we have some differences - firstly the layer mask is added as a ‘Child Layer Mask’ - it is a child of the parent layer. Also the layer mask displays a mask symbol in the bottom right hand corner (I found that distracting as it looks so similar to a brush mark on the mask). Painting on the mask with the brush tool and the foreground set to black does as expected and reveals the pixels of the layer below. The Brush works in Live Preview mode so you can see exactly where you are about to paint and if the hardness of your brush is set to 0% it is easy to see the feathered area of the brush.

Layer Mask symbols
mask on a layer requires nesting masks inside Groups - with Affinity it is possible to select the layer and continue applying multiple masks, thus making this non-destructive tool very useful.
Create a stamp layer
I was delighted to find my favourite keyboard shortcut Control+Shift+Alt+E still creates a new stamp copy layer (a combination of all visible layers).
A touch of cloning
The clone tool in Photoshop has its own Panel so that the destination can be scaled and flipped - all these commands are available in Affinity and are found on the Clone Brush context bar. Photoshop has the option to use five clone stamp tools all with their settings saved, this does not seem to be available in Affinity. Use the clone stamp tool on the top layer to clone plain white pixels over the bottom of the stem to create the illusion of a floating flower.
Embed a second image with a texture
Now to blend a texture with the image. In Photoshop I would use the File | Place Embed command to place another image document into the Alstroemeria. This method places a ‘flattened’ version of the embedded file on a new Smart Object layer. Smart Objects have the advantage that if you double click the Smart Object the original image is opened with all its layer structure intact for editing, any changes that are applied are then updated and reflected in the embedded layer. Another advantage of Smart objects is that a right click on the Smart Object layer enables the image to be replaced with another. Although there is no equivalent Smart Object in Affinity, the same behaviour is there - images can be placed by selecting File | Place. A new layer is automatically created and the context toolbar displays tools to replace, edit, align and resize the placed image. In Photoshop to directly edit the embedded image requires the Smart Object layer to be rasterised and the same applies in Affinity - right click the image layer and select the Rasterise option.
Affinity Image Layer
Blend two layers
And now my final step is to blend the texture image with the Alstroemeria. I will use the Multiply blend mode on the newly imported texture image - the layer blend modes are located in both applications at the top of the Layer Panel - in Affinity they are on the right and in Photoshop they are on the left. Photoshop has 27 blend modes whereas you will find 32 in Affinity, with Average, Negation, Reflect, Glow, Contrast-negate and Erase being extras and Dissolve not on the list. The application and behaviour of the blend modes is identical. What is different though is the amazing Blend If feature in Photoshop has an even more powerful equivalent in Affinity - accessed from the settings cog and called the Blend Range, located to the right of the blend mode drop down and offering a very controllable and powerful method for blending two layers.
File formats and saving the output
Affinity is compatible with Adobe and can import .PSD files, import Photoshop brushes, use most Photoshop plug-ins, and edit from Lightroom. It also has many templates to choose from, organized by output. However, Affinity files can only be opened with the Affinity program. Photoshop files can be opened in a variety of external programs. CorelDraw, Krita, GIMP, and many Adobe applications can all open .PSD files. Affinity can output to JPEG, TIFF, BMP, EPF, GIF, TGA, HEIF, HEVC, CMYK, PSD, PSB and of course its own default, ‘.afphoto’. Saving files in both Photoshop and Affinity can be found under File | Save As or File | Export will give you all the export options. Further export options in Affinity are found using the Export Persona l
WORkSHOpS
If you would like to learn more about the crossover between Affinity and Photoshop or you are new to Affinity and would like an introduction to this application, head to the Virtual Workshops page on the RPS South East region web page - rps.org/regions/southeast/bytesize/ where you will find a variety of short sessions focussing on different aspects of these key applications scheduled for October.