
4 minute read
Lengthening a piece of music


Malcolm Imhoff FRPS FACI(M)
In the last issue we looked at how to shorten a piece of music. No prizes for guessing what comes next! Sometimes our chosen music isn't long enough, so we need to extend it to t the voiceover or the number of images we need to show. The technique for doing this is exactly the same as shortening a music track, copy and paste.
In my AV The Stain in the Snow I wanted a dramatic musical introduction featuring the family of three impressive mountains which dominate the Bernese Oberland, the Eiger, the Mönch, and the Jungfrau.


I found the perfect piece, Verdi's "La Forza del Destino" which starts with two trumpet fanfares. (Figure 1 right) shows the original score with the two fanfares. I needed three, so I rewrote Verdi's opera!
I used the rst fanfare (always a good idea to use the start of a piece of music) to introduce the Eiger.
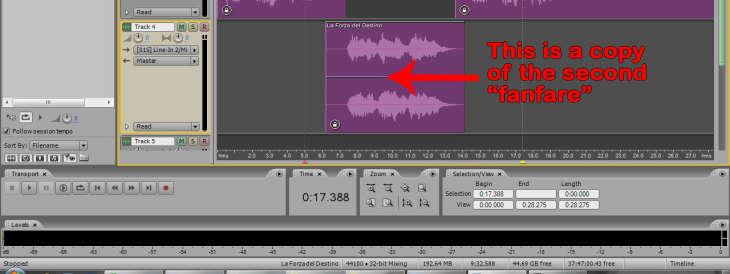

I split the music track, copied the second fanfare, and pasted it into the mix at the appropriate point to show the Mönch. I then slid the second (now the third) fanfare to the right for the Jungfrau (Figure 2 below).
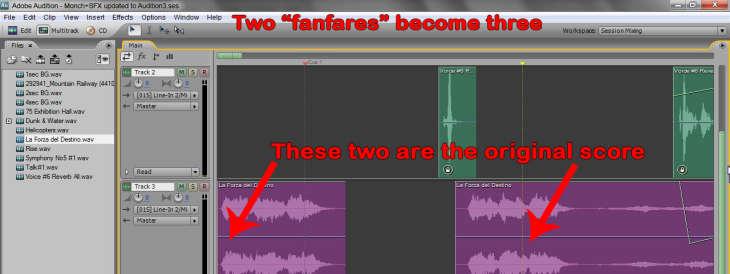
Three fanfares for the three mountains!
Lengthening a Piece of Music continued ...
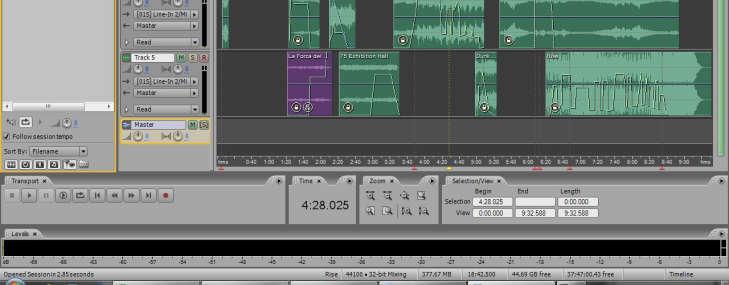
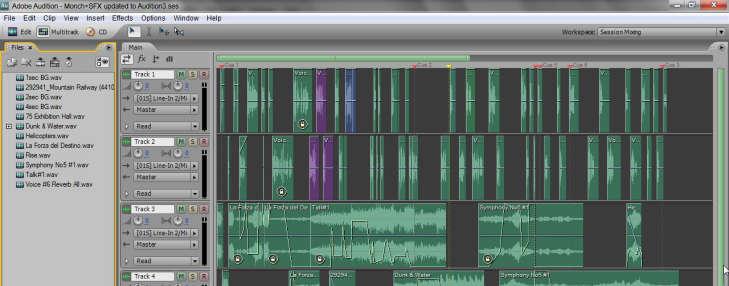
I used about another minute of "La Forza del Destino" but with four separate copies of the music track to t the voiceover. Then there are three other pieces of music in the AV, all treated in the same way, copied, positioned and pasted, so the nal session le looks a bit complicated (Figure 3 below).
Keith Scott FRPS DPAGB AV -AFIAP
In the May edition, we took a brief look at some of the new functions incorporated into Photoshop CC 2019 (version 20), especially the new Content Aware Fill which had been completely reimagined. However, there are plenty of other new or improved functions. Although designated CC 2019 it was ofcially introduced to the world on 15th October 2018, so by the time you read this article in our August edition it will have been in common use by subscribers for around ten months, therefore some of these functions may have already been discovered and exploited.
Adobe Cloud Libraries incorporating `Adobe Color Themes’ has been with us for several version of Photoshop CC. This function has been of great use to generate specic colour themes or to import those created by others e.g. subtle variations of colour based on subject matter such as water, skies, skin tones etc. Colours from such themes could then be added to the `Swatch’ panel for later use, whereas `Adobe Color Themes’ could only be accessed while signed into your Adobe account.
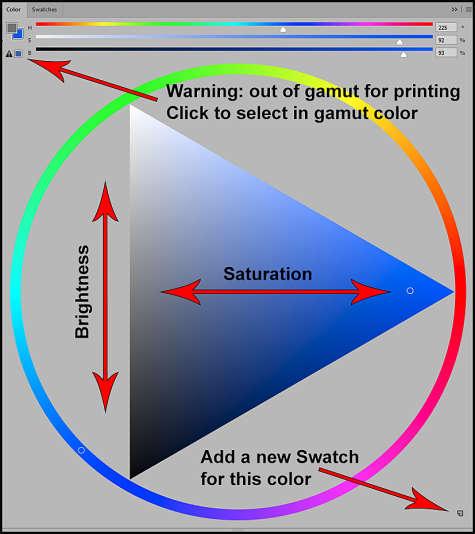
In this latest Photoshop iteration, a new and useful colour function has been added in the form of a `Color Wheel’. The basic concept of this wheel will be instantly recognisable to anyone familiar with subtraction colour printing. To access the `Color wheel’ from the main menu click on `Window’ then click on `Color’ (shortcut F6). Clicking anywhere on the outer circle will select a `Hue’ from either red, green, blue, yellow, magenta or cyan. In this example `blue’ has been selected.
Photoshop – v20 Updated for 2019 (Part 2) continued ...
Click on the centre triangle to change the brightness, up for brighter lower for darker. Clicking on the centre triangle also changes the saturation, left is less saturation and right is more. In this example the selection towards the far right of the triangle caused a small warning exclamation mark to appear at the top left which states `Warning: out of gamut for printing’. Next to this is a small box which when hovered over states `Click to select in Gamut Color’, whereby the nearest in gamut colour will be selected.
For most AV workers a colour out of gamut for printing will not be an issue because sequences are projected in sRGB colour gamut. This is smaller than Adobe RGB 1998 or Pro Photo RGB used by print workers.
Colours outside of gamut will be ignored because of projector or monitor limitations. However, for those making colour prints with critical requirements several other factors will also determine achievable gamut i.e. colour prole, type of monitor, printer, calibration, ink-set chosen, and type and quality of printing paper. Another important factor frequently forgotten when viewing prints is the colour temperature of the viewing source. When viewing AV sequences, we are either looking at a projection screen in a darkened room or PC monitor, therefore the viewing colour temperature and gamut is dictated by such equipment. In respect of colour monitors most `Standard Monitors’ cannot display colours much beyond sRGB, for critical printing high end specialist and expensive wide gamut monitors are required.
Getting back to our `Color Wheel’. Situated at the bottom right of the `Color Wheel’ control panel is a tiny icon, clicking on this icon will open up a `Color Swatch Name’ box enabling the new colour swatch to be named or numbered before adding it to the swatch panel. There is also a small box to tick to add the swatch to your personal library.
Of course, there are other ways to generate a swatch but using this new function allows total control of very subtle hue, saturation and brightness.
|
Swatches aren’t new, they’ve existed in Photoshop seemingly forever. By default, they are shown as small squares of colour within the Swatch panel. From here a click with the eye dropper tool will select any swatch as background colour. Right click with the eye dropper tool on any swatch and a small box will appear offering three options i.e. `New Swatch’, `Rename Swatch’, or `Delete Swatch’. However, to delete a swatch simply left click and drag it into the small dustbin icon at the bottom right.

Next to the dustbin icon is another small icon resembling a folded page, clicking on this is another way to create a swatch whereupon the same `Color Swatch Name’ box previously mentioned will open. The default swatch panel can be changed if desired to a range of different views. Whilst this isn’t new it is useful to know. Click the top right `menu’ icon to reveals a large list of specialist colours including those for `Mac’, `Windows’, and `Pantone’ colour sets including metallic.
The `Frame Tool’ within Photoshop CC 2019 is a brand-new tool which works in a similar manner as the tool within Adobe InDesign. Its main use is described as an image place holder. Frame tools with various functionalities have been around for some time in other software but this is a rst for Photoshop. What makes this tool unique is its ability to use not only rectangular or elliptical frames, but also `Custom Shapes’, and `Text’. Regular frames appear as skeleton outlines as exampled right and are drawn directly onto the canvas using the new `Frame Tool’, whilst `Custom Shapes’ are converted to frames after drawing the shape with the normal custom tool. Likewise, with text it is rst typed using the regular text tool then converted to a text frame.


