BROILER SIGNALS CHECKBOOK

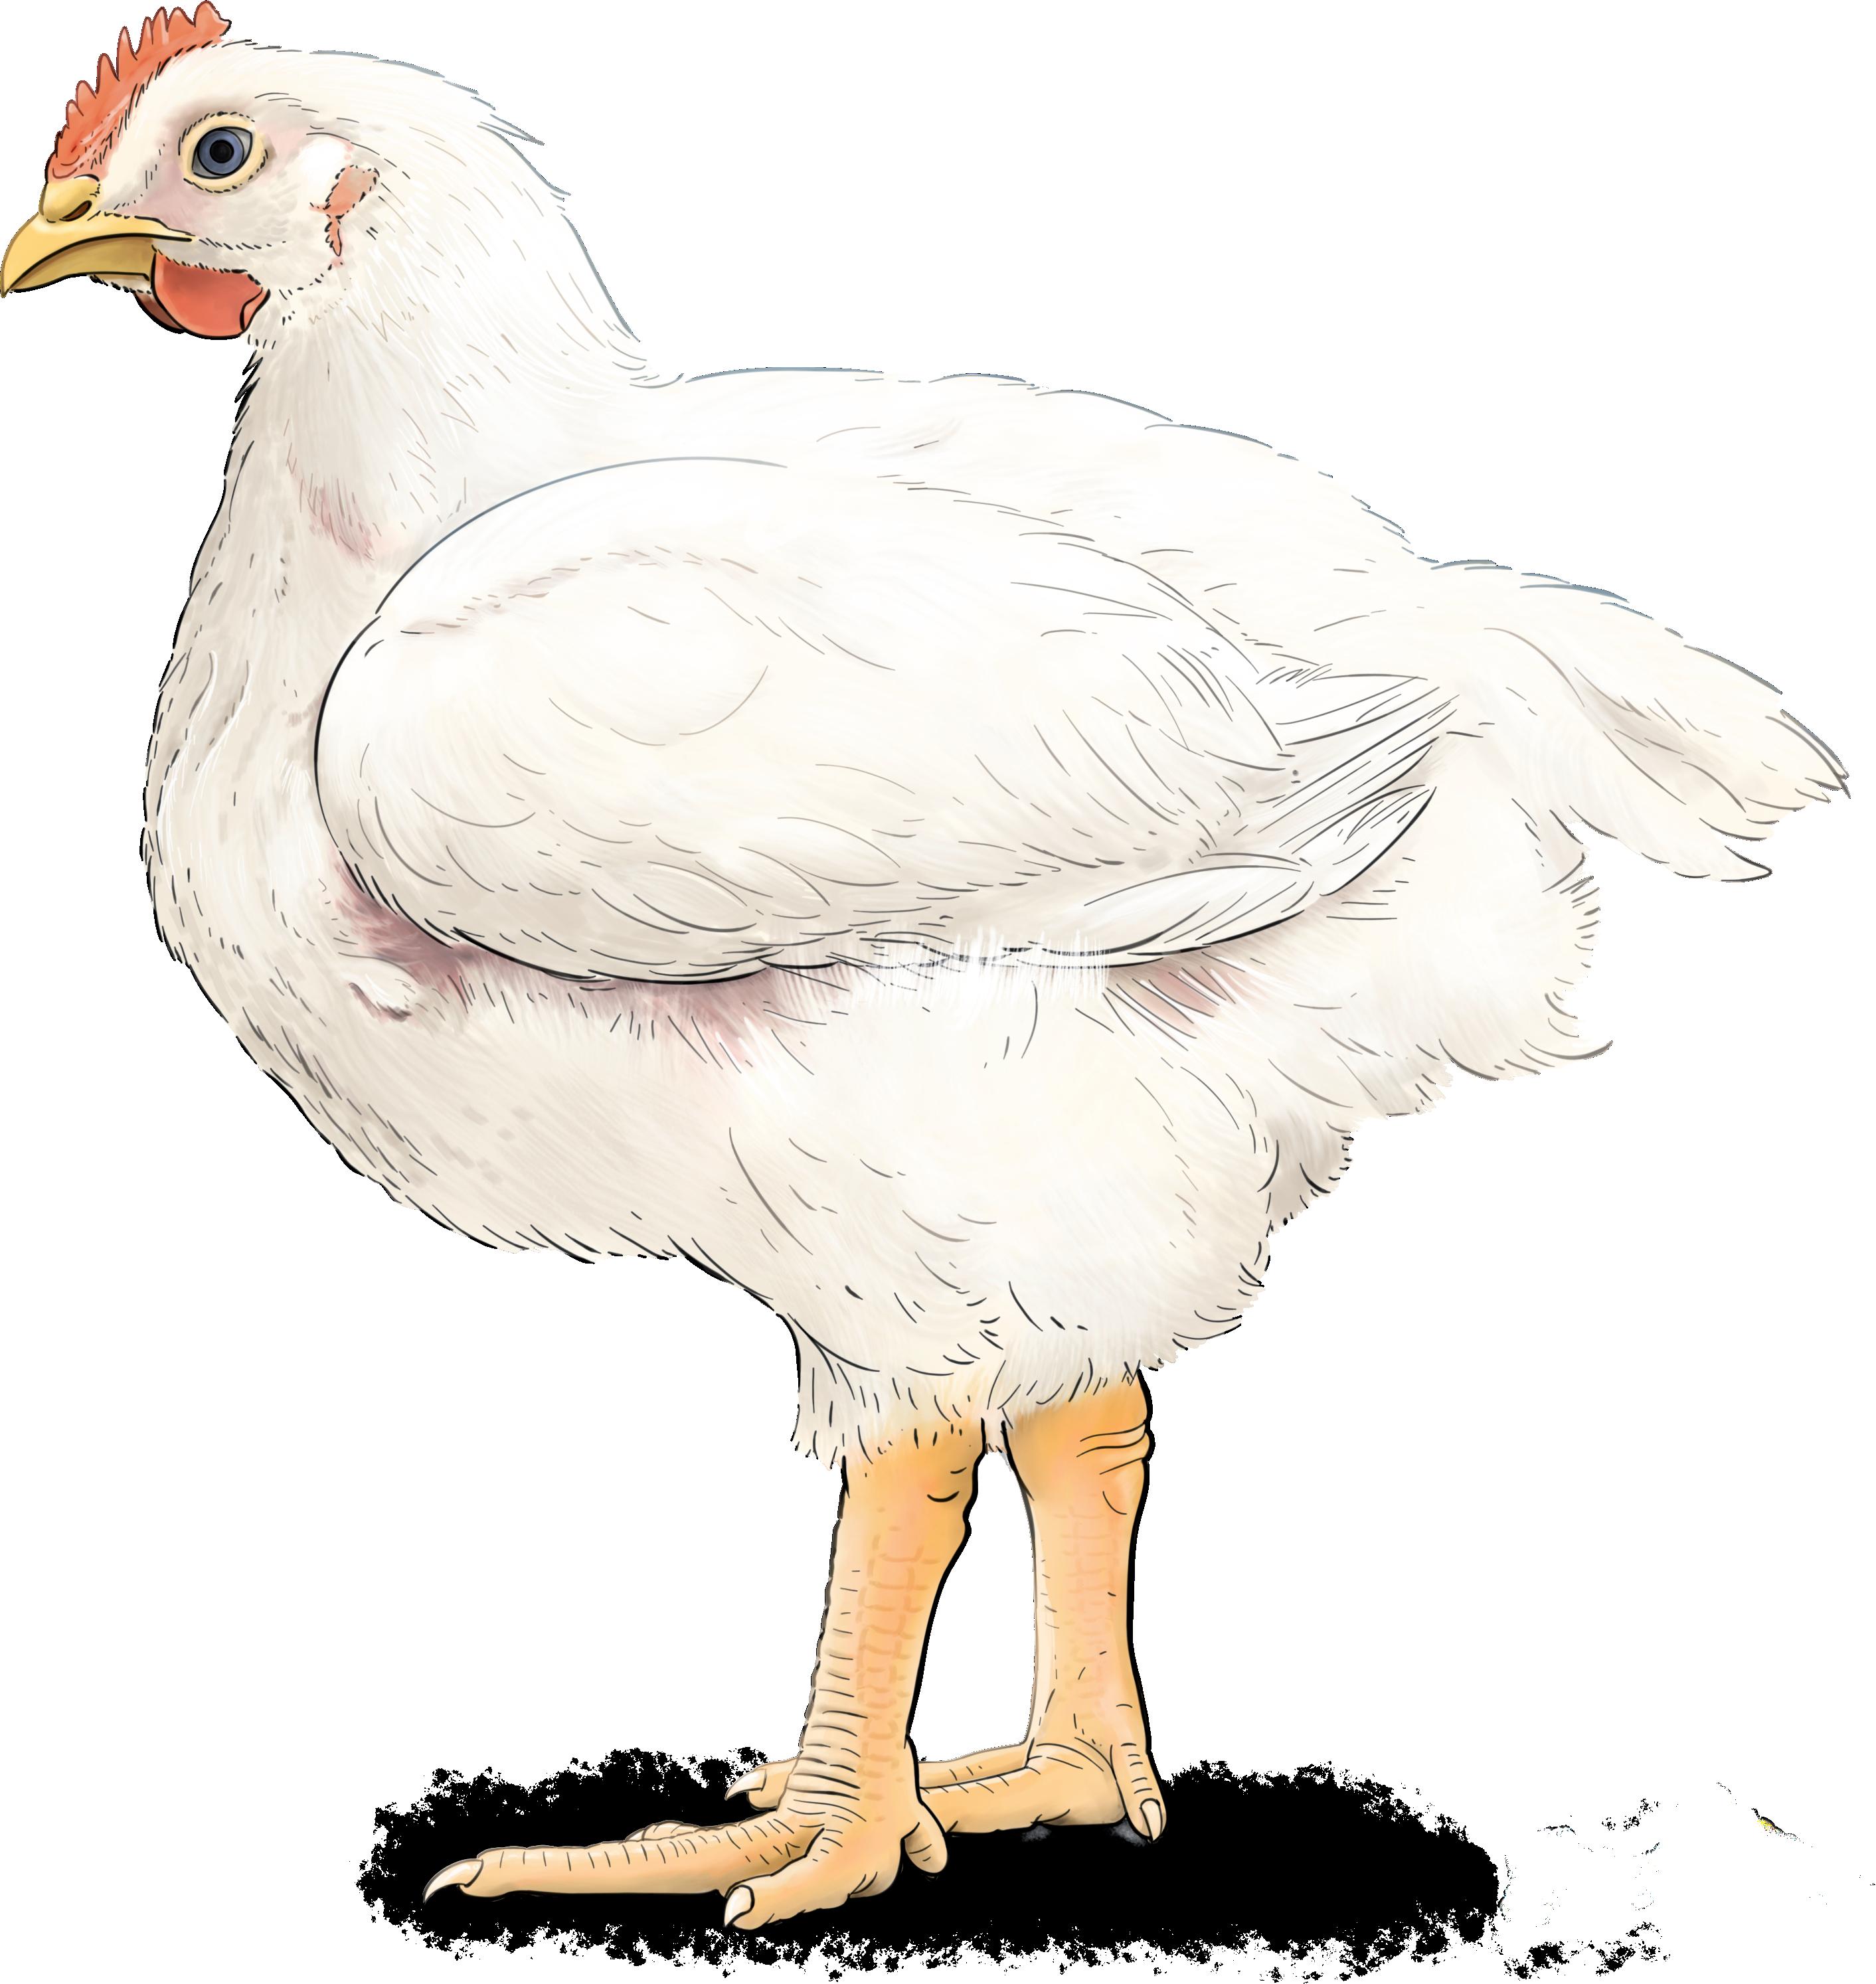
Focus on health, welfare and growth
Copyrightprotected
1. Preparation 5
The Poultry Signals Concept 7 Focus Points in a Broiler’s Life 8 Checklist for Inspection 9 Checklist Healthy Broiler 10 Checklist Unhealthy Broiler 11 Checklist Basic Biosecurity 12 Biosecurity: Shower Protocol 13 Instruction Cleaning and Disinfection 14 Pest control 15 Checklist Litter Quality: Raw Materials 16 Checklist Drinking Water Nipples 17 Checklist Round Drinkers 18
2. Day-old chicks 19
Checklist Before Chick Arrival 21 Welcome Check Day-old Chicks 22 General Checklist Day-old Chicks 23 Day-old Chick Quality: Navels 24 Day-old Chick Quality: Legs 25 Day-old Chick Quality: Belly 26 Day-old Chick Quality: Chick Length 27 Measuring Chick Temperature 28
3. The first week 29
Chick Distribution 31 Checklist Crop Fill 32 Weighing Young Chicks 33 Causes of Death 34
4. Flock management 35
House Inspection 37 Individual Bird Inspection 38 Individual Weighing of Broilers 39 Checklist Monitoring Heat stress 40 Checklist Preventing Heat Stress 41 Score Card Footpad Lesions 42 Checklist Factors Influencing Footpad Dermatitis 43 Score Card Dermatitis 44 Score Card Feather Condition 45 Break the cycle 46 Checklist Litter Quality 47 Checklist Water Quality 48 Biofilm 49 Drinking Water Treatment 50 Feed signals 51 Checklist Light Programme 52 Checklist Air Quality 53 Air movement 54 Effective temperature 55
5. End of production and slaughter 57
Preparation for Catching 59 Catching: Bird Treatment 60 Checklist Muscle Disorders (myopathies) 61 Checklist Leg Disorders 62 Score Card Bone Disorders 63 Checklist Skin Damage 64 Bleeding and Bruising 65
6. Health 67
Checklist Interior: Organs 69 Checklist Interior: Skeleton 70 Instruction On-farm Euthanasia 71 Checklist Poultry Droppings 72 Checklist Poultry Droppings: Problems 73 Instruction Salmonella Sampling 74 Coccidiosis: Lesion Score 75 Scorecard Dysbacteriosis 76 Instruction Drinking Water Vaccination 77 Checklist On-Farm Spray Vaccination 78 Good Vaccination Practices 79 Dissection step-by-step 80 Dissection: Signals of Respiratory Problems 81 Dissection: Signals of Intestinal Problems 82 Dissection: Signals of Mobility Problems 83 Dissection: Signals of Internal Organs 84
Contents Copyrightprotected
The Poultry Signals Concept
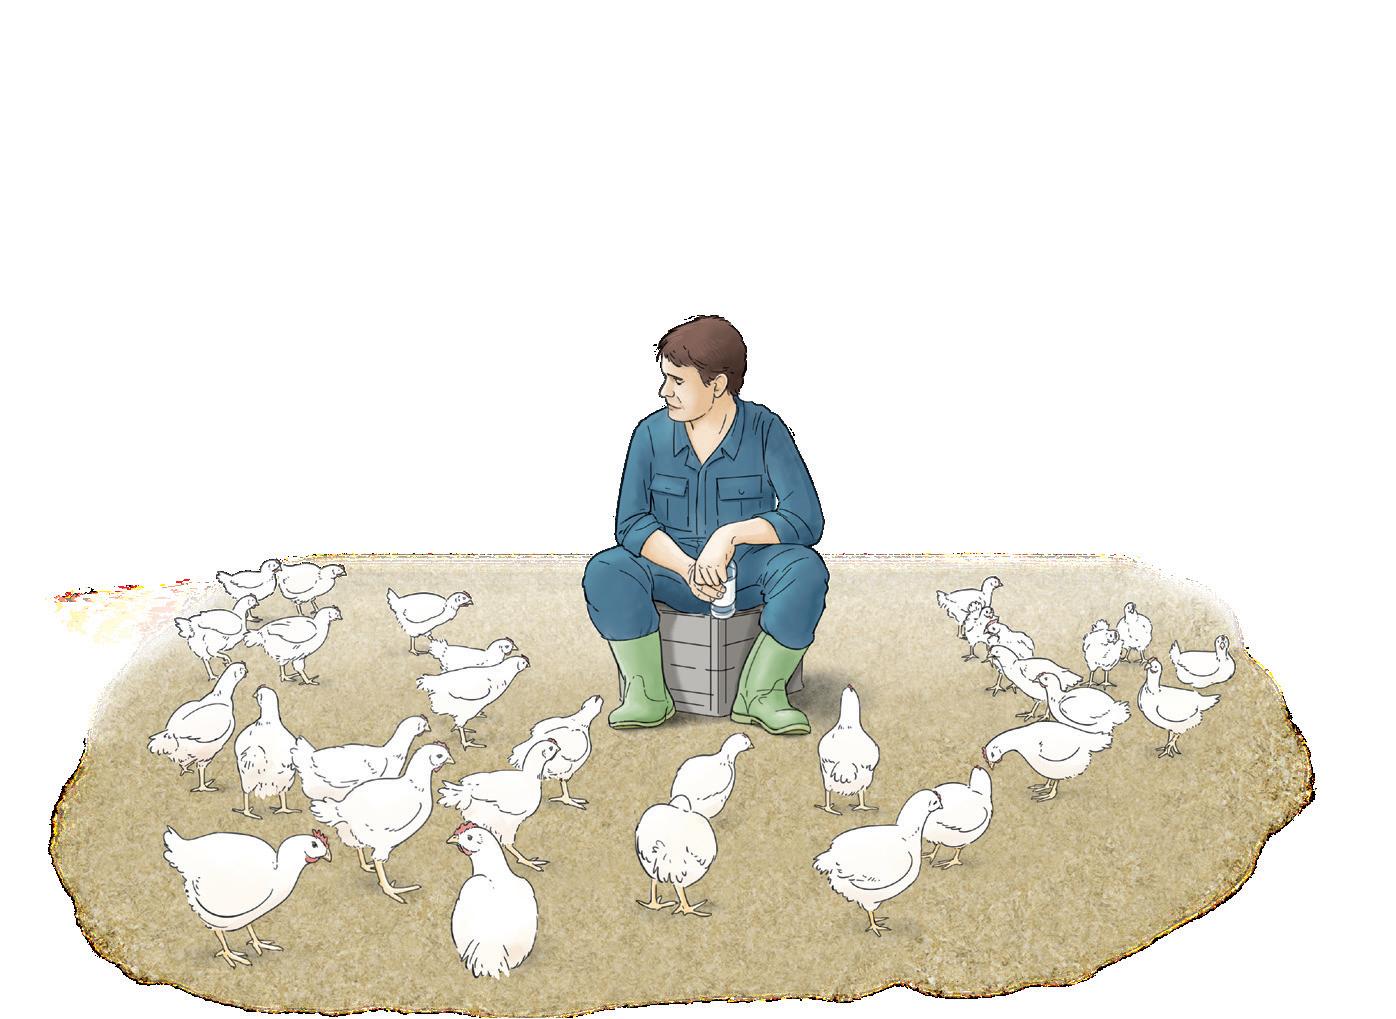
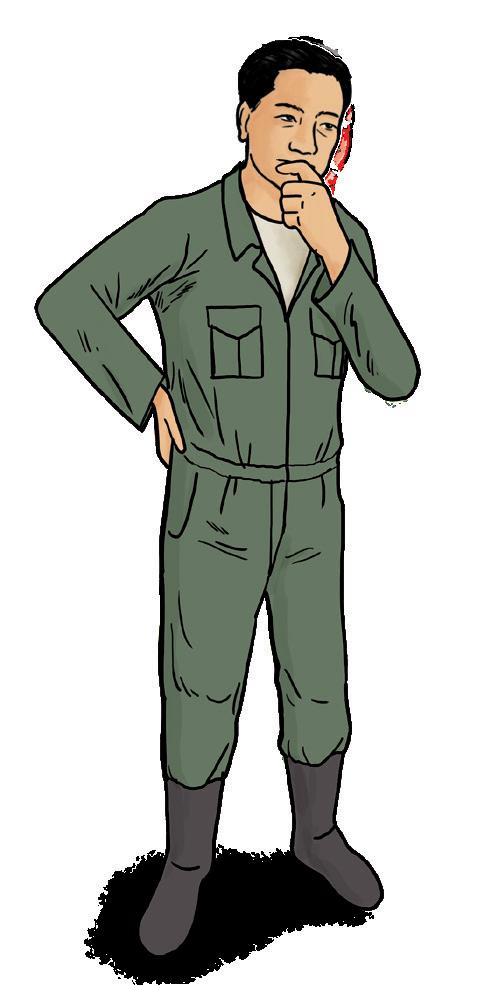
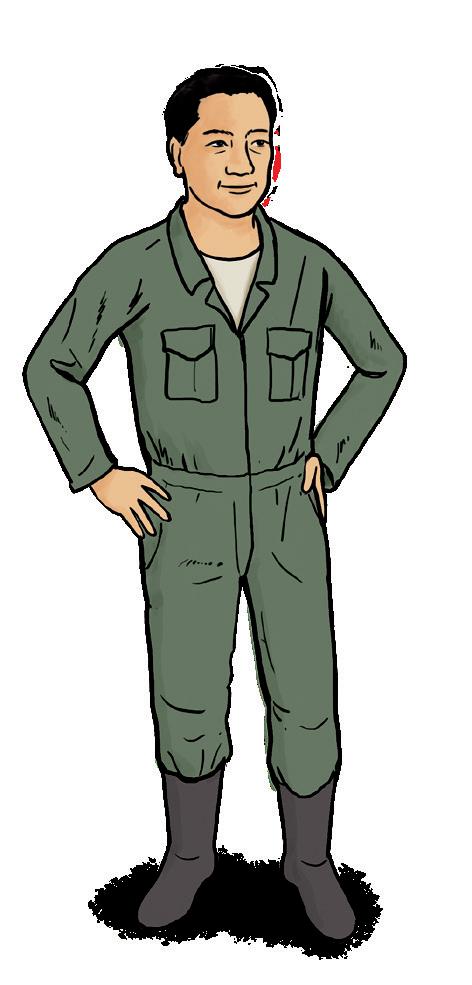
You don’t manage a farm behind a desk. You have to go into the houses and see what is happening there, think what it means and act accordingly. For good observation take your time and use all your senses.
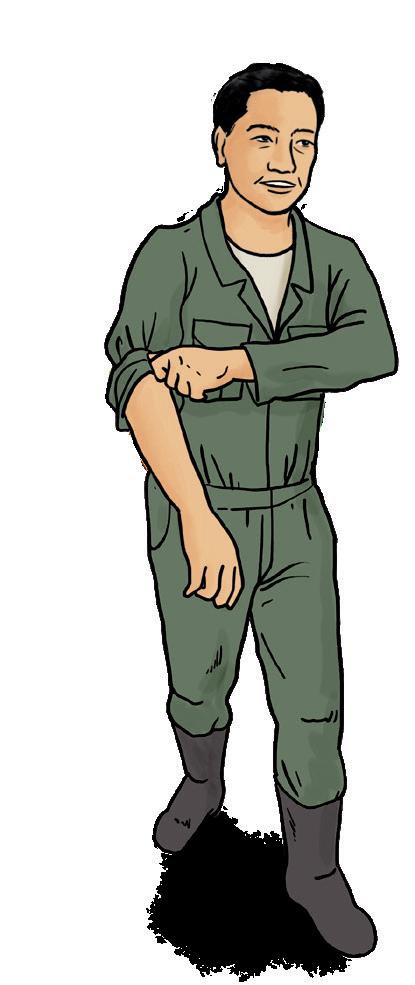
What do I see?
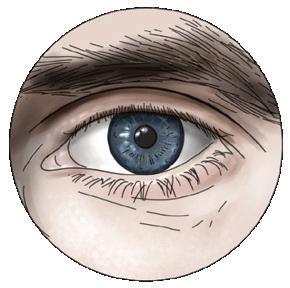
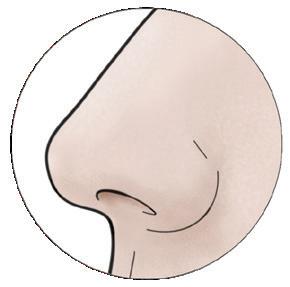
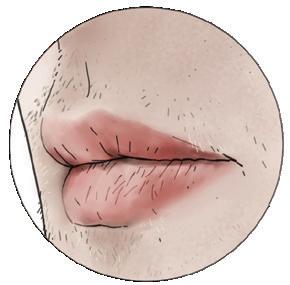
Why is this happening?
What should I do now?
Broiler Signals Checkbook: 1. Preparation 9
your
taste smell look listen feel touch Copyrightprotected
Look Think Act Use all
senses
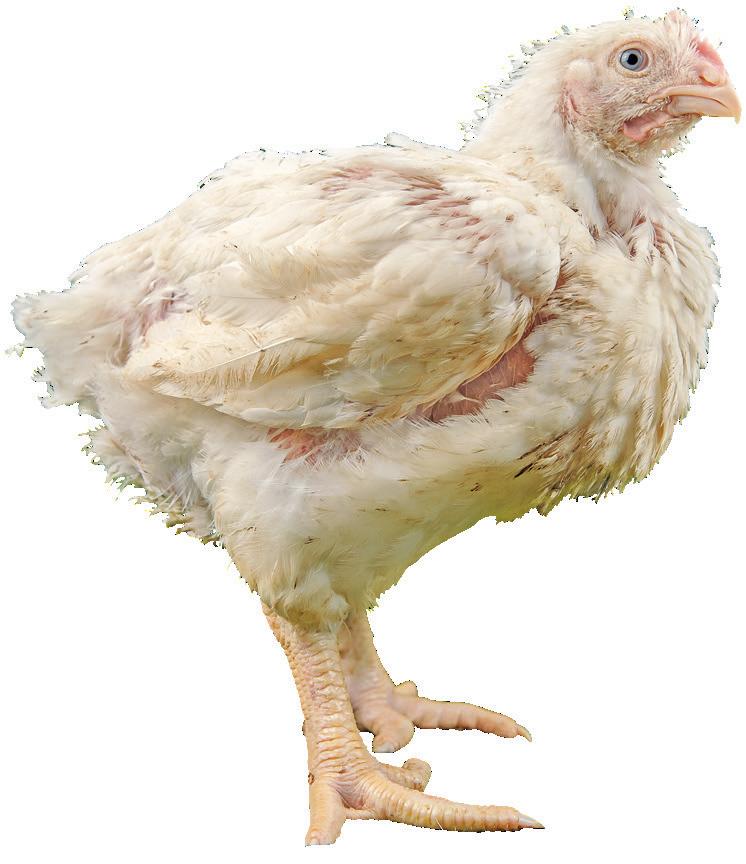
Focus Points in a Broiler’s Life
Broilers grow very rapidly in a short time. When you take action, don’t think in days but in hours or even less. The slightest interruption can disrupt the delicate process. So it’s all the more important to prevent problems, or at the very least react quickly to the signs.
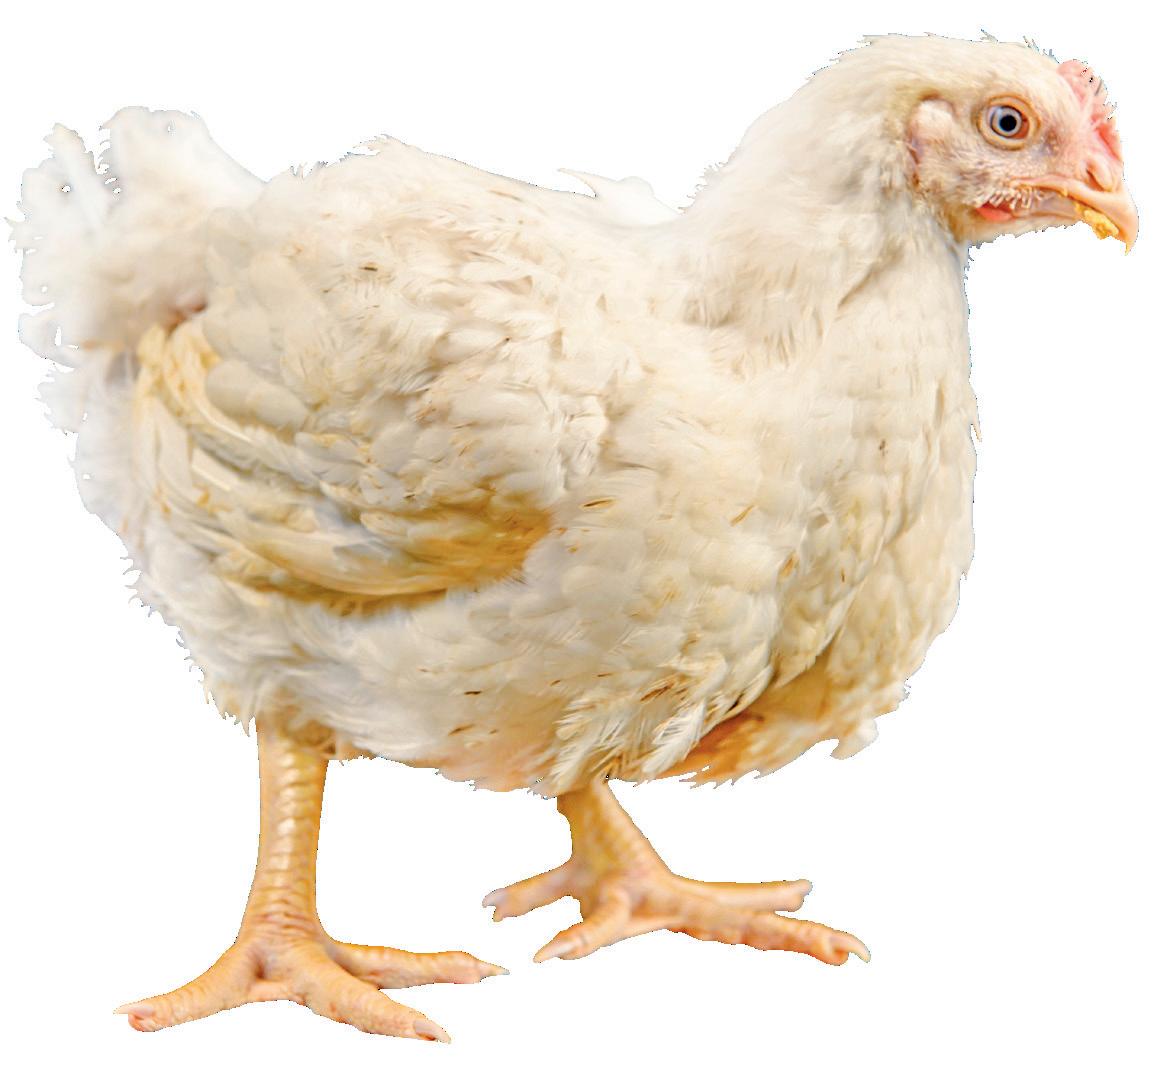
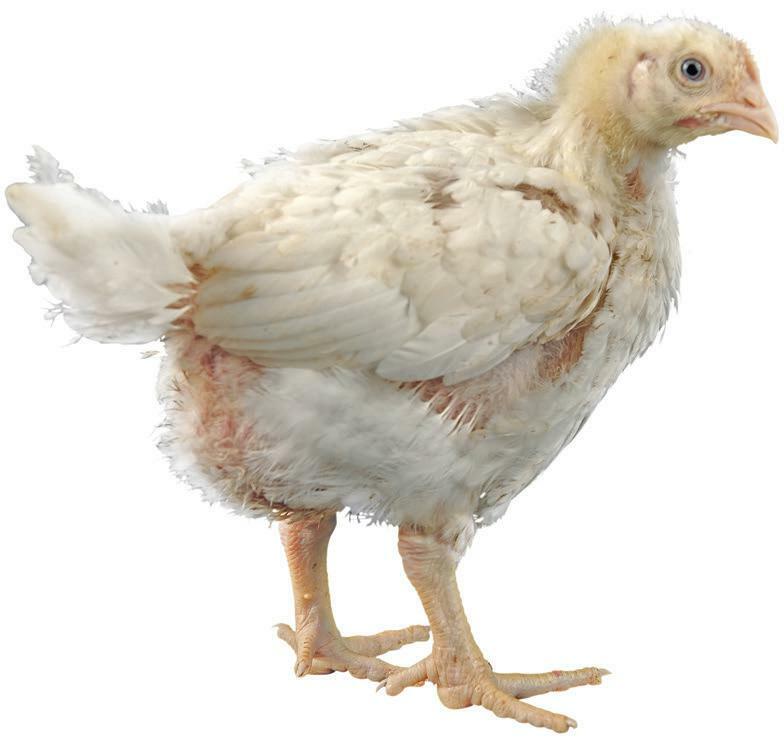
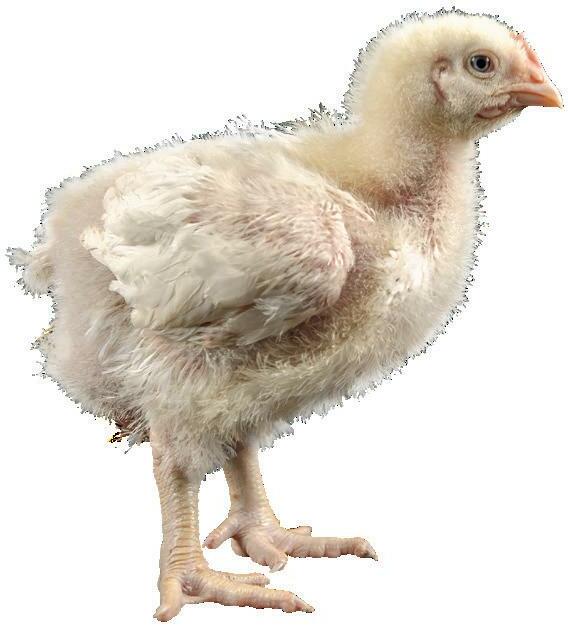
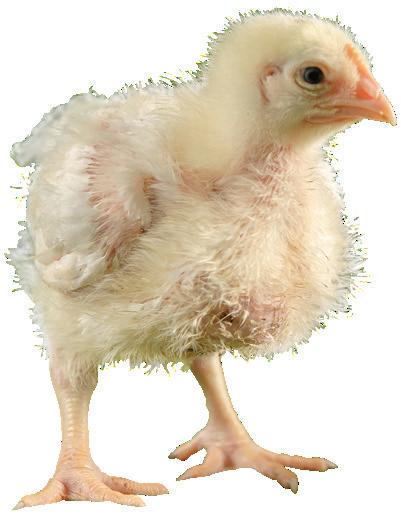

Day 1
• day-old chick quality
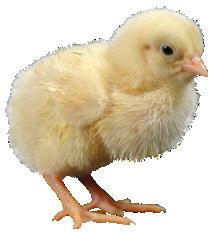
• body temperature
• eating and drinking
• crop fill
• distribution
Week 3
• intestinal health
• droppings
• clean feathers
Week 5
• litter quality
• overheating
• footpad lesions
• mobility (lameness)
Week 1
• growth
• distribution
• crop fill
Week 2
• organ development
• bone development
• muscle development
• growth
Week 4
• respiratory health
• change from requiring heat to excess heat
• panting, sniffing, sneezing
Week 6
• leg problems
• skin damage
• heat stress
Broiler Signals Checkbook: 1. Preparation 10
Copyrightprotected
Checklist for Inspection
Almost everything is automated in most broiler houses: ventilation, feeding, drinking. But inspection is a key activity and the human touch remains essential. What do you look at? Also be aware of things you don’t pay attention to (and ask yourself why).
Frequency
You don’t have to do everything, every day. So decide what your plan is for this particular house inspection.
Daily
Daily inspection is required for: Water, feed, ventilation, litter, broken equipment.


Importance
1-2 times per week
Inspections that require weekly attention: Weighing, lights, inlets, section.

Occasionally
Less frequently or when suspecting or experiencing problems. Manure sampling, blood sampling, equipment maintenance
Not everything is of equal importance. Pay more attention to critical signals and decide whether signals require immediate action or not.
Critical
If you don’t take action now, your whole flock will be lost (e.g. high mortality, no drinking water or feed, specific signals of infectious diseases).
Timing of inspections
Important
This is important, but wont jeopardise your whole flock (e.g. wet litter. increased mortality, foodpad lesions, etc.).
Inspections take time and you have to plan this. It has to be a routine activity, but not a rut.
Useful
Things that need to take care of, but are not essential (e.g. single broken light, one broken nipple, etc). Or things that can just be ignored.
Set times
Plan inspections at set times, such as every morning after feeding and at the end of the day. So you can compare between days.
Variable times


Visit the flock at different times, so you will see different things. If you only observe at feeding times, you will never know that the birds do at their ‘spare time’.
All the time
When inspecting your flock, don’t do anything else (like repairing things, tidying up). But when doing other things, always keep your eyes open for signals!
Broiler Signals Checkbook: 1. Preparation 11
Copyrightprotected
Checklist Healthy Broiler
What are the characteristics of a health broiler? In inspection rounds you always look for birds that do not appear normal. So first you need a reference of what normal is.
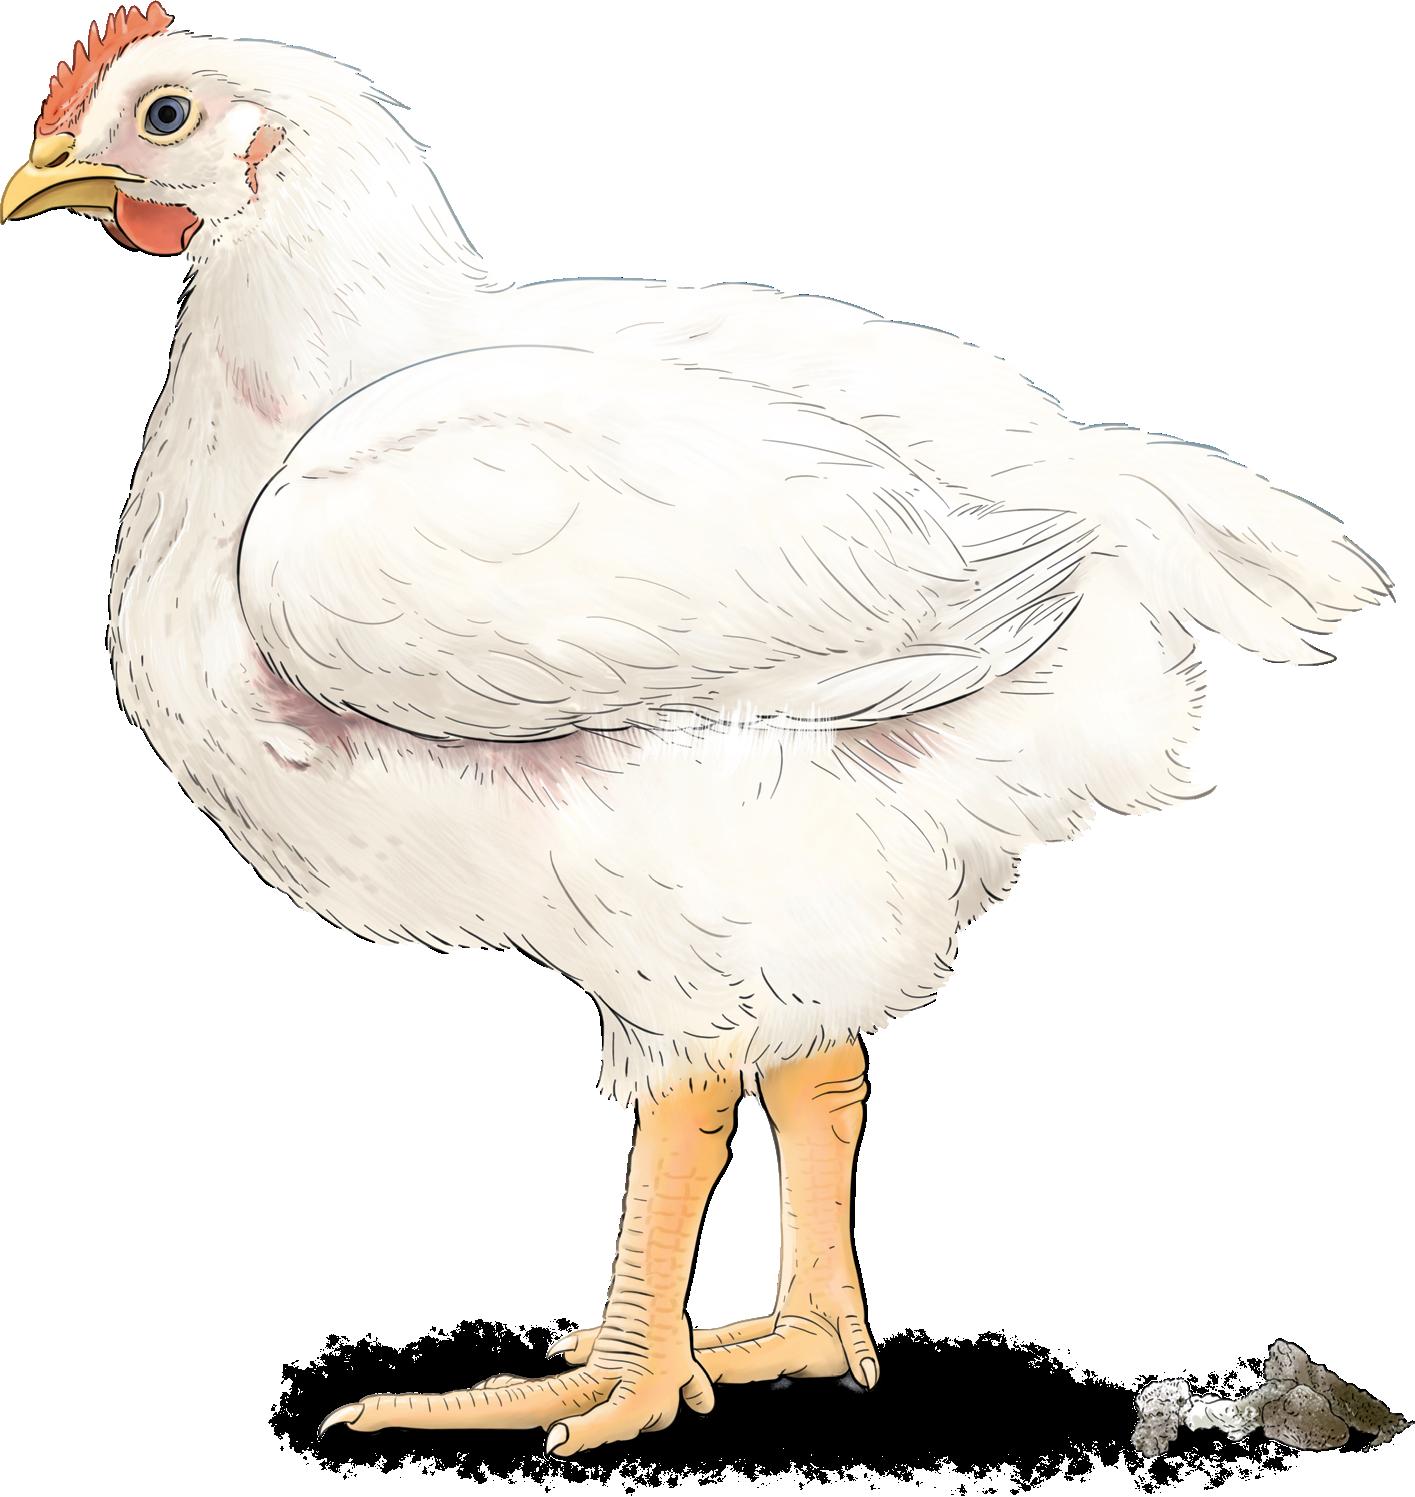
clean nostrils pink and moist mucous membranes
straight neck proudly upright posture
closed beak, normal breathing
filled crop
full muscled breast pink, undamaged breast skin
straight keel bone
wings well positioned along her body
smooth footpads straight toes
concave back
behaviour: alert, stands up when approached clean, smooth and even plumage smooth and flexible joints
no injuries to head, neck, back and tail
nice and cheerful sound red and clear comb and wattles clear eyes firm droppings straight, yellow legs, and not overly warm
Broiler Signals Checkbook: 1. Preparation 12
Copyrightprotected
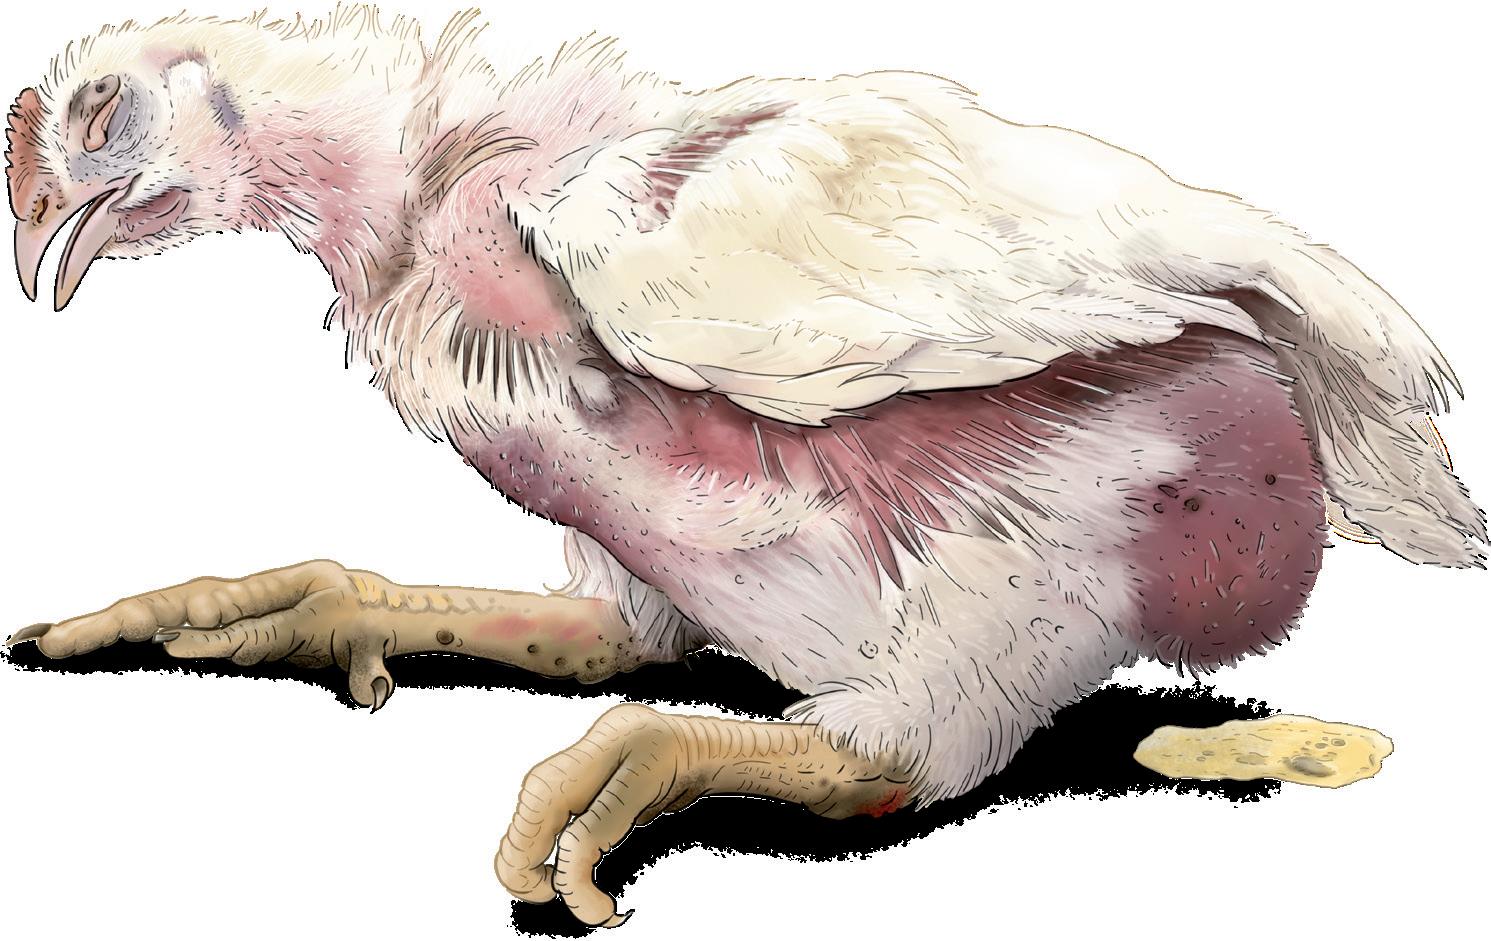
Checklist Unhealthy Broiler
This broiler does not exist in reality. But it gives an insight in what could be wrong with a broiler. It is more important to recognise an unhealthy broiler than a healthy broiler!
screaming, squeaking, congested sound
eyes: mucus, semi-closed, frothy, swollen, white eye, dry, dull/pale in colour
comb/wattles: pale, purple dirty, moist nostrils
behaviour: sits still in a corner, lethargic and slow
swollen nasal cavity
convex back neck feathers standing out
drooping and hunched-up posture
open beak, gasping
tongue and mucous membranes pale, dull and dry
pecking and scratching injuries skinny breast, under-developed muscles
damaged breast skin: ammonia burn, litter spots, breast blisters
hot legs (fever)
lame, crooked legs, pulled up
empty crop foot pad lesions
sitting on hocks (hock dermatitis)
thick joints
wet, soggy litter
wings drooping along her body or standing out
plumage: dirty, fluffed out, faded, worn, no symmetry
Broiler Signals Checkbook: 1. Preparation 13
Copyrightprotected
Checklist Basic Biosecurity
To keep diseases out is the best prevention. This requires biosecurity measures. These will be different on each farm, but some rules apply in all cases.
No unauthorized access to the farm.
Register all visitors.
Shower and change clothing on-farm.
Wash and disinfect hands and boots when entering and leaving houses.
Clean and disinfect all equipment before bringing in to the house.
Go from the youngest flock to older flocks.
Use the ‘all in/all out’ principle and maintain a period of downtime between flocks (preferably 2 weeks).


People working on the farm should not keep any poultry - or actually any birds - at home.
These could be a hazard.
Ensure all buildings are adequately sealed against access by wild birds or vermin.
Maintain an effective rodent/vermin control program. Clean-up feed spills, do not leave equipment, building materials or litter lying around. Store litter material in bags or inside a storage building or bin.
Broiler Signals Checkbook: 1. Preparation 14
Copyrightprotected
Instruction Cleaning and Disinfection

Cleaning the poultry house after depletion and before the new flock arrives is the most important measure to prevent diseases. Don’t short cut procedures as it will cost you more than you gain.
1. Preparation

Empty feeders and hoppers in the house. Remove the litter from the house and from the farm. Spray the house interior with an insecticide and all equipment after birds have been removed.
2. Brush clean
Dry clean and remove equipment from the house. Remove remaining dust from the house interior.
3. Soaking
Spray the house to remove as much organic material as possible with a low pressure-washer.
4. Washing
Wash the interior and all remaining equipment with a foam detergent compatible with the disinfectant to be used later. Don’t forget to wash outside the house (access routes, staff facilities). Drain, wash and disinfect the water system.
5. Drying


Let everything dry-off properly. Remaining water in the house would diluted the disinfectant.
6. Disinfection
Apply disinfection to the house interior and all equipment according to the manufacturer’s guidelines (concentration, exposure time).
7. Rinsing and drying
Rinse off the disinfectant after the minimum exposure time as disinfectants might be toxic or aggressive for the new flock. In case fumigation is applied make sure the house is sealed and closed for people during fumigation.
8. Inspection
Inspect the house to evaluate cleaning and disinfection. Take samples when possible (bacterial count).
9. Down-time


Leave the house empty to decrease the level of pathogens. The general advice is 14 days. Use this time to effectively control rodents and other pests. Refresh footbaths, hand sanitizers and farm clothing.

Broiler Signals Checkbook: 1. Preparation 16
Copyrightprotected
2. Day-old chicks Copyrightprotected
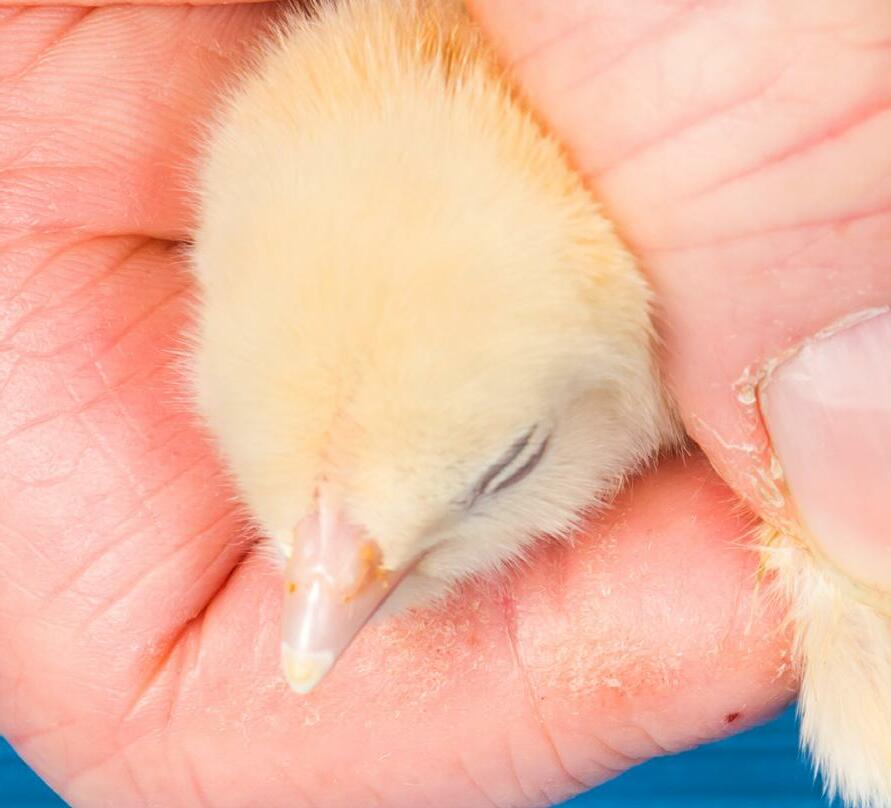
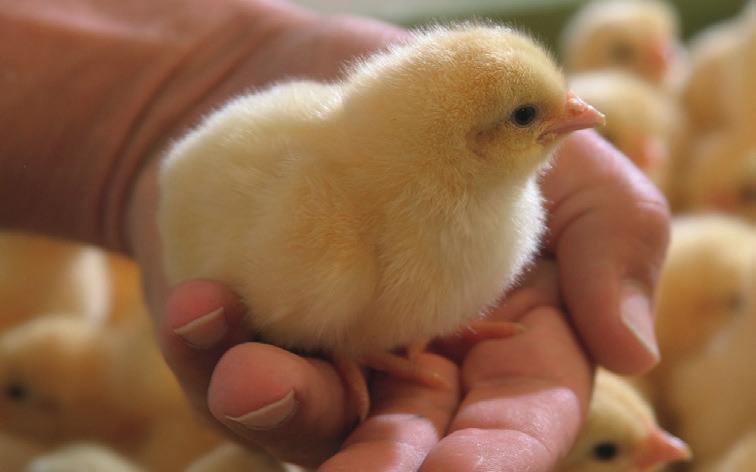
General Checklist Day-old Chicks
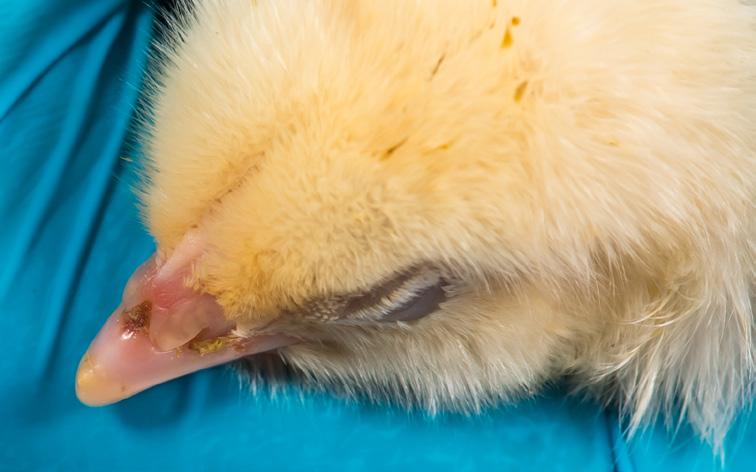
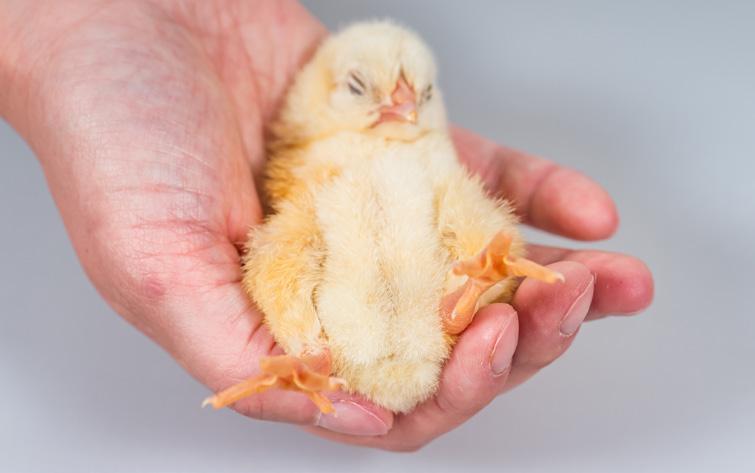
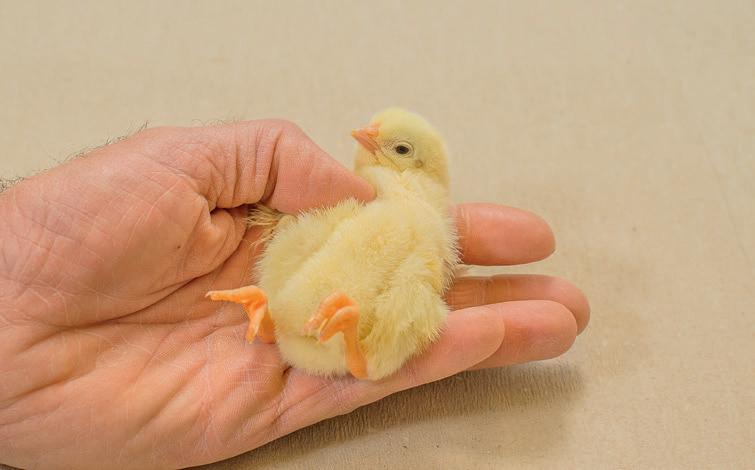
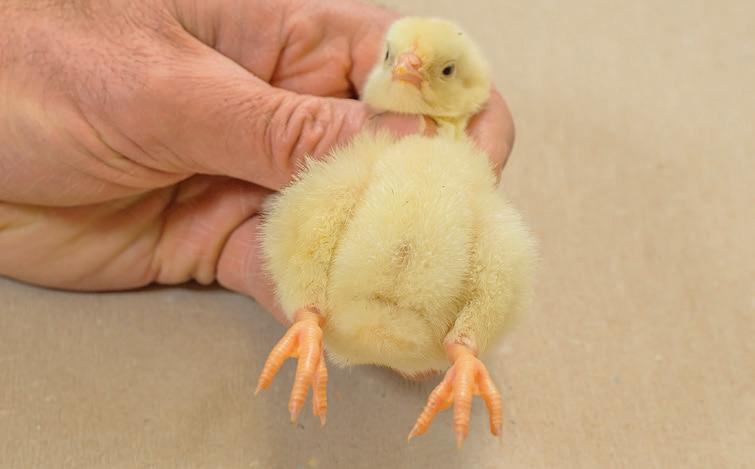
Always check the quality of day-old chicks. Most important objective measure is the cloacal temperature, but also general appearance is important. Check the basic characteristics of a sample of chicks.
Reflexes
A chick put on its back should stand on its legs again within 3 seconds.
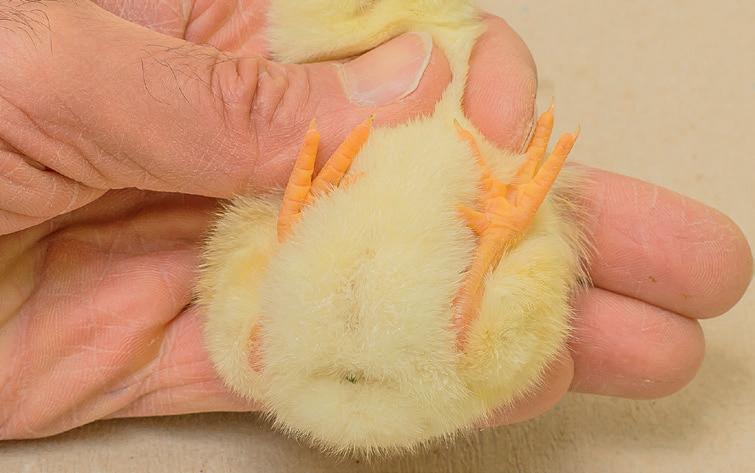
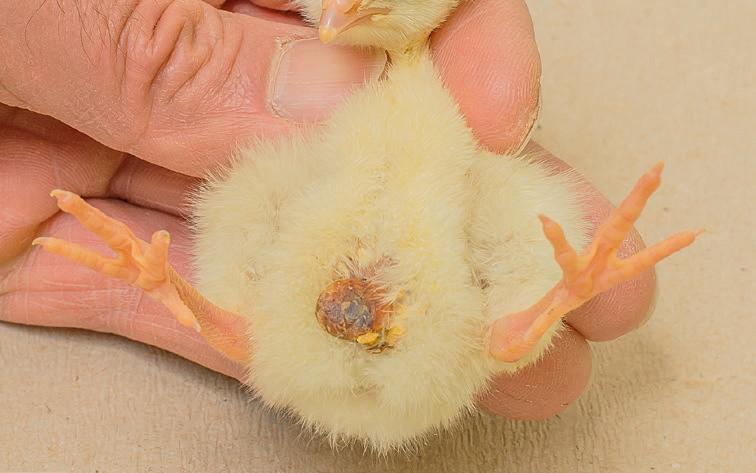
Navel
The navel should be properly closed and clean. It should A navel that is open or has a black knob, a tear, show inflammation or is red.
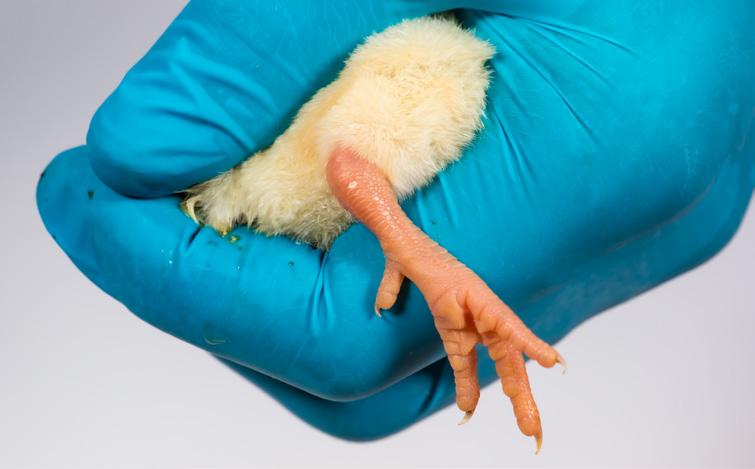
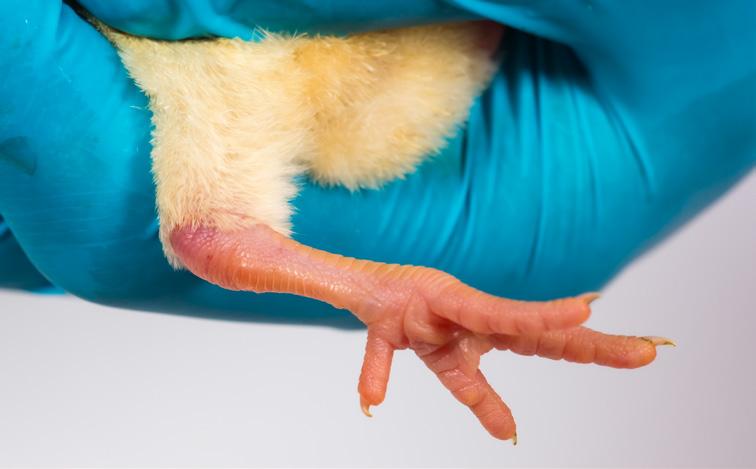
Legs
Legs should be strong with normal skin colour. They should not be dried out, red or very skinny legs, or ones with red hocks and clearly visible blood vessels.
Beak
The beak should be clean, normally coloured, with anice clean comb. The beak should not be dirty or red beak, and a dirty comb.
Belly
You should feel a soft and supple belly Chicks with a distended, hard belly, or that immediately excrete meconium when their belly is touched score 1.
Broiler Signals Checkbook: 2. Day-old chicks 25
Copyrightprotected
Day-old Chick Quality: Navels
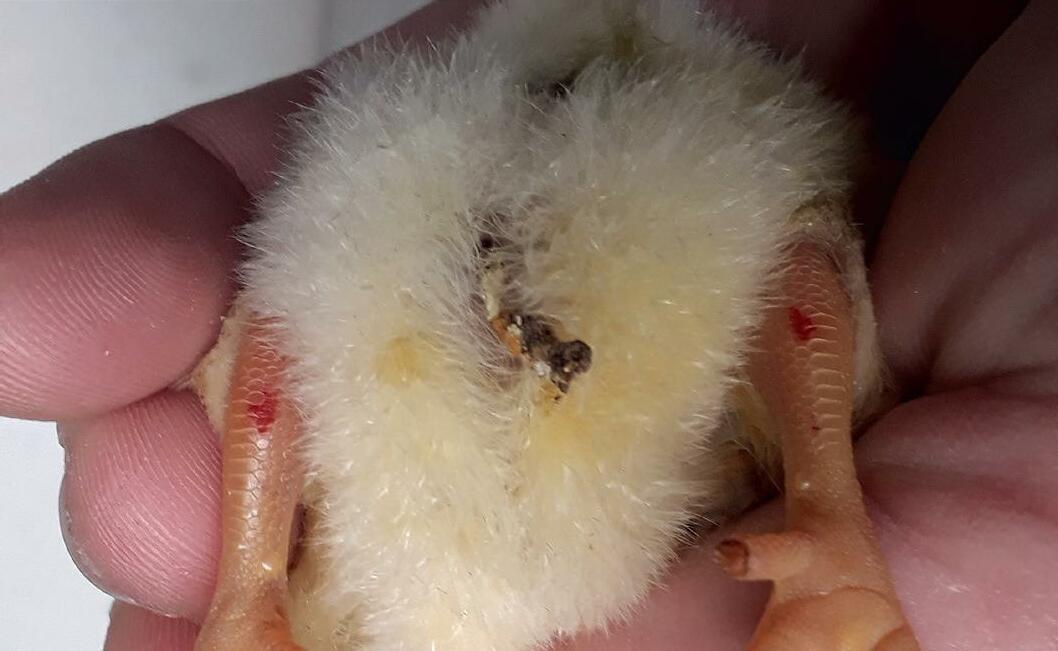
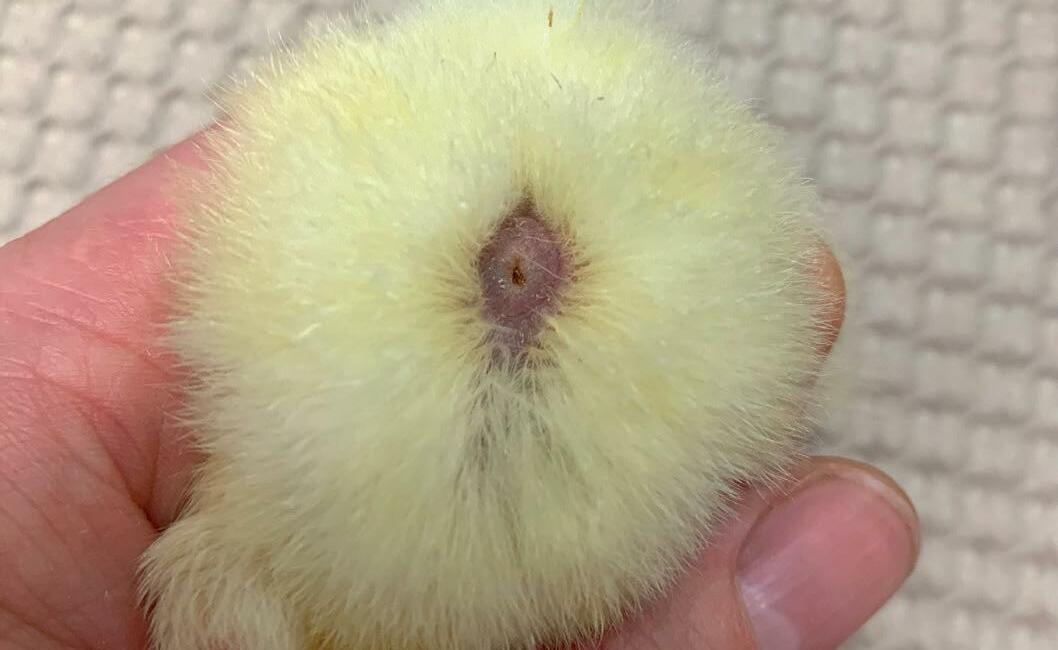
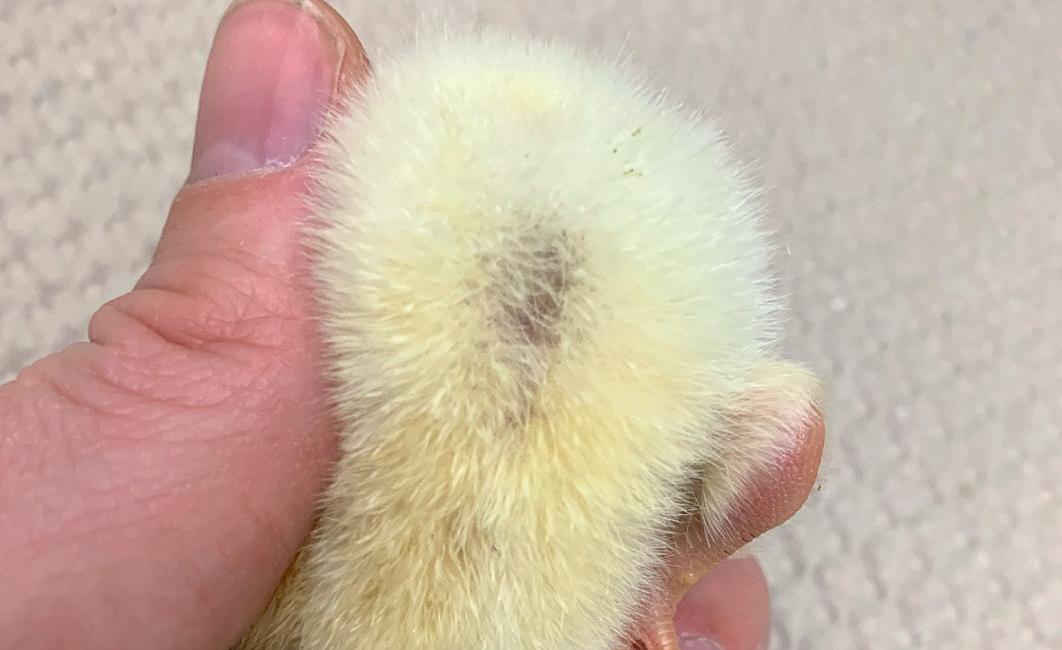
Expose the navel by blowing blowing gently onto the navel area. The feathers part and the navel becomes visible. A good, well-healed navel indicates that the abdomen sealed nicely after the yolk was retracted into the body. Poorly sealed navels increase the risk of mortalities.
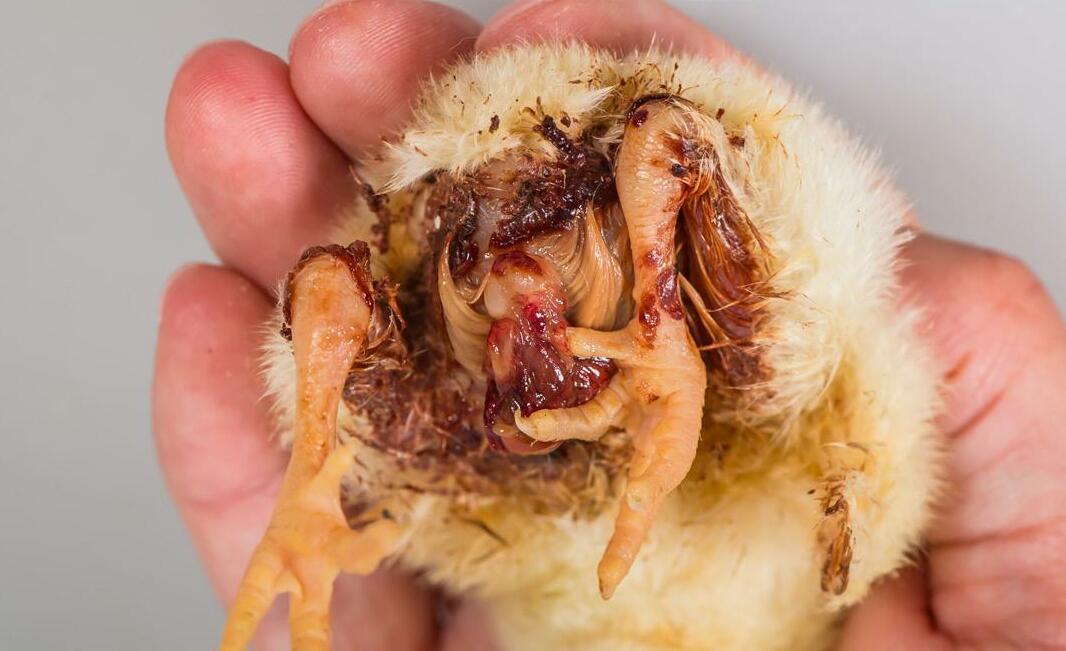
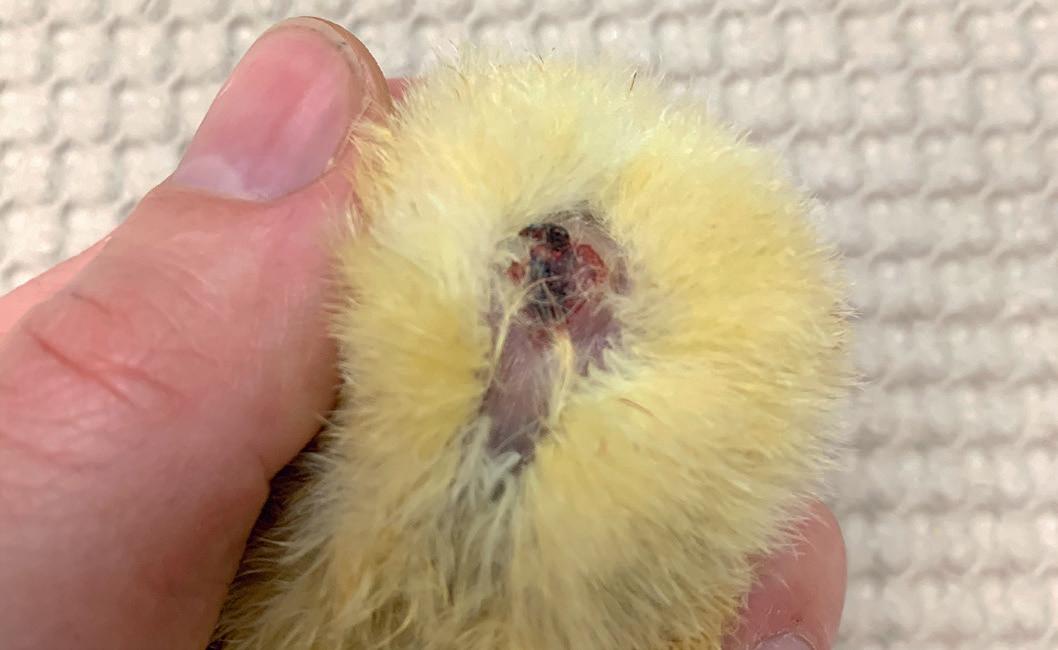
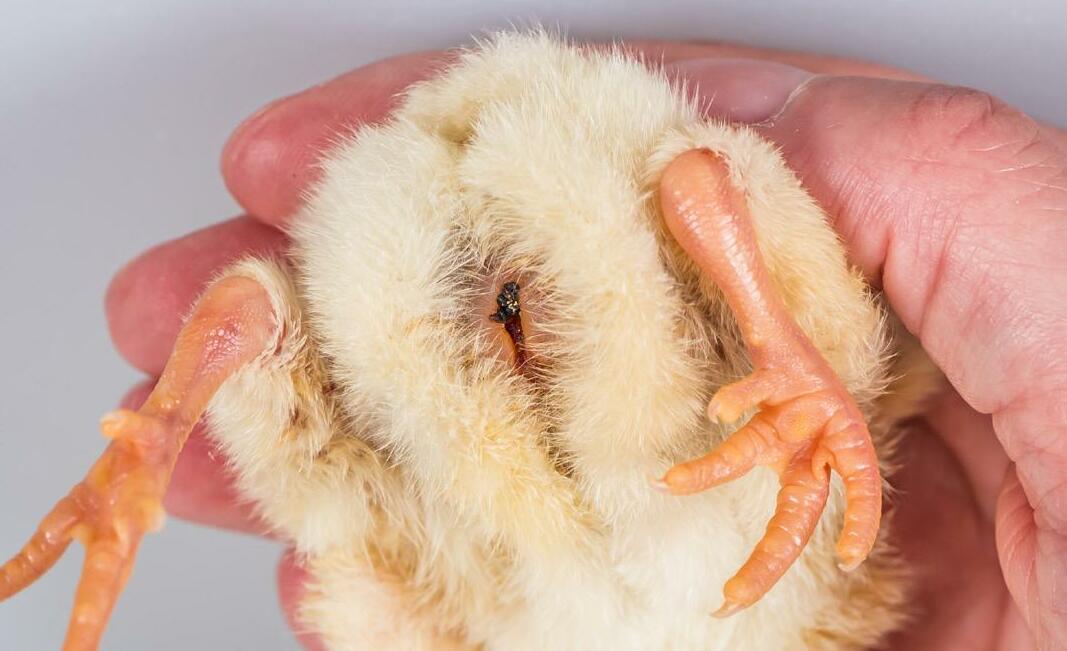
A well-healed, sealed navel.
Open navel that will be a port of entry for infections.
This navel is still slightly open. A well-sealed navel must be completely closed.
Abnormal and unacceptable (bloody and starting infection). This navel will not seal.
Residual yolk protruding from the navel. This is a potential portal of entry for infection.
Bloody navel. This indicates wrong hatching conditions.
26
Broiler Signals Checkbook: 2. Day-old chicks
Copyrightprotected
Measuring Chick Temperature
The development of chick temperature is extremely important at the first day. The body temperature should be 40.0-40.5°C. Overheated chicks are more susceptible to intestinal damage. Cold chicks get lethargic and will die. 10% of chicks with temperature of 37°C at arrival will die. Sample at least 10 checks at 5 locations in the house the first 4-5 days after placement.
Chick temperature is often measured with an IR ear thermometer. This is not very accurate and often shows a slightly lower reading.
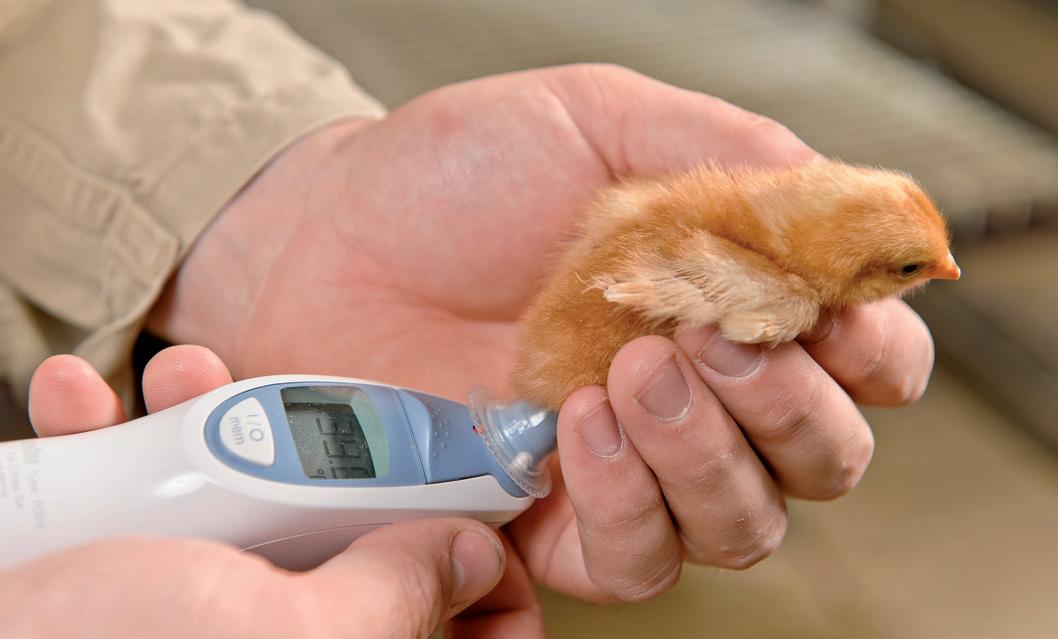
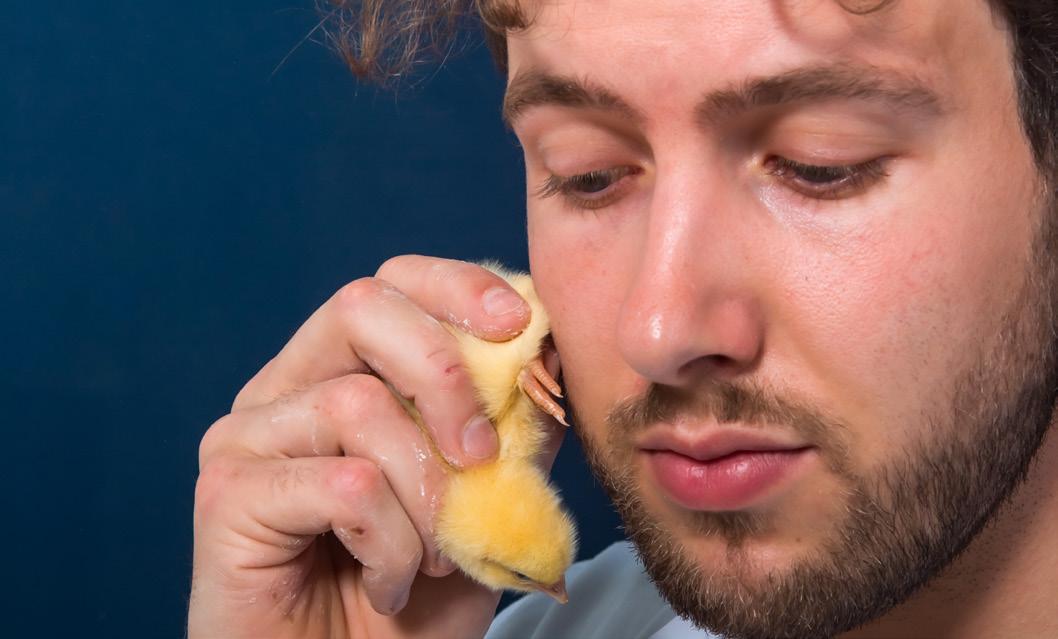
You can assess a chick’s temperature by holding its legs against your cheek. You will notice cold legs very quickly this way.
Body temperature and chick behaviour
44°C or higher Death 42-43°C
Heavy panting – loud chirping 41-42°C
Beaks open – rapid panting 40.6-41°C Walking – spread wings and legs 40-40.6°C
Normal – content chirping 38.5-40°C Huddling – soft chirping/quiet 37-38°C
Large groups huddling – very quiet 36°C Sleeping – very quiet
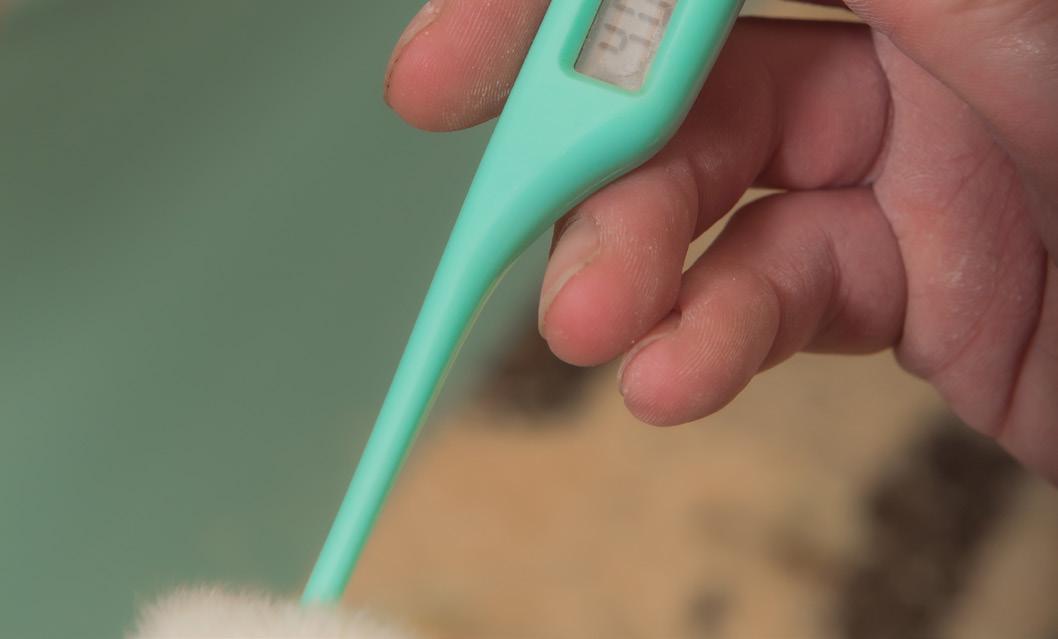
Cloacal temperature is the best method of measuring body temperature. Make sure to insert the thermometer is 2 cm into the cloaca for a correct reading. Lubricate the tip with a little Vaseline to make insertion easier. Do not take the temperature of chicks with wet or dirty vents.
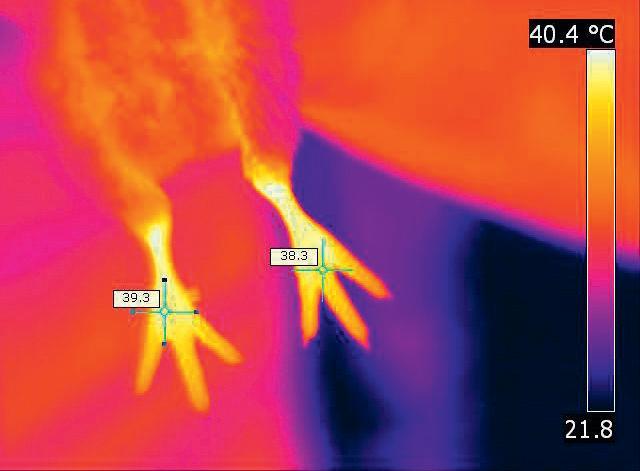
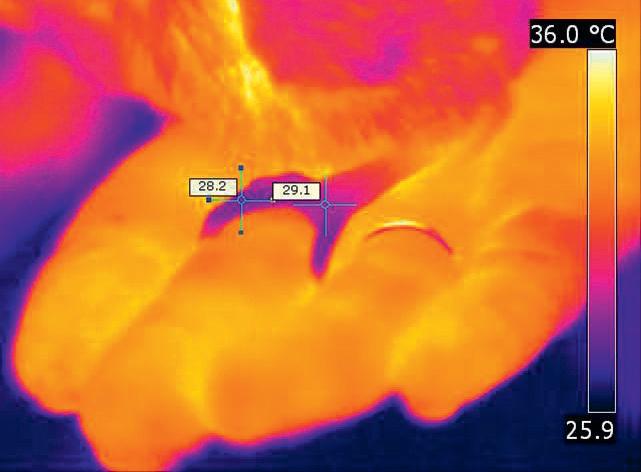
The thermal image on the left shows warm legs. The legs in the image on the right are cold (they should appear lighter yellow than the hand).
30
Broiler Signals Checkbook: 2. Day-old chicks
Copyrightprotected
3. The first week Copyrightprotected
Copyrightprotected
Chick Distribution
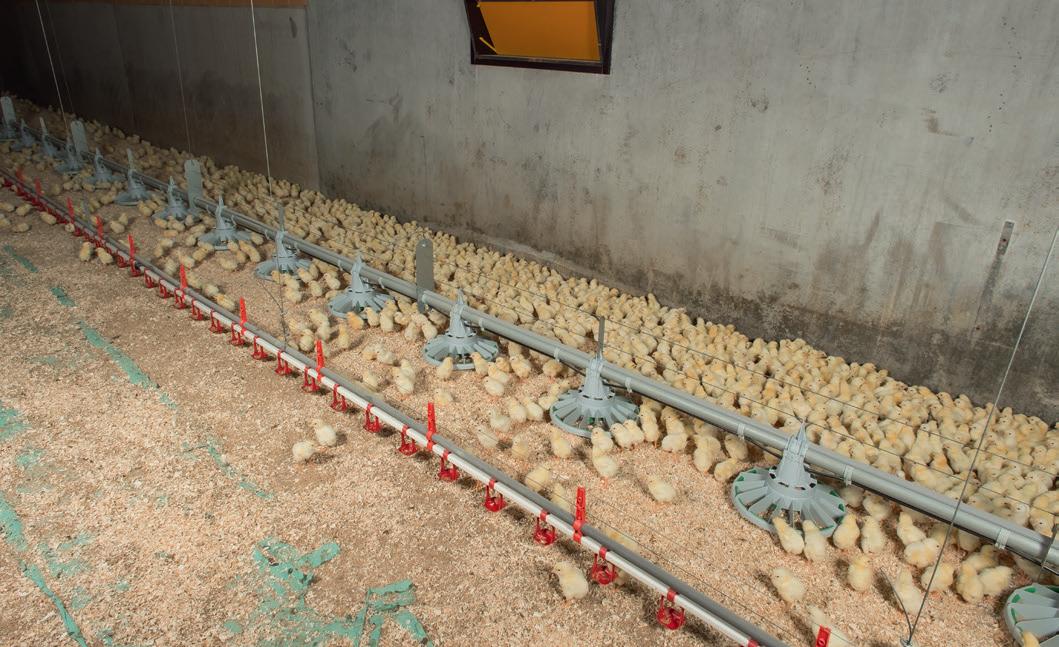
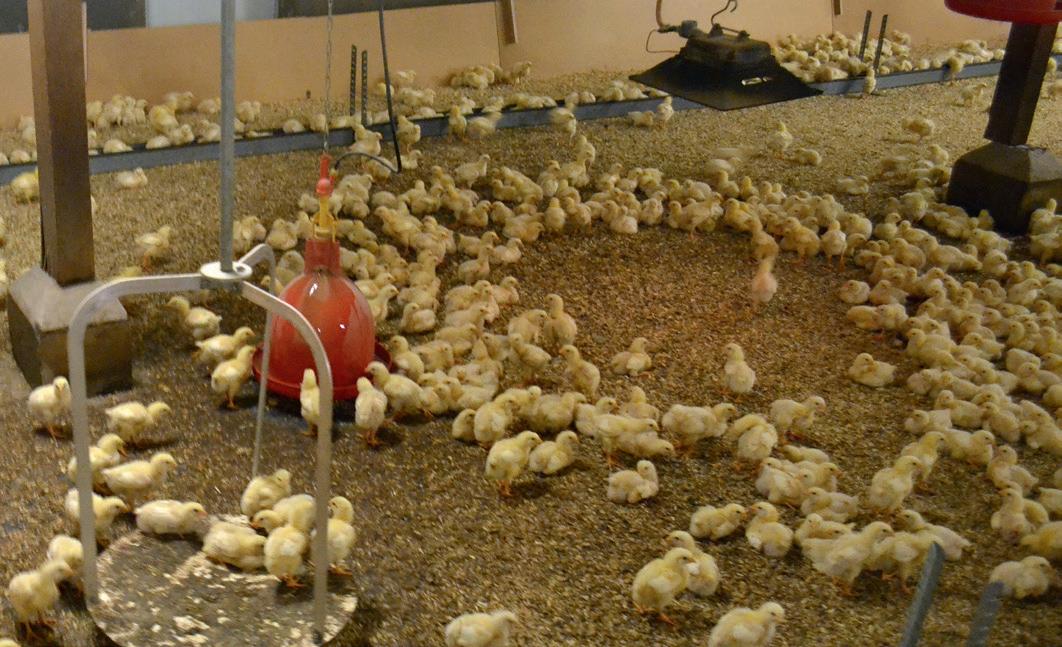
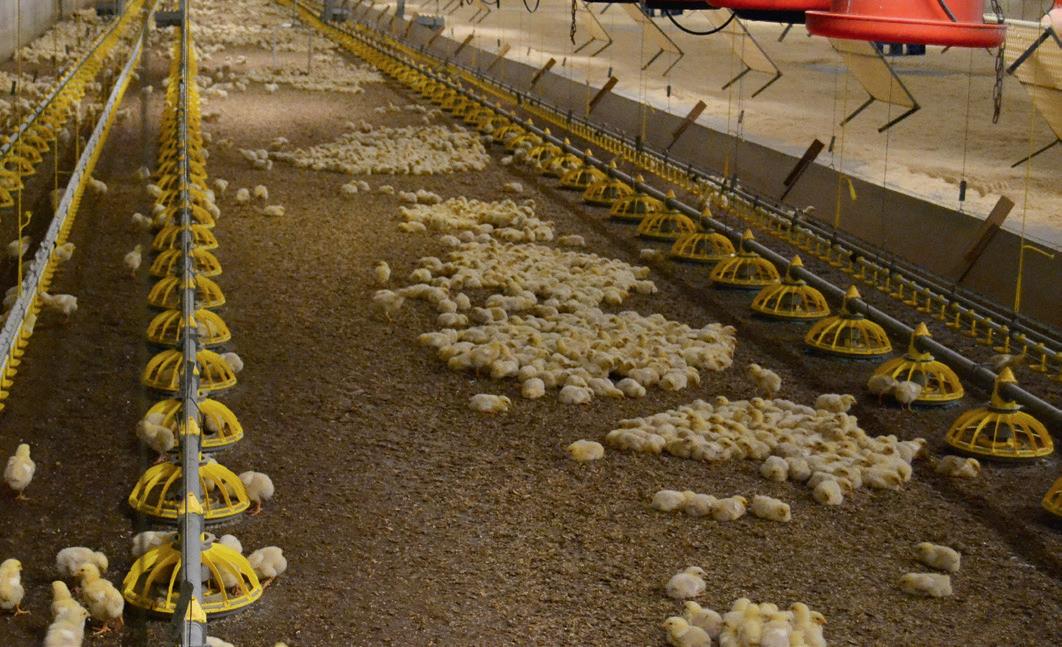
The distribution pattern provides signals about the comfort of the chicks. This counts booth for brooder rings and for whole house brooding. The distribution does not only have to do with the temperature, but also light has an influence. Being forest birds, the young chicks tend to avoid light.
Temperature signals of chick distribution in a brooding ring


Temperature too high Correct temperature Temperature too low Draft
• Chicks away from brooder.
• Chicks pant, head and wings droop.
• Chicks are noisy, distress calling
• Chicks are evenly distributed.
• Noise level indicates satisfaction.
• Chicks crowd under brooder.
• Chicks huddle in one area.
Chicks evenly distributed in the house.
These birds are lying together in groups because they are cold.
The chicks are grouped around the gas heater to keep warm. But not directly underneath it, since that area seems too hot for them. The chicks can choose their own area of comfort.
Broiler
Checkbook: 3. The first week
Chicks grouped against the wall or in corners could be a signal of the house climate, but it could also be caused by the light distribution.
33
Signals
Copyrightprotected
Causes of Death
Mortality provides important management information. Total mortality should be below 4%. First week mortality should be below 1%.
General mortality
Broiler mortality usually peaks at approximately 3 to 4 days after placement, declines until approximately day 9 or 10 then stabilizes until approximately day 30. After day 30 a gradually increase is seen until approximately day 40 to 45. After day 45, mortality rates increased until harvest.
Instant mortality
If you see instant mortality during the first few days, the start of the day-old chicks was not good. There was stress during pipping, transport or at arrival (cold or heat stress).
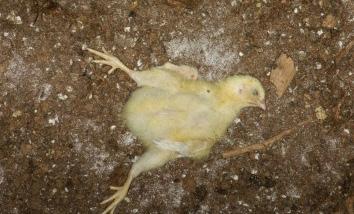
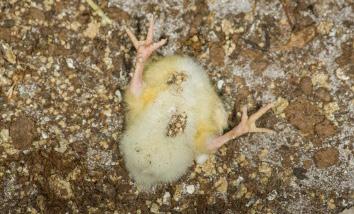
Early mortality
Since the chicks have residual yolk, mortality due to not finding feed or water will appear around day 3-4. This is also the period that infections of navel and yolk sac cause mortality (E.coli).
Late mortality
normal Chick age (days)
0123456 7
Mortality later in production could be caused by locomotive problems, ascites or heart failure. If legs are too weak, birds won’t be able to get to feed or water. Flock that have an increased early mortality also tend to have a higher late mortality.
Checkbook: 3. The first week 36
Broiler Signals
In order to identify
look
•
fill >
• Navel >
•
> Copyrightprotected
Peak in the rst few days: poor quality broilers Mortality (%) normal Chick age (days) Peak at the end: locomotion problems Mortality (%) 03540 50 56 45 0 10 20 30 40 50 56 normal Chick age (days) Average mortality for straight run broiler ocks Mortality (%) 01234567 Chick age (days) Mortality (%) Peak at day 4-5: bacteria normal
causes of death
at:
Crop
starvation?
infection?
Conformation
4. Flock management Copyrightprotected
Copyrightprotected
House Inspection
Perform at least two inspections per day. Look at different times to find different signals. Prepare your visit by looking at the basic information from your management system/records. Water and feed consumption patterns. Temperature and RH and if possible CO2 development in the house. Is any malfunctioning reported? Check recent mortality. This gives you clues on what to pay extra attention to in the house.
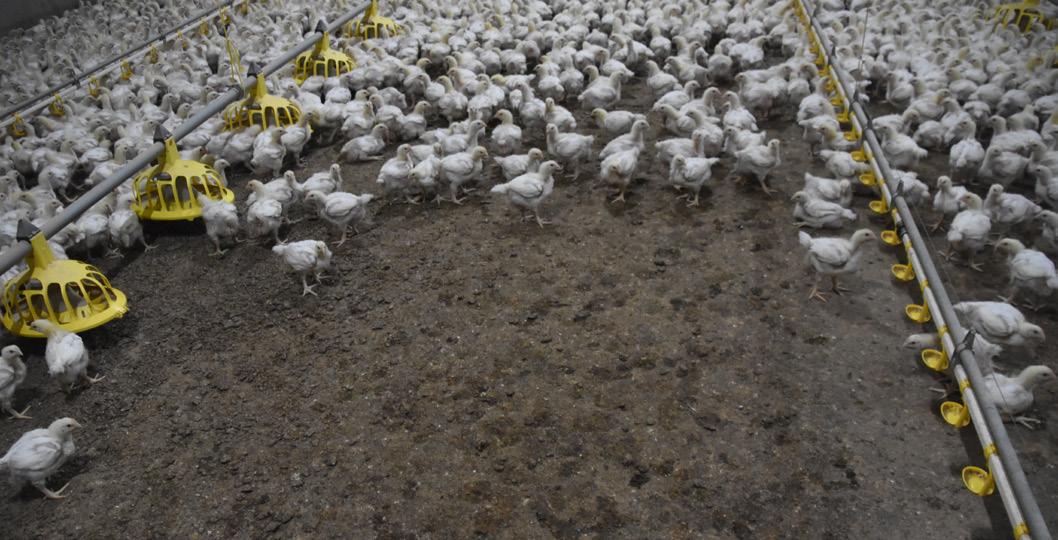
1. First observations
Look into the house before entering to observe the bird distribution, if possible. Listen carefully to the sound the birds make. You can also leave the light out to listen to sounds: sniffing? Could be a vaccination reaction. Any change in sound should get your attention.
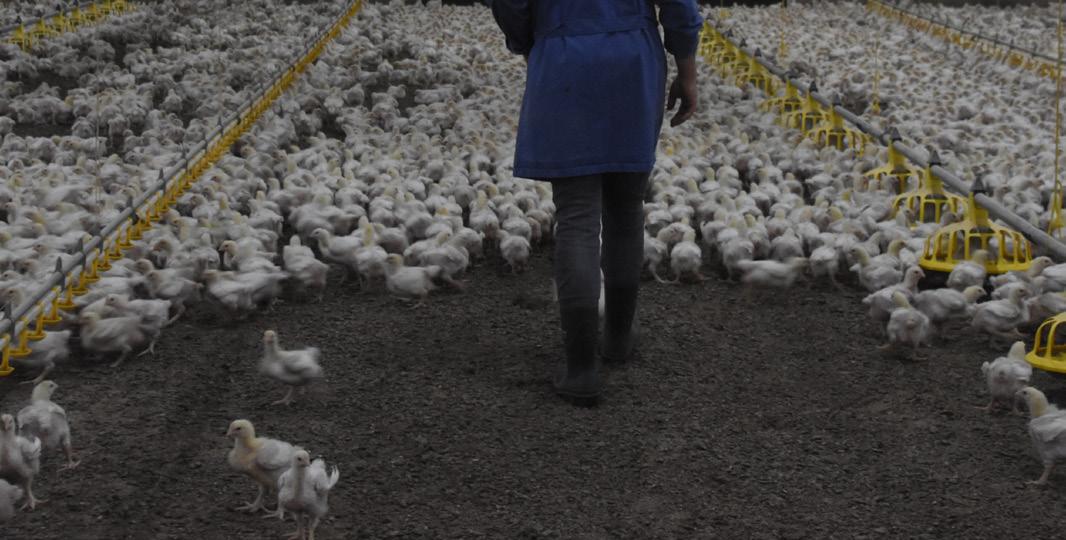
2. Enter the broiler house
Enter without disturbing the flock. Observe bird distribution and general behaviour. If they are too hot, young chicks tend to run around to cool themselves down, old broilers tend to be lethargic. From 2/3 weeks on you should observe young males fighting.

3. Walk around
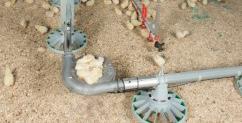
Walk through the whole house and look at wet spots, mainly in the area between drinking lines and feeders. Check the climate for local differences, draughts. Check the air inlets and air flow there. Check the height of the drinkers and feeders.
4. Inspect the flock
How do the birds react to you? Are they active and move away from you? Do they show lameness? Are they curious and approach you after a while? From 2-2.5 weeks of age the birds should move away just in front of you, and the gap should close behind you. If they don’t walk away or sit too fast (after 2-3 steps), this is bad sign.
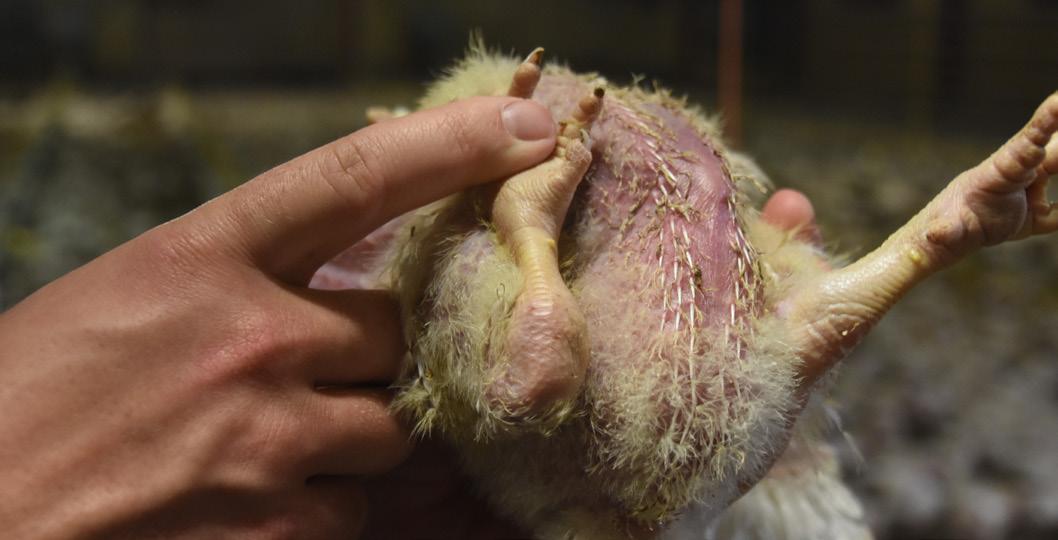
5. Inspect individual birds
Pick up individual birds that stand out, but also random birds for an individual inspection. Check general appearance, crop fill, legs, feathering, cloaca and confirmation.
6.
Remove dead birds/cull sick birds
Remove dead birds and cull birds that are not going to make it to the end. Perform dissection on the dead birds or send them in for analysis when there is increased mortality or any other suspicion that could affect the whole flock.

Broiler Signals Checkbook: 4.
39
Flock management
Copyrightprotected
Individual Bird Inspection
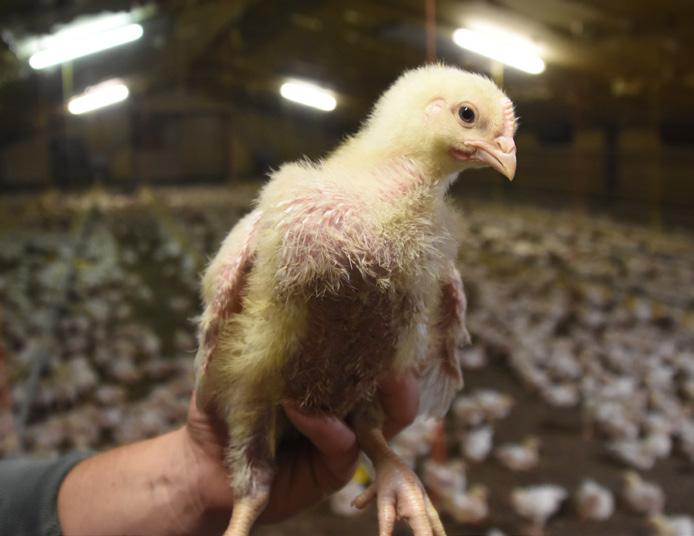
During an inspection, you pick up a bird every now and then. Look at the bird in a structured way, assessing the most important characteristics.
1. Pick up the bird
Does the bird tries to get away? Does it flap its wings? How is the tension on the wings?
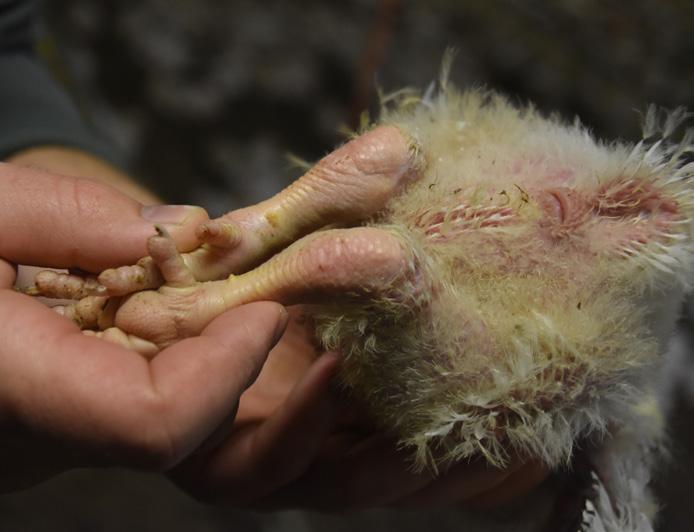
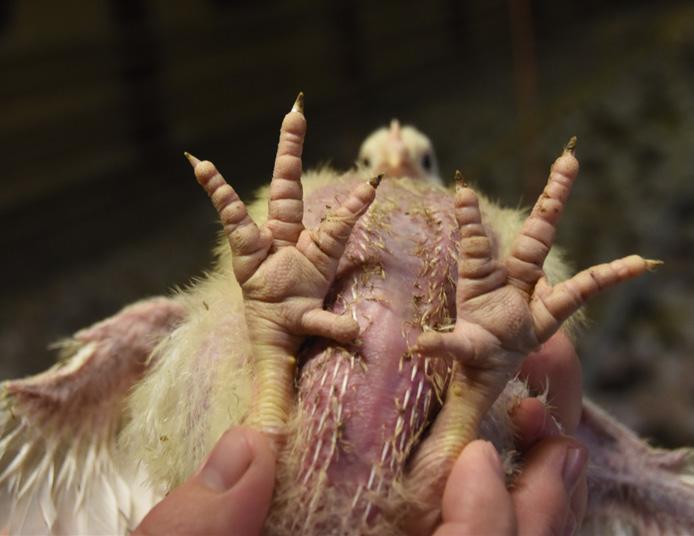
4. Footpads
The footpads should be clean. No discoloration, wounds, crusts or inflammations.
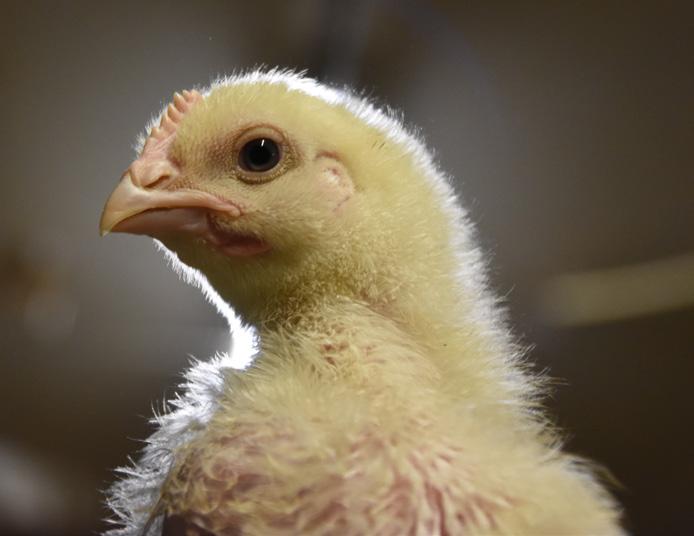
2. Head
Does the bird look alert? The eyes should sparkle, no nasal discharge. Look at the comb colour.
5. Hocks
The legs and hocks should have a good colour. Not red: irritated. If the hocks are of a darker colour it is even worse: infection or ammonia burn.
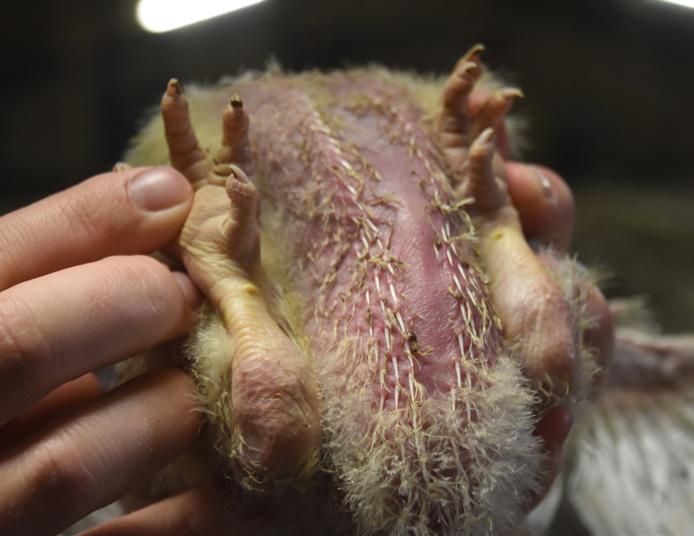
3. Crop
Did the bird eat enough? Too little: crop feels like a bag of water, too much: crop feels hard. Take feeding times into account in order to make a proper assessment.
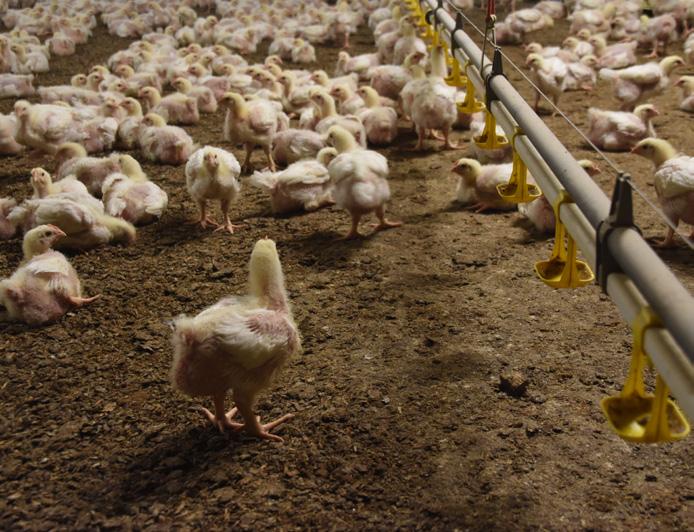
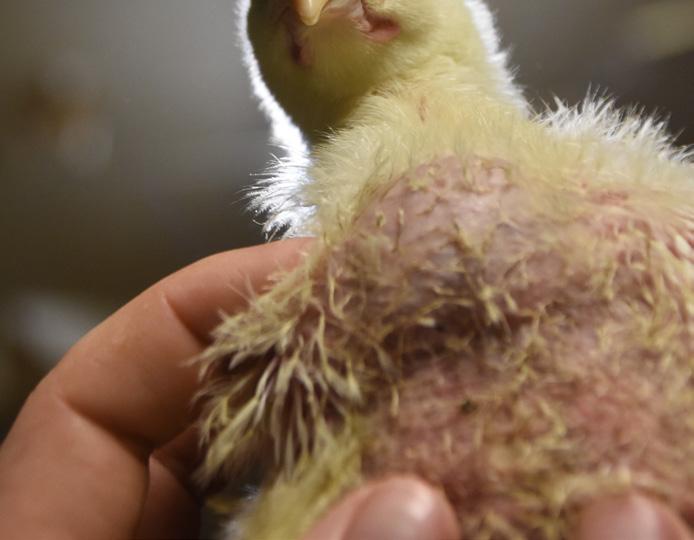
6. Feathering
The feathers should be clean and dry. No breast irritations or litter spots.
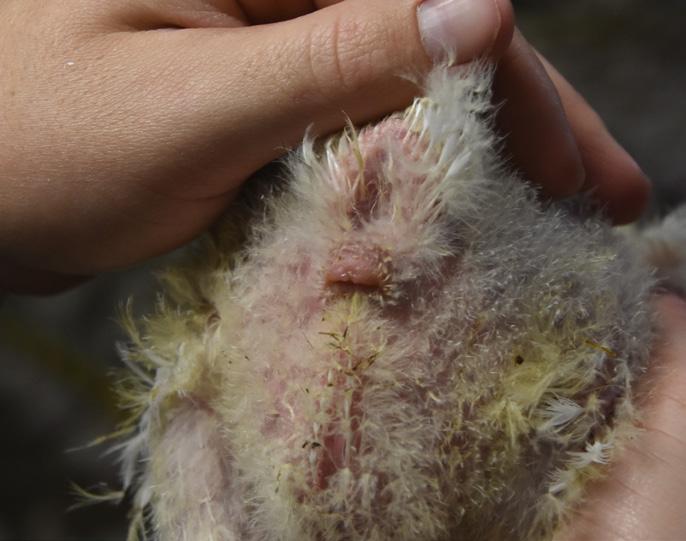
7. Cloaca
If the feathers around the cloaca are dirty and wet. This indicates too much protein in the feed/bad digestion, feed withdrawal (empty pans) or (intestinal) disease.
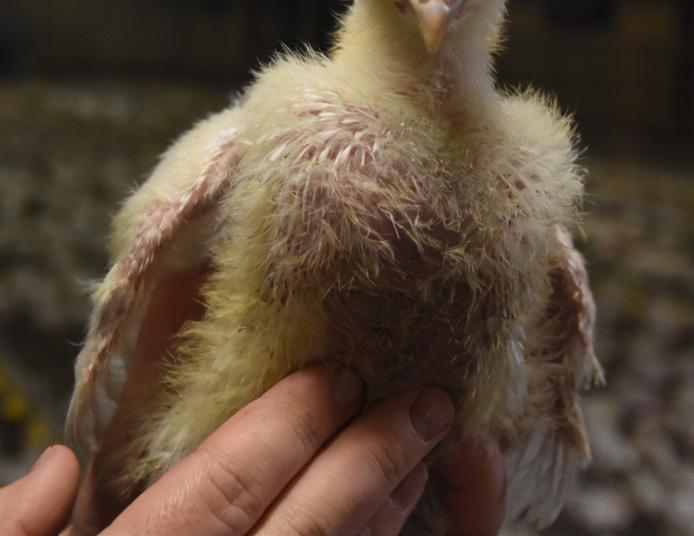
8. Conformation
Feel the of breast muscles. Are they developing well? Do they feel pointed or are they well rounded?
9. Release the bird
You put the bird back in the flock. Does is walk away directly? And does it move in a normal way. That is an indication of general health and bone strength.
Broiler Signals Checkbook: 4. Flock management 40
Copyrightprotected
Score Card Footpad Lesions
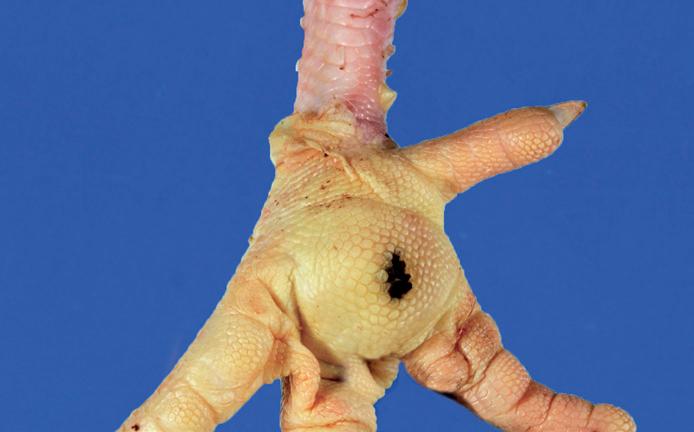
Foot pad lesions (Foot pad dermatitis: FPD) develop on any area that is in contact with the floor, mainly caused by bad litter quality. This a welfare issue also affects production: birds with painful feet eat and drink less (less growth) and develop breast blisters (deterioration of slaughter quality).
Inspection
1. Inspect footpads at least twice a week, starting on day 4-5. Footpad lesions can appear very early on.
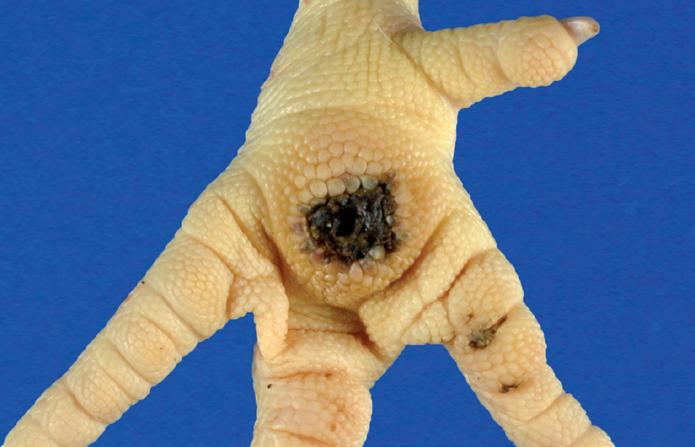
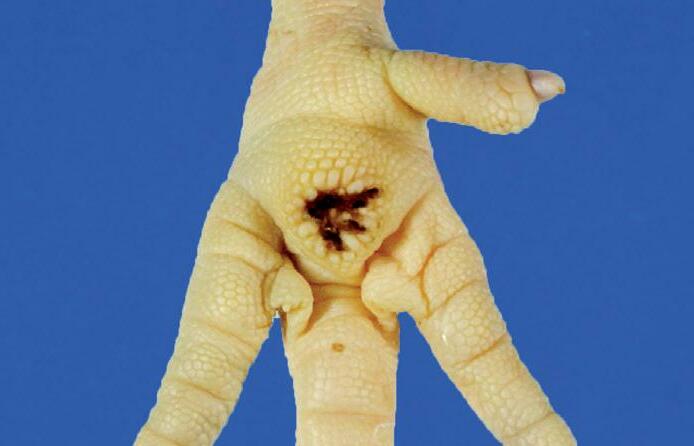
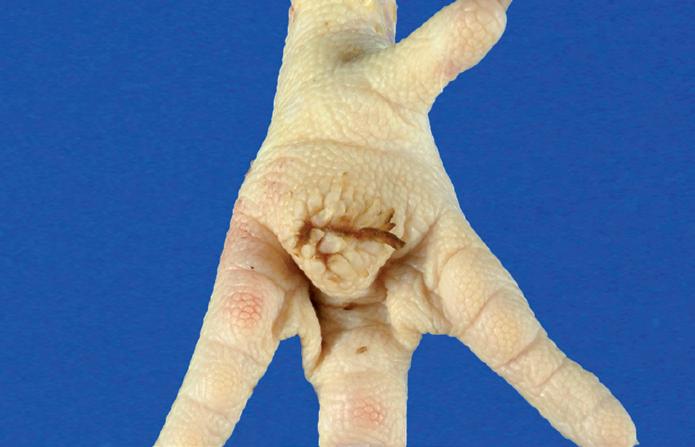
2. Inspect birds with good mobility as well as those that are less mobile.
3. Always check a number of birds in different parts of the broiler house. Rule of thumb: four areas with five birds per area. If more than 10-20% of the birds have mildly affected footpads, take action.
4. Check dead and selected birds for footpad lesions.
Class 0 - No lesion: No lesions or very small and superficial lesions, slight discolouration on a limited area, mild hyperkeratosis, old scars.
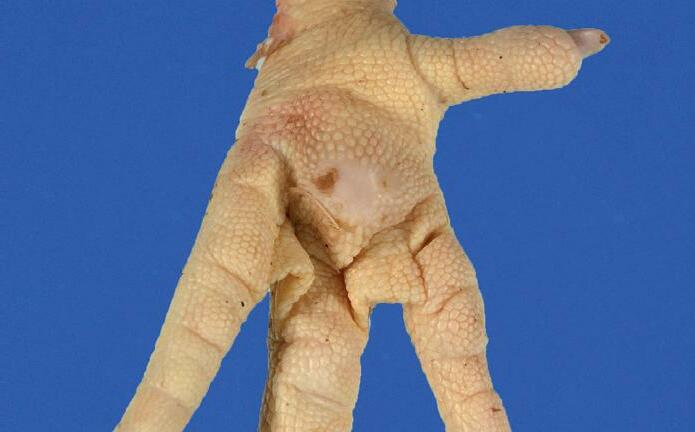
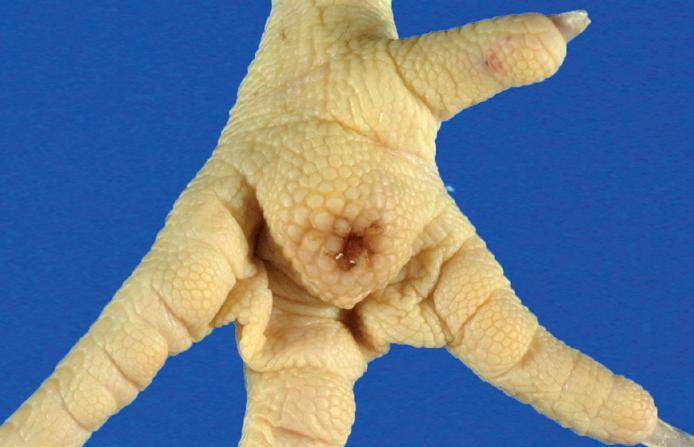
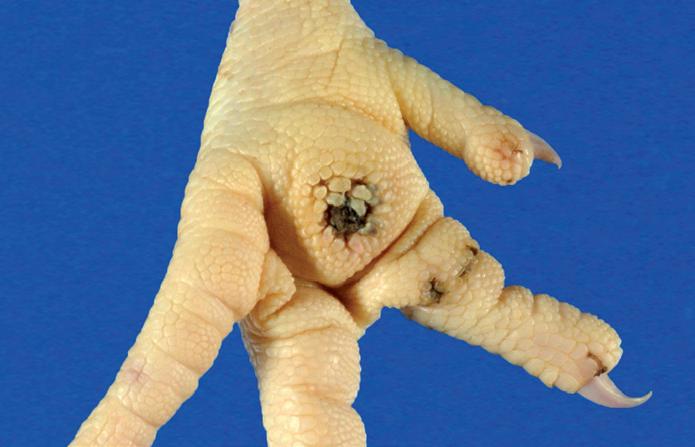
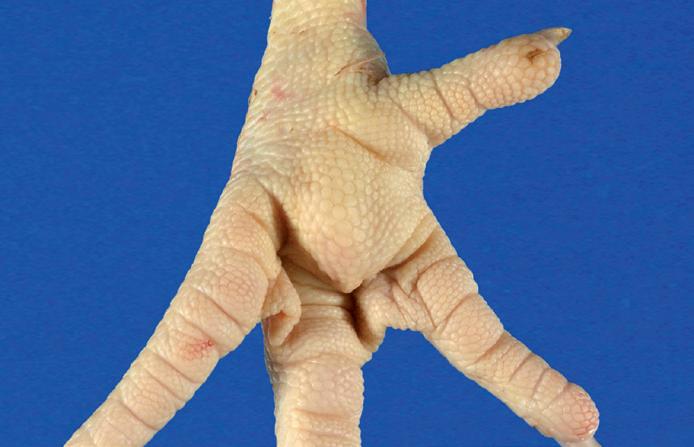
Class 1 - Mild lesion: Substantial discolouration of the footpad, super-ficial lesion, dark papillae.
Class 2 - Severe lesion: Ulcers or scabs of significant size, signs of hae-morrhages or severely swollen footpad.
Dark papillae and ulcer

Broiler Signals Checkbook: 4. Flock management 44
Smooth, no lesion
Superficial lesion, discolouration
Small discolouration
Dark papillae, no ulceration
Ulcer covered by crust
Almost healed lesion, scar
Substantial discolouration
Abscess/bumble foot swollen
Source: Livestock Research, Wageningen UR.
Copyrightprotected
Checklist Factors Influencing Footpad Dermatitis
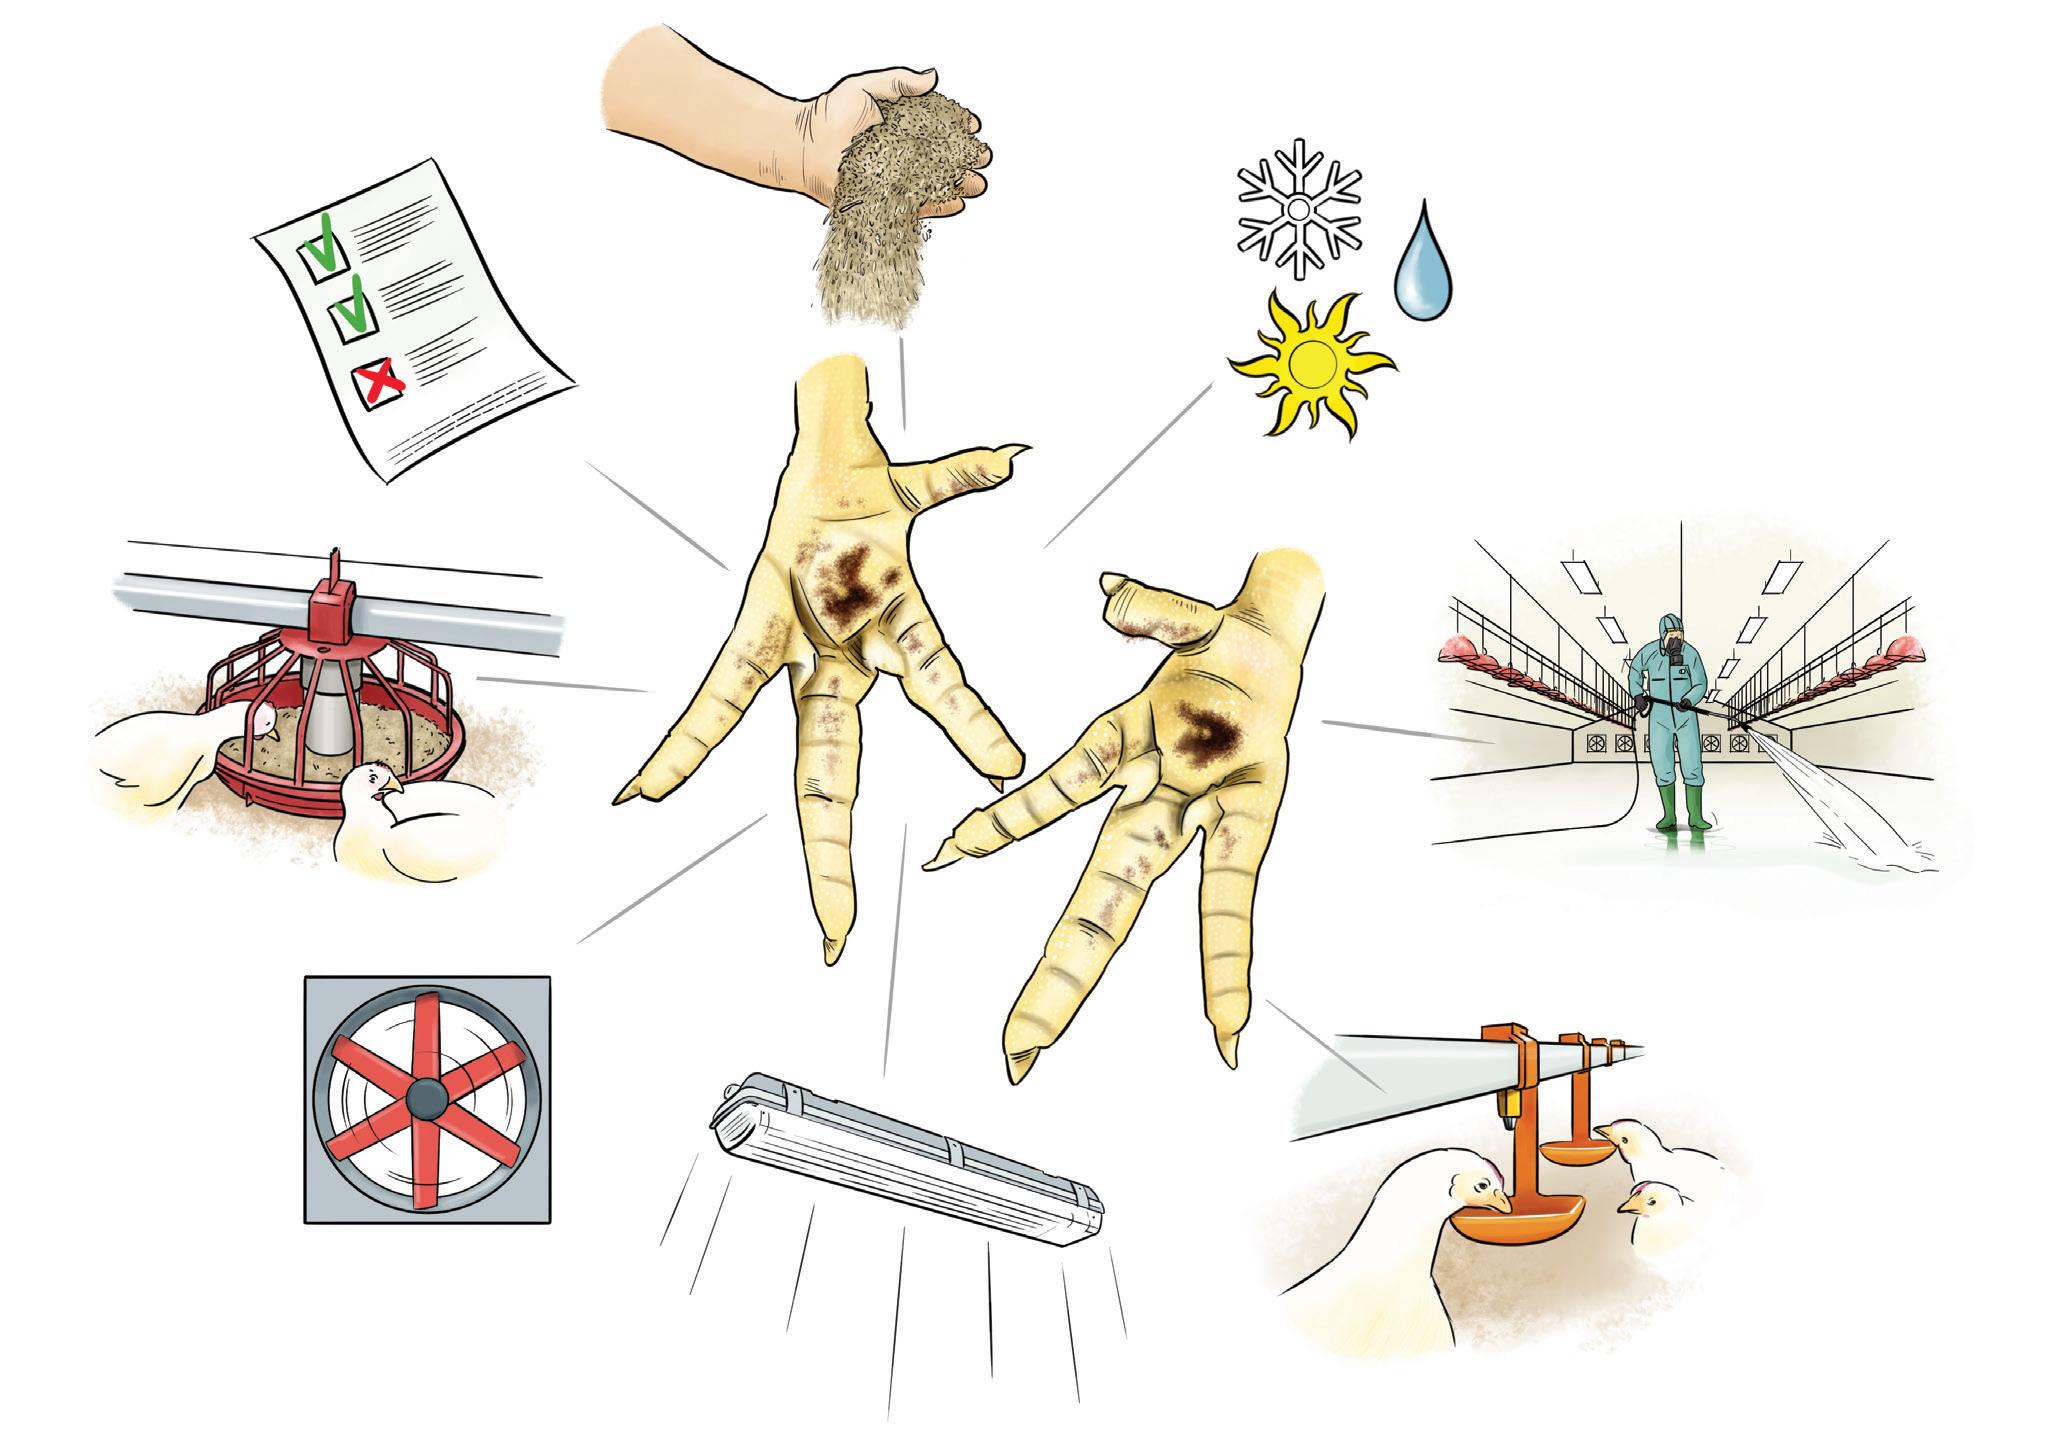
Footpad lesions develop from three weeks onwards, the main cause being bad litter quality. There are various factors that have an influence on this.
litter management
inspection season
Signals
feed
climate control
light
preparation of the house
drinking water (quality leaking)
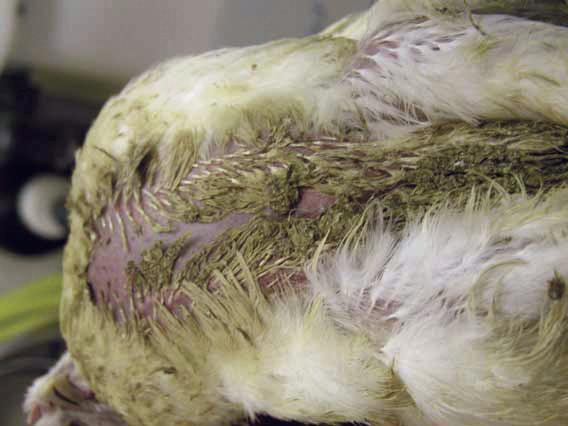
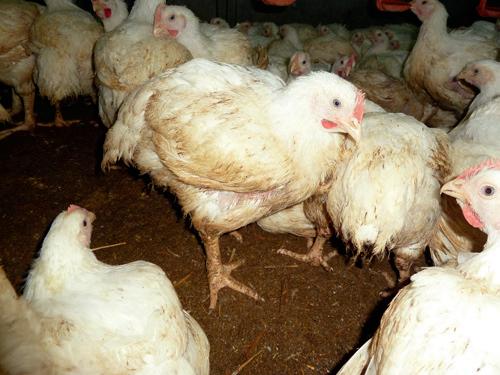
A first signal of bad litter quality is often dirty feathering.
Breast irritation is caused by poor litter quality: acid burns and dampness together with damp heat. At slaughter this may cause black discoloration (litter spots) on the skin. Breast blisters can also develop.
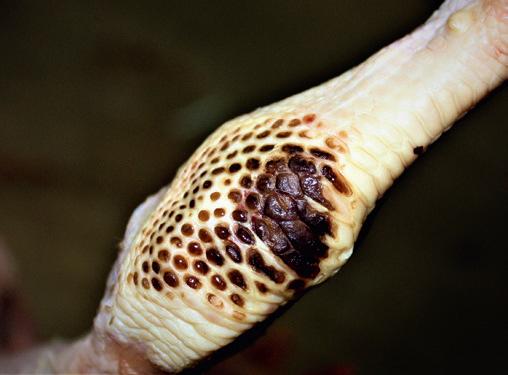
Hock burn generally (blackishbrown discolouration) occurs after a long period of contact with moisture and ammonia on poor quality litter (ammonia burn): the last two weeks before slaughter.
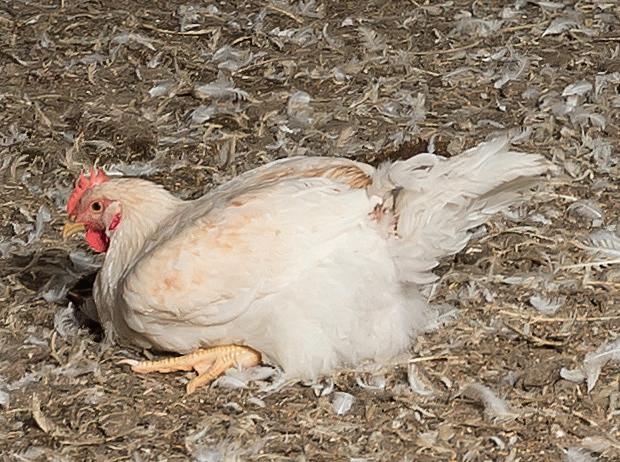
If broilers sit on their hocks a lot, they have excessive contact with the litter. If the litter quality is poor, they will develop hock burn. But why are they sitting on their hocks in the first place: footpad problems?
Broiler Signals Checkbook: 4. Flock management 45
Copyrightprotected
5. End of production and slaughter Copyrightprotected
Broiler Signals Checkbook: 4. Flock management 59
Copyrightprotected
Preparation for Catching
Make sure everything is prepared when the catcing team arrives and monitor the procedure. Withdraw the feed. Remove all obstacles. Implement partitions. But maintain ventilation to prevent overheating of the birds.
Remove obstructions before catching. Withdraw water as late as possible. If water is withdrawn too soon, the crops may not get empty.
Catching in the dark or in very dim light can ensure that the broilers remain calm.

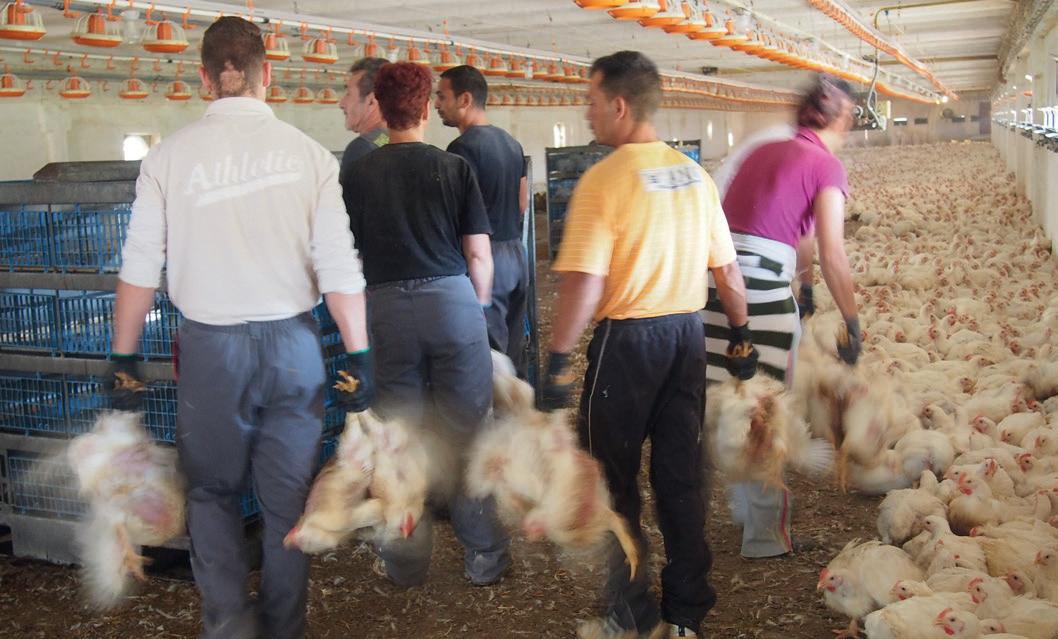
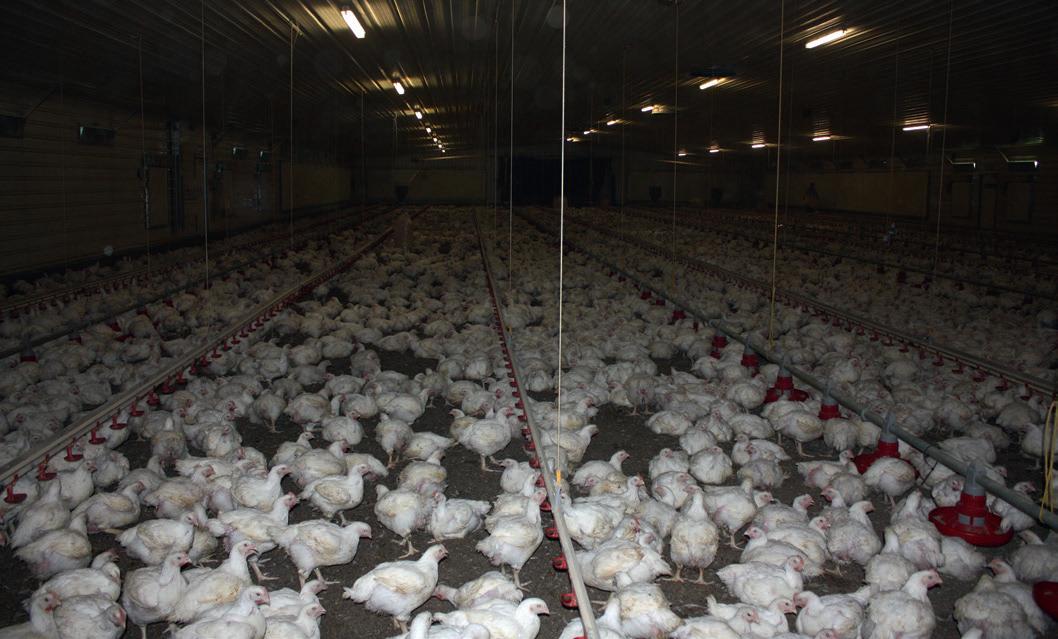
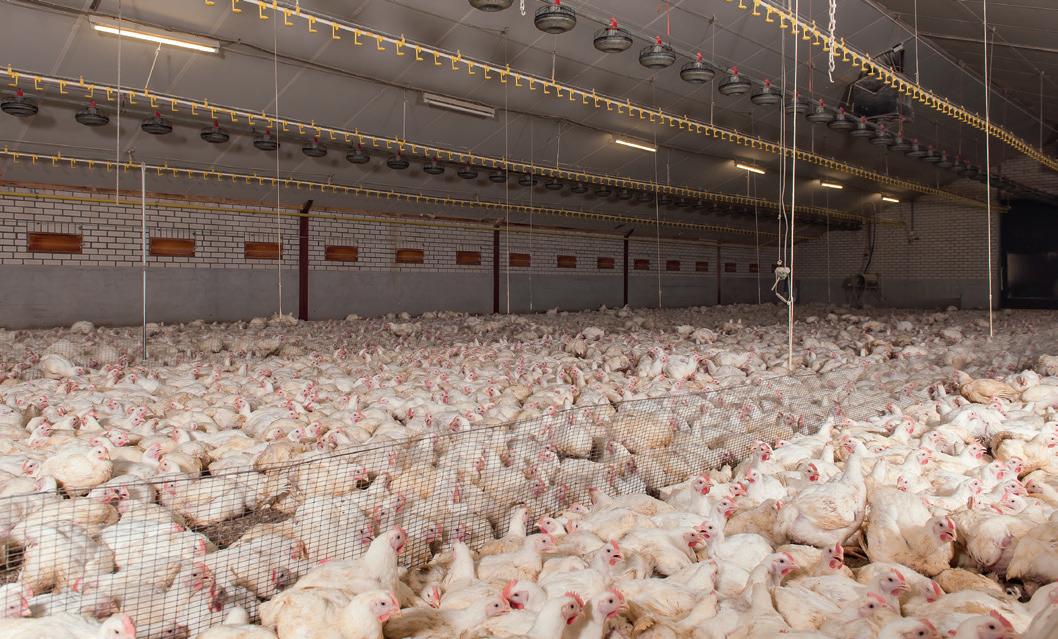
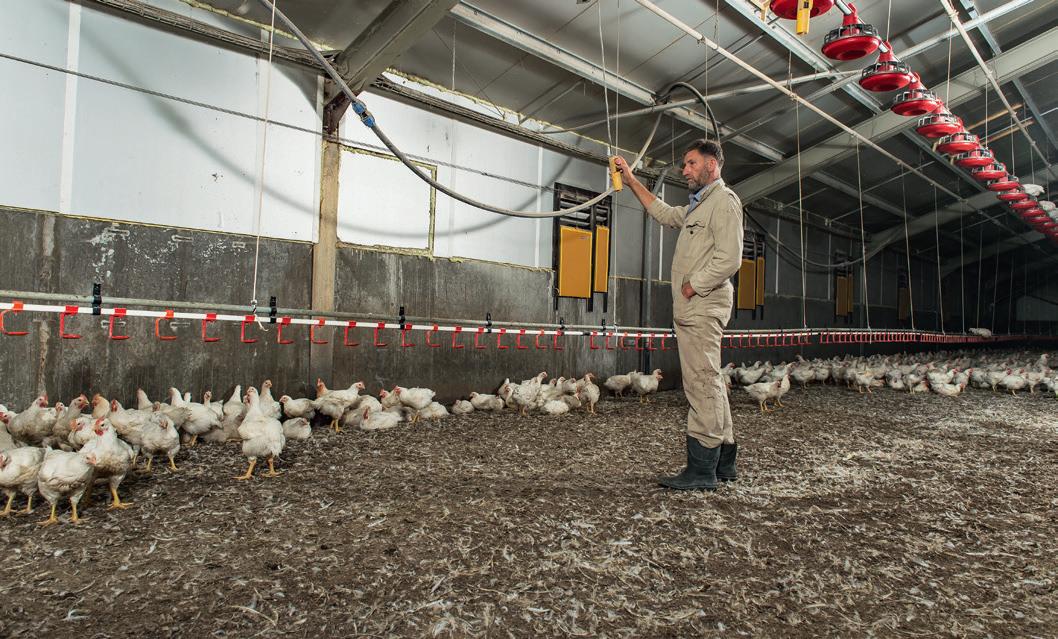
Use partitions in large houses to avoid crowding. You could also use this so that part of the flock can still drink.
Place the containers inside the poultry house to prevent the broilers to be carried a long way to the containers.

Broiler Signals Checkbook:
61
5. End of production and slaughter
Catching in daylight can cause wing damage due to flapping by active broilers.
Blue light calms the birds down and humans will still be able to see sufficiently when catching.
Copyrightprotected
Catching: Bird Treatment
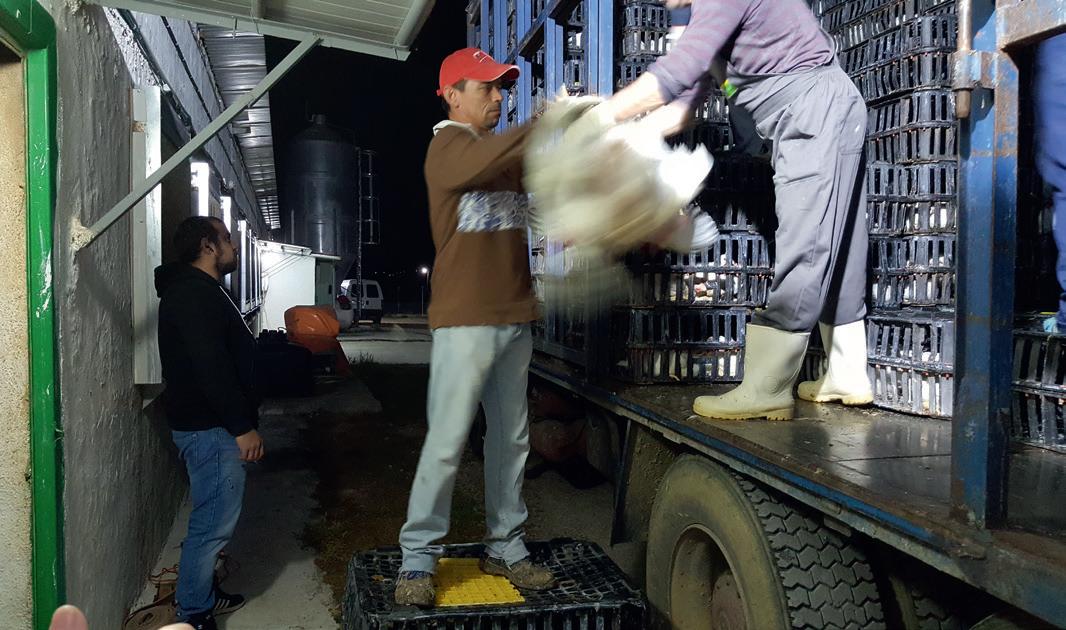
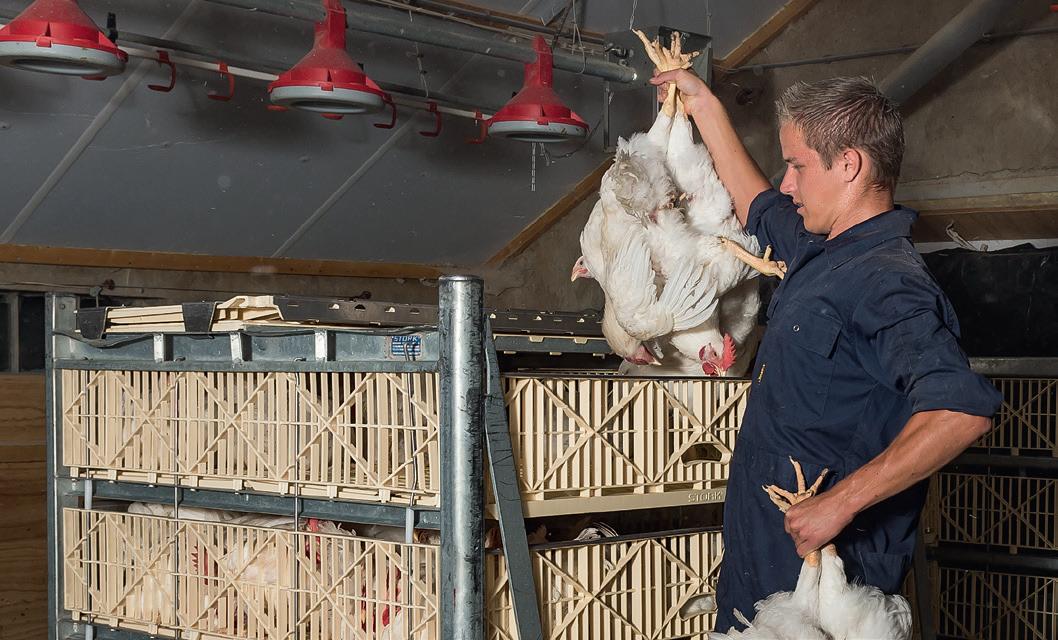
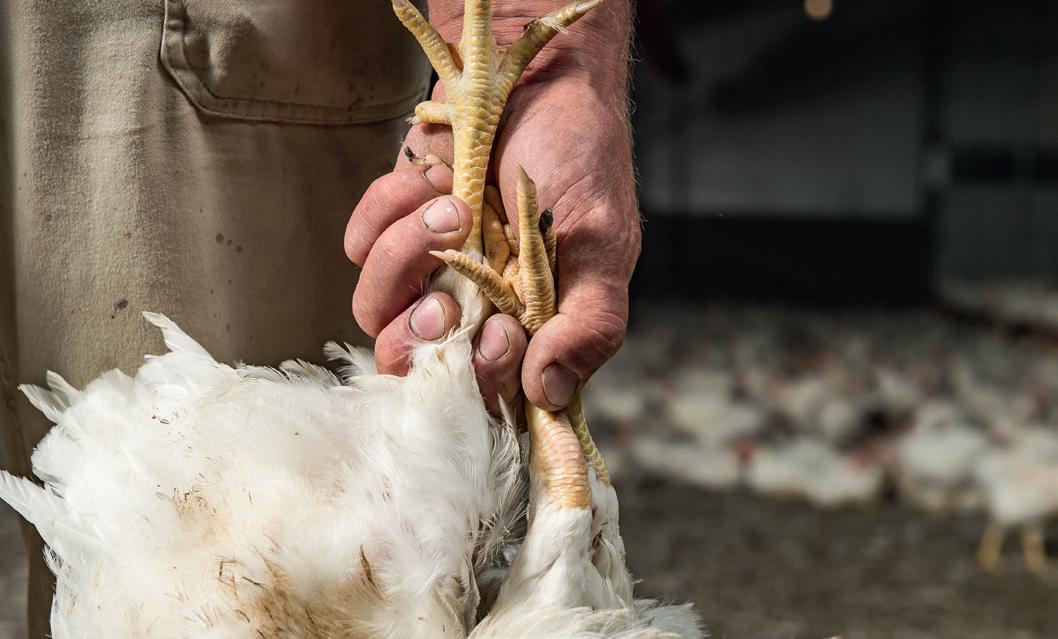
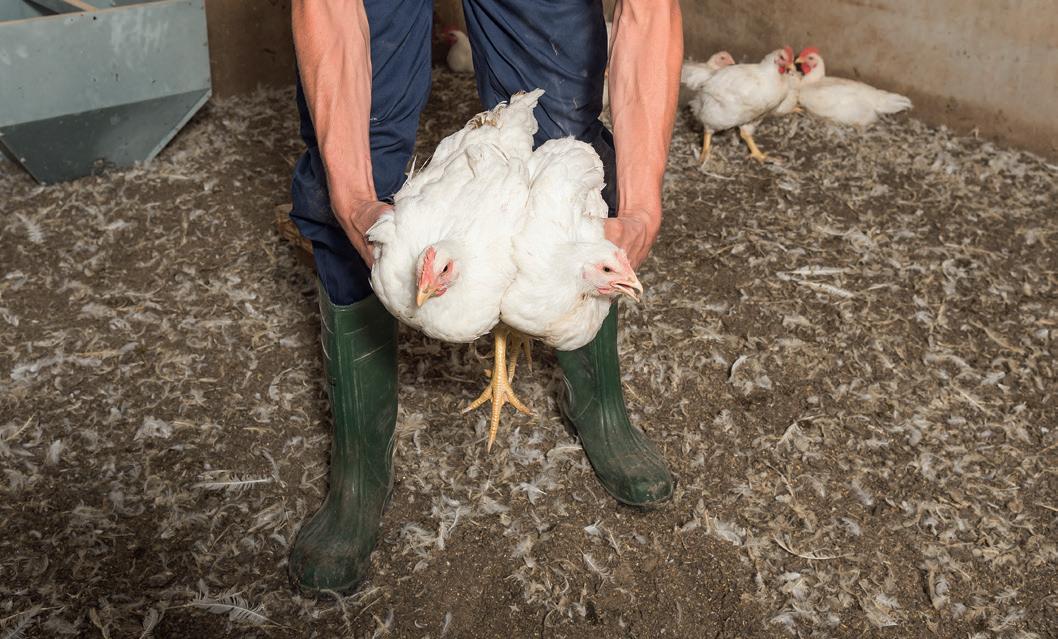
Birds have to be caught with care. For the welfare of the animals. But also to prevent buises, fractures and stress that will have a negative effect on meat quality. Although often executed by specialised catching teams, the farmer is responsible from day-old chick up to slaughter, so this includes catching and transport.

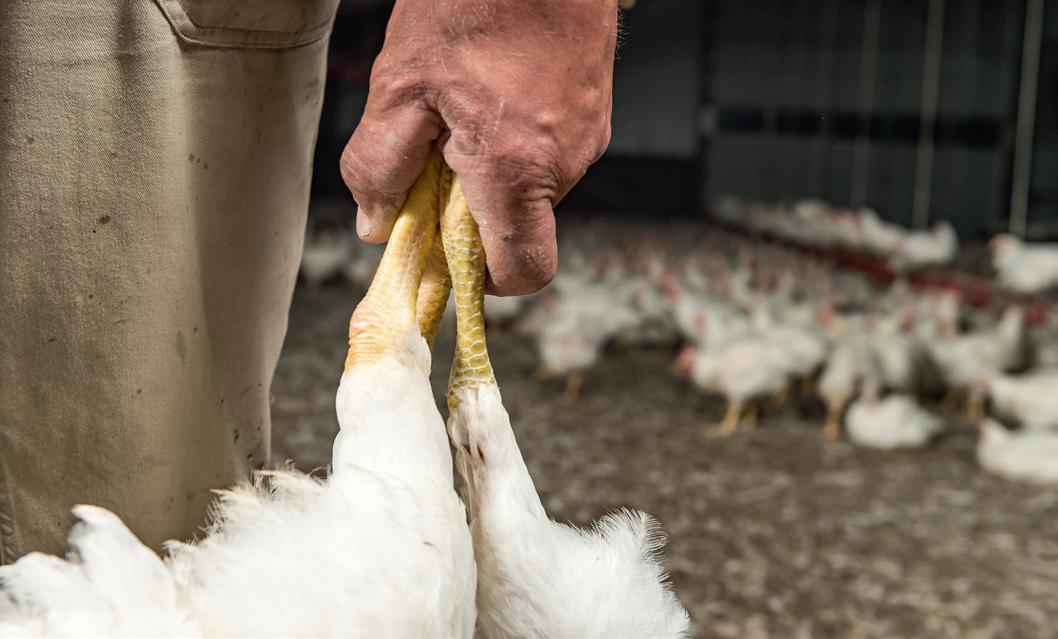
If
This
If
There
Broiler Signals Checkbook: 5.
and slaughter 62
End of production
you carry the birds by the legs, do this correctly.
Hip haematomas occur mainly when you lift broilers too high. You then have the tendency to twist your wrists and the bird’s leg. So lift your arm up high enough, like this.
Whole body catching. This method causes little stress and injuries. It does require skill and commitment of the catching team.
is a high risk of injuries when broilers are handed between several people. So do not do it! The less steps in the process, the better.
bird is held too high which can cause drum bruising.
the catching crate opening is too small, the broilers’ wings or legs will get caught easier. In such cases, keep the wings well together.
Copyrightprotected
Checklist Muscle Disorders (myopathies)
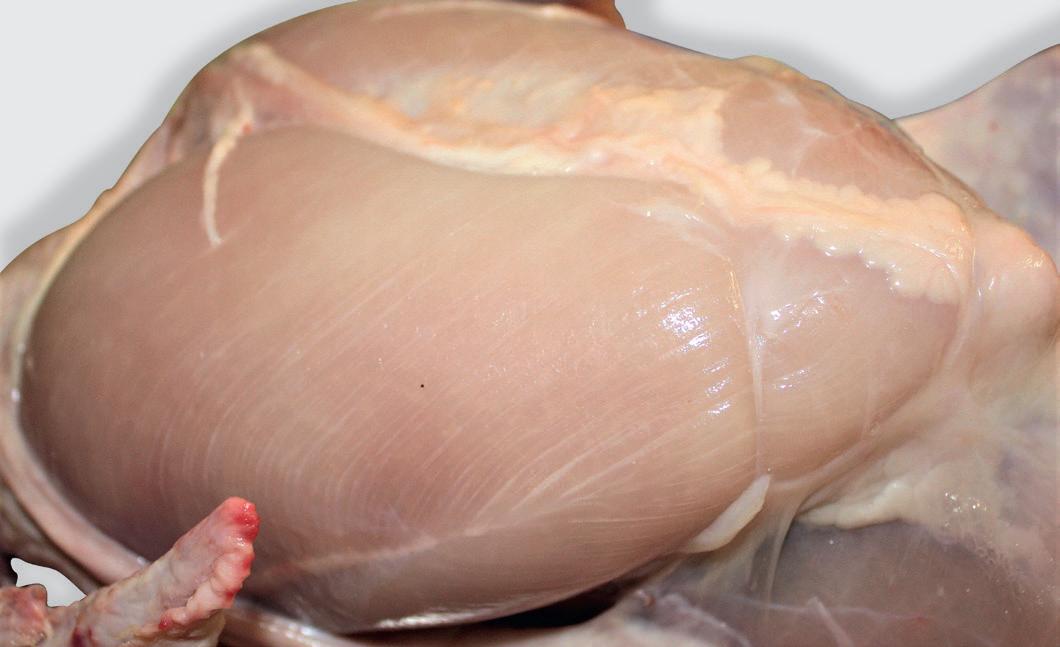
Muscle abnormalities may occur from 21 days of age. Disorders arise through factors such as a high demand for nutrients and oxygen in the muscle, or because metabolic waste products and moisture are insufficiently removed. You can feel firm muscles on the live animal.
Factors influencing these disorders:
• Genetic predisposition
• Fast growing breeds
• Seasonal influence (more in nov/dec, march/april: higher growth rate)
Normal breast muscle.
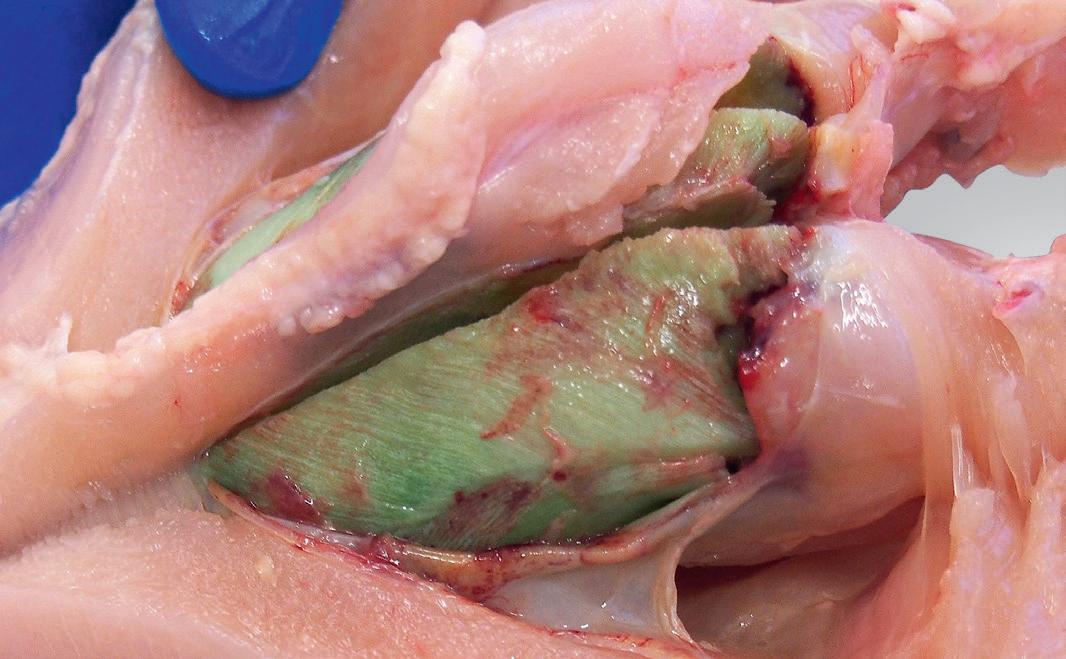
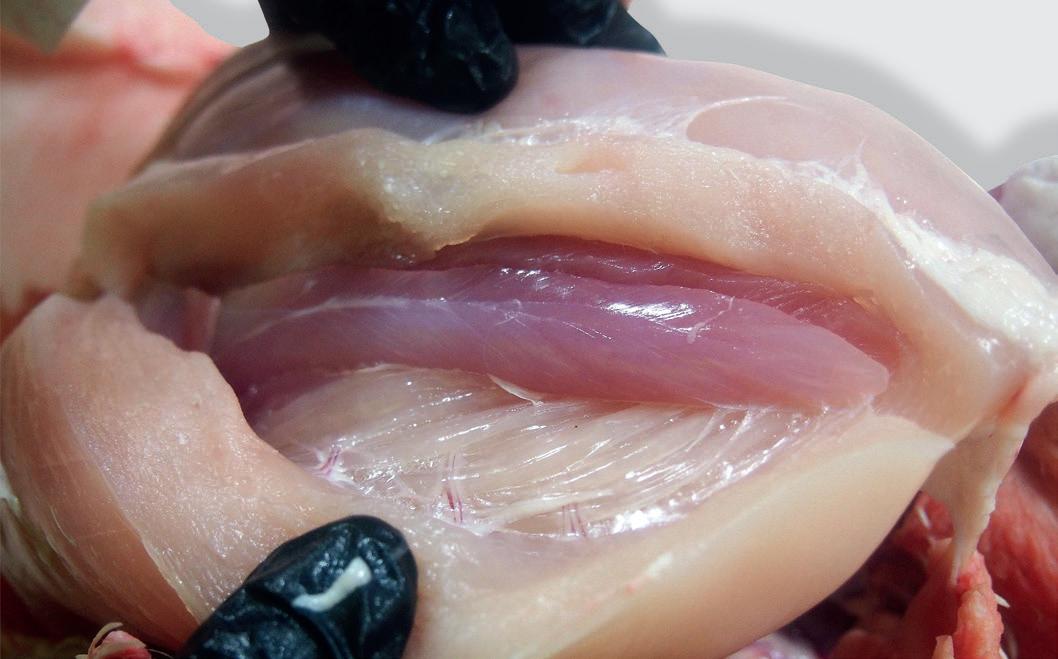
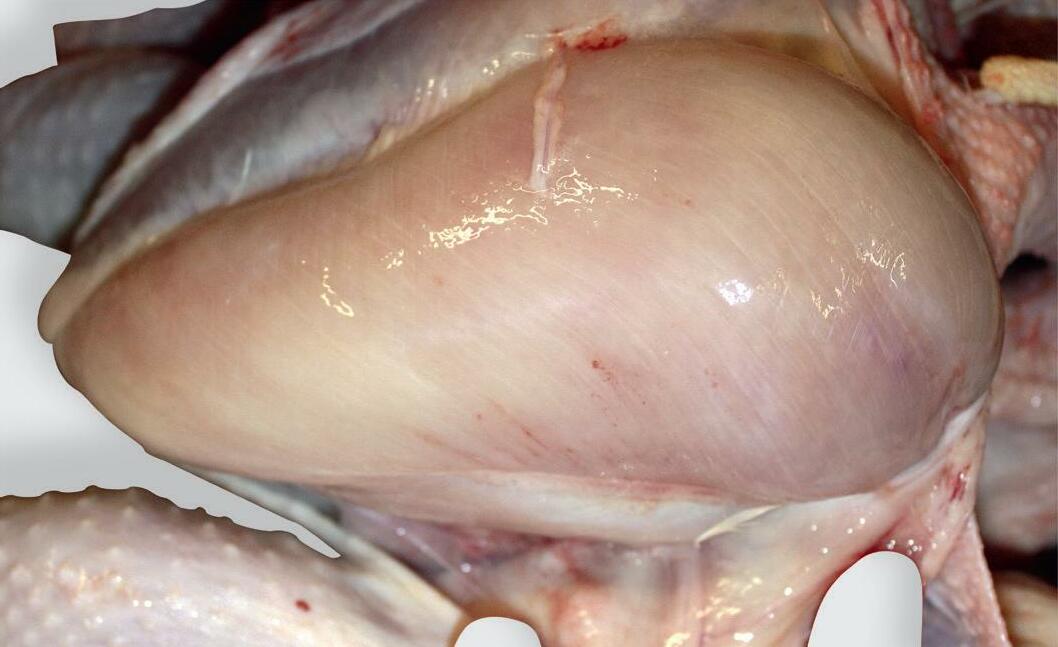
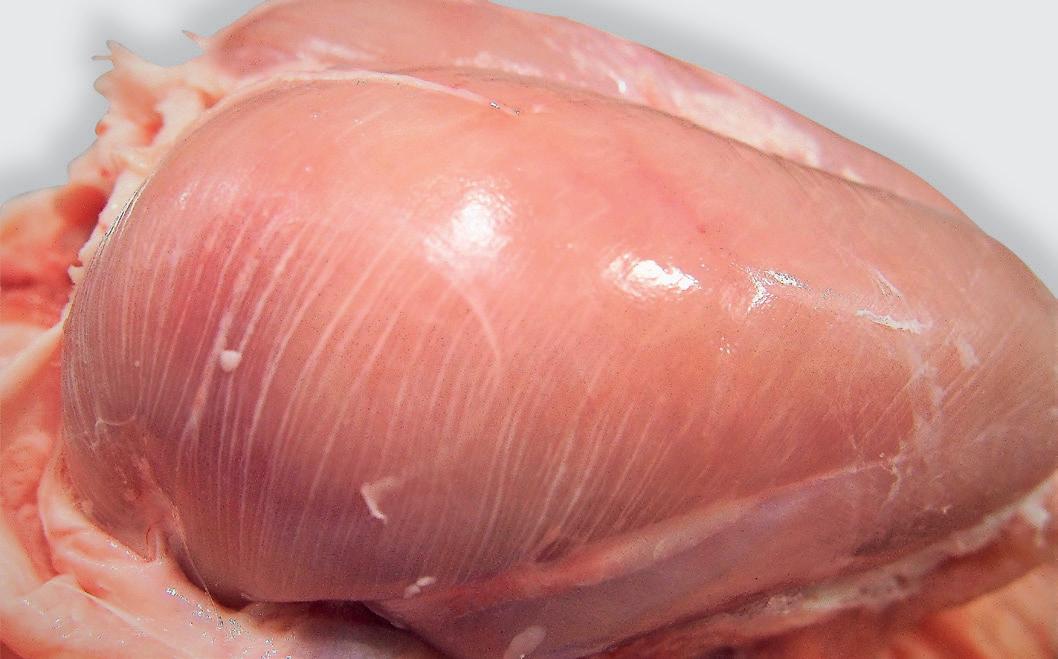
‘White
‘Wooden breast’. Disease of the superficial part of the breast muscle, especially in male animals (hard, light coloured muscles).
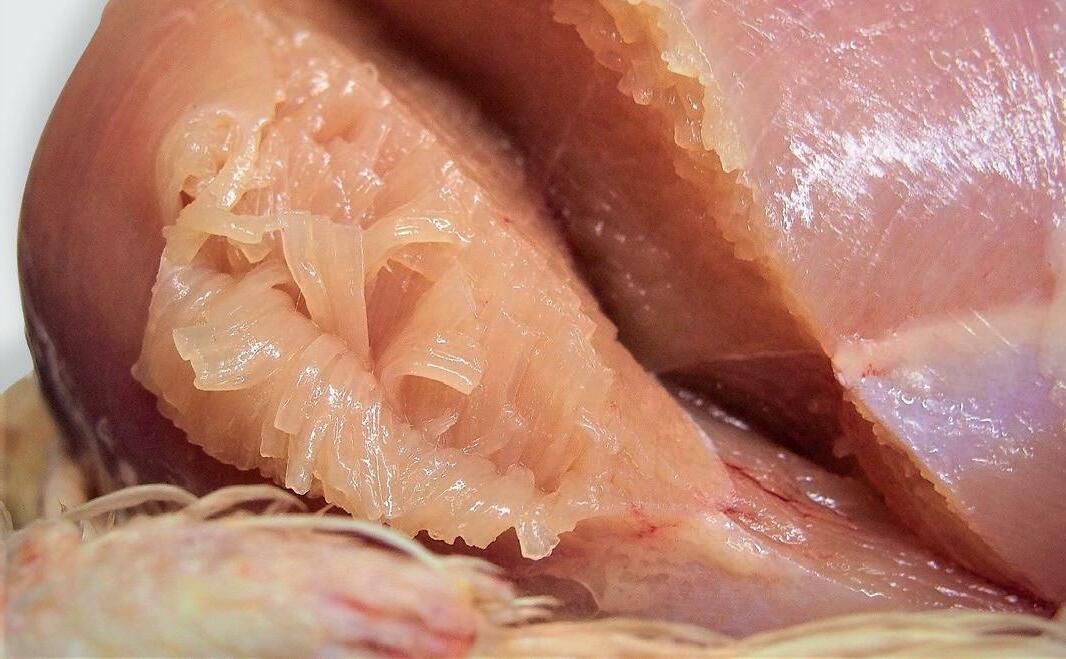
‘Spaghetti
Abnormality
‘Green
Broiler Signals Checkbook: 5. End
and slaughter 63
of production
meat’. Muscles with a soft, fibrous structure.
of the ‘tenderloin’ or ‘inner fillet’ in the breast muscle (colour change).
striping’. Broadened connective tissue strips between the muscle fibres.
Copyrightprotected
muscle disease’ (GMD), deep pectoral myopathy (DPM) or Oregon disease. Abnormality affecting the deep breast muscle.
Checklist Leg Disorders
The causes of leg disorders are pathogens, nutritional or management problems. Because of these disorders, broilers have difficulty walking, so they eat and drink less and fall behind in growth, thus causing poor uniformity. They are also inclined to sit on their breast, causing litter spots, bruising, breast blisters.
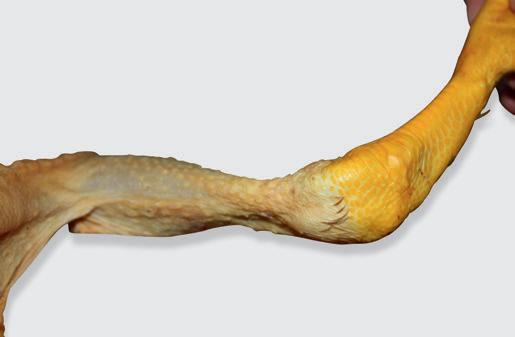
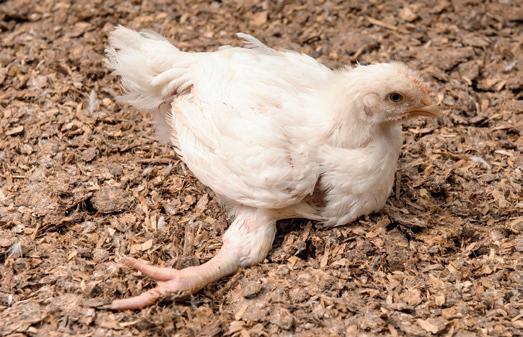
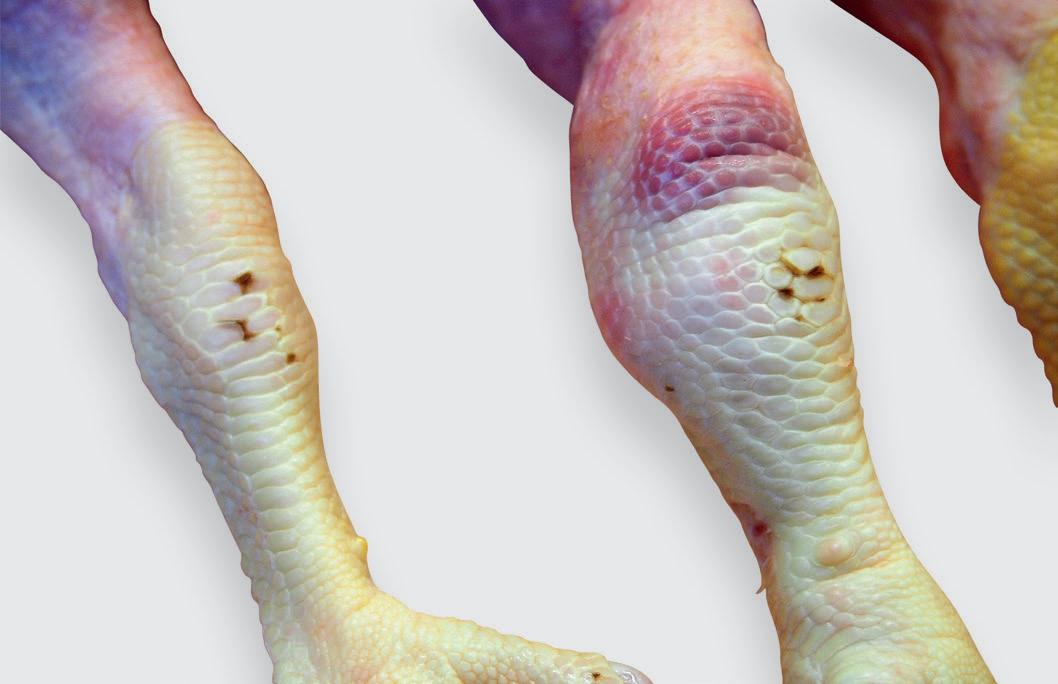

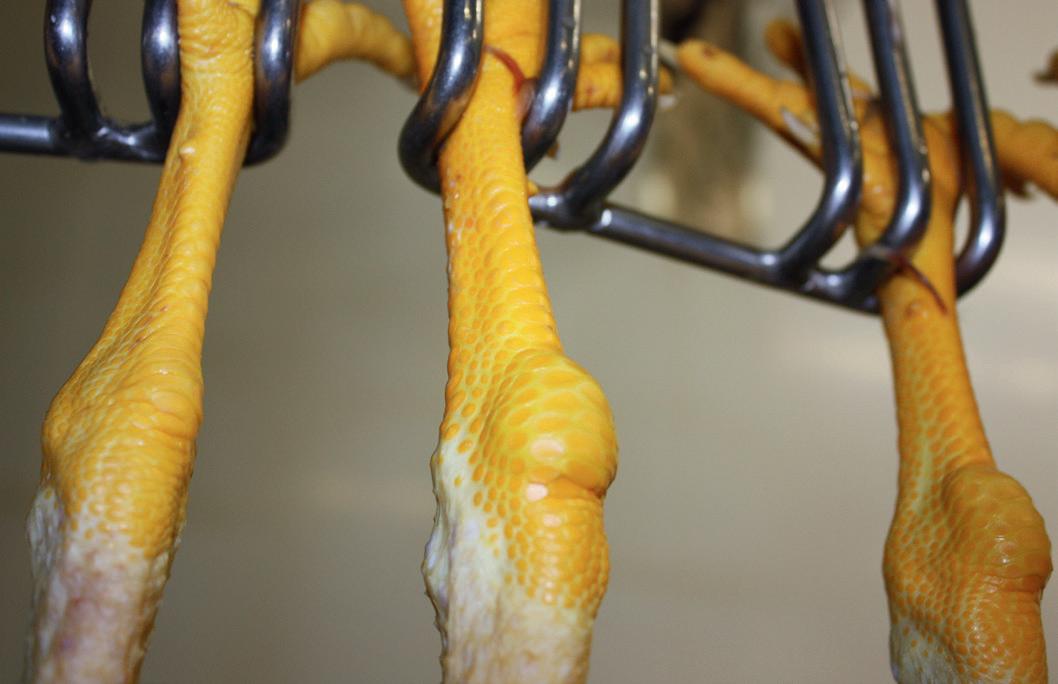
Synovitis
Cause: trauma or overload of joints and tendons, causing more joint lubrication in the capsule. Lying down on its breast leads to a higher risk of litter spots and breast blisters on the breast skin. The affected part is rejected for human consumption.
Tenosynovitis
Inflammation of the Achilles tendon/tendon sheath (Reo-virus) enhanced by bacterial infection. Swollen, warm and painful tendon. Bruises, skin irritation and hock burn develop. Often on both legs. In that case, the entire carcass and the organs must be rejected.
Peri-arthritis
Subcutaneous inflammation around and in the joint. It may spread via the bloodstream to liver, kidneys, lungs and elsewhere. The affected part is removed up to the joint above. If the infection is spread through the body, the entire carcass and organs are rejected.
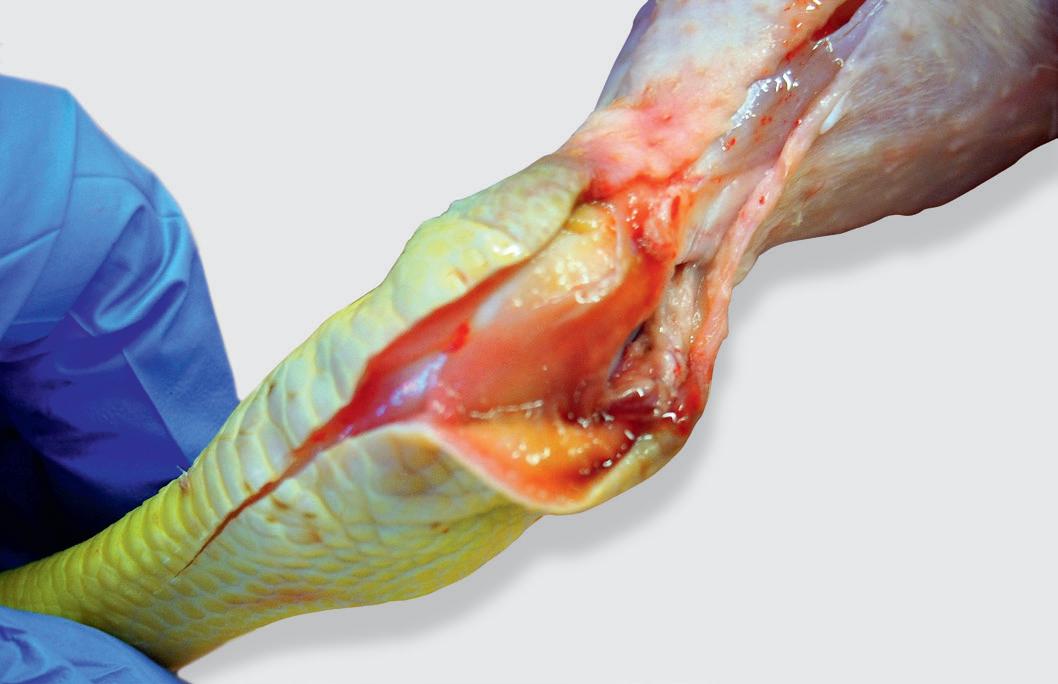
Arthritis
Festering inflammation in a joint, always involving a bacterial infection (Staphylococci, E-coli, Salmonella). Usually a one-sided inflammation. In that case only the affected part is removed, up to the joint above it.
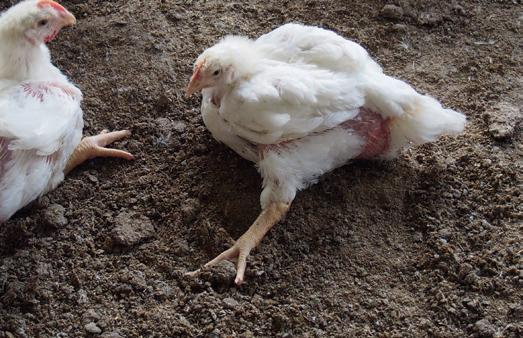
Perosis
Slipped (Achilles) tendon, causing the lower foot to rotate outwards (twisted leg). Cause: nutritional deficiencies (manganese, zinc, choline, other B vitamins such as pyridoxine, biotin, folic acid, niacin).
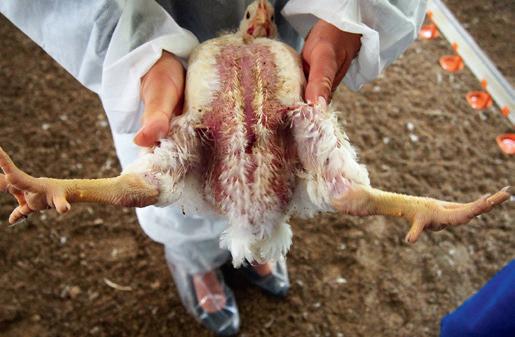
Pseudoperosis
Resembles perosis. One or both legs are turned outward. The hatching process might be the cause, but it can also occur later, especially in young chicks not moving enough. Birds can’t move and often die from malnutrition. No reason to reject the leg or the whole carcass.
64
Broiler Signals Checkbook: 5. End of production and slaughter
Copyrightprotected
6. Health Copyrightprotected
Copyrightprotected
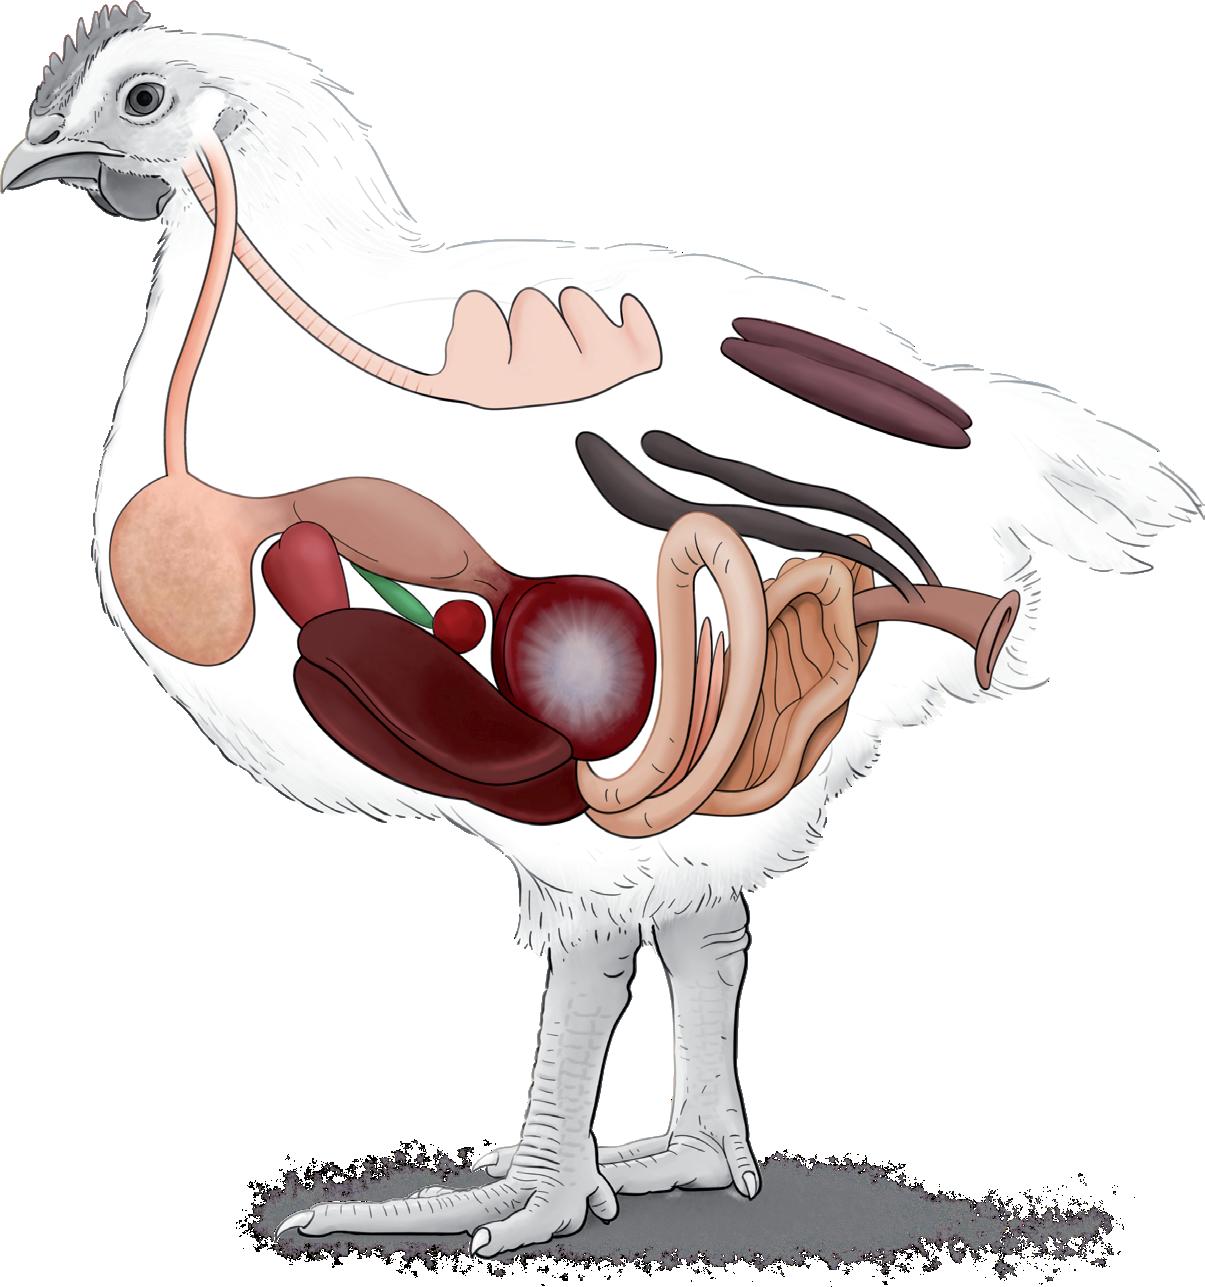
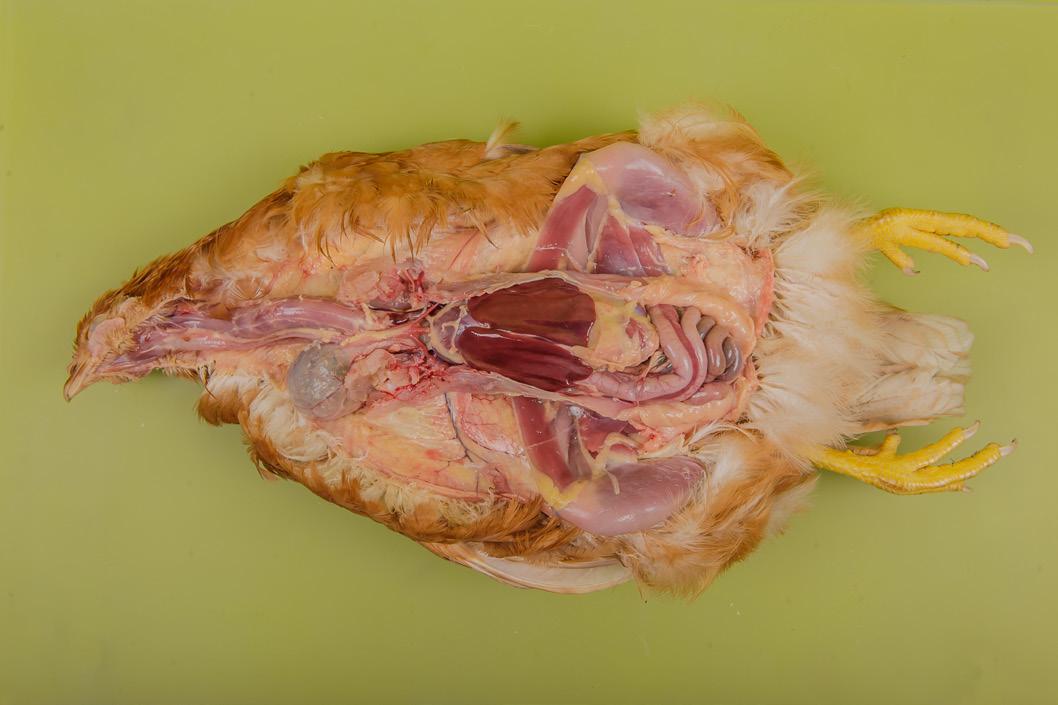
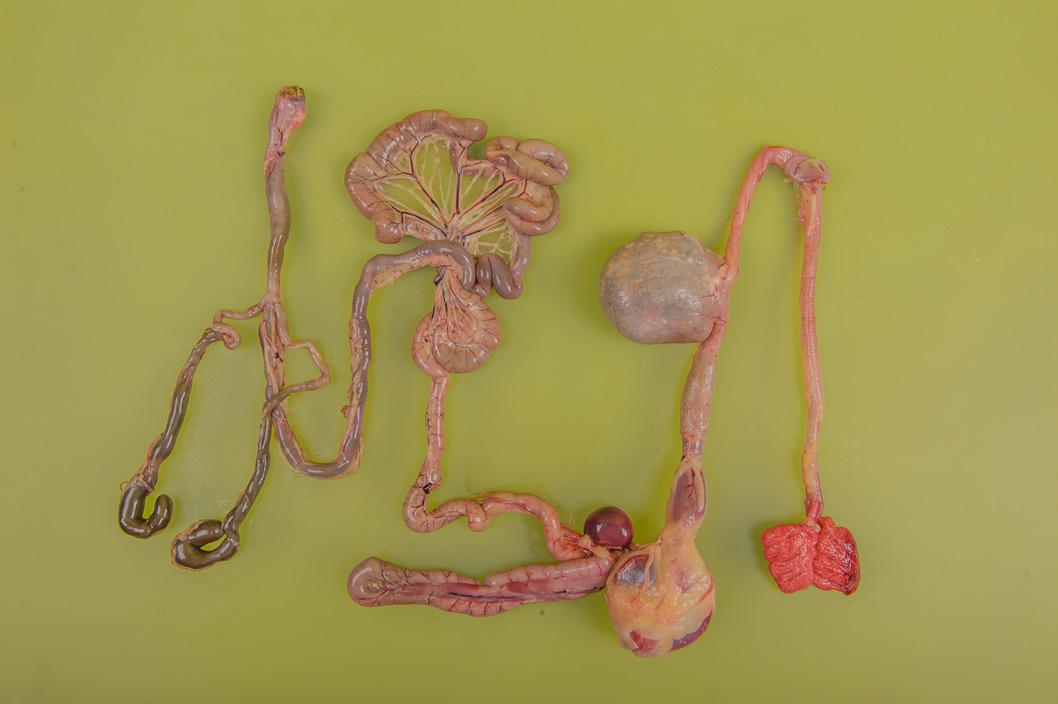
Broiler Signals Checkbook: 6. Health 71 Checklist Interior: Organs When dissecting a broiler you look at all organs as a lot of diseases cause clinical symptoms in vital organs. Organs 1. lungs 2. caecum 3. ovary 4. kidneys 5. oviduct 6. vent 7. rectum 8. small intestine 9. duodenum 16 15 11 14 12 17 13 18 1 2 3 5 4 6 7 8 10 9 10. pancreas 11. liver 12. gallbladder 13. spleen 14. heart 15. crop 16. trachea 17. proventriculus 18. gizzard Copyrightprotected
Checklist Interior: Skeleton
The broilers’ bones are young and still flexible. Problems with the locomotion system or skeleton are often related to the joints (heavy weight of broiler). Enterococcen may casue femoral head necrosis and abscesses on the spine. During catching for slaughter you have to be careful not to break the bones.
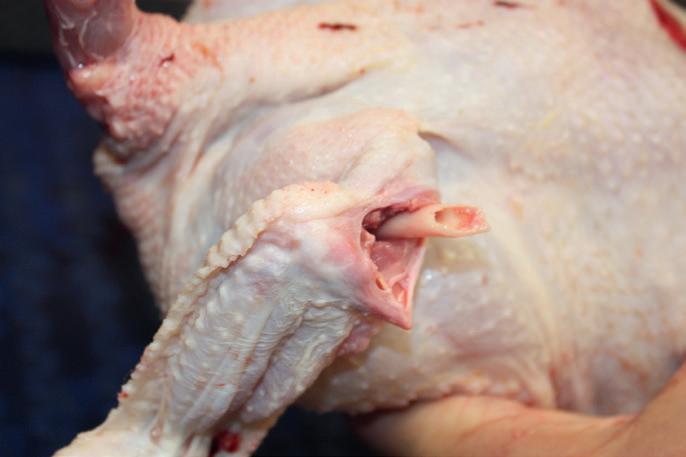
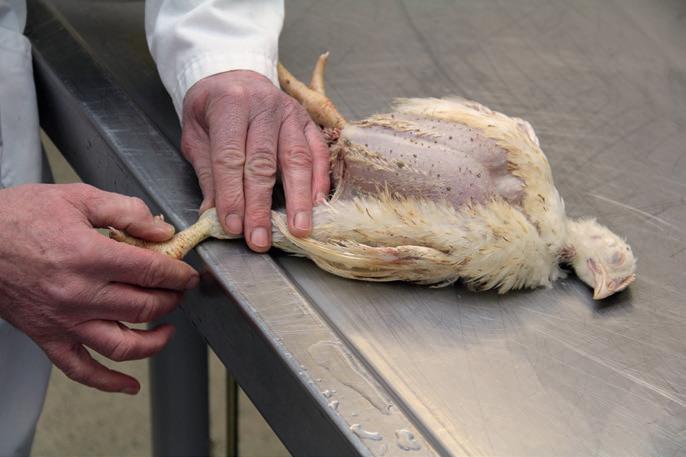
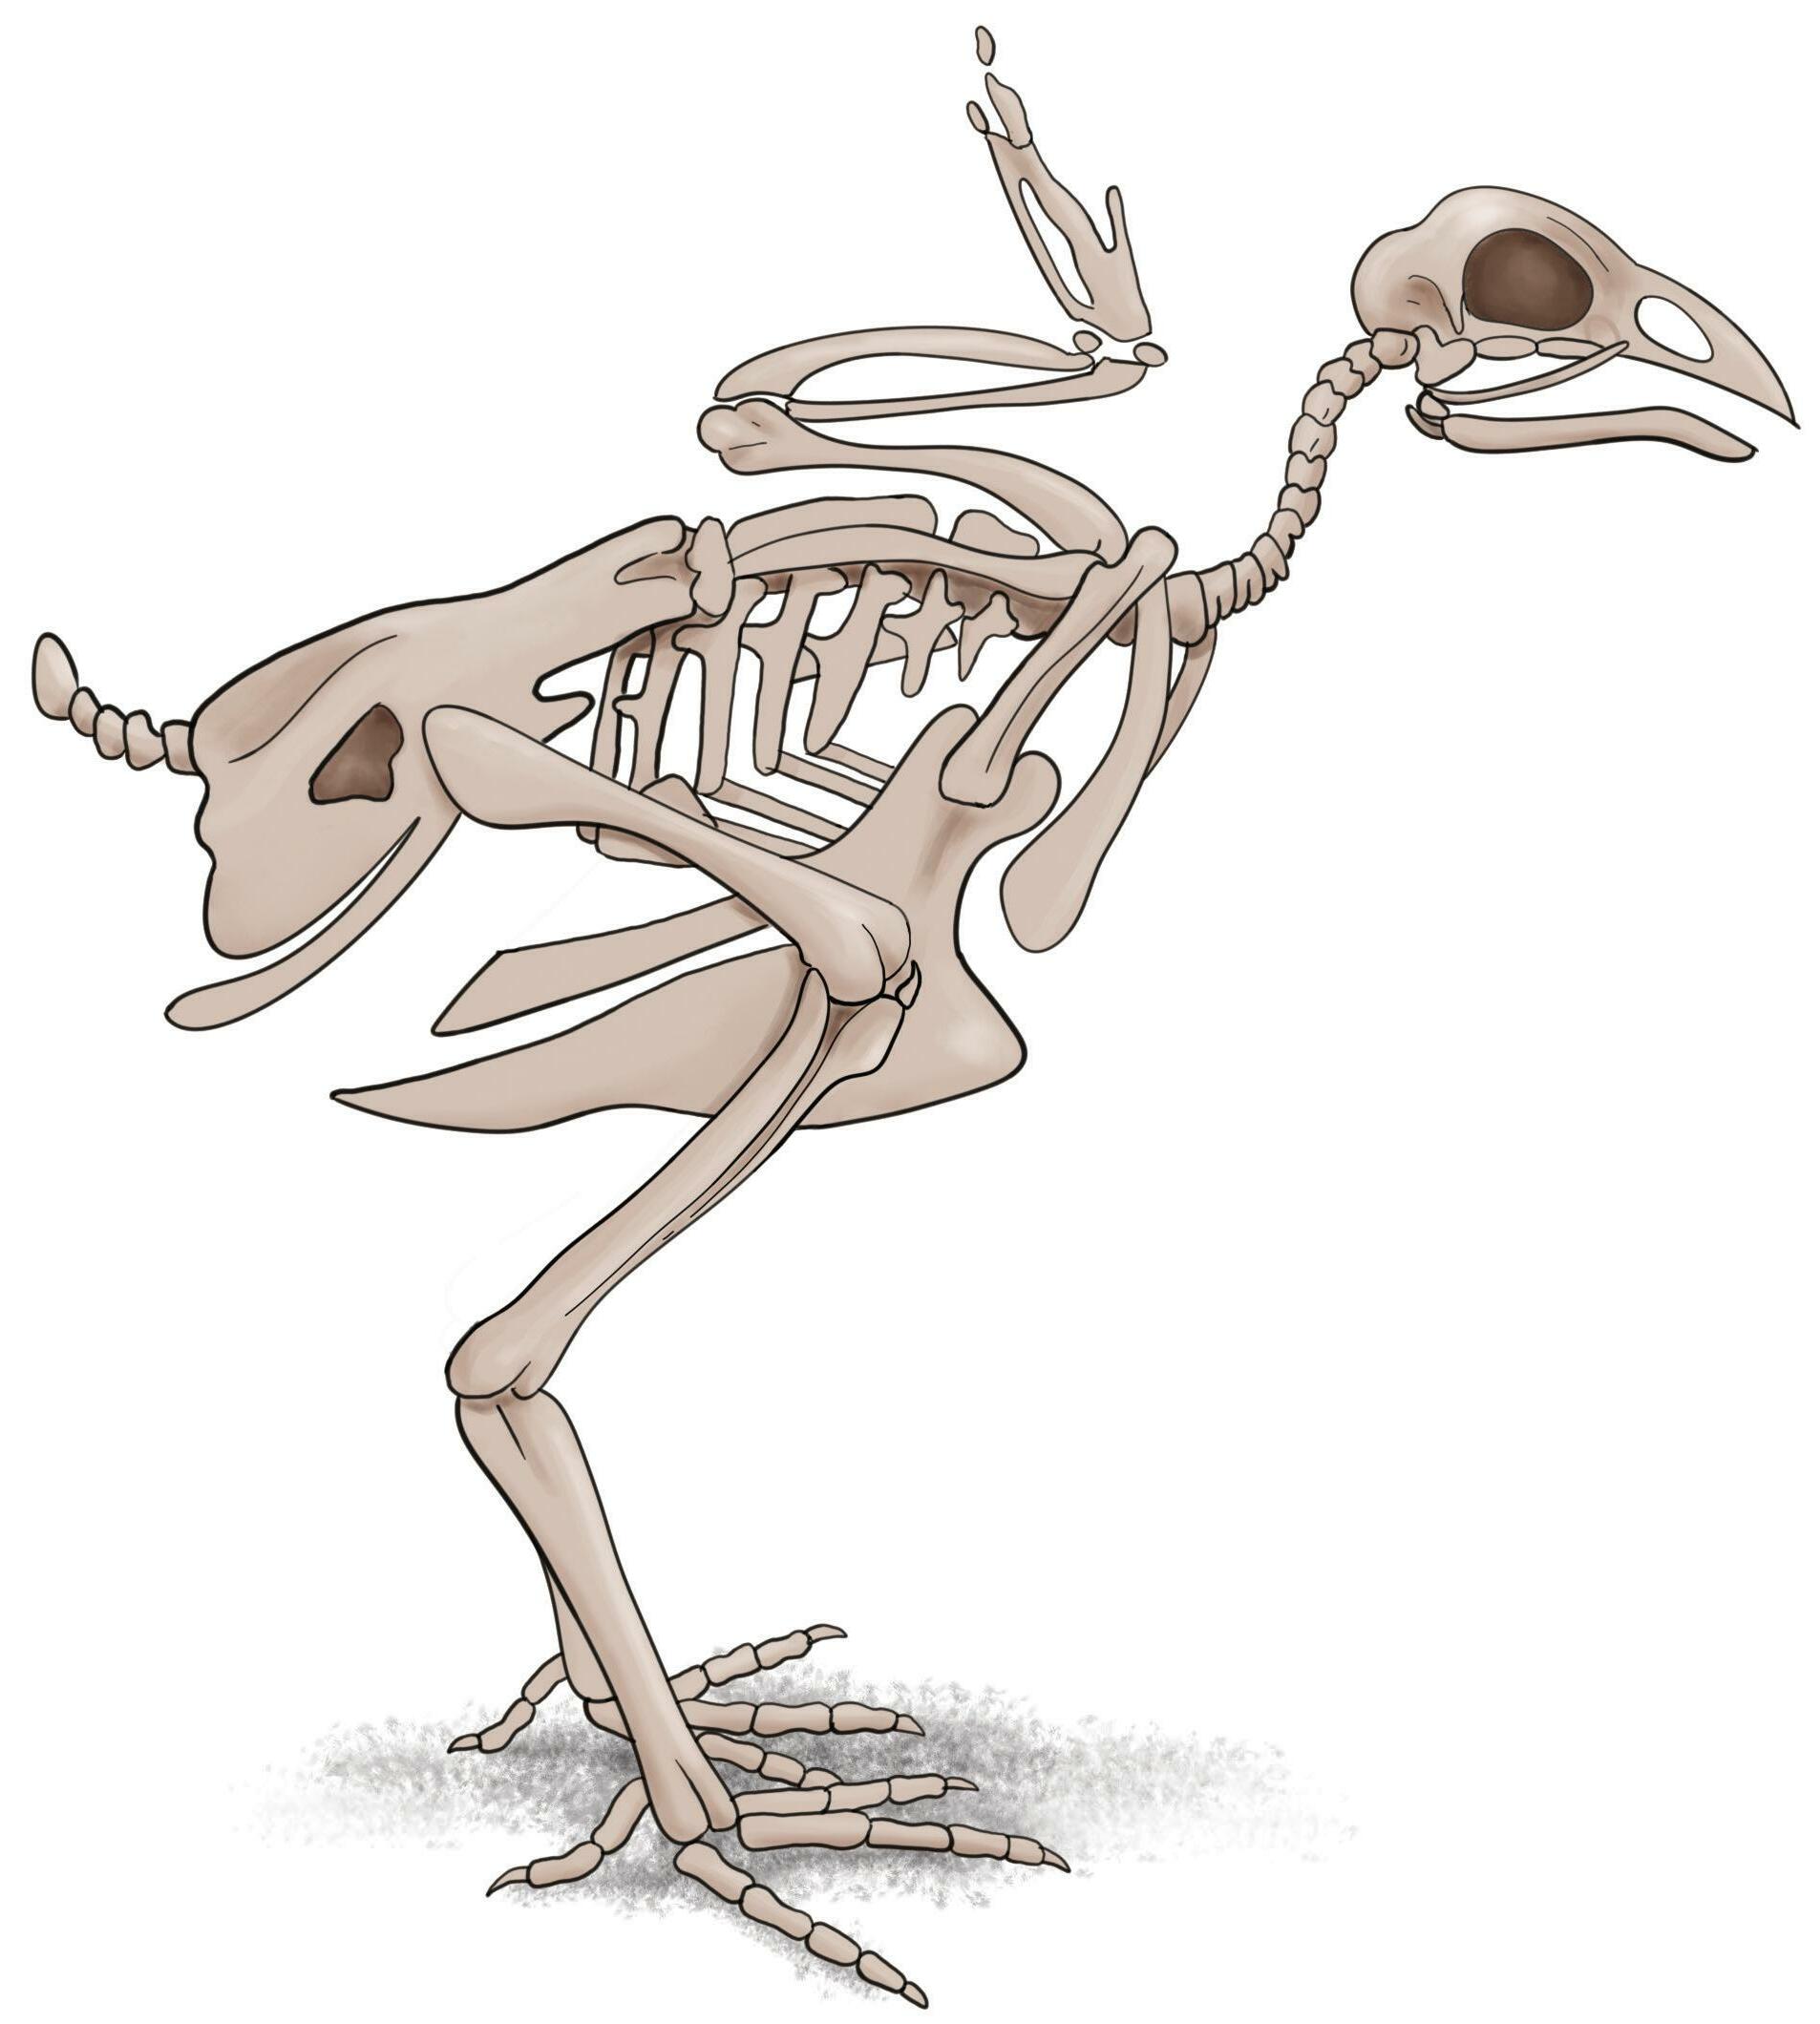
Skeleton 1. cranium 2. eye socket
nasal cavity 4. nostrils 5. cervical vertebrae 6. thoracic vertebrae
radius 8. metacarpus 9. ulna 10. humerus 11. pelvis 12. tailbone
ischium 14. pubis 15. femur 16. fibula 17. tibia 18. hock joint 19. metatarsus 20. knee joint 21. sternum 22. clavicle 23. coracoid 24. scapula
soft, mushy abdomen (ascites)
Bone problems
Broiler Signals Checkbook: 6. Health 72
4 22 21 19 17 3 10 1 5 7 9 8 11 12 6 2 13 14 15 16 18
24 23 20
3.
7.
13.
Broken bones after killing Xxxxxx.
The broilers’ bones are young and still flexible but you should hear a dry crackling sound when breaking it. It requires some power to break the bone. A poorly calcified bone breaks easily with a soft sound. Copyrightprotected
Checklist Poultry Droppings
Droppings tell you a lot about a bird’s gut health. Chickens produce two types of faecal material: intestinal (‘normal’) and caecal droppings. Monitor these in every inspection round. In case of abnormal droppings: get it analysed or let your vet do some dissections.
Intestinal dropping
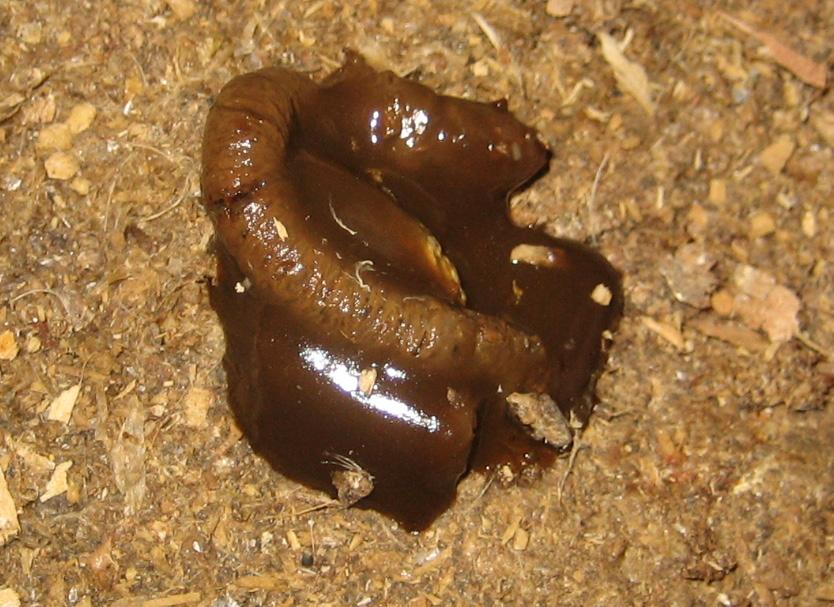
Caecal dropping
The ‘normal’ or intestinal droppings should be firm with a white urate cap on it and without too many undigested particles.
Consistency
The brown caecal droppings, which are usually smooth and creamy, are produced when the caecum is emptied. The colour in itself doesn’t say much, but it should not be foamy.
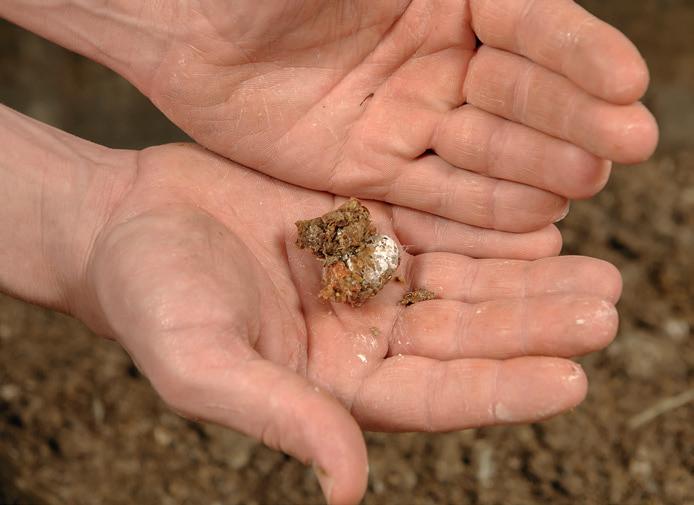
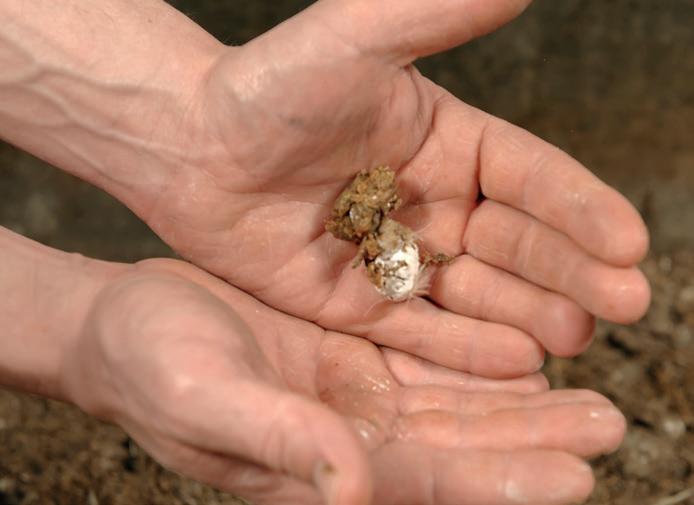
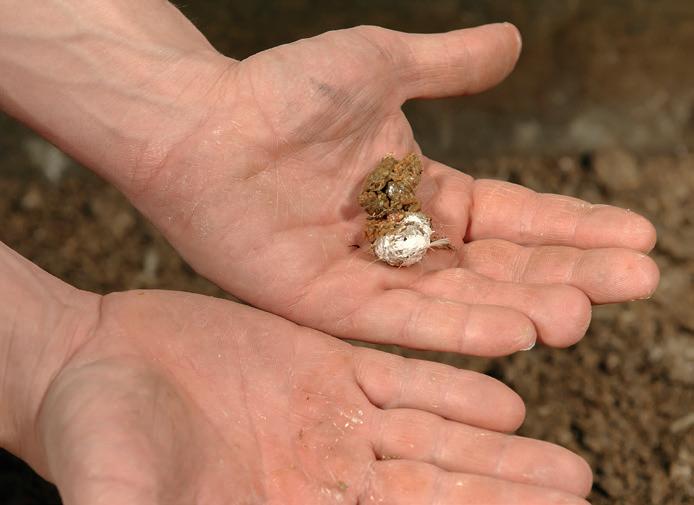

Roll a dropping from one hand to the other. Good consistency: no dirt is left behind on your hands. If the droppings stick to your hand, this indicates poor fat digestion.
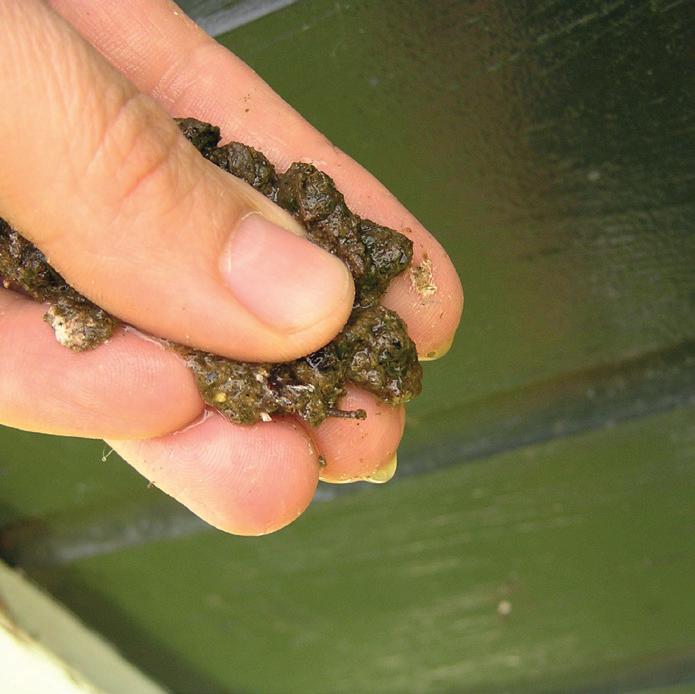
Manually Squeeze droppings, when water drips out it is a bad signal.
Paper
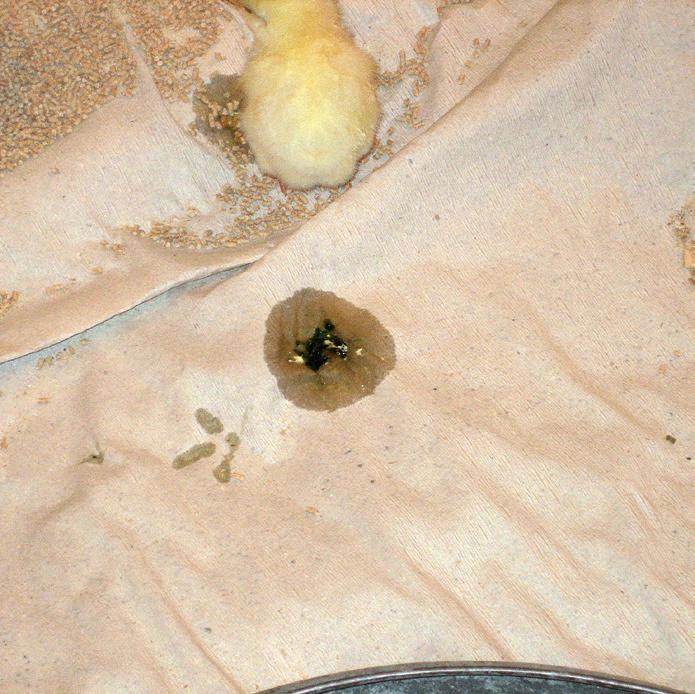
Collect fresh droppings on paper. A large water rings around the droppings (photo) indicates an intestinal problem.
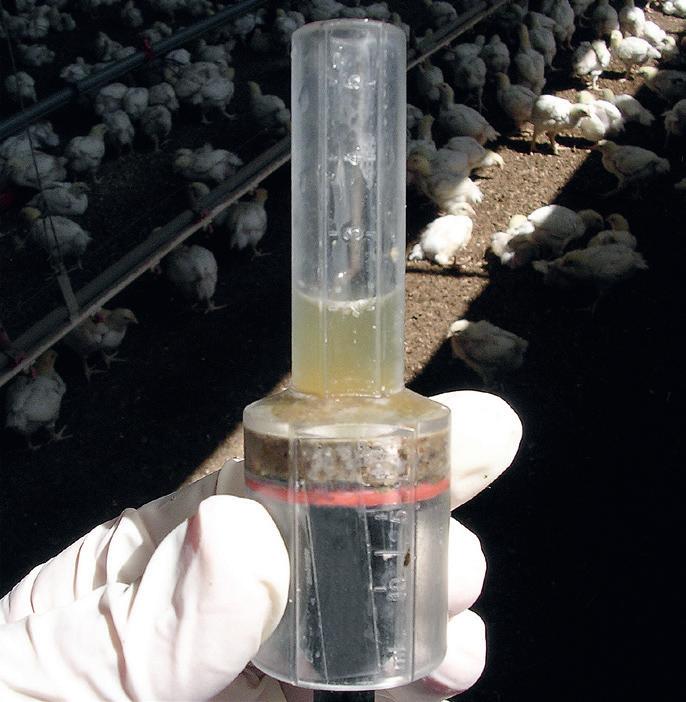
Moisture meter
Use a device to quickly and objectively assess moisture content.
Broiler Signals Checkbook: 6. Health 74
ConsistencyCopyrightprotected
Checklist Poultry Droppings: Problems
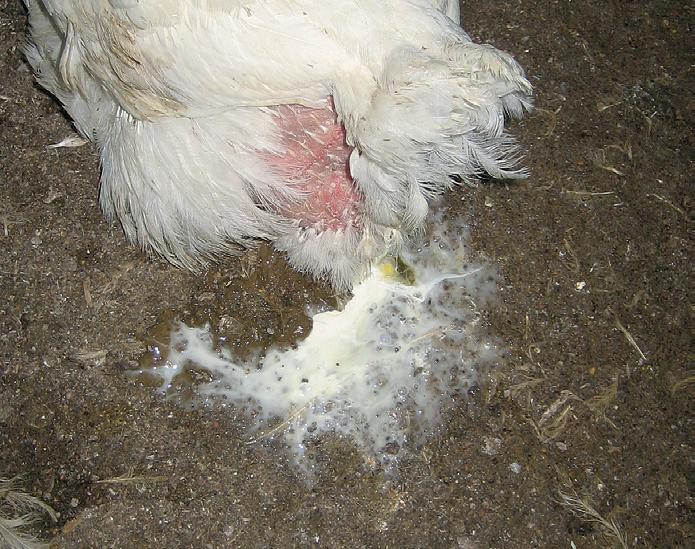
Intestinal problems can be seen in the droppings. Assess droppings on consistency (firm), moisture content (dry), colour (dark brown) and digestion (fine). To assess digestion, squash droppings in your hands and feel with your finger for coarse parts. Get samples analysed or perform a dissection of some birds.
Good droppings, nice brown color with white cap and firm dropping without undigested parts.
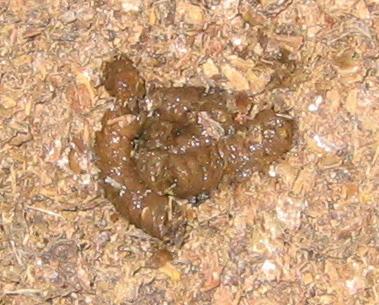

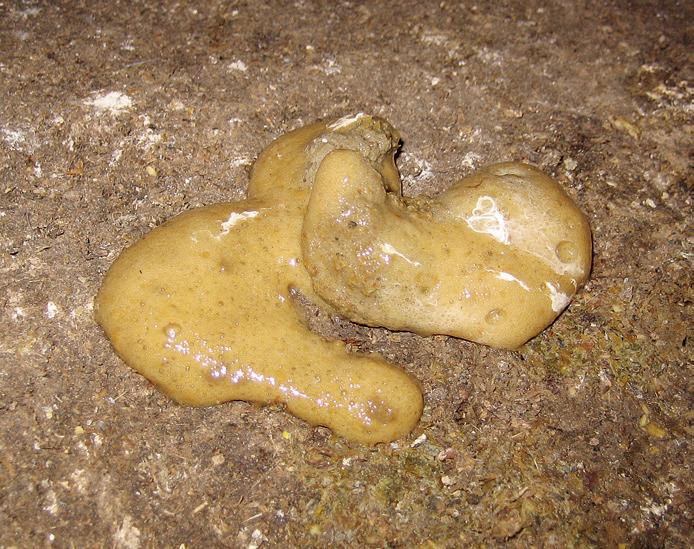
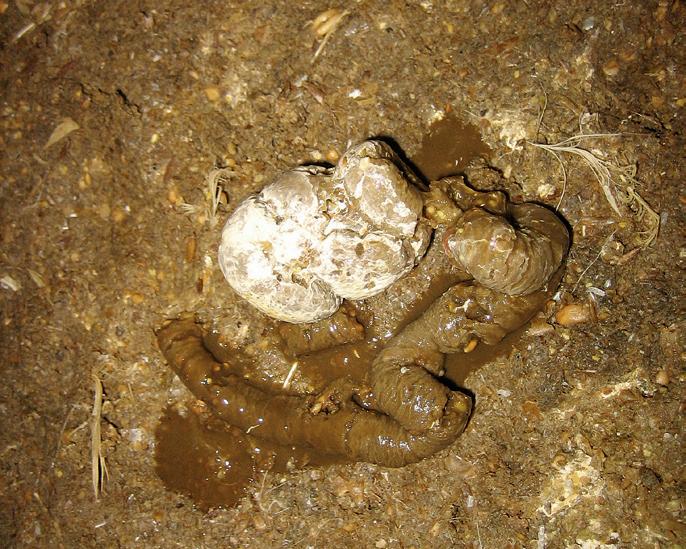
Green bile indicates an empty intestine (starvation) and/or an infection (such as IBD). The white urates are a waste product of protein break-down.
If droppings are mixed with blood, alarm bells should ring. This could indicate coccidiosis (Eimeria tenella).
The white layer on the dropping is uric acid. White/yellow fluid indicates kidney damage.
White/yellow Orange
Orange mucus in droppings indicates a damage intestinal lining. Often combined with blood (enteritis).
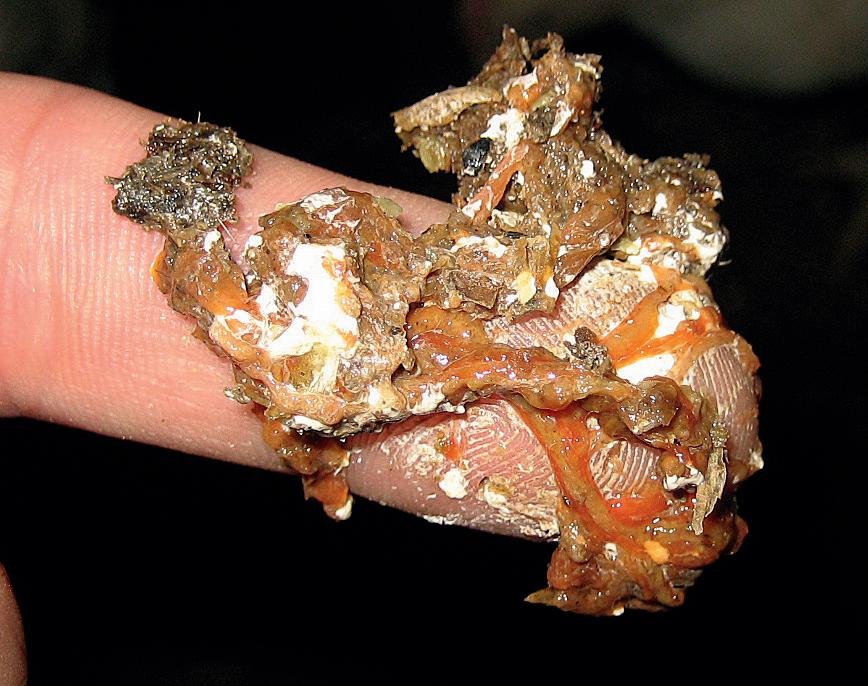
Dark droppings usually indicate bleeding in the first part of the intestinal tract. Blood is digested and turns black.
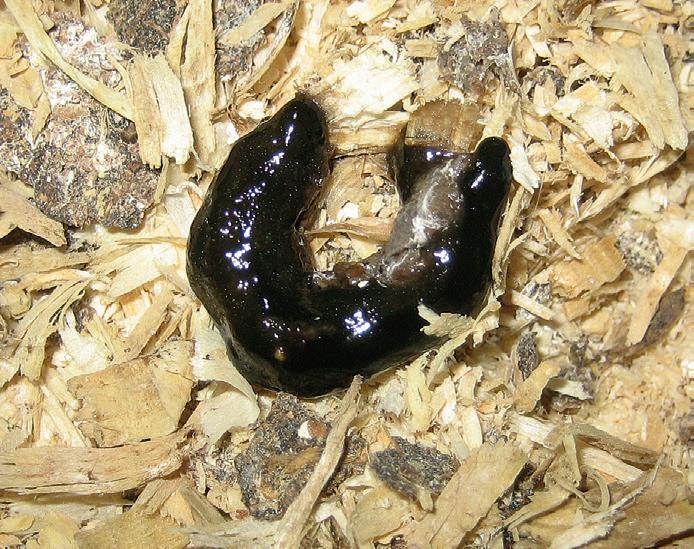
Light coloured, foamy caecal droppings indicate excessive gaseous bacteria in the caecum (Clostridium, Dysbacteriosis).
You can even see maize in this very poorly digested dropping; normally this is the most easily digestible ingredient of chicken feed.
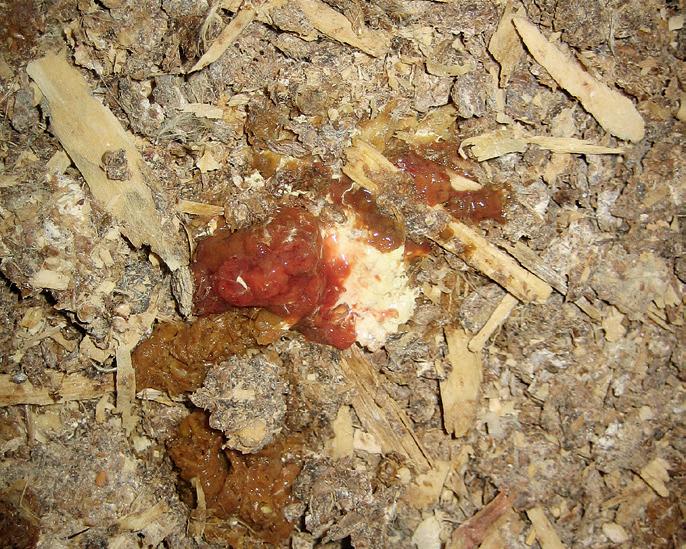
If droppings get soft, this is a first indication for diahrroea. Solve this before it gets really watery.
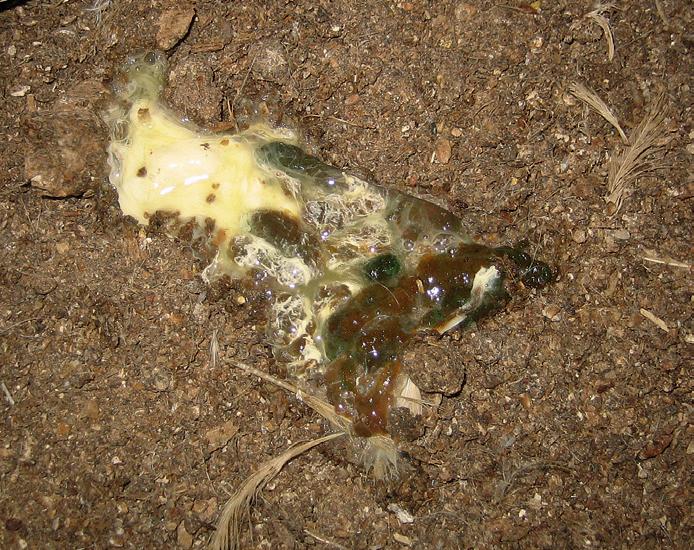
Broiler Signals Checkbook: 6. Health 75
Copyrightprotected
Foamy Dark Undigested Soft/watery Good Green Bloody
BROILER SIGNALS CHECKBOOK
Focus on health, welfare and growth
Broiler Signals Checkbook
Broiler farmers are always looking for practical tools that they can use in their daily work. This checkbook focuses on this practical knowledge. It is not a book that you have to read from back to back, but separate cards on various topics. To be consulted when required. With little text as possible and full of visual aids in the form of photographs and illustrations.
The book has been developed in close collaboration with poultry farmers, veterinarians and farm advisors. The checkbook is a collection of 60 cards that can be used independently. The total checkbook comprises 80 pages.
Topics range from preparations for a new flock, via guidelines for euthanasia to assessing intestinal health and slaughter quality. The whole broiler production process is covered.
There are various type of cards. Instruction cards shows you step-by-step how to perform certain activities on the farm. Scoring cards help you to objectively assess specific potential problems. Checklist address the highlights per topics that you should focus on.
In Broiler Signals Checkbook various topics are presented on separate pages bound together with a wire-o-binding, making it easy to flick throught. Pages are laminated in order to withstand dirt and water. So it can be used in the poultry house or anywhere else on the farm in order to have it at hand all the time. To be used by farmers, advisors, trainers and students.
Broiler Signals Checkbook is part of the successful Poultry Signals® series. Poultry Signals® presents practical knowledge of animal oriented poultry farming in an easy, accessible format.
ISBN 978-90-8740-372-0
9 789087403720
www.roodbont.com
Copyrightprotected


