Solutions for black spots that can inexplicably appear in red oak
HARDWAX OIL EXPLAINED
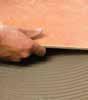
CONCRETE
MOISTURE MATTERS
A PRIMER ON MULTI-HEAD SANDERS
ACTIVATE YOUR PETPREMIER™ CAMPAIGN ASSETS TODAY TO ENGAGE NEW CUSTOMERS.
Tibor Svajko
Photo courtesy Tibor Svajko
ALL ABOUT WOOD
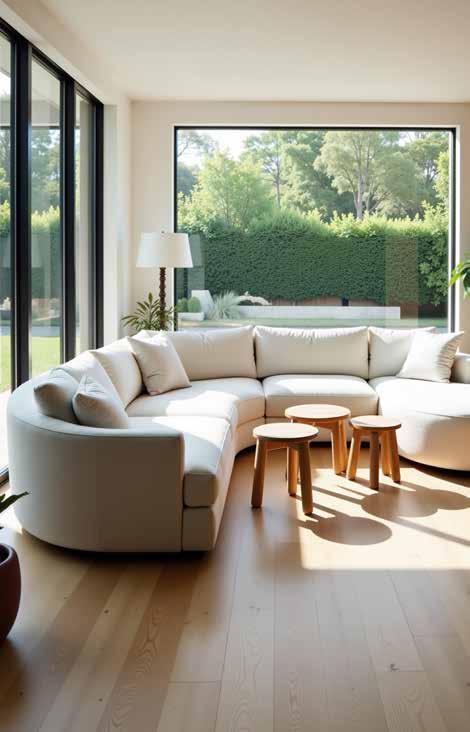
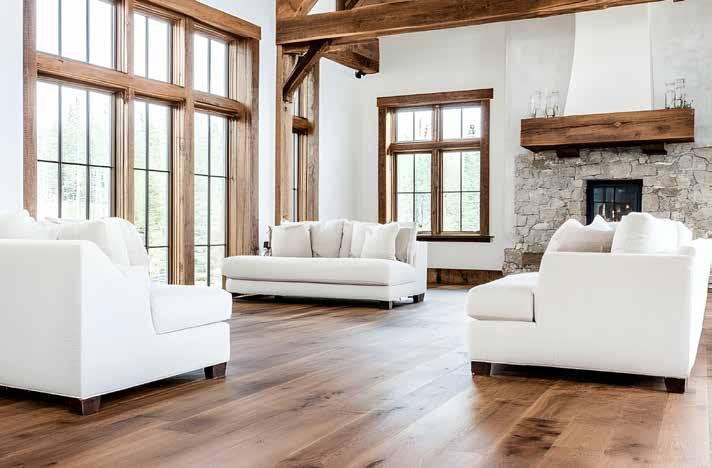
WHEN WE MOVED into our home just over 14 years ago, one of the first renovations we embarked on was replacing the existing hardwood floors. The floor featured narrower strips of hardwood that were heavily used in flooring at the time our home was built. Refinishing was not an option as it was worn, so much so that the previous homeowners slapped slate tile atop in the hallway. (That still bewilders me.) We chose a solid maple hardwood in a cocoa finish, which was on-trend around the millennium and sometime thereafter. While dark tones have since fallen out of popular favour, giving rise to reclaimed wood floors and, more recently, lighter wood styles, they are classic and timeless, bringing a cozy sophistication to any space.
Updating flooring is a common practice of new homeowners, especially purchasers of older properties. It’s also one of the most important and least costly renovations that can be made to boost a home’s value. Current estimates peg new floors can add three to five per cent to a property’s financial worth, the dollar amount dependent on the type of flooring installed. In most cases, hardwood flooring has the greatest positive impact on home resale value, immediate enjoyment and expected life span.
This issue, our entire flooring focus is devoted to wood flooring. A variety of topics are covered, including spline, used to bridge the gap between two pieces of flooring where they meet at a joint; the emergence of dark spots in newly laid or refinished red oak; multi-disc floor sanders; hardwax oil finishing products; and the latest innovations in hardwood flooring.
New this issue is Contractor’s Corner, a regular column penned by Chris Maskell, CEO of the National Floor Covering Association of Canada. In his first instalment, Chris addresses a critical best practice — concrete moisture testing.
Our guest Installation Matters columnist is Scott Conwell with the International Masonry Institute. He delves into tile showers and many of the points that define their successful installation.
To close is our Then & Now column. The featured project is Riverwalk Retirement Residence in Calgary, designed by Newcombe Design Associates. Practice leader Becky Thayer walks through the design of the residential environment for seniors, including flooring choices.
PRODUCTION COORDINATOR Ines Louis Inesl@mediaedge.ca
Coverings is published four times annually — Spring, Summer, Fall and Winter — for Canada’s floor covering industry. Subscriptions are free to qualified participants in Canada’s floor covering industry. Subscribe at www.coveringscanada.ca. Readers from outside Canada may purchase subscriptions for $55 Cdn. For subscription inquiries, e-mail circulation@mediaedge.ca. Return undeliverable Canadian addresses to: Coverings 251 Consumers Road, Suite 1020, Toronto, Ontario M2J 4R3
MediaEdge Communications and Coverings disclaim any warranty as to the accuracy, completeness or currency of the contents of this publication and disclaims all liability in respect to the results of any action taken or not taken in reliance upon information in this publication. The opinions of the columnists and writers are their own and are in no way influenced by or representative of the opinions of Coverings or MediaEdge Communications.
Concrete moisture testing best practice addresses billion dollar-plus problem
By Chris Maskell
Afew years ago, the project manager for a large construction company called me to get clarification on the type of concrete moisture testing required for a sizable commercial construction project and the quantity of test locations needed to meet minimum industry standards.
My response (which has always been the same): Follow the adhesive and floor manufacturers’ installation guidelines. If tolerances differ, go with the stricter of the two.
In this case, both the adhesive and floor manufacturers’ guidelines required that relative humidity (RH) in situ probe testing be performed according to ASTM F2170, with a maximum tolerance of 85 per cent being acceptable.
So, for this builder and his 900,000-square-foot project, the answer was to perform the test at 902 individual locations — ASTM F2170 requires three tests for the first 1,000 square feet, and one test for each additional 1,000 square feet — the cost being somewhere between $100 to $150 per location (depending on the number of tests required). It was a big deal for the builder who had not scheduled or budgeted for this. It becomes an even bigger deal when you think that after going through all of that testing, the builder may still not be able to guarantee a thoroughly dry concrete surface that is ready to receive flooring. If this is true, then what moisture testing system does guarantee a dry surface? Is relying on one test method not enough to fully evaluate the moisture condition of a slab?
Typically, when moisture testing is on the radar during a project, two different test methods are considered. One, or a combination of these two tests, may be required depending on what the adhesive and/or flooring manufacturer calls for in their installation guidelines.
These two tests are ASTM F1869, Standard Test Method for Measuring Moisture Vapour Emission Rate of Concrete Subfloor Using Anhydrous Calcium Chloride, and ASTM F2170, Standard Test Method for Determining Relative Humidity in Concrete Floor Slabs Using in situ Probes. The first measures the dynamic (moving) moisture vapour being emitted through a concrete slab. The second measures the static moisture vapour in the form of RH within a concrete slab.
Each test method identifies different kinds of moisture vapour that can affect adhesives and flooring negatively. They are somewhat complicated to execute and require that testing fields (on busy construction sites) be protected from other trades spoiling the test locations. As well, both produce results that tell you what is going on with the concrete moisture characteristics at the time the tests were taken.
So, let’s say the tests were performed mid-April, and you start the floor installation in mid-May. Should you be worried about what has happened on-site during the month in-between?
Absolutely.
Local spills on-site, wet cutting stations, wet trades and higher humidity conditions are all a concern because higher moisture levels will likely interfere with the adhesive bond.
Dew point is another potential hazard — moisture that condenses from a vapour into a liquid when ambient humidity and surface temperatures are within a certain range.
Humid, warm air condensing on a cool surface like a single-pane window in winter is a serious concern because the same thing can happen on a cold concrete surface. The difference between a concrete surface and a window is that the window is not porous, so the water sits on the surface. Most concrete will absorb this moisture as it is usually porous, so you can’t see the water build up.
Are construction sites prone to dew point conditions?
Yes.
If the building heat is turned off on a winter night, the slab could become colder. Then the trades arrive in the morning, begin work, humidity levels and ambient room temperature quickly rise, but the slab surface stays cold creating conditions for condensation (dew) to form.
How do we protect against dew point and local spills?
Perform an electrical impedance (moisture) test in accordance with ASTM F2659, Standard Guide for Preliminary Evaluation of Comparative Moisture Condition of Concrete, Gypsum Cement and Other Floor Slabs and Screeds Using a Non-Destructive Electronic Moisture Meter.
This test method is simple to perform, non-destructive, provides instant results, and is effective and inexpensive. Most important, the meter tests the surface of the concrete, which, after all, is what you are trying to bond to. This test, at the very least, should be performed in combination with one or both of the other two tests.
So, why not perform an electrical impedance test before every installation? Is it that old habits die hard? There is confusion over what test does what? There’s a stubborn belief current testing (ASTM F1869 and F2170) practices are good enough? There’s little to no direction in the architectural specifications regarding testing requirements?
There’s no mention of ASTM F2659 as a requirement in manufacturers’ installation guidelines? (The last one is a biggie.)
Maybe all of these apply. But one thing is for sure — moisture-related claims keep going up.
How many installations have proceeded blindly over concrete that may have been tested two or three weeks prior with little to no thought given to surface conditions at the time of install?
Too many.
The risk should be a concern to all involved in a floor covering installation; cupped planks, expansion leading to binding and joint pressure-related issues, squeaks, locking mechanism failure, chipping, discolouration, split seams, re-emulsified adhesive, bubbles, mould, damaged reputations, client dissatisfaction, holdbacks and more. Yet, we see a continuing habit of ‘install without thorough testing and just hope for the best.’
It’s ironic that within the scope of work for a floor covering installer is the electrical impedance test, which must be performed immediately before proceeding with installation and periodically throughout. But most installers don’t do it and the majority of flooring manufacturers have not included this as a requirement in their installation guidelines. How can we change this? And do we even need to?
With these questions in mind, the National Floor Covering Association of Canada took a deep dive into the subject of moisture testing concrete. Many affected parties and subject matter experts were invited to participate, including adhesive and flooring manufacturers’ technical representatives, installers, builders, concrete consultants, flood restoration experts, architects, specification writers, testing agencies and flooring inspectors. More than 65 construction professionals from all corners of the industry joined a committee, which met over the course of 18 months.
The goal was to write a concrete moisture testing best practice and involve as many companies as possible in its development. This way manufacturers and distributors would feel they were part of the solution and, as a result, be more likely to embrace any recommendations that came from the process.
Another goal was to have the committee reach agreement on the conclusions prior to publishing. No agreement would mean back to the drawing board.
We achieved these goals and the document was published. It is available at no charge for anyone to download at www.nfca.ca/free-resources/concrete-moisture-testing-best-practice/.
Shortly after wrapping up the committee, multiple manufacturers reached out with news that they would be updating their installation guidelines accordingly.
One less claim as a result is a very good thing.
Chris Maskell is CEO of the National Floor Covering Association (NFCA) of Canada. Chris has worked in the floor covering industry for more than 30 years. During this time, he has been a flooring contractor, manufacturer’s representative and business owner. As CEO of NFCA, he works with the association’s board of directors to promote NFCA standards and updated specifications for commercial floor covering installations. He also operates the NFCA’s quality assurance program, a specifiable third-party inspection review service for commercial projects, and is a certified floor covering inspector.
SHOWER TIME
Critical points of ceramic tile design, installation for TCNA B415
By Scott Conwell
Tile showers are highly durable, water-resistant and, when constructed properly, can provide generations of reliable service. While a tile shower may appear simple on the surface, there is a lot going on behind the scenes. In fact, a tile shower can be one of the most complex assemblies an installer will ever build.
SHOWER TYPES
When it comes to tile showers, there is no standard design. Rather, there are varying methodologies and materials.
Some variables to take into consideration include: Is the water directed to a conventional drain with weep holes via a ‘water in, water out’ approach or to a flanged drain via a single line of defence approach? Is the slope to drain provided by a mortar bed or prefabricated ‘pre-slope’ mechanism? Is the slope in four directions to a centrally located drain or in one direction to a linear drain? Does the shower have a curb at the front to contain the water or is it curbless for wheelchair accessibili-
ty? Does waterproofing take the form of a sheet pan liner or liquid? Is it sandwiched between the pre-slope and the finish mortar bed or is it bonded to the top of the finish mortar bed? Is the bottom of the backer board on the shower walls buried in the mortar bed or is it elevated above the top of the mortar bed?
A few commonly specified shower assemblies that address each of these variables appear in the Tile Council of North America (TCNA) Handbook for Ceramic, Glass and Stone Tile Installation; however, there are many other variations of successful showers that are not cited in it. A qualified tile setter should be able to install any type of shower to exacting performance criteria.
While a comprehensive analysis of shower receptors is out of this article’s scope, it will examine one specific assembly, TCNA B415, and its critical points of design and installation. The B415 shower is currently one of three shower types that form the basis of the tile industry’s Advanced Certifications for Tile Installers (ACT).
PERFECTING THE PRE-SLOPE
A shower’s ability to direct water to the drain relies on the slope of the finish tile. The pre-slope sets the slope of the entire shower assembly, so it is critical that it be accurate. The pre-slope must have a uniform slope of one-quarter inch per foot (two per cent slope) to the drain. A prefabricated pre-slope device simplifies this task but if a mortar bed pre-slope is floated, it must have the correct and consistent slope without even slight humps or valleys that could impede flow. It should also be bonded to the substrate with modified thinset mortar or a cement slurry.
WATERPROOFING MEMBRANE
The sheet membrane, also known as the shower pan liner or waterproofing membrane, is the component in the assembly that protects the substrate from contact with water. In the B415 shower, it is loose laid and continuous.
The membrane must be installed seamlessly inside the receptor, returning vertically up the perimeter walls the specified distance. If separate pieces of membrane are required to create the vertical returns, the membrane must be adequately lapped and sealed. And if the membrane is folded at the inside corners to avoid seams, the folds should be consistent at each corner to achieve a square angle once the backer board is installed on the walls. Folding the membrane at corners sometimes creates an excessively thick condition that may need to be corrected with shims when the backer board is installed. The membrane is mechanically fastened to the vertical framing or blocking, with the fasteners no lower than three inches from the top of the finished curb.
The membrane must be sealed to the drain collar with approved sealant, rather than simply laid loose, to prevent water from becoming redirected underneath the membrane where it may never reach the drain. Once this task is complete, the drain’s clamping ring is installed, providing the critical watertight connection between the membrane and drain.
The membrane must completely cover the rough curb, including the entire front face of the curb. There should be no fasteners on the top or inside surface of the curb. Installers must use pre-formed membrane corner pieces to ensure continuity at the top ends of the curb.
FLOOD TESTING
After installation of the membrane, including all transitions and terminations, and weep hole protection, the in-progress shower receptor should be flood tested to ensure watertightness. Methods of flood testing vary but they are generally based on ASTM D59574, Standard Guide for Flood Testing Horizontal Water-proofing Installations. This test method calls for the shower drain to be temporarily plugged and shower receptor filled with approximately one inch of water, then allowed to stand for one to two hours. The assembly is considered to have passed the flood test if no leaks are determined to have occurred during the test period.
VAPOUR RETARDER AND BACKER BOARD
Although these components don’t always fall in the scope of the tile work, qualified installers should be versed in installing vapour retarder and backer board. These tasks may occur as the shower assembly is constructed and their construction often defaults to the tile trade.
When vapour barrier is specified, it should be free of rips and tears, shingled over the shower pan liner and adequately fastened to the backing, but with no fasteners lower than three inches above the top of the finish curb.
The backer board is installed over the vapour barrier. If there is none, it is installed directly over the pan liner using shims, if necessary, to maintain plumbness, and then mechanically fastened to the framing. If the backer board is a cementitious backer unit (CBU) conforming to ASTM C1325, Standard Specification for Fibre-mat Reinforced Cementitious Backer Units, it may be buried in the finish mortar bed. Alternatively, if a more moisture sensitive backer board is used, such as fibre-cement backer board (ASTM C1278, ASTM C1288), coated or uncoated glass mat water-resistant gypsum board (ASTM C1178, ASTM C1658) or cementitious coated extruded foam board (ASTM C578), the backer board should be elevated above the top of the mortar bed so it does not absorb moisture through its bottom edge. In all cases, as with the pan liner and vapour barrier, the backer board should have no fasteners lower than three inches above the top of the finish curb.
WEEP HOLE PROTECTOR
Every qualified installer knows that when using a conventional twostage drain, they must provide protection for the drain’s weep holes. A weep hole protector prevents the weep holes in the drain from becoming clogged with mortar or debris. Keeping the weep holes unobstructed allows them to function as a secondary method of handling any moisture that penetrates the tile surface and is otherwise unable to reach the drain via conventional channeling.
MORTAR BED AND CURB
The final step of a B415 shower install before laying the tile itself is the application of the mortar bed and mud curb. These activities are typically done at the same time.
Because the slope has already been formed, the final mortar bed is floated to a consistent thickness and follows the contours of the preslope below. The mortar bed should retain the one-quarter inch per foot (two per cent) slope and be free of humps or valleys that could impede flow of water to the drain.
As the shower receptor is floated, mortar is also applied to the rough curb with metal lath reinforcement embedded. At its completion, the mud-finished curb should be square to the shower, parallel to the back wall, flat in the long direction and have a cross slope of one-eighth of an inch toward the shower. Once the shower’s wall, floor and curb substrates are in place, the final stage of installation is tiling and grouting the entire assembly.
Scott Conwell is director of industry development and technical services at the International Masonry Institute (IMI), whose training and education foundation and joint apprenticeship and training committees teach the skills required of a B415 shower, as well as most other common shower types. Scott leads IMI’s tile, marble and terrazzo industry development program and is the creator of its masonry detailing series, an online collection of construction details and technical information that sets the industry standard for architectural details on masonry, tile, stone and terrazzo.
SPLINE TIME
Why this flooring accessory is required and how to properly install
By Brett Miller
Spline is a challenging subject. For starters, it plays one exclusive role within an installation, which is never seen nor appreciated by the end-user. Spline is also one of the most critical components of any properly installed wood floor.
Spline is known by many names, depending on geography and what you were originally taught to call it. Some common names include
slip-tongue, false-tongue, loose-tongue and tongue-spline.
The singular purpose of wood floor spline is simply to allow two pieces of wood flooring to be joined together to make a single flat surface, while maintaining consistent tongue and groove engagement through the entire installation.
For most wood floor installations, spline should be a regular component of what is delivered to
every job site. It is required anytime the wood floor installation has direction changes; when reversing installation direction, such as starting in the centre of a layout or back-filling; at all headers or flush transitions; and when installing or assembling any parquet pattern where two pieces of wood adjoin.
One of the most important elements of spline is how it matches the specific flooring profile. Not
all splines fit the same groove profile of all flooring. Three-quarter inch spline is readily available at most flooring distributors.
Manufacturing spline can be dangerous and tricky. The small profile of the material requires precision and a keen eye for quality. Todd Hooper, third-generation owner and president of Log Power, exclusively uses a kiln-dried, prime-grade poplar to produce his company’s spline. He says Log Power, which focuses solely on producing spline for the wood flooring industry and currently makes more than one million feet of spline each year, does this for a couple reasons: it is the cleanest wood to mill into such a small profile (oak splits too easily); and it is an inexpensive species (pine mills easily but is costly).
Some manufacturers also may create spline for 5/8 inch flooring and half-inch flooring, but this is uncommon. The reason is because not all groove profiles are identical for all flooring, especially when you get into the engineered flooring tongue and groove profile variances. In these cases, you may need to make your own spline. This can be done by using a table saw to rip down some quality plywood or flooring material to a dimension that allows the spline to snugly fit both grooves of two adjoining boards. Installation of the spline is quite simple. There are just a few key things that need to be accounted for when installing it at the job. Cut a groove for the spline where necessary, using a router bit designed for the thickness of the flooring and the spline profile. Then, abut the spline to the length of the board or overall run. Use a polyvinyl acetate or carpenter’s wood. Apply a thin bead of glue to the bottom side of the receiving groove. Be careful not to overfill. Too much glue in the groove can cause the adhesive to push out and glue adjoining boards together. You don’t want this to happen. The objective is to
simply glue the spline to the board it has been inserted into. Next, insert the spline into the groove. Once the spline is placed snugly in the groove, it should be nailed in place using a flooring nailer. Fasteners should be placed at the intervals necessary for the flooring being installed,
per National Wood Flooring Association or manufacturer guidelines. To ensure the new spline remains in the proper position and and does not displace, use the groove side of a piece of scrap flooring to secure it while nailing it into place.
Brett Miller is vice-president of technical standards, training, and certification for the National Wood Flooring Association, an international not-forprofit trade association representing all segments of the hardwood flooring industry. Brett has been in the hardwood flooring industry since 1991. His passion began as an installer, sander and finisher of wood floors, and then progressed to being a successful business owner, wood floor inspector, commercial and residential project manager, regional manager for a large finish manufacturer, technical standards writer and an instructor. Brett can be reached at brett.miller@nwfa.org.
\\ Spline is required when installing or assembling any parquet pattern where two pieces of wood adjoin.
EYE SPY
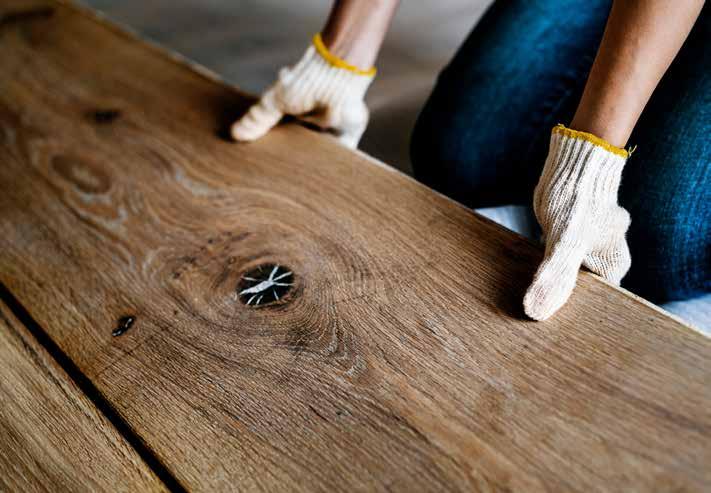
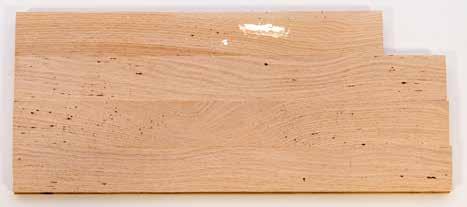
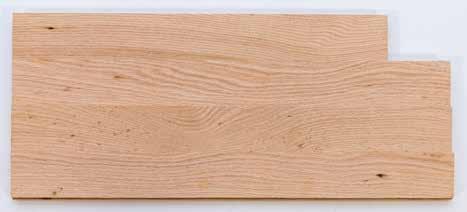
Causes, prevention and fixes for black spots in red oak flooring
By Todd Schutte
In recent years, the resurgence of lighter-toned hardwood floors has led to the return of a long-standing issue in red oak flooring: the mysterious appearance of dark spots. These blackish marks, once a concern in the late 1980s and early 1990s, have re-emerged as homeowners and contractors increasingly opt for natural or white-stained floors instead of the darker brown and grey-toned finishes that dominated for the past quarter-century.
THE ISSUE AT HAND
When a new red oak floor is installed or an existing one is sanded and refinished, a common scenario may unfold. Initially, there are no visible issues with the wood or installation. However, once a white stain is applied and sealed with a waterborne finish, dark spots may begin to appear in a random pattern across some of the boards. One would think these marks must be from external contamination, such as iron deposits from the errant shavings of a scraper. However, these markings originate from within the wood itself, specifically in the soft grain vessels of those individual boards.
UNDERSTANDING THE CAUSE
The consensus among industry experts is these black spots result from the tree’s natural defensive response to damage, infection or microorganism colonization. This response leads to the formation of a dark, gum-like substance within the open grain vessels of the wood. Though kiln-drying stabilizes the substance, the process does not heat the wood to a temperature high enough to render it completely insoluble. Consequently, when alkaline and polar solvents found in many modern sealers and finishes are applied, the substance reactivates and migrates to the surface, creating the unwanted dark spots.
PREVENTION STRATEGIES
Since the underlying cause of the spots origi-
nates from the tree itself, eliminating the issue entirely is impossible. However, several strategies can help minimize its occurrence and prepare wood floor owners to understand what could occur.
The initial and most effective approach is to educate the homeowner or wood floor owners about the potential for these spots to appear. By discussing this issue upfront, flooring professionals can ensure clients understand these marks are a natural characteristic of red oak and not a flaw in workmanship.
When possible, contractors should inspect boards for visible signs of dark deposits before installation. While this is challenging because the spots often remain hidden until the finishing process begins, it’s nevertheless worth the effort to potentially catch any signs.
Because life-form deposits that cause black spots are soluble, water-popping a new install or after the first cut on a re-sand should bring any potential spots to light. Spot-popping problem boards or areas between every cut can also be beneficial as the more spots that are made visible and sanded off with each cut, the better chance of significantly minimizing any residual material from being drawn out once the stain, sealer and finishing process starts. However, it’s important to remember this could open up other cells containing the black material, creating additional spotted areas, though usually on the same boards.
While the ‘thin to win’ theory isn’t a general recommendation with sealer application, since these spots emerge due to greater solubility of the dark deposits in waterborne finishes, applying multiple thin coats in this instance, instead of a single thick coat, can help control the issue. Reducing exposure to water provides less emergence of spots and the resulting initial sealer film helps to minimize any others popping up. This method minimizes the amount of moisture that penetrates the wood, thereby reducing the likelihood of reactivating the dark deposits.
In cases where black spots still appear after sealing, contractors can use waterborne game line paint to touch up affected areas. This method involves carefully blending a light beige or customized paint mix into the grain pattern to create a natural look. Touching up the grain vessels should be handled like a stain repair,
dabbing on the paint and feathering it out in the same direction as the grain and spot pattern with an artist’s brush. Good feathering and the right colour match are key to making this look natural.
The application of white stain is not enough to seal the dark deposits into the vessels, and they’re typically not visible once the floor has been sanded, so staining a red oak floor may be a waste as any residual dark spots will still pull up through the stain. Because of this, using a thin coat of white-pigmented sealer will minimize deposits and build to the desired colour. Then, touch up any spots, as needed, with the paint blend and apply clear coats of waterborne finish over the top to protect it all.
Although solvent-based sealers could prevent black spots from appearing, they tend to yellow the wood over time, making them unsuitable for achieving a white or natural aesthetic.
A LONG-TERM PERSPECTIVE
In many cases, black spots will fade over time. Several contractors have observed and reported that spots become significantly less noticeable in only one year. Rather than aggressively re-sanding a floor to correct the issue, and unnecessarily taking away from the life span of the floor, a little patience and minor paint may be a more effective short-term solution while the spots fade.
With the growing popularity of white and natural finishes in hardwood flooring, red oak’s tendency to develop black spots remains a challenge for flooring professionals and homeowners alike. While complete prevention is not feasible, understanding the science behind these spots and applying strategic finishing techniques can help minimize their impact. Open communication with customers about this natural characteristic of red oak ensures realistic expectations and helps maintain the integrity of the final flooring project.
Todd Schutte is director of global eLearning for Bona AB in Englewood, Colo.
\\ TOP: Dark spots can emerge due to greater solubility of the dark deposits in waterborne finishes. Applying multiple thin coats of the finish can help control the issue. BOTTOM: Because life-form deposits that cause black spots are soluble, water-popping a new install or after the first cut on a re-sand should bring any potential spots to light. Photos courtesy Bona.
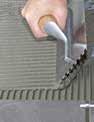
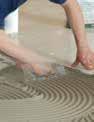
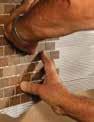
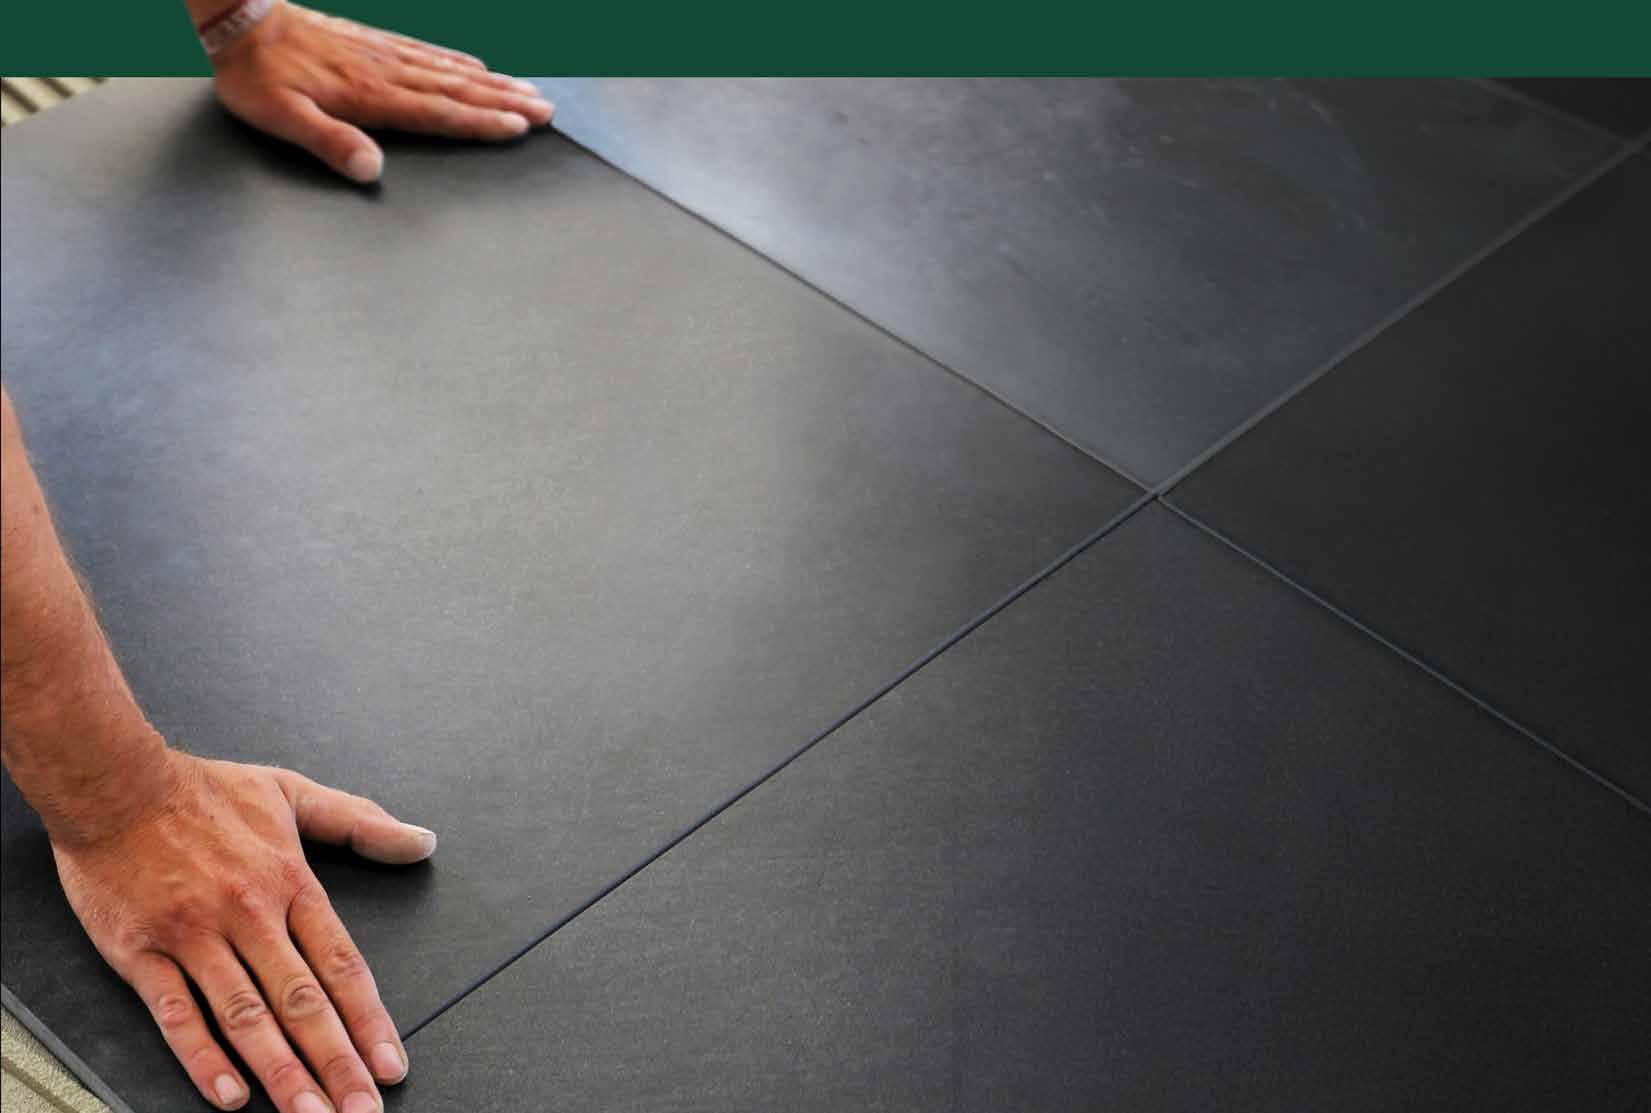
PREMIUM MORTAR SYSTEMS
POLYMER-MODIFIED MORTARS
LARGE-FORMAT TILE MORTARS
Innovation Meets Installation.
We understand that offering quality products is not nearly enough. You need a partner who will stand by you, before, during, and after the sale to help you achieve success. A partner with an experienced technical support team that helps every project go smoothly, and who helps protect your good reputation by offering the quality, personal service and support you need.
THE RIGHT PRODUCTS
Every installation has unique needs, which is why PROMA offers one of the widest selections of quality setting materials available. Installing in a high-traffic or exterior environment under a tight deadline? PROMA provides the high-strength, rapid-curing PRO QUICK PLUS SYSTEM. Do you need an easy-to-use, one-step setting material that combines the extreme performance and superior strength of a two-part system? PRO HPX does exactly that and is truly revolutionizing the industry. Are you installing moisture-sensitive stone, such as green marble? PROMA offers compatible setting materials for this –PRO GROUT XTREME and PRO SEAL & SET 100 NS.
INNOVATIVE SOLUTIONS
Always proactive, always listening, always moving forward. PROMA’s research and development team works closely with our customers and with the world’s top raw materials suppliers. This synergy allows PROMA to develop new and innovative products that excel beyond current industry standards and enables us to bring tomorrow’s technology to today’s products.
SUPERIOR QUALITY
PROMA offers one of the broadest array of products available so you can choose the right solution for any given job. Our products have been engineered to provide user-friendly, time-saving jobsite characteristics and exceptional, long-lasting performance through strength, flexibility and durability.
ECOLOGICAL AND RESPONSIBLE
Many of PROMA’s products have been formulated to have minimal impact on the environment, are safe to apply, and do not contribute to unfavorable jobsite conditions or adversely affect indoor air quality. Some also help contribute toward attaining credit requirements within the LEED® (Leadership in Environmental and Energy Design) USGBC and CAGBC Rating Systems, and WELL® (International WELL Building Institute) certification program. Products have achieved independent validation by the renowned environmental auditor Vertima.
SECRETS OF MULTI-DISC SANDERS
The most important things to know
By Wayne Lee
It’s best to start backward and move to where we are now. Drum sanders became belt sanders, scrapers became palm sanders, dust control became the standard and hardplates became multi-disc sanders.
The first multi-disc unit I saw was the Trio from Lägler in 1994. The tool was not created to replace the big machine, but to reduce stress on the body, remove imperfections and minimize the scratch. The driving force of the Trio was to flatten the floor and complement the big machine. Today, we have multiple options for multi-disc sanders or, as I like to call these tools, paper turners. The paper does the work and it’s the mineral that cuts.
UNFORGETTABLE FEATURES
Multi-disc sanders may use paper sizes from four to eight inches. Even though the units are all unique and different in their own way, each offers the same feature with regards to getting imperfections like chatter, wave and dish-out out of the floor. Hard plates can do this as well, but unlike today’s multi-disc units, they can leave a harsher scratch. I see this as the best feature of the multidisc. It can get a floor flat while reducing its own scratch at the same time.
The next feature of multi-disc sanders is how they complement the big machine. Yes, I see social media posts of folks doing the total job with just the multi-disc and a jitter-bug (also
known as a palm sander), but when you have a remodel job with some bad overwood or loose floors, it can take more time to get the floor flat.
One or two cuts with the big machine on angles will speed up the job. It is not uncommon to cut a floor on a 15 to 20 degree with 40 or 50 grit (big machine) to get it flat, then jump to 60 grit (multi-disc) to remove the angle cut using a multi-disc sander. The next best feature is you can put the untrained floor mechanic behind the unit. Pushing it like a shopping buggy cannot get any easier for the newest crew member.
Let there be light directed at the floor. This feature offers light with a purpose. Seeing the fine scratch can be a challenge at times,
so having scratches exposed with bright LED lights is a must.
Having choices with power is great as well. In some older homes, there are still screw-in fuses and getting 220-volt is a battle. The 115/120volt units give people an option when dropping a 220-volt line is otherwise impossible. (The 115/120-volt units do require a ‘clean’ line to prevent popping breakers or fuses.) These units are not as heavy and one person can tote them in and out of the home. They cut flat, scratch less and floors look amazing once finished.
BIG BENEFITS
The most important benefit of using multi-disc units is the final flat, scratch-free look of the floor. Zero wave, zero chatter, zero dish-out, zero drum marks, refined scratch — the perfect surface that lets the finish lay right on the floor like it was meant to be. Multi-direction floors, mixed species, flat sawn floors, wide boards, floating floors, engineered flooring and custom installs fall right into the benefits of when and where to use multi-disc machines. The multi-disc units can also be used on factory finished floors.
With diamond drivers, you are able to cut through the finish quickly while saving money on high-performance sandpaper. Once the finish is cut off, you can move forward with the big machine to remove any micro bevel or overwood. Once more, the multi-disc is complementing the big machine while saving time, money and body fatigue.
MINIMIZE SCRATCH
Every machine has a cutting point and footprint. While it seems like it would not matter how you travel across the flooring with these units, that is far from true. The multi-disc units that work like the buffer still move right to left and up and down with handles. The multi-disc units you can move around like a shopping buggy have slight slope. The main heads rotate opposite the disc on almost all units. There are a few that rotate in the same direction as the main head and that can change the way the unit cuts. The most important factor is they all drive paper and that paper will leave a footprint.
First, the size of the paper matters. Four-inch paper almost always is not round but has a flower shape. This helps with the cleanup of its own scratch. If it hits a void and then hits it again, it helps to reduce its own scratch much like inter-coat pads and sandpaper. It cuts, cleans, cuts and cleans while you are using the cutting point on the machine.
The friction drive units have a two-degree pitch to the drive disc. The main head spins counterclockwise, making the drivers spin clockwise. Units like this have more pressure on the outer edge of the pads. They flex a small bit and are aggressive. They flatten fast with a smaller footprint. Some units have six discs while others have
five. The five-disc unit will cut faster and flatter than the six-disc unit. The scratch is easy to hide when using the correct grit sequence with either of these types of units.
Most people water pop so the ‘angel hair scratch’ hides when stain hits the floor. The seven and eight-inch units cut flat and are planetary driven with a belt, gears or chain and can be bigger and heavier. The extra weight and size does change the footprint to a much wider base and cut. They do leave a longer scratch due to the size of the paper. Get down on the floor with a bright LED beam and look at how each unit cuts, cleans and leaves a scratch.
Asking a few manufacturers’ representatives, they will all tell you that theirs is the best, fastest and hides the scratch. Ask me and it’s all about your style, needs and how they can complement your sanding jobs.
This affects me when I see the last coat of finish. The flat floors look amazing. I do not have to spend more time reducing the scratch. The reduction of stress on the body is huge and having the ability to control the speed on the unit aids with the paper’s life. Training a new floor mechanic is easy and fast. It bringsallofusuptothenextlevel.
Multi-disc sanders are here to stay. They have changed the rules for how well a floor can be sanded.
Wayne Lee is business development and technical advisor for Middle TN Lumber in Burns, Tenn. He can be reached at wlee@midtnlumber.com. This article is an abridged version of the one that first appeared in the April/May 2025 edition of Hardwood Floors, the magazine of the National Wood Flooring Association.
\\ Line up of multi-head sanders. Photo courtesy National Wood Flooring Association.
NATURAL WOOD PRESERVER
Hardwax oil offers oh so smooth finishing touch
By Keith Hardisty
Hardwax oil is a wood finishing product that combines natural oils and waxes to protect and enhance the beauty of wood. Originating in Europe, this finish has gained significant traction in the North American market due to its appearance, ease of application and long-term durability. Unlike traditional polyurethane finishes that form a plastic-like film, hardwax oil penetrates the wood while leaving its texture and grain intact, resulting in a more natural aesthetic.
STEPPING INTO THE PAST
Before the advent of synthetic finishes, wood was traditionally protected using natural substances like pine tar and linseed oil. By the late 19th century, linseed oil had become a widely used wood finish, often supplemented with beeswax for added water resistance. However, this combination required frequent maintenance and lacked durability.
Almost a century later, in the 1990s, European manufacturers developed the first hardwax oil finishes by combining natural oils and waxes into a single formula. This innovation resulted in a product that penetrates deep into the wood while also forming a protective wax layer on the surface, creating a durable and easily maintained finish.
ALL THE RIGHT INGREDIENTS
Hardwax oil is formulated using a combination of oils, waxes and additives. The oils are typically from plant-based sources, such as linseed, safflower, soybean, tung and thistle. These oils penetrate the wood and provide deep protection while enhancing its grain. Natural hardening waxes like carnauba and beeswax form a thin protective layer on the wood’s surface, increasing water resistance and durability. Some formulations include pigments for colouration, dryers to speed up
curing or solvents to aid in application and penetration.
Single-component hardwax oil cures oxidatively by reacting with oxygen in the air. This process can take up to 30 days for a full cure, requiring caution against moisture exposure during this time.
Two-component hardwax oil includes a hardening agent that accelerates the curing process, allowing the finish to dry and cure in about five days. This results in superior durability, quicker usability and better chemical resistance compared to single-component formulations.
Some hardwax oil formulations contain zero volatile organic compounds (VOCs), making them an environmentally friendly choice for indoor use. Others may contain minimal VOCs, depending on the solvent content used to adjust drying time and workability.
VOCs are chemicals that evaporate into the air, contributing to indoor air pollution. People
sensitive to chemicals often prefer zero-VOC hardwax oils, as they emit fewer airborne irritants. Many manufacturers also offer certifications for compliance with indoor air quality standards, such as Greenguard Gold or Eurofins gold label.
The solid content of hardwax oil is determined by how much material remains on the wood after application and curing. Higher solid content results in better coverage and durability, with some products offering 100 per cent solids, meaning no solvents evaporate during drying.
FLOOR FINISH PROS AND CONS
Hardwax oil has several advantages over traditional polyurethane and varnish finishes. Hardwax oil maintains the original texture and grain of the wood without creating a plastic-like film. Contrary to polyurethane, it does not build up a plastic layer on the surface. As such, hardwax oil provides a soft, natural look in a matte to satin sheen finish with perfect clarity. Unlike film-forming finishes, which require complete sanding and refinishing, hardwax oil allows for spot repairs. Many hardwax oil products have low or zero VOC content, making them safer for indoor use. When properly maintained, hardwax oil surfaces do not require complete refinishing and can last indefinitely.
Despite the many benefits, there are some drawbacks. Hardwax oil does not create a thick plastic build layer, making it more prone to staining if spills are not addressed within a reasonable time. Also, it requires periodic reapplication to renew the surface. But while hardwax oil requires a bit more maintenance than polyurethane, reapplications fix minor damage, making the floors look new again.
A LESSON IN APPLICATION
Applying hardwax oil is relatively straightforward but requires proper preparation. The surface must be sanded correctly to allow penetration of the oil. Over-sanding with too fine a grit can prevent adequate absorption. The oil is spread using a pad, trowel or buffer, then allowed to penetrate the wood. Excess oil is then removed and the surface polished with a buffing pad. Depending on the product, drying times vary from 24 hours to several days.
With proper care, a hardwax oil finish will develop a beautiful patina over time, enhancing the character of the wood. To maximize its life span, the surface should be vacuumed or dry dust mopped regularly. Wet cleaning
\\ OPPOSITE PAGE: Rift-sawn white oak flooring and spiral staircase finished with Rubio Monocoat Oil Plus 2C, a wood protector that colours and protects in one single layer. ABOVE: Walnut parquet floors at the Santa Anita horse race track in California, also with two-component finish Oil Plus 2C.
should only be done with a manufacturer recommended soap and water never used in excess. Generic household cleaners may strip the finish and leaving standing liquid on the surface for a prolonged period may result in staining. Periodic maintenance may be required with a renewing oil.
SETTING A STANDARD INSIDE AND OUT
Hardwax oil may be used for beautifying and protecting a variety of wood surfaces across residential, commercial and industrial applications. These include wood flooring, stairs and millwork like baseboards, among others. Additionally, hardwax oil is well-suited for surfaces such as cork, wood fibre panels and en-
gineered wood products.
In high-traffic commercial spaces, such as hotels, restaurants and retail stores, hardwax oil provides a durable and repairable finish that withstands wear while maintaining a natural aesthetic. In residential applications, it enhances the warmth and character of wood surfaces while allowing for easy maintenance. Hardwax oil is also commonly used in historic building restoration, where maintaining the authenticity of original wood surfaces is a priority.
Hardwax oil is formulated for both interior and exterior applications, making it a versatile choice for a wide range of woodworking and architectural projects.
As marketing director of Rubio Monocoat Canada, Keith Hardisty leads the promotion of innovative, plant-based hardwax oil wood finishes. Rubio Monocoat’s unique molecular bonding technology allows for a one-coat application that is easy to use, highly durable, volatile organic compound-free and enhances the natural beauty of wood. Keith can be reached at media@rubiomonocoatcanada.com.
THE SAME BUT DIFFERENT
Advancements in technology improving how real wood floors perform
By Brian Beakler
While most solid and engineered plank and strip wood flooring products perform predictably, they do have limitations. For instance, traditional wood flooring formats struggle with specific performance attributes, such as resistance to impact, significant static load and maintaining dimensional stability in high or low relative humidity environments. These limitations have historically restricted the environments where wood flooring could be installed, paving the way for other flooring products like vinyl-based sheet goods, luxury vinyl tile and plank, ceramic tile and rigid vinyl (SPC).
Over the years, wood flooring manufactur-
ers have demonstrated remarkable ingenuity in developing products with features to address known issues. Some manufacturers attacked low-hanging fruit — the most easily achievable improvements — by replacing plywood cores with alternative wood and nonwood-based composite materials to enhance hardness and stability. In contrast, others have implemented chemical and physical modifications to the wood (lumber or decorative wood veneer) to achieve comparable performance improvements. This innovative approach has led to the formation and development of niche markets focused on these unique products showcasing enhanced capabilities.
Thermal treatments have been applied to wood for decades to improve its resistance to dimensional changes in extreme environments and to fungal degradation. Scandinavian technologies fine-tuned thermal wood modification, specifically with external applications in mind (decking, siding and fascia). The thermal treatment process alters specific chemical components in the wood’s cell wall, limiting its use mainly to non-structural elements. While thermal treatment enhances dimensional stability, it also degrades some of the physical properties of wood. Some engineered wood flooring manufacturers in the United States, Europe and China experiment-
SENIOR LIVING AT ITS FINEST
Flooring choices add touch of luxury to Calgary aging-in-place facility
By BECKY THAYER
Nestled in Calgary’s Cliff Bungalow-Mission neighbourhood, Riverwalk Retirement Residence, developed by Verve Senior Living, is a vibrant community offering a continuum of care, from independent supportive living to memory care. Designed to foster connection, wellness and comfort, the residence is thoughtfully crafted to provide a luxurious and welcoming environment for its senior occupants.
The flooring materials lay the foundation for a cohesive and visually engaging interior. A mix of porcelain tiles from Olympia Tile, wood-look luxury vinyl tile (LVT) from Polyflor Canada and tailored carpets from Shaw Contract define the character of each space. Porcelain tiles in high-traffic areas like the lobby and spa offer durability and sophistication, while the LVT provides warmth and texture in social spaces. Soft, textured carpets in lounges, dining rooms and suites bring comfort and a sense of intimacy.
Walls throughout Riverwalk enhance the design with rich textures and thoughtful finishes. In the lobby, marble slabs, stained wood millwork and vinyl wall coverings create a layered and elegant look. These elements are softened by custom screens and sheer drapery, filtering light and adding depth. Decorative lighting fixtures, including elegant pendants and sconces, highlight these materials and add warmth, creating an inviting atmosphere throughout the 12-storey facility.
Patterns and finishes across the residence add visual interest and depth. Subtle transitions and textures between flooring types ensure continuity, while wall details like painted millwork, stained panelling and
decorative tiles provide character and charm. Thoughtfully placed artwork, accessories and curated furnishings add personality and vibrancy, making every space feel unique yet cohesive.
In wellness areas, such as the spa and fitness centre, materials promote tranquility and durability. Large-format tile in a stone-look finish, light and fresh in colour from the Duluxe series by Olympia Tile, pairs with decorative wall tiles to create a serene and practical environment. Porcelain tiles complement these elements, while furnishings like spa chairs and fitness equipment prioritize both comfort and functionality. Private suites balance durability and coziness. The living areas feature LVT flooring from Patcraft, embossed with a wood-look in walnut colour, providing both durability and a warm feel in the lounge. This is complemented by soft carpets in the bedroom from Shaw’s hospitality group in a mid-value colour — not too light or dark — with a refined balance appearance that brings a subtle elegance to the space. Painted walls and accent tiles ensure each suite feels like home, offering residents a private retreat within the residence.
Becky Thayer is a practice leader at Newcombe Design Associates. Newcombe specializes in designing residential environments for seniors, including retirement residences, senior apartments, long-term care facilities and various healthcare settings like acute care, rehabilitation, mental health facilities, clinical practices and laboratories. Becky can be reached at thayer@newcombedesign.com.