


1. The laser engraver emits laser light. Placing any living body under the laser emission port (marked with an orange warning sign) is strictly forbidden.
2. Patients with photosensitive epilepsy are prohibited from using or approaching the laser engraver.
3. When using the laser engraver, the operator and anyone near the machine must wear laser safety goggles. Operating the laser engraver without goggles’ protection is not allowed. Our machine comes with a pair of safety goggles, but additional laser safety goggles need to be purchased separately. The goggles should offer wavelength protection of 400-445m(±5m), an outer diameter of +5, and a minimum L-level L5.
4. Avoid placing flammable materials near the laser engraver. When the laser engraver is running, closely observe it and avoid leaving it unattended to prevent the engraved objects from catching fire. Set up the laser engraver in a fireproof area and ensure proper ventilation. If possible, we recommend purchasing a fire extinguisher and keeping it nearby the machine.
5. Ensure there is enough space when operating the laser engraver. Engraving certain materials may produce smoke, so it's important to use exhaust equipment to vent the smoke out.
6. When the machine is running, avoid letting your body or other objects touch the laser beam, as this may cause serious bodily injury or beam reflection. Do not touch the radiator, as it may still be hot even after the laser engraver has stopped working.
7. Do not allow children or teenagers to use the laser engraver alone, especially children under the age of 14. Adult supervision is required at all times.
8. The operating temperature range of the machine is -10°C to 40°C.
9. The use of the laser engraver carries a significant risk of fire. When operating the machine, please ensure that someone is available to handle any potential fire emergencies at all times.

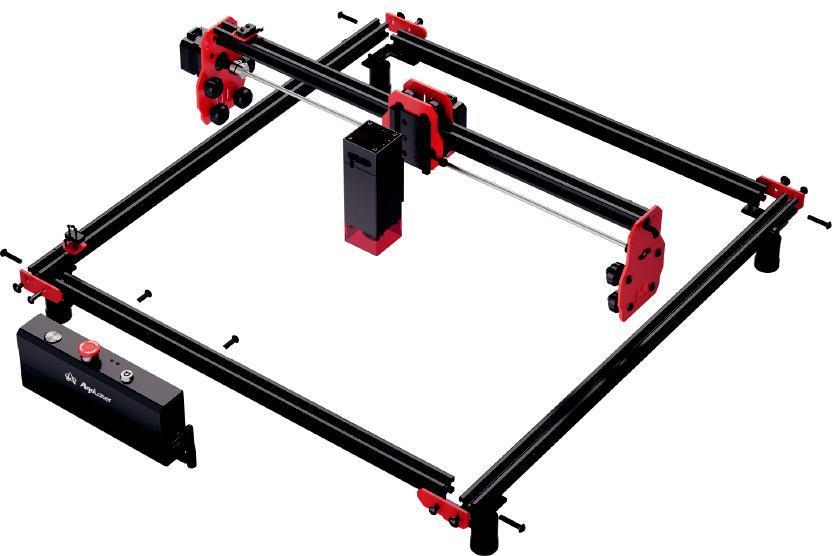
1.2.1 Machine
A
B
C
Front Frame * 1
Rear Frame * 1
Left Y-Axis Frame * 1 D
Right Y-Axis Frame * 1
X-Axis Frame * 1
Control Box * 1 G WiFi Aerial * 1
L-Bracket * 4 I
Limit Switch Mounting Plate * 1
Screw M5X8 * 4
Screw M5X14 * 17 M
Screw M5X25 * 6 O
M2.5 Allen Key * 1


End Plate * 4
Limit Switch * 2
Screw M2.5X6 * 2 N
Screw M2X9 * 4
M2.0 Allen Key * 1 P
M5X15X1 * 4 Washer
Screwdriver * 1
Wrench * 1
M3.0 Allen Key * 1 Q Brush * 1 R Laser Goggle * 1 S Power Cable * 1 T Support Foot * 4


01/ 18
Step 1: Place the Front Frame and Rear Frame ends flush with the sides of the Left Y-Axis Frame. and Right Y-Axis Frame. Secure using M5X25 Screws.
Assemble the X-Axis Component.
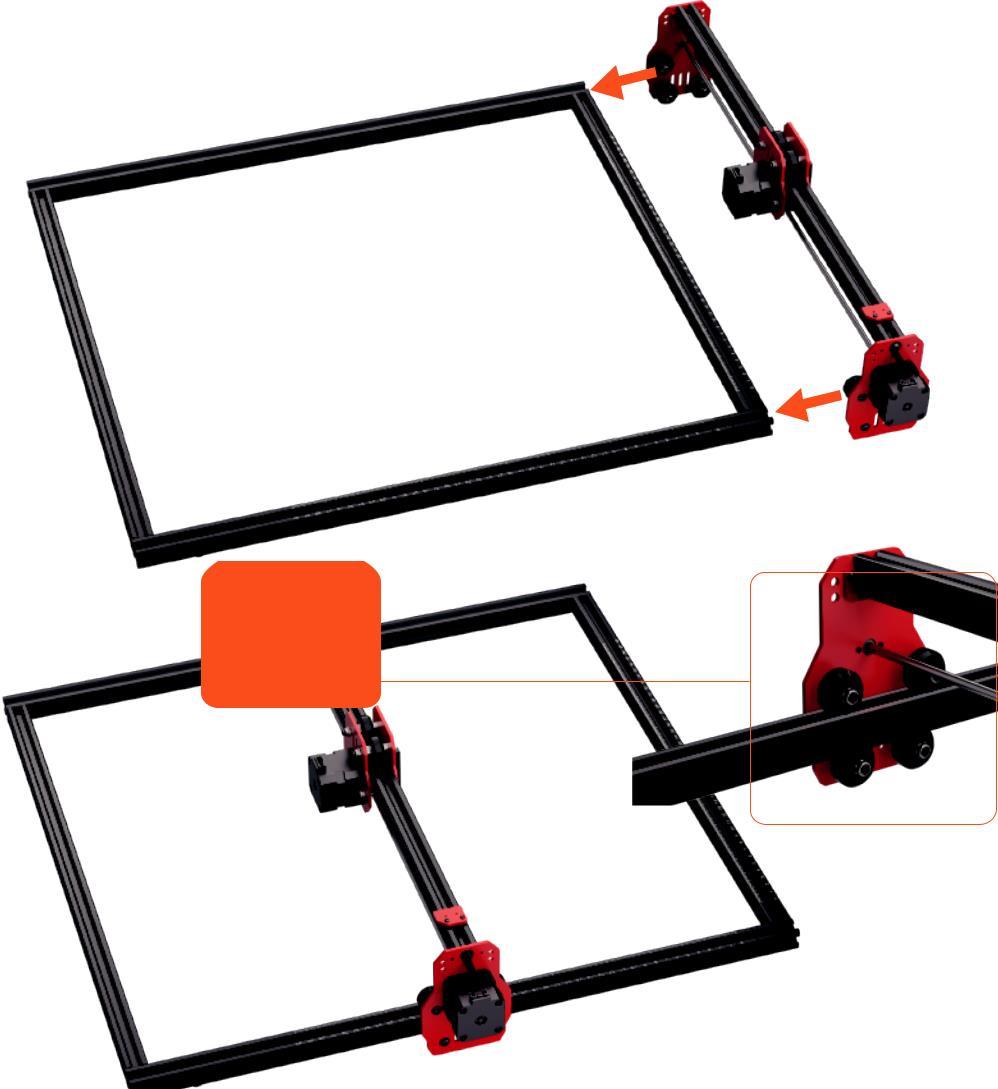
Step
Step 2: Finished

/ 18
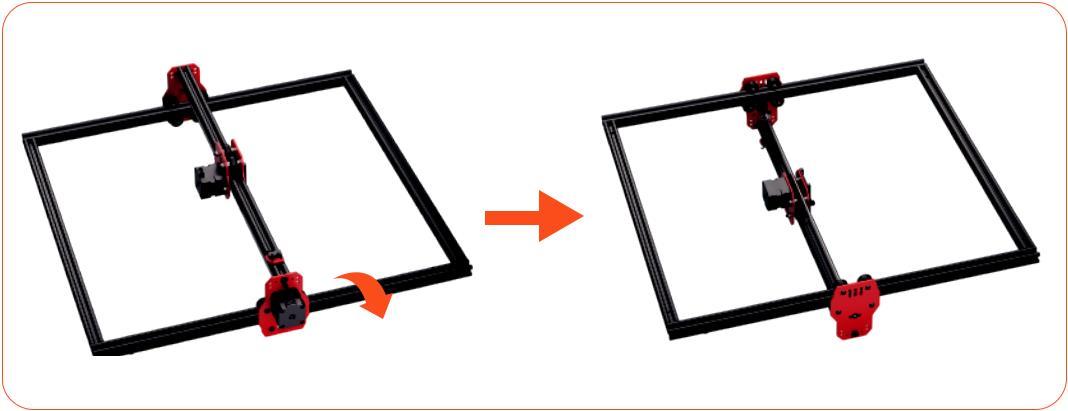
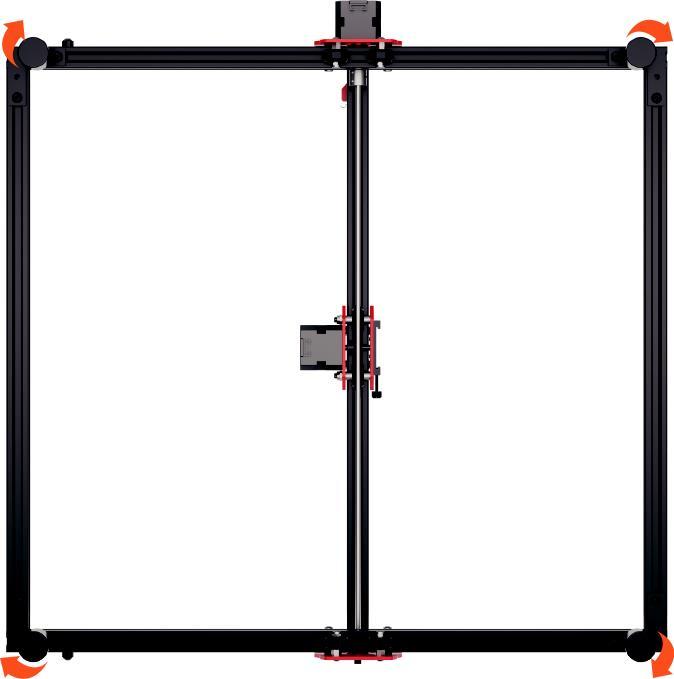
Flip the Machine

/ 18
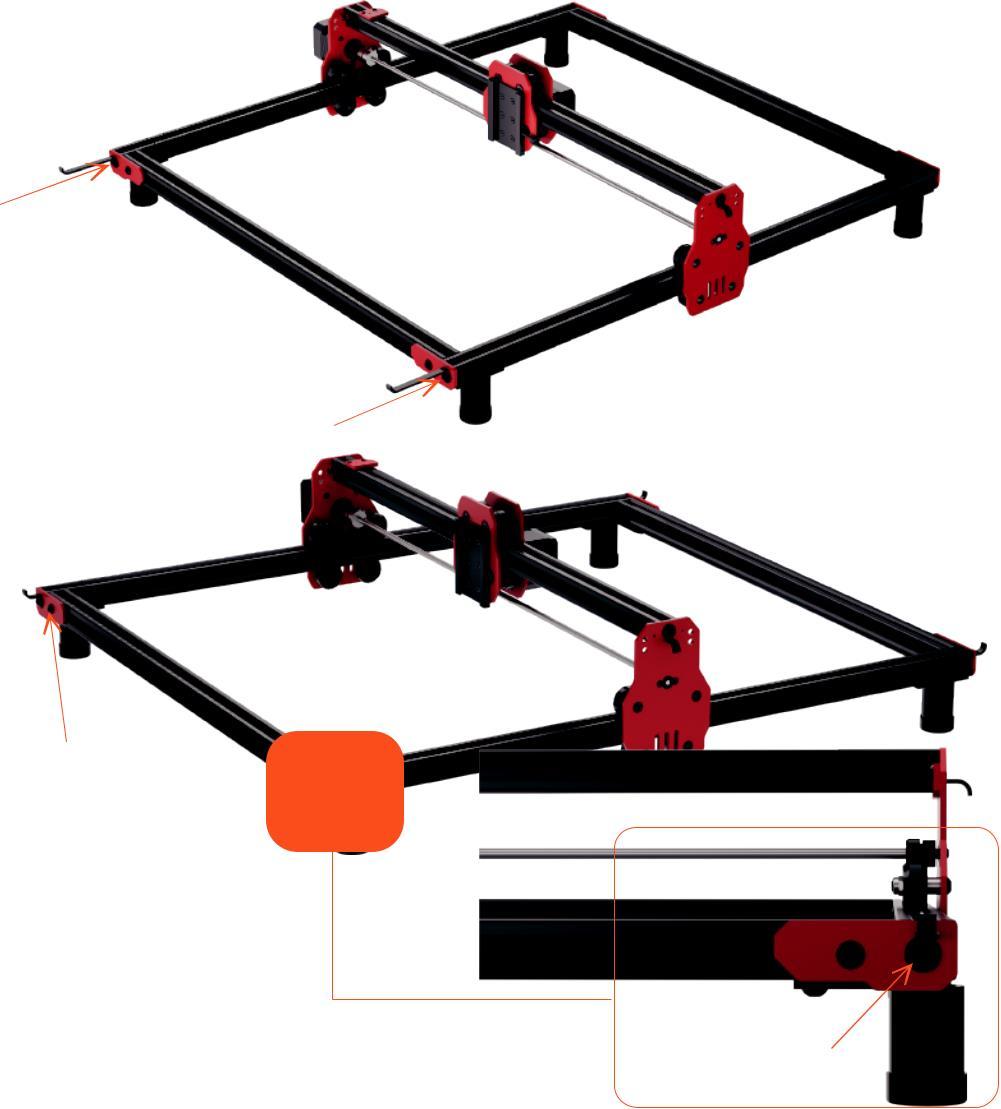
Assemble the L-Bracket.
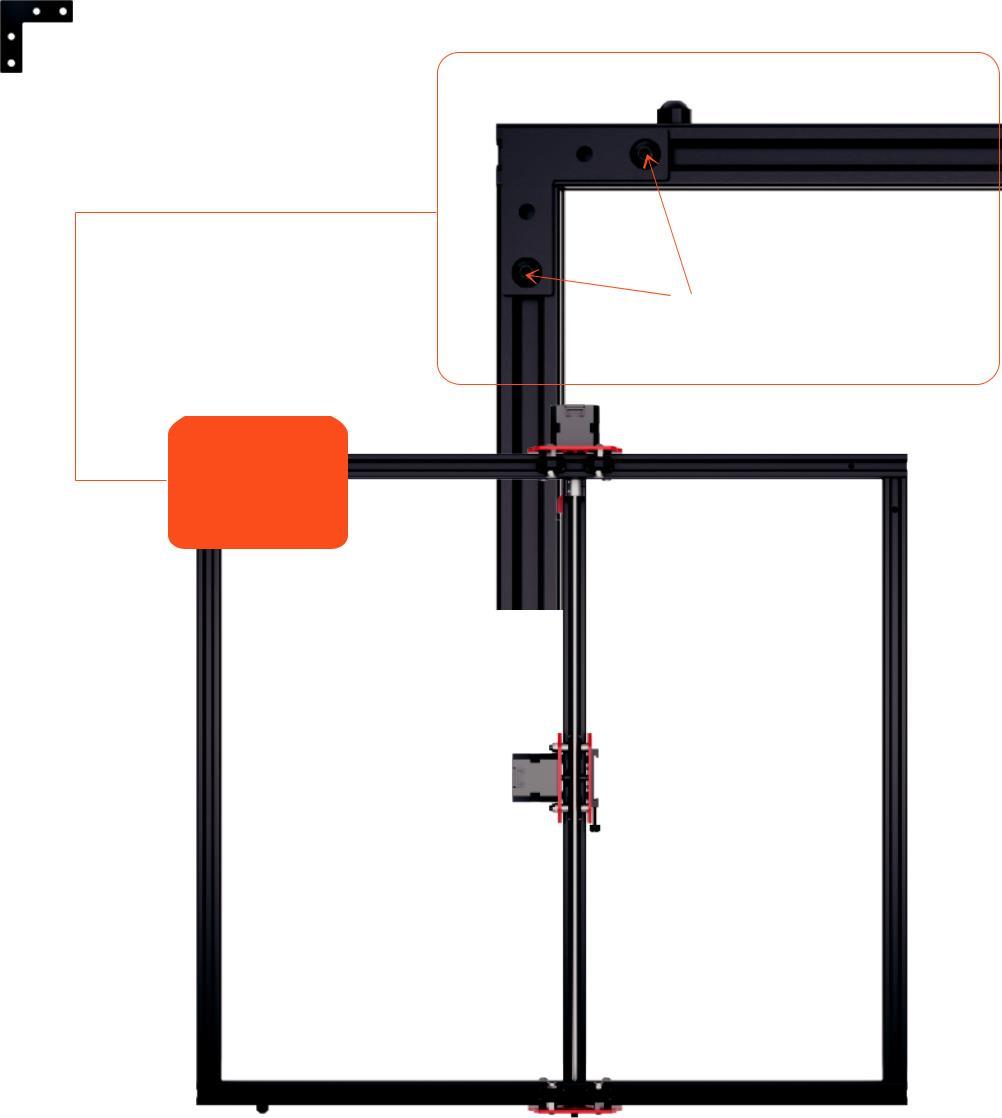
Step 4: Align the L-Bracket with the frame mounting holes. Secure using M5X14 Screws.
05/ 18
Assemble the L-Bracket.

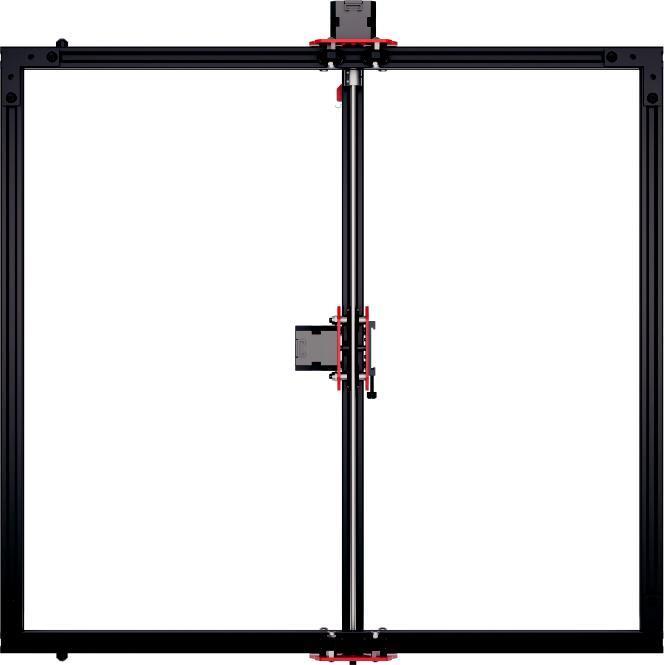
Step 5: Using the same method, install the remaining three L-Brackets. Secure using M5X14 Screws.
06/ 18
Assemble the Support Feet.

Step 6: Screw the Support Feet into the corresponding mounting holes on the L-Brackets in a clockwise direction.
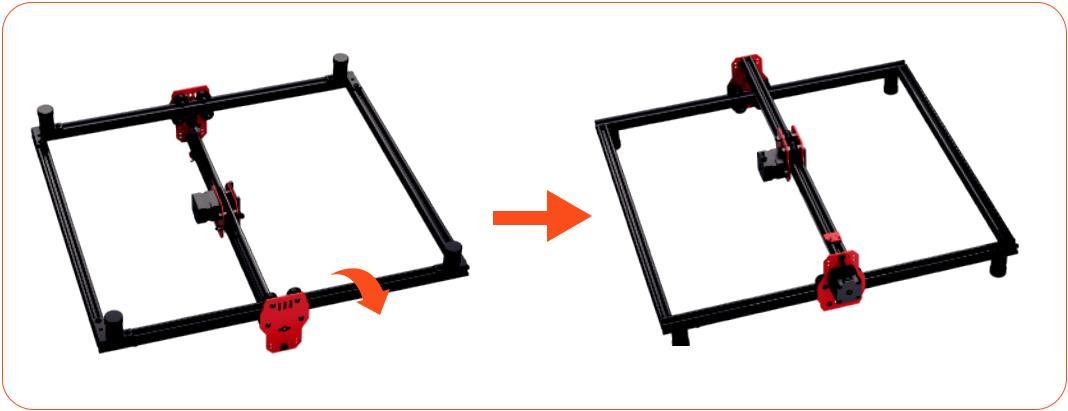
/ 18 Flip the Machine Again
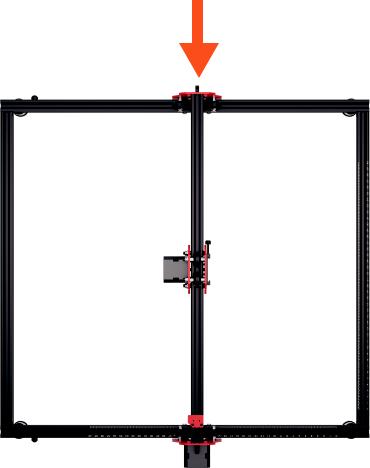
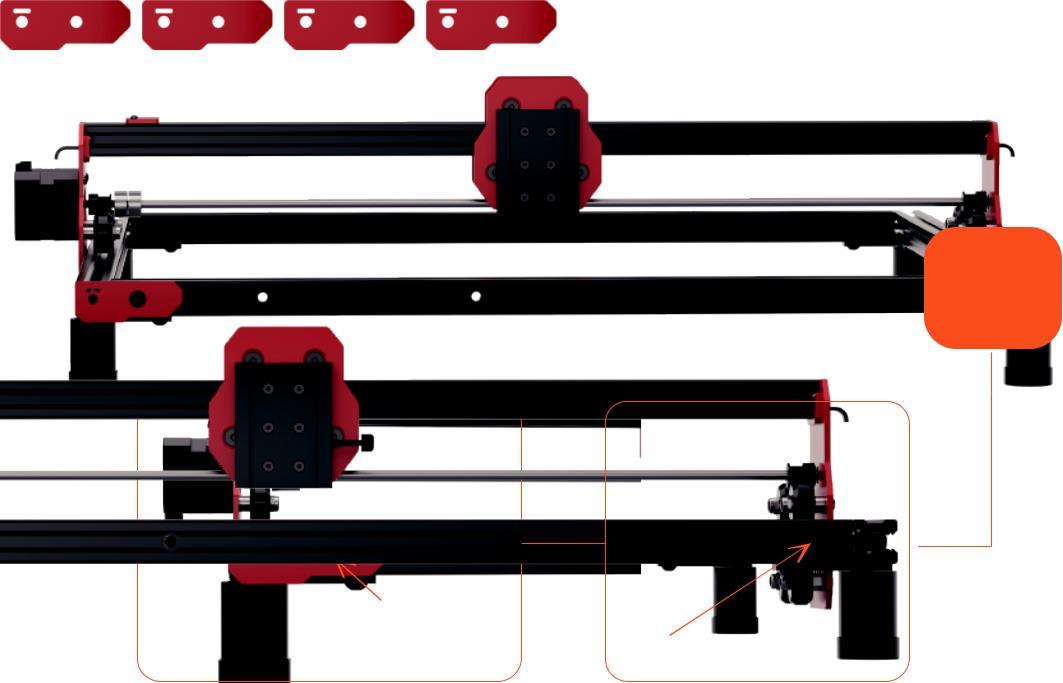

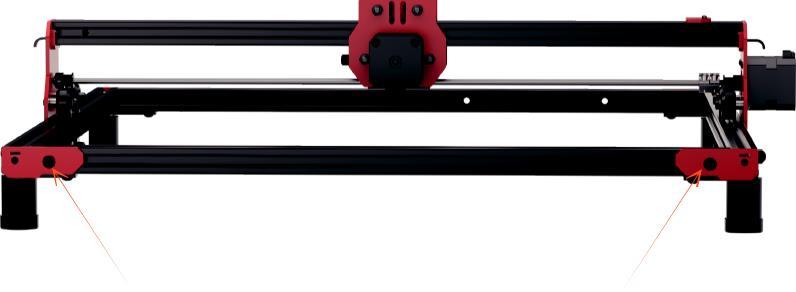
Step 8: Align the End Plate with this hole. Secure using M5X14 screws.
09/ 18
screw
M5X15X1 washer
Step 9: Thread the belt through the hole in the direction of the arrow. Secure the belt using M5X8 screws and M5X15X1 washers.
M5X15X1 washer
/ 18
M5X8 screw M5X15X1 washer
Step 10: The belt passes through the hole at the other end along the Y-Axis. Do not twist the belt, ensure it remains flat. Secure it M5X8 screws and M5X15X1 washers.
11/ 18
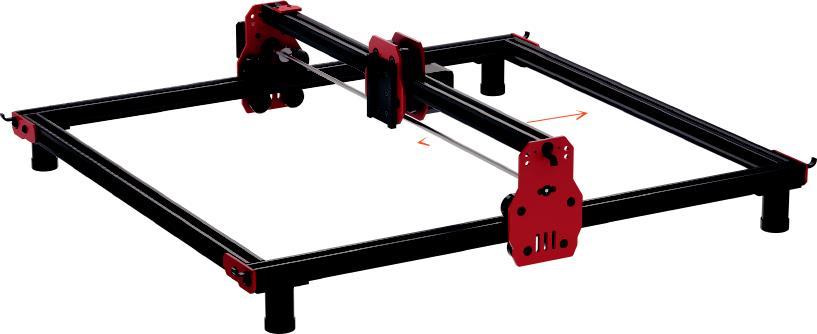
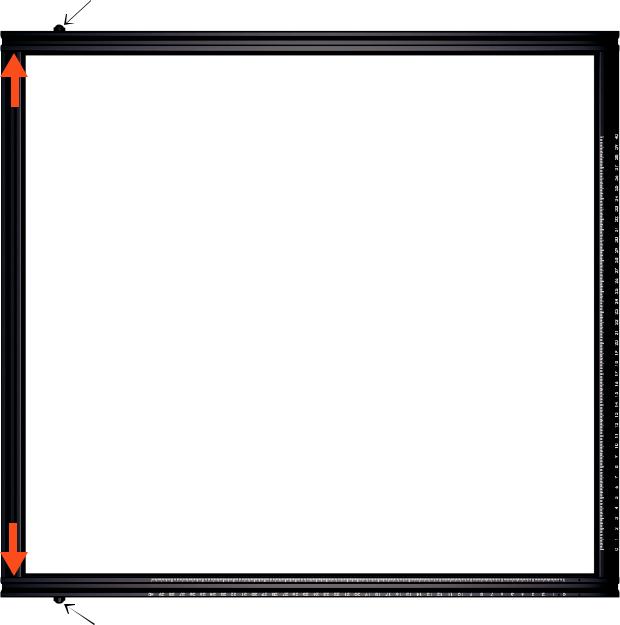
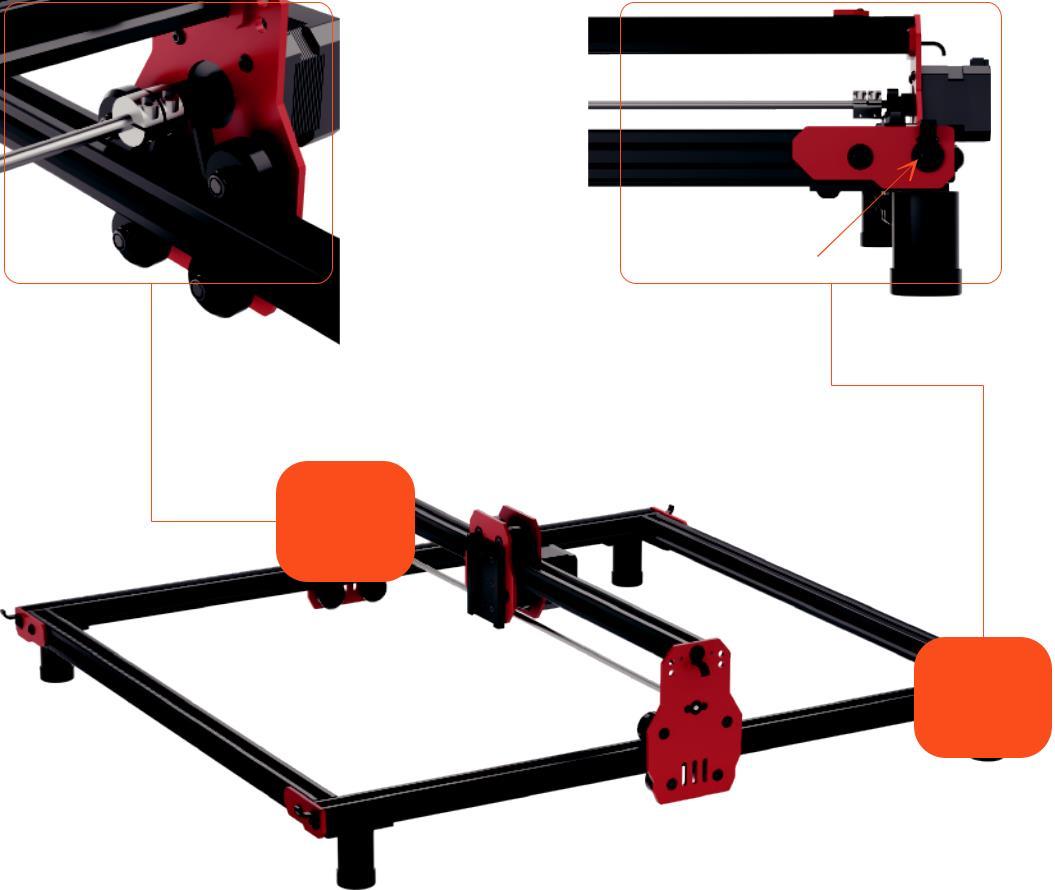
Step 11: Gently move the X-Axis by hand to check the belt tension. If it's too loose or tight, adjust accordingly.
12/ 18
Assemble the Limit Switch.
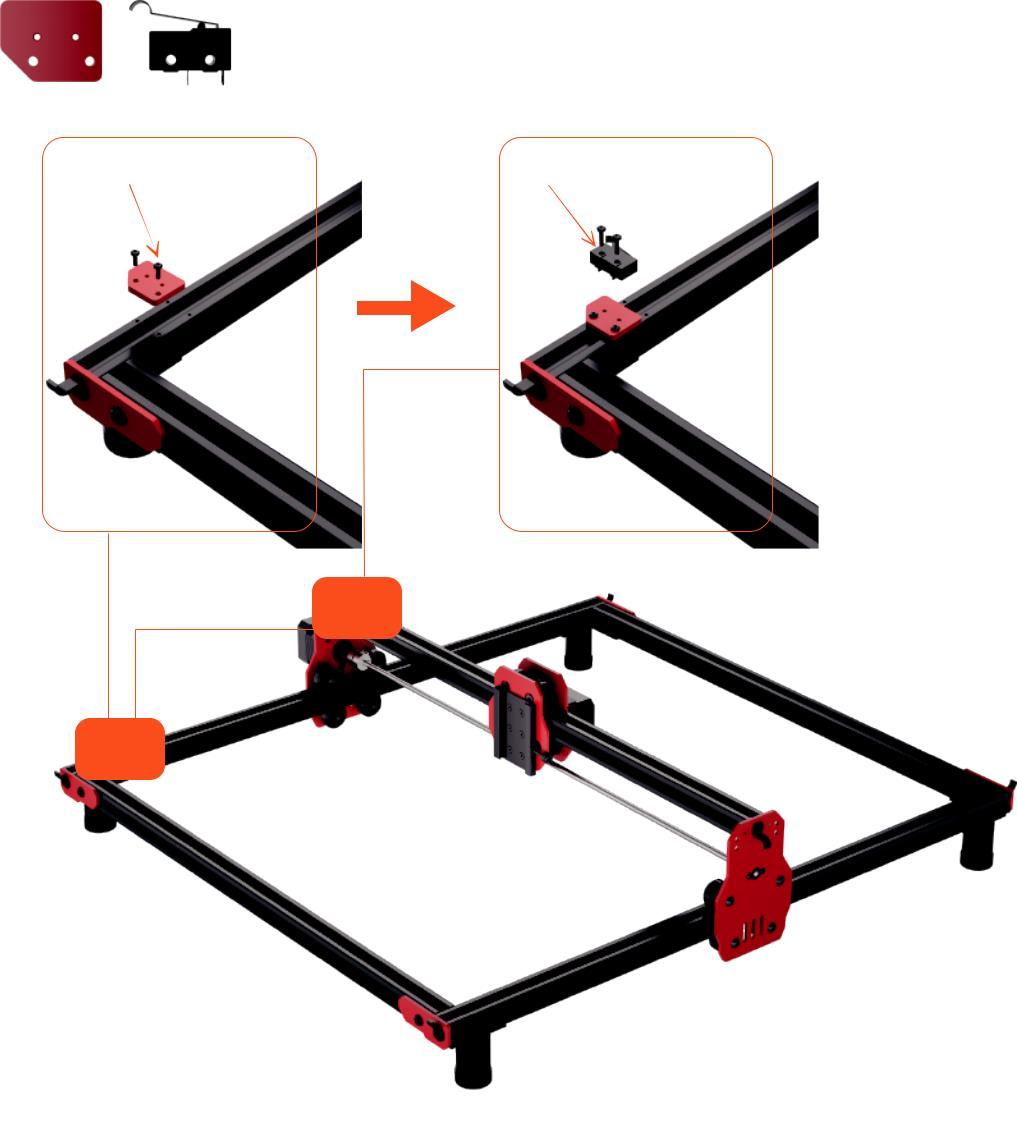
Step 12: Finished
Step 12: Secure the Limit Switch Mounting Plate using M2.5X6 screws. Secure the Limit Switch using M2X9 screws
18
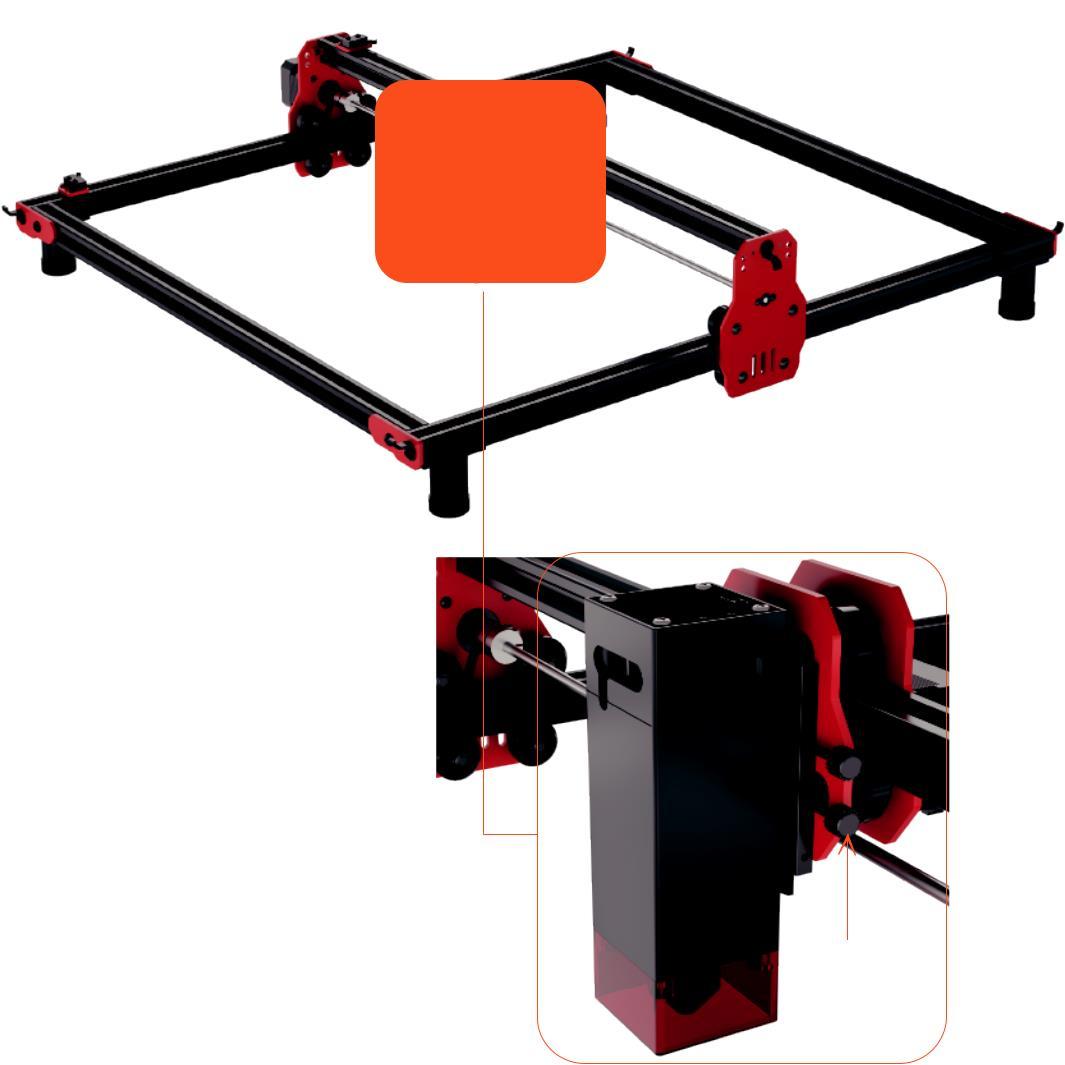
Step 13: Finished
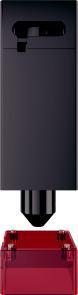
Step 13: Insert the rear dovetail groove of the Laser Module into the corresponding slot on the fixture. Tighten the screw clockwise to secure it in place.
14/ 18
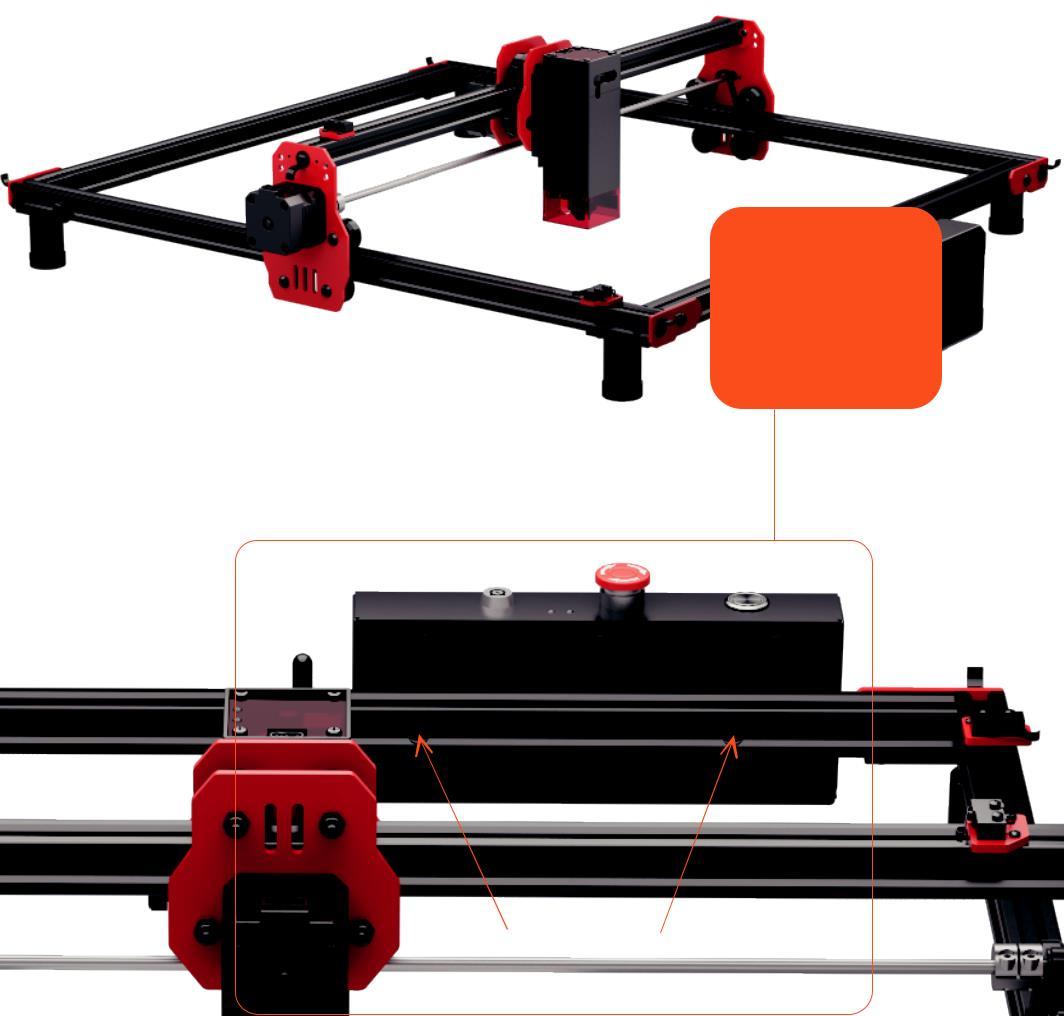
Step 14: Align the installation nut on the back of the Control Box with the mounting hole on the Front Frame. Secure it by using M5X14 screws.
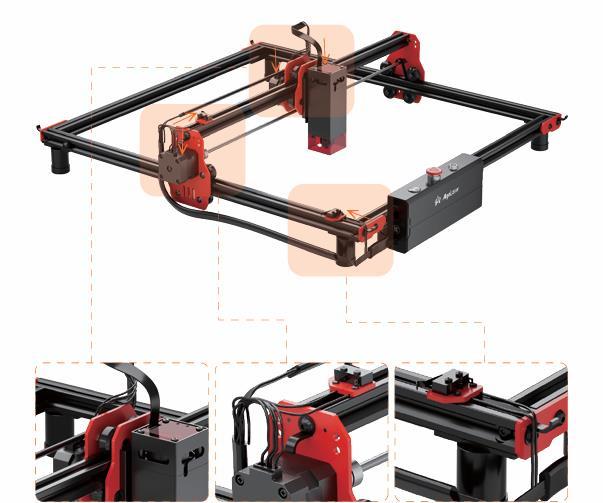

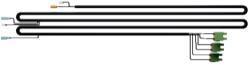
Step 15: Insert the cable connectors into the Limit Switches, Motors, and Laser Module Sockets in the sequence shown in the picture.
16/ 18
Assemble the main cable

Step 16: Secure the cables in the appropriate positions using zip ties.
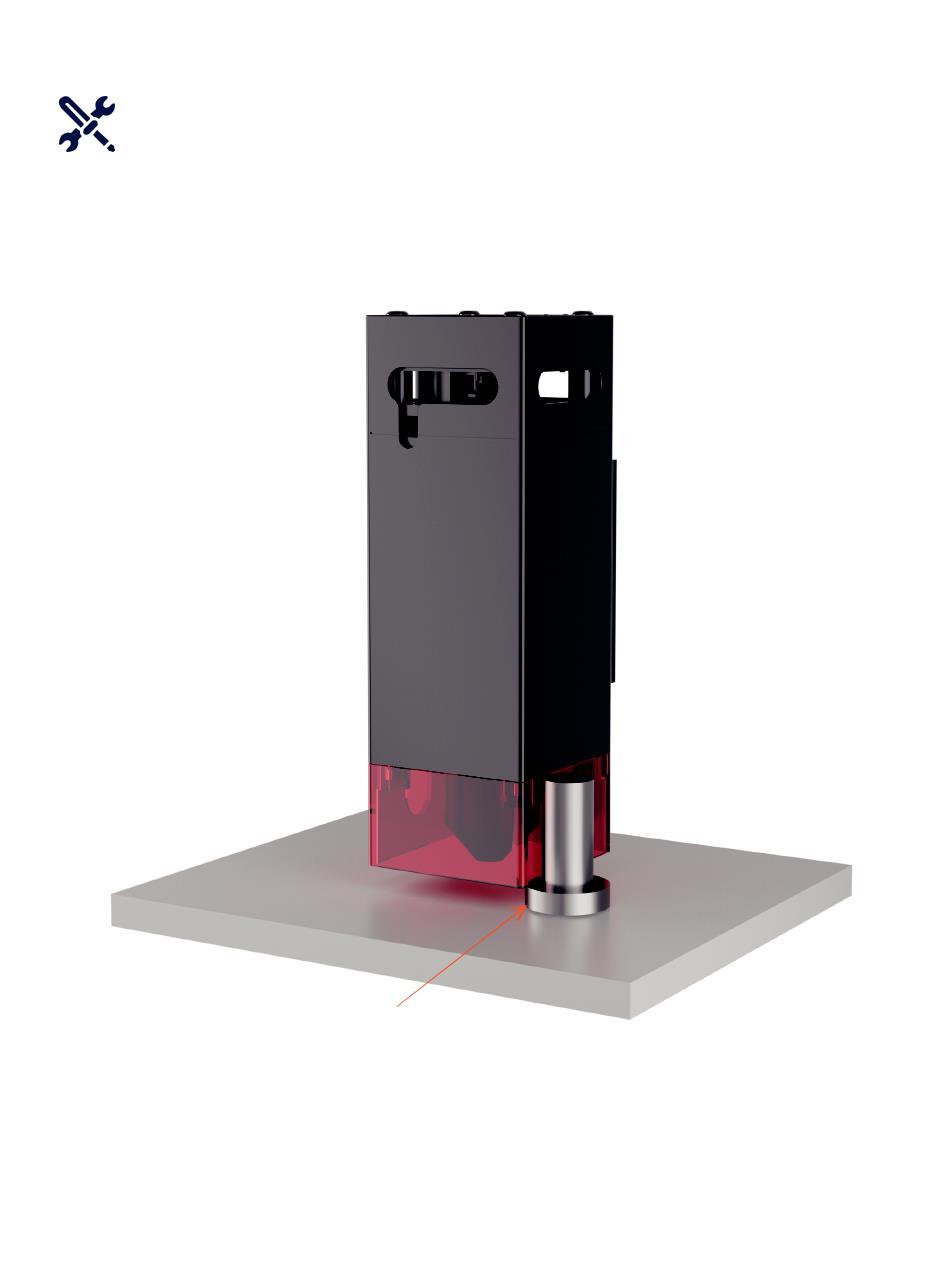
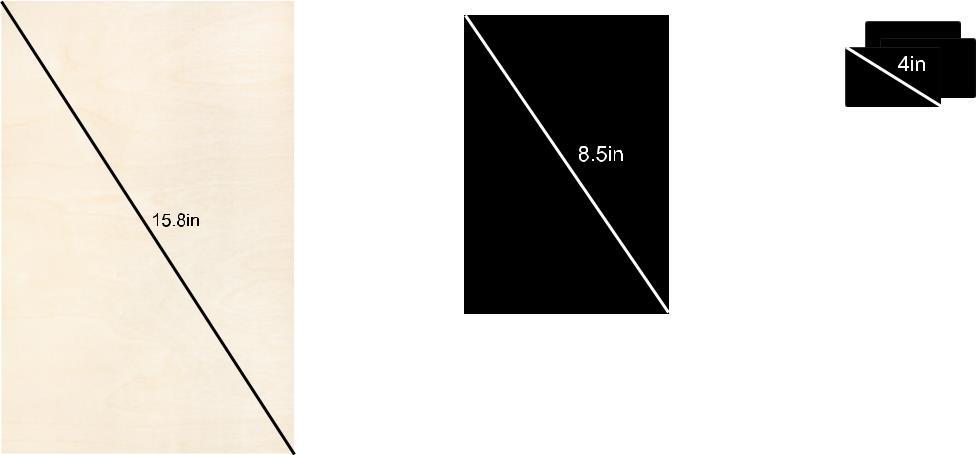
Step 17: First, place the Focus Assist on the engraving material, ensuring it is positioned beneath the laser module. Gently slide the laser module downward until its edge lightly touches the circular disc on the bottom of the Focus Assist. Once in this position, tighten the laser module's Thumbscrew to secure it. Finally, remove the Focus Assist from underneath the laser module.
/ 18
(Keep the key. Professional use only)

Step 18: The type-C to USB cable is used to connect the computer and machine. Ensure that the type-C end is plugged into the laser machine, while the USB end is plugged into the computer.

Power button short
Power on Machine quickly Power on seeks Machine powers on press <0.5s gradually brightens and for machine zero point
The white LED
Power off Machine shuts Power off down Machine powers press >1.5s gradually dims off and stops all operations
Power button long
The white LED
Press and hold the power button while
The red, green, simultaneously pressing
Power off Machine shuts Enter upgrade mode the RESET button on and blue LEDS flash down Machine powers the control board when alternately off and stops all operations the machine is in the power-off state
Enter network Power button continuous
The lights transition The machine can configure network information configuration short press 5 times into a colorful gradient through the APP
Control board reset
Standby
Press the RESET
The lights transition The machine can configure network information button briefly into a colorful gradient through the APP
When the machine
The white light
The machine is in is powered on and idle breathes in and out idle standby state
When the machine is
The cyan-blue light
The machine is in Working powered on and remains steady motion processing state in operation
When the machine
The yellow light slowly encounters a malfunction The machine cannot engrave Fault indicator flashes and accompanied and cannot perform there is a malfunction by a “di, du” sound engraving movemen
Install the driver: Before installing the computer driver, please power on the machine and connect it to the PC using a USB cable. Then, choose the appropriate driver file based on your computer system and proceed with the installation.

To install the driver, make sure the machine is powered
WIN 7/WIN 8 on and connected to the computer via USB. The installation process can only be carried out when the machine is in the powered-on state and connected zadig-2.5.exe to the computer.
WIN 10/WIN 11 No installation required
Mac No installation required
To check the driver installation, follow these steps:
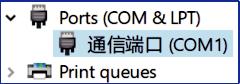
① Find the Device Manager on your computer.
② Navigate to the Ports section.
③ Disconnect the USB cable from the computer.
④ Observe that the new serial port disappears from the Ports section.
⑤ Reconnect the USB cable.
⑥ Verify that a new serial port appears, indicating successful driver installation.
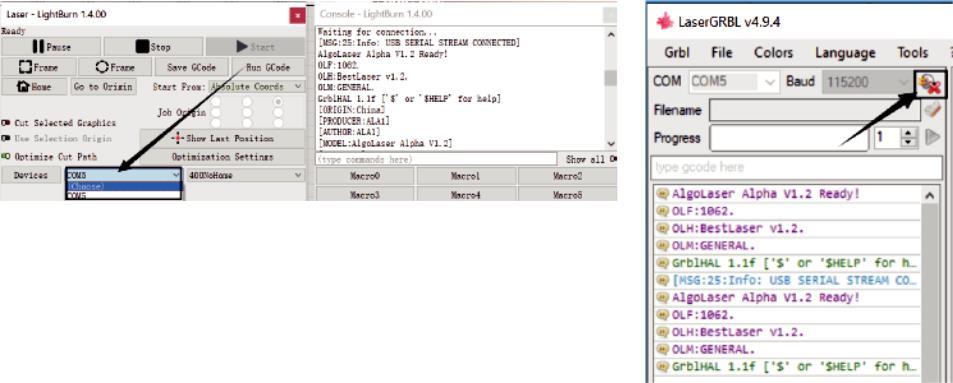
① Launch the LaserGRBL / LightBurn software.
② Select the COM port that corresponds to the one identified in step two of the installation process.
③ Click on the “Connect” button.
④ If a welcome message appears in the command box, it indicates a successful connection.
For resolving driver issues on Windows 7/8, you can follow these steps
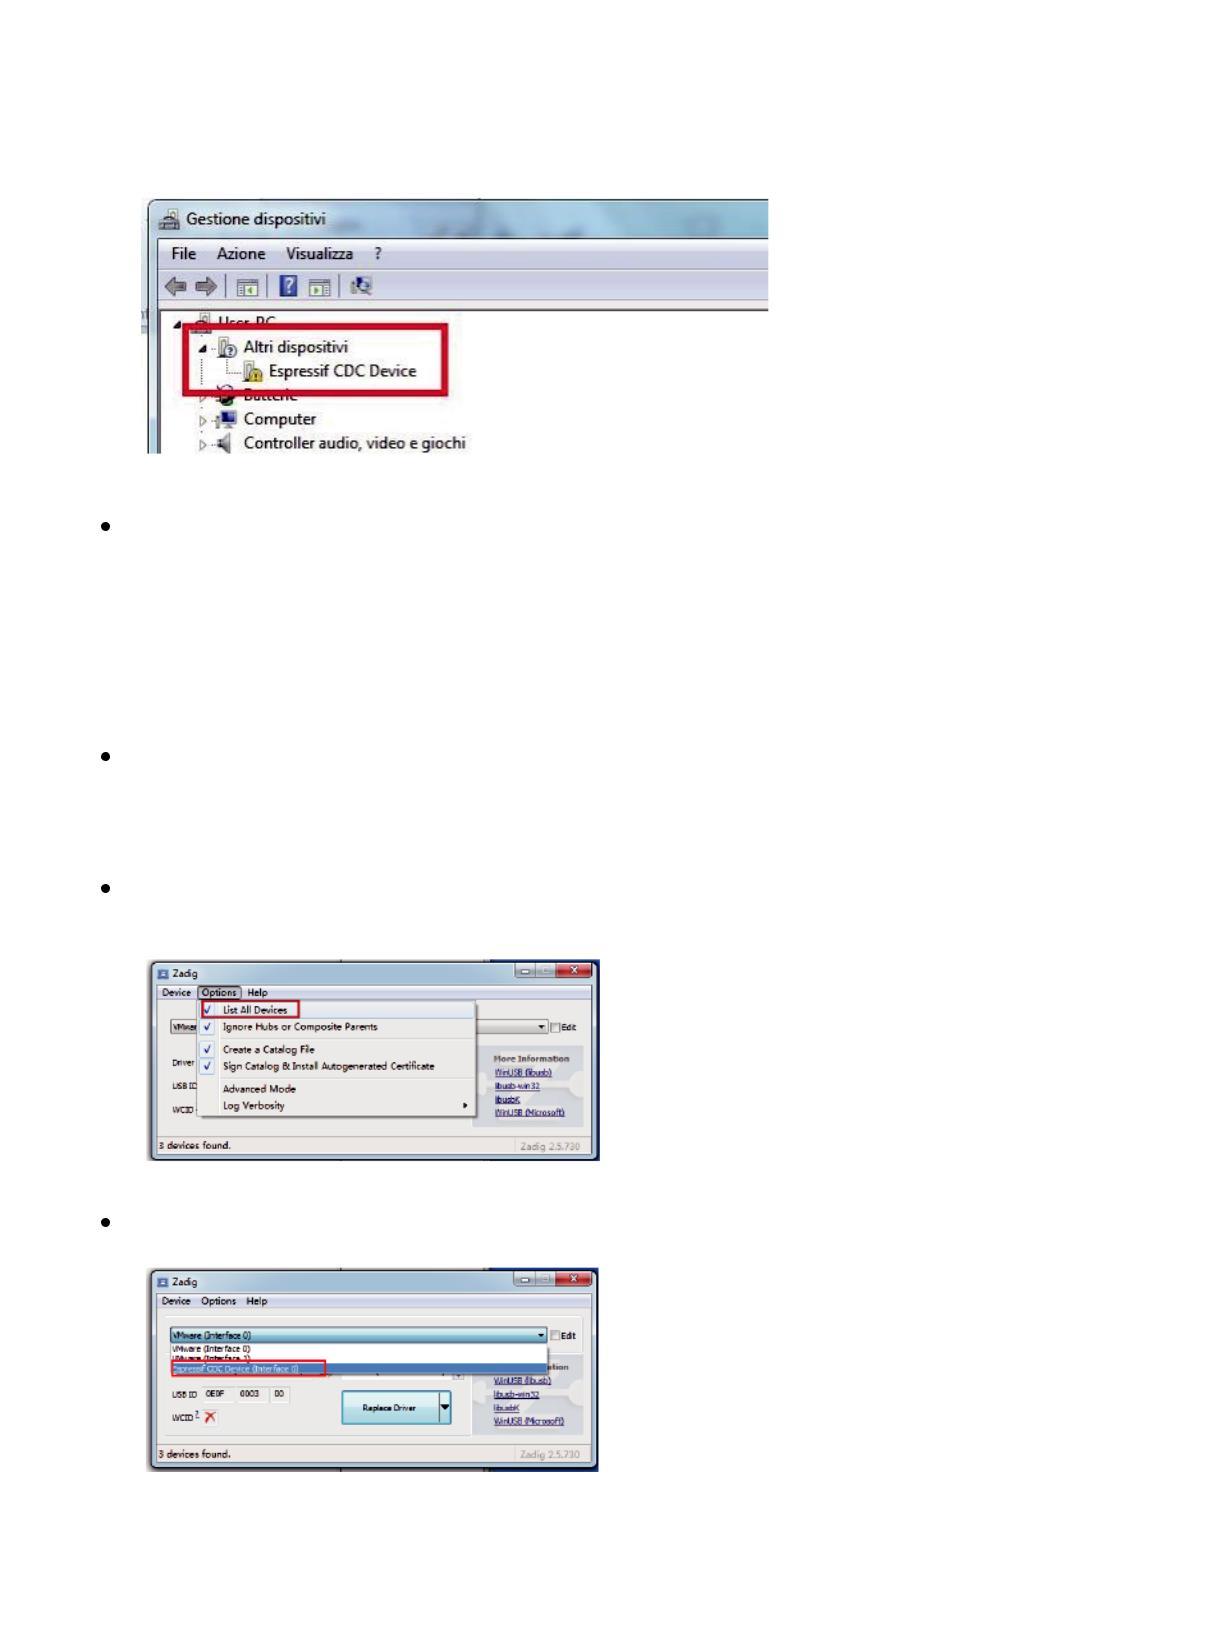
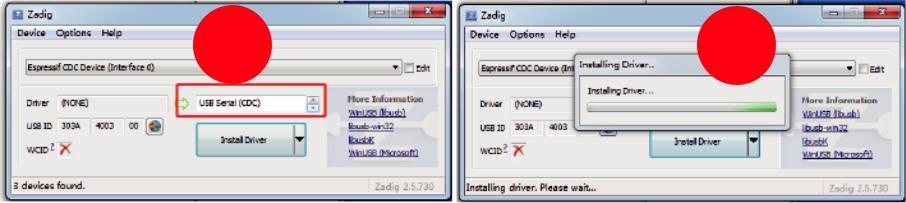
Resolution for Driver issues on ESP MCU Espressif CDC Device Error (Applicable to WINDOWS 7/8 )
Click on the download link to download the file: Zadig-2.5.exe
Download:https://zadig .akeo.ie/
Zadig-2.5.exe
Once download is complete, please run the application with Administrator Rights.
Once open select List All Devices from the menu Options.
Wait for the refresh
Select Espressif CDC Device (Interface 0) from the drop-down list.
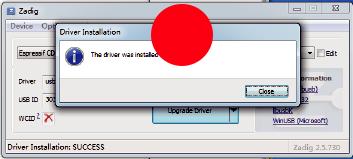
Select USB Serial (CDC) from the list of drivers available, click the Install Driver button, and wait for the installation to complete.
1 2 3
When you're done, you can close the Zadig software.
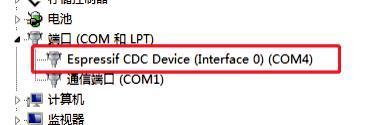
The New Espressif CDC Device (Interface 0)(COM X) port in Device Manager. Note the COM number might be different in your machine.
Connection: Unplug the Y-axis motor wire from the Y-axis motor and connect it to the corresponding motor jack of YRR/YRC.
Connect the control terminal: Use USB or other methods to connect the computer.
LaserGRBL: Send "$22=0" in the “Type gcode here ”field
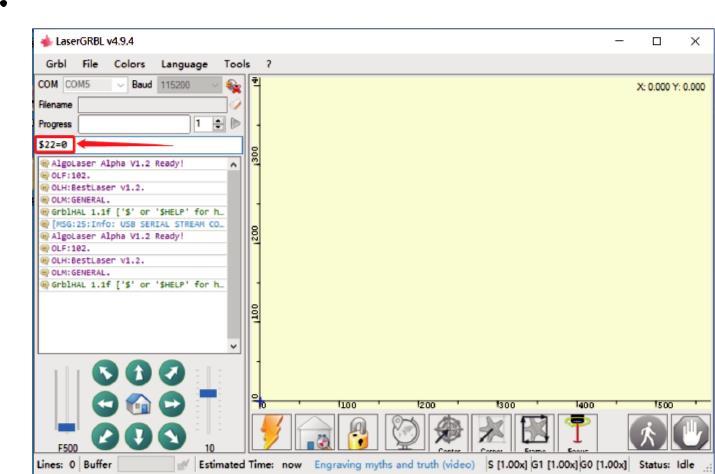
LightBurn: Send the command "$22=0" in the "(Type Commands here)" field.

No response from the machine when being powered on.
No power supply: Please check the socket and switch as well as the machine power socket to ensure that they ha been correctly plugged with normal power supply. It cannot be connected to computer.
USB cable not connected: Please check the USB data cable interface on the machine and computer to ensure it's correctly plugged.The USB interface on the front panel of some desktop computers is invalid, it's better to connect to the interface on the back.
Driver not properly installed: Install the driver according to the instructions. After the installation is done, the computer will recognize the device as a serial port,which means the hardware connection is OK.
Other special problems:Pull out the USB data cable and power cable, keep the machine power off for 5 seconds and then try the connection once again.
No response from the phone APP when being connected to the machine. Wrong Bluetooth connection: Make sure it's connected to the Bluetooth released by the machine. Please read “App Connection” in the User Manual for details.
Incompatibility: In the case of abnormal connection due to incompatibility of newly-released phone or upgraded system, please contact our customer service with the screenshot of phone configuration so as to get technical support as soon as possible.
Shallow engraving effect or no traces.
Inaccurate focus: Refer to the "Focus Adjustment" in the User Manual to make the correct focus.
Engraving speed: Too fast speed is due to short burning time.Please read the“Engraving Parameters" in the Manual to readjust the parameters.
Photo color is too light: The photo added should be clear. If the line is too thin or the color is too light, the engraving effect will be directly influenced. Position of object to be engraved: If the object is placed obliquely, the focal length of laser is fixed,so the object should be placed horizontally in parallel to the machine; otherwise, the inaccurate focal length will result in bad engraving effect.
Offline engraving unexpectedly stops
The photo is not completely downloaded when being connected to computer, please download the photo once again.