THE MAIN EVENT p. 24


THE MAIN EVENT p. 24


There’s no better time to go big than the holidays, and if you want to make this festive season one to savor, you’ve come to the right Field Guide. Follow along to impress your guests with a magnificent meal full of gourmet courses galore. Extravagant breakfast? Check. Outstanding rib roasts? You know it. Pasta in a cheese wheel? We went there. Stunning desserts? 100%. Keep reading for these showstopping recipes and more. Happy holidays from our family to yours!



WRITING & EDITING
Lydia Humburg
Calista Marouk
LEAD PHOTOGRAPHER, STYLIST, & RETOUCHER
Victoria O’Brien
PHOTOGRAPHY
Willow Smith
Michael Sylvester
CHEF DE MARKETING
Stazi Dulman
PRODUCT & INFORMATION RESEARCH
Corporate Directors & Buying Team
LEAD GRAPHIC DESIGNER
Michelle Leal
GRAPHIC DESIGN
Aaron Davis
Willow Smith
DIRECTOR OF MARKETING
Rebecca Reichardt
MARKETING MANAGER
Marco Enriquez
CORPORATE COMMUNICATIONS
Yazmeen Reyes-Takaki
SENIOR WEB DEVELOPER
Mark Eagleton


When I think of celebrations, I think cheese boards, baked brie, and all sorts of fancy fromage. As a self-proclaimed curd nerd, I may be biased, but specialty cheese really does have the ability to make any occasion just that—special. My current obsession is using cheese to take pasta over the top (see p. 14 to see just what I’m talking about). Whether you’re like me or in the mood for something different, we offer an extensive selection of local and imported cheeses (200–400 varieties depending on the store location!) perfect for all your culinary adventures.
Not only that, our dedicated cheesemongers are here to help you with tasty recipe ideas, creative pairings, and artisan cheese boards made to order. However you choose to celebrate, drop by our Specialty Cheese Department to find new favorites, connect with fellow foodies, and make your holidays extra special. Cheese to the good life!
DIRECTOR OF SPECIALTY CHEESE
Jaclyn Neff


Perfect for amping up any occasion, this sweet and savory take on bacon can be stuffed in a breakfast sammy, tucked into a cocktail (turn to p. 9 for proof!), and enjoyed all on its own for maximum bacon bliss.


PREP TIME: 5 MINUTES
COOK TIME: 20–30 MINUTES
YIELD: 6–8 SERVINGS


Arguably the first course in a day full of decadent dishes, the holiday breakfast sets the scene for all the deliciousness to come. Start your celebrations with a bang with homemade crepes, chicken and waffles, sumptuous bacon, classy cocktails, and other over-the-top tasty recipes that only make their appearance for special occasions (just like those matching pjs).


• 1 package (12–14 ounces) thick-cut bacon
• ½ cup light brown sugar
• 1 teaspoon crushed red chili flakes
• 1 teaspoon coarse cracked black pepper


Arrange bacon slices on a baking pan lined with parchment paper, then sprinkle with brown sugar, chili flakes, and pepper. Place pan into cold oven, then turn heat to 375°F. When the oven reaches 375°F, rotate the pan 180 degrees, then bake 8–10 minutes, or until bacon is golden brown and caramelized. Let bacon cool on the pan for 3–5 minutes, then place on a wire rack to drain before serving.


Visions of sugar plums? Try bacon. Made with 125 years of experience, hours of smoke, and a craftsman’s commitment to quality, this premium pork is a gift in and of itself.


Bacon biscuit sandwiches, anyone? Make these beautifully flaky and buttery biscuits from scratch to pair with Billionaire Bacon, fruity jams, more butter, or sausage gravy.


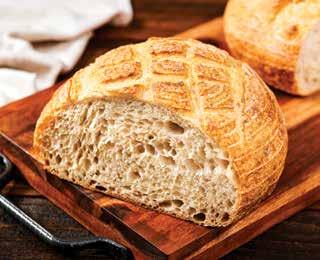
For some truly tremendous toast, don’t stop with avocado—use artisan bread, thick-cut bacon, and chili flakes for bona fide brunch-time bliss!
PREP TIME: 10 MINUTES
COOK TIME: 16–17 MINUTES
YIELD: 6–8 TOASTS
• 12 ounces thick-cut bacon
• ½ loaf Fresh to Market Roasted Garlic Boulot
• 3 tablespoons extra virgin olive oil, divided
• 3–4 ripe avocados, halved
• Coarse finishing salt, to taste, for garnish
• Red chili flakes, to taste, for garnish
Preheat oven to 400°F.
Place bacon on a lined cookie sheet and bake for 15 minutes, or until crispy, then drain on a wire rack and set aside.
Cut boulot into slices about 1 inch thick. Brush with olive oil and toast oil-side down on a grill, in the oven, or in a hot pan.
Transfer toasted bread to a work surface. Cut bacon slices in half and place two halves on each toast. Drizzle with olive oil and top with mashed avocado, then season with salt and top with red chili flakes.
You don’t have to make your own bread at home to make toast a thing of beauty. Enjoy scratch-made, fresh-baked goodness without the work with lovely loaves from our Bakery! Our talented bakers handcraft all sorts of artisan breads here in-house and bake them on stone deck ovens daily for the freshest, bestest breads around. Enjoy popular picks like our tangy Sourdough (made from our own natural starter!), tender, cloud-like Ciabatta, crusty, rustic Baguettes, flavorful Focaccia , flaky, hand-shaped Croissants , and so much more!


The only thing that could make fried chicken even better is an excuse to eat it for breakfast. Enter waffles. Use our chef-created recipes to make both from scratch, then top it all off with syrup or hot sauce for a mouthwatering masterpiece.


The perfect fried chicken is tender and juicy on the inside, crispy and crunchy on the outside, and easier than you think. Give this recipe a go and see for yourself!
PREP TIME: 30 MINUTES

COOK TIME: 14–18 MINUTES
YIELD: 4 SERVINGS
INGREDIENTS
• 2 cups distilled vinegar
• 2 cups water
• 2 tablespoons kosher salt


• 2 tablespoons granulated sugar

• 1 whole chicken, cut into 8 pieces (wings, breasts, drumsticks, and thighs)

• 2 cups all-purpose flour
• ½ cup corn starch
• 2 teaspoons baking powder
• 1 tablespoon cayenne pepper
• 1 tablespoon paprika
• 1 teaspoon cracked black pepper

• Oil, for frying


Combine vinegar, water, salt, and sugar and whisk until both the salt and sugar are dissolved. Place chicken pieces in a large bowl and pour the vinegar solution over the top. In another bowl, combine the remaining dry ingredients and mix to combine.


Toss each piece of chicken in the flour mixture until coated, then dip into the vinegar solution, and then back in the flour mixture. Transfer each coated piece to a tray.


In a Dutch oven or large cast-iron pan, add oil to a depth of at least 2 inches, then heat to 315°F. Add the dredged chicken to the oil and fry to an internal temperature of 165°F, about 14–18 minutes. Fry chicken in batches as needed to avoid overcrowding. Transfer to a rack to drain for 5 minutes before serving.


There are waffles, and then there are Belgian waffles. Cook up the real deal at home with imported pearl sugar from Belgium and this simple recipe.
PREP TIME: 15 MINUTES
COOK TIME: 2–3 MINUTES PER WAFFLE
YIELD: 4 SERVINGS
• 1 cup all-purpose flour
• 1 cup whole wheat flour
• ¼ teaspoon kosher salt
• 1 teaspoon baking powder
• ½ teaspoon baking soda
• 3 large eggs, separated
• 2 cups buttermilk
• 1 tablespoon vanilla extract
• 6 tablespoons unsalted butter, melted
• ½ cup pearl sugar
Sift together both flours, salt, baking powder, and baking soda into a work bowl. Separately, combine egg yolks, buttermilk, and vanilla extract and mix well.
In a different bowl, whip egg whites until stiff peaks form.
Mix the dry ingredients with the yolk mixture until just combined, then stir in the melted butter. When the butter is incorporated, fold in whipped egg whites in three stages. Then fold in pearl sugar.
Cook waffles in a Belgian waffle maker according to its instructions. When done, top waffles with fried chicken or fresh fruit as desired.


Available for a limited time!
For the ultimate in easy extravagance, these wondrous Belgium-born waffles are stuffed with the good stuff, like real fruit and Belgian chocolate. Abracadabra… Breakfast is served!

Like your breakfast with a bit of heat? Add a dab of Zab’s! Made with a special pepper called the datil, this boss of a sauce boasts a slow burn and sweet, tingly heat. Try their classic, vinegar-based Original or their St. Augustine Style for some sweet and fruity flair.
These golden, buttery Belgian waffles are bejeweled with pearl sugar for an extra delightful crunch within each fluffy bite, perfect for pairing with the savory flavors of fried chicken.

Sustainably harvested from family farms, our certified organic Grade A maple syrup is a sweet addition to chicken and waffles, pancakes, oatmeal, smoothies, dessert, and so much more!


RECIPE


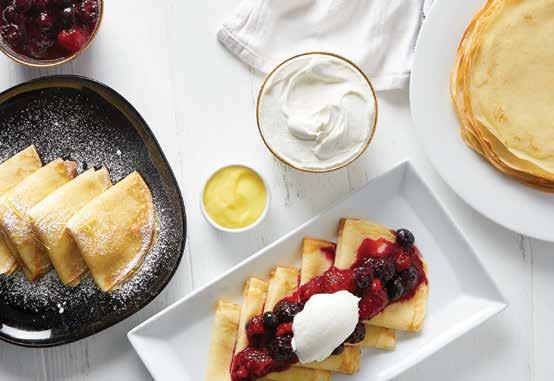
Fill these classic crepes with homemade lemon curd, mixed berry sauce, or whipped crème fraîche for an elegant breakfast that’s just a bit extra.




Nutritious and delicious go hand in hand with these gourmet, gluten-free granolas. Every flavor is crafted with intentional ingredients like ancient grains, coconut oil, and coconut sugar with organic, vegan, grain-free, and probiotic options to suit every taste!


Perfect your parfait with this traditional Greek yogurt handcrafted with whole food ingredients like real fruit purees and generations of experience. Available unsweetened or in extra decadent flavors, this dreamy yogurt is ideal for making any morning merry.


Once you experience the rich, tangy notes of this full-flavored Bloody Mary, you may never go back. The infused vodka and homemade Bloody Mary mix take a little time, but you can reserve the extra to make future cocktails that much easier!
PREP TIME: 5 MINUTES,
PLUS 12 HOURS INFUSING
COOK TIME: 35 MINUTES
YIELD: 1 COCKTAIL
INGREDIENTS
Upgrade with Billionaire Bacon Recipe
Bacon & Balsamic-Infused Vodka:
• 2 tablespoons olive oil
• 1 cup small-diced yellow onion
• 1 cup small-diced bacon
• 1 cup brown sugar
• 1 cup balsamic vinegar
• 1 bottle (750 mL) vodka
Basic Bloody Mary Mix:
• 46 ounces Bianco DiNapoli
Tomato Juice
• 4 ounces Worcestershire sauce
• 2 ounces Tabasco Sauce
• 4 teaspoons Dijon mustard
• Juice of 2 lemons


Bacon & Balsamic-Infused
Bloody Mary:
• 1 lemon wedge, for rimming glass
• Sea salt, for rimming glass
• 1½ ounces bacon and balsamic-Infused vodka
• 4 ounces basic Bloody Mary mix, or your mix of choice
• Garnishes of your choice
PREPARATION
To make the baon and balsamicinfused vodka, sauté olive oil and onion for 5 minutes, add bacon, and cook for another 5 minutes. Add brown sugar and balsamic vinegar, reduce heat to low, and simmer for 25 minutes. Remove from heat
Bright and bubbly with a touch of elderflower and grapefruit, this lovely sparkling cocktail goes beautifully with brunch.
PREP TIME: 5 MINUTES
YIELD: 1 COCKTAIL
and let cool. Combine 2 cups of the bacon and balsamic reduction with the vodka in an airtight container. Infuse overnight, then strain and pour back into the bottle.
To make the basic Bloody Mary mix, combine all ingredients, mix well, and store refrigerated in an airtight container until ready to use.
For the cocktail, rub lemon wedge around the rim of a pint glass, then roll rim of glass in sea salt to coat. Fill with ice and set aside.
Combine infused vodka and Bloody Mary mix in a cocktail shaker, stir, and pour into pint glass. Finish with your chosen garnishes.
• 4 ounces Cremant Rosé
• 1 ounce premium white rum
• 1 ounce St-Germain
Elderflower Liqueur
• 1 ounce fresh grapefruit juice
• ½ ounce simple syrup
• Ice
• 1 grapefruit slice, for garnish
PREPARATION
Combine rosé, rum, elderflower liqueur, grapefruit juice, and simple syrup in a white wine glass. Top with ice and garnish with a grapefruit slice.


Enjoy the steakhouse experience at home with Buckhorn’s one-of-a-kind Certified Angus Beef Tri-Tip, pre-charred by the pros so all you have to do is roast to your desired doneness for tender, juicy magnificence.
Before the full feast, it’s important to warm up with a few starters. (You don’t want to run out of room, after all!)
Whet your guests’ appetites with irresistible appetizers, salads, and soups like these, or scan the QR code for even more recipes to get the party started.
Set the starter bar high by topping artisan bread with tender tri-tip, caramelized onions, and a hit of horseradish spice in these craveworthy canapés.
PREP TIME: 15 MINUTES
COOK TIME: 40–55 MINUTES
YIELD: 24–30 CROSTINI
INGREDIENTS
• 1 tablespoon unsalted butter
• 1 teaspoon extra virgin olive oil
• 1 medium to large yellow onion, sliced thin
• Kosher salt, to taste
• Cracked black pepper, to taste
• 2 pounds Buckhorn Tri-Tip
• ½ Fresh to Market Roasted Garlic Boulot
• ¼ cup extra virgin olive oil
• 2 cloves garlic
• 2 ounces grated horseradish, drained
• 2 ounces mayonnaise
• 3 ounces sour cream
• ½ bunch chives, minced, for garnish
PREPARATION
To prepare the caramelized onions, melt the butter in a medium saucepan over medium-low heat. Add the olive oil and onions, then season lightly with salt and pepper and stir to combine. Cook for 30–45 minutes or more, stirring frequently, until the onions have reduced to about ¼ cup and become pale golden in color. Transfer to a small bowl and set aside.
While the onions are caramelizing, prepare the tri-tip according to package instructions, then allow to rest for 20 minutes before thin-slicing across the grain.
Preheat oven to 350°F.
Slice boulot half into 24–30 slices, about ¼ inch thick. Brush the slices lightly with olive oil, then place them in a single layer on a baking sheet. Bake for about 5 minutes, until dry and crisp, then remove from oven and gently rub each slice with garlic.
To prepare the horseradish sauce, mix the horseradish, mayonnaise, and sour cream in a small bowl until well combined.
To assemble, spread about ½ teaspoon horseradish sauce on each toasted boulot slice, drape a few slices of tri-tip over the top, add about ½ teaspoon caramelized onions, then garnish with minced chives. Repeat with remaining crostini.

RECIPE QR CODE ON P. 10 Devils on Horseback
Sweet, savory, and surprisingly simple, these lovely little morsels also have a heavenly variation called Angels on Horseback with oysters instead of cheese-filled dates.

Sweet caramelized onions in a rich beef broth topped with toasty bread and broiled cheese... what could possibly be better? Making it with your own homemade beef stock and demi-glace, of course!
PREP TIME: 20 MINUTES
COOK TIME: 2 HOURS 30 MINUTES
YIELD: 4 SERVINGS
INGREDIENTS
• 6 tablespoons unsalted butter, plus more for bread
• 3 pounds yellow onions, sliced ⅛ inch thick
• Kosher salt, to taste
• Cracked black pepper, to taste
• ½ cup dry sherry
• 1½ quarts beef stock
• 2 sprigs thyme
• 1 bay leaf
• 1 cup demi-glace
• 1 teaspoon apple cider vinegar
• 8 slices rustic baguette, toasted
• 1 clove garlic
• 1 pound Gruyère cheese, grated, divided
• 2 tablespoons minced chives, for garnish
Melt butter in a large, stainless steel stock pot over medium-high heat until foaming. Add onions and cook, stirring occasionally, until softened, about 8 minutes. Lower heat to mediumlow and cook, stirring frequently so the juices on the bottom don't burn, until onions are very sweet and a rich golden-brown color, about 2 hours. Season with salt and pepper. Add sherry and bring to a simmer, scraping up any browned bits from the bottom of the pot. Cook until alcohol smell is gone, about 3 minutes. Add stock, thyme, and bay leaf, raise heat to medium-high, and bring to a simmer, then simmer on low for 20 minutes.
Discard thyme sprigs and bay leaf, add demi-glace and apple cider vinegar, and season with salt and pepper.
Preheat broiler and adjust oven rack to top position.
Butter toasts and rub with garlic clove until fragrant. Spoon a small amount of soup into the bottoms of 4 ovenproof serving bowls, then top each with a toast. Sprinkle some grated cheese on top, then spoon more soup over the top, nearly filling the bowls. Set remaining toasts in bowls, pushing to nearly submerge them, and top with remaining grated cheese
Set bowls on a baking sheet, then broil until cheese is melted and browned. Garnish with chives and serve.
Making beef stock at home is easier than you think. All it takes is a little time (and thyme!) before you have a rich and flavorful base for soups, stews, and more.
PREP TIME: 10 MINUTES
COOK TIME: 6 HOURS
YIELD: 2 QUARTS
INGREDIENTS
• 5 pounds beef knuckle bones
• 3 tablespoons vegetable oil, divided
• 1 large yellow onion, diced rough
• 1 medium carrot, diced rough
• 2 large celery ribs, diced rough
• 1 cup boiling water, for deglazing
• 2 sprigs thyme
• 1 sprig Italian parsley
• 2 cloves garlic
• 2 tablespoons tomato paste
• 1 gallon cold water
PREPARATION
Preheat oven to 400°F with rack set in middle position.
Lightly coat all the beef bones with 1½ tablespoons oil and arrange in an even layer on a rimmed baking sheet or in a roasting pan. Roast, turning bones twice, until they just turn golden brown, about 30 minutes.
While the bones roasting, lightly toss onion, carrot, and celery in 1½ tablespoons oil. Once the bones
are roasted, scatter oiled vegetables over the bones and continue roasting until bones and vegetables are browned but not burned, about 30 minutes.
Transfer beef bones and vegetables to a stock pot. Pour off and discard any accumulated fat from the roasting pan. Pour 1 cup boiling water into roasting pan and scrape up any browned bits, then pour the pan juices into the stock pot. Add thyme, parsley, garlic, tomato paste, and 1 gallon of cold water.
Bring to a boil, then simmer over medium-low heat for 5 hours.
Strain stock through a fine-mesh strainer, discarding the solids. Refrigerate until well-chilled, then remove the solid cap of fat that rises to the top. If not using immediately, portion stock into storage containers or zip-top bags, then freeze or refrigerate until ready to use.

This highly concentrated beef reduction has intense flavor perfect for amping up the richness in sauces, soups, and other dishes. Start with homemade beef stock to make sure it has enough gelatin to thicken properly.
PREP TIME: 10 MINUTES
COOK TIME: 2–3 HOURS
YIELD: 2 CUPS
• 1 large yellow onion, diced rough
• 1 medium carrot, diced rough
• 1 large celery rib, diced rough
• 1 tablespoon vegetable oil
• 1 quart beef stock
• 2 sprigs thyme
• 1 sprig Italian parsley
Toss vegetables in oil and sauté in a large saucepan over medium-high heat until onions and celery are translucent.
Add beef stock and herbs then bring to a simmer, but do not let it come to a boil. Simmer for 2–3 hours, until volume is reduced by half.
Strain through a fine mesh strainer. If not using immediately, portion into an ice cube tray to freeze for later use.
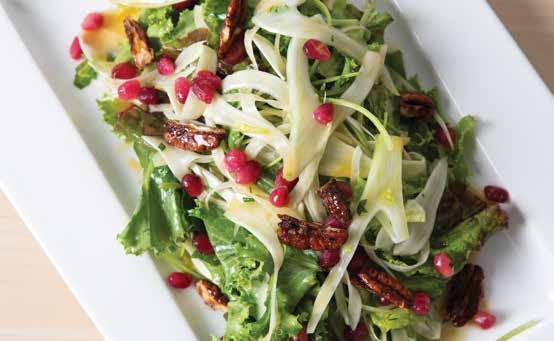
Light, easy, bright, and nutty, this sensational fall salad is sure to please.
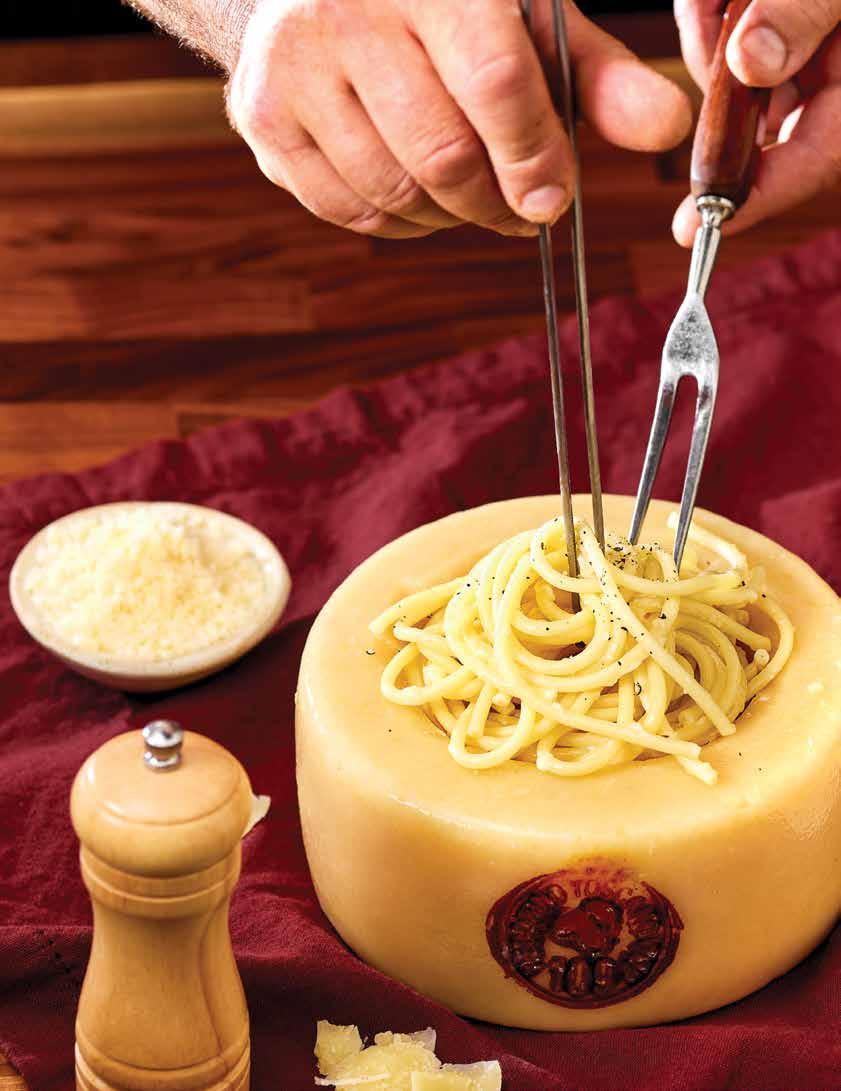
Pecorino Toscano
With a milder flavor than Pecorino Romano, this aged Italian sheep’s milk cheese is great for grating over pasta or buying by the (mini) wheel to fill with it instead!
This holiday season, go all out by celebrating one of life’s timeless twosomes: cheese and noodles. If you’re feeling extra fancy, doll up this classic comfort food by preparing your pasta in a mini cheese wheel to show off your showmanship, making authentic carbonara with real guanciale, or quadrupling the cheese in a classic mac casserole. Whichever you choose, drop by our Specialty Cheese Department to get started!
For dinner and a show, prepare your pasta in a cheese wheel! The cheese melts onto the hot noodles to create a simply delicious sauce that's sure to impress.
PREP TIME: 15 MINUTES
COOK TIME: 8–11 MINUTES
YIELD: 2 SERVINGS
INGREDIENTS
• 1 wheel of Pecorino Toscano
• 1 tablespoon cracked black pepper
• 6 ounces dry bucatini pasta
• Kosher salt, to taste
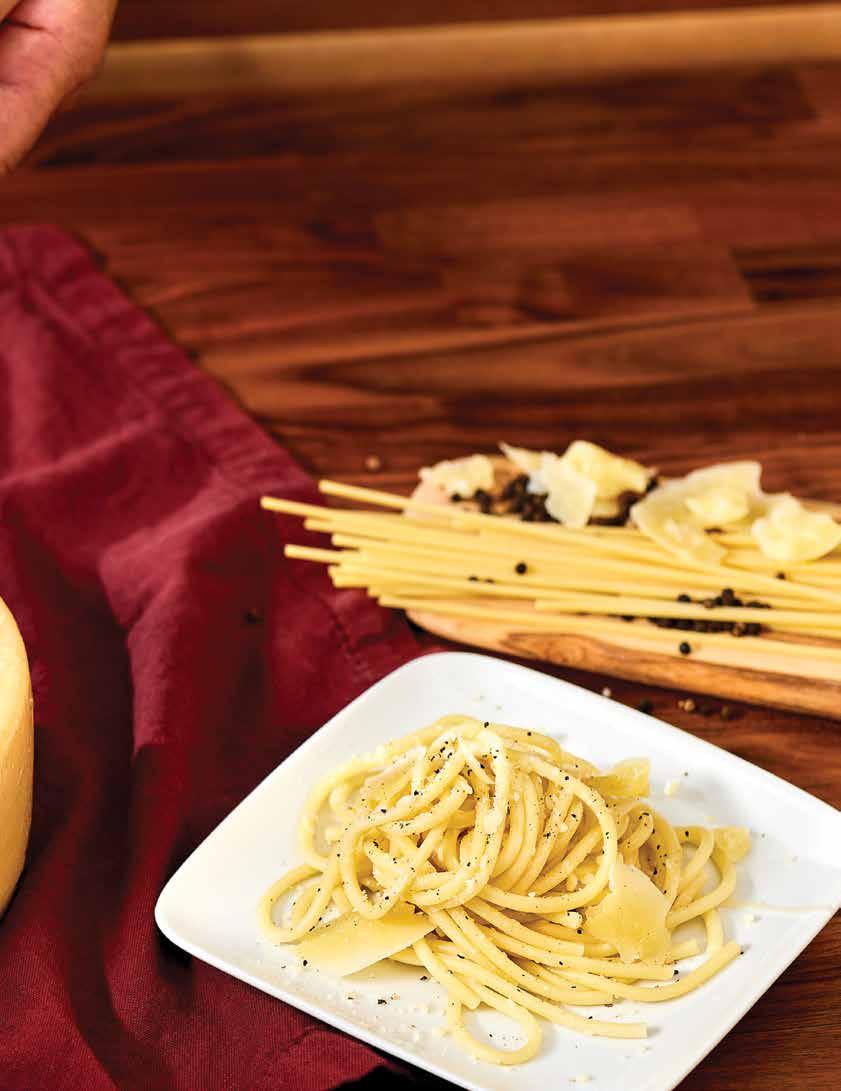
This authentic, artisanal pasta is made in Italy with bronze dies and Rummo’s trademark Lenta Lavorazione (“slow processing”) method for top-notch taste and texture. Buon appetito!
PREPARATION
Cut the Pecorino Toscano wheel to create a bowl in the top, then scrape the inside of the bowl shape to create cheese shavings.
Bring salted water to a rapid boil in a large pot, then add the pasta and cook until al dente, 8–11 minutes.
Place the hot pasta in the scraped cheese wheel and stir until the cheese is creamy and melted onto the pasta. Add black pepper and serve immediately garnished with cheese shavings, if desired.
The magic of this classic Italian dish is how the sauce comes together from cheese, eggs, cured pork, and pasta water—no cream required!
PREP TIME: 5 MINUTES
COOK TIME: 15 MINUTES
YIELD: 4 SERVINGS
INGREDIENTS
• 6 ounces guanciale, pancetta, or bacon
• 2 large eggs
• 2 egg yolks
• 3½ ounces grated Pecorino Romano, plus more for garnish
• ¼ teaspoon cracked black pepper, plus more for garnish
• 14 ounces dry spaghetti
• 1 tablespoon kosher salt
• ½ cup pasta cooking water
• 4 sprigs Italian parsley, minced, for garnish (optional)
PREPARATION
Cut guanciale into ¼-inch slices, then into batons.
Place eggs and yolks in a large bowl. Whisk to combine, then stir in the Pecorino Romano and pepper.
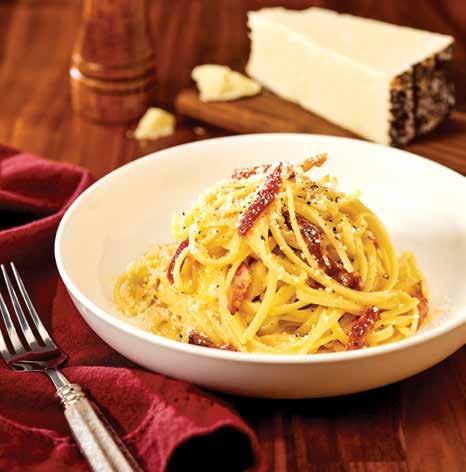
Bring 1 gallon of water to a boil with the salt. Add pasta and cook according to manufacturer's directions, about 9–11 minutes. Reserve ½ cup of pasta cooking water, then drain the pasta. While the pasta is cooking, place guanciale in a nonstick pan over medium-high heat and cook for 4–5 minutes, until golden and crispy. Fat will render during cooking.


Place drained pasta into the pan with the cooked guanciale and toss to coat in rendered fat.
Transfer the pasta and any residual fat into the bowl with the egg mixture. Add ½ cup pasta cooking water and stir vigorously so the sauce emulsifies and clings to the pasta.
Serve immediately garnished with Pecorino Romano, a pinch of black pepper, and minced parsley, if desired.
To make traditional carbonara, you need guanciale, which is slow-cured pork jowl with plenty of fat to build the rich, unctuous sauce. Drop by our Specialty Cheese Department to find this singular salume crafted locally in Sonoma County! Journeyman Meat Co. pairs time-honored tradition with today’s technology to create the finest salumi this side of the Atlantic. Case in point, their small-batch guanciale features humanely raised heritage pork which is slow-cured for 30 days, seasoned with Italian spices, and aged 30 more days to build an amazing depth of flavor. It’s also ready to eat so you can give any extras a nibble while your carbonara is cooking.

Fans of fromage are sure to enjoy this decadent take on a classic starring four fantastic cheeses!
PREP TIME: 10 MINUTES
COOK TIME: 25–30 MINUTES
YIELD: 6–8 SERVINGS
INGREDIENTS
• ¼ cup plus 1 tablespoon unsalted butter, divided
• 2 ounces all-purpose flour
• 5 cups whole milk
• 7 ounces grated Kaltbach
Cave-Aged Gruyère
• 7 ounces grated BelGioioso
Italian Fontina
• 7 ounces grated aged cheddar
FRESH TO MARKET EXCLUSIVE
Mitica Parmigiano Reggiano
• Kosher salt, to taste
• Cracked black pepper, to taste
• 1 pound pasta, cooked al dente
• 1 cup panko breadcrumbs
• ¼ cup grated Fresh to Market Parmigiano Reggiano
PREPARATION
Heat oven to 350°F.
Melt ¼ cup butter in a large sauce pot. Add flour and cook over medium heat for 2 minutes, whisking constantly to avoid lumps. Slowly add 1 cup of milk at a time, incorporating completely before adding more. Bring milk mixture to a simmer and cook for 5 minutes.
Turn heat to low and whisk in Gruyère, Fontina, and aged cheddar. Stir until completely melted, then add salt and pepper to taste. Add cooked pasta and mix until well coated. If sauce is too thick, add more milk in small increments until it reaches desired creaminess, then place cheese and pasta mixture in a baking dish.
Melt remaining butter, then place in a small work bowl and mix with panko and Parmigiano Reggiano. Sprinkle panko mixture over the top of the pasta and bake until golden brown and bubbly, about 10 minutes.
Here at Nugget Market, we source only the very best products for our Fresh to Market lineup, which is why we’re so excited to share the king of cheese itself... Parmigiano Reggiano! Scan the QR code to learn more.
LEARN MORE
Without a showstopping spread of sumptuous sides, the main course would just be… dinner. Fill out your feast with copious culinary creations like homemade stuffing (or dressing?), creamy casseroles, and root veggie recipes galore. (Pass the potatoes, please!)
Get cooking with all the recipes seen here and even more online in our curated collection of holiday favorites.
Is there a difference between stuffing and dressing?
Technically, yes! While their ingredients are often similar (usually bread, butter, veggies, herbs, and broth), the key differentiator is how it’s cooked. Stuffing is stuffed inside a turkey (hence the name), while dressing is cooked separately and served alongside the meat to dress it up! That said, if your family recipe calls it stuffing but cooks it on the stove, that’s A-okay, too.
Note: Because of the different cooking methods, stuffing often has a firmer, toastier texture while dressing retains more of its moisture for a softer mouthfeel. Either way, make sure to cook it properly so you don’t end up with soggy soup or a dish that’s been in contact with undercooked poultry—food safety first!

What about bread pudding? Isn’t that dessert?
As you can see on the neighboring page, bread pudding is also part of the stuffing/dressing debate! While this dish is more famously sweet, making a savory version is as simple as taking out the sugar and choosing savory flavorings like garlic and parsley instead of cinnamon and vanilla. From there, it has bread, butter, herbs, and veg, just like stuffing and dressing—the difference is the liquid. Instead of broth or stock like stuffing, bread pudding involves soaking cubed bread in a dairy-rich custard before baking (outside of a bird).
One thing all three of these cozy comfort foods have in common? They’re sure great for stuffing yourself!
But what bread should I use? I loaf them all!
Basically, any one you want! Seriously, all sorts of loaves can be used to make stuffing, dressing, and bread pudding. The main factors to consider are texture and flavor. For instance, white bread is a standard selection for when you want the herbs and other flavorings to shine, sourdough can hold its structure for a firmer final product, cornbread adds a subtle, crumbly sweetness, and buttery brioche adds a little extra decadence. What flavor and texture you prefer is ultimately up to you!
Pro Tip: Whichever you pick, start with stale bread so it can soak up the good stuff without becoming a soggy mess. If you only have fresh bread, never fear! Simply cube and toast it in the oven until dry and crispy before starting your stuffing (or dressing or…).

Even the most enticing entrée can’t go it alone. Learn how to make Roasted Brussels Sprouts with Pearl Onions and a variety of other delicious dishes perfect for a holiday feast!
Take basic Brussels sprouts over the top with a generous helping of savory bacon, dry sherry, caramelized pearl onions, and sweet dried cranberries.
Break out the bourbon for this decadent spin on stuffing, made with rich egg bread, fresh leeks, and flavorful chanterelle mushrooms.
PREP TIME: 20 MINUTES, PLUS 1 HOUR RESTING
COOK TIME: 1 HOUR 20 MINUTES
YIELD: 10–12 SERVINGS
INGREDIENTS
• 2 pounds brioche (or other egg bread like challah), cut into 2-inch cubes
• 3 small leeks
• 2 tablespoons unsalted butter
• 1 tablespoon olive oil
• ½ teaspoon kosher salt, plus more to taste
• ¼ teaspoon cracked black pepper, plus more to taste
• 1½ pounds chanterelle mushrooms, torn into pieces
• ¼ cup chopped Italian parsley
• 2 large garlic cloves, minced
• 6 large eggs
• 3 cups half and half
• 3 tablespoons bourbon
PREPARATION
Preheat oven to 350°F with rack in the middle.
Spread bread cubes on a baking sheet in a single layer and bake 10–15 minutes, until golden brown.
To prepare the leeks, remove the roots and leaves, then halve them lengthwise, slice thin, rinse, and pat dry.
In a medium skillet, melt butter with the olive oil. Add leeks and season to taste with salt and pepper. Cook over moderate heat, stirring until tender, about 15 minutes.
Add mushrooms, ½ teaspoon salt, and ¼ teaspoon pepper, and cook until the liquid from the mushrooms evaporates, about 15 minutes. Add parsley and garlic, then cook while stirring for 2 minutes. Remove from heat and let cool.

In a large bowl, beat eggs with half and half and bourbon, then stir in the cooled leek and mushroom mixture.
Place toasted bread cubes in a large, buttered casserole dish. Pour chanterelle custard mixture over the bread and let rest for about 1 hour so the bread can fully absorb the liquid.
Cover bread pudding with foil and bake for 30 minutes, then finish uncovered for 10–15 minutes, until lightly golden on top.
This classic dish gets an extra-decadent makeover with a rich mushroom and Parmesan cream sauce plus fresh thyme for a fragrant finish.
PREP TIME: 30-40 MINUTES
COOK TIME: 1 HOUR 30 MINUTES
YIELD: 8–10 SERVINGS
• 2 shallots, sliced thin
• 1 clove garlic, crushed
• 2 tablespoons unsalted butter
• 1 bunch thyme, picked and chopped, stems reserved
• ½ cup marsala
• ½ ounce dried porcini mushrooms
• 2 cups milk
• 3 cups heavy cream
• 1¼ cups grated Parmesan cheese, divided
• 1 tablespoon kosher salt
• ¼ teaspoon white pepper
• 3 pounds large Yukon gold potatoes
PREPARATION
Sauté the shallots and garlic in butter until translucent. Add thyme stems, deglaze with the marsala, and add the dried mushrooms. Reduce until almost dry, then add the milk and cream. Bring to a simmer, then remove from heat and let steep for 10 minutes.
Remove thyme stems from hot cream mixture, then transfer to a blender. Add 1 cup Parmesan cheese and puree on high for 30 seconds. (This may need to be to be done in batches depending on the size of your blender.) Strain through a fine mesh strainer into a large work bowl. Season with salt and white pepper.
Few things can elevate a dish like the humble truffle. Their earthy, complex notes of garlic and umami have an undeniable je ne sais quoi, which is why TruffleHunter tracks down the finest truffles on earth and transforms them into the perfect finishing touch. Add gourmet glamour to almost any dish with their classic White Truffle Oil, Black Truffle Mustard, White Truffle Hot Honey, and Black or White Truffle Crisps (a.k.a. truffleinfused potato chips) for the ultimate truffle bliss.

Use a mandolin or knife to slice the potatoes no more than ⅛ inch thick, then place in the mushroom cream and toss gently to coat. Shingle a single layer of the coated potatoes into a casserole dish, then top with ½ teaspoon chopped thyme. Repeat the layering process until the potatoes are about ½ inch from the top of the dish. Add any porcini cream left in the bowl just to cover the potatoes.
Heat oven to 400°F.
Cover the dish with foil and bake for about 1 hour, or until the potatoes are tender and a knife slides easily into the center.
Remove foil, sprinkle with ¼ cup Parmesan cheese and a pinch of thyme, and bake uncovered for 10 minutes until top browns. Let rest 10 minutes before serving.


Smooth, creamy, and decadently delicious—you can't go wrong with classic mashed potatoes!
PREP TIME: 10 MINUTES | COOK TIME: 45–60 MINUTES | YIELD: 6–8 SERVINGS
INGREDIENTS
• 5 pounds large russet potatoes
• 4 ounces unsalted butter, melted
• 8 ounces heavy cream, hot
PREPARATION
• 1 tablespoon kosher salt
• 1 teaspoon cracked black pepper
Fill a large pot with cold water. Peel potatoes and cut into eighths. Bring water to a boil and simmer potatoes until soft, about 45–60 minutes. Drain and let steam 5 minutes.
Press the flesh of the potatoes through a food mill or mash with a potato masher. Add butter and mix thoroughly. Fold in cream, then season with salt and pepper.

Topped with a crunchy mix of panko and Parmesan, this delicious root veggie dish is a fantastic addition to your Thanksgiving feast and your weekly dinner rotation!
PREP TIME: 30 MINUTES
COOK TIME: 55–70 MINUTES
YIELD: 8 SERVINGS
INGREDIENTS
• 3 tablespoons unsalted butter, softened and divided
• 2 cups heavy cream
• Kosher salt, to taste
• White pepper, to taste
• 3 garnet yams, peeled and sliced into ⅛-inch rounds
• 3 sweet potatoes, peeled and sliced into ⅛-inch rounds
• 2 tablespoons chopped thyme, divided
• ¼ cup panko
• ¼ cup grated Parmesan
PREPARATION
Heat oven to 375°F.
Grease the inside of a 9x9-inch baking dish with 1 tablespoon of butter. Season the cream with salt and pepper and divide into two work bowls. Toss the sliced yams in one bowl and the sweet potatoes in the other to coat with cream.
Shingle the yams in a single layer on the bottom of the greased baking dish. Sprinkle with 1 teaspoon of thyme. Next, shingle the sweet potatoes on top of the yams and repeat the pattern until the dish is filled to just below the top. Pour remaining cream over the top of the filled dish to just below the level of the yams and sweet potatoes.
Cover with parchment and foil and place on a lined baking sheet. Bake 45–60 minutes, until a knife inserts easily into the center. Melt the remaining butter and mix with the panko, Parmesan, and remaining thyme. Remove the cover and evenly distribute the panko mixture over the top. Bake uncovered until the top is golden brown. Let rest 10 minutes before serving.
Up the ante on this family favorite with fresh green beans, crispy fried shallots, and a flavorful, homemade mushroom sauce.
PREP TIME: 45 MINUTES
COOK TIME: 50–60 MINUTES
YIELD: 6–8 SERVINGS
• 3 cups plus 2 tablespoons vegetable oil, divided
• 4 large shallots, sliced thin on a mandoline
• Kosher salt, to taste
• 1½ cups water
• ½ ounce dried porcini mushrooms
• 1½ pounds fresh green beans, trimmed and halved
• ¾ pound white button mushrooms, trimmed and cut into ½-inch slices
• 1 small onion, diced
• 2 cloves garlic, minced
• ¼ cup unsalted butter
• ¼ cup all-purpose flour
• 1 cup milk
• ½ cup heavy cream
• ¼ teaspoon ground nutmeg
• Cracked black pepper, to taste
Heat 3 cups oil over medium-low heat in a medium saucepan to 275°F. Add shallots and cook gently, stirring occasionally until golden brown. Use a slotted spoon to remove shallots from oil and transfer to a sheet pan. Blot with paper towels and sprinkle lightly with salt.
In a small pot, bring 1½ cups water to a boil then remove from heat, add dried porcini mushrooms, and allow to steep 30 minutes to create a mushroom broth.
To prepare green beans, cook in a large pot of salted boiling water for 6–8 minutes. Drain and shock in ice water, then pat dry.

In a sauté pan over medium-high heat, add enough oil to coat pan. When oil is smoking, add fresh mushrooms in a single layer and sprinkle with salt (cook in batches if needed). Allow mushrooms to brown without moving them for 1–2 minutes before flipping. Once mushrooms are cooked, remove from pan and set aside.
In the same pan, add oil to coat, then sauté onion and garlic until translucent, remove from pan, and set aside.
Add butter to the same pan. When melted, add flour and cook for 2 minutes. Whisking constantly, gradually add 1½ cups mushroom broth and milk, scraping off all the browned bits from the bottom of the pan. Allow to thicken, then add cream, nutmeg, and sautéed mushrooms and onions. Season with salt and pepper. Preheat oven to 350°F.
Add green beans to the mushroom sauce and toss to coat. Mix in ⅓ of the fried shallots. Transfer mixture to a casserole dish and bake until bubbling around the edges, 20–30 minutes. Serve topped with remaining fried shallots.
If preparing shallots ahead of time, store in an airtight container at room temperature with a layer of paper towels underneath. Store pre-blanched green beans in a zip-top plastic bag in the refrigerator.
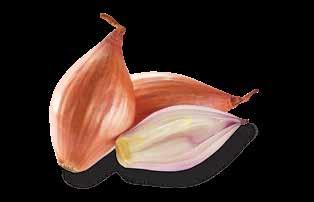
These small, teardrop-shaped alliums have a more delicate flavor than other onions, making them very versatile—try using them raw, pickled, caramelized, fried, and more!
Being trusted to make your holiday feast isn’t something we take lightly. Our team of pro chefs is dedicated to crafting five-star offerings from scratch—from our complete Holiday Meals to all our gourmet entrées and sides, it’s our job and our privilege to create vibrant, delicious food to make your holidays shine!

ORDER

Now, the moment you’ve all been waiting for… the pièce de resistance, the star of the show, the thing this most magical time of year is about (besides love and gratitude, of course)… the main course! Whether it’s ham or lamb or something else entirely, it’s time to gather around something good, and we’ve got everything you need for a spectacular showstopper!
Want to DIY your holiday dinner from scratch? Make entertaining easy with everything you need in one place! Our handy Turkey Tactics Toolbox includes a printable menu, a shopping list, an equipment checklist, and a timeline all in PDF form, along with a video on turkey carving and every recipe on the aforementioned menu!


Both sweet and savory, the holiday ham is a classic for a reason—it's super simple to prepare with succulent results!
PREP TIME: 10 MINUTES
COOK TIME: 1 HOUR
YIELD: 1 HAM
INGREDIENTS
• 1 ham
• 1 jar (11 ounces) ham glaze
• Fresh herbs, for garnish (optional)
Preheat oven to 350°F.
Place ham in a shallow roasting pan and cover with ham glaze. Heat for 1 hour, or until a thermometer inserted into the thickest section of the ham reads 135°F.
Remove ham from the oven, cover loosely with foil, and let rest for 15 minutes. Garnish with fresh herbs as desired.

Hill’s Premium Meats Ham
Want ham that goes ham? From a family-owned and -operated company comes this mouthwatering masterpiece. Featuring natural juices, this premium pork has Duroc genes, an American breed known for its red color and marbling.


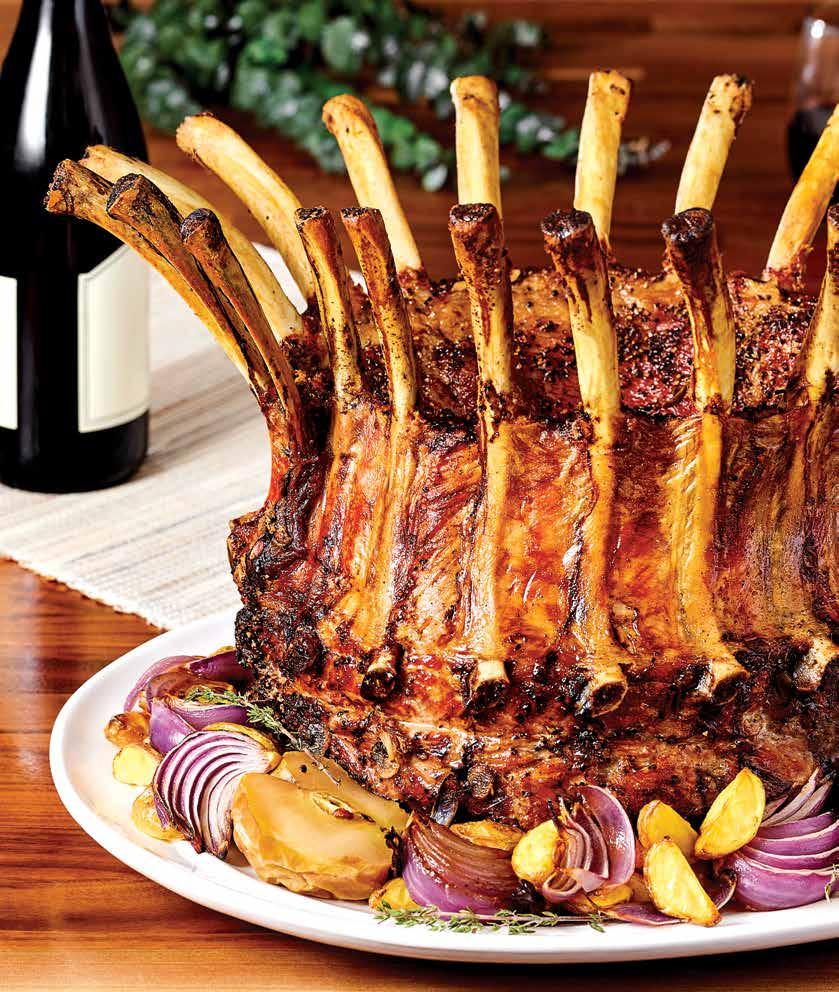
For a showstopping centerpiece that's sure to impress, pick up a Pork Loin Crown Roast from our Meat Department, then follow these simple cooking instructions!
PREP TIME: N/A
COOK TIME: 1½–2½ HOURS
YIELD: VARIES
• 1 pork loin crown roast
Preheat oven to 350°F.
Place roast in a shallow roasting pan, then place pan on the center rack in the oven. Roast for 10–15 minutes per pound, or until a thermometer inserted into the center of the thickest section of the roast reads 145°F.
Remove roast from the oven, place a piece of foil loosely over the pan, and let rest for 15 minutes before carving.

Chicken, duck, and turkey—oh, my!
This savory, stuffed spectacle is a thing of dreams, each enticing layer brimming with flavor and opulence.
PREP TIME: 5 MINUTES
COOK TIME: 3–7 HOURS
YIELD: VARIES
INGREDIENTS
• 1 Fresh to Market Turducken or Turducken Breast Roll
• Olive oil
• Kosher salt, to taste
• Cracked black pepper, to taste
Preheat oven to 400°F. Rub turducken with oil then season with salt and pepper. Let rest until turducken reaches room temperature. Place turducken into a roasting pan, cover with foil, and place in the oven on the center rack. Roast for 30 minutes. Reduce temperature to 325°F and roast 20–30 minutes per pound, or until a thermometer inserted into the center of the turducken reads 165°F. Remove foil for the last hour of cooking to brown the exterior.

While Turducken is considered an American tradition, you can find a similar trio of poultry on your plate across the pond. The Gooducken is a chicken stuffed in a duck stuffed in a goose!
Once fully cooked, allow to rest for 15–20 minutes before carving and serving.

Syrupy blackberry sauce complements crispy-skinned duck breast and flavorful sautéed veggies in this irresistible sweet and salty combo.
PREP TIME: 45 MINUTES
COOK TIME: 1 HOUR
YIELD: 2 SERVINGS
Port Blackberry Sauce:
• ½ tablespoon unsalted butter
• 1 shallot, sliced thin
• 6 large blackberries
• 1 cup red port
• 1 cup red wine
• 2 cups chicken stock
• Kosher salt, to taste
• Cracked black pepper, to taste
Crispy Duck Breast & Vegetables:
• 2 duck breasts
• Kosher salt, to taste
• Cracked black pepper, to taste
• ½ tablespoon vegetable oil
• ½ head fennel, small diced
• 1 kohlrabi, small diced
• ½ cup small-diced yam
• 1 parsnip, small diced
• ½ head savoy cabbage, cut into ½-inch ribbons
• 1 pear, small diced
• 1 bunch chives, chopped
For the sauce, heat a small sauce pot over medium heat. Melt the butter, add the shallots, and sauté until wilted. Add the blackberries and red port and reduce until syrupy. Add the red wine and reduce again to a syrup. Add the chicken stock and simmer until reduced by ½–⅔. Remove from heat, season with salt and pepper, and keep warm.
While the sauce is cooking, score the skin of the duck breast in a cross pattern with about ½-inch spaces in between. Season the skin with salt and pepper, then let rest for 10 minutes.
Pat each duck breast dry with a paper towel and place skin-side down in a cold, heavy-bottomed sauté pan.
Place pan on a burner set to mediumlow. Season the other side of the duck breast with salt and pepper, and let render for 7–10 minutes, until the skin is golden brown and crisp. The skin should gently sizzle and become quieter as it renders. If needed, gently press the duck into the pan with a spatula or spoon to make sure that the entire surface of the skin comes in contact with the pan and crisps evenly. When the skin is crispy, turn the duck breast over and cook on the other side for 2–3 minutes for medium to medium-rare. Tilt the pan as needed so the edges of the duck are cooked as well. Remove duck from the pan and let rest.
Drain all but 2 tablespoons of the rendered fat from the pan. Return pan to burner and turn heat to high. Add the fennel, kohlrabi, yam, and parsnip in a single layer. Let caramelize, then add the cabbage and toss together. When the cabbage has wilted and started to caramelize, add the pear and heat through. Add chives and toss together.
To serve, place the cabbage mixture on serving plate, top with the sliced duck, and spoon sauce around the edge of the plate.


Cook duck legs low and slow in duck fat to create this decadent French dish that's tender and crispy in all the right ways.
PREP TIME: 15 MINUTES, PLUS 12 HOURS CURING
COOK TIME: 4 HOURS
YIELD: 6 SERVINGS
INGREDIENTS
• 6 duck legs
• 1 tablespoon plus 1 teaspoon kosher salt
• 1 small onion, chopped coarse
• 6 cloves garlic, chopped coarse
• ½ bunch Italian parsley with stems, chopped rough
• ½ bunch thyme
• 2 teaspoons whole black peppercorns
• 4 cups rendered duck fat
PREPARATION
Season duck legs evenly on all sides with salt then set aside.
Combine onion, garlic, parsley, thyme, and peppercorns in a bowl and mix until well combined. Place duck legs and mixture in a 1-gallon zip-top bag and seal, pressing out as much air as possible. Massage the bag until duck legs are evenly coated, then lay bag flat on a cookie sheet and refrigerate overnight.
Preheat oven to 225°F with rack in the middle position.
Place duck fat in a microwave-safe bowl and microwave 2–3 minutes to melt.
Remove duck legs from cure and rinse gently under cold water to remove all seasonings. Pat duck legs dry with paper towels, then arrange in a small baking dish and cover with melted duck fat, making sure legs are fully submerged. Cover with lid or aluminum foil and transfer to oven. Cook until duck is tender, about 4 hours. Remove duck from oven and cool to room temperature in the baking dish, removing lid but keeping duck submerged in fat. Once cool, cover container tightly and transfer to refrigerator, where confit can be stored for up to 1 month.


One of the finest fats in cooking, rendered duck fat is rich, decadent, and versatile with a high smoke point, making it perfect for adding a little extra depth of flavor to everything from duck confit to sautéed spuds.


For a tempting twist on classic tamales, try this fantastic fusion stuffed with decadent duck confit.

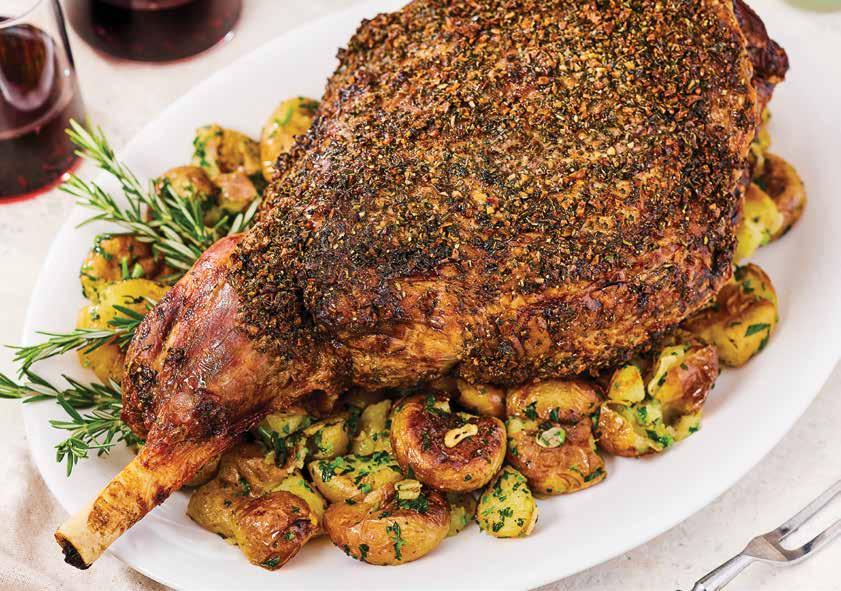
For a stunning centerpiece for your feast, serve this succulent, herbaceous leg of lamb on a bed of crushed potatoes.
PREP TIME: 20 MINUTES
COOK TIME: 2 HOURS 15 MINUTES–2 HOURS
45 MINUTES
YIELD: 10–12 SERVINGS
INGREDIENTS
Leg of Lamb:
• 1 bone-in leg of lamb (9 pounds)
• Kosher salt, to taste
• Cracked black pepper, to taste
• ½ cup olive oil
• ½ cup chopped garlic
• 1 bunch rosemary, chopped
• ¼ cup chopped mint

Crushed Potatoes:
• 2½ pounds yellow marble potatoes
• 6 tablespoons extra virgin olive oil, divided
• Kosher salt, to taste
• Cracked black pepper, to taste
• 6 cloves garlic, sliced thin
• Zest of 1 lemon
• 1 bunch Italian parsley
PREPARATION
Remove lamb from refrigeration 1 hour before cooking. Lightly score the fat on the exterior of the leg, not cutting into the flesh, then season with salt and pepper.
Heat oven to 325°F.
In a work bowl, combine the olive oil, garlic, rosemary, and mint. Rub the herb mixture evenly over the entire leg of lamb, then place fat-side up on a roasting rack on a lined baking sheet or roasting pan. Place in oven and
roast to an internal temperature of 125–130°F for medium, about 2½ hours. Remove from oven and let rest loosely tented with foil for at least 30 minutes before carving.
Toss potatoes with 2 tablespoons olive oil plus salt and pepper in a work bowl. Place potatoes on a lined baking sheet and roast in the oven with the lamb until the potatoes are tender, about 45 minutes. Remove potatoes from oven and let cool to room temperature, then crush with the back of a spoon to flatten.
Heat remaining olive oil on medium heat. Add sliced garlic and cook until just beginning to toast. Add lemon zest and parsley and cook for 10 seconds, then transfer to a work bowl with the potatoes and toss to coat.
Place potatoes on a lined baking sheet and place back in the oven for 10 minutes to reheat before serving.
Tender and succulent, it’s hard to find something more satisfying than a beautiful brisket. Fill your home with tantalizing aromas as you roast one at home in your oven!
PREP TIME: 20 MINUTES
COOK TIME: 6 HOURS
YIELD: 10-12 SERVINGS
INGREDIENTS
• 4 tablespoons paprika
• 2 tablespoons brown sugar
• 1 tablespoon onion powder
• 1 tablespoon cracked black pepper
• 2 tablespoons kosher salt
• 1 tablespoon chili powder
• 1 brisket flat (about 10 pounds)
• ¼ cup yellow mustard
• 4 yellow onions
• 2 cups water
PREPARATION
Preheat oven to 275°F.
In a mixing bowl, combine paprika, brown sugar, onion powder, pepper, salt, and chili powder. Rub the brisket with mustard, then sprinkle evenly with the spice mixture. Let rest at room temperature for 20 minutes.
Cut each onion into 3 equal rounds and arrange on the bottom of a roasting pan. Add 2 cups of water to the pan, then place the seasoned brisket on top of the onions.
Roast uncovered for 4 hours, or until the internal temperature reads 170°F. Cover loosely with parchment paper, then roast for another 2 hours, until tender and the internal temperatrure reads 205°F.
Rest the brisket tented loosely with foil for 45 minutes before slicing thin and serving.


These tasty potato pancakes of love are great to serve any time of the year, especially when served with smoked salmon, sour cream, and applesauce.


It’s easy to host a fantastic feast, especially with this handy cooking countdown. Follow these simple instructions for a delicious DIY dinner featuring Standing Rib Roast, Whipped Horseradish Cream, Gourmet Green Bean Casserole, Pureed Parsnips, and Brioche Chanterelle Bread Pudding. Bon appétit!
THE DAY BEFORE:
• Pick, clean, and blanch green beans.
• Fry shallots.
• Prepare horseradish.
THE DAY OF:
• Noon: Pour yourself a glass of wine, and get yourself situated with your checklist, mise en place, and anything else you need.
• 1:00 p.m.: Pull roast out of refrigerator and season. Allow to sit at room temperature for 2 hours.
• 1:30 p.m.: Assemble bread pudding, then refrigerate until slightly before baking.
• 2:30 p.m.: Preheat oven to 450°F.
• 3:00 p.m.: Sear roast in hot oven for 15 minutes.
• 3:15 p.m.: Reduce oven temperature to 325°F and continue roasting for 2 hours. Prepare green bean casserole and set aside.
• 4:00 p.m.: Remove bread pudding from refrigerator.
• 4:15 p.m.: Make parsnip puree, cover with foil, and keep at a warm temperature.
• 5:15 p.m.: Remove roast from oven and let rest for 45 minutes. Increase oven temperature to 350°F and bake bread pudding.
• 5:30 p.m.: Place green bean casserole in oven beside bread pudding.
• 5:45 p.m.: Whip heavy cream for horseradish sauce.
• 6:00 p.m.: Remove bread pudding and green beans from oven.
• 6:05 p.m.: Arrange all dishes for presentation. Carve the roast tableside, plate, and serve. Enjoy!
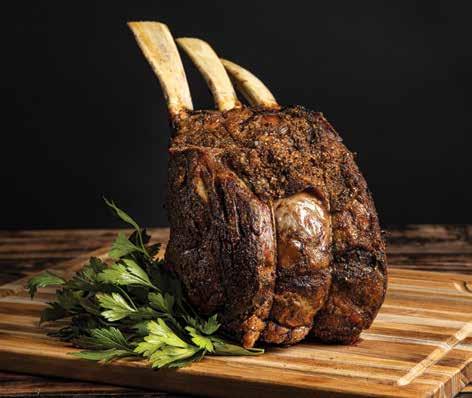
Nothing says the holidays like a big, juicy roast beef. Enjoy with plenty of horseradish and a well-aged bottle of Bordeaux for the full experience.
PREP TIME: 20 MINUTES
COOK TIME: ABOUT 3 HOURS, OR 10–12 MINUTES PER POUND
YIELD: 6-8 SERVINGS
INGREDIENTS
• 1 standing rib roast (six-bone size, about 14 pounds)
• ¼ cup kosher salt
• Cracked black pepper, to taste
• 3 bunches thyme, picked and rough chopped
• 12 cloves garlic, minced
PREPARATION
Remove roast from refrigerator 1 hour before cooking.
Heat oven to 450°F.
Season roast with salt, pepper, thyme, and garlic, then place bone-side down in a roasting pan. Roast for 15 minutes at 450°F, then reduce the temperature to 275°F.
Continue cooking for 10–12 minutes per pound, until internal temperature reaches 110°F (for medium-rare). Begin checking internal temperature 30 minutes prior to estimated finished cook time.
Allow roast to rest 30–45 minutes before carving to allow for carryover cooking.
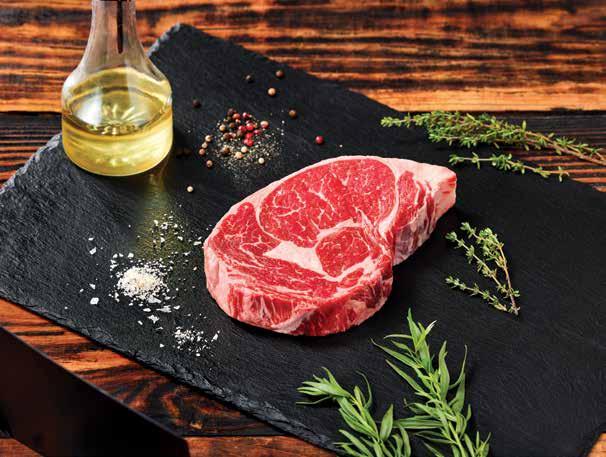
This show-stopping bone-in ribeye roast boasts both taste and presentation that are sure to impress. When planning portions, estimate about two servings per bone, or a half pound per person.
PREP TIME: 5 MINUTES
COOK TIME: ABOUT 2 HOURS
YIELD: VARIES
INGREDIENTS
• 1 beef tomahawk roast
• Kosher salt, to taste
• Cracked black pepper, to taste
• Granulated garlic, to taste
PREPARATION
To prep the bones, remove them almost entirely, then tie them back on before roasting. In addition to added flavor, the bones help insulate the meat during the cooking process so it cooks gently.
Remove roast from the refrigerator about 2 hours before you plan to roast it. Season roast with kosher salt, cracked black pepper, and granulated garlic.
Preheat oven to 450–500°F. Oven-sear the roast by cooking for 20–30 minutes, then reduce oven temperature to 200°F to finish for 20–30 minutes per pound. Roast beef uncovered to get a nice, crispy crust.
Remove the roast when it's about 5°F below the desired final temperature to account for carryover cooking:
• 120–125°F for rare
• 125–130°F for medium-rare
• 130–145°F for medium
• 150°F and above for medium-well
Let the roast rest for 25–30 minutes after cooking to allow the juices to redistribute back into the meat. Slice across or perpendicular to the direction of the muscle fibers in the meat for ample tenderness, then serve.


Nothing says “celebration” like a fancy, savorable glass of wine or a spunky, stylish spirit; and nothing says “refinement” like it, either. If you’re looking for nuanced rarities and sophisticated sips, you’ve got a whole world at your fingertips in our Adult Beverage Department—and here’s a taste with a few artful selections!

Bedrock Wine Co.
Old Vine Zinfandel
Made from some of the oldest Zinfandel vines in the country and one of the best wine values in the world, if you’ve never had this wine, get a bottle now! The average age of the vines used to grow the grapes for this wine is 80 years, resulting in wonderful concentration and complexity. Fermented with indigenous yeasts and never over-oaked, the fruit is always the star of this wine.

Cincinnato Pollùce
Nero Buono
This wine is made from an ancient, long overlooked, almost forgotten grape variety, Nero Buono, which has been revived thanks to a few dedicated visionary wine producers like the folks at Cincinnato. This is a fun wine to enjoy, with a strong personality. While it has some familiar flavors you’ll recognize, there’s still a few notes that you just can’t put your finger on—in a good way.

Shannon Family of Wines
OVIS Cabernet Franc
Made from grapes farmed with the utmost respect for the land (the winery uses sheep to weed, till, and fertilize the vineyard!), this Cabernet Franc is not only delicious, but also vegan. One sip of this wine and you wouldn’t guess it comes from a very finicky grape to grow. (Also, did you know Cabernet Franc is one of Cabernet Sauvignon’s parents? The other is Sauvignon Blanc!)

Maison la Berthaude Chateauneuf-du-Pape Vieilles Vigne
This traditional blend of Grenache, Syrah, and Mourvèdre is made from old vines that are between 60 and 100 years old. While they don’t produce a large crop due to their age, what grapes they do produce are exceptionally flavorful and concentrated, making for one heck of a wine. Made by fifth-generation winemaker Xavier Rolin, this is one of the best values you’ll find.

While southern Italy is the spiritual home of the Primitivo grape, its origins are in Croatia. Later, the grape was brought to California and called Zinfandel. This version from Hendry, a winery in Napa, is fermented in stainless steel to preserve the fresh, fruity flavors of cherry and plum. It has moderate acidity, soft tannins, and a nice touch of new oak on the finish.
Soalheiro Alvarinho
This wine is labeled Alvarinho because it hails from the Vinho Verde region in northern Portugal, as opposed to Albarino, which traditionally comes from Spain; but both use the same grape! No matter where the grapes come from, this wine is a benchmark for its type. A long, slow, cold fermentation and aging process produces a highly aromatic wine with a full mouthfeel.

This is truly a family-made, farm-to-table product. All the ingredients used to make this bourbon are 100% sustainably grown on a family farm in Fallon, Nevada. The fermentation, distillation, five years of aging, and bottling are also done on the property. It’s great on its own or in your favorite bourbon cocktail!

While the traditional home of the Grüner Veltliner grape is Austria, we’re seeing more of these vines planted around the globe. This version from Fiddlehead Cellars (whom we think is one of the best winemakers around) is from Santa Rita Hills in our Golden State’s Santa Ynez Valley. Classic flavors of stone fruit, jasmine, and white pepper mingle in each luxurious sip.

The Meletti family has been making craft spirits in Italy since 1870 (really, 1870!) never taking shortcuts. Their Coffee Liqueur is our favorite of its class, lauded by our Adult Beverage buyers as perhaps the best spirit they’ve tasted this year. Real coffee and cacao beans are used for incredible, fresh flavors of chocolate and coffee; nothing artificial to see or taste here.

Préservés
Made from three rare, local grapes (including Gros Manseng) from the Saint Mont region of Gascogne in southern France, this was our surprise standout wine of the year. Elegant but delicious, with flavors of stone fruits and dried herbs and a refreshing acidity, this is one of our favorite white wines.

Made entirely from a new variety of a unique heirloom corn called Baby Jane that took years to create, this bourbon truly stands out from rest of the pack. It’s a true small batch where only a few barrels are blended at a time, then non-chill filtered and proofed with mineral water from the legendary mines of Rosendale, New York.

PREP TIME: 5 MINUTES
COOK TIME: 5 MINUTES
YIELD: 2 COCKTAILS
INGREDIENTS
Infused Maple Syrup:
• 2 ounces raw maple syrup
• 2 tablespoons brown sugar
• 1 teaspoon vanilla extract
• 1 cinnamon stick
• 2 ounces water
Cocktail:
• 6 ounces bourbon
• 3 ounces infused maple syrup
• 3 ounces fresh apple cider or apple juice
• 2 teaspoons fresh lemon juice
• 4 drops orange bitters
• 2 cinnamon sticks, for garnish
• 2 thin apple slices, for garnish
PREPARATION
To make the infused maple syrup, combine all ingredients in a small saucepan and bring to a boil. Reduce heat and let simmer for 3 minutes. Remove from pan and let the mixture cool.
For the cocktail, combine all ingredients in a cocktail shaker. Either mix and pour over ice into two tall rocks glasses, or add ice cubes to the shaker and shake, then pour into two martini glasses. Garnish each glass with a cinnamon stick and apple slice.

PREP TIME: 5 MINUTES
YIELD: 1 COCKTAIL
INGREDIENTS
• 2 ounces bourbon
• ½ ounce Luxardo Cherry Syrup
• ½ ounce cherry liqueur
• Juice from ½ lemon
• 3–4 dashes Angostura bitters

PREP TIME: 3 MINUTES
YIELD: 1 COCKTAIL
INGREDIENTS
• 1½ ounces vodka
• 1 ounce espresso
• ¾ ounce Meletti Coffee Liqueur
• Ice
• 3 espresso beans, for garnish
PREPARATION
Shake all ingredients with ice and strain into a chilled cocktail glass. Garnish with espresso beans.
• 1 egg white
• Ice
• 2 ounces soda water
• Luxardo Cherries, for garnish
PREPARATION
Combine bourbon, cherry syrup, cherry liqueur, lemon juice, bitters, and egg white in an ice-filled shaker and shake vigorously for 30–40 seconds. Strain contents into a tall glass, add ice, top with soda water, and garnish with Luxardo cherries.


WHAT YOU NEED
• 2 ounces your favorite bourbon
• 4 ounces Q Mixers Ginger Ale
• Lemon peel, for garnish
MIX IT UP
In a rocks glass, add ice, bourbon, and Q Mixers Ginger Ale. Express a lemon peel (squeeze it so the oil puffs out effervescently) and garnish.

What exactly does Q Mixers’ Q stand for, you ask? Is it for “quintessential,” as in, “Q Mixers are quintessential to any good libation?” What about “quenching,” as in, “Not only are these little cans thirst-quenching, but they pack a flavorful punch!” In truth, it could be either of those things! But what the Q really stands for is “quality.” Starring premium ingredients (nothing fake!), less sweetness, and perfect carbonation, every flavor makes marvelous mocktails or cocktails—or just drink them straight!


LOOK FOR THESE Q MIXERS PRODUCTS:
• Club Soda
• Ginger Ale
• Ginger Beer
• Hibiscus Ginger Beer
• Tonic Water
• Light Tonic Water
• Sparkling Grapefruit

Take your holiday (or any day) to the next level with the finest chocolates our great state has to offer. Crafted by California’s premier chocolatiers, these artisanal delights are ideal for gourmet gifting and indulging in a little sweet self-care.

Why settle for a chocolate fountain when you can have a whole island? Drop by your local Nugget Market to explore a dedicated table topped with the finest cocoa-based confections around. Enjoy Golden State goodies like Lula’s Pecan or Macadamia Nut Caramels handmade in Monterey, Sacramento favorites like Bart’s Chocolate Fudge and
Ginger Elizabeth Chocolate Bars and Chocolate-Covered Candied Almonds, award-winning Charles Chocolates like Chocolate-Covered Lemon Peel and luxury Ruby Cacao Bars from San Francisco, our very own Fresh to Market Chocolate Bars made in Napa Valley by a master chocolatier, and many more. Welcome to chocolate paradise!
You may have already heard about it, but have you had the pleasure of tasting the untold decadence of Dubai chocolate firsthand? Originally made by a chocolate shop in Dubai (hence the viral nickname), the classic Pistachio Kataifi Chocolate Bar is a trendsetting confection featuring a
melt-in-your-mouth milk chocolate exterior filled to the brim with sweet pistachio paste and a crispy, shredded Middle Eastern phyllo pastry known as kataifi. The tantalizing trio of ingredients results in a larger-than-life chocolate bar with a creamy, crunchy mouthfeel and sweet and nutty flavor, often with a decorative splash of color on top. Give it a try and see what the buzz is about!


If you’re not traveling overseas anytime soon, enjoy this California riff on Dubai chocolate! Made in San Francisco with artisanal techniques and the finest ingredients, these beautiful bars boast house-made pistachio cream and crispy shredded kaitifi (think tiny shreds of filo dough) enrobed in rich, bittersweet chocolate for a beautiful balance of flavors and textures. For even more deliciousness, try their versions with gooey caramel and chocolate ganache!
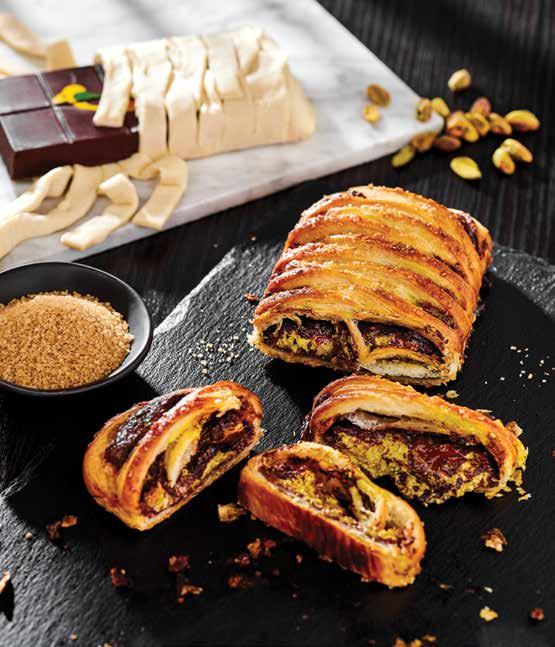

Make all sorts of desserts and appetizers in a snap with the flaky finish of Dufour Pastry Kitchens’ award-winning Puff Pastry, ideal for sweet or savory applications alike!
This simply stunning dessert is easy, elegant, and endlessly customizable. Simply stuff pre-made puff pastry with your favorite chocolate bar for the ultimate in care-free decadence.
PREP TIME: 10 MINUTES
COOK TIME: 25–30 MINUTES
YIELD: 6 SERVINGS
• 1 sheet Dufour
Pastry Kitchens
Classic Puff Pastry
• 1 gourmet chocolate bar
• 1 egg
• 2 teaspoons turbinado sugar (optional)
Preheat oven to 400°F.
Allow frozen puff pastry to thaw for about 30 minutes, then place on a baking pan lined with parchment paper or a silicone baking mat. Place chocolate bar in the center of the pastry, then make 9–10 cuts on either side of the chocolate, creating long pastry flaps.
Starting at one end, fold the first pastry flap over the chocolate at an angle. Fold the first flap from the opposite side over at an angle, then continue alternating pastry flaps to form a braid.
Beat egg in a small bowl with a whisk or fork to create egg wash. Use a basting brush to brush the egg wash onto the pastry, then sprinkle with turbinado sugar for added texture, if desired.
Place pastry braid in the oven and bake for 25–30 minutes, until golden brown. Let cool on the pan for 10 minutes, then transfer to a wire rack to cool completely.
NATURAL COCOA POWDER
At its core, cocoa powder is simply ground up roasted cocoa beans. Since cocoa beans are acidic, so is the powder, which gives it a slightly bitter flavor. Fun Fact: Since natural cocoa powder is acidic, it reacts with baking soda (which is basic) and can help give baked goods their rise!
DUTCH-PROCESSED
COCOA POWDER
A.k.a. alkalized cocoa powder, this kind of cocoa powder is made from beans bathed in an alkaline solution which neutralizes their natural acid. This results in a darker color, mellower flavor, and a chemically neutral powder that often needs baking powder (which has both basic and acidic components) to rise.

This organic, Fair Trade Certified cocoa made locally in Berkeley is high-fat and non-alkalized, giving it a beautiful boldness and versatility perfect in sweet and savory recipes.
‘T is the season for bountiful baking! Before you make a batch of your favorite festive cookies, pie, or fudge, be sure to stock up on essentials like flour, sugar, vanilla, sprinkles, and, of course, chocolate! From chips and chunks to powders, discs, and bars, baking chocolate can take many forms to suit any recipe.
Take our mini cocoa class to learn more!

This premium, extra fine, unsweetened cocoa is ideal for baking, dusting, and more. It’s made in France by a B-Corp dedicated to crafting premium chocolates for more than a century!
Milk and dark chocolate lovers alike will melt for this purely plant-based 66% bittersweet dark chocolate which brings together fruity and nutty flavors in deliciously complex harmony.

Cacao nibs are bits of fermented and roasted cacao beans. These ones have a deep, nutty flavor and satisfying crunch that goes great in (or on!) a variety of desserts and other dishes.


Making premium vanilla for more than 100 years, this family-owned and -operated company crafts a variety of superior baking extracts just down the way in Paso Robles, California!
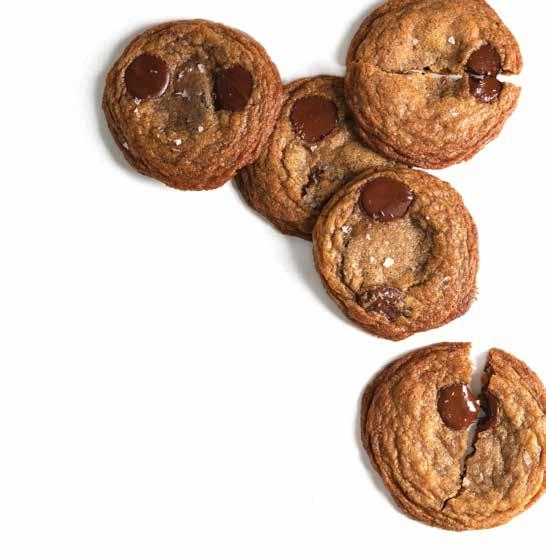
With browned butter decadence and gooey chocolate pieces galore, these cookies are simply irresistible!

Sporting colors from plants and spices, these super (and natural!) sprinkles are sweet, soft, vegan, and allergy-friendly making them the perfect choice for that special festive finish.


Made with three kinds of chocolate and the perfect pop of peppermint, this beautiful bark is sure to become a holiday favorite!
PREP TIME: 10 MINUTES, PLUS 40 MINUTES COOLING
COOK TIME: 20 MINUTES
YIELD: 10–12 SERVINGS
INGREDIENTS
• 9 ounces dark chocolate chips
• 9 ounces semi-sweet chocolate chips
• ¾ teaspoon peppermint extract, divided
• 18 ounces white chocolate chips
• 1 cup crushed candy canes or peppermint candies
PREPARATION
Line a low-sided baking sheet with parchment paper or a silicone baking mat.
Melt dark chocolate chips over a double boiler on low heat. When completely melted, remove the bowl from the pot and add half of the semi-sweet chips. Stir until melted, then add the remaining semi-sweet chocolate chips and stir until melted. If needed, place bowl back over steam briefly to help melt the chips.
Fold in ½ teaspoon peppermint extract then pour chocolate onto lined baking sheet. Spread to a thickness of about ¼ inch, making a rectangle about 9x12 inches. Let cool until set.
Melt white chocolate over the double boiler and fold in ¼ teaspoon peppermint extract. Pour over the set chocolate, spreading it into an even layer all the way to the edges. While white chocolate is still warm, sprinkle the crushed candy canes over the top and gently press into the surface. Let cool to room temperature.
Once bark is completely set, break or cut into pieces.
The perfect combination of rich chocolate and sweet peppermint, these little treats are a delicious dessert bite.
PREP TIME: 30 MINUTES,
PLUS 2 HOURS CHILLING
COOK TIME: 5 MINUTES
YIELD: 25 TRUFFLES
• 8 ounces heavy cream
• 2 tablespoons unsalted butter
• 1 tablespoon light corn syrup
• 8 ounces bittersweet chocolate chips
• 2 tablespoons peppermint schnapps
• ¼ cup cocoa powder
• 4 candy canes, crushed
• 2 tablespoons assorted sprinkles
In a small saucepan over medium heat, combine cream, butter, and corn syrup, stirring occasionally until warm and steaming.
Place chocolate chips in a heatproof bowl. Pour cream mixture over chocolate chips and stir to combine. Add peppermint schnapps and stir until smooth. Chill mixture in refrigerator for 1½ hours.
Scoop ganache into balls with a melon baller and place on a parchment-lined baking sheet. Return to refrigerator for another 30 minutes.
Place cocoa powder, crushed candy canes, and sprinkles in separate bowls for dipping. Using a fork, roll chilled ganache truffles in chosen toppings, then place in small cupcake liners to serve.


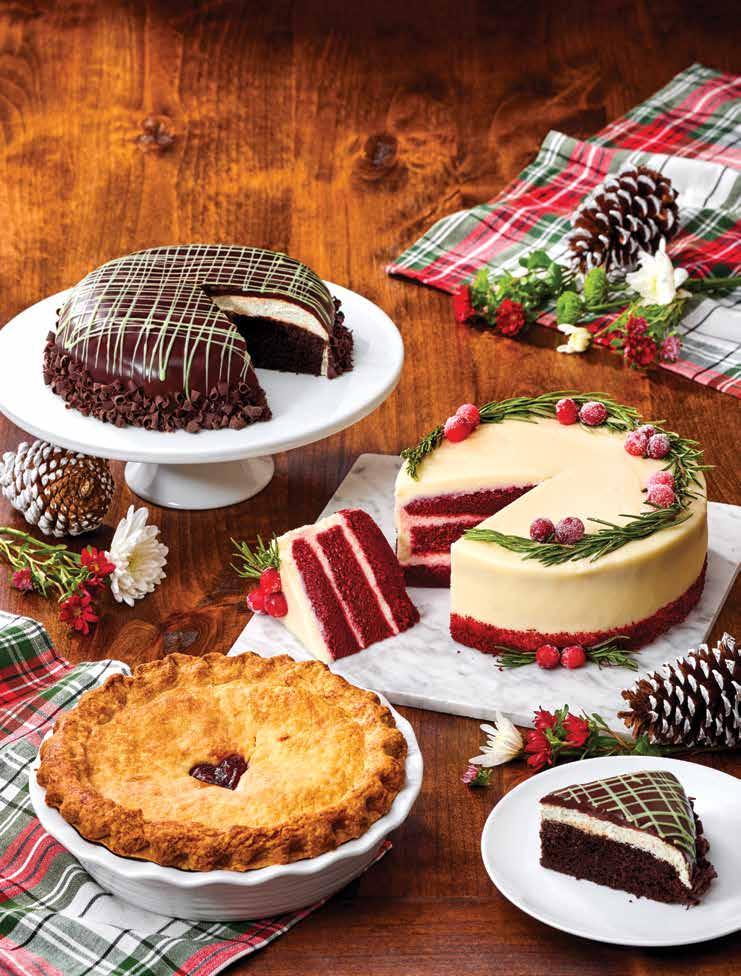
Visions of sugar plums dancing in your head? How about a Festive Red Velvet Cake, piquant Peppermint Torte, or pleasing pie from Beckmannʼs? Order online or visit our Bakery and treat your family (and yourself) to all sorts of heavenly holiday hits. (Sugar plums not included.) Plan ahead and order early!
The season of sweetness has begun! Big batches of holiday cookies are one thing, but what about equally shareable éclairs, tarts, croissants, and petit fours? Whether you’re a wide-eyed beginner or a pastry pro, it’s time to bake it up a notch and impress with elevated, elegant eats worthy of wonder. Explore versatile base recipes, then branch out into even more goodies you can make with them! Once you’ve mastered the basics, the sky is the limit. Here’s to the sweet life!
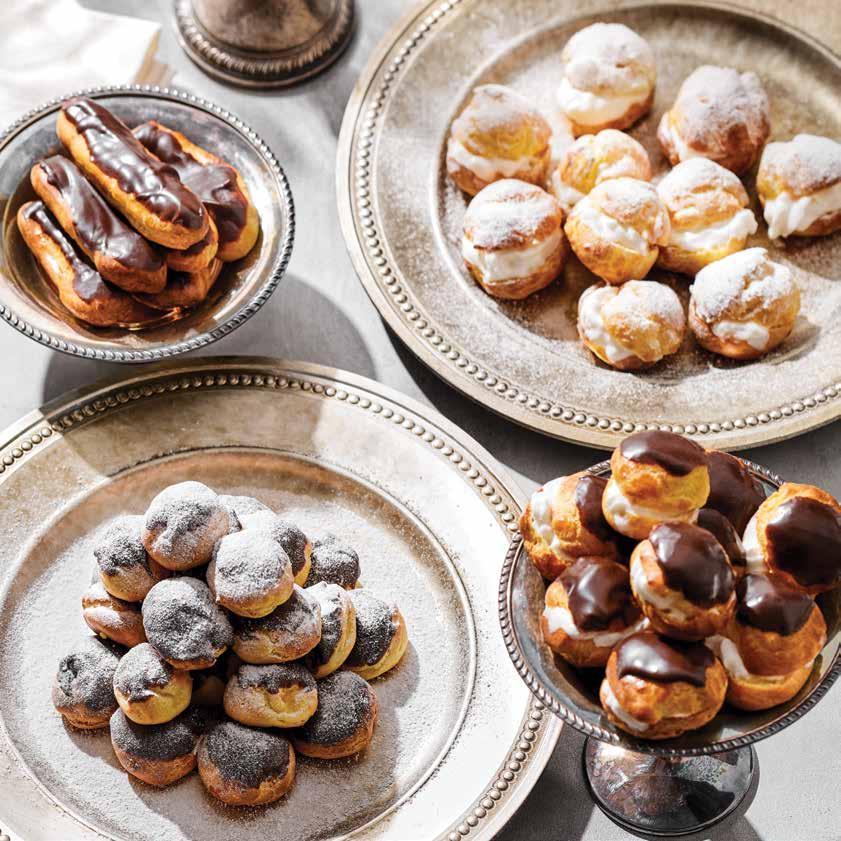
Pronounced “paht ah shoe,” this is one French pastry that’s easier to make than you’d think. It’s also unique in that it’s kind of like a dough-batter and gets cooked on the stove before being piped and baked. This is because steam is essentially its leavener (what makes baked goods rise, or, in this case, puff up).
Cooking it ensures it’s pipeable rather than too liquidy and perfects its elasticity so it can hold a shape. The shape you pipe your choux in depends on the recipe you’re making, and the possibilities are truly endless! Now, allons-y!
Make these little puffs of pleasure extra special with homemade pastry cream! Also, a word to the wise: make sure your dough is sufficiently cool before you add the eggs (you don’t want to end up in a scramble—literally!).
PREP TIME: 10 MINUTES
COOK TIME: 35 MINUTES
YIELD: 8–10 SERVINGS
Pâte à Choux:
• ½ cup (118 grams) water
• ½ cup (121 grams) whole milk
• ¼ cup (57 grams) unsalted butter
• 1 teaspoon kosher salt
• 1 tablespoon granulated sugar
• 1 cup (130 grams) all-purpose flour
• 4 large eggs
Egg Wash:
• 1 large egg
• 1 tablespoon water
Filling:
• 2 cups pastry cream (or desired filling)
Ganche:
• 1½ cups (227 grams) semi-sweet chocolate chips
• 1½ cups (357 grams) heavy cream
PREPARATION
Preheat oven to 350°F. Line two baking sheets with parchment paper and lightly brush them with water. For the pâte à choux, combine water, milk, butter, salt, and sugar in a saucepan and bring to a boil. Reduce heat. Add flour and mix vigorously with a wooden or heat-proof silicone spatula until a smooth, dry ball forms and a film on the bottom of the pan is present, about 4 minutes. Remove from heat and allow to cool. Add 1 egg at a time, stirring constantly, ensuring each is incorporated and the mixture is velvety and smooth before adding the next.

Transfer mixture to a piping bag fitted with a medium star tip. For profiteroles, pipe mounds onto prepared parchment. For éclairs, pipe 5-inch straight lines onto prepared parchment. Space shapes out by 1 inch. Press down any peaks with a damp finger.
For the egg wash, whisk together egg and water, then brush onto piped dough.
Transfer to oven and bake for 25–30 minutes or until golden brown and puffed. Do not open oven while baking. Cool completely on a wire rack. Poke a hole in the bottoms of the pastries (1 for profiteroles and 2–3 for éclairs). Fill a piping bag with pastry cream or desired filling and cut off the tip, then insert into each hole and squeeze to fill pastries.
For the ganache, place chocolate chips in a large glass bowl. Set aside. Pour heavy cream into a small saucepan and heat over medium heat until simmering. Remove cream from heat and pour evenly over chocolate chips. Do not stir. Cover with plastic wrap and let sit for 5 minutes.
After 5 minutes, remove plastic wrap and whisk the chocolate and cream together gently until completely melted and combined.
Holding an éclair or profiterole upside down (hole-side up), dip the top gently into the ganache. Wait for the ganache to set on each pastry before serving.
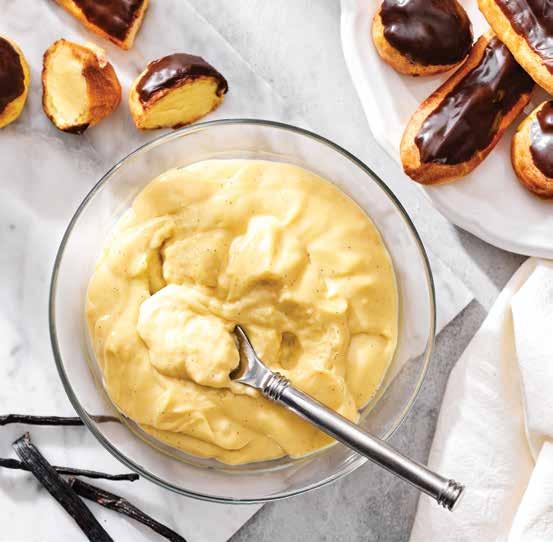
Versatile and delicious, pastry cream is perfect for all kinds of uses, from filling éclairs to enjoying in a fruit tart. Pro Tip: It’s essential to continuously whisk so the cream doesn’t curdle or scorch!
PREP TIME: 5 MINUTES, PLUS 2 HOURS CHILLING
COOK TIME: 30 MINUTES
YIELD: 3 CUPS
INGREDIENTS
• 2 cups (485 grams) whole milk
• 1 vanilla bean pod, split lengthwise, seeds scraped
• 6 large egg yolks
• ⅔ cup (134 grams) granulated sugar
• ¼ cup (33 grams) corn starch
• 1 tablespoon (14 grams) unsalted butter, cold
In a medium saucepan, combine the milk and vanilla bean pod and seeds. Heat over medium until simmering, then immediately remove from heat and set aside. Let sit for 15 minutes to allow vanilla to infuse into milk. Remove the vanilla bean pod. The mixture should still be hot.
In a heat-proof bowl, whisk the egg yolks and sugar until smooth and light in color. Sift in corn starch and whisk vigorously until no lumps remain. While whisking, slowly pour in ½ cup of the hot milk mixture until incorporated. Then, slowly whisk in the remaining hot milk mixture. Once combined, pour the mixture through a fine mesh strainer back into the saucepan.
Cook over medium heat, whisking continuously, until the cream is thickened and just starting to bubble, about 5–8 minutes. Remove from heat and whisk in butter until melted and incorporated.
Transfer the pastry cream to a bowl. Press plastic wrap directly onto surface to prevent a skin from forming. Chill for at least 2 hours. The custard can be made up to 24 hours in advance. Whisk the pastry cream until smooth before using, as it will have set into a firm custard.
Made with a pâte à choux pastry base, these cheesy, light delights are best served hot, so enjoy them fresh from the oven!
PREP TIME: 10 MINUTES
COOK TIME: 35 MINUTES
YIELD: 8–10 SERVINGS
Pâte à Choux:
• ½ cup (118 grams) water
• ½ cup (121 grams) whole milk
• ¼ cup (57 grams) unsalted butter
• 1 teaspoon kosher salt
• 1 cup (130 grams) all-purpose flour
• 4 large eggs
• 1 cup (108 grams) shredded Gruyère cheese
• ½ teaspoon nutmeg
Egg Wash:
• 1 large egg
• 1 tablespoon water
• 1 pinch kosher salt
PREPARATION
Preheat oven to 350°F. Line two baking sheets with parchment paper and lightly brush them with water.
For the pâte à choux, combine water, milk, butter, and salt in a saucepan and bring to a boil. Reduce heat. Add flour and mix vigorously with a wooden or heat-proof silicone spatula until a smooth, dry ball forms and a film on the bottom of the pan is present, about 4 minutes.
Remove from heat and allow to cool. Add 1 egg at a time, stirring constantly, ensuring each is incorporated and the mixture is velvety and smooth before adding the next. Mix in Gruyère cheese and nutmeg.
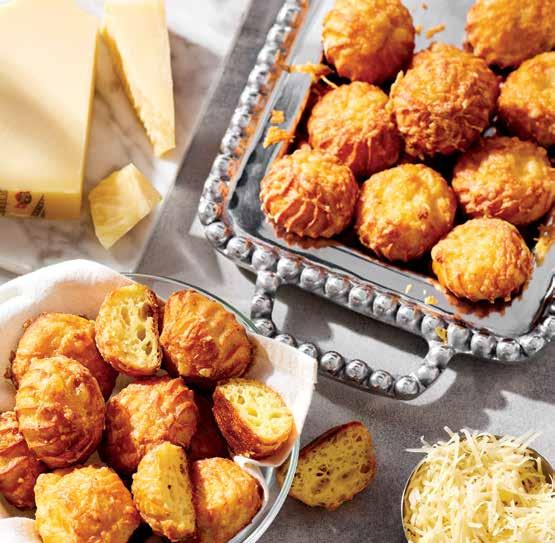
Transfer mixture to a piping bag fitted with a medium star tip. Pipe mounds onto the prepared parchment, spaced out by 1 inch. Press down any peaks with a damp finger.
For the egg wash, whisk together egg, water, and salt. Brush piped dough with egg wash.
Transfer to oven and bake for 25–30 minutes or until golden brown and puffed. Do not open oven while baking. Remove from oven and serve.

In all its light, thousand-layered, crunchy glory, puff pastry is delicate, versatile, and to many, intimidating. But it doesn’t have to be, especially if you know why you’re doing all that rolling and folding! The process is called lamination, which is what creates all the layers of butter and dough. If the butter is too firm, the dough will tear; if it’s too soft, it’ll squish out. So, make sure both dough
and butter are the same level of cool, firm, and pliable. As the pastry bakes, the butter melts and creates steam, which makes the thin pastry layers rise. The lipids in the butter also essentially fry the dough, making it crispy. Now that you’re armed with knowledge, you’ve got this!
Whether you’re making a Napoleon, tart, or some other tantalizing treat, this recipe for puff pastry is the place to start!
PREP TIME: 1 HOUR, PLUS 6–10 HOURS CHILLING
COOK TIME: 16–20 MINUTES
YIELD: 1 SHEET (12X18 INCHES)
Base Dough:
• 3½ cups (456 grams) all-purpose flour
• 2 tablespoons granulated sugar
• 1½ teaspoons kosher salt
• ¼ cup (57 grams) unsalted Europeanstyle butter, cold and cubed
• 1 cup (237 grams) cold water
Butter Block:
• 3 sticks (1½ cups or 340 grams) unsalted European-style butter, cold
PREPARATION
For the dough, sift together flour, sugar, and salt in the bowl of a stand mixer fitted with a paddle attachment. Mix on low speed until combined, about 30 seconds. Add butter and beat on medium speed until it is well incorporated, no lumps remain, and the mixture has a sandy texture, about 3 minutes.
Change mixer attachment to dough hook. On low speed, slowly add in cold water. Mix until dough just comes together, about 30 seconds. Increase to medium speed and mix until dough is smoother, about 2–3 minutes. Remove dough, wrap it in plastic wrap, and place it in the refrigerator.
For the butter block, prepare two large sheets of parchment paper. Place butter on one piece, and lay the other piece on top of the butter. Using a rolling pin, whack the chilled butter until it is malleable and spreadable, but still cold. Using the rolling pin, continue to roll out and form the butter into an 8x8-inch square. Fold the parchment to fit the square and press the butter into the corners. Press down on the butter block with a cutting board to ensure uniform thickness. Set the parchment paper-wrapped butter block in the refrigerator.
Remove dough from the refrigerator and set it on a lightly floured surface. Using your hands, gently shape the dough into a square. Using a rolling pin, roll the dough out into a 12-inch square. To keep the dough in a uniform square shape, roll the dough from its center out towards each corner in an “X” pattern. Remove butter block from the refrigerator and place it in the center of the dough at a 45-degree angle, so it looks like a diamond in a square. Fold the edges of the dough up over the butter block, pressing the edges together to completely seal in the butter. Turn the dough back 45 degrees to its original orientation. With the rolling pin, roll out the dough, seam-side up, into a rectangle at least twice as long as it is wide, about about 20x10 inches. Fold the dough in thirds by folding the top third down, followed by the bottom
third up. Rotate the dough 90 degrees clockwise. Again, roll the dough into a rectangle at least as twice as long as it is wide, about about 20x10 inches, and repeat the folding process. Wrap the dough in plastic wrap, then place it in the refrigerator until chilled and well rested, at least 1 hour.
Remove dough from the refrigerator and repeat the above folding process to make two additional turns. Wrap the dough in plastic wrap and let it rest in the refrigerator for at least 4 hours, or ideally overnight.
Repeat the folding process one more time to make two additional turns. Return the dough to the refrigerator to chill for at least 1 hour.
With a rolling pin, roll out the dough into a ⅛–¼-inch thickness, about about 18x12 inches. Trim off about ¼ inch on all four sides, which takes off the folded edges to ensure that it puffs properly in the oven.
Cut dough into desired shape(s) and bake according to the type of pastry you’re making.
If not baking immediately, puff pastry may be refrigerated for several days or frozen for up to six months. To use from frozen, allow puff pastry to thaw in the refrigerator overnight.
Crispy puff pastry contrasts against cool, soft pastry cream in these delightful desserts, and fresh berries make it all the more refreshing! Napoleons are best eaten fresh, but can be stored in the refrigerator for about a day.
PREP TIME: 45 MINUTES
COOK TIME: 23–26 MINUTES
YIELD: 6 SERVINGS
INGREDIENTS
• 1 sheet (12x12 inches) puff pastry
• 3 cups pastry cream
• 1 pint blackberries, divided
• 1 pint raspberries, divided
• ½ cup powdered sugar
Preheat oven to 400°F. Line a baking sheet with parchment paper.
Place the puff pastry on a clean, lightly floured work surface. Cut the puff pastry into 3 rectangles (4x12 inches each), then cut each rectangle into 6 slices (2x4 inches each), yielding 18 strips total. Transfer the strips to prepared baking sheet, spaced apart. Prick the strips with a fork and chill until firm, about 30 minutes.
Transfer baking sheet to preheated oven. Bake for 10 minutes, until puff pastry is golden around the edges. Lower oven temperature to 375°F. Set another baking sheet directly on top of the pastry strips and bake for 8 more minutes.
Remove the top baking sheet and continue to bake 5–8 minutes, until the pastry is golden brown on top and bottom, checking frequently to prevent burning. Remove from oven and cool completely.
Cut a hole in the tip of a pastry bag, fit it with a ½-inch round tip, and fill it with half of the pastry cream.
On a flat surface, lay out 6 pieces of baked puff pastry for the bases. Pipe an even layer of pastry cream onto each one, then use half of the berries to top them. Place a second baked puff pastry strip on top of each one to create 6 stacks of 2 layers.
Fill the pastry bag with remaining pastry cream, then pipe it evenly onto the second layer of each stack. Top pastry cream with remaining berries, then top each stack with a final strip of baked puff pastry to create 6 stacks of 3 layers.
Dust with powdered sugar and serve. See photo on p. 53
These tantalizing tartlets are the perfect level of sweetness thanks to fresh fruit being the star of the show. For the same splendor out of pear season, try stone fruits or apples!
PREP TIME: 25 MINUTES
COOK TIME: 15–18 MINUTES
YIELD: 4 SERVINGS
INGREDIENTS
• 1 sheet (12x18 inches) puff pastry
• 2 tablespoons unsalted butter, melted
• 1 tablespoon light brown sugar
• 1 teaspoon vanilla paste
• 2 red pears, halved and sliced thin
• 1 tablespoon granulated sugar
PREPARATION
Preheat oven to 400°F. Line a baking sheet with parchment paper.
Place the puff pastry on a clean, lightly floured work surface. Cut into 4 rectangles (6x9 inches each), then gently transfer to prepared baking sheet.
In a small bowl, combine the melted butter, brown sugar, and vanilla paste. Using a pastry brush, generously brush the top of the puff pastry with the butter mixture. Leaving a ½-inch border, fan ¼ of the pear slices on top of each puff pastry. Brush the top of the pastries with remaining butter mixture and sprinkle with granulated sugar.
Bake for 15–18 minutes, or until the pastry is golden brown and puffed around the edges and the pears are tender. Remove from oven and let cool before serving.
See photo on p. 53
These terrific twists are almost as easy to make as they are to enjoy! Don’t be afraid to mix it up with other flavorful, savory seasoning additions, like a sprinkle of pepper or powdered garlic.
PREP TIME: 15 MINUTES
COOK TIME: 12–15 MINUTES
YIELD: 12 TWISTS
INGREDIENTS
• 1 sheet (12x18 inches) puff pastry
• 1 egg
• 1 tablespoon water
• ½ cup (42 grams) grated Parmesan cheese
• 1 teaspoon sea salt
PREPARATION
Preheat oven to 375°F. Line a baking sheet with parchment paper. Place puff pastry sheet on a lightly floured surface. Whisk egg and water in a cup to make egg wash, then brush it on the puff pastry.
Sprinkle grated Parmesan cheese evenly over the puff pastry. Gently roll a rolling pin over the top of the puff pastry to press the cheese into the dough.
Cut the pastry into 12 strips, each about 1 inch wide. Hold the ends of each strip and twist to create a corkscrew-like spiral, then gently place onto the baking sheet.
Brush each twist with egg wash and sprinkle with sea salt. Bake for 12–15 minutes, or until lightly golden.
These light, crispy French delights are easy to make whenever you have leftover puff pastry dough— but they’re so good, you’ll be making (or buying!) puff pastry just to have them! Try putting your own spin on them by making them into different shapes and giving them different fillings, like swirls studded with chocolate pieces.
PREP TIME: 15 MINUTES
COOK TIME: 10–12 MINUTES
YIELD: ABOUT 15 SERVINGS
INGREDIENTS
• 1 sheet (12x18 inches) puff pastry
• ¾ cup (150 grams) granulated sugar
PREPARATION
Preheat oven to 375°F.
Place puff pastry dough on a floured surface. Sprinkle dough evenly with sugar, then use a rolling pin to gently roll over it to press the sugar into the dough. Starting on the right side, roll or fold the dough over itself towards the center until you reach the middle. Repeat with the left side until the two rolls meet in the middle.
Cut dough vertically into ¼-inch-thick slices. Place slices flat on a baking sheet, then transfer to the oven and bake for 10–12 minutes.
Let cool on the baking sheet for 10 minutes, then move to a wire rack to cool completely.

What’s the difference between puff pastry and yeasted laminated dough? Great question! You already know what lamination is (p. 53), but this time it’s more like “turns.” The addition of yeast brings fermentation into play, giving the dough an airier, softer, less dry, and breadier texture and helps it double in size.
(This means you can’t skip the resting periods, which help reduce shrinkage.) Yeasted laminated dough is also enriched, thanks to milk and sugar. Like with puff pastry, the trick is to keep it cool—literally and figuratively!
Ever wanted to make your own croissants or their chocolatey bretheren, pain au chocolat? Now you can! After you’ve made the base dough, you don’t have to cut and shape it right away—you can freeze and store it for later use. Use the base dough to make either variation of this classic treat!
PREP TIME: 1 HOUR, PLUS UP TO 17 HOURS RESTING
COOK TIME: 16–20 MINUTES
YIELD: 8 SERVINGS
INGREDIENTS
Base Dough:
• 4⅓ cups (565 grams) all-purpose flour
• ¼ cup (50 grams) granulated sugar
• 1 tablespoon kosher salt
• 2¼ teaspoons (7 grams) dry active yeast
• ⅔ cup (158 grams) water
• ½ cup (121 grams) whole milk
• 1½ tablespoons (21 grams) unsalted European-style butter, cold and cubed
Butter Block:
• 3½ sticks (1¾ cups or 397 grams) unsalted European-style butter, cold
Filling:
• 2 high-quality bittersweet or semi-sweet chocolate bars, cut crosswise into 16 batons (for Pain au Chocolat variation)
Egg Wash:
• 1 egg, beaten
• 1 tablespoon whole milk
PREPARATION
For the dough, combine flour, sugar, salt, yeast, water, and milk in the bowl of a stand mixer fitted with a dough hook attachment. Mix on low speed until well combined, about 3 minutes.
Add butter and continue to mix on low speed until the butter is well incorporated and no lumps remain, about 3 minutes. Increase mixer speed to medium and mix until the dough is smoother in texture, about 3 minutes. Remove dough from bowl, wrap in plastic wrap, and place in refrigerator to chill for at least 4 hours.
For the butter block, prepare two large sheets of parchment paper. Place butter on one piece, and lay the other piece on top of the butter. Using a rolling pin, whack the chilled butter until it is malleable and spreadable, but still cold. Using the rolling pin, continue to roll out and form the butter into an 8x8-inch square. Fold the parchment to fit the square and press the butter into the corners. Press down on the butter block with a cutting board to ensure uniform thickness. Set the parchment paper-wrapped butter block in the refrigerator. Remove dough from refrigerator and set it on a lightly floured surface. Using a rolling pin, gently shape dough into a square shape before rolling it out into a 8x14-inch rectangle. Remove butter block from the refrigerator and place it in the center of the dough. Fold the edges of the dough over the butter block, pressing them together to completely seal in the butter. Turn dough 45 degrees, back to its original orientation.
With a rolling pin, roll out the dough, seam-side up, into an 8x14-inch rectangle. Fold the dough in thirds by folding the top third down, followed by the bottom third up. Rotate the dough 90 degrees clockwise. Again, roll out the dough into an 8x14-inch rectangle and repeat the folding process. Wrap dough in plastic wrap and place in the refrigerator until chilled and well rested, at least 1 hour.
Remove dough from the refrigerator and repeat the folding process. Wrap the dough in plastic wrap and let it rest in the refrigerator for 1 more hour.
Remove dough from the refrigerator and repeat the folding process once more. Wrap the dough in plastic wrap and let it rest in the refrigerator for 4 hours or up to overnight.
Remove dough from the refrigerator. With a rolling pin, roll out the dough to ⅛–¼-inch thick. Trim off about ¼ inch on all four sides—this helps ensure that it puffs properly in the oven.
Prepare a baking sheet with parchment paper.
For croissants, use a pizza cutter to cut dough vertically into equal thirds. Cut each third diagonally to make triangles. Cut a small notch at the base of each triangle and tug at each side of the base, then tug at the tip of each triangle to stretch it out a bit. Start at the base of the triangle to roll it up and make a croissant shape, being careful not to roll too tightly. Repeat for all triangles.
For pain au chocolat, use a pizza cutter to cut dough into 4x8-inch rectangles. Place a chocolate baton horizontally near the top of each rectangle. Roll the rectangle down into itself once to encase the chocolate baton in dough, then stop rolling and place a second chocolate baton horizontally across the dough and continue rolling. Repeat for all rectangles.
Allow croissants or pain au chocolat to proof covered in a warm area for at least 2–3 hours, until doubled in size.
Preheat oven to 350°F.
For the egg wash, whisk together the egg and milk. Gently brush pastries with egg wash after they have finished proofing.
Place proofed croissants or pain au chocolat on the baking sheet, bake for 16–20 minutes, or until golden brown.

Marzipan is pure, concentrated almond goodness. It’s also malleable—sort of paste-like, sort of dough-like—meaning you can roll it out, cut it up, and shape it to your heart’s content. Though it’s a simple recipe, avoid overmixing in your food processor. Otherwise, the almond oils will be
too expressed, resulting in more of a butter. For a flavor twist, add some drops of food-grade rosewater or orange blossom water for floral flair, or bit of liqueur for a boozy one. Marzipan marvelousness starts now!

This classic almond-based confection can be shaped and decorated into fun treats as is, or used to add a nice nuttiness to recipes like marzipan cookies.
PREP TIME: 5 MINUTES
YIELD: 1 ½ CUPS
INGREDIENTS
• 1½ cups almond flour
• 1½ cups powdered sugar
• 1 large egg white
• 1 pinch kosher salt
• 1½ teaspoons almond extract
Combine the almond flour and powdered sugar in the work bowl of a food processor. Pulse to blend until just combined.
Add the egg white, salt, and almond extract, processing until the mixture comes together and forms a pliable ball.
Remove the almond paste from the food processor, then shape it into a log, wrap it in wax paper, parchment paper, or plastic wrap, and refrigerate until ready to use.
Crispy on the outside and chewy on the inside, these cookies are perfect for lovers of all things almond.
PREP TIME: 25 MINUTES
COOK TIME: 15 MINUTES
YIELD: ABOUT 22 COOKIES
INGREDIENTS
• 14 ounces (397 grams) marzipan, cut into chunks
• 1 cup (201 grams) granulated sugar
• 2 egg whites
• ¼ cup plus 2 tablespoons (36 grams) almond flour
• 2 cups (215 grams) chopped almonds
• ¼ cup (31 grams) powdered sugar (optional)
Preheat oven to 350°F. Line a baking sheet with parchment paper.
In the bowl of a stand mixer fitted with a paddle, combine marzipan chunks, granulated sugar, egg whites, and almond flour. Mix on medium speed until a smooth, sticky dough forms.
Pour chopped almonds into a separate shallow bowl.
Scoop cookie dough into 1-tablespoon portions. With damp hands, roll the dough into 1-inch balls, then roll them in the chopped almonds to coat.
Place coated dough balls on the prepared baking sheet 2–3 inches apart. Bake for about 15 minutes, until the edges are golden brown, but the tops are still light at the center.
Remove cookies from oven and cool on the baking sheet for about 5 minutes, until they are firm enough to move to a wire rack to cool completely.
Once cool, sift powdered sugar over cookies, if desired. Store at room temperature in an airtight container for up to 2 weeks.
These dainty cakes are a labor of love! Use melted chocolate or ganache to decorate them after the fondant dries or pick up some pre-made, small royal icing shapes to stick on. You can store them in the fridge for about two days if they don’t all disappear in one go.
PREP TIME: 50 MINUTES, PLUS 1½ HOURS SETTING
COOK TIME: 2 HOURS
YIELD: 24 SERVINGS
INGREDIENTS
Cake:
• ⅔ cup (151 grams) unsalted butter, softened
• 4 ounces (113 grams) cream cheese, softened
• 1½ cups (302 grams) granulated sugar
• 4 large eggs, room temperature
• 2 teaspoons vanilla extract
• 2 cups (260 grams) all-purpose flour
• 1 teaspoon baking powder
• ½ teaspoon kosher salt
• ¼ cup (61 grams) whole milk
Fillings:
• 8 ounces (227 grams) marzipan
• 1 cup (227 grams) lemon curd
• 1 cup (320 grams) raspberry jam
White Chocolate Fondant:
• 8 ounces (226 grams) white chocolate, chopped
• 3½ cups (432 grams) powdered sugar
• ⅓ cup (79 grams) hot water
• ¼ cup (82 grams) corn syrup
Preheat oven to 350°F and line two rimmed baking sheets with parchment paper.
For the cake, combine butter, cream cheese, and sugar at medium-high speed in a stand mixer fitted with a paddle until creamy and light in color. Add eggs, one at a time, beating for about 10 seconds on medium speed after each one. Add vanilla extract and continue beating, stopping the mixer occasionally to scrape the sides and bottom of the bowl with a spatula, until mixture is smooth, light, and creamy.
In a separate bowl, whisk together flour, baking powder, and salt. With mixer on low speed, alternate adding the flour mixture and milk to the butter mixture until ingredients are completely combined, scraping the sides and bottom of the bowl with a spatula as needed.
Split batter between prepared baking sheets and spread with a spatula so batter is even and smooth. Transfer to oven to bake for 15 minutes, or until cakes spring back when pressed lightly. Cakes will still appear very pale when baked completely.
While cakes are cooling, use a rolling pin to roll marzipan into a thin 8x8-inch square. Cut the square in half to make two 4x8-inch rectangles. After cakes have cooled completely, cut each into four even rectangles. Transfer each piece to a clean surface. Spread lemon curd evenly on the first piece. Spread jam on the second piece. Lay the rolled-out marzipan on the third piece. Leave the last piece plain—this will be your top layer.
Gently stack the cake pieces, finishing with the plain piece on top. Repeat with next set of prepared layers. Put the cakes in the freezer for about 30 minutes to firm up.
Remove cakes from the freezer. Make notches in 1½-inch intervals along the width and length of each cake. With a serrated knife and using the notches as a guide, cut across each cake to make even 1½-inch squares. Transfer the cake squares to a wire cooling rack over a baking sheet. Cover cake squares with plastic wrap and place in freezer.
For the white chocolate fondant, melt the chopped white chocolate in a bowl set over a pot of simmering water (a.k.a. a double boiler or bain marie), stirring occasionally. In a separate large bowl, sift powdered sugar. Add hot water and corn syrup to sifted sugar and fold with a spatula until combined. Stir in melted white chocolate until smooth. If the consistency of the fondant is too thick, mix in more hot water 1 teaspoon at a time.
Remove cake squares from the freezer. Place one cake square on a fork and dip the bottom into the fondant. Lift the cake and spoon more fondant over the top until the sides are coated. Lightly tap the fork on the bowl to remove excess fondant. Return cake square to wire cooling rack to set. Repeat process for the remaining cake squares.
Let fondant set for about 1½ hours, then decorate as desired.
This terrific tart combines ease with elegance and deliciousness. If you can’t find Cosmic Crisp apples, feel free to use Honeycrisp or Granny Smith, which will keep their shape and taste just as good.
PREP TIME: 30 MINUTES
COOK TIME: 45 MINUTES
YIELD: 8–10 SERVINGS
INGREDIENTS
Crust:
• 2 cups (260 grams) all-purpose flour
• ¼ cup (55 grams) light brown sugar, packed
• ⅛ teaspoon kosher salt
• 7 tablespoons (99 grams) unsalted butter, cold and cubed
• 1 large egg, lightly whisked
Filling:
• 13½ ounces (383 grams) marzipan
• 4 large Cosmic Crisp apples
• 2 tablespoons (27 grams) light brown sugar, packed
For the crust, mix flour, brown sugar, and salt in a bowl. Add butter and egg and mix until distributed. Rub the butter and flour mixture between your fingers until no dry flour remains and soft crumbs form, resembling breadcrumbs or wet sand. Press the crumbs evenly into the base and sides of a 10-inch tart pan. Set aside.
Preheat oven to 350°F.
For the filling, use a rolling pin to roll out marzipan into a 10-inch circle. Place the marzipan into the prepared tart pan.
Core and halve apples, then slice the halves into thin slices. Arrange apple slices on top of the marzipan. Sprinkle brown sugar evenly over the top.
Bake on the middle rack of the oven for 45 minutes, or until the apple slices are tender. Let tart cool completely before removing from the pan.

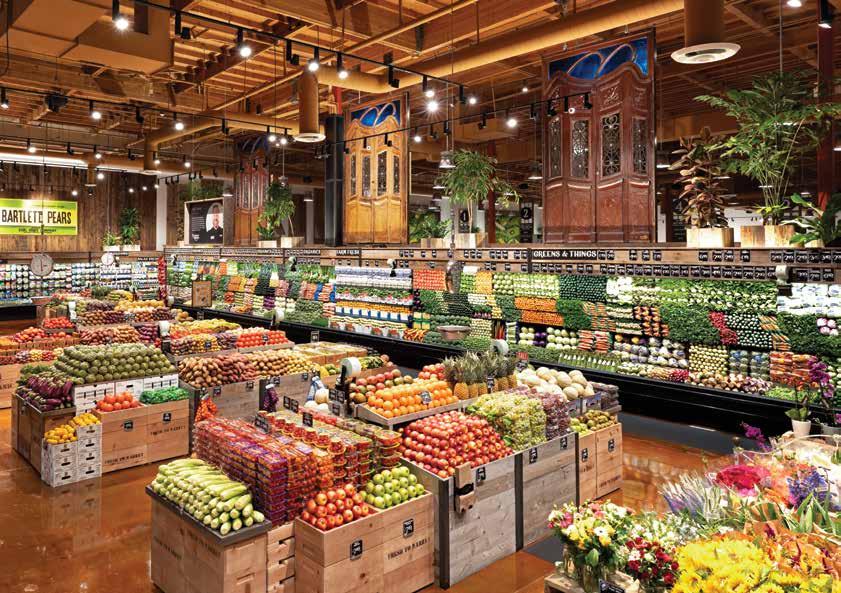
4500