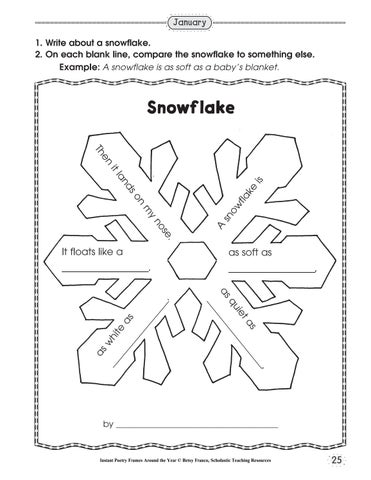
January 1. Write about a snowflake. 2. On each blank line, compare the snowflake to something else. Example: A snowflake is as soft as a baby’s blanket.
Snowf lake en Th y m . se no
A
on
sn ow fla ke
is
s nd la it
as soft as
____________________.
____________________, _, __ s __ t a ____ ie _ qu ___ as ____ _ __
as __ wh i __ __ te a __ __ s __ __ __ __ __ .
It floats like a
by __________________________________________________
Instant Poetry Frames Around the Year © Betsy Franco, Scholastic Teaching Resources
25
Winter Things I’m always wearing white. I have a carrot nose. When the sun comes out to play, I melt down to my toes. What am I? ________________________
I love to carry you on my back as I’m sliding down snowy hills. You yell and scream over all the bumps ’cause riding on me is such a thrill! What am I? ________________________
In wintertime, the birds come by and nibble up my seeds. I look like a teeny tiny house. I give birds what they need. What am I? ______________ ______________
Riddle Poem of the Day © Betsy Franco, Scholastic Teaching Resources
Each of us is different, but we like to fall together. We look like lace or little stars. We’re part of winter weather. What are we? ________________________
I make you sniffle and snuffle. I make you say, “Achoo.” You use a lot of tissues when I come to visit you. What am I? ________________________
Riddle Poem of the Day © Betsy Franco, Scholastic Teaching Resources
2
Winter Things snowman sled/sleigh bird feeder snowflakes a cold/the flu
3
Riddle Poem of the Day © Betsy Franco, Scholastic Teaching Resources
Glue page 3 here.
Winter Snowf lake
Spread cream cheese.
Glue page 5 here.
Follow-the-Directions: No-Cook Snacks © Immacula A. Rhodes, Scholastic Teaching Resources • Page 2
by _______________
Put a piece of cereal in the center.
Make a row from the center.
Make two more rows.
A snowy day snack!
Making the Mini-Books
1
Cut out the three sets of mini-book pages. Tort l (There are two pages in each Tort set). G ue page 3 ere
Tort Tor lla la Turkey T r ey
Spread cream cheese G e p ge 5 he e
byy_______________
P
u on efeathers he and d a head e Put
Add eyes a beak and feet
F ldl he h wing i s
Gobble it up!
Sequence the pages, using the picture and text clues as guides. Write in the number a for each step. Then color the pictures.
3
Glue the pages where indicated. Tortill Turkey rt l together T rke
F
2
GG bb el tt p!p
h
m
_
To lla la Turkey e Tort
by _______________
4
Spread cream cheese
1
2
P t t n feathers f h s ndda head h
3
Add eyes a beak and feet
4
Fo d the hew ngs i
Gobble t up!
5
6
h d
Tortilla
by ____
e a beak
A
D c eDr
Fold the pages to make an accordion-fold book.
n
fe
F ldl t h w
____
G bb b el it t
s
T
__ __
Sp
crea
e
Turkey
______
_____
2
am cheese
1
Spread cre
Put on fea
hers and
a head
3
s a beak
d eye Ad A
and feet
4
Fold the
wings
5
bble Go G
t up!
6
t
k and
old h wi
5
Put n fea t
a k ©2 ow he D
Optional Assembly: Cut apart
all of the mini-book pages (trim off the glue tabs). Sequence the pages, fill in the page numbers, and color the art. Stack and staple the pages together along the left edge. e
G
e
w h D
n
da
Pt
F
he
g
Tortilla Turkey
le t u !
Follow-the-Directions: No-Cook Snacks © Immacula A. Rhodes, Scholastic Teaching Resources
by
1
3
Name
Date
Winter Words Write each word below the correct picture. The first one has been done for you.
boots
hat
jacket
mittens
skates
snowflake
Name
TicTacSnow
Date
Snowman vs. Snowflake
Challenge a friend to a snowy game of tic-tac-toe! Cut out the markers. Then use the game board on page 2 to play, following the directions below.
Print on thick paper for sturdy markers.
How to Play: 1. Each player has four markers: all snowmen or all snowflakes. 2. Flip a coin to see who will go first. 3. Players take turns putting their markers on empty squares. 4. The first player to get three marks in a row (up, down, across, or diagonally) is the winner.
Page 1
Name
TicTacSnow
Date
Snowman vs. Snowflake Cut out the markers on page 1, and then use the game board below to play tic-tac-toe!
Page 2
Ski Maze
Help the skier find a fun way through the trees to the bottom of the hill!
start
finish!
Get Dressed for the Winter! Brrr! It’s cold outside! Color the clothes you would wear on a wintery day.
SKI RACE!
Have a grown-up help cut out and put these together!
How to Play: Each player rolls the die and follows the instructions. The first one down the mountain to the finish, wins!
Fold on the dotted lines.
✁
For added stability, slide a paper clip on the bottom of each piece.
✁
Tape on the bottom.
For best results, print on
thicker paper.
Fold on the dotted lines.
Ski to next gate
Stay here this turn.
You hit the gate!
Ski to next gate Stay here this turn.
thi
You hit the gate!
t re paper. s e b For cker
on
Ski to next gate
print , s t sul
Whoops!
Ski to next gate
✁
✁
Have a grown-up help cut out and put these together!
Whoops!
SKI RACE!
Cut, fold and then tape the dice together. Now you are ready to play!
START
Build a Snowman! Print this page at least three times. Have a grown-up help cut the cards out and assemble the die on the next page.
GAME
✁
How to Play: Place all of the cards face down in a pile between the players. Players take turns rolling the die and following the instructions. After all the cards have been used, players count up the total number of whole snowmen they can make with their cards. The one with the most snowmen wins! In case of a tie, the player with more snowflakes wins.
Middle
Head
Arms
Cap
Bottom
Snowflake print on For best results, r. thicker pape
Build a Snowman! GAME
Cut, fold and then tape the dice together. Now you are ready to play! For best results, print on
✁
thicker paper.
Have a grown-up help cut out and put these together!
Take a Card
Lose Your Turn!
Put a Card back
Take a Card
Take a Card from a player
Fold on the dotted lines.
Take a Card
✁
Help Ron get ready for a winter afternoon
playing in the snow. Draw a circle around all the things he should wear and bring.
Snowflakes! Print out this template to try this fancy snow flake. Turn printed down side before folding.
Copyright © 2010-2011 by Education.com Copyright © 2010-2011 by Education.com
More worksheets at www.education.com/worksheets More worksheets at www.education.com/worksheets
Snowflakes! Print out this template to try this fancy snow flake. Turn printed down side before folding.
Copyright © 2010-2011 by Education.com Copyright © 2010-2011 by Education.com
More worksheets at www.education.com/worksheets More worksheets at www.education.com/worksheets
Snowflakes! Print out this template to try this fancy snow flake. Turn printed down side before folding.
Copyright © 2010-2011 by Education.com Copyright © 2010-2011 by Education.com
More worksheets at www.education.com/worksheets More worksheets at www.education.com/worksheets
Snowflakes! Print out this template to try this fancy snow flake. Use a round piece of paper and fold into eighths. Turn printed down side before folding.
Copyright © 2010-2011 by Education.com Copyright © 2010-2011 by Education.com
More worksheets at www.education.com/worksheets More worksheets at www.education.com/worksheets
Make a Paper Snowflake! Make a pretty snowflake to decorate for the holidays. 1. Carefully cut out the circle. 2. Fold in half along the dotted lines. 3. Fold in half twice more along the lines. Make sure the slice with the small designs is on top. 4. Cut out shapes along the dotted designs. 5. Unfold for a beautiful snowflake!
Ma ke s u re t h is Then cut o u t sl ice t h e is o n sh ap to p es . .
ca
al
i tt er
fo r
a
gl
lt
n
os
ee
!
u Yo ** dd
fo
ra
sp
ec
ia l
sp a
rkly
sn ow
Tape
f l a ke.**
u
n po
aw
d in
ow
Paper Snowflake Template Directions: 1. Cut out the square below and fold it as necessary to create a paper snowflake. 2. Make sure that the blue cut-out template lands on top. 3. Cut out every shape that’s in blue. 4. Open to reveal your snowflake!
Snowflakes! It’s easy to make paper snowflakes. All you need is paper and scissors!
4
. Fold the lower left corner to the right.
1
Trace a circle on a piece of paper and cut it out. It could be small like a glass, or large like a plate.
3
Fold the paper circle in half again.
2
4
Fold the paper circle in half.
Fold the paper circle in half one more time.
Try This!
Cut away the dark part to make this snowflake.
Copyright © 2010-2011 by Education.com Copyright © 2010-2011 by Education.com
More worksheets at www.education.com/worksheets More worksheets at www.education.com/worksheets
Snowflakes! It’s easy to make paper snowflakes! Start with a square piece of paper.
1
Fold the upper left corner down to meet the lower right corner.
2
Fold the upper right corner down to meet the lower left corner.
3
Fold the lower left corner to the right.
Folded side
4
. Fold the lower left corner to the right.
5
. Cut off the bottom off to make a straight edge.
6
. When cutting, the fold should be on the right, and the open side on the left.
Try This!
Cut away the dark part to make this snowflake.
Copyright © 2010-2011 by Education.com Copyright © 2010-2011 by Education.com
More worksheets at www.education.com/worksheets More worksheets at www.education.com/worksheets
How To Make a Paper Snowflake Winter is coming! Follow these simple directions to get started creating your own snowflakes. Use this template to create the snowflakes shown in the following pages. What you’ll need: -Paper -Scissors
Step One 8.5” x 11”
This first step is necessary only if you are using a piece of paper that measures 8.5” x 11” (also known as “printer paper”). Take the upper right corner of the paper and fold it down diagonally so it lines the left side of the paper. While folded, cut off the excess paper to create a perfect square.
Step Two
Next, take the square and fold it again in half diagonally, top-right corner to bottom-left corner. Then take the top-left corner of that triangle and fold it down to the bottom-right corner of the triangle to make a smaller triangle.
Step Three
Take the left point of the triangle and fold it 1/3 of the way over to the right. Then take the right point of the triangle and fold it over the remaining third of the way. Each side should line up evenly.
Step Four Main fold
Lastly, cut off the remaining corners by cutting a straight horizontal line, leaving a triangle. Then fold the triangle in half by folding the right corner over to the left corner. Now you’re ready to design your own snowflake!
Cut off Final Snowflake Shape
Paper Snowflake Designs Now that you’ve learned how to prepare your paper to create a snowflake, use the following templates to make your own! What you’ll need: -Paper -Scissors -Pencil (optional)
If needed, use a pencil to draw out the shape of your snowflake first before cutting.
What is Snow? weather science
Needles
Column
Plate
Column capped with plates
Dendrite
Star
When water heats up, it turns into a vapor and rises in the sky, forming clouds. The water that forms these clouds can create tiny bits of ice. The heavier the ice is, the more likely it is to fall back to the ground. The ice melts into raindrops if it falls through warm air, but if the weather is cold enough, a snowstorm is born. Ice crystals form on small particles of dust and the crystals melt together to
form snowflakes. There are six different types of snowflakes, all of which have six sides. These different shapes form depending on how much water there is in them, as well as how cold it is. That's why when it's really chilly during a snowstorm, the flakes are tiny, but when the weather is a little warmer, the flakes are much larger. Now that you've learned all about snow, answer the question below.
Why does it snow more during winter?
What is Snow? weather science Fold a square in half
Fold rectangle up as shown
Cut as you like!
1 3 2
Make your own snowflake!
Now that you’ve learned all about snow, follow these easy instructions to make your own snowflake.
Write the name of a friend or a family member on the dotted line within each of the snowflakes.