7 minute read
OAKWOOD ASC WEBSITE


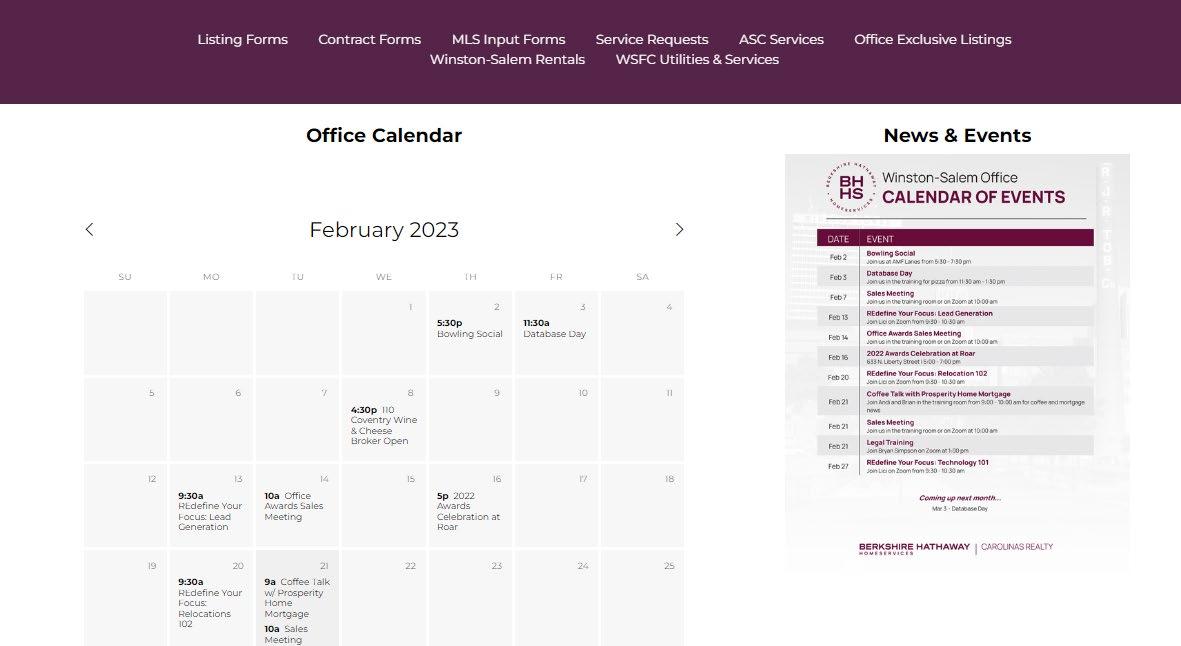
To get to the Oakwood ASC website, simply type in www.oakwoodasc.com in your search bar. This will take you to page asking for a password.
Password: oakwoodasc
The calendar has all office and agent events coming up. Under News and Events, you can get more details on upcoming events in our office.
The menu at the top of the website is also where you can find the following:
Lis�ng Forms: Forms for Coming Soon, Office Exclusives, and ShowingTime
Contract Forms: SAI and HSA Home Warranty Brochure

MLS Input Forms: These are forms needed to input a lis�ng in MLS.
Service Requests: Here are links to Google forms for photo requests, steel-tape measuring requests, and courier requests.
ASC Services: This takes you to a flyer explaining all that ASC has to offer
Office Exclusive Lis�ngs: This is an ac�ve list of all office exclusive lis�ngs.
Winston-Salem Rentals: This is an ac�ve spreadsheet with rentals in our area.
WSFC U�li�es and Services: This flyer holds addresses and contact informa�on for u�li�es and services in our area.
1. Login to Zipforms plus either through the tile in WeMakeGreatNeighbors or by going to www.zipformplus.com
2. On the Dashboard, click on the Transaction Tab.

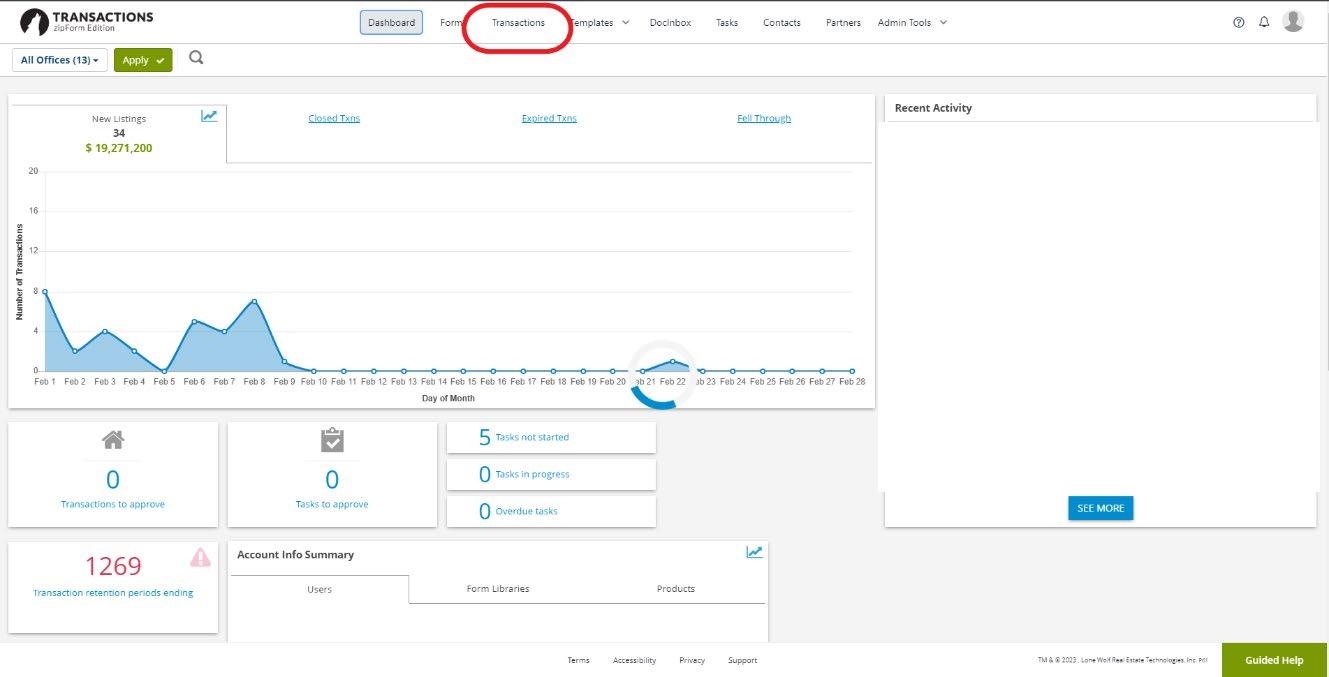
3. On the Transactions Page Click on NEW.
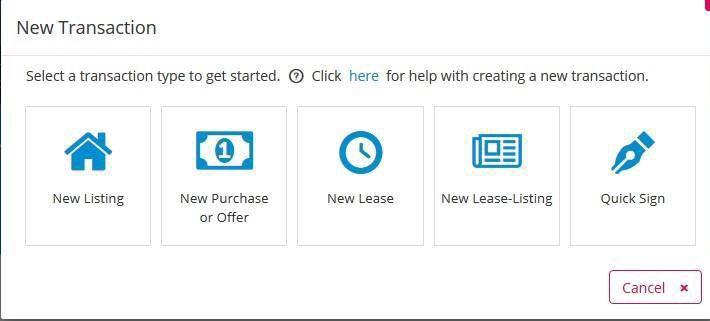
4. Select the Transaction type and fill out the details.
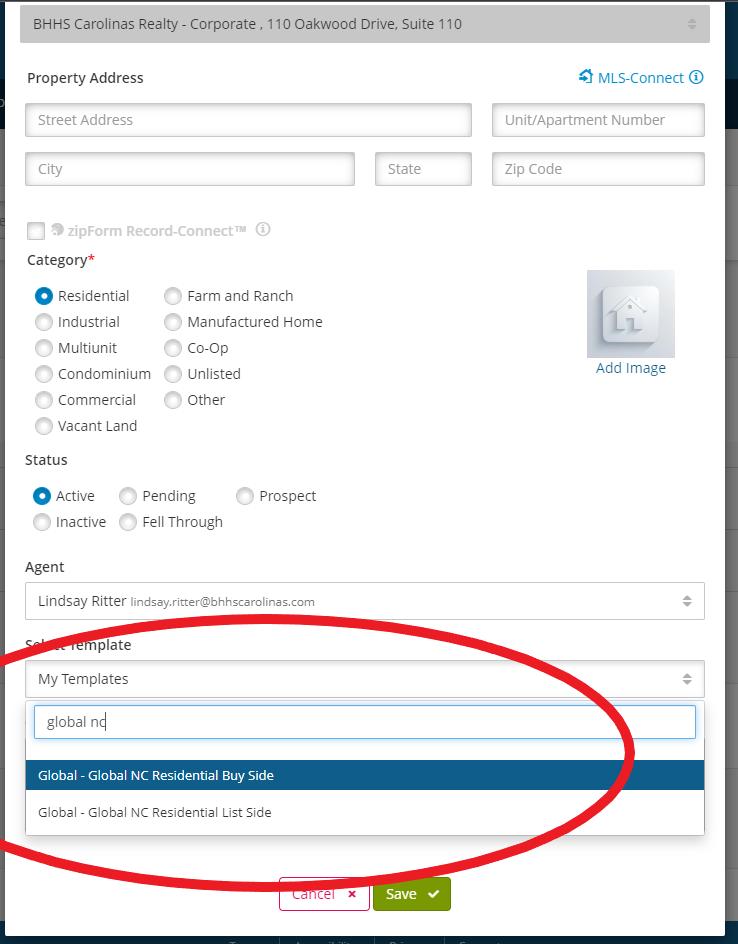
5. In the Templates field above, choose either the Global NC Residential List or Buy Side template for the most up to date forms.

6. Click Save This will pull all required forms for a transaction along with a cover sheet. The rest of the process can be completed in Docusign.

7. Login to your Docusign Transaction Room account and click on the ROOMS tab. Then click on the NEW button to create a new room.
8. Complete details regarding address, side, and role. YOUR ROLE WILL ALWAYS BE AGENT. Note: Two separate rooms for each side will be required if you are representing both sides of the transaction. This is required for accounting and payment purpose.
9. Go to the Documents Tab and click on the Actions button.

10. Choose Attach a Task List from the dropdown and choose the appropriate Transaction type (Buyer Checklist NC, Listing Checklist NC, Land Checklist NC, etc.) Then click on the Attach button. This puts placeholders for all associated documents into the room.

11. On the Documents tab, click the ADD button and choose ZipForm from the dropdown.

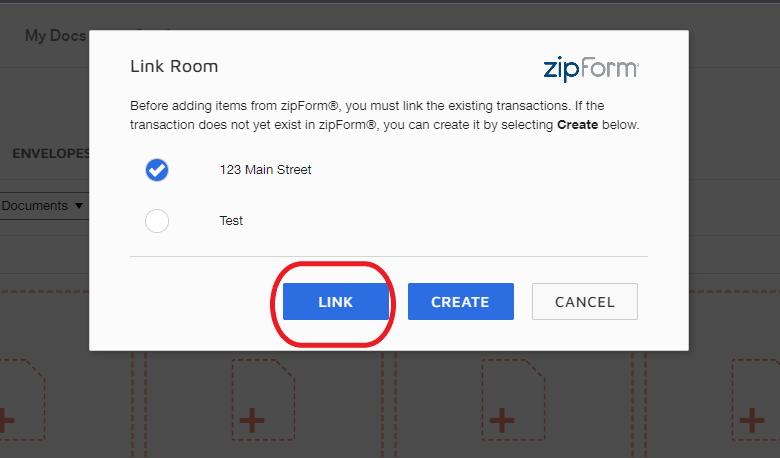
12. Choose the correct transaction from the list of Zipform transactions and click the blue LINK button.
13. The next option will be to choose the Location. Choose Linked Transaction from the dropdown.
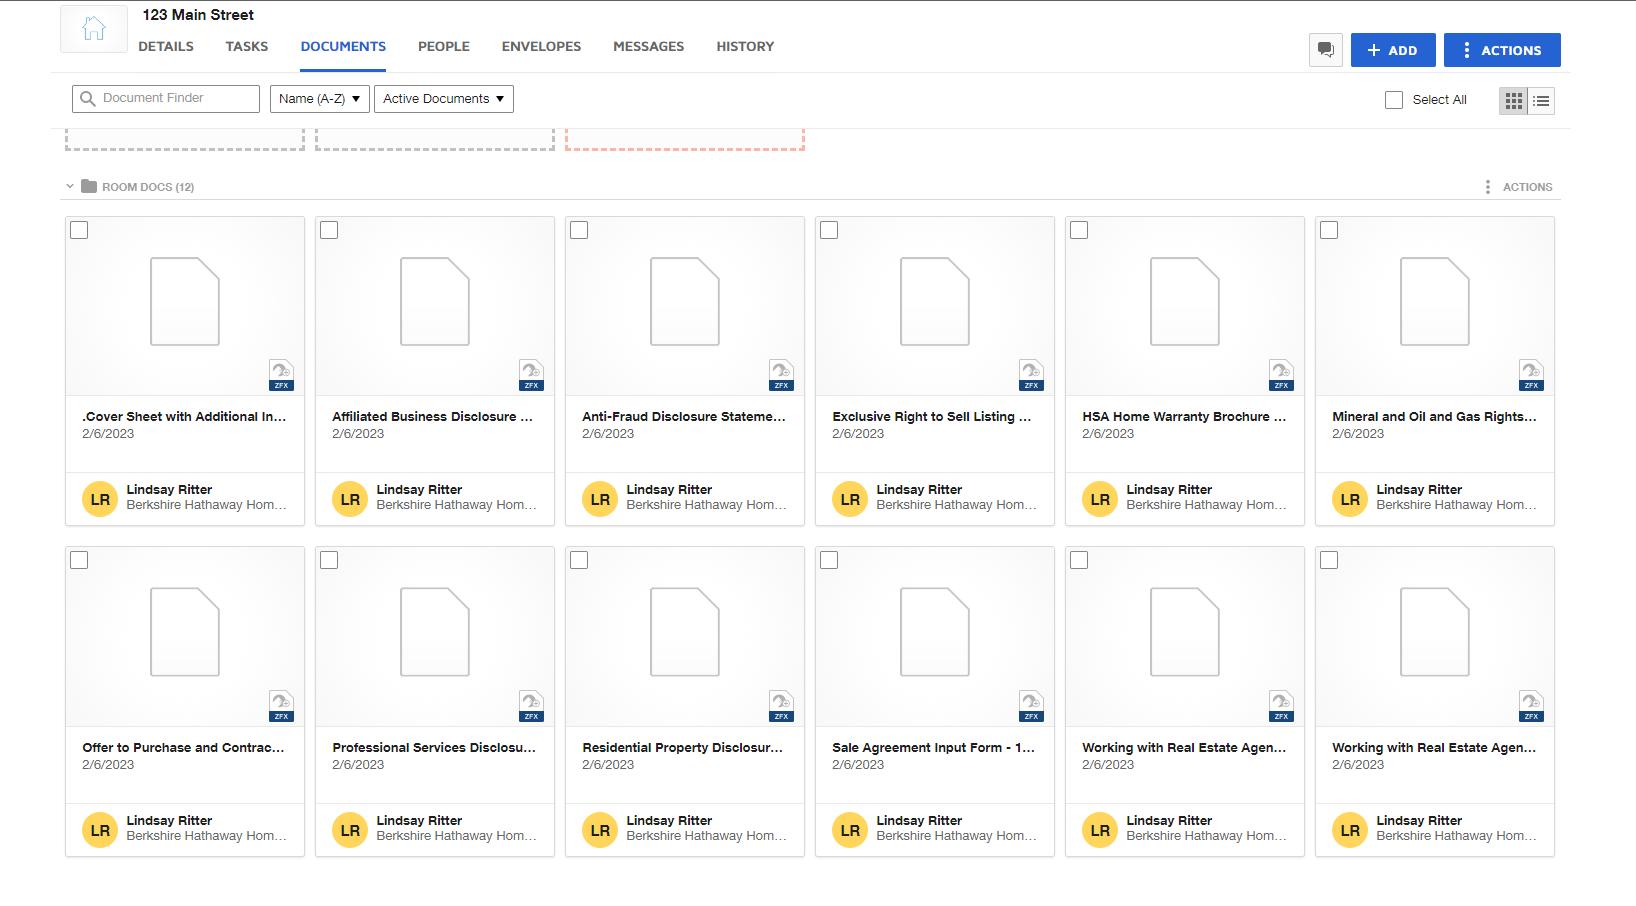
14. The next window will open a list of forms. These are the forms that were added to your Zipform transaction when you applied the Global Template. SELECT ALL and click ADD.

15. This puts all your Zipform formatted documents in the bottom of the room below your place holders. From here you can fill out your documents. Make sure you SAVE any changes you make.
Quick Tip: By completing a Cover Sheet first, you will be able to fast fill your documents. Do not prepopulate dates where signatures are required. The Docusign date and time stamp will fill there when the documents are signed.

16. Once your documents are complete, go to the PEOPLE tab. Click the blue INVITE button and complete the email invitation form.

17. Go to the ENVELOPES tab and choose NEW. This takes you to the DocusignSignatures side. Under ‘Add Documents’, click UPLOAD and select Add Room Documents

Check the box next to all documents you want added to the envelope.
18. Once your documents are added, you will choose who you are sending the forms to. Select the appropriate roles and participant for each form. Please note that many of the forms may be labeled differently, i.e. Buyer 1, Client 1. Choose the appropriate person for each role. If you would like to select a signing order, check the box at the top and arrange the recipients in the order the documents should be signed.


19. Once roles are chosen, add a message to communicate with your clients and click NEXT
20. This takes you to the Docusign Signatures page. Signature, Initial, and Date tagging should pre-populate. TRUST BUT VERIFY! Please scroll through your entire document packet to verify that tagging is populated where it should be.
21. To change the signer, use the dropdown in the top left corner. Each signer should be assigned a different tag color.


22. Once all tag placement has been verified, click the yellow SEND button in the upper right corner. If you need to sign anything first, you will be prompted to sign in the SEND process.
23. Once all parties have signed, the ENVELOPE will be marked with a green COMPLETED banner and the completed document will be in the Documents tab, marked as signed and formatted as a PDF. Note that the original Zipform formatted document will still be available should any changes need to be made.
24. The completed document is ready to be assigned to the Task List. Simply click on the appropriate box in the Task List, choose the appropriate document, and click on the blue ASSIGN button.

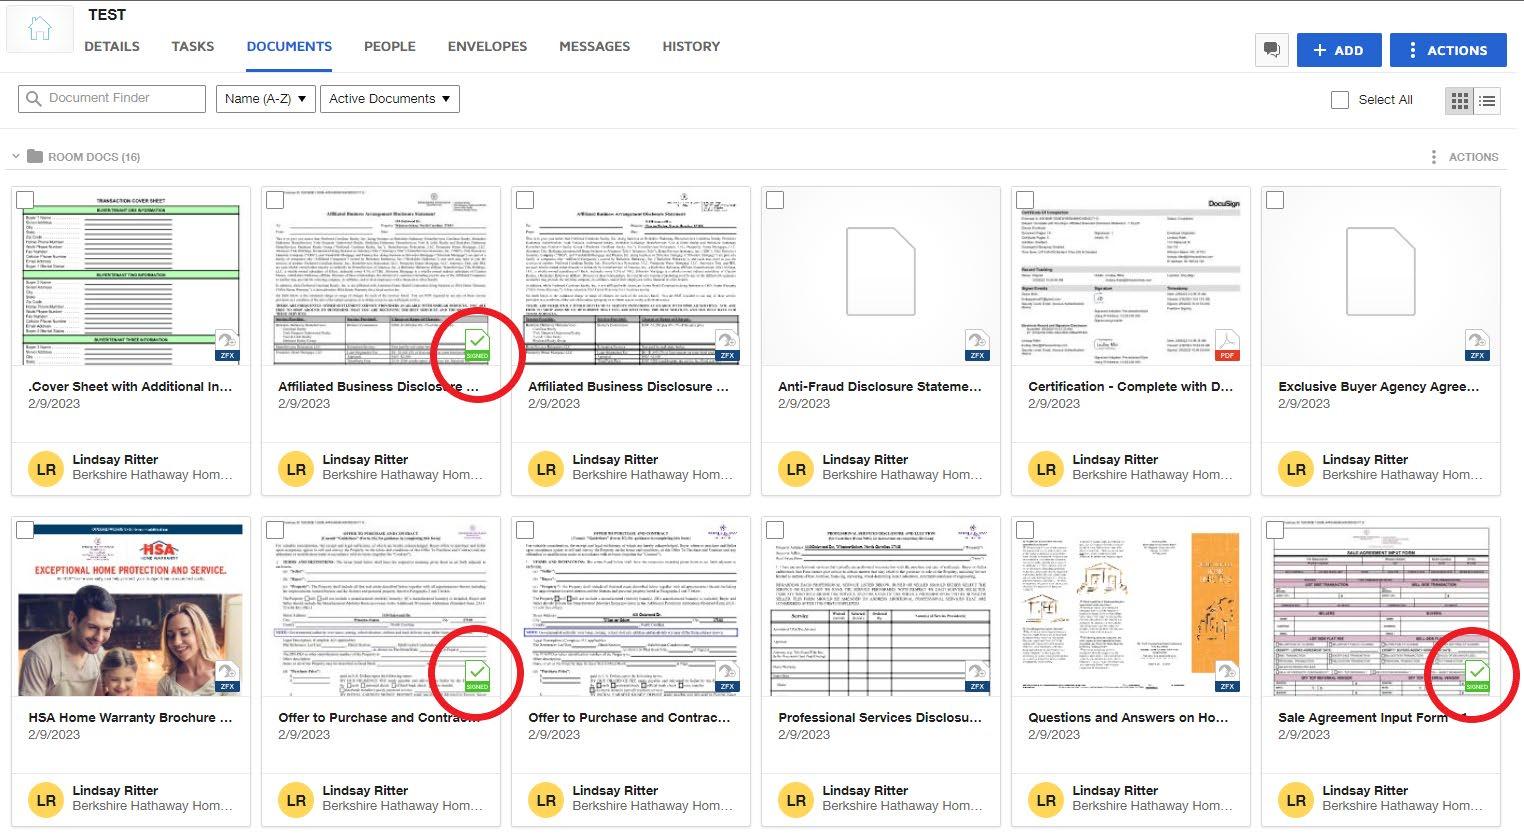
REMINDER: All red boxes are required and MUST have a document in the place holder to close your transaction. Transaction coordinators will approve / decline all documents in the room. Once approved, a green banner will display across the document.

Zipforms and DocuSign: Sending E-Sign from Zipform
Creating a Docusign Room
1. Sign into rooms.docusign.com and click on the ‘Rooms’ tab.
2. Click the blue ‘New’ button.
3. Fill out the room info – use street number and name as room name that way it is easier for Transaction Coordinators to find. (Skip the darker gray box at the top asking for zip code and public records.)
4. Use EITHER list or buy side. Never List & Buy even if you are representing the buyer and seller – these are processed as two separate transactions and require separate rooms
5. Save
6. Go to the ‘Documents’ tab and click the blue ‘Actions’ button.
7. Attach a task list – choose Listing / Buyer /Land NC from the list
8. Go to zipformplus.com and continue with the steps below.
Creating a Transaction and Sending Docs out for Signature through ZipForm
1. Click the ‘Transactions’ tab and select New (+).
2. Enter your information. Select either Global NC Residential List Side or Global NC Residential Buy Side from the template dropdown and click ‘Save’
3. In the gray toolbar select ‘Documents’
4. Click each document and fill out the “text” portion
5. Be sure to hit the blue ‘save’ button after each edit in the top left hand corner.
6. After all forms are filled out, click ‘E-Sign’ in the gray toolbar.
7. Click the New (+) button in the top left corner and select Alternate eSign Service.
8. Check the box next to all documents you want to send for signature and click Close
9. Give your E-Sign packet a name and verify that DocuSign is selected as your signing service Click ‘Next’
10. Sign into your DocuSign account.
11. Create your ‘Parties’ – fill in the names and email addresses of your clients (be sure they are under the correct ‘role’) and yourself and check the box on the left side Check the box for signing order and edit if desired.
12. Hit ‘Close’ and ‘Next’
13. Scroll through your documents and add tags where they have not been automatically applied (Documents that could be used for either side of the transaction) be sure you are adding tags for all signers, using the dropdown menu in the upper left. Each signer will be assigned a different color. TRUST BUT VERIFY.
14. You can select ‘Recipient Preview’ to view the document as the signers would
15. Once everything is tagged, hit SEND in the bottom right corner. To view the status of your signatures – Sign into Docusign and select ‘Switch to Esignature’ from the profile photo/initials in the upper right hand corner.
16. You will receive an email after each client has viewed/signed the document. When the Document is completed, you will receive an email with a link (that will take you to Esignature) as well as a signed PDF
Back to ROOMS.DOCUSIGN.COM
1. Select your Room and choose ‘Documents’.
2. There are a few different methods to add documents to their boxes.
a. You can click the tile and select ‘Upload new document’ b. Upload finished documents in the basement. Click the tile and choose from the selection uploaded. c. Drag and drop from the ‘basement’ to the tile d. Click on the file in the ‘basement’ and click the small clipboard in the upper right – “assign to task list” and choose from the list
3. You can also “link” a room to your Zipform Transaction a. Click the blue ‘Add’ button. b. Zipform c. Select the room you want to link and click “link.” d. Choose the method of adding forms (Linked transaction) and select the forms that you want to add to your Docusign room.
4. For listings – Once you have a listing agreement and MLS Input sheet, send an email to AgentServiceCenter@bhhscarolinas.com and let Lindsay P. and Jasmin know your listing paperwork is complete. They will input in MLS and provide marketing materials.
5. Under contract? - Once you have a signed OTP and SAI send an email to OakwoodContractsandClosings@bhhscarolinas.com and let us know it is under contract! Add forms as you get them signed and Kayla Hiatt will take it from there and let you know if there are any changes that need to be made.
6. Closed? - Email OakwoodContractsandClosings@bhhscarolinas.com again after you have a closing disclosure and commission check, and Laura Guigou will process.
• Submit all checks (commission, earnest money, and due diligence) to Laura Guigou
Questions?
Taylor White– Tools and Technology Support – 336-760-7272
Grace Bolin – Director of Sales Support – 336-760-7206
Lindsay Park – Listings and Marketing – 336-760-7270
Jasmin Sutton – Listings and Marketing – 336-659-2116
Kayla Hiatt – Under Contract – 336-760-7280
Laura Guigou – Closings – 336-748-2025


