Maximizing Merriment through Decorations 10 An Overview of Expert Light Displays 16 What You Need for the Perfect Get-Together 18 Experiments on Canvas 24 Home-Baked Sweets for the Season
Pick the Perfect Fireplace
36 Twelve Days of Organizing 42 Tools for Prepping a Scrumptious Feast 44 Festive Tablescapes Made Easy 48 Christmas Tree Deterrents for Cats
PUBLISHER
Chief Executive Officer Steven Acree publisher@remindermedia.com
EXECUTIVE
President Luke Acree
Chief Marketing Officer Joshua Stike
Chief Operating Officer Michael Graziola
Chief Revenue Officer Ethan Acree
MARKETING
Vice President of Content and Marketing Operations Jessica Fitzpatrick
Director of Marketing Dan Acree
Director of Creative Services Kristin Sweeney marketing@remindermedia.com
EDITORIAL
Senior Layout Designer Jordan Hunsberger
Senior Writer and Editor Matthew Brady
Editor Dakota Damschroder
Content Writers Allison Gomes, Lauren Kim, Andre Rios editorial@remindermedia.com
SALES AND CLIENT SUCCESS
Vice President of Operations Nicholas Bianco
Vice President of Sales Michael Campanile
Director of Client Success Matthew Frizalone hello@remindermedia.com
OPERATIONS
Vice President of Finance Shana Lebofsky
Vice President of IT Thomas Setliff
Director of Projects Kelsie Schmall
Director of Business Intelligence Daniel Gallaway
Director of Manufacturing Shannon Mosser
Director of HR John Keogh hr@remindermedia.com
Overcoming Seasonal HOSTING CHALLENGES
written by ALLISON GOMES
The holidays bring joy, laughter, and, let’s be honest, a few logistical headaches. If you’re hosting a crowd but anticipate space or supply issues, try these quick fixes to ensure that your event runs smoothly.
Not enough chairs?
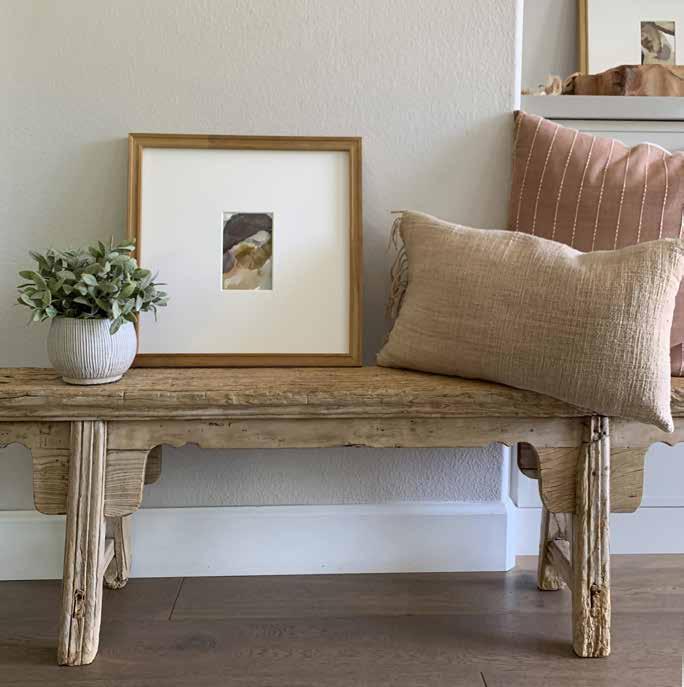
Should your guest list be bigger than your standard seating options, pull in benches, ottomans, and even sturdy storage cubes to create extra spots for sitting. Floor cushions and poufs can also work for casual gettogethers, and a standing table near the food will allow guests to mingle without the need for additional chairs. And if all else fails, consider renting seating just for the occasion.
Table too small?
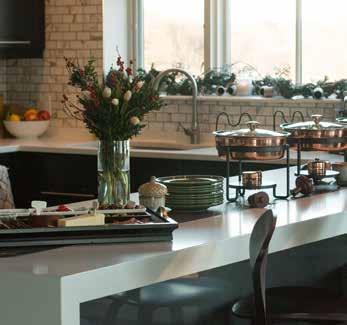
Your dining table likely isn’t long enough to accommodate a large party, but you can simply push smaller ones together and cover them with a single tablecloth for a unified look. Don’t have extra tables? Set up a buffet instead and encourage guests to eat in different areas, such as your living room, kitchen, and sunroom.
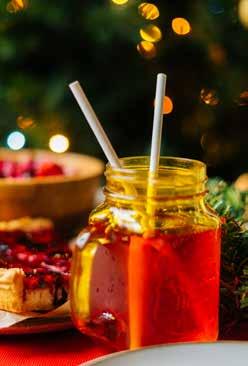
Short on dishes?
Get creative: sheet pans can double as large serving trays, and Mason jars will work for drinks and desserts. As long as you have places to put the food and plates to eat from, it doesn’t matter if you have to mix and match—just say that you were going for eclectic holiday charm.
House too warm?
A full house heats up fast, so before guests arrive, turn the thermostat down a few degrees to help keep them comfortable. You can also crack a window for airflow or strategically place a few different fans in common areas to circulate air without making them drafty.
With a little flexibility and creativity (along with the suggested hosting essentials on page 16 and kitchen gadgets on page 42), you can throw together a stress-free holiday gathering that your guests are sure to enjoy.
and
,
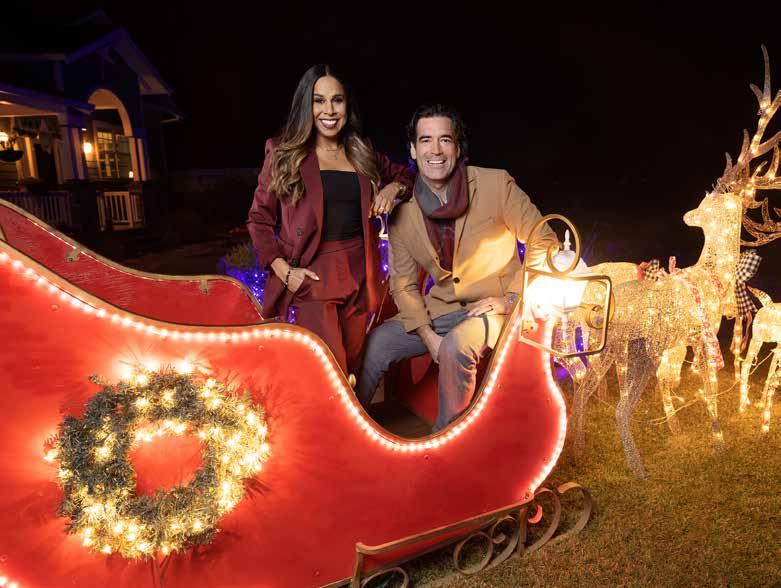
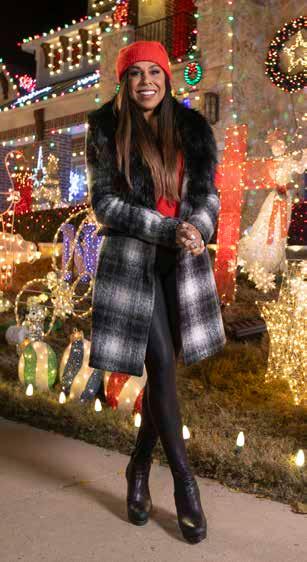
MAXIMIZING MERRIMENT through Decorations
Interior designer Taniya Nayak cohost of ABC’s The Great Christmas Light Fight, shares a behind-the-scenes look at the reality TV show, provides a glimpse into her seasonal decorating style, and offers tips for dressing up your own space.
interview with TANIYA NAYAK
written by LAUREN KIM
photos courtesy of TANIYA NAYAK
TANIYA NAYAK
CARTER OOSTERHOUSE
the hosts of ABC’s The Great Christmas Light Fight
How is the series filmed?
The filming itself is very fast-paced. We complete each season over about six weeks across several states, with my cohost, Carter Oosterhouse, and I splitting up the locations. In fact, we don’t work together or see each other at all during filming.
Additionally, we shoot at night, so I often work into the early morning, spending six to ten hours at one house. Sometimes, I’ll then hop on an early flight the next day to another destination. I love the hustle and bustle, though—it keeps me going. It’s hard to believe, but I’ve been hosting for more than a decade! It has become a fun holiday tradition.
Do you know any details about the houses before seeing them?
All I get are the addresses. I tell the producers not to give me any hints about what the houses will look like to ensure that my responses are completely real. I love being surprised; the minute the Christmas lights go on, it’s all energy and everyone is so happy. By the end of the night, my cheeks hurt from smiling so much. It’s one of the aspects I adore most about my job.
How is the judging done?
Carter and I each appear in three episodes, and we decide which house is designed the best. Every episode features three competitors and one winner, making a total of six champions across a season. To avoid forgetting any details, I fill out a judging form immediately after I visit a home, using criteria like creativity and craftsmanship to grade it. The winning homeowner then receives $50,000 and a light-bulb-shaped prize we call the Bulby Trophy.
Choosing a champion is never easy. The homeowners pour their hearts into their designs, and their imagination and skill are remarkable. There have been moments when I’ve been practically in tears, wishing I could declare a tie. The technology keeps evolving too. Christmas lights used to be all incandescent but are now largely LED; similarly, light displays used to be static or maybe blink, and now there are light shows and drone displays. All this makes the judging even more challenging.
Do you also go all out decorating for the holidays?
Truthfully, not really. For starters, my eyes get pretty maxed out from all the bright lights on the show. But it’s mostly because we start filming at the end of October and go right up until Christmas—there have been times when I’ve gotten home so close to the holiday that I can barely do anything for it. Plus, my husband, Brian O’Donnell, and I head straight to our vacation home in Fort Lauderdale, Florida, with our English bulldog, Flynn, just a few days after we wrap on filming.
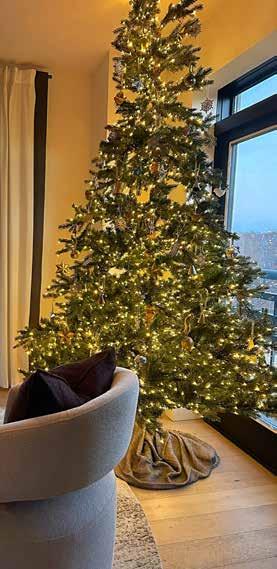
When I do decorate, though, I focus my efforts on the interior since we live in a Boston condo. I prefer a subdued and elegant approach, keeping my Christmas tree simple with classic white lights. I’ll also add tall greenery, such as a few evergreen or birch branches in a beautiful vase, somewhere to the space. I love using natural elements like pine cones, berries, and other lovely outdoor finds in arrangements.
Conversely, I don’t often dress up our vacation home at all for Christmas given that we usually arrive that evening or the day after. Brian and I love how serene and peaceful it is there, and it’s easy to get into the holiday spirit—the Seminole Hard Rock Winterfest Boat Parade, which feels like The Great Christmas Light Fight on the water, can be seen right from our place.
What tips do you have for replicating the magic of the show on a smaller scale?
I recommend incorporating a few thoughtful yet impactful touches, especially if you’re working with a compact space and don’t have much storage. For interiors, items like table runners and throw-pillow covers are perfect for lending festive cheer and can be easily removed and tucked away after the season ends. You can also be creative with ornaments. For example, I sometimes place a few in a pretty bowl and nestle candles among them for a warm and inviting look. You don’t have to stick to tradition; feel free to use any type, theme, or color combo that complements your style, even pink! If you’re a nature enthusiast, bird-themed ornaments can be a delightful addition. The key is choosing items that will showcase your personality. For more info, visit taniyanayak.com
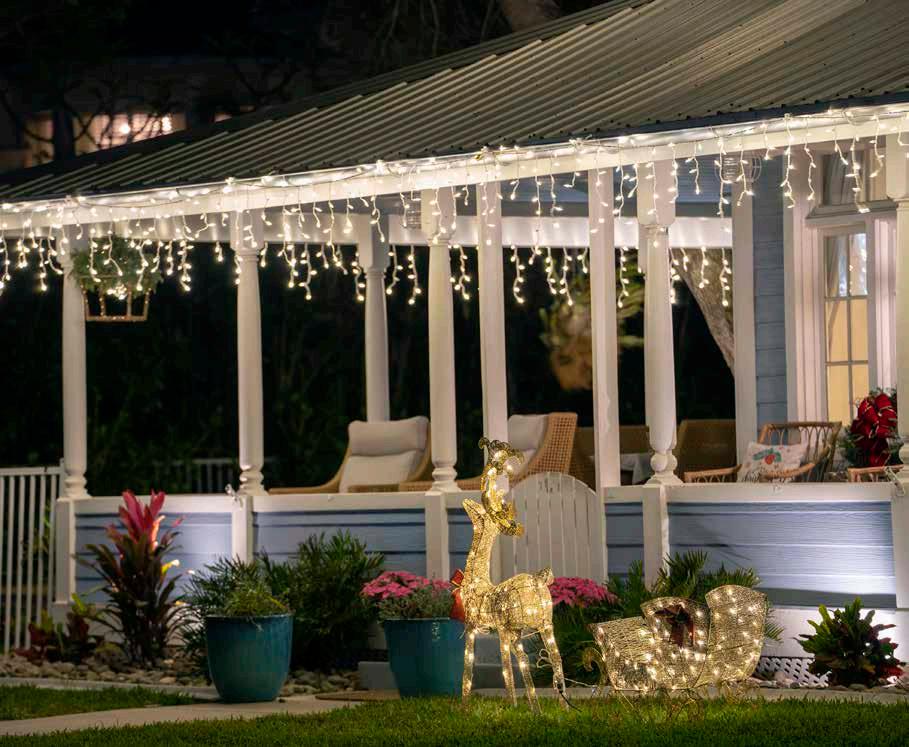
EXPERT LIGHT DISPLAYS
written by MATTHEW BRADY
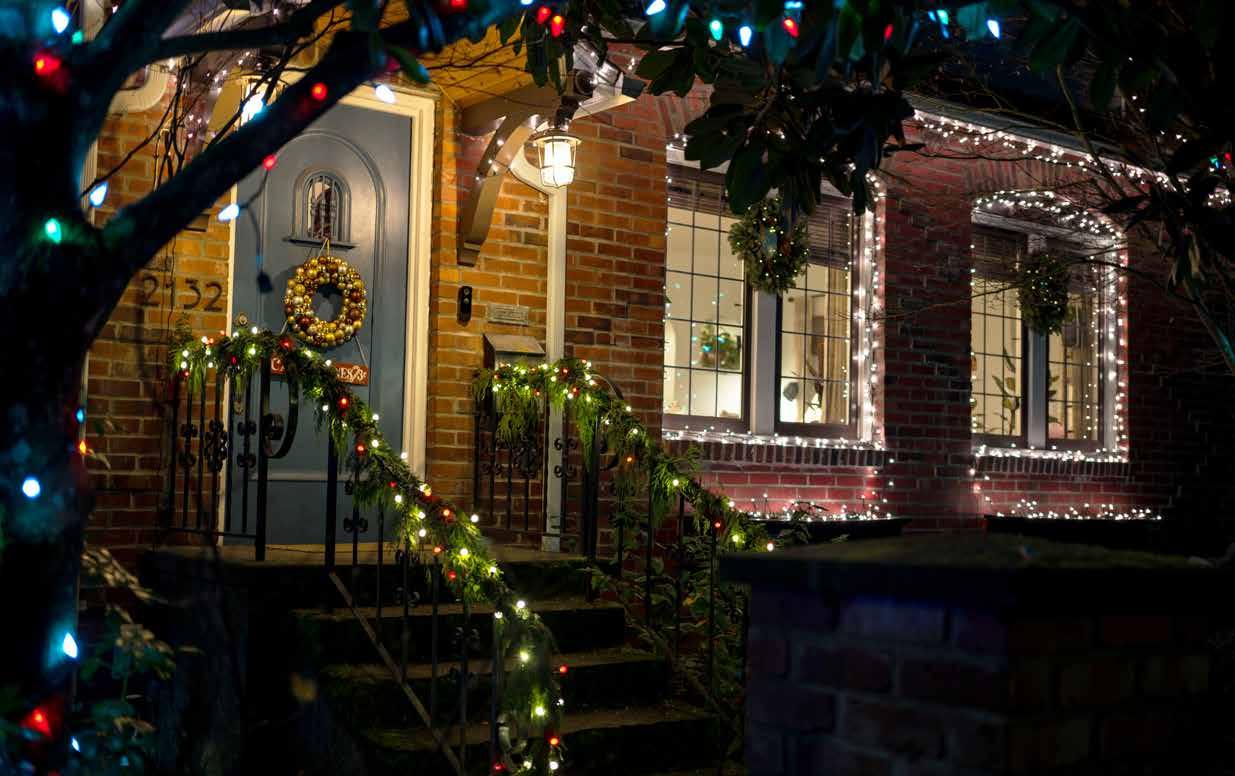
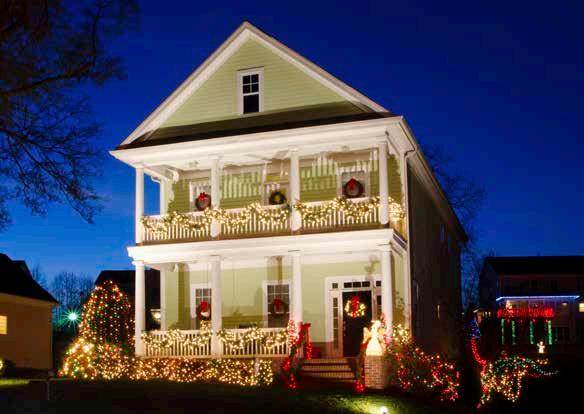
Putting lights on your home during the holidays is a labor of love—between detangling them, checking for burnedout bulbs, and hanging the strands, it can require hours of your time. For Clark Griswold types, the effort is usually well worth it. However, there’s an alternative option that takes care of all the work for you while creating a display that’s the envy of the neighborhood: hiring professionals for the job.
Key considerations
Companies have actually been doing such installations for decades, but they’ve become an increasingly popular choice for homeowners in recent years. Here are some important factors to weigh before leaping in.
Goals
To begin, determine how you’d like your exterior to look during the holiday season. Do you want to go all out, cramming in as many bulbs as you can, or would you prefer simple elegance? Do you enjoy large LEDs or many small ones shimmering like little diamonds? And what color palette will you pick? Having such answers from the get-go can help you with . .
Cost
Per the home-improvement site Angi, the average price of an expert install is $443, though Today’s Homeowner estimates a much higher one at a little over $1,000. Of course, yours will vary based on several factors, such as your home’s square footage, the type of bulbs, the number of lights, and whether they extend into your yard.
Upgrades
You may also want to ponder possibilities beyond the basics. For example, a convenient upgrade would be adding a timer so your display automatically turns on and off every night. Or up the fun factor by including twinkling lights, sound, or inflatables as part of your festive package. In addition, you can choose to keep your illumination up yearround if you wish—and, to make it even more impressive, purchase smart color-changing bulbs to match each holiday throughout the calendar. Angi estimates that a permanent setup can cost around $3,500.
Reviews
Look into companies who provide this service to your area, focusing on both their aggregate ratings and number of reviews. Then scour local neighborhoods searching for yard signs boasting their branding to get a firsthand look at their work. Even better, if you’re friendly with the homeowner, strike up a conversation with them to ascertain how they feel about the results. Getting the opinion (and possibly the pricing) from someone you know and trust would be invaluable.
Per the homeimprovement site Angi, the average price of an expert install is $443, though Today’s Homeowner estimates a much higher one at a little over $1,000.
Safety
Finally, be realistic about your own situation. If you are older, have difficulty moving, or own a trickyto-navigate roof, safety could be a real concern. In such a circumstance, you may be better off letting a professional take care of the work. But account for their safety (and your liability) as well by checking that they’re insured.
How to vet businesses
Once you’re ready to start contacting companies, prepare a list of questions to ask to help ensure that you cover your bases. Use the classic reporter’s questions as your guide:
• WHO from the company will install the lights, and how experienced are they? You could even ask who their supplier is—an established, trusted one such as Christmas Designers will likely deliver better, longer-lasting products.
• WHAT’S included in the price and covered under the warranty? Also, what can be expected if something goes wrong after the lights are hung?
• WHEN will they be mounted (i.e., how far in advance do you need to book the job) and taken down?
• WHERE will everything be stored year over year: in your home or with the decorators?
• HOW many lights, cords, and sockets will be needed, and roughly how much energy will be used? Also, how will the lights look in the end? (Most companies will show you sample projects, much like an interior designer would.)
• Most importantly, WHY should the company do the job for you? Treat it like an interview, and be clear about what your expectations are if you go through with the install.
One final point—be sure to get multiple “offers” as you would with any other project. Doing so will allow you to compare packages to better guarantee that you’re getting the best bang for your buck.
Holiday lights are mainstays of the season, but that doesn’t mean you need to spend time and endure hassle to add them to your home’s exterior yourself, especially if you’re physically limited. After pondering all the relevant factors, you may just decide that hiring a professional is in the cards for you this year.
what you need for the perfect
GET-TOGETHER
written by ALEXA BRICKER
When it comes to welcoming guests this time of year, one of the most frustrating feelings is going through hours of prep work only to realize during the gathering that there is still something you overlooked. To help prevent such nuisances, consider the following under-the-radar must-haves. By keeping them on hand, you can better ensure that the event goes off without a hitch and make cleanup afterward a little easier.
CORDLESS HANDHELD VACUUM
More people equals more mess, but an easily accessible handheld vacuum can allow you to pick up small spills in a pinch. Some cordless varieties can handle both dry and wet messes, enabling you to handle virtually any mishap that occurs.
DESIGNATED TRASH CANS
You’d be surprised by how much trash can accumulate after just a few hours, and having to empty the bin multiple times throughout the party is a huge pain. Set up and label a receptacle—for both trash and recycling—in each of the main areas of your home. This will prevent attendees from having to search high and low to dispose of their waste and you from having to take a bag outside so often.
There’s nothing more awkward than guests being forced to pile uncomfortably onto a love seat or, even worse, stand to enjoy their meal. To be safe, consider purchasing a set of folding chairs you can pull out at a moment’s notice in case an unexpected plus-one arrives.
Certain smells can be divisive at best and downright irritating at worst, so it’s best to avoid fragrant candles altogether. Opt for unscented varieties instead, which will provide your home with a pleasant glow without an overbearing aroma. ICE MACHINE
An ice maker might sound superfluous, but if your event is long or has a lot of guests, it can be a much easier option than trying to estimate how many bags you might need from the local gas station. Alternatively, if your freezer has a built-in ice maker, collect a few bags of ice from it in the days leading up to your party to help ensure that you don’t run out.
UNSCENTED CANDLES
Hosting is a big job, but by equipping yourself with these essentials, you can spend less time problem-solving and more time making lasting memories with your loved ones.
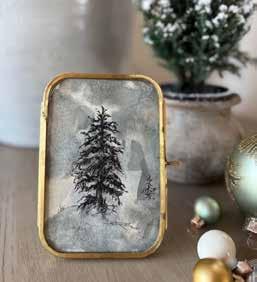
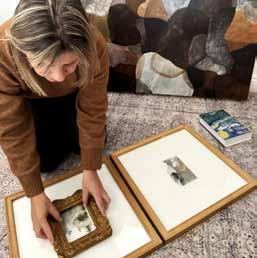
EXPERIMENTS ON CANVAS
Southern California-based abstract painter Monica Gava delves into her ongoing artistic journey and the impassioned instincts that fuel her work.
interview with MONICA GAVA
written by ANDRE RIOS
photography courtesy of MONICA GAVA
When did you discover that you had a gift for the arts?
I’ve had an artistic spark in me since I was a kid growing up in Brazil— almost like it is just part of who I am. I wasn’t the kind of child who spent time playing with dolls or pretending to be a princess. Instead, I would get lost for hours filling in coloring books, making collages, scrapbooking, and even pretending to run my own stationery store.
How did you begin creating art professionally?
I was introduced to graphic design in high school and then went on to study advertising in college, which was my first real dive into the professional creative world. I did some freelance gigs crafting logos and branding for local clients, and after graduating, I worked as a copywriter for a decade. But when I moved to the States with my husband in 2021 to study graphic design at the University of California, Irvine, I realized that my true passion wasn’t being fulfilled. That’s when I shifted my focus and took my first steps to revive my old dream of becoming an artist.
I took countless hours of art workshops and began painting small florals and landscapes on paper with mixed media and vibrant colors. As I studied impressionism, color mixing, and composition (or how different visual elements of a painting relate to one another), I gradually found my true voice and my style started to shape into what it is today. Now I can say that I’m a professional fine artist.
I would get lost for hours filling in coloring books, making collages, scrapbooking, and even pretending to run my own stationery store.
Who are some of your biggest influences?
I’ve been inspired by classic painters like Monet and Van Gogh and more recent ones like Cy Twombly, who’s a good reminder of how to abandon my consciousness and follow my instincts to convey abstract emotions visually. However, my newer work is heavily influenced by Paul Cézanne’s color palette; like him, I use warm and cold versions of the same color to add dimension to my abstract pieces.
Would you walk us through your creative process?
Curiosity is my driving force. I find myself constantly experimenting with new materials, seeking to discover what resonates with me at any given moment. Right now, acrylics, watercolors, and
inks are my primary tools, but my work is far from confined to these. What excites me most is how each material behaves and how I can push its limits to create something unique. One layer of torn paper might complement the transparency of a watercolor wash in a way I couldn’t anticipate.
A central element of my practice is layering multiple coats of paint to transform a flat surface into something textured, dynamic, and vibrant. For my works on canvas, I mostly use the adding and subtracting technique, where paint is applied to the surface but also removed with different tools while it’s still wet. Slowly, the juxtaposition of these layers creates depth and complexity, turning a simple surface into something multidimensional.
Your work was featured on Disney+. What was that experience like? That story starts with an email from a potential buyer on my Etsy store. But this wasn’t any ordinary message—she was interested in purchasing one of my pieces for use on a movie set. My first instinct? Spam. But the conversation unfolded, and after some back-and-forth, the deal was set. Then, in a twist that felt like something out of a movie itself, she told me to keep an eye out for the film Crater, set to be released on Disney+.
I eventually sat down to watch it with my husband and kids, saying, “Let’s see who will spot my piece first!” I did: it was hung on the walls of a room where the main characters gathered. It was a “pinch me” moment, knowing that my art had contributed to a world far beyond my studio. But the best part of all was hearing my family say they were proud of me.
What are some of your latest projects?
I’m working on a new collection of landscapeinspired pieces with a twist. Normally, I love allowing my materials to speak for themselves. For this newer body of work, though, I’m taking a more intentional approach, painting layers in a way that suggests a horizon, mountains, or even a more dreamlike, abstract scene that still feels grounded in nature. It’s a fun challenge to push myself out of my comfort zone and experiment with creating something that feels familiar but fresh at the same time, and I am thrilled to see how it comes out.
For more info, visit monicagava.com or follow Monica on Instagram @koketistudio
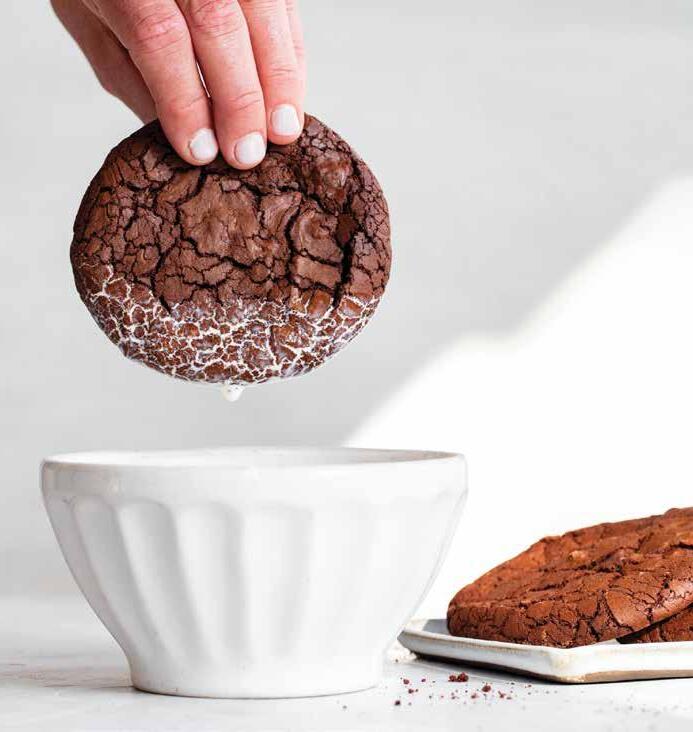
HOME-BAKED SWEETS for the season
recipes by HEATHER HARDCASTLE photography by ERIN SCOTT
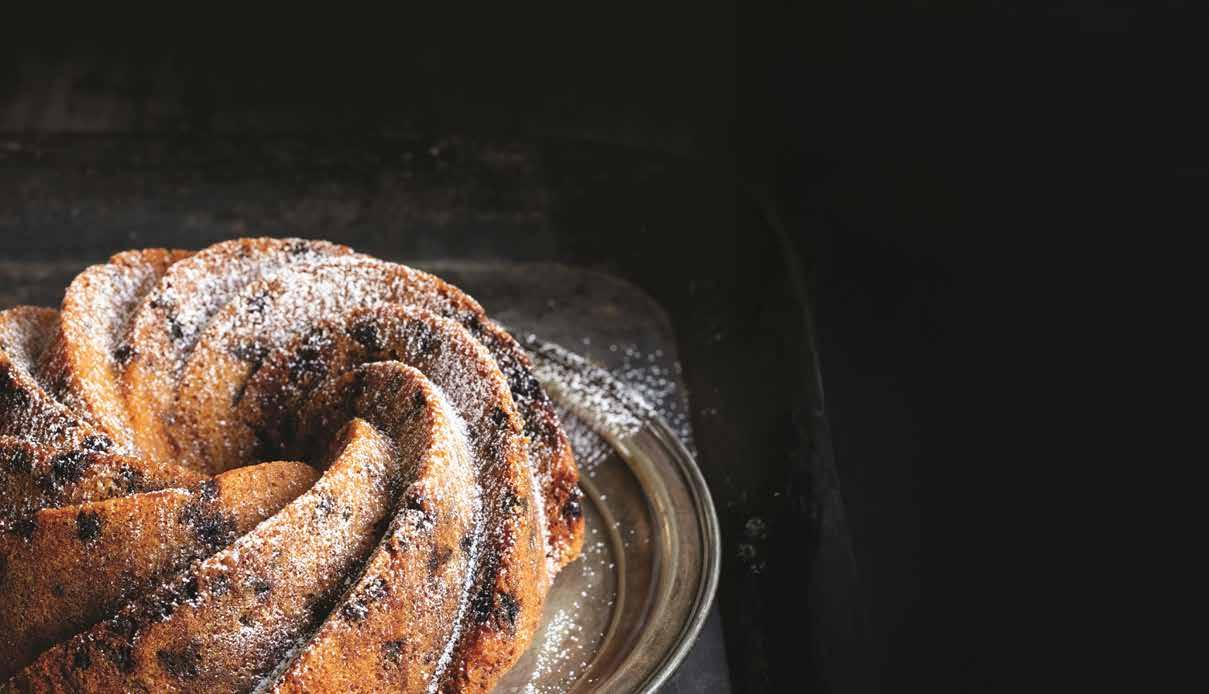
Other than hugs from loved ones, nothing is quite as welcoming during the holidays as freshly made baked goods. And these options from The Flour Craft Bakery & Café Cookbook are sure to add to the festive spirit, whether you’re hosting guests or attending a gathering. Their intoxicating aromas, melt-in-your-mouth textures, and tantalizing flavors will make any four walls feel like home—for family and friends alike.
I’m a big fan of the humble Bundt cake. There’s something so old-fashioned and homey, yet impressive, about its appearance. I collect vintage Bundt pans and some of the designs are so intricate! Look for them at your local flea market or garage sales. A little scrub is all it takes to bring them back to life. I like this cake for so many reasons, most notably because it’s ultralight from the whipped eggs and sugar, which add so much airy goodness to the finished cake.
Ingredients:
SERVES: 10–12
COOK TIME: 40–45 min.
6 large eggs
1½ cups white sugar
1 tbsp. vanilla extract
1 tbsp. lemon zest
1¼ cups brown rice flour
½ cup millet flour
¼ cup tapioca starch
1 tbsp. baking powder
½ tsp. xanthan gum
1 tsp. kosher salt
1 stick butter, melted
½ cup vegetable oil
1 cup blueberries, fresh or frozen (not thawed)
Instructions:
1/ In the bowl of a stand mixer fitted with the whisk attachment, whip eggs, sugar, vanilla, and lemon zest on high speed for 3–5 minutes until the mixture has doubled in volume and thick ribbons fall off the end of the whisk when lifted.
2/ Add brown rice flour, millet flour, tapioca starch, baking powder, xanthan gum, and salt and mix on low speed until just combined.
3/ Slowly add the melted butter and vegetable oil, mixing on medium speed until well combined, about 2 minutes.
4/ Cover the bowl with plastic wrap and refrigerate for about 20 minutes to allow the proteins to rest and the batter to thicken.
5/ Preheat the oven to 325°F. Thoroughly spray a 10-cup Bundt pan with nonstick spray.
6/ After the batter has rested, gently fold in the blueberries, taking care not to overmix or the batter will be streaky.
7/ Pour the batter into the prepared pan. Bake for 40–45 minutes, rotating the pan halfway through baking, until the cake is golden brown and springs back when touched. Let cool in the pan at least 30 minutes before unmolding. The cake will keep tightly wrapped in plastic wrap in the refrigerator for up to 5 days.
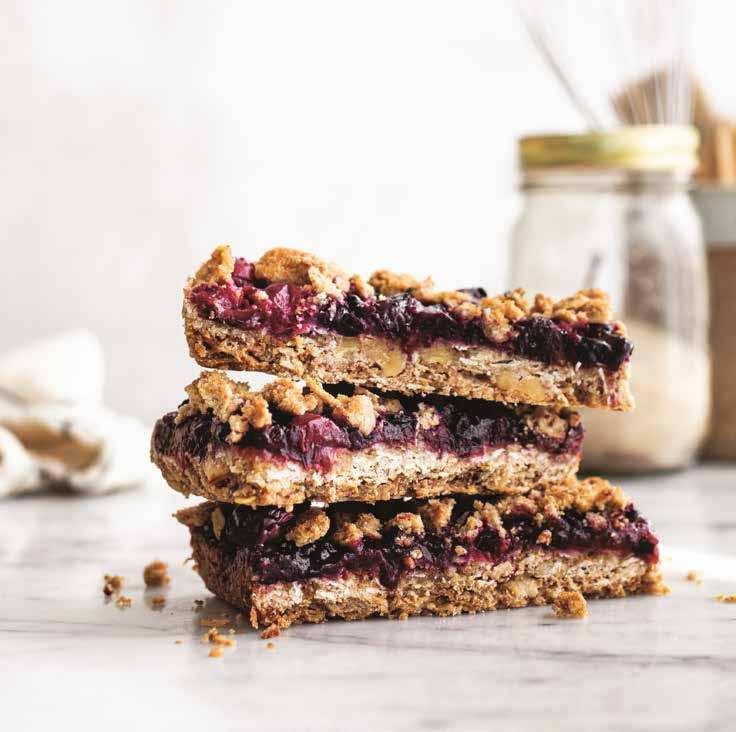
vegan fruit crumble BARS
Jammy, crunchy, fruity—these fruit bars are just plain scrumptious. The key here is to wait until they’re chilled to cut them into tidy bars. The coconut oil must fully chill to be firm enough to hold them together. Use whatever berries, fresh or frozen, you have on hand or what you like most. I’ve made these bars with freshly picked blackberries and with a bag of frozen mixed berries from the freezer. Both work great. Or, if you’re feeling impatient, just scoop it out warm and top with vanilla ice cream (or non-dairy ice cream) for a delicious, if less tidy, fruit dessert.
Ingredients:
1½ cups gluten-free rolled oats
1½ cups brown rice flour
⅓ cup tapioca starch
1¼ cups brown sugar
½ tsp. kosher salt
½ tsp. baking soda
½ cup chopped walnuts
½ tsp. ground cinnamon
¾ cup coconut oil, melted
¾ cup fruit preserves
2 cups fresh or frozen berries
Instructions:
1/ Preheat the oven to 375°F. Line a 9 x 9-inch pan with foil. Spray the foil with baking spray and line the foil with parchment, cut to fit the size of the pan with a 1-inch overhang on all sides. The layer of foil will allow you to lift the bars out of the pan cleanly and the parchment will keep the bars from sticking to the foil.
2/ Put rolled oats, brown rice flour, tapioca starch, brown sugar, salt, baking soda, walnuts, and cinnamon in a large bowl. Toss with your hands or a wooden spoon to combine. Add coconut oil and mix, using your hands or a wooden spoon, until the crumble mixture holds together in large clumps.
3/ Spread two thirds of the crumble mixture in the bottom of the pan and press down firmly to create an even layer, making sure the mixture reaches into the corners as well. Spread the fruit preserves over the crust, leaving ½ inch of space around the edges. Scatter the berries over the jam. Sprinkle with the remaining crumble, leaving space so that the berries show through.
4/ Bake for 40–45 minutes, rotating between upper and lower oven racks halfway through baking, until the bars are golden brown and the berries are bubbling. Allow to cool completely in the pan before transferring to the refrigerator to chill for at least 2 hours before cutting the bars.
NOTE
Keep the crumble recipe handy as it’s a great topping for all manner of fresh fruit. I make a large batch of the crumble topping and store it in a zip-top bag in my freezer. Toss whatever type of fresh or frozen fruit you have on hand with a little tapioca starch, sugar, and lemon juice. Place the fruit in a baking dish, top with the crumble, and bake it for a perfect fruit crisp in no time!
triple-chocolate flourless COOKIES
These cookies are for those of us, me included, who really, really love chocolate. They’re ultra rich, fudgy, and decadent in every way. I use a bittersweet chocolate (70 percent cacao) here as I prefer a darker, more bitter flavor. If you prefer a sweeter flavor, try using a semisweet chocolate (54–60 percent cacao). Since the chocolate is really the star of the show, the quality you use will make a big difference in flavor. Use Valrhona chocolate if you can find it but Guittard and Scharffen Berger are also great, and readily available at most well-stocked supermarkets.
Ingredients:
1 stick butter
4½ cups bittersweet chocolate, chopped
6 large eggs
2 cups brown sugar
¾ cup cocoa powder
1 cup chocolate chips
Instructions:
1/ Preheat the oven to 350°F. Line two baking sheets with parchment paper. Melt the butter and chopped chocolate together in the microwave or over a double boiler. Stir every 45 seconds or so, taking care not to burn the chocolate. Whisk the melted butter and chocolate to combine.
2/ Meanwhile, in the bowl of a stand mixer fitted with the whisk attachment, whip together the eggs, brown sugar, and cocoa powder until tripled in volume, 5–7 minutes.
3/ Pour the whipped sugar and egg mixture into a large mixing bowl. Add the melted butter and chocolate and gently fold the two mixtures together, taking care not to deflate the egg mixture. When the mixtures are evenly combined, gently stir in the chocolate chips.
4/ Using a 2-ounce cookie scoop (#16, or about ¼ cup), scoop the batter onto the prepared baking sheets, leaving 2 inches of space between the cookies. You will fit about 8 cookies per sheet. These cookies spread a lot during baking! Depending on the size of your oven and how many baking sheets you have, you may need to work in batches.
5/ Bake for 8 minutes, rotate the sheets between upper and lower oven racks, and bake for another 4 minutes until the edges are just barely set and the middle still feels quite mushy. Take care not to overbake. You want these fudgy and soft. They will firm up as they cool. Repeat with the remaining dough. Depending on the size of your oven and how many baking sheets you have, you may need to work in batches. Store at room temperature for up to 2 days or in the freezer in a zip-top bag up to 1 month.
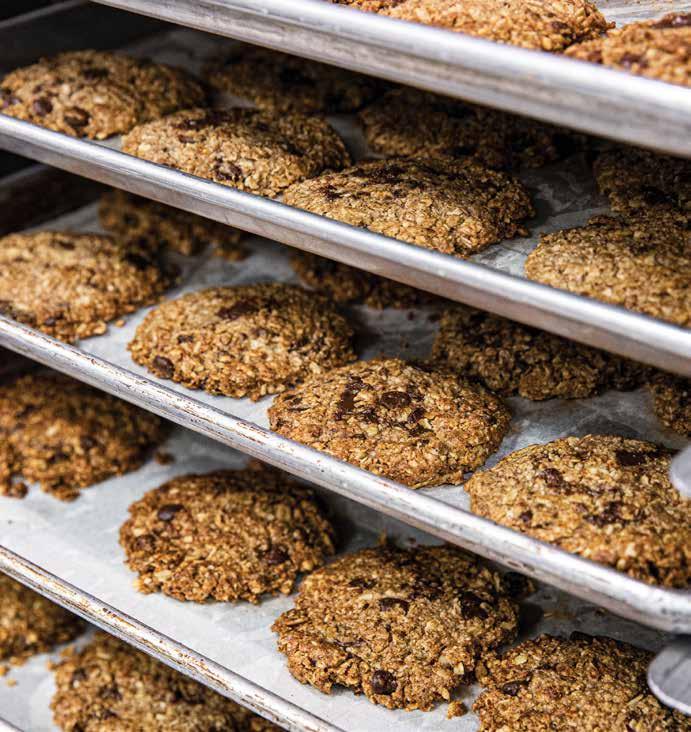
vegan oatmeal raisin COOKIES
I have no willpower when it comes to these cookies! I love the butteriness that comes from the ground nuts and the pops of bursty currants and warm spices. The only sweetener is maple syrup and they’re entirely vegan, so in my opinion they’re practically a breakfast cookie, not that I’ve ever tried eating them for breakfast or anything.
Ingredients:
4 cups raw pecans or walnuts
2 cups gluten-free rolled oats
1½ tsp. baking powder
1 tsp. kosher salt
1 tbsp. tapioca starch
1 tsp. xanthan gum
1 tsp. ground cinnamon
¼ tsp. ground nutmeg
½ tsp. ground cardamom
½ cup olive oil
½ cup maple syrup
1 tsp. vanilla extract
1 cup currants
Instructions:
1/ Preheat the oven to 325°F. Line two baking sheets with parchment paper. In a food processor, grind nuts until very finely ground, 3–4 minutes. You are looking for the texture of almond flour, a fine meal. Take care not to blend too far or you will make nut butter.
2/ In the bowl of a stand mixer fitted with the paddle attachment, put the ground nuts and the rolled oats, baking powder, salt, tapioca starch, xanthan gum, cinnamon, nutmeg, and cardamom. Mix on low speed, just to combine, about 1 minute. Add olive oil, maple syrup, and vanilla and continue mixing until ingredients are evenly moistened and the mixture starts to hold together, about 2 minutes more. Stir in currants on low speed until just combined.
3/ Using a 1.5-ounce scoop (#24, or about 3 tablespoons), scoop dough balls onto the prepared baking sheets, leaving 2 inches of space between them. You will need to press the dough firmly into the cookie scoop, so it forms a tight ball when scooped onto a baking sheet. If the balls are not tight enough, the dough will not hold together when pressed in Step 4.
4/ Bake cookies for 10 minutes. Remove sheet pans from the oven and using a piece of parchment paper or a large spatula, press cookie balls into flat disks. Return the pans to the oven and bake another 10 minutes until cookies are the lightest golden brown and feel set at the edge. They will firm and crisp up as they cool.
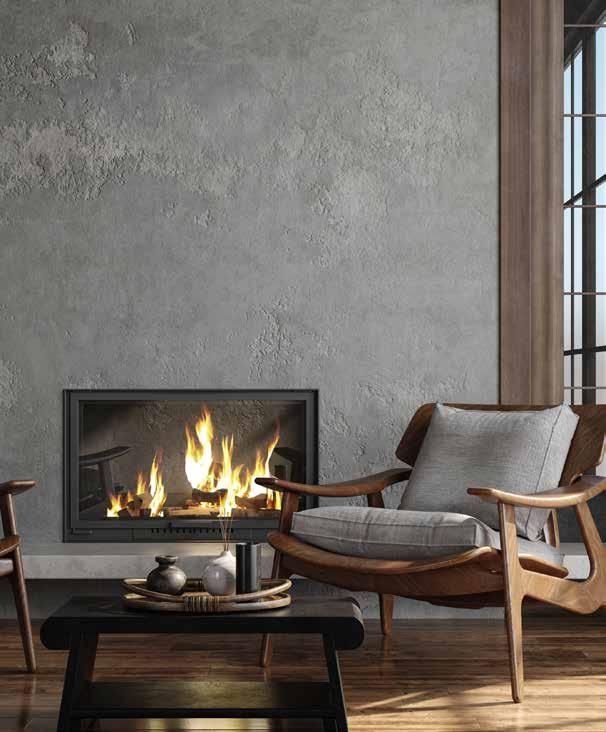
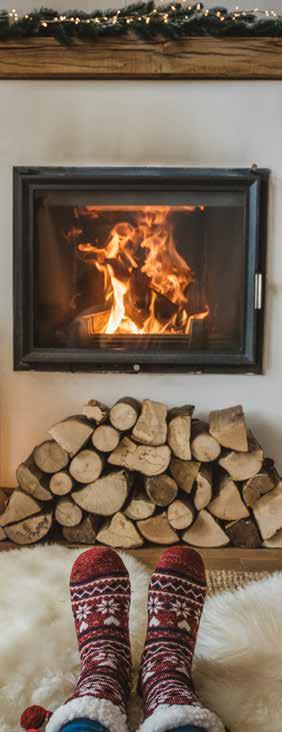
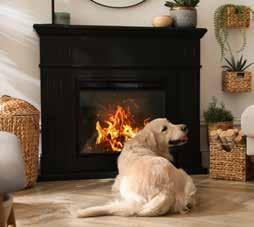
pick the perfect FIREPLACE
written by ANDRE RIOS
Almost nothing expresses the comforts of home like a fireplace—the perfect cozy spot to retreat to after coming indoors from a chilly night. Such a feature allows you to set a romantic ambience, enjoy treasured gatherings with your family, and savor the natural glow of a flame flickering safely in its hearth. If you’re looking to install one in your home, the following tips can help you select and style a truly heartwarming centerpiece.
Figure out the fuel
You’ll first need to decide which basic fireplace type to install. Each one is designed to consume a specific fuel source and may vary in price, visual potential, and maintenance needs. Here are the most common options:
Wood-burning
Pros: Excellent scent and classic charm
Cons: Necessitates replenishing its firewood often, demands more extensive maintenance due to the debris it creates, and utilizes a broad chimney, which may be complicated and expensive to add to an existing home
Gas
Pros: Quick to install, especially if you opt for a ventless model, and more efficient than a wooden fireplace
Cons: Requires a potentially risky gas connection and may be costly to set up if your chosen model needs a ventilation system
Electric
Pros: Simple to install, doesn’t require ventilation features—which makes it extremely energy efficient—and is available in built-in or portable models
Cons: Doesn’t burn a pleasantly authentic flame and cannot provide much-needed heat during a power outage
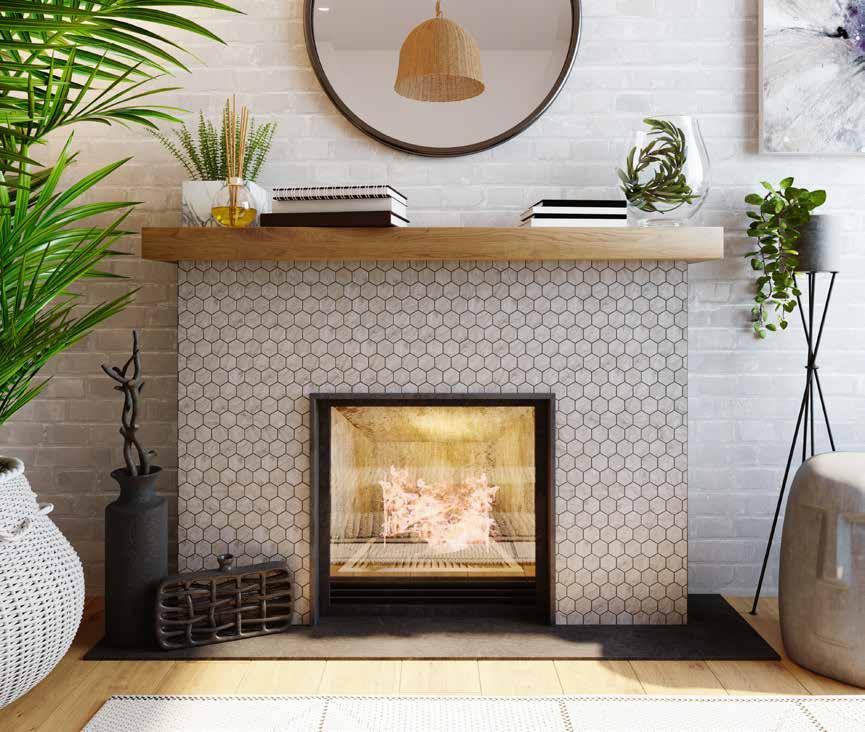
Ethanol
Pros: Offers the same advantages as electric, plus produces a smokeless flame due to the fuel type
Cons: Generates less heat than the prior options, uses somewhat pricey bioethanol fuel, and is potentially less safe than gas and electric
If you’re unsure of which to choose, contact a fireplace contractor to go over the various models and finishing features available; they can also give you a better estimate of the total price based on factors like materials and dimensions. Per the home-improvement site Angi, the average installation price is about $2,500, so to mitigate your costs, you may want to build the surround (the frame encircling the fireplace opening) out of simple brick or go with a more affordable prefabricated model.
In addition, be mindful that some states have banned certain models, such as ventless fireplaces, due to air-quality concerns. To be safe, discuss your planned upgrade with your local zoning department before you decide on a structure.
Seek inspiration
Once you choose a fireplace, you can then design the decorative elements for enclosing it, including the mantel and hearth. For a seamless style, take inspiration from the surrounding room, pulling from a single motif—such as contemporary clean lines or traditionally ornate woodwork—that would complement it nicely. For example, while an intricate wooden surround and mantel with ornate trim beckons thoughts of fine estates, such pieces would appear out of place in a midcentury modern home.
To enhance visual impact, select a quality material like flagstone or brick for the fireplace surround, hearth, and chimney breast (the structure around and above a fireplace that projects into the room). You can even affix a ventless fireplace into the latter for an old-fashioned look. Further, installing a prominent mantel can set the stage for displaying goods like holiday decor or electronics above the firebox. Making these thoughtful style considerations will help you create a truly stunning centerpiece.
Heed advice
Working closely with a fireplace contractor is ultimately the key to devising an attractive yet practical model that suits your tastes. Just as important, they can provide ongoing maintenance advice about cleaning debris, inspecting the fuel source often, and more based on the variety you choose. Stay on top of these tasks, and you and your loved ones can bask in the welcoming glow of a fireplace for years to come.
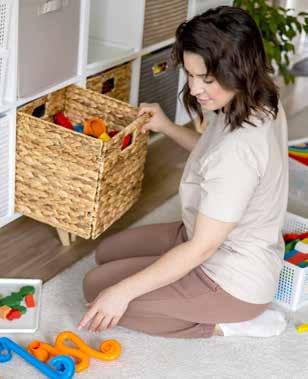
ORGANIZING TWELVE DAYS OF
written by ALLISON GOMES
A tidy home doesn’t just impress guests—it also makes the season’s numerous demands easier to manage. But instead of viewing cleaning as a chore, why not turn it into a challenge? This year, embrace the spirit of the holidays with this twelve-day organizing plan that will help you tackle clutter and refresh your spaces, ensuring that they’re both inviting and stress-free for the weeks ahead.
DAY 1: SET UP A DONATION BOX
Because you’ll likely come across stuff you no longer need during your cleaning spree, start by setting up a donation box for clothes, household items, toys, and other pieces in good condition. Put it somewhere central to your home, such as in the living room, so you can quickly add items as you go.
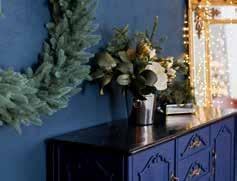
DAY 2: CLEAR THE ENTRYWAY
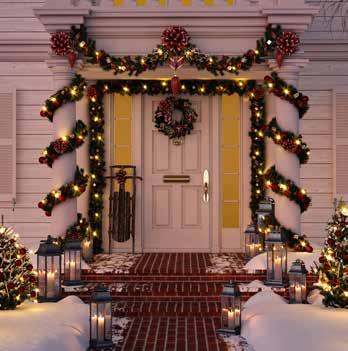
Next, move on to the first thing guests will see in your house—your entryway. Clear out old shoes from the floor or shoe rack, coats from the stand or hooks, and mail from the side table to create a welcoming zone where people can shed their outer layers when visiting. Once it’s straightened up, consider giving it a small, festive touch with a holiday wreath on your front door or a decorative basket for keys.
Day 3: SPRUCE UP THE LIVING ROOM
It’s important to make sure that this area is cozy since you’ll likely spend a lot of time gathering here. Stow away unused items, tidy up bookshelves, and clear off the coffee table for a neat appearance as well as a blank canvas for your holiday decor, which will lend extra warmth and charm.
Day 4: REFRESH THE BATHROOMS
Turn your attention to your bathrooms, decluttering countertops, disposing of expired and unused toiletries, and adding a bit of cheer with a seasonal hand towel or scented candle. Consider also incorporating storage solutions like baskets or drawer organizers to maintain order for both yourself and any visitors.
Day 5: TIDY THE KITCHEN
Cooking for a crowd is easier in a clutterfree kitchen, so remove rarely touched appliances and other items to make space for baking and meal prep. Additionally, wipe down every surface, organize your utensils, and make sure frequently used ingredients are within reach in your cupboards.
Day 6: REFRESH THE PANTRY
Before buying supplies for your holiday meals, take stock of your pantry. Check expiration dates, and clear out anything that’s past its prime. Further, grouping like items together, such as baking essentials, will make it simpler to find what you need when it’s time to get cooking.
Day 7: PURGE THE FRIDGE AND FREEZER
Similarly, make room for ingredients in your fridge and freezer; you’ll also appreciate having the extra space when it comes time to find a home for leftovers. Remove everything, wipe down shelves, and toss expired items. You can then sort what’s left, using clear bins to ensure that everything is visible and easily accessible.
Day 8: TACKLE THE CLOSETS
Prep for new gifts by going through your various closets and tossing belongings you no longer need into your donation box. For the one in your bedroom, store away lighter fabrics and rotate seasonal clothing so your warm options are front and center. If you’re having any overnight visitors, create space in the guest bedroom and bathroom closets for their belongings.
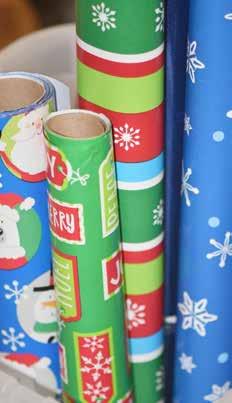
Day 9: STREAMLINE YOUR GIFT-WRAPPING SUPPLIES
Make your life easier by keeping all your wrapping supplies together in one place, such as a hall closet. An over-the-door organizer is great for storing gift tags, ribbons, tape, scissors, and other small materials. Place rolls upright in the corner, and toss any scraps you may have been hanging on to.
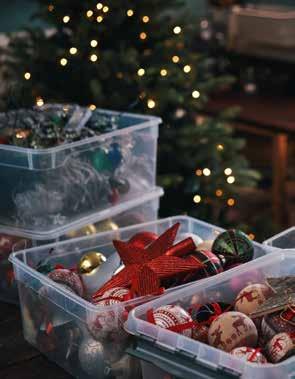
Day 10: WHITTLE DOWN HOLIDAY DECOR
Finish decking the halls with your holiday decorations, and once you’re done, take stock of what remains. Should you realize that you haven’t used something in a few years, it may be time to part with it and free up storage for new items in the future.
Day 11: SORT TOYS AND GAMES
If you have children, go through toys and games before gifts arrive, donating gently used items to make room. You can even encourage your kids to participate by letting them choose which items to give away or get rid of.
Day 12: ORGANIZE THE HOME OFFICE
MAKE YOUR
LIFE EASIER
BY KEEPING ALL YOUR WRAPPING SUPPLIES TOGETHER IN ONE PLACE.
Though people may not be hanging out in your office during visits, it’s a good idea to clear out old paperwork, tidy your desk, and set up a designated space for holiday cards and receipts. This will help you enjoy the well-wishes from loved ones and make any necessary exchanges or returns in the coming days.
A perk of this challenge is that it is completely customizable—you can start it whenever you like, switch up the order of the days, and swap out irrelevant tasks for ones essential to you. Either way, a well-defined plan will allow you to welcome the holiday season with a clean and cozy home that’s ready for celebrations, relaxation, and a fresh start in the new year.
tools for prepping a SCRUMPTIOUS FEAST
written by DAKOTA DAMSCHRODER
As much as everyone may look forward to digging into a beautiful spread of succulent turkey or ham, mouthwateringly rich sides, and indulgent desserts, the idea of creating such a large, elaborate meal can be daunting. If you’re picking up the mantle this season, equipping your kitchen with the right tools can help streamline preparation to save you time and effort, transforming holiday cooking from a stressful task into a joyful experience.
FOOD PROCESSOR
Why go through the tediousness of chopping vegetables yourself when a food processor can do it in less than half the time? Simply select the blade attachment for either large or fine dice, toss the food in the bowl (cutting each piece into smaller chunks as needed to fit), and turn on the device at an appropriate speed. Plus, this versatile machine can shred cheese, make dips and sauces, and even knead dough. From creating smooth cranberry sauce to finely mincing herbs for stuffing, it will have you moving through meal prep with ease.
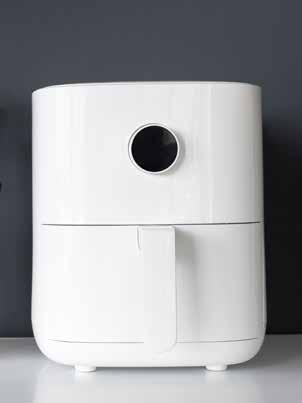
AIR FRYER
This countertop marvel uses rapid air circulation to cook food quickly and evenly with minimal oil, enabling it to deliver crispy texture without excess fat. Its different functions for baking, grilling, and roasting make it ideal for appetizers, vegetables, and a small turkey or chicken, depending on the size of your air fryer. In turn, you can free up valuable space in the oven for other dishes like casseroles, helping you maximize your efficiency in the kitchen.
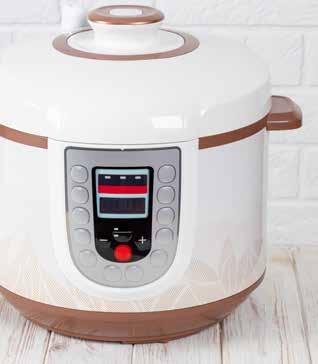
SLOW COOKER
A slow cooker is a hero for hands-off cooking. All you need to do is add your ingredients, set the timer, and let everything simmer over the course of several hours. Whether you’re crafting a hearty stew, braised meat, or warm dip, such a gradual process will allow the flavors to meld beautifully for an irresistible dish. Just as valuable, this gadget will keep food warm ahead of and throughout the festivities so you never have to worry about reheating.
STAND MIXER
For bakers, a stand mixer is a must-have. Its powerful motor and various attachments effortlessly mix batters, knead dough, and whip cream with consistent results, ensuring that everything is perfectly combined. It doesn’t matter if you need to make a hearty loaf of bread for an appetizer or cookies for dessert— this appliance will be your best friend.
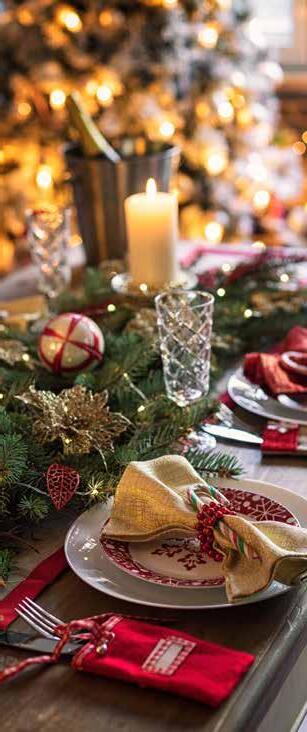
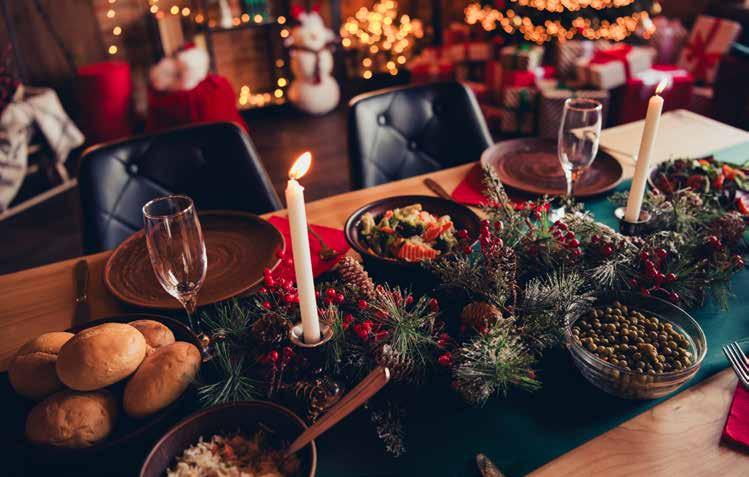
FESTIVE TABLESCAPES Made Easy
written by ALLISON GOMES
Your dining table undoubtedly shines during formal feasts, when it’s filled with tempting platters and surrounded by good company. But on an average day? It might look a little uninspired. That’s where the concept of the tablescape comes in. More than just decorations, a tablescape is an artfully arranged combination of centerpieces, tableware, and accents that sets the perfect festive mood. And the best part is that it doesn’t require expensive pieces or elaborate setups. With just a few small touches, you can create a warm, inviting holiday table that’s sure to impress.
Layer a base
When designing your setting, start with a table runner featuring a print, pattern, or color that speaks to you, and lay a strand of faux or fresh garland on top. It’s a simple way to add texture and dimension to your design, forming a solid foundation that you can then build upon.
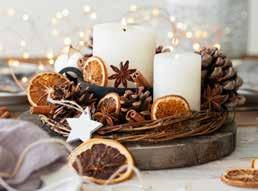
Craft a centerpiece
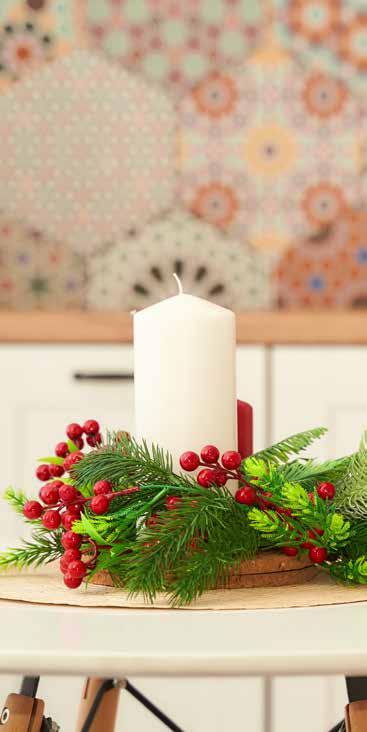
You can easily throw together a stunning centerpiece by buying a pretty basket or bowl (or repurposing one you already have) and filling it with holiday-themed items such as pine cones, ornaments, and dried orange slices. For a little sparkle, you could even mix in a strand of battery-powered fairy lights. It doesn’t have to be overly complicated or ornate since it won’t be the only decorative feature adorning the table.
Holiday-themed items such as pine cones, ornaments, and dried orange slices are great additions to any centerpiece.
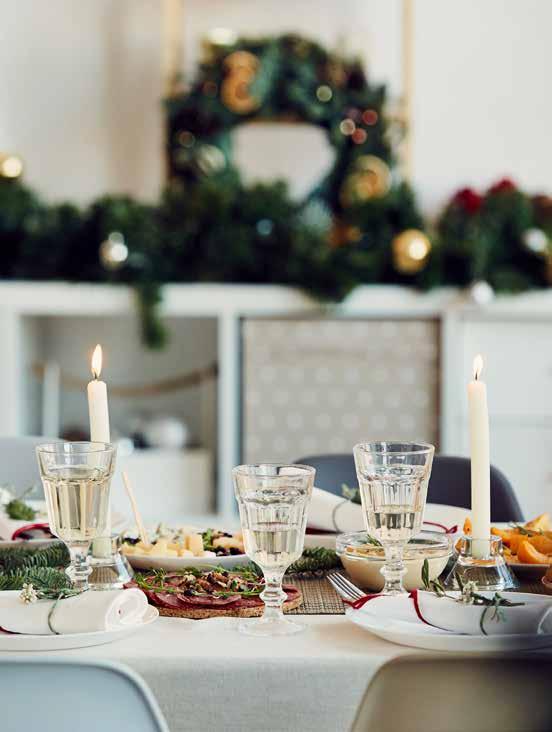
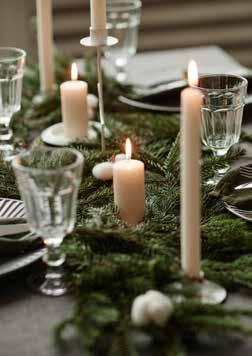
Speaking of lights, candles are the best way to lend warmth and ambience. Select a mix of tea lights and pillar candles in varying heights, and scatter them down your runner for an effortlessly chic look. If you’re concerned about open flames, opt for battery-operated versions that flicker in close resemblance to the real thing.
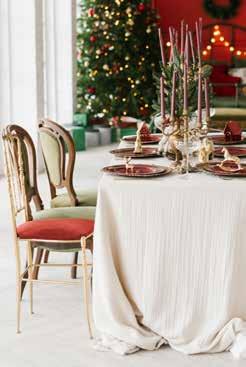
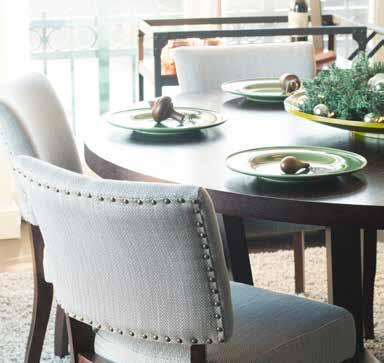
With the center of your table established, you can now move on to place settings. The traditional mode of thought is that you need matching fine china to be appropriately fancy, but a mix of different chargers, plates, bowls, and glasses in complementary colors can lend an equally charming collectedover-time look. Complete the design with coordinating cloth napkins and silverware for each person; if you don’t already have a nice set of the latter, it may be worth investing in a quality one to use for special occasions.
You can often find beautiful dishware for low prices at thrift stores and antique malls. When shopping, stick to a color scheme, like classic red and gold or elegant silver and blue, to keep everything cohesive. Also, small details can make a big impact. Try tying a piece of twine around a folded napkin and tucking in a sprig of rosemary or a cinnamon stick for a natural, rustic touch.
While it’s fun to put together a festive display, make sure not to go too overboard. You’ll want to leave enough space for serving dishes and platters, especially if you’re hosting large groups this season, and keep your centerpiece low and arrangements compact at a sit-down dinner so guests can easily see and talk to each other across the table. You could also opt out of using chargers to ensure that they have enough room to comfortably rest their arms while dining.
Remember, the best part about a tablescape is that it doesn’t have to be perfect—it’s about creating something festive and unique to your home. Take your time shopping to find pieces that make you happy, and you’re sure to craft a holiday table that brings joy day in and day out.
Place candles
Embrace eclectic place settings
written by MATTHEW BRADY
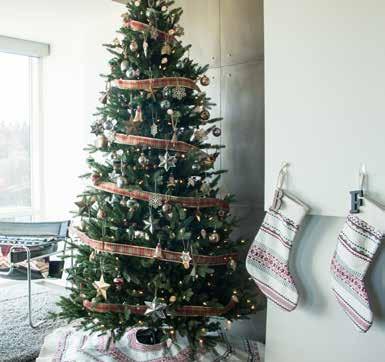
christmas tree deterrents FOR CATS
As a cat owner, it can be an annual challenge to protect your Christmas tree from the never-ending curiosity of your feline friend. After all, the stately shrub provides a giant tower to climb, various places to hide, and an array of shiny baubles to play with.
But the precautions are worth the effort, not only to preserve all the work you put into your display but also for your pet’s safety—this form of holiday decor is chock-full of hazards. Here are some common tactics to consider for preventing a cat-astrophe.
ALUMINUM FOIL
Try scrunching strips of this kitchen item into balls and scattering them near your tree; many cats detest foil’s sound and feel. Be forewarned, though, that they can adjust quickly to it as well.
CITRUS
Felines tend to have an aversion to this scent, and as a bonus, orange is already associated with the season. So spray citrus cat repellent throughout your branches to provide both a deterrent and a festive aroma, reapplying it when the scent fades.
DOUBLE-SIDED TAPE
Adhere this option to the floor a few inches outside the perimeter of your tree’s base; cats are particular about what touches their sensitive paws and may be dissuaded. Just make sure it won’t damage the surface and that people don’t accidentally step on it.
PARTITIONS
If all else fails, adopt the attitude of a castle owner fending off invaders by constructing a barrier around your tree. Many plastic pet playpens even feature sheer panels, allowing you to still see its beauty as it’s being protected.
Keep in mind that you may have to do some trial and error since every pet is different. If you find an approach that works, stick with it—but be prepared to adjust your tactics, especially as your cat grows, to continually discourage this unfortunate holiday tradition.