Director of Client Success Matthew Frizalone hello@remindermedia.com
OPERATIONS
Vice President of IT Thomas Setliff
Vice President of Finance Shana Lebofsky
Director of Projects Kelsie Schmall
Director of Business Intelligence Daniel Gallaway
Director of Manufacturing Shannon Mosser
Director of HR John Keogh hr@remindermedia.com
Good to Be Home is published by ReminderMedia. For more information about Good to Be Home magazine, please visit us at www.remindermedia.com, email us at info@remindermedia.com, or call us at 866-458-4226. All rights reserved.
NO PART OF THIS PUBLICATION MAY BE REPRODUCED WITHOUT THE EXPRESSED WRITTEN CONSENT OF THE PUBLISHER. This magazine is for information and entertainment purposes only; it is not an attempt to solicit business. The contents of Good to Be Home are for editorial purposes only.
A Watermelon extravaganza
written by: FAITH FIORILE
Nothing screams “summer” like a piece of luscious, sun-ripened watermelon.
Renowned for its vivid color and sweet taste, this fruit is a mainstay of beach picnics, pool parties, and barbecues alike.
Plus, it’s comprised of 92 percent water and boasts vitamins A, B6, and C, making it a healthful and hydrating choice. Here are some ideas to help you truly savor the treat this season.
Prepare it differently
Although wedge slices are classic, there are lots of interesting ways to consume watermelon.
If you’re looking to avoid desserts with added sugars, you can create sorbet by mashing frozen chunks of the fruit or craft ice pops by blending and freezing it. Or toss it with feta, mint, and cucumber for a refreshing salad.
You could even throw a few slices on the grill to caramelize the natural sugars, resulting in a deliciously smoky taste.
Add it in
On top of being a star ingredient, watermelon’s versatility means it can also be an excellent addition to all sorts of dishes. In salsa, for instance, you can substitute diced watermelon for tomatoes; alternatively, toss it into guacamole for a sweet variation. And when it comes to beverages, simply mix blended watermelon with Greek yogurt for a delightful smoothie or use chunks as a garnish to elevate your favorite mocktails or cocktails.
Create a themed activity
Of course, you don’t have to eat watermelon to enjoy it! At your next gathering, consider holding a competition where participants young and old stand in a line, take a bite of juicy melon, and see how far they can spit the seeds they get from it.
Another good bonding activity could be carving the fruit into different shapes, pushing each other to see who can be the most creative. With such fun times, your event is all but guaranteed to be a hit.
Smart and Stylish KITCHEN GOODS
written by: ANDRE RIOS photography: AS NOTED
BALMUDA The Brew coffeepot
Your daily cup of joe will ascend to a professional level with the help of this stellar brewing machine, which measures only about five and a half inches wide and features a one-cup carafe. Rather than concealing it alongside your other small appliances, though, you might actually enjoy featuring its smart design on your countertop. A sleek steel and matte-black device with an elegantly fluted silhouette, The Brew can fit seamlessly into any kitchen aesthetic.
But perhaps even more striking than its appearance is its coffee-conjuring method, a pour-over process you can adjust to your preferred serving size and intensity with the touch of a button. While it retails at $699, those who consider coffee an indulgent hobby, not just a daily necessity, will find this a valuable appliance that produces delectable results.
For more info, visit us.balmuda.com
Felt+Fat 3-piece confetti dishware set
Rather than stoic and antique, this festive dishware set by Felt+Fat—which includes an everyday plate, snack plate, and soup bowl—helps you serve up refreshments and hearty meals alike in stunningly modern style. Its well-crafted products each display a slew of scintillating colors across a neutral, off-white surface; the vibe screams “party” while the traditional shape keeps occasions refined and formal.
Even better, these pieces are as durable in form as they are delicate in appearance. In addition to being suitable for both the microwave and dishwasher, they’re made of food-safe ceramic rather than heat-intolerant plastic or fragile glass. And, on top of that, Felt+Fat’s artisans painstakingly handmake the dishware to order, well earning the set’s $140 price tag.
For more info, visit feltandfat.com
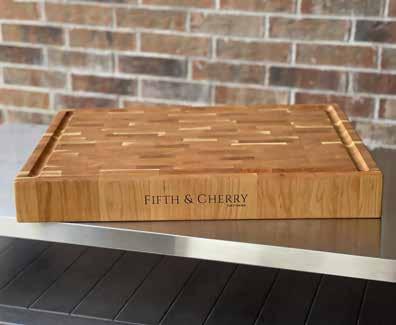
Fifth & Cherry custom cutting board
While a basic value-brand cutting board can get the job done, a premium piece by Fifth & Cherry may become a point of pride for your kitchen. Each one is exceedingly sturdy, helps prevent food contamination, and adds a touch of art to meal preparation. Attribute these many perks to the brand’s craftspeople as well as its sourcing: it uses only responsibly harvested American black cherry tree wood, which offers elegant grain, wonderful coloring, and years of utility.
Fifth & Cherry sells a variety of premium boards in a range of dimensions and styles on its website, but ordering a custom one grants you the freedom to tailor it perfectly to your countertops’ dimensions, your cooking needs, and more. (Prices vary, though you can receive a free quote online.) In addition to promising excellent results, all boards come with a complimentary refinishing service for the lifetime of the product.
For more info, visit fifthandcherry.com
BALMUDA
Fifth & Cherry
Noon & Moon Iridescent Glasses
Toast to the weekend, a special celebration, or quality time alongside treasured company with this sophisticated set of crystal glasses, which serve up classic elegance with a twist thanks to their distinct rainbowlike sheens, beautifully beveled stems, and art deco and midcentury modern profiles inspired by the architecture of Los Angeles, the company’s home. The stemware is 100 percent unique as well thanks to its handblown artistry, making each piece a veritable collector’s item for showcasing on your bar, tea cart, or buffet table.
Note the six varieties of glasses in this set, retailing for $192. They range from a lean champagne flute to a broader burgundy glass, equipping you to serve an array of beverages. But if you’d prefer a matching collection, you can also select the one you like best and order as many as you want. Then prepare to astound your guests with one-of-a-kind pieces that show off Noon & Moon’s sculptor-like craftsmanship and expert attention to color.
For more info, visit noonandmoon.com
Town Cutler Desert Dawn Chef Knife
Elevate your home cooking with a professional-grade tool: this “workhorse” general-purpose knife by Town Cutler that is equally stunning in appearance. Taking inspiration from desert moonlit mountains and starry skies, it features a perfectly beveled and matte Nitro-V stainless-steel blade sitting within a buckeye-burl wood handle marbled with black resin. Sheath it in the wooden saya, or protective covering, and it transforms into a fashionable piece of decor that you could very well display on its own shelf.
But don’t leave it idle for long. Utilize this everyday knife for everything from dicing vegetables to butchering meats to witness how its ultrathin, ultrasharp, and lightweight blade improves your daily food prep to top-chef quality. The Desert Dawn Chef Knife starts at $230, which is an exceptional value for not only its breathtaking look but also its ability to replace just about any other knife in your drawer.
For more info, visit towncutler.com
Town Cutler
Preserve Your Summer Harvest
written by: LAUREN KIM
One of the greatest joys of gardening is relishing homegrown crops, from tomatoes and peppers to strawberries and melons. By preserving them, you can enjoy them year-round too! While certain methods like canning can require a steep learning curve, these simpler ones may allow you to easily extend the lives of your fruits, vegetables, and more well beyond summer’s end.
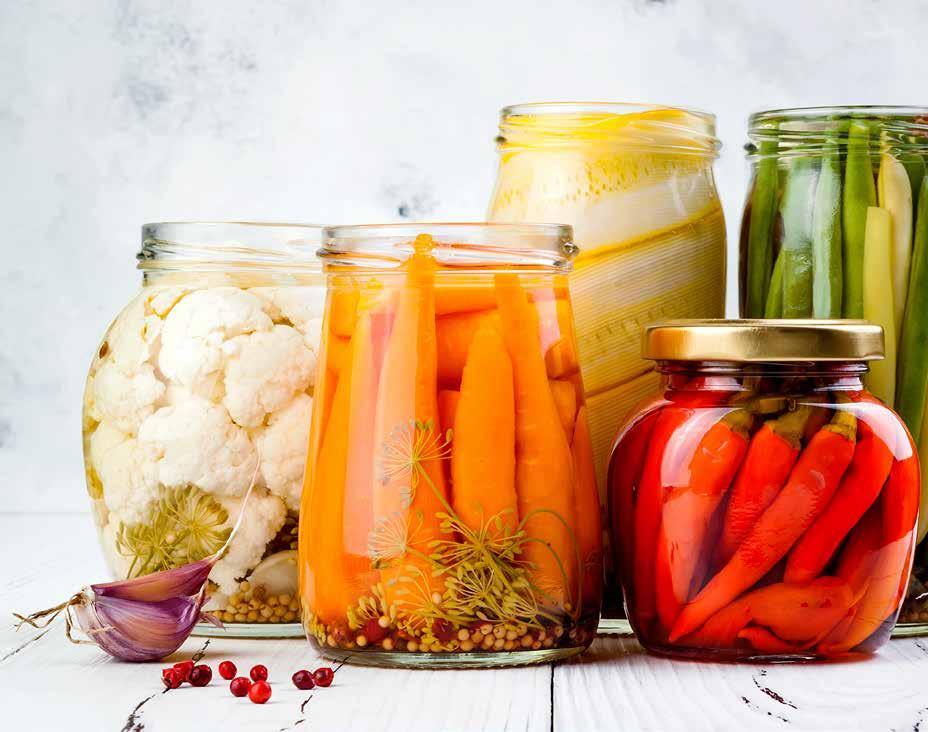
Quick pickling
Canned pickling is a traditional and long-lasting way to preserve vegetables, but it can also take several weeks, which is why many prefer to quickpickle them in the refrigerator instead. All you need is some water and vinegar, a few lidded pint-sized jars, and the freshest veggies from your bounty. You’ll first want to wash and dry the crops and cut them into slices or spears; smaller ones, such as cherry tomatoes, can be left whole. Then place them into the clean jars and prepare the brine, mixing equal parts vinegar (any basic variety will work) and water. Feel free to add your choice of seasonings— for example, garlic, dill seed, and red pepper flakes for classic cucumber pickles or honey and sea salt for sweet pickled onions.
Once the brine boils, carefully pour it over the vegetables, leaving a little space at the top of the jars. Tap gently to release any trapped air bubbles, secure the lids tightly, and store the jars in the refrigerator. Though the brine will begin to work in about ten minutes, wait at least a day to allow the flavors to develop. Properly stored in the fridge, your pickled vegetables will stay fresh and delicious for one to three months.
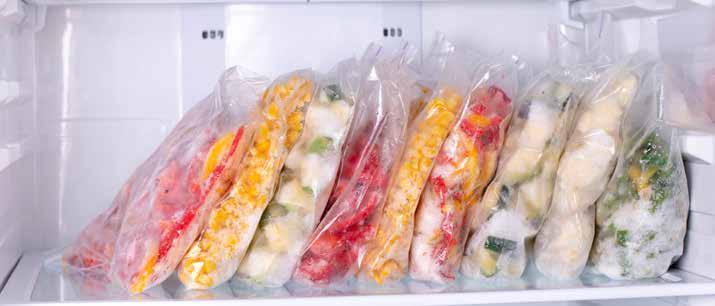
Freezing
Storing your produce in your freezer is a quick and effortless tactic to extend its life for up to a year. Most fruits, veggies, and herbs can be frozen, though delicate ones like lettuce and cucumbers may lose some of their crispness. For best results, pick them in the morning when they’re at their freshest, getting them prepped and stowed within twelve hours. It’s also a good idea to cut larger items into smaller pieces; this will allow them to freeze and thaw faster and more evenly.
In addition, many vegetables should be blanched (briefly boiled or steamed) first to kill bacteria, deactivate decay-promoting enzymes, and preserve texture. (To get specific blanching times for different vegetables, visit the National Center for Home Food Preservation’s website.) After blanching, immediately place them in an ice bath to stop the cooking process, then pat them dry and store them in airtight, freezer-safe containers. As for herbs, wash, dry, and chop them before combining them with a neutral oil, such as extra-virgin olive or avocado oil, and freeze the mixture in ice-cube trays or freezer bags for easy use in future recipes.
Dehydrating
Another option is to dehydrate your crops to create delicious snacks like kale chips and fruit leather that can be stored for four to twelve months. You’ll get the best consistency with a dehydrator, but you can also use an air fryer on its lowest temperature; some even have a dehydrator setting. Alternatively, you can simply set your toaster oven or full-sized oven to low.
While dehydrating is a basic process, it does require patience: it can take up to four hours in an air fryer, ten hours in an oven, and twelve hours in a dehydrator. To prepare your foods, wash and dry them thoroughly, then cut them into uniformly sized slices. For fruits that are prone to oxidation, such as peaches, pretreat them with a mixture of bottled lemon juice and water to prevent browning. Lay your produce flat on a tray in your appliance to ensure that they dry evenly, and store them in an airtight container in a cool, dry, and dark area like your pantry.
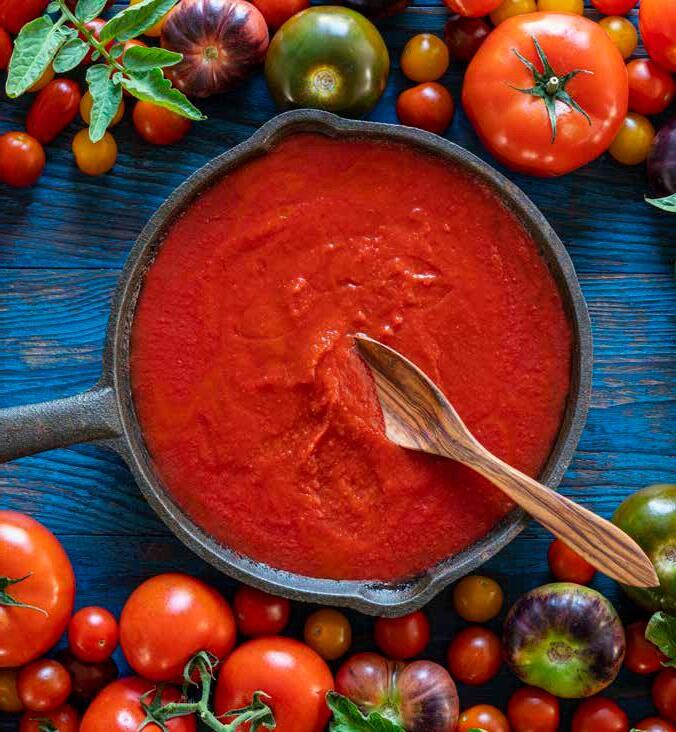
Soups and sauces
If you have an abundant harvest, options premaking soups and sauces for busy weeknights can make excellent use of them. Most can keep in your freezer for around three months—just move them to your fridge the day before you wish to enjoy them. Depending on what your garden yields, you might whip up a creamy roasted carrot soup, a vibrant chimichurri with fresh cilantro and parsley, or a rich tomato and basil pasta sauce. With a little creativity, the possibilities for delicious homemade dishes may be endless!
Save your flowers
Are you more of a flower gardener than a veggie one? There are plenty of ways to enjoy your blooms’ beauty long into autumn as well. Try the pounding method, which involves placing them on a piece of fabric or paper over a hard surface, covering them with a paper towel, and gently hammering them to transfer their pigments. Or you can press them by laying them between parchment paper within the pages of a book and setting a heavy item on top. Then use them to embellish handcrafted cards or bookmarks or make stunning decor for your home.
With these techniques, you may prolong your enjoyment of your delicious and beautiful garden, giving you plenty of tasty foods and pretty blooms to savor for weeks to come.
Exploring CAR-FREE COMMUNITIES
written
by: ANDRE RIOS photography courtesy of: CULDESAC
In the 1950s, the American dream neighborhood was a suburban paradise of tract houses featuring matching lawns, attached garages, and lots of elbow room. But over seventy years have passed since the suburbs boomed, and growing populations, traffic congestion, environmental challenges, and cultural changes are sparking a different trend nationwide: communities that eliminate cars and other motorized vehicles, favoring walkability instead. Check out this fascinating alternative-home environment that seeks to offer a healthier, more collective way of life.
OLD IDEA, NEW TAKE
It would be inaccurate to call the car-free community a totally brand-new concept. Dense urban living existed for many centuries before the single-passenger vehicle, and many of America’s current cities support transportation on foot, train, or bicycle, including New York City and San Francisco. However, modern developers and would-be occupants are pushing the envelope further, opting for neighborhoods that minimize or even eliminate the need for any kind of personal motorized vehicle. Such living could untether individuals from the confines and challenges of automotive-designed
infrastructure and grant them access to a more walkable, cohesive, and nurturing environment.
NOTABLE EXAMPLES
Although this movement is still in its early stages in the United States, several prominent projects are spearheading the shift. For example, a community in progress in Tempe, Arizona, designed by real estate developer Culdesac is set to house over 1,000 residents, all of whom will rely on walking, biking, and public transportation to get around. The development orients its architecture toward green spaces and includes local shops
and coworking offices, making it possible for residents to fulfill most of their daily needs within the neighborhood itself. The creators describe living here as being “connected with those around you—your neighbors, local businesses, and the broader city.”
Additionally, the charming coastal community of Seaside, Florida, boasts its own car-free elements, having been built with walkability in mind. Although it does feature roads, it was designed with narrower streets, pedestrianfriendly promenades, and centralized commercial spaces.
Such aspects elevate foot and shuttle transportation, working to reduce residents’ dependence on privatevehicle travel. But small towns aren’t the only ones getting in on the trend—Portland’s BIKETOWN service, for one, gives locals and tourists easy access to e-bikes to encourage them to get around the city sustainably.
THE BENEFITS OF GOING CAR-FREE
As cities grow denser, air pollution and traffic congestion have become increasingly common issues, with the latter contributing to greater stress and exhaustion for drivers. But car-free communities help alleviate these problems in several ways. To start, fewer cars on the road naturally means less exhaust being released into the air, promoting a healthier environment. And without private vehicles, residents are motivated to walk or cycle more, leading to more active lifestyles that can boost their moods along with their physical well-being.
At the same time, implementing these neighborhoods can reduce traffic accidents and save lives. According to the National Highway Traffic Safety Administration, nearly 19,000 people were killed in motor vehicle crashes in the first half of 2024 alone. Eliminating cars can create safer spaces for pedestrians and cyclists, especially higher-risk individuals like children, the elderly, and those living with disabilities.
Furthermore, such communities generally offer a singular area where residents can live, shop, and play, which could reduce the need for long drives. These conveniences may seem particularly appealing to individuals working from home, who aren’t bound by a commute. On top of that, living without a vehicle
could be budget friendly. Gen Z young adults specifically are increasingly opting out of car ownership to avoid the high costs associated with buying, insuring, and maintaining one.
POTENTIAL DOWNSIDES
As exciting as car-free communities may seem, integrating them across the country isn’t necessarily seamless. Ones separated from rail lines or other public transportation may make it more challenging for residents to access essential businesses, ranging from retail to health care. But even if a neighborhood provides sufficient travel within its nearby
metro area, long-distance visits to out-of-town family members, especially those in more isolated rural areas, can prove difficult and frustrating.
Perhaps most concerning of all, though, is the lack of emergency vehicle access. This can be extra worrisome for elderly folks who may be more likely to need health assistance. However, some communities have factored in these necessities: car-free Fire Island, New York, has pathways in place to allow for emergency and state vehicle travel, while Culdesac’s residences are each ambulance accessible.
A CAR-FREE FUTURE
While the transition to car-free living may still be in its early stages, the bourgeoning interest in this trend could be reflecting a broader shift in how Americans view urban residences. Public health concerns, quality-of-life challenges, and the reframing of the average workday may be pushing citizens to pursue a new type of living experience. And though limited examples of these lifestyle developments currently exist, innovators continue to rethink real estate, paving the way for a pedestrian-focused future.
simple recipes for summer
recipes
Everybody loves welcoming get-togethers, especially this time of year. The preparation that’s often required? Not so much—especially with the seasonal heat. But you can serve your guests truly mouthwatering meals and tasty treats without a ton of time and effort thanks to these recipes from the entertaining-focused publication Swing By!
Makes 10 popsicles
key lime pie popsicles
The tart sweetness of key lime pie is so refreshing on a hot day. I adapted this flavor profile to a frozen treat to make it even better.
ingredients:
• 2 cups key lime juice (store-bought is fine)
• 2 (14-ounce) cans sweetened condensed milk
• 8 graham crackers, crumbled
instructions:
1. Use a fork to mix the key lime juice and condensed milk in a large measuring cup.
2. Carefully pour the liquid mixture into popsicle molds, filling each cavity three quarters of the way full. Place the molds in the freezer. After 1 hour, insert popsicle sticks. Freeze for at least 12 hours total or up to 1 month.
3. When ready to serve, unmold the popsicles and press each side into the graham cracker crumbles, coating all sides completely.
SCAN QR CODE for the full cookbook.
Recipes from Swing By! by Stephanie Nass. Rizzoli New York, 2024. Photography by Stockton Johnson and Quentin Bacon.
by: STEPHANIE NASS photography: AS NOTED
Photo by: Quentin Bacon
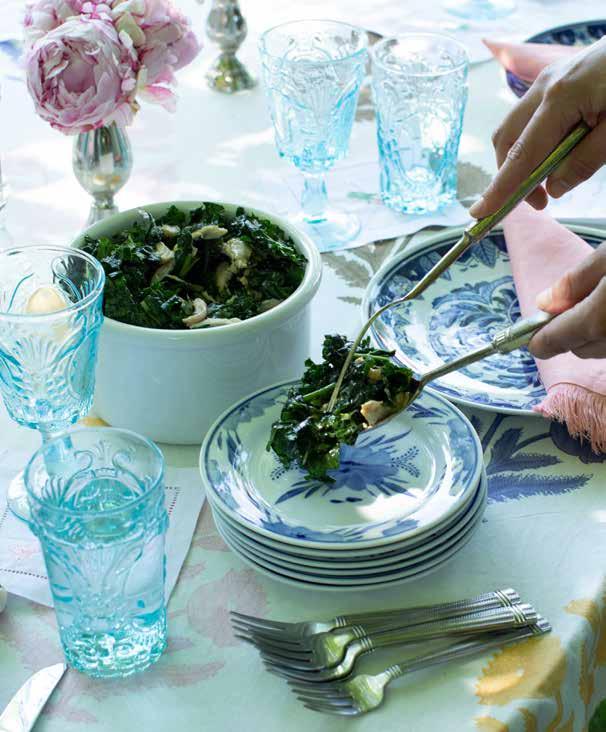
emerald kale salad
Inspired by my favorite salad at the Palm Beach Grill, this recipe is adapted for a pool party anywhere you are. The ingredient list for the dressing is a bit long, but the alchemy of all the flavors makes it totally worthwhile, plus you’ll likely have leftover dressing that can be enjoyed for several days.
instructions: ingredients:
Dressing
• ¾ cup peanut oil
• ¼ cup rice vinegar
• 2 tablespoons soy sauce
• 1 tablespoon freshly squeezed lemon juice
• 2 teaspoons honey
• 1½ teaspoons Dijon mustard
• 1 teaspoon sesame oil
• 1 teaspoon Worcestershire sauce
• ½ teaspoon freshly ground black pepper
• 1 garlic clove, minced
Salad
• 2 bunches lacinato kale, stemmed and thinly sliced
• ¾ cup unsalted roasted peanuts, roughly chopped
• 5 ounces Pecorino Romano, grated (about ¼ cup)
• 1 rotisserie chicken, skinned and shredded
Make the dressing: In a large measuring cup, combine the peanut oil, rice vinegar, soy sauce, lemon juice, honey, Dijon mustard, sesame oil, Worcestershire sauce, pepper, and garlic and whisk to thoroughly incorporate.
Make the salad:
1. In a large serving bowl and with clean hands, massage the kale for about 3 minutes until the leaves soften.
2. Add the peanuts, Pecorino Romano, and chicken and toss together. Pour ¼ cup of the dressing on the salad and toss. If the salad seems too dry, add another ¼ cup. Leftover dressing can be refrigerated in an airtight container for up to 1 week.
3. Place the salad in a serving bowl, if passing at the table, or on individual salad plates. Serve immediately.
Photo by: Quentin Bacon
cacio e pepe
I love dishes that are theatrical and incorporate their preparation into how they are presented. Preparing this pasta dish in a giant wheel of cheese in front of guests is a wow. You can source the wheel online, from a food distributor, or (with enough advance notice) potentially from your local grocer. After the event, you can grate and freeze the cheese for future use.
• 60-pound wheel Pecorino Romano, hollowed out at the top to form a bowl shape (approximately 2 to 4 inches deep; use pieces removed to grate)
• 3 pounds spaghetti, cooked until almost al dente and tossed in olive oil
• Salt
• 2 cups freshly grated Pecorino Romano
• Black pepper
1. Move your cheese wheel so it is beside your pasta pot and visible to guests.
2. In a pot of boiling salted water, reheat individual servings of cooked pasta for 1 to 2 minutes. As the pot boils down and water runs lower, you can add additional water (and salt).
3. Using tongs, transfer the reheated pasta to the well of the cheese wheel. Add ½ cup pasta water and a sprinkle of the grated cheese. Toss the pasta around the well until it is coated with a slippery cheese sauce.
4. Transfer the pasta to a plate and freshly crack black pepper over the top. Serve immediately. Continue this process until all guests are served. instructions: ingredients:
Photo by: Stockton Johnson
Serves 8
Makes about 30 cannoli; serves 8
rigatoni cannoli
I was determined to create a pasta-derived dessert to surprise and delight. I thought of cannoli, a dessert beloved by my family, best bought on Arthur Avenue in the Bronx or Mulberry Street in Lower Manhattan. It occurred to me that rigatoni’s wide tubular shape is similar to cannoli. Bam! Fried rigatoni could become the cannoli tube, filled with sweetened ricotta and cocoa powder.
• ½ pound of rigatoni
• Kosher salt
• Vegetable oil
• 2 tablespoons ground cinnamon
• 2 tablespoons granulated sugar
• 1 cup whole milk ricotta
• 2 tablespoons confectioners’ sugar
• Cocoa powder
6. Set the filled cannoli on a serving platter. Garnish with a dusting of cocoa powder and serve. instructions: ingredients:
1. Cook the rigatoni in a pot of salted boiling water according to the package instructions. Once tender, drain the pasta. Set aside pieces that have broken. Blot the winners dry with paper towels. Roll them in about a tablespoon of oil so that they don’t stick together.
2. Heat 1 inch oil in a medium saucepan on medium-high heat until very hot but not smoking. Line a large plate with paper towels. Gradually, add the rigatoni noodles, so as to not overcrowd the pan, and fry until golden and crisp, about 2 minutes. Remove with a slotted spoon and drain on the paper towels. Add more oil to the pan, if needed, and continue frying the remaining pasta.
3. In a shallow bowl or on a small plate, use a fork to combine the cinnamon and granulated sugar.
4. While the rigatoni is still warm, roll in the sugar-cinnamon mixture, shaking off excess. Place on a clean plate and continue to roll the remaining pasta.
5. In a medium bowl, combine the ricotta and confectioners’ sugar until incorporated. Transfer the mixture to a piping bag using a rubber spatula. Snip the tip of the piping bag and fill each rigatoni with the ricotta mixture.
Photo by: Stockton Johnson
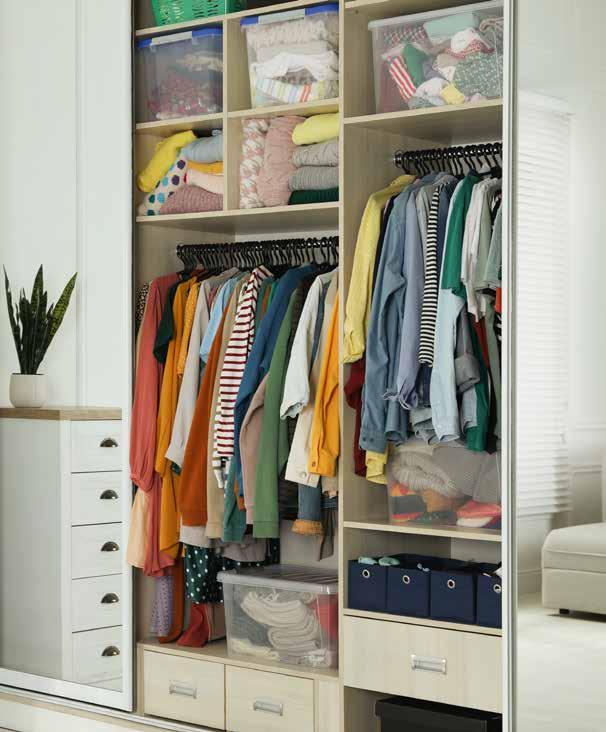
MAXIMIZE your BEDROOM CLOSET
written by: LAUREN KIM
If you find yourself having to dig through a heap of items just to find a single pair of shorts, your flip-flops, or other summer clothing, your bedroom closet may need some reorganizing. However, embarking on a full overhaul may take hours, time that could be better spent soaking up the sun at a park picnic or hiking along a gorgeous nature trail. Instead, try these easy tactics to help you quickly tame the chaos.
DECLUTTER
One of the simplest ways to create extra room is by clearing out anything you either no longer want or won’t need in the coming weeks. Grab a bag for tossing items with holes, stains, or other damage and a box for ones suitable to donate. Then pull out offseason garments to temporarily stow them elsewhere—perhaps under the bed in a zipped fabric storage bag. Consider decluttering in small, focused sessions to help keep the task manageable.
HANG MORE ITEMS
If your closet has a rod, you have several options to enhance your hanging space. For example, you could buy a package of slim hangers to fit in more of your wardrobe; just be aware that these tend be flimsier than others, making them best for lighter items. They are, however, often covered in a nonslip material to better secure clothing and prevent a mess on your floor. You could also hang closet organizer with tiers to provide convenient spots for folded items.
Additionally, aim to capitalize on the empty spaces on your closet walls and back of the door.
Installing a few hooks in the former will allow you to hang hats and purses out of the way along with canvas bags to hold various items like sunglasses or socks; adhesive hooks are an easy alternative if you don’t wish to drill holes. Add an over-thedoor organizer as well, and you’ll have handy pockets you could use to stash all sorts of items, from slippers and sandals to belts and ties.
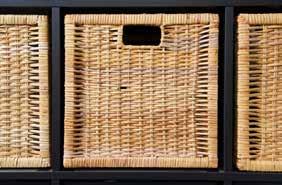
TAKE ADVANTAGE OF TOP SHELVES
It can be challenging to keep high shelves tidy, especially if they’re hard for you to reach. A solution for utilizing this space more efficiently is to place containers that have see-through fronts or can be clearly labeled, allowing you to corral your belongings by type and quickly find them later. Also consider getting a step stool to give you easy access to the upper shelf; look for one that folds up compactly so you can put it in the back of your closet or underneath your bed.
INTRODUCE FLOOR UNITS
Don’t forget about the square footage at the bottom of your closet! To make the most of it, move all your hanging shirts, blouses, and other shorter items to one side to make room underneath for a wheeled multidrawer unit, stackable bins, or cubbies. Such pieces will offer extra storage for clothing like sweatshirts or T-shirts.
BRIGHTEN IT UP
As a final touch, consider adding an LED wireless ceiling light so you can see your clothing more easily as you sort through it all for an outfit. Another option is to stick a few rechargeable motion-sensor lights on the walls to make sure every section is visible. With optimal lighting and a perfectly organized space, you can enjoy a truly stress-free closet experience.
french elegance Meets Functionality
interview with: SEASHAL BELLDINA
written by: MATTHEW BRADY
photography by: ERIN ASH
KELLY
designs by: INTERIORS BY SEASHAL
Seashal Belldina, owner of the design studio
Interiors by Seashal, discusses how she merged French aesthetics with durable products to transform a family’s new construction in suburban Pittsburgh.
What is your design background? My parents bought and renovated our late-1800s Victorian home, so I grew up around design and was always making over my own space. After graduating from college, I worked in advertising for almost fifteen years. One company I was at transferred me to San Francisco, where my husband and I bought a condo in the heart of the design district. I was always walking around and checking out the stores to peruse the latest furniture lines to fulfill my love for design.
Eventually, we moved to Pittsburgh to raise our kids closer to his family. Needing to furnish and decorate our new house, I started going to High Point Market, a home-furnishings mecca in North Carolina, with a friend in interior design;
Pictured: Seashal Belldina
I also dabbled in that area as a hobby for a few years. People kept encouraging me to do it full-time, though, so I decided to reinvent myself. I went back to school, got an interior design certification, and launched Interiors by Seashal six years ago.
This home was a brand-new build. How do you tackle such a project versus renovating an existing place? We use 3D modeling for all our projects, which is particularly important for new builds because you’re often looking at drawings instead of actual rooms. Ideally in such situations, the designer, builder, and architect work together and have clear communication from the start. In fact, large-scale home builders have told me that they won’t even start a job until there’s an architect and designer involved. It prevents them from having to make changes after they begin and saves homeowners a lot of money.
Unfortunately, though, that doesn’t always work out, and it can become tricky to determine whether things will fit. That happened a bit with this home—I was brought in after the floor plans were constructed and, as a result, had to ask the builder to move a couple of walls to account for the furniture.
What were the clients looking for? They enlisted me and my team to make their house French provincial while also accounting for their three young kids. To accomplish this, we added touches of the style with family-friendly materials such as sturdy frames and performance fabrics.
The clients also wanted the main areas to be neutral with bolder pops of color. A good example of this is the living room—its overall hue is muted, but the sofa is yellow like flowers from the South of France and the chairs are navy blue. Natural light is important when looking at paint colors, too, and this home has tons of it. We chose a warm white throughout for a calmer vibe.
In contrast, a few other rooms are quite dark. What was your objective there?
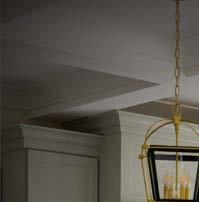
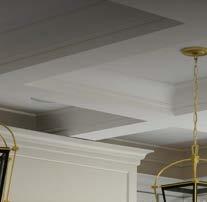
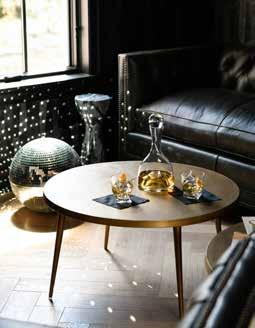
One of my favorite rooms is the moody bar room/ lounge near the entry, which allows guests to get a drink, sit down, and chat before going into the rest of the home. The husband wanted a tufted leather sofa in it—very traditional French. But to make the space more modern, young, and stylish, I wrapped the backs of the aged-leather chairs in fun striped fabric, created textured walls, and added a corked ceiling with gold flecks as a nod to the couple’s love of champagne. Overall, I really enjoy the juxtaposition of that cozy, dark room transitioning to the grand open floor plan with its bright kitchen and living room.
Details are clearly important to you. Would you discuss why? Thank you. For each design, I like incorporating unique pieces that lend texture, color, or pattern to a room and can serve as conversation starters. For instance, the living room’s clam-shaped coffee table is really different and unexpected, especially as the space’s focal point. Almost all the furniture I select is customized and direct from the manufacturer: no client will see their design in a catalog or even in their neighbors’ homes. It should reflect their personality.
How did you make the kids happy with their rooms? One of the boys first said he loved jungle animals, but then right before they moved in after the two-year build process, he changed his choice to dinosaurs. The design worked great for both, and it became a jungle dino room. His brother enjoys gaming, so I had a muralist come in and put wild graffiti art all over his room; I also added colorful LED lights and a funky rug.
Their sister, meanwhile, wanted her room to feel elegant and girly, which I accomplished with the wallpaper and some Restoration Hardware furniture—they really brought in the home’s French design and provided just the right look she was hoping for.
Tell us how you made the primary bedroom a sanctuary: The couple needed a calm space, so I put velvet everywhere, from the fabulous layers of bedding to the classic French-blue settee. I also added reproduction French nightstands and lamps. However, their biggest ask was an antique mirror; I managed to track down an amazing gold eighteenth-century piece to add as a wow factor.
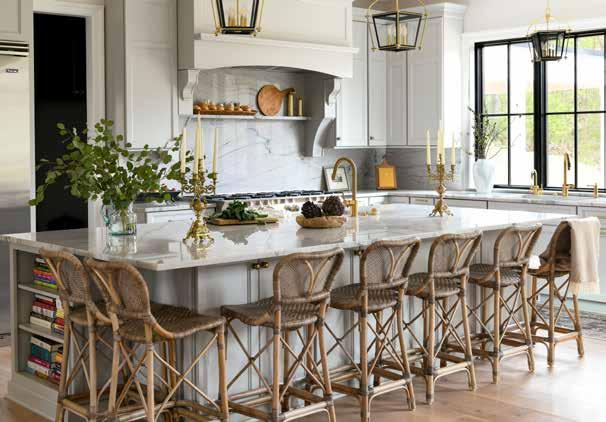
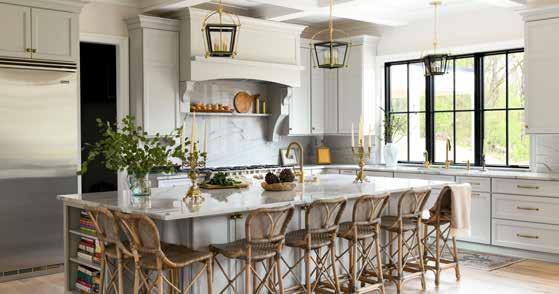
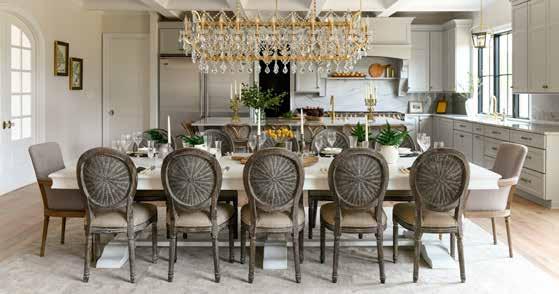
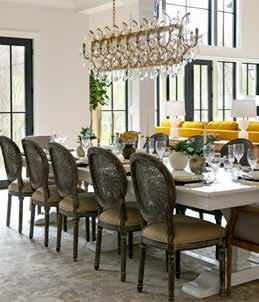
Did you design the ample kitchen and dining room for entertaining? Definitely. They host a lot, hence the jumbo kitchen island slab and added seating.
Similarly, I had the oversized dining room table, including extra leaves and chairs, custom designed to fit everybody comfortably for holiday gatherings. I also placed a sturdy rug beneath it to both bring in some color, texture, and pattern and prevent the high-ceilinged room from being echoey.
On your website, you promise that if clients trust your process, everyone will have fun. Would you elaborate? While we work hard and are serious about what we do, we also have a lot of fun along the way. We’re bringing joy to people’s lives—how could we not? A renovation can be a long journey, but the results are always worth it when clients trust the process. We’re very clear about ours from start to finish and keep our timelines tight so we can deliver beyond homeowners’ expectations.
For more info, visit interiorsbyseashal.com
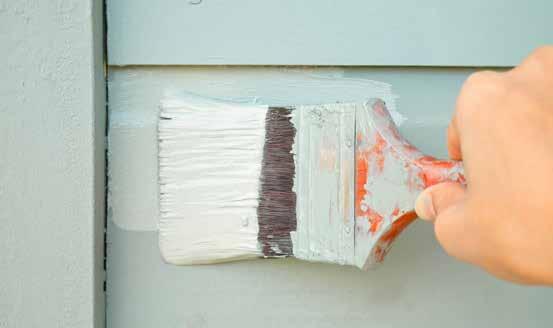
PROS AND CONS
OF PAINTING YOUR HOUSE
written by: FAITH FIORILE
With its many benefits ranging from enhanced curb appeal to protection from the elements, it’s no surprise that exterior painting is one of the most popular home improvement projects. But before starting this endeavor, it’s important to consider the benefits and drawbacks to make sure it that fits your abilities, schedule, and budget.
PROS
Even if your home is in good shape, peeling paint, faded sections, or an outdated color can still make it feel a bit rundown. Giving it a fresh coat with a well-chosen color is one of the simplest and most affordable ways to instantly improve its curb appeal and make it feel like new again. This could be the perfect opportunity to jump on design trends, such as using soft neutrals like gray or navy as your primary base and accent colors on the trim. Imagine the joy you’ll get every day coming home to the soothing vibe of sagegreen siding offset by complementary white window frames.
The benefits of painting your house go further than just aesthetic appearance, however. High-quality options can provide a general barrier against weather damage and more, with certain brands offering specialized protection as well. For instance, some include UV inhibitors to keep the paint from fading or peeling due to sun exposure—a
great solution for those in areas that receive a lot of direct sunlight. Meanwhile, paints that contain mildew-resistant chemicals are ideal for places that experience excessive rain or high humidity. And there are even ones designed to create a dust-proof coating or repel pests like termites.
Additionally, the expense of taking on this project yourself is surprisingly lower than you might think. Including the paint and prep, the total cost generally falls between $500 and $2,400 depending on the size of your house. This is a fraction of the price of other renovation projects. Even better, a well-done paint job can yield homeowners looking to sell in the near future an over 50 percent average return on investment, making this option a smart financial move.
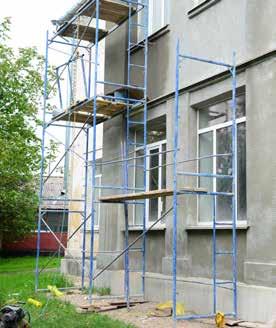
CONS
While opting to handle the painting on your own can be costeffective, it does demand a lot of time and effort. You will need to conduct careful preparation, including cleaning, scraping, and repairing any current damage, as well as potentially rent scaffolding or ladders if your house is tall or has multiple stories. And once you finally have your exterior ready to go, the actual painting can be a time-consuming task, requiring careful application and several coats for a perfect finish.
On top of that, one of the most important factors to consider is that there is such a thing as a job not well done: even after all your hard work, you may wind up experiencing regrets or errors. For instance, you could get halfway done only to realize the color looks strange in the sunlight, forcing you to start from scratch again.
Or you may accidentally choose improper paint for your house’s siding or your region’s elements, leading it to bubble or peel away within months.
Of course, you can avoid a lot of hassle and potential issues by hiring a professional, who can help guide you through the process and better ensure excellent results. However, this can also run your bill up quite a bit—you can expect to spend an average of $5,000 to $9,000 on labor for a 2,500-square-foot home. The investment may well be worth it for the stress it takes off your plate and the greater guarantee of top-quality results, but it’s still an important consideration for your budget.
Regardless of which route you take, you’ll have to face a certain level of inconvenience. Laying out the necessary mats, ladders, and other equipment could create tripping hazards, and if you decide to hire a professional service, there will be workers around all sides of your home for the duration of the project. Plus, if your home has an HOA, it will likely need to approve the color you choose—starting without this OK could incur a fine, and you may be required to repaint.
While painting your home can add elegance, protection, and value, there are also potential downsides to consider. Whether you’re thinking of handling the project yourself or calling on experts, you’ll want to assess all the relevant factors and engage in careful planning to ensure that you get an end result you can enjoy for years to come.
written by: ANDRE RIOS
Backyard Essentials to Beat the Heat
Summer’s sweltering conditions can risk putting a serious damper on your fun, especially during peak sunlight hours. But if you incorporate a few key items, you can craft a cooler outdoor oasis that’s perfect for enjoying the season.
Comforting covers
Blocking the sun’s rays can reduce the ambient temperature by as much as 20 percent, making an umbrella, awning, or other sunshades crucial components of your backyard setup. They can even be some of your most eye-catching features, particularly if you choose a stylish product such as a sunshade sail or wraparound curtains. Seek out neutral options that complement your other decor, or add pops of fun accent colors like summery magenta and mint.
Instant misters
Keep yourself and your guests comfortable with a misting appliance that offers an instant burst of cool air and skin
hydration. Consider stocking portable handheld devices for individuals to use as needed or placing a decorative pedestal fan near your porch or pergola seating. You could also hang a ceiling-mounted piece that mists from above; to preserve your style, choose a sleek and monochromatic one that won’t distract from more appealing backyard amenities.
Hydration station
Gathering in the summer heat means providing beverages is a necessity, and an easy way to make them accessible is with a table, countertop, or bar cart that features drinking dispensers along with plenty of ice and stylish glasses. To jazz up the options, mix fun flavors in an infusion pitcher, trying kidfriendly concoctions such as strawberry and lemon alongside mature offerings like basil, lime, and cucumber. You could also serve popular canned options like sparkling water. With such enticing variety, you’ll find yourself and your guests making repeat visits to the hydration station—ensuring that everyone stays healthy and satisfied.