SYNCHRONOUS ONLINE LESSON LESSON PLAN AND SLIDES

July 15, 2020

Karen E. Ballengee
Making Your Word Document Accessible
July 15, 2020
7:00 p.m. Central Time
Audience: Adult Learners
Content Area: Accessibility
Attendees: Wendy Dover and Susan Dawson
Outcome(s):
When given a Word document containing accessibility errors, students will perform an accessibility check and make the document 100% accessible.
• The students will successfully add alt text to an image.
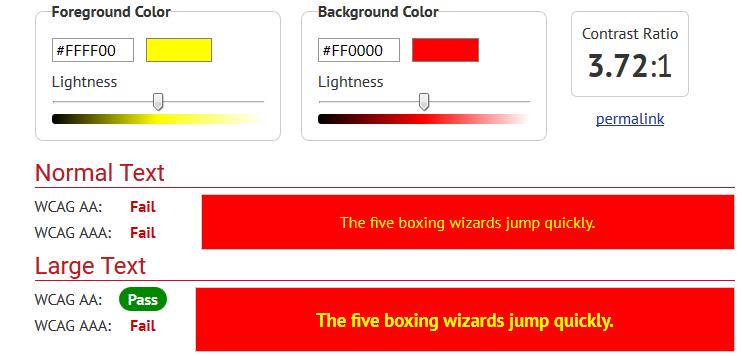
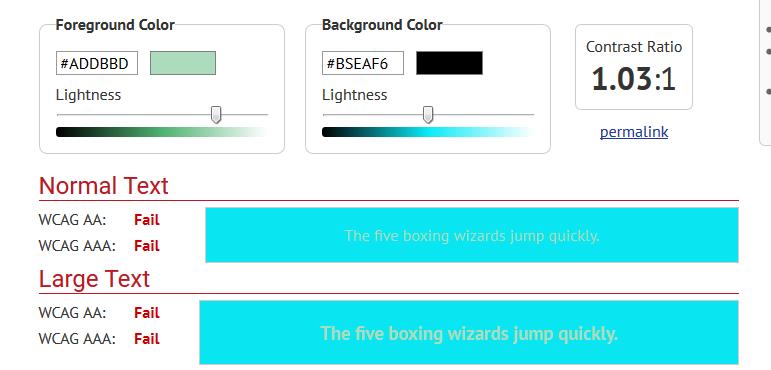
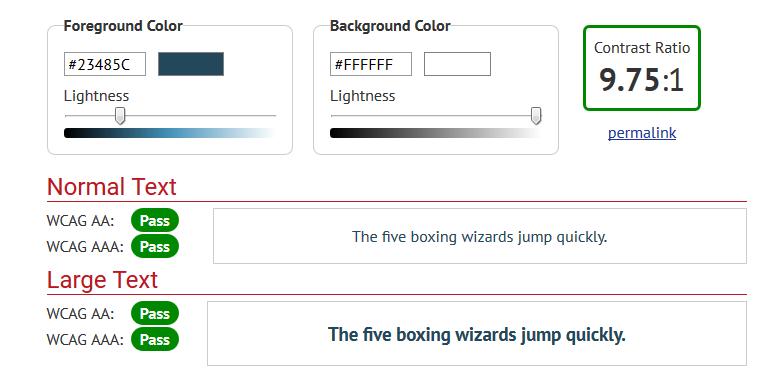
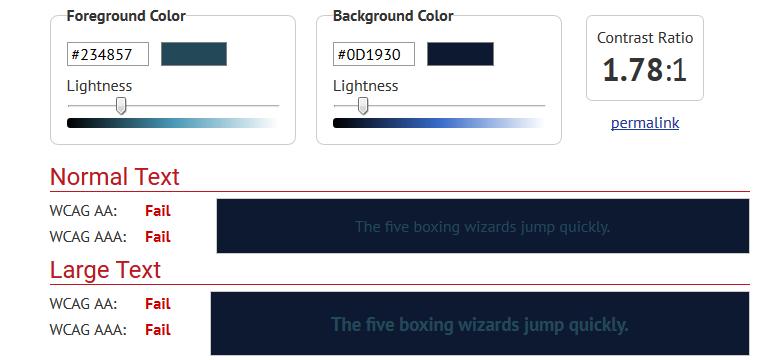
• The students will successfully use compliant color contrast.
Outline of Activities
The students were first given the link to a Wakelet and a Word document to bring to class. The Wakelet contains all of the materials needed for the lesson, slides from the presentation, how-to videos, surveys, extra resources, and materials for future lessons and the final project. The students need only to answer the pre-course survey linked in the Wakelet and watch a short video on accessibility. They were encouraged to download the PDF guide and follow along and watch the how-to videos for the current lesson. The reason we did not watch the video over Zoom is sometimes there is a lag between audio and video.
I presented the lesson using Power Point because I believe this is the best way to present visual information First, I started by introducing myself and having my students introduce themselves. My goal was to see what they know about accessibility and what they think they need to know. I then moved on to explain how to ask a question, what to do of we encounter a ZOOM bomber, and how to find the chat. These students seemed familiar with ZOOM I didn’t have to do much explaining.
The lesson started with the different types of disabilities and other conditions that can benefit from accessibility. Then the students learned how to use proper color contrast and add alt text to an image. I used examples for both so that the students had a clear idea of each. Embedded in the Power Point were several check-for-understanding activities
I then demonstrated to the students how to run an accessibility check, add alt text and how to find the proper color contrast. After that, I had the students demonstrate their knowledge. I gave them the choice of having a break and doing it on their own or walking me through it. They choose to walk me through it. If this lesson continued, the students would continue, the students would create their own fully-accessible invitation or event advertisement in Word. We even had a little time so that I could show them Adobe Color and WebAIM Color Contrast Checker to get the hex values for their text and check it for accessibility. This would be something that would be in the next lesson.
Student learning and engagement was assessed informally through questions about the video, the check-on-learning where they classify something as a disability or a condition that can benefit from accessibility, their identification of proper color contrast, and their ability to walk me through the steps of running an accessibility check
ZOOM Features Used:
• Chat Box
• Annotation
• Screen Share
Reflection
Overall Success of the Lesson
Since the students met the objectives, the lesson was successful. The students were engaged and asking thoughtful questions. They even looked at the additional Wakelet material before the class. I had one student tell me she is going to use the how-to PDF at work.
Challenges and Changes
I’ve presented this material several times at conferences and I was worried about how to make it engaging through a ZOOM session. The students in this case, were very eager to learn and have at least intermediate knowledge of Word. I gave them a word document so they would have a hands-on activity. This would probably work best if I gave them five minutes to complete the task. In the future, I may have to have the students share their screen if they aren’t getting it.
I completely forgot about MAC users so that question wasn’t included in my survey and I have no instructions for MAC. I will definitely ask the MAC question in the next survey. I’m not sure how I will get screen captures since I do not own a MAC. The best plan would be to include YouTube videos on how to do each task on a MAC.
This class had no time limit, but any future training may. We got slightly off track during this session, but I felt like the students were asking great questions and I want to encourage that. Maybe I can just have students type any questions into the chat and stop only at certain points to answer the questions.
Evaluation of ZOOM features
Chat box
This worked very well. I was able to place the links to the surveys and Wakelet in here and the students were able to retrieve them. The chat is automatically saved so I have a record of what the students said they learned in this session.
Annotation
This worked perfect for circling the color that doesn’t have good contrast, writing a check beside the colors that do have good contrast, and placing a question mark beside the color that is questionable. I was also able to erase these annotations.
Screen Share
Screen Share worked very well for presenting my Power Point and demonstrating what I want the students to do in Word. Screen Share has one little quirk that I discovered during this session. If I go from sharing a PowerPoint to a Word document or website,
the students’ screen may lag behind. They are still seeing the PPT when I have moved on to the Word document. The best way to deal with this issue is to stop sharing and then start sharing again.
Tips and strategies
Have your documents and websites ready for screen share. This way you are not wasting class time by searching for what you want to show students.
If the class is really large, remind everyone to mute themselves until it is their turn to speak or have them raise their hand so that more than one person at a time isn’t speaking. I have found that, in smaller groups, it’s ok if everyone is off of mute.
Practice. I practiced this lesson using ZOOM four times before I presented it.
Summary of Student Feedback
Chatbox
20:59:43
From Wendy the Librarian : I learned that I can go to File>Check accessibility on a Word doc and it checks to make sure I have an ALT tag for images
21:00:11
From Susan Dawson : I learned how color contrasts “accessibilty are as important as text and picture accessibility
21:00:49
From Wendy the Librarian : YEs
21:01:15 From Susan Dawson : Yes
21:02:03 From Susan Dawson : This was great Karen! Lots of very helpful information. Thanks!
Pre-Course Survey
1.
2.
3. What is your experience level with Word?
4. Going into this course, what d0 you know about making documents accessible?
1. Do you feel this training increased your knowledge of accessibility?
2. What is one thing you learned in this training?
Response 1: How to check a Word doc for accessibility.
Response 2: Accessibility (and accessible documents) is more than just proper text headings and formats, but also concerns color usage/contrasts, formatting changes and issues in applications used, and a multitude of other issues. I especially liked the video that taught us what a screen reader "reads aloud" when using an accessible document versus a non-accessible document! Quite eye-opening!


