Building Future Innovators With Computer Science
LOGIC & TECH

NAME:
SCHOOL:


NAME:
SCHOOL:
WizKlub Futurz is an innovation platform to build Human-only skills, that are essential to succeed in school today and in career later. Wizklub Futurz offers a research-based education program designed to develop future skills across Logical Reasoning, Critical Thinking, Problem Solving, and build Inquisitiveness. This helps nurture a creator’s mindset through Technology (coding and robotics) and achieve academic success by enhancing scientific and mathematical aptitude. Our mission is to inspire minds to think a million creative thoughts, tackle real-world challenges, and shape the future.
This is a confidential document prepared by WIZKLUB Futurz. This document, or any portion thereof, should not be made available to any persons other than the authorised and designated staff of the company/institution/vendor to which it has been submitted. No part of this document may be reproduced, stored in a retrieval system, or transmitted, in any form or by any means, electronic, mechanical, photocopying, recording, or otherwise, without the prior written permission of WIZKLUB.
Technology is evolving at a rapid pace, transforming the way we live, work, and communicate. From artificial intelligence and automation to cybersecurity and data science, advancements in technology are shaping every industry. In this rapidly changing digital era, staying updated with the latest technological trends is not just an advantage but a necessity.
Computer Science programs provide students with a strong foundation in coding, computational thinking, and real-world problem-solving. Through hands-on learning, interactive projects, and exposure to emerging technologies, we prepare students for future careers in technology and beyond. By fostering creativity, logical reasoning, and adaptability, we empower students with future-ready skills, enabling them to become not just users but creators of technology.
By the end of this program, you will be able to:
• Describe the roles and functions of computer hardware and software components
• Demonstrate proficiency in working with functions and features of common computer applications
• Develop coding skills through interactive and engaging activities
• Apply problem-solving and critical thinking skills to real-world challenges using technology
Get ready to explore, learn, and unlock the exciting world of computers!

By the end of this chapter, you will be able to,
• Explain the basic functions of a microprocessor
• Describe the components of a microcontroller
• Differentiate between microprocessors and microcontrollers
Imagine you’re playing a video game and press a button to jump or move. How does the game make your character jump or move instantly? It’s because the game is controlled by a computer’s brain called the processor, which quickly understands your command and makes it happen.
A processor is the main part of the computer that helps it follow instructions and complete tasks. It controls the actions of the computer by working with both hardware and software.
Processors can be categorised into different types. In this chapter, we’ll learn two key types named ‘Microprocessor’ and ‘Microcontroller’.


Let us get started!
A microprocessor is a small electronic chip used in many of the devices we use every day, like washing machines, microwave ovens, smart TVs, and smartphones. It’s called “micro” because it’s tiny, and “processor” because it processes information to give us the right result, just like our brain helps us make decisions.
Microprocessors are created by leading technology companies like Intel, AMD, and ARM. These chips power various devices, from personal computers and laptops to gaming consoles and smartphones. For example, Intel’s Core series is widely used in PCs, while ARM processors are found in most mobile devices.
Let us learn how does a microprocessor work.
Microprocessor acts like the brain of a device, helping it think and perform tasks. It gets information from the device, (like when you press a button on a remote), processes that information, and then sends the result to an output device (like showing a picture on a screen). Inside the microprocessor, there are three main parts that help it do all these works.
Registers are the memory of the microprocessor. They store information temporarily while the device is working on it. For example, when you’re playing a game and the computer needs to keep track of your score, the register stores your score for a short time.
2 0 1
The ALU helps the microprocessor do math and solve problems. It can add numbers,
subtract, and even compare things. For example, if you have 3 red balls and 2 blue balls, the ALU can add them up and tell you how many balls you have in total. If you want to know if you have any blue balls, the ALU checks and says “Yes” or “No”.
This part in the processor makes sure that everything in the microprocessor works at the right time. Think of it like a traffic light. Just like how the traffic light turns green, yellow, and red at the right time to help cars move smoothly, the timing and control unit makes sure all parts of the microprocessor work together at the right time.
Figure 1.7: Timing and Control Unit – Manages operations, like traffic light control flow
Are you wondering, how to see the processor and where to locate in the computer system? Perform this fun hands-on activity in the lab to identify the processor!
Lab Activity

Explore processors in detail by completing the task in the lab. Follow the steps below
to find information about the processors installed on your system and fill out the details.
Step 1: Click on the
Start Button
Step 2: Type ‘Settings’

Figure 1.9: Typing Settings in the search bar
Step 3: After opening the Settings app, locate the System menu from left side of the screen
Figure 1.10: Navigating to the System menu
Step 4: Inside System menu, scroll down to locate the option ‘About’
Figure 1.11: Navigating to ‘’About” section of System menu
Step 5: Click on the About section and locate the device specifications heading. Find the details of the processor your laptop or desktop is using.

1.12: Knowing about the Processor

Most modern smartphones typically have 2 processors (also known as “cores”). One is designed for handling high-performance tasks, while the other is optimized for power efficiency. When you see a mobile phone box, check for the core count-it indicates how many processors it contains.
Figure 1.13: Nokia Smartphone Snapdragon Dual Core Processor
We’ve learned about microprocessors, which are like tiny brains that process information in devices. But what if a device not only needs to process information but also perform a complete task, like turning lights on or running a motor? That’s where microcontrollers come in!
A microcontroller is a tiny computer designed to control specific tasks in a system. Unlike microprocessors, which focus on processing data, microcontrollers include everything needed to act as a complete computer on a single chip. They are built for devices that perform simple, specific functions efficiently and at a lower cost.
1.14: Microcontroller
Applications of Microcontroller:
Washing Machines: They use microcontrollers to control the motor, water levels, and washing cycles.
Microwave Ovens: They help set the cooking time and power levels, manages the timer and heating settings.
Smart Toys: They make toys move or light up when you press buttons.
Remote Controls: They send signals to turn your TV on or change the channel.
1.15: Real-time devices using a microcontroller
A microcontroller has several important parts that work together to make it function. Let’s look at some of the important parts:
I. CPU (Central Processing Unit): The CPU is the brain of the microcontroller. It decides what actions to take based on the instructions it receives.
Example: Just like your brain tells you to move your hand when you touch something hot, the CPU tells the device what actions to take based on the instructions it gets.
II. ROM & RAM (Memory Units): ROM (Read Only Memory) stores important instructions that don’t change, like the rules of a game. RAM (Random Access Memory) holds information temporarily while the device is working, like remembering your score in a game.
III.I/O Ports (Input and Output Ports): These ports let the microcontroller receive information (input) and send out information (output).
Example: When you press a button on a remote control (input), the microcontroller sends a signal to turn on the TV (output).
IV. Timer: The timer helps the microcontroller keep track of time and control when things happen.
Example: In a microwave, the timer makes sure the food cooks for the right amount of time.
V. Serial COM Port: This port allows the microcontroller to connect and communicate with other devices.
Example: It’s like a phone line that lets your toy robot talk to a remote control. You have come a long way in knowing about microprocessors and microcontrollers. Let us test your memory.

Find the missing letters and complete the word.
While a microprocessor focuses on processing, a microcontroller acts as a complete computer that controls a system. It processes, stores, connects to devices, and manages
tasks, all in one tiny chip. In the next section, we’ll compare microprocessors and microcontrollers to understand their differences better.

Relate the concepts of microprocessors and microcontrollers to everyday experiences, like using a smartphone or operating household appliances. Reallife examples make the subject matter more relevant and relatable.
Table 1.1 differentiate the functions of a microprocessor and a microcontroller. This comparison will help you understand when to use each in different devices.
It is the central processing unit that is designed to execute general arithmetic and logical functions.
It is a complete computer system built on a chip with the capability to do some specified functions. It can execute a wide range of instructions. It can execute a limited range of instructions and is very specific.
Requires more power.
Expensive
Programming a microprocessor requires more complex software.
Requires less power.
Low-Cost
Programming a microcontroller is done easily and simply.
Table 1.1: Difference between Microprocessor and Microcontroller
Now, we understand the difference between a microprocessor and a microcontroller and when to use each. We live in a world filled with smart devices, like remotecontrolled cars, smart lights, and smart TVs, which make our lives easier and more fun. With the help of microcontrollers, sensors, and other small electronic parts, these devices are becoming even better and more helpful. As technology keeps improving, we’ll see more amazing gadgets that can solve problems and make our lives even more exciting!

Foster a classroom environment where students feel comfortable asking questions and expressing curiosity. Encourage them to think critically and explore their understanding of computer processors.

Microprocessor- A microprocessor is a small electronic device or an electronic chip, that can perform arithmetic and logical operations.
Microcontroller- Microcontrollers are electronic devices that control the function of a system.
Recap

• The microprocessor is the brain of the computer and performs all kinds of arithmetical, logical, and complex problems.
• The microprocessor has three main components: Register, ALU, Timing and Control Unit.
• Registers are temporary storage devices.
• Microcontroller contains CPU, ROM, RAM, I/O Ports, Timer, and Serial COM Port as its main components.
Exercise

I. Write True or False
1. A microcontroller is a small computer system.
2. We don’t live in a world where technology is evolving constantly.
3. Register is a permanent storage location.
4. A microprocessor performs arithmetic and logical operations.
5. Computers can function without a processor.
II. Fill in the blanks
1. The ______________________ is the smaller CPU version you have seen in your computer lab.
2. Microprocessors can perform _______________ and _______________ operations.
3. Serial __________ port is used in __________________ for data transfer.
4. RAM stands for ____________________.
5. A USB port is used to connect _______________ to a computer.
III. Answer the following questions:
1. Explain the Timing and Control unit of the microprocessor.
2. List some applications of a microcontroller.
3. What makes a microcontroller different from a microprocessor?
4. What are the different components of a microcontroller?

For this activity, you will explore how processors are part of the devices you use every day. Follow the steps below:
Observe and List:
Find 5 devices you use daily, such as a smartphone, washing machine, microwave, or any other electronic device.
Describe:
• Write what each device does (e.g., “The microwave heats food”).
• Think about how the device might use a “processor” to work. For example: The microwave’s processor might decide how much time to heat the food based on the settings.
Choose one of the devices you listed.
Draw a picture of it and label how it might use the processor’s components:
ALU: What part of the work does the “thinking”?
Timing Unit: How does it keep things in order?
Control Unit: How does it decide what to do next?
Note: You can take help from your parents, older siblings, or even your teachers if you need ideas or guidance.


By the end of this chapter, you will be able to,
• Describe computer memory
• Categorise different types of memory
• Define various memory units
Have you ever tried to remember the steps of a dance or the lyrics to your favorite song? Of course, you have! How do you recall those steps or lyrics? That’s right your brain helps you remember and recall them. Similarly, a computer has a special part called memory that helps it remember your instructions and store data!
In the previous chapter, we explored how the processor, the brain of the computer, helps carry out tasks by following instructions. But what happens when the processor needs to “remember” information to complete those tasks? That’s where the computer memory comes in.
In this chapter, we will uncover how computer memory works, why it’s so important, and the different types of memory that make your computer fast and efficient.
Let us get started!
Before we dive into the chapter, let’s start with a fun activity!
Think and Answer

Here are 10 tricky words for you. Look at them carefully and try to remember as many as you can. Now, close your eyes and see if your memory can recall all ten. Ready to test your brainpower? Let’s go.
Just like our brains help us remember things, computers also need a way to store and recall information. This is where computer memory comes in. Computer Memory is a special part of the computer that stores data, instructions, and results so the processor can access them quickly. Why is memory so important?
Imagine trying to solve a puzzle without keeping the pieces in front of you-you wouldn’t get very far. Similarly, a computer uses memory to temporarily or permanently store information it needs to complete tasks efficiently. For example, when you save a document, the memory stores your text until you save it, or when you play a game, it remembers your progress.

Data is the information we collect and organise to understand things better. Data includes video, graphics, text and images.
Let’s explore the types of computer memory and how they work together to keep your computer running smoothly. Computers have two types of memory: Primary memory (internal memory) and Secondary memory (external memory).
2.1.1
Primary memory is the part of a computer that stores data. It is commonly referred to as main memory because it is directly accessible by the computer’s processor. Primary memory plays a crucial role in the computer’s functioning. The primary memory of a computer is divided into two types: RAM (Random Access Memory) and ROM (Read-Only Memory).
Figure 2.2: Primary Memory (RAM and ROM)
I. RAM
RAM, or Random Access Memory, is like a computer’s short-term memory. It works only while the computer is on and helps the computer quickly access the data it needs to perform tasks. For example, when you open a game or a website, the data is temporarily stored in RAM so the computer can access it quickly while you are using it. But as soon as you
switch off the computer, all the information in RAM disappears. That’s why it’s called volatile memory-it depends on power to hold data.
ROM, or Read-Only Memory, is like a book that always remembers its content, even if you close it. It is a type of memory that keeps its data even when the computer is switched off, which is why it’s called non-volatile memory
For example, imagine a toy car that always knows how to move forward or backward when you press a button. The instructions that tell the toy car what to do are like the information stored in ROM-they’re always there, ready to use, even if the toy car is turned off. Similarly, ROM helps a computer know what to do when it is turned on.
Difference between RAM and ROM
RAM
RAM Stands for Random Access
Memory
RAM is a volatile memory.
Volatile memory means the stored data is lost if the power goes off.
RAM data can be read, erased, or modified.
RAM speed is high.
ROM
ROM Stands for Read Only Memory
ROM is a non-volatile memory.
Non-volatile memory means the information stored in it is not lost even if the power supply goes off.
ROM data is only readable.
ROM speed is slow as compared to RAM.
Table 2.1: Difference between RAM and ROM

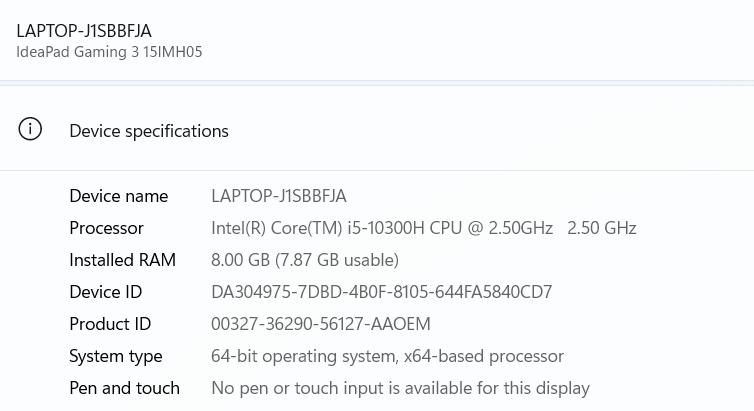
Lab Activity
You are now aware of the distinction between ROM and RAM. Let us now examine the RAM installed on your device. Take the actions listed below.
Step 1: Click on the “Start” menu located at the bottom left corner of your screen.

Figure 2.3: Navigating to the Start Button
Step 2: Look for the “Settings” app after clicking on the start button.

Figure 2.4: Navigating to the Settings Button
Step 3: Click on the “System” option available in the left-hand corner of your screen.

Figure 2.5: Navigating to the System option
Step 4: You can view all the information under the device specification section.

Think and Answer
Let us see how you understood computer memory so far. Choose the right answer for the following question. Which of the following is also known as volatile memory?
a. ROM
b. CPU
c. USB
d. RAM
Ans: _________
Secondary memory is a type of computer storage used to save information permanently. Unlike primary memory, it keeps data safe even when the computer is turned off.
Imagine it as a bookshelf where you store your favourite books. Even if you’re not reading them right now, they stay there until you take them out again. Similarly, secondary memory holds your data and programs until you need them. For example, a USB Flash drive or Pen Drive is a type of secondary memory where you can store files like school projects, photos, or videos so they can be accessed later,
even after switching off your computer.

Hard Disk was invented by IBM (Internal Business Machines) in 1956.
Now that we know about primary and secondary memory, you might wonder: how do we measure how much information a computer can store? Just like we use litres to measure water and kilograms for weight, computers use special units to measure memory. Let’s explore these memory units and understand how they help us know the capacity of a computer’s storage!
Computers have special units to measure data, such as bytes, kilobytes (KB), megabytes (MB), and gigabytes (GB). These units help us understand how much information a computer can hold. The smallest unit of data is a bit, and 8 bits make a byte. As the size increases, we move to larger units like kilobytes, megabytes, and beyond, up to yottabytes (YB), which represent enormous storage capacities.

Compare computer memory to something familiar to kids, like a bookshelf or a toy box. This can help them understand the concept better.
bit
1 byte = 8 bits
A memory unit is a standard way of measuring and expressing the size of data stored in computer memory. It helps us compare storage capacities and understand how much information a device can hold.
Here’s a table showing the different memory units and their equivalent sizes in bytes:
Memory Unit
Kilo Byte
Mega Byte
Giga Byte
Tera Byte
Peta Byte
Hexa Byte
Zetta Byte
Yotta Byte
Description
1KB = 1024 Bytes
1 MB = 1024 KB
1 GB = 1024 MB
1 TB = 1024 GB
1 PB = 1024 TB
1 HB = 1024 PB
1 ZB = 1024 EB
1 YB = 1024 ZB
Table 2.2: Memory Units

You did an excellent job in the last activity! Now, let’s see if you can find the full form of the following.
KB ________ 2. GB ________ 3. MB ________ 4. TB ____
Computer memory is like a superpower that helps computers remember things at lightning speed. Just like our brains can remember a list of words, computer memory stores vast amounts of information using tiny electrical components that can hold only 0s and 1s.
Isn’t it cool those photos, videos, and all kinds of information have a special space to live in your computer? When you save a picture, it’s like giving it a home in the computer’s memory. And whenever you want to see it again, you can find it there, safe and sound. Computer memory helps make our digital world amazing!

Computer Memory - It is the storage space in the computer, it is just like human brain.
Primary Memory - It is the computer’s working memory. Compared to secondary memory, it is quicker.
Secondary Memory - It is a permanent storage device.

• Data in RAM can be modified, erased, or read. Data in ROM can only be read, it cannot be modified or erased.
• Primary Memory is the computer’s working memory. Compared to secondary memory, it is quicker.
• Secondary memory is a permanent storage device. It is also called the auxiliary memory.
• Data is measured by computers in various units. These units are referred as Memory Units. For example, KB, GB, MB, etc.
Exercise

I. Fill in the blanks
1. The ______________ comprises RAM and ROM.
2. The ______________ is also known as auxiliary storage.
3. Individually, a binary number is known as___________.
4. One GB is equal to ___________.
II. Choose the right answer
1. The CPU directly retrieves information or data from the ____________.
a. Hard Disk b. CD c. RAM
2. Which of the following is a secondary storage device?
a. ROM b. cache c. hard disk
3. Which of the following is an optical storage media?
a. Hard disk b. CD c. RAM
4. 1024 bytes = ____________________________. a. 1 MB b. 1 GB c. 1 KB
III.Answer the following
1. What is computer memory?
2. What is bit?
3. What is a memory unit?
4. Difference between RAM and ROM.
5. What are the types of computer memory? Activity Time

Activity Name: “Memory Hunt at Home”
Memory Match:
Look around your home and find objects that can represent the two types of memory: Primary Memory (RAM/ROM): Things that are used instantly and temporarily, like a whiteboard or sticky notes.
Secondary Memory: Things used to store data for a long time, like a notebook or photo album.
Write a short explanation for each object you find, explaining why it represents that type of memory.
For example: A whiteboard is like RAM because it holds information temporarily and can be erased.
Spot the Devices:
Find two or more devices at home that use secondary memory (e.g., pen drive, CD, external hard drive). Write down what these devices store (e.g., music, movies, photos) and how they are used.
Creative Challenge:
Create a mini poster or chart listing the different storage devices (pen drive, CD, hard disk, etc.) and their uses. You can draw pictures or use printed images to make it colourful and engaging.
Note: You can take help from your parents, older siblings, or even your teachers if you’re unsure about something.


By the end of this chapter, you will be able to,
• Describe the features of Operating System
• Explore the functions of Control Panel
Imagine switching on your computer or tablet. How does it know what to do? How does it let you open games, play music, or type your homework? It’s all thanks to something amazing called the Operating System (OS), which works behind the scenes to make sure everything runs smoothly.
In this chapter, we will learn about the features of an Operating System and how it allows us to control our computer easily. You will also explore how to use a special tool called the Control Panel to customise settings on your computer.
Let us get started!
An operating system acts as the interface between computer software and hardware. Are you familiar with its functions? Let’s try to explore and execute the following activities!

Match the following words to the appropriate statements.
Software Screen that comes first when we turn on our computer
Operating System It is the most common operating system used in desktops/ laptops
Lock Screen Provides instructions to hardware to execute any tasks.
Search Bar Programs that control a computer’s hardware and allow other software to run.
Windows 10 This area is next to the start button of the desktop. Allows us to search for any apps.
Examine the images below to recognise the names of various operating system software. Options are given below, select the correct one and write it in the provided box.
(Apple OS, Android, Ubuntu, Windows OS, LINUX)



Think about this: What happens if someone changes the screen brightness, the wallpaper, or the volume on the computer in your lab? Wouldn’t you want to know how to fix it and make it just the way you like? That’s exactly what we will uncover as we dive into the fascinating world of OS operations!
The operating system offers unique features that make using a computer easy and enjoyable. Let’s explore these features one by one!
I. Control Panel: It is one of the most important features that help users to modify a computer’s different settings and configurations. For example, changing the wallpaper of desktop and adjusting the volume of the system.
II. Cortana: Cortana is a helpful computer feature created by Microsoft that assists users by answering questions and doing tasks when spoken to. Users can ask Cortana things using their voice, just like talking to a friend, and Cortana will try to help by giving information or doing things on the computer.

3.3:
III. File Explorer: A tool that allows users to navigate and manage files and directories on their computer, such as copy, delete, paste, and many more.
3.4:
IV. Internet Browsers: Every OS will provide the software to interact with web pages using the internet. We call this software a browser. The most recommended browser from Microsoft is Microsoft Edge. Other than this, the Chrome browser stands out to be the most accepted internet browser.

V. Disk Cleanup: When computers are in use for many hours, it becomes essential to free up the memory to keep computers stable. Disk Cleanup feature helps free up the memory so that the tasks are done faster without causing any problems.
VI. Hardware Requirements: The working of the OS is dependent on RAM, processor speed, storage capacity, and other hardware requirements. In your upcoming lab session, you will get a chance to explore these features on your computer.
Before we proceed, let’s have a quick question-and-answer session. Try to answer the following questions!

Guess who I am?
• I can interact with web pages and make you work on the internet.
• I am a Microsoft-created virtual assistant.
• I help users to modify the computer’s different settings and configurations.
Now that you have learned about the important features of an OS, let’s dive deeper into one of its most essential features’ the Control Panel.
The control panel in an operating system is a central hub where you can access various settings and features of your computer.
It helps you to manage and customise different aspects of your computer’s behaviour and appearance. Understanding how to use the Control Panel is crucial because it helps you personalise your device and solve problems when things don’t work as expected.

3.2.1 How to access the Control Panel on Windows OS?
Step 1: Click on the search bar in the taskbar. Search...
Step 2: Type Control Panel and you will see an icon as given in the figure.

Step 3: Click on the control panel menu.


Figure 3.8: Searching for the Control Panel in the search button
3.2.2 What’s inside the Control Panel?
The Control Panel page is shown in the image below, labeled as 3.9.
As you can see, it contains a lot of components. Let us study each component and how they are helpful for users.

I. System and Security - This helps to maintain the security of the system. For example, if any file is lost, this feature can help you retrieve the lost file. It also protects the computer from various threats or viruses that can steal the information kept on your computer. The following components are available inside System and Security.




3.10:


II. Network and Internet - This feature helps in connecting your computer to the network available. It provides ethernet, LAN, Wi-Fi, and Bluetooth connections. The following components are available inside the Network and Internet.


3.11: Components of Network and Internet
III. Hardware and Sounds - This feature helps in connecting any kind of hardware device to the computer and adjusting the hardware settings. Also, it helps in the volume control of devices such as headphones, microphones, speakers, etc. We can see the following components inside it

3.12: Components of Hardware and Sounds
IV. Appearance and Personalisation - This feature helps in adjusting the theme and look of Windows. Also, it gives you options to change the fonts and manage the taskbar. It contains the following components.


3.13: Components of Appearance and Personalisation
V. Clock and Region - This feature helps in setting the clock timings according to the location and region where the user is located or as the user wants the computer to display the time. It contains the following components.
Date and Time
Figure 3.14: Components of Clock and Region

Now that you are familiar with the various customisable features of the Control Panel, let’s put that knowledge into practice by performing the activity.

Let’s learn how to set the date and time of your computer.
Step 1: Open the control panel from the start menu.
Step 2: Click on the “Clock and Region”section.

Figure 3.15: Navigating to ‘Clock and Region’ feature
Step 3: Now you can set the date and time and add clocks for different time zones as well.

3.16: Setting Date and Time

Explain how the Control Panel is like the settings menu for a computer, just like they have settings for their video games or toys. Relate it to things they’re familiar with.
Now, you understand all the Control Panel’s basic features. You will learn more
about OS operations throughout your practical sessions. You must understand your computer and the tasks that it can execute. Computers are machines that function based on how users interact with them. So, let us put your knowledge of hardware, software, and operating system operations to good use.

Operating System- Operating Systems act as the interface between user and computer hardware.
Control Panel- It is one of the most important features of OS that helps users to modify a computer’s different settings and configurations.

• The Operating System acts as an interface between the user and computer hardware.
• Users can modify the OS features according to their requirements.
• The Control Panel is one of the most important features of an OS.
• A good operating system is always compatible means it supports many hardware devices to function properly when connected to a computer.
Exercise

I. Tick the correct options
1. ___________ is one of the widely used OS.
2. ______________ is the Microsoft-created virtual assistant.
3. ________________ helps to set date and time.
II. Answer the following questions
1. Write down the components of the Control Panel and explain any three of them.
2. Mention the basic features of Operating System.
Activity Time

Activity Name: OS Explorer
Explore Your Computer :
• At home (or in the computer lab, if applicable), open your computer’s Start Menu or equivalent.
• Write down three tasks you can perform with the operating system (e.g., open a file, search for an app, change wallpaper).
• For each task, note why you think the OS helps you do it easily.
Control Panel Hunt:
• Explore the Control Panel (or similar settings menu). With the help of your parents or teacher if needed, find:
• Display Settings: Try changing the screen brightness or wallpaper (with permission).
• Sound Settings: Adjust the volume or test speakers.
• Time and Date: View or change the time and date settings.
Create an OS Guidebook:
• Write a few lines about what you explored in the Control Panel.
• If possible, draw or describe your favorite feature of the OS. For example, changing wallpaper or adjusting volume.
Note: If you don’t have access to a computer, ask your parents or teacher to explain these settings and imagine what you would like to try.


By the end of this chapter, you will be able to,
• Describe the key components of the Internet
• List the benefits of using the Internet
• Use web browsers and search engines to find information efficiently
Do you have any plans for your summer vacation? Maybe you’re wondering,“What’s the best place to visit for summer vacation?” You could ask your parents or a friend, but what if they don’t know either? This is where the internet comes in. The internet is like a giant library, full of information, pictures, games, and videos from all over the world. It helps you find answers to almost any question you have.
Now, how do you access this big world of information? You need something called a browser. A browser is a special tool, like a magic window, that lets you look through the internet. When you open a browser on your computer or tablet and type in a question, like “best places to visit for summer vacation,” it helps you find websites that have the information you’re looking for!
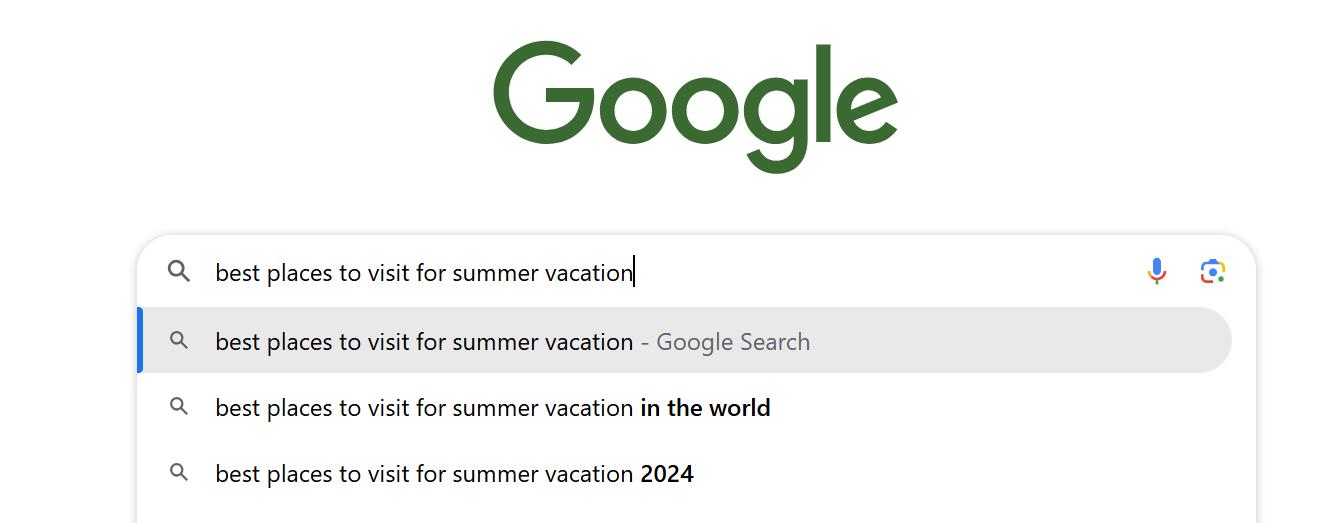
Figure 4.1: Searching for Summer Vacation Ideas on Google
In this chapter, we’ll learn what the internet is, how browsers help us use it, and how we can safely explore this exciting world. Ready to discover the internet? Let us get started!
The word “Internet” is a combination of the words “inter” and “network”. “Inter” means “between” or “among”, and “network” refers to a “system of inter connected elements”. The internet is like a giant network that connects millions of computers, phones, and tablets all over the world. It’s a place where you can find information, play games, watch videos, talk to friends, and learn new things. Imagine it as a big web that links different websites and helps you find answers to your questions.
The Internet was created by the United States Department of Defense. They developed a network called ARPANET in 1969, which was the foundation of the Internet. The purpose was to create a reliable way for military and scientific organisations to share information and communicate with each other. Over time, the internet expanded beyond its initial purpose and became a global network that is now used by people all around the world.

Did you know the internet’s official birthday is January 1, 1983? On this day, a major upgrade called TCP/IP connected different networks, allowing them to share information and sparking the internet’s rapid growth!
• Information Access: The Internet offers endless information, helping us find answers, learn new things, and access educational resources.
• Communication: The Internet helps us stay connected through emails, messaging apps, and video calls with people worldwide.
• Entertainment: The Internet provides endless entertainment, including videos, movies, games, and music.
• Online Learning: The Internet makes learning easy with online courses, tutorials, and educational websites.
• Collaboration and Creativity: The Internet enables collaboration, idea-sharing, and creative expression through blogs, videos, and social media.
• Global Awareness: The Internet keeps us informed with news, articles, and global perspectives.
To use the internet, you need devices as shown in Figure 4.3.

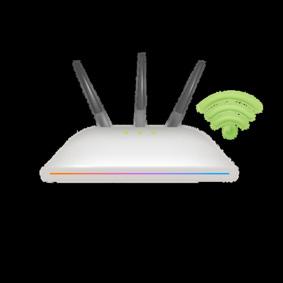


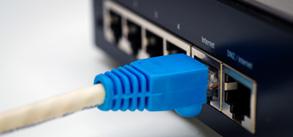
Figure 4.3: Requirements for an Internet Connection
• Computer / Laptop: This is the device you use to connect to the internet. It could be a computer or a laptop.
• Modem / Router: This device brings the internet to your home. The modem connects to the internet, and the router helps share the internet with your computer or other devices, either through Wi-Fi (wireless) or a cable.
• A Browser Software: This is an app or program on your device (like Chrome or
Safari) that lets you search for things on the internet. It’s helps you to see all the websites.
• A Switch or Cable: This is what helps connect your computer to the internet using a wire (Ethernet cable), so it can send and receive information.

Think and Answer
In this activity, you will explore different things that you can do on the Internet. Below is a list of common online activities. Your task is to label each activity correctly and think about how each one can be done on the internet.
Listening to Music Online Shopping
Searching for Information Playing Games ONLINE
Now, let’s explore the World Wide Web (WWW), where all the information is found!
The World Wide Web (www) was invented by Sir Tim Berners-Lee in 1989. It is like a giant library on the Internet where you can find websites and web pages filled with information.
a. Website: A website is a collection of web pages linked to each other. Think of it like a book, where all the pages together form the website.
b. Web Page: A web page is a single page on a website. It’s like a single page in a
book, with specific content such as text, pictures, or videos.
Now let us learn about some essential tool that helps us navigate the vast online universe - the web browser and Search engine!
A Web browser is a special application software that allows you to access all the information available on the web. It acts as a tool that you can use to explore the internet.
A search engine is a tool that helps you find information on the web by searching through websites. It shows you results based on the keywords you enter. Examples include Google, Bing, Yahoo, and DuckDuckGo.
In short, the browser is the tool you use to access the web, while the search engine is what helps you find information once you’re online.
Here’s how it works:
Step 1: Typing the Web Address
First, you type a website address (called a URL) in the browser’s address bar. For example, you might type “www.google.com” to go to Google.
Step 2: Sending a Request
When you press “Enter,” your browser sends a special request to a web server. This is like asking a library for a book (the website you want to visit).
Step 3: The Web Server Responds
The web server is a computer that holds all the information (web pages) of the website you want to visit. The server sends back the web page to your browser.
Step 4: Displaying the Web Page
The browser then takes the web page from the server and shows it on your screen. It might show text, pictures, videos, or links.
being reliable and is popular among users who value privacy and freedom of choice.

III. Google Chrome
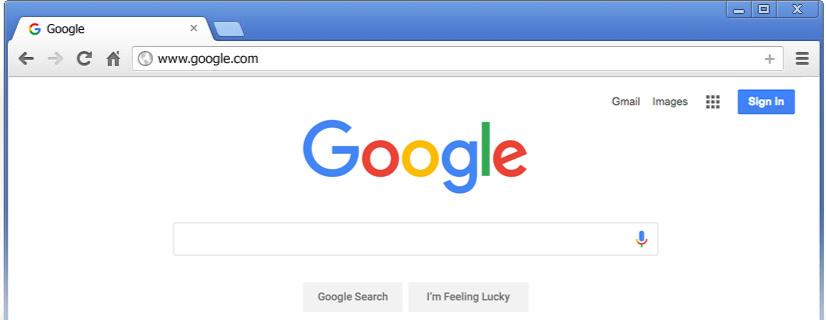
Google Chrome, created by Google, is one of the most widely used web browsers worldwide. It is known for its speed, simplicity, and integration with other Google services. Chrome offers a clean and intuitive user interface and supports a vast library of extensions, allowing users to enhance their browsing experience with various tools and features.
IV. Apple Safari
Safari is the default web browser on Apple devices, such as iPhones, iPads, and Mac computers. It is designed to work seamlessly with the Apple ecosystem, providing a fast and efficient browsing experience.

Now that you have explored various web browsers, let’s put your skills into practice and learn how to open them through this activity.

You may need to connect your computer to the internet before launching your web browser. Once you establish a connection, you can launch your browser by following these steps:
Step 1: Click the Start button on the taskbar

Step 2: Click on the browser app such as Chrome, Firefox, Safari, or Edge. The browser window will open.

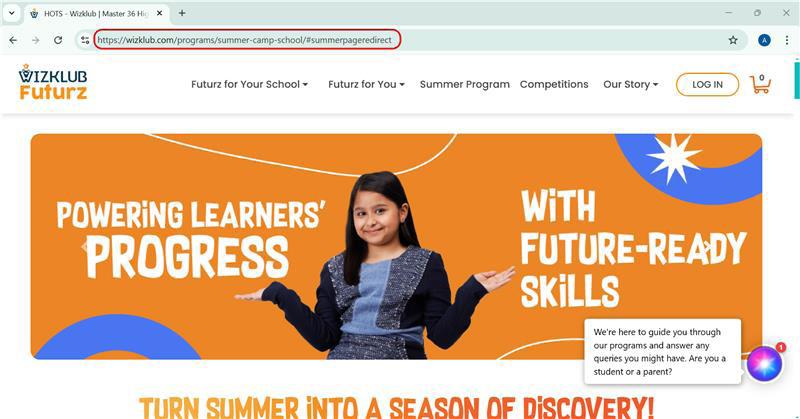
Once you have selected a browser, you will be able to access websites by entering a URL into the browser’s address bar.
Are you wondering what a URL is?
A URL, which stands for Uniform Resource Locator, is like an address that helps us find and access specific resources on the Internet. Just as your home has a unique address that tells people how to find it, a URL guides your web browser to locate and display a specific webpage, image, video, or any other online resource.
Once you’ve entered the website’s URL, you will be taken to the website’s home page.

Lab Activity
Let’s learn how to search the internet for information.
Step 1: Launch your computer’s web browser.
Step 2: Type “capital city of Australia” into the search bar at the top and hit Enter.

Step 3: Search for websites that offer details about the capital city of Australia.
Step 4: Look through the websites to find the right response.
Note: Remember to use the internet responsibly, and under the guidance of a teacher enjoy the incredible knowledge and opportunities it offers!
The Internet is a powerful tool that helps us connect, learn, and explore the world. It lets us find information, play games, and communicate with others. Always use it safely and wisely to make the most of its benefits!

Internet – The Internet is a global network that connects millions of computers and devices, allowing them to share information and communicate with each other.
Website – A website is a collection of web pages that are linked together and hosted on the Internet. It is designed to provide information, services, or entertainment.
Web browser – A web browser is a software application that allows users to access, view, and interact with websites and web pages on the Internet. Examples include Google Chrome, Mozilla Firefox, and Safari.
Search Engine – A search engine is a specialised website or tool used to search for information on the Internet by entering keywords or phrases. Examples include Google, Bing, and Yahoo.

• The Internet is a vast network of connected computers that allows us to access information and communicate with people all over the world.
• The World Wide Web is a part of the Internet and consists of many web pages that are linked together.
• Web pages are like digital documents that can contain text, images, and videos, and we can view them using web browsers.

1. The Internet is limited to a specific country or region.
2. Web browsers are only used to view text-based content.
3. A URL is like an address that helps your web browser find and display specific resources on the Internet.
4. Internet Explorer is currently the fastest and most feature-rich web browser available.
1. What are some advantages of using the Internet?
2. How do search engines help users find information on the web?
3. What is the purpose of web browsers?
4. How are the Internet and the World Wide Web related?

Activity: Internet Explorer Quest
Instructions:
1. Use a browser like Google Chrome, Safari, or Firefox on your computer or tablet.
2. Complete these tasks and write in your notebook:
Task 1: Search for today’s weather in your city. Write the temperature and condition (sunny, rainy, etc.) in your notebook.
Task 2: Search about your favourite animal. Write the animal’s name and one fact about it in your notebook.
Task 3: Look up one fun fact about space. Write it in one sentence.
Task 4: Search for the meaning of the word “browser.” Write the meaning in your notebook.


By the end of this chapter, you will be able to,
• Explain how to work with slides in a presentation
• Create slides by adding and formatting text and tables
• Enhance slides by inserting images and animations
Till now we focused on the hardware aspect of the computer and how to use the Internet effectively, let us investigate the software part of the computer system by accessing a few computer applications. Remember, in the previous grade, you learned the basic features of MS PowerPoint and how its various tools and feature’s function.
In this chapter, you will discover the advanced features of PowerPoint and learn how to create impressive presentations. You will explore working with slides, text boxes, images, advanced text formatting, inserting visuals, and adding basic animations. Get ready to have fun and design captivating presentations!
Let us get started!
Advanced text formatting in Microsoft PowerPoint allows you to make your slides look professional and visually appealing by emphasizing key points and improving readability. Features like adding shadows, glows, and reflections can make your words stand out and look awesome, making your presentations more engaging and polished.
Let’s explore these features step by step, starting with creating stunning text effects.
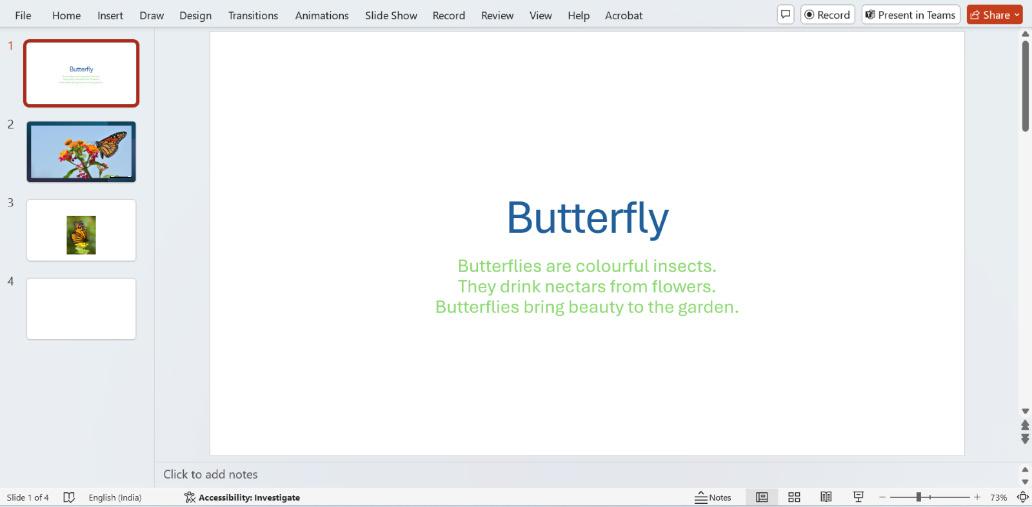
Here is a presentation created about butterflies using basic features of PowerPoint.
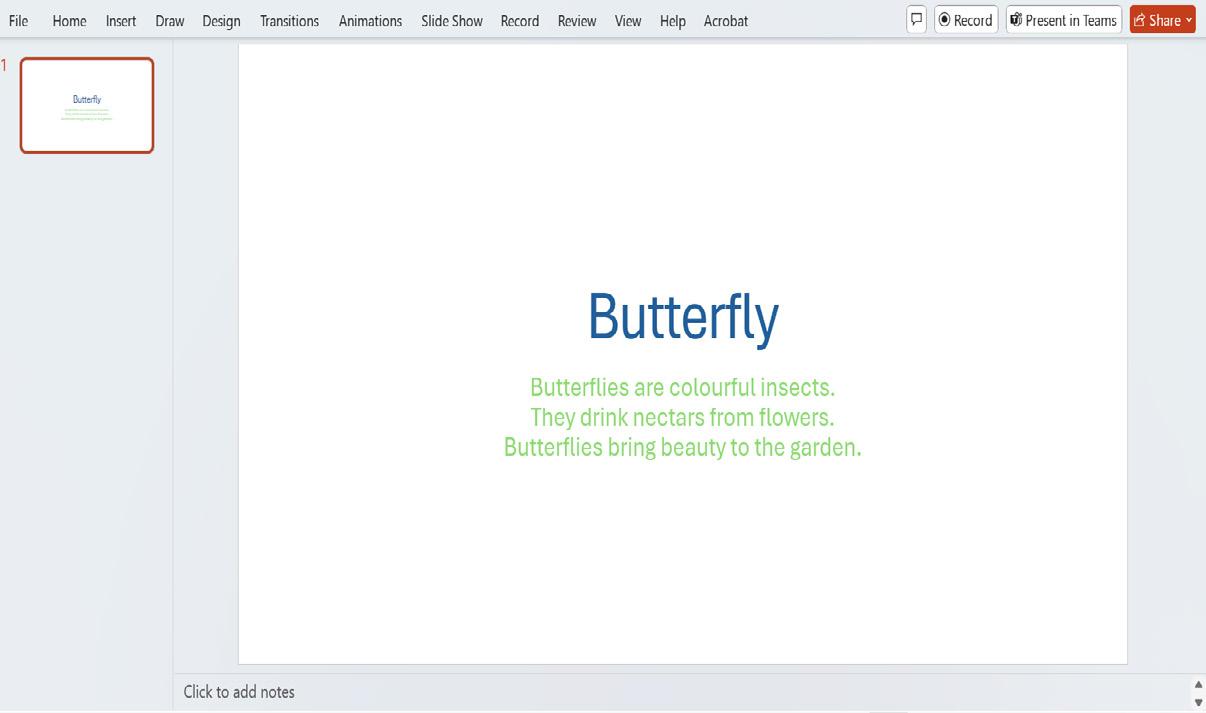
Figure 5.1: PowerPoint presentation
Let’s try to modify the above given presentation (figure 5.1) using advanced features of MS PowerPoint!
Step 1: Open the butterfly PowerPoint presentation and select the text you want to format.

Figure 5.2: Selecting Text
Step 2: Go to the ‘Shape Format’ tab.

5.3:
Step 3: In the ‘WordArt Styles’ group, click on ‘Text Effects’.
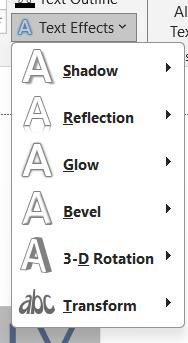
Figure 5.4: Adding Text Effects
Step 4: Choose from a variety of text effects, such as ‘shadow’, ‘reflection’, and ‘3D rotation’, to enhance your text.
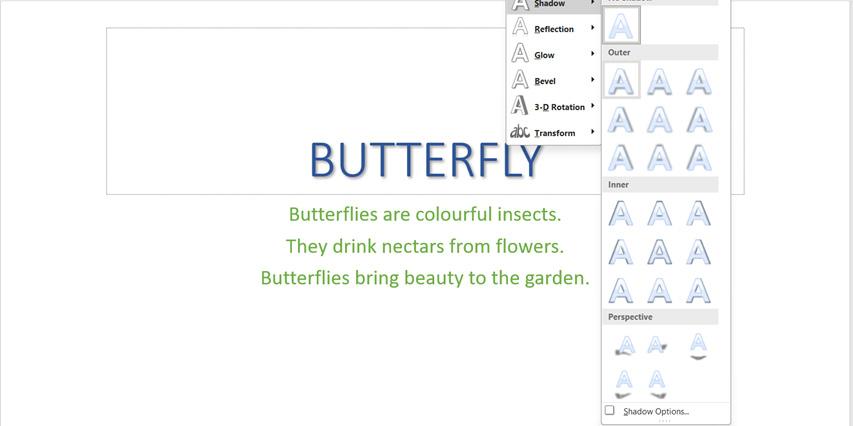
Figure 5.5: Adding text effects
Gradients are gradual transitions of colour that can be applied to your text. They create a beautiful blend of colours that can add depth and style to your text.
Now, let’s add some colour blends to make our presentation more awesome.
Step 1: Select the text you want to format.

5.6: Selecting Text
Step 2: Navigate to the ‘Shape Format’ tab.

5.7: Shape Format Tab
Step 3: In the ‘WordArt Styles’ group, click on ‘Text Fill’ and select ‘Gradient’.

5.8: Adding Text Fill
Step 4: Choose a gradient style and customise the colours to create a stunning effect.

5.9: Adding Gradient to the Text
Animations can make your presentation more engaging by adding movement to the elements on your slides. Here’s how you can add simple animations:
Step 1: Click on the object (text box, image, etc.) you want to animate.
Step 2: Go to the ‘Animations’ tab and choose an animation style from the options. You can see a preview of the animation by clicking on it.
Figure 5.10: Adding Animations
Step 3: To customise the animation, click on the ‘Effect Options’ button. You can change the direction, speed, and other settings to make it just right.

Figure 5.11: Effects Option
Slide transition is used to add visual effects to the slide when a slide changes from one slide to another slide. Slide transition can be applied to selected slides and to all slides.
To Apply Transitions to Slides
Follow the below steps to apply transitions.
Step 1: Select the slide or slides
Step 2: Click on the ‘Transitions’ tab and click on any transition effect in the ‘Transition to this slide’ group. Notice the transition effect of each transition style you choose or click the preview button.

5.12: Adding Transitions to Slide

Figure 5.13: Adding transition to Slide
To preview more transition options, click the drop-down arrow.
Now, let us learn how to add multimedia in Microsoft PowerPoint. Multimedia elements, such as audio and video, can bring life and interactivity to your presentations, making them more engaging and informative. Let us explore how to add audio and
video, as well as best practices for using them effectively.
The given steps are followed to add audio to the presentation.
Step 1: Click on the slide where you want to add audio.
Step 2: Go to the ‘Insert’ tab and choose ‘Audio’.


Step 3: Select an audio file from your computer or online sources.
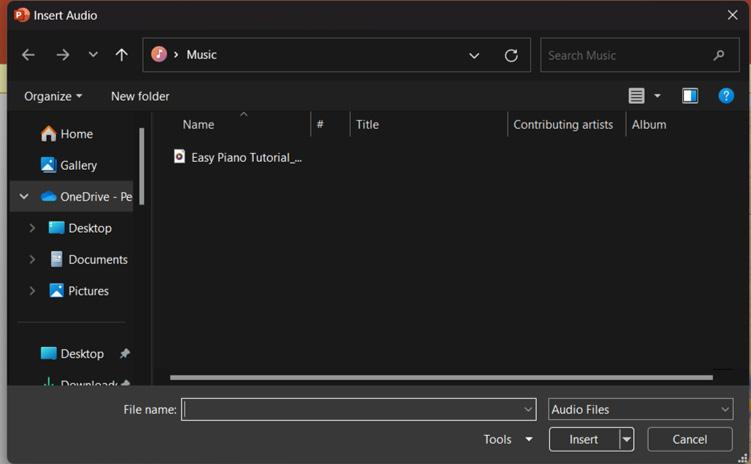
Step 4: Customise audio settings, such as volume and playback options.

You can bring your presentation to life with videos. Including videos adds a fun and informative touch, making your slides more engaging for everyone. To add video to your presentation, follow the steps below.
Step 1: Click on the slide where you want to add the video.
Step 2: Navigate to the ‘Insert’ tab and choose ‘Video’.
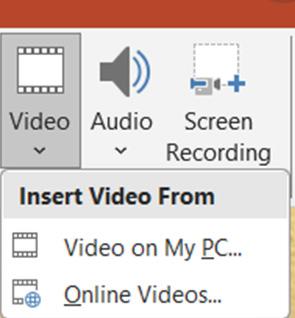
Figure 5.17: Adding Video
Step 3: Insert a video from your device or an online platform like YouTube.

Figure 5.18: Adding Video from your device
Step 4: Adjust video playback settings, size, and position.
SmartArt is a feature that enables the visual representation of information, serving as an alternative to conveying ideas through traditional text. It allows users to create visually appealing diagrams, charts, and graphics, making it easier to convey complex information in a more engaging and comprehensible manner. Let’s learn how to insert a SmartArt graphic into our presentations.
I. To Insert SmartArt Graphic
To insert SmartArt Graphic into your presentation, follow the steps listed below.
Step 1: Click on the ‘Insert’ tab and select the ‘SmartArt’ button in the Illustrations group.

Step 2: Choose a SmartArt Graphic window and select any category.

5.20:
Step 3: Select the desired SmartArt graphic and click on the OK button.
II. To add text to the SmartArt graphics
Enhance your SmartArt graphics by adding text! Simply follow the steps below to make your ideas clearer and more informative in your presentation.
Step 1: Click within the top-left (Text) area. You will now see a text-inserting point within the area of the graphic. Type ‘Input’ and the information will immediately appear in the right pane in the graphic.

Step 2: Similarly, Click on the next (Text) area and type ‘Output’.

We will learn how to use tables and pie charts in Microsoft PowerPoint. Tables are useful for organising and presenting data, while pie charts provide a visually engaging way to represent information. Both of these tools are essential for creating informative and appealing presentations.
A Chart is a graphical representation of numbers. A Chart is used to display data in pictorial form. Follow the steps listed below to insert charts into your presentation.
Step 1: Go to the slide where you want to insert the chart.
Step 2: Click on the ‘Insert’ tab in the ribbon at the top.
Step 3: In the ‘Illustrations’ group, click on ‘Chart’.
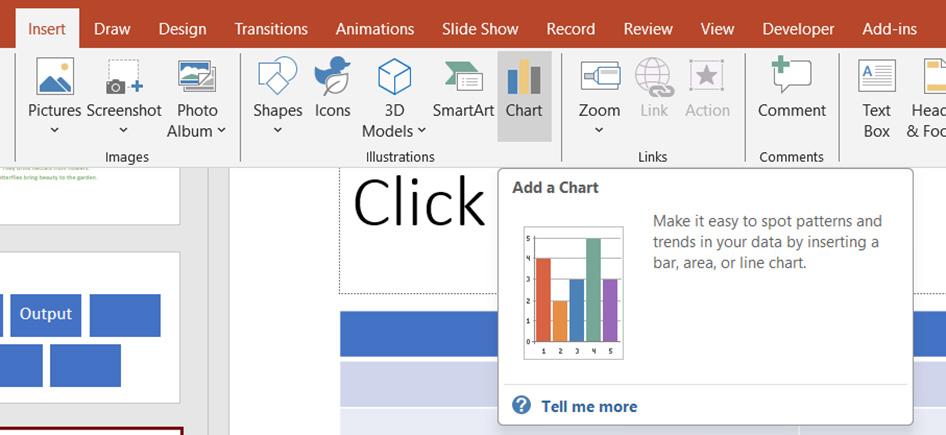
5.23: Inserting a chart
Step 4: A ‘Add a Chart’ dialog box will appear. Choose the chart type you want, like bar, pie, or line chart.

Figure 5.24: Selecting Chart
Step 5: Click ‘OK’ to confirm your choice and a chart will appear on your slide.
Step 6: A spreadsheet-like window will open on the right called ‘Microsoft Excel’. Enter your data into this spreadsheet, and the chart on the slide will update automatically.

5.25: Adding data to the chart
Step 7: Customise your chart by adding titles, and labels, and adjusting colours as needed.

Figure 5.26: Customise chart
Step 8: Close the Excel window when you’re done, and your chart will be in your PowerPoint slide. You can resize and move the chart to fit your slide design. That’s it! You’ve successfully inserted a chart into your PowerPoint presentation.
Follow the steps below to insert tables into your presentation.
Step 1: Go to the ‘Insert’ tab and select ‘Table’.
Step 2: Choose the number of rows and columns for your table.
Step 3: Click to insert the table into your slide.
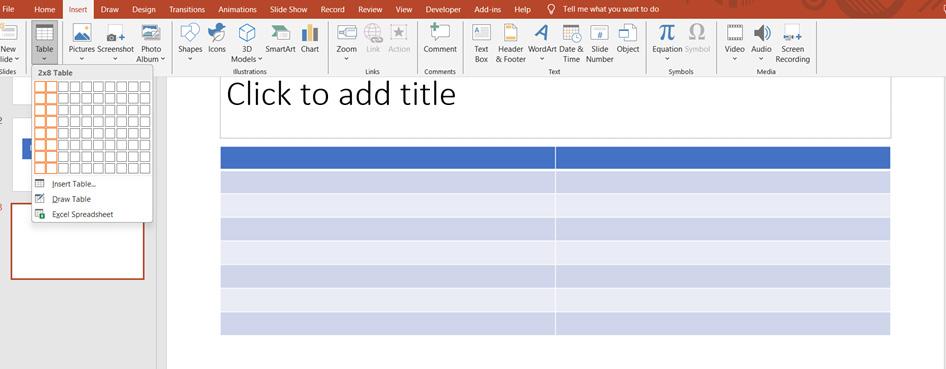
Figure 5.27: Inserting Table
Input information effortlessly into your presentation by entering data. The following steps are used to make your slides informative and engaging:
Step 1: Click in a cell to start typing data.

Figure 5.28: Adding Text
Step 2: Use the Tab key to move to the next cell.
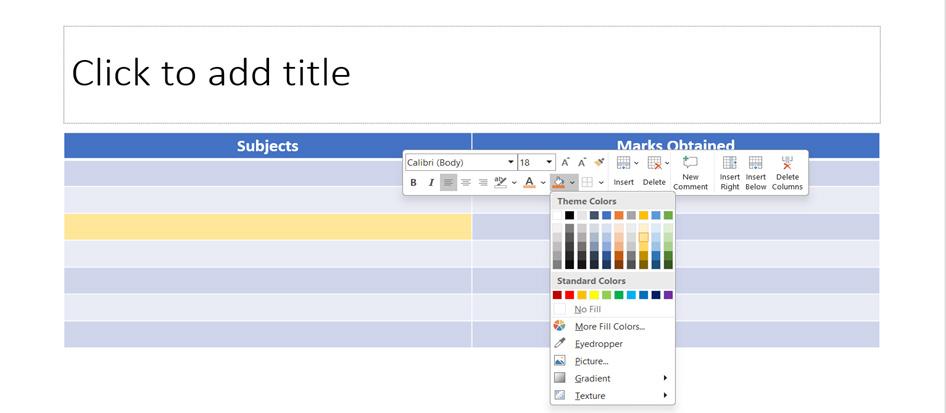
Figure 5.29: Moving to the next cell
You can customise the appearance of your table by adjusting fonts, colours, and cell borders. Right-click on the cell to format it.
There are five different views using which we can view our slides in various styles.

Figure 5.30: Viewing slides
The various Views available in Microsoft PowerPoint 2016 are:
• Normal View
• Outline View
• Slide Sorter View
• Notes Page View
• Reading View
These options are available in the View Tab of the Presentation View Group.
Normal view: This is the most common view used in PowerPoint while creating a presentation. Normal view is helpful while creating and editing the slides in the presentation.
5.31:
Outline view: This view is used to edit and jump to another slide so that you can easily create an entire presentation just by pasting your outline from Word into the Outline pane.

Figure 5.32: Outline View of the Presentation
Slide Sorter view: Slide Sorter view is used to display all slides as thumbnails.
We can quickly look at and recognize all the slides and sort them according to our requirements.

Figure 5.33: Slide Sorter View of the Presentation
Notes Page View: This view displays the slide content along with notes in the textbox provided which is below the slide content. The notes are just for the user’s reference and will not be displayed during the presentation but can be printed.

Figure 5.34: Notes Page View
Reading View: This view is used to play your slideshow in the PowerPoint window to see animations & transitions without switching to a full-screen slideshow.

5.5 Slide Show
It is used to present the slide content in a sequence to the audience with animation effects.

To present the slide show to your audience, follow the steps below:
Step 1: Click on the Slide Show Tab.
Step 2: Choose From the Beginning Tool to start the slide show from the first slide.

Figure 5.37: Presenting a slide show
Step 3: If you want to show from the selected slide, click on from Current Slide option.

Figure 5.38 Choosing the current slide
Step 4: Click on the Slide Show Icon at the bottom of the PowerPoint window.
Through this chapter, you learnt how to colour the slides, add fancy fonts to the words, and even make certain elements move. Additionally, you learnt how to add engaging graphics like tables, charts, SmartArt, music, and videos. Remember to test out various slide presentation techniques and background settings. You are all ready to deliver fantastic presentations!

Include hands-on activities throughout the lesson to engage students actively. For example, have students follow along on their computers or provide printed worksheets for them to practice adding slides, inserting images, formatting text, etc.

Perform the below tasks in MS PowerPoint:
Create a PowerPoint presentation titled “Gifts of Nature” with the following elements:
• Use WordArt for the title on the first slide.
• Add at least three slides, each featuring a gift of nature (e.g., forests, rivers, wildlife).
• Include relevant images for each slide with a short description (1-2 sentences).
• Apply background themes and animations to the text and images.
• Use transitions between slides to make the presentation visually engaging.
• View the slides in different ways like - Normal view, Outline View, Slide sorter etc.
• Show it to your teacher and friends!

PowerPoint presentations- Digital slideshows created with Microsoft PowerPoint to present information visually.
Slides- Individual pages within a PowerPoint presentation containing content.
Text boxes- Containers for entering and formatting text within slides.
Images- Visual elements are inserted to enhance the presentation.
SmartArt graphics- Predefined visual representations for illustrating concepts and hierarchies. Recap

• A PowerPoint presentation consists of slides, which are like pages in a book. Each slide can contain different information and can be created by clicking on the “New Slide” icon in the “Home” tab.
• Text boxes are used to input text onto slides. They can be moved and resized to customise the placement of the text on the slide.
• SmartArt graphics and charts can be inserted to communicate information visually
and represent data in a graphical format.

I. Fill in the blanks
1. PowerPoint presentations are made up of __________.
2. Text boxes are used to __________.
3. Images can be inserted into slides to make the presentation more __________.
4. To insert an image from your computer, click on the “__________” tab and choose “Pictures”.
5. To add a new slide, click on the“__________”tab and then the“New Slide”icon.
II. Answer the following questions in brief
1. How can you add a new slide to your presentation?
2. What are text boxes used for in PowerPoint?
3. How can you insert images into your slides?
4. What is SmartArt and how is it useful in PowerPoint?

Activity: Retell a story you read recently Instructions:
Pick a story you’ve read recently and enjoyed.
1. Make Your Slides:
Slide 1: Write the title of the story and your name.
Slide 2: Show the main characters (you can use pictures or drawings).
Slide 3: Describe where and when the story happens (the setting).
Slide 4: Write about the most exciting part of the story.
Slide 5: Tell us how the story ends.
2. Add Fun Details:
a. Use pictures, colours, and animations to make your slides interesting.
b. Write only a few simple sentences on each slide.
3. Show your slides and tell your classmates about the story!


By the end of this chapter, you will be able to,
• Explore the advanced features of MS Word
• Describe the importance of formatting features in MS Word
MS Word allows users to create and edit documents with ease. Apart from this, Word has a lot of advanced features that can help make your documents look more professional and visually attractive. You have learnt about its basic features in the previous grade such as what is a document, how to create and save a document, and more.
In this chapter, you will explore the advanced features of Microsoft Word and how you can use them to make your documents look perfect.
Let us get started!
Advanced features of MS Word include tools like tables, lists, and formatting options to create structured and visually appealing documents. Let us learn one-byone.
In Microsoft Word, formatting is the process of changing the appearance of text and organising the layout to make the document look neat and professional.
It includes adjusting fonts, spacing, alignment, and adding elements like tables and lists.
Let’s begin exploring these advanced features of formatting the text by writing a brief description about Indian rivers.
Step 1: Write a 3-line description about Indian rivers in MS Word or any topic of your choice.

6.1: Description of Indian Rivers
Step 2: Select the text you want to format

Figure 6.2: Select the Text
Step 3: Go to the Home tab on the ribbon. Change the font, font size, style, and colour, and add effects like bold, italic and underline.

6.3:


6.5:
Step 4: To change the text case, highlight the text and go to the Home tab, then click on the “Change Case” button.

6.6:
Step 5: Choose from options like sentence case, lowercase, uppercase, and more.

You can also use keyboard shortcuts like Ctrl + B for bold, Ctrl + I for italic, and Ctrl + U for underline. To remove formatting, select the text and press Ctrl + Spacebar.
Remember, consistent formatting makes your document look professional and easy to read.
6.1.2 Lists
Lists can be used to organise information in a clear and concise manner in Microsoft Word. There are two types of lists that can be created in Word: bulleted and numbered.
I. Bulleted List Example: Imagine you have a list of your favourite animals. Instead of just writing them in a paragraph, you can use bullets.
• Dogs
• Cats
• Elephants
• Penguins
This makes it easy to identify each animal separately.
II. Numbered List Example: Now, let’s say you want to create a list of your morning routine. Numbering would be helpful.
1. Wake up
2. Brush teeth
3. Have breakfast
4. Get dressed
Numbers show the order of your routine, making it clear and easy to follow.
So, just like making a fun list of your favourite things or a step-by-step routine, you can use bullets and numbers in Word to make your writing neat and organised!
Step 1: Open the previously created document on Indian Rivers and add a section on the importance of rivers

Figure 6.8: Importance of Indian Rivers
Step 2: Select the text and click on the “Home” tab in the top menu
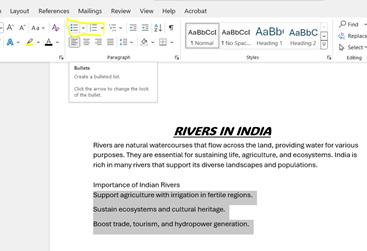
Figure 6.9: Home Button
Step 3: Select either the “Bullets” or “Numbering” option.

Figure 6.10: Select Bullet
Once the list is created, the formatting can be customised, such as changing the bullet or number style or adding indentation. Lists can be useful in creating outlines, agendas, and to-do lists.
Tables
Microsoft Word is an excellent tool for creating tables. You can use tables to organise information, make it more readable, and create a more professional looking document.
To get a clear understanding about table, you must learn what a cell, column, and row are. A cell is a part of a table where a row and column intersect. Rows are a group of cells arranged horizontally to provide uniformity. Columns are a group of cells aligned vertically, and they run from top to bottom.

Figure 6.11: Cell, Rows, and Columns
How to create a table in Word?
Following steps are used to create a table in a Word document to add River’s name and their places of origin: Step 1: Click on the “Insert” tab in the top menu.
Step 2: Select “Table” as shown in Figure 6.12.

Figure 6.12: Creating a table
Step 3: Choose the number of rows and columns you want in your table.

Figure 6.13: Created a table
Step 4: Add the text inside and you can also customise the look of your table by changing the borders, shading, and other formatting options.

Figure 6.14: Table with Text
When working with tables and lists, it’s important to keep them organised and easy to read. Use headings and subheadings to break up your content and make it more scannable. You can also use bold and italicised text to draw attention to important information.

In this activity, you will learn practically how to create a table in MS Word. We will build on what you learned in the previous activity. Now create a table in the following format. Make a table of Indian states and their capitals.
Karnataka Bangalore
Tamil Nadu Chennai Kerala Thiruvananthapuram
Telangana Hyderabad
The “Find” option allows you to search for specific words or phrases within your document. When you use the “Find” feature, Word will locate the first occurrence of the word or phrase you’re searching for and highlight it. You can then choose to continue searching for the next occurrence or make changes to the highlighted text.

Figure 6.15: Find and Replace Option
The “Replace” option, on the other hand, not only helps you find specific words or phrases but also allows you to replace them with something else. When you use the “Replace” feature, Word will search for the first occurrence of the word or phrase you want to replace and highlight it.
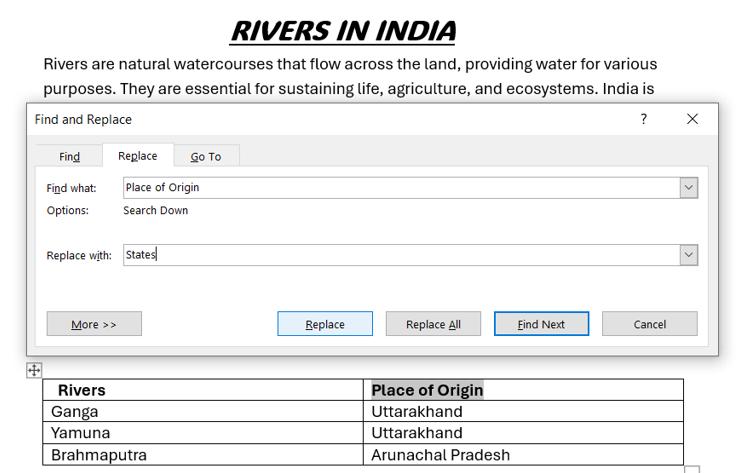
6.16: Find and Replace Option

Figure 6.17: Applied Replace Option
You can then enter the new word or phrase you want to use as a replacement. Word will replace the highlighted occurrence with the replacement text. Find and replace can be a powerful tool for quickly making changes to your documents, but it’s important to use it carefully to avoid unintended changes.
The Drop Cap feature in Microsoft Word is a decorative way to add emphasis to the beginning of a paragraph. To use this feature, select the paragraph you want to add the drop cap to, go to the “Insert” tab, click on “Drop Cap”, and select the style you want to use.

The Page Setup feature allows you to customise the size, margins, orientation, and layout of your document. To access the Page Setup dialog box, click on the “Layout” or “Page Layout” tab in the ribbon and then click on “Margins” or “Size.”
From there, you can choose your desired settings for the page size, margins, and page orientation. You can also adjust the layout of your document by selecting options such as columns, breaks, and page borders.

6.19: Page Setup
Adding a watermark, inserting pictures, and using headers and footers in MS Word are all great ways to enhance your documents and make them look more professional.

A watermark is a background image that appears in Word documents behind the text. We can identify the manufacturer or brand that the specific papers pertain to
The given steps are followed to add a watermark in the page:
Step 1: Go to the Design tab

Figure 6.20: Page Setup
Step 2: Click on the Watermark in the Page Background section


Figure 6.21: Watermark Option
Step 3: Choose a pre-designed watermark or create a custom one

6.22: Applied Watermark
Do you remember how to add pictures from the previous grade?
To insert a picture in a document, the given steps are followed.
Step 1: In your document, click where you want to insert your picture
Step 2: Click the Insert tab
Step 3: Click the Pictures button
Step 4: Navigate to the picture you want to insert and select it

Step 5: Click the Insert button to insert a picture

A header is a section at the top of each page in a document, and a footer is a section at the bottom of each page. They help you add important information or elements that you want to show on every page, like titles, page numbers, dates, or logos.
For example, you can put the title of your document in the header so that it appears at the top of each page. In the footer, you can add page numbers, so readers know which page they are on. Headers and footers are useful for making your document look professional and consistent.
Headers and Footers
Step 1: Go to the “Insert” tab
Step 2: Click on Header or Footer in the Header & Footer section

Figure 6.25: Adding Header & Footer
Step 3: Choose a pre-designed header or footer or create your own.
Step 4: Customise the header or footer as desired.


By incorporating these features, you can make your document more visually appealing and professional-looking.
Microsoft Word offers a variety of features that can help improve the quality of your writing, including a thesaurus and spell check. The thesaurus is a tool that allows you to find synonyms and antonyms for words in your document. To access it, simply select the word you want to look up, rightclick on it, and choose “Synonyms” from the drop-down menu. This will bring up a list of alternative words that you can use instead.

Spell check is another important feature that can help you catch errors in your writing. When you run a spell check, Word will scan your document for misspelled words and suggest corrections. To run spell check, click on the “Review” tab in the ribbon, and then click “Spelling & Grammar”. Word will then highlight any errors it finds, and you can either accept the suggested correction or ignore it.

Figure 6.29: Spellcheck
Tools like spell check and grammar check can help improve the accuracy and clarity of your writing. However, they are not perfect and can miss some errors. It’s important to proofread your work carefully to ensure it is error-free and wellwritten.
MS Word is an excellent tool for improving your writing skills. In this chapter, you have explored various features that help to create, format, and edit documents effectively. Remember to practice these skills to become more confident in using Word for your projects and assignments. Keep exploring and making your documents even better!

Lists- Lists can be used to organise information in a clear and concise manner in Microsoft Word.
Header and Footer- A header is a section at the top of each page in a document, and a footer is a section at the bottom of each page.
Thesaurus- The thesaurus is a tool that allows you to find synonyms and antonyms for words in your document.

Recap
• MS Word allows users to create and edit documents with ease.
• Lists can be used to organise information in a clear and concise manner in Microsoft Word.
• Find and Replace is a powerful tool that allows users to quickly search for specific words or phrases and replace them with new ones.
• You can also use keyboard shortcuts like Ctrl + B for bold, Ctrl + I for italic, and Ctrl + U for underline. To remove formatting, select the text and press Ctrl + Spacebar.
Exercise

I. Fill in the blanks
1. You can use _____________ to organise information and make it more readable.
2. ______________ is a tool that allows users to quickly search for specific words or phrases.
3. ______________in Microsoft Word is a decorative way to add emphasis to the beginning of a paragraph.
4. _____________ feature allows you to customise the size, margins, orientation, and layout of your document.
5. Ctrl + B -__________
II. Write “True” or “False”
1. A footer is a section at the top of each page in a document.
2. Spell check in Microsoft Word scans your document for misspelled words and suggests corrections.
3. The Find feature in Word allows you to search for specific words or phrases within your document.
4. Headers and footers are useful for maintaining a consistent look in your document and can include page numbers, titles, and logos.
5. The “Change Case” feature in Word allows you to change the colour of text.
III.Answer the following
1. What is the use of the find and replace feature in MS Word?
2. Define tables
3. Give a brief explanation of the Drop Cap feature in MS Word
4. What is a thesaurus in MS Word?

Activity Title: Birthday Bash Designer
Activity Description:
• Create a vibrant Birthday Greeting Card for your friend using MS Word. Use advanced features like text formatting, picture insertion, and shapes to design a unique card.
• Add a heartfelt message and decorate it with festive elements like balloons, cakes, and candles.
• Once done, share your creation with the class or save it as a special gift for your friend.


By the end of this chapter, you will be able to,
• Define Files and Folders
• Explain the importance of Grouping, Sorting for organising Files and Folders
• Learn to organise files by creating hierarchies
Have you ever arranged things like toys, books, or clothes to keep your room tidy? It feels so much neater when everything is in its place, doesn’t it?

Similarly, in a computer, files and folders help keep documents organised instead of messy, making everything easy to find!
You’ve already learned how to create files and folders in the previous year. Now, let’s explore fun and creative ways to organise and sort them, making it easier to find your favorite games, photos, and schoolwork in no time!
Let us get started!
Files and folders help organise and store information on a computer, making it easier to find and manage. A file is a basic storage unit in a computer where programs, pictures and the information can be created, saved and accessed.
For example, any text document you can create and saved to your computer saved as file. A folder is like a container used to store one or more files and can also hold other folders inside it. It helps organise files and can be empty until something is added. For example, you can create and store files such as pictures, text documents, or even music files inside a folder to keep them organised.

Look at the figure 7.3. The image shows different types of shapes kept together. We might find it a little difficult to identify the shapes as they are overlapped with each other. Right?
Now, let us try to separate them and group into separate categories.
Think
Answer

Can you try to give an appropriate name to each of the shapes in the box given below?

While grouping the shapes, did you notice that you were focusing on the similarities of different shapes to sort them? The shapes that looked like a square were grouped together. Same for circles, and triangles. Similarly in computers, when you have different types of files inside a folder, you should learn to sort them according to some property.

Now let us see if you can identify the files from the image below that are of similar type and put the numbers in the bucket given below.





If you observe, you have categorised the files into three different types of files. They are Audio, PowerPoint, and Word files. Now it becomes easy for you to find the different types of files. In a similar manner, you are going to explore the different types of grouping methods in files and folders.
When working with files and folders on a computer, it is essential to understand how to sort them using criteria.
Sorting means keeping things in the right order and the right place so that they are easy to find.
On the computer, we get many sorting options. Let us learn the steps to get those options.
Step 1: Double-click on the folder where you have kept files.
Step 2: Right-click on the free area, and you get a dropdown menu.
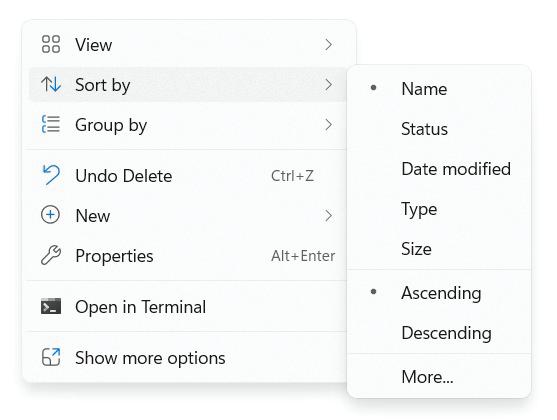
Figure 7.4: Classifying different types of files
Step 3: Click on Sort by option, and you get a lot of options.

Lab Activity
Look at the images below, and follow them to discover the sorting options, the next time you go to the lab.


On performing this activity, you will get to know the different types of sorting options available. Let us now study them one by one.
• Name: Files and folders are sorted alphabetically by name.
• Date Modified: Sort files and folders by the last time they were altered or modified.
• Type: Sorts files and folders according to their file type or format.
• Size: Sorts files and folders from smallest to largest file size.
• Ascending: Sorts files and directories in ascending order, from A to Z, or numbers from smallest to biggest.
• Descending: Sorts files and directories in descending order, from Z to A, or from the largest to smallest value.
When we have a large number of files, we start grouping them on the basis of certain properties and keep them organised inside a folder. Let us understand it by the example given and perform the activities.

Observe the following images and answer the following questions. There are three folders: Vegetables, Fruits, and Flowers. Write the names of the items that you think should be inside the mentioned folder.
Folder Name: Vegetables ________________________________________
Folder Name: Fruits ____________________________________________
Folder Name: Flowers ___________________________________________
Great Job! You grouped all the similar kinds of items in the folder. This is called grouping. Grouping is very similar to sorting, but it is done when you have a large number of files in a computer. On the computer, we get many grouping options. Let us learn the steps to get those options.
Step 1: Double-click on the folder where you have kept files.
Step 2: Right-click on the free area, and you get a dropdown menu.
Step 3: Click on Group by option, and you get a lot of options.


So, you know what amazing things you can do with files. Let us move ahead in learning the next important property which is to create Hierarchy.
Well, to understand Hierarchy let us understand the term relationship.
Figure 7.6: Different generations creating a hierarchy
The figure 7.6 shows people from different generations. As known, the grandfather is the eldest, then comes the father, then comes his son, and then the grandson. Here a hierarchy of age is being followed.
Grandfather Age > Father Age > Son Age > Grandson Age
Let us understand this in terms of files and folders by performing the activity.

Go Explore
Follow the steps given below in your computer. Suppose there is an Olympiad competition going on throughout the country. Every school from every state must participate. The judges are creating files for different schools to store the names of the students. Let us see how they are doing it.
Step 1: The jury created one folder named: The Olympiad Competition
Step 2: Inside that folder, he created 28 folders for 28 states.
Step 3: Inside one state folder, he creates folders for different classes.
Step 4: Inside each school folder, he creates folders for dofferent classes.
Step 5: Inside each class folder, he creates folders for different sections.
Step 6: Inside each section, he creates file for all the students.
When you keep items in a hierarchical manner, it means you decide which item gets the most importance. Accordingly, you create sub-folders inside a folder. Hence in the above go explore activity, the most important folder is the Olympiad Competition. Inside that folder, you started creating many subfolders. The process of creating a subfolder inside a folder continued till you finally created the files for each section of students.
A hierarchy is a method of organising items in an organised and hierarchical manner, with each item placed beneath another item based on their relationship.
Now that you know how to create files and folders, how to organise them by sort and group options, and how to create folders and subfolders to maintain the hierarchy of the file structure.

Sort - Sorting means keeping things in the right order and in the right place so that they are easy to find.
Group - When we have a large number of files, we start grouping them on the basis of certain properties and keep them organised inside a folder.
Hierarchy - A hierarchy is a method of organising items in an organised and hierarchical manner, with each item placed beneath another item based on their relationship.

• Sorting means keeping things in the right order and in the right place so that they are easy to find.
• When we have a large number of files, we start grouping them on the basis of certain properties and keep them organised inside a folder.
• Hierarchy means to keep files or folders beneath a folder based on their relationship.

I. Fill in the blanks
1. In computers, we can have different types of _________ inside a folder.
2. Sorting means keeping things in the right _______ and in the right place so that they are easy to find.
3. Grouping is very similar to _______, but it is done when you have many files in a computer.
4. Categories are similar to ______ or _______ that we use to organise our belongings.
II. Solve the following questions.
1. Sort the given folders by date.
Look at the file dates, and mark the options as 1 to 4, from latest to oldest created files.


2. You have been a part of your school essay competition. Students from grade 1 to grade 10 have participated. The principal wants to keep the files submitted by students from all grades on a computer so that the files are safe.
Look at the steps below and tick the correct order in which she will create the files and folder. Tick the correct option.

Activity Title: Create Your Personal Folder
Activity Description:
Create a personal folder with your name, then write 5 lines about yourself in a Word document and save it inside the folder. This activity helps you learn to organise files and create documents.


By the end of this chapter, you will be able to,
• Define sequence
• Explain the importance of arranging steps in a specific order
• Describe loops and their types
• Demonstrate the usage of “Repeat,”“Repeat Until,” and “Counter” blocks to repeat actions
Think about getting ready for school in the morning. First, you wake up, then take bath, get dressed, eat breakfast, and finally head out the door. If you mix up these steps—like putting on your shoes before your socks—things just wouldn’t work!
Figure 8.1: A Morning Routine to Get Ready for School
Similarly, computers also need instructions to be executed in a specific order to get the work done. Computers rely on clear instructions to perform tasks; without them, they cannot function correctly. That’s where the concept of “sequence” in programming comes in.
A sequence is the order in which steps or actions are arranged to complete a task. In programming, it refers to the specific arrangement of instructions that the computer follows to achieve a goal. It’s like brushing your teeth-first, you take your toothbrush, then put toothpaste on it, brush your teeth, and finally rinse your mouth. Each step needs to be taken in the right order for it to work properly.


Aroyi wants to make a delicious fruit salad, but she needs your help to follow the steps correctly. Guide her by filling the blanks using the options provided: (fruits, pieces, sugar, fruit, bowl)

Step 1: Wash the ________ thoroughly to remove dirt.
Step 2: Peel the ________ if needed.
Step 3: Chop the fruits into small ________ using a knife.
Step 4: Mix the chopped fruits in a large ________.
Step 5: Add a drizzle of honey or ________ for extra flavor.
Remember: Following the steps in the right order will help Aroyi make a perfect fruit salad!
In the same way, in computer programming, we follow a sequence of steps to get things done. Computers follow a specific order when they work with information. Let’s understand this with an example.
Consider a game in a blockly environment where the pegman follows a path to reach the endpoint. The code blocks shown in the figure 8.3 get executed in order and hence the pegman reaches the destination.
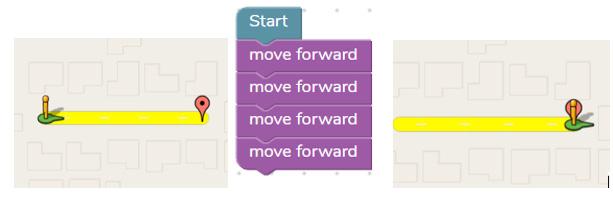
Here we used the “Move Forward” block 4 times, it tells Pegman to move 4 steps forward, one after the other. This helps Pegman reach his destination. Each “Move Forward” block is like a small instruction, and when arranged correctly, they guide Pegman to reach his goal! Now let us change the code blocks as shown in the figure 8.4
(Note: Try to change the codes in the lab as shown in the figure to see if the pegmen reaches the endpoint or not.)
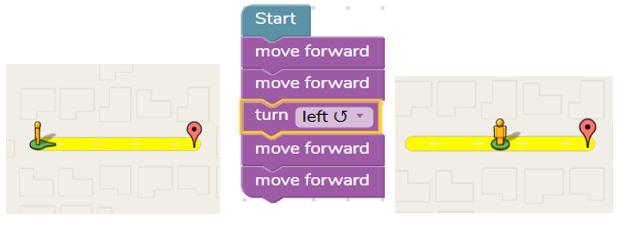
8.4:
In this code, the pegmen first move two steps forward. This makes the pegman move away from the yellow path. Then he turns left. The rest of the codes don’t get executed as the pegmen doesn’t find any path in front of him. Hence the game could not be completed as the instructions was changed. Therefore, it is essential to provide clear and accurate instructions to the computer.

In your next lab session, try to create a sequence of instructions in the correct order for the following given path. Fill in the space given below using the set of code blocks as required.

Imagine you are giving directions to a friend. Instead of saying ‘move forward’ four times, wouldn’t it be simpler to say, ‘move forward four steps’? Similarly, in programming, repeating the same block multiple times can be inefficient and cluttered. Look at figure 8.3, we added the Move Forward block four times to guide the character. Repeating the same block multiple times can be time-consuming and takes extra space. What if we could simplify this? What if there was a way to combine these instructions into a single block? That’s where the concept of loops comes in! Loops allow us to repeat actions without duplicating blocks, saving time and space in our code.
In programming, a loop allows us to repeat a set of instructions multiple times without having to write them over and over. Instead of manually repeating the same commands, loops let us tell the computer to execute the same action a specific number of times or until a condition is met. For example, consider Fig 8.3. We can rewrite the same code using loops shown in the figure 8.5.

This way, instead of writing the Move Forward block four times, we use a loop block to make the program more efficient and easier to understand. There are primarily three types of loops, which are:
8.2.1 Repeat Loop
The Repeat Loop will repeat a task a fixed number of times. It’s like saying, “Do this action 5 times, no matter what!”
For example, Consider the figure 8.3. We want to tell the computer to move pegman forward 4 times, the Repeat loop would do it exactly 4 times, then stop shown in the figure 8.6.

8.2.2 Repeat Until Loop
The Repeat Until Loop is different because it repeats actions until a specific condition is met. It’s like saying, “Keep doing this until pegman reaches the destination” So, it will repeat until the condition becomes true shown in the figure 8.7.

Let us summarise with an analogy, while cleaning your room, if you know there are exactly 10 toys on the floor, you can use a Repeat Loop, where you pick up one toy at a time and repeat the action 10 times. On the other hand, if you don’t know how many toys are scattered, you can use a Repeat Until Loop, where you keep picking up toys one by one until the floor is completely clean.
The key difference is that a Repeat Loop works when the number of repetitions is known, while a Repeat Until Loop is ideal when the task continues until a specific condition is met.

Let us observe the codes given in the figure 8.6 and 8.7 and understand how Maze Pegman can reach its destination in two different ways using Blockly code!
a) What do you think will happen when Pegman follows repeat block code? How many times will Pegman perform the action?
b) What do you think will happen when Pegman follows repeat until block code? How will it be different from the “repeat” block?
Imagine you have 5 toys scattered on the floor, and you need to pick them up one by one. A Counter Loop would be like saying, “Pick up one toy, then pick up another, and keep doing this 5 times.” You know exactly how many times you need to repeat the action (5 times), just like counting the toys.
In programming, this would look like repeating the action (picking up a toy) a specific number of times, based on the number of toys. So, each time you pick up a toy, the loop counts until it reaches 5 and then stops.
A “counting loop” or “Counter loop” in Blockly is a special way of making a computer do something multiple times. We use a special number, like a counter, to keep track. This special number starts at a certain value, and the computer keeps doing the task until it reaches a certain point.
Let’s attempt same task given in the figure 8.3 using a counting loop.

The code says: Here the default name of the counter is “i”, but you can name it whatever you wish. We specify the starting and ending values of the counter, as well as the increment to count by (such as count by 1s, or 2s, etc.).
Here’s what happens step by step:
Start Counting: ‘i’ starts at 1. Pegman listens and moves forward.
Keep Counting: ‘i’ goes up to 2. Pegman moves forward again.
Counting Continues: ‘i’ reaches 3. Pegman takes another step forward.
Final Count: ‘i’ is now at 4. Pegman takes his last step.
With this code, Maze Pegman will take four steps in total to reach his destination.
Now that we understand the significance of sequences and loops in programming, we can see how they form the foundation of structured coding. Sequences allow us to execute tasks in a specific order, ensuring precision, while loops help us repeat actions efficiently, saving time and effort. Together, they play a vital role in solving complex problems and building creative solutions in programming.

Sequence- Sequencing is the act of putting steps or actions in the right order so that we can achieve the desired result. By carefully arranging the necessary tasks, sequencing helps us follow a logical and organised path to reach our goal.
Loops- Control structures that allow a program to repeat a set of instructions or tasks a certain number of times or until a specific condition is met.

Engage students in hands-on activities to reinforce the concept of loops. For example, ask them to perform a specific action (e.g., clapping, jumping) in a loop for a certain number of times. This will help them understand how loops save time and effort.

• Sequencing is the process of putting things in a specific order, where one thing follows another in a certain sequence.
• Examples of sequencing include arranging events in a story, following steps in a recipe, putting together a puzzle, and solving a maths problem.
• Loops are like magical tricks that let us repeat tasks without having to do them individually. They save time and effort.
• There are three main types of loops: the Repeat Loop, the Repeat Until Loop, and the Counting Loop.

I. Write True or False
1. Sequencing is only important in solving mathematical problems.
2. Stories should be presented in any order.
3. A loop is a way to repeat a task a certain number of times in programming.
II. Answer the following
1. Why is sequencing important in solving mathematical problems?
2. What are some examples of everyday tasks that require sequencing?
3. How can sequencing help us avoid making mistakes when completing tasks?
4. What is a loop in programming?
5. What are the three main types of loops?
III. Complete the patterns
• 10, 20, 30, 40, ________, 60, ________
• ▲, ▲▲, ▲▲▲, ▲▲▲▲, ________, ________
• ABCABC________
• 5, 10, 15, 20, ________, 30
• Red, Blue, Yellow, Red, Blue, Yellow, ________

Here are the steps to follow to draw a snowman, so let’s get started. Could you try it?


By the end of this chapter, you will be able to,
• Describe the concept of conditionals
• Explain different types of operators and their uses
Have you ever decided what to wear based on the weather? You might think, “If it’s cold, I’ll wear a jacket. If it’s hot, I’ll wear a t-shirt.” That’s making a choice based on a condition-just like how a computer chooses what to do based on specific conditions in a program.
In this chapter, you will explore how computers think and make decisions using Conditionals ”Operators”. Let us get started!
Conditional statements are a fundamental concept in programming that allows a program to make decisions based on certain conditions. They are also called decision-making statements because they help the program choose a specific path of execution based on whether a condition is true or false.
Conditional statements are instructions that help a computer make decisions and choose actions based on whether a condition is true or false.
There are primarily three types of conditional statements. For now, let’s focus on learning two types, and you’ll explore the remaining type in the coming year!
An If statement is a conditional statement in programming that allows a program to
execute a specific block of code only when a given condition is true. If the condition is false, the block of code inside the if statement is skipped.
In simple terms, we can say, “If a certain condition is true, then our program will do this.” For example, If It’s raining then Take Umbrella
This statement allows the program to make decisions based on whether a certain condition is satisfied.
9.1: Checking rain condition
Figure 9.2 illustrates a game where an if statement is used with the condition ‘if path ahead’. This condition checks if there is a path ahead, and if the condition is true, it executes the set of instructions enclosed in the condition.

Figure 9.2: Execution of “if statement”
There are many situations where we need to make decisions, which we explored in if condition. But sometimes, we face decisions where we need to choose between two actions
depending on the situation. This is where an if-else condition helps, allowing us to specify what to do if the condition is true and what to do if it isn’t. Let’s explore how if-else conditions work in such scenarios!
Imagine you are deciding what to wear before going outside. You look out the window and check if it’s raining. If it’s raining, you wear a raincoat or carry an umbrella. Else, if it’s not raining, you wear your regular clothes. This is how you make a decision based on the condition of the weather.
Figure 9.3: Checking weather condition
In programming, this is called an if-else condition. It helps the computer make decisions by checking a condition.
• The if part checks if the condition is true (e.g., “Is it raining?”). If true, the computer follows one set of instructions.
• The else part runs if the condition is false (e.g., “If it’s not raining, do this instead.”). This allows the computer to choose between two actions based on the situation, just like we do when making real-life decisions!
Figure 9.4 illustrates a game where an if statement is used with the condition ‘if path ahead’. This condition checks if there is a path ahead, and if the condition is true, it moves forward. If the condition is false (no path), it turns right to find the correct direction.
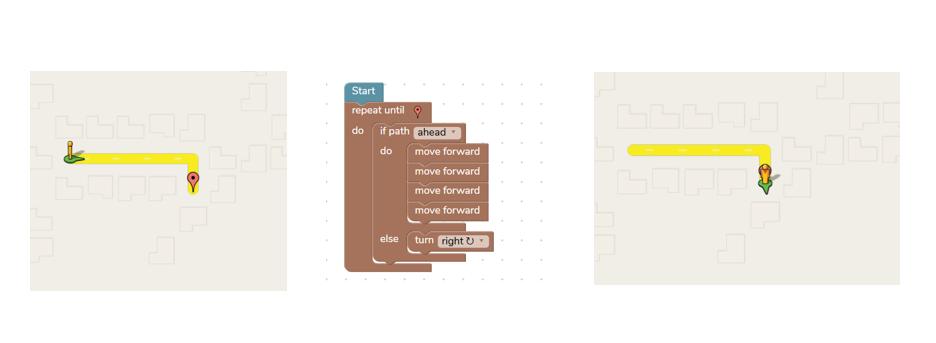

Read the following situations and write down what decision you would make based on the condition described:
• If it’s raining, ______________.
Else, ______________.
• If you finish your homework, ______________. Else, ______________.
• If it’s too hot outside, ______________. Else, ______________.
• If it’s lunchtime, ______________. Else, ______________.
That is about the conditions, but sometimes we want our program to make decisions based on certain conditions, like whether a number is greater than or less than another number, or whether two conditions are true at the same time. This is where logical operators come in the picture!
Logical Operators help us to make decisions in programming. They allow us to compare things and understand whether certain statements are true or false. Logical operators use simple words like “AND”, “OR”, and “NOT” to combine different conditions or statements.
Let’s understand one by one!
9.2.1 AND Operator
The AND operator is used to combine two or more conditions, where both conditions must be true for the result to be true. If either condition is false, the result will be false.

This block lets you pick between two options: ‘and’ and ‘or’. When you use ‘and’, it means both conditions must be true for the whole thing to be true.
Imagine this:
Your parents say,
“You can go outside if you finish your homework AND clean your room.”
This means:
• You must finish your homework ✅ AND clean your room ✅.
• If you only do one, you can’t go outside��.
Let’s see how “and” operator works in blockly.
When one condition is true (3 equals 3) and the other is false (5 equals 10), Pegman turns left without moving forward.

The OR operator is used when you have two options, and only one of them needs to be true for something to happen.
Imagine you are at ice cream shop, “You can choose a cone if they have Chocolate OR Vanilla”
This shows how the OR operator works-at least one condition must be true for the decision to happen.
Let’s see how “or” operator works in blockly.
Check the figure 9.8, In this scenario, since one condition (3 equals 3) is true, it will be executed, although the other condition is false (5 = 2)

The NOT operator is used when you want something to happen only if none of the conditions are true. For example, imagine you can only go to the park if it’s not raining and not snowing. If both conditions (raining or snowing) are false, you can go.
Let’s see how “not” operator works in blockly.
Check the figure 9.9, In this scenario, since both conditions are false (3=4) and (5=2), it will be executed.


In the upcoming lab session, your task is to explore and experiment with different logical operators in the Blockly environment. Analyse how they function and apply them to create simple logical operations.
In this chapter, we learned about conditionals and operators, helping computers make decisions based on whether a condition is true or false. We explored if statements, if-else statements, and logical operators like AND, OR, and NOT. Now, you can use these tools to create your own decision-making programs!

Conditionals - Instructions in programming that let a program decide what to do based on certain conditions—if something is true or false. If Statement- A command in programming that runs a block of code if a condition is true. Logical Operators- A logical operator is a symbol used in programming to perform logical operations on one or more conditions or expressions.
• AND (&&): Checks if both conditions are true.
• OR (||): Checks if at least one condition is true.
• NOT (!): Reverses the truth value.

Recap
• Conditionals are instructions in programming that allow a program to decide what to do based on certain conditions—whether something is true or false.
• If statement is used in programming to run a block of code if a condition is true.
• Logical operators include AND, OR, and NOT, which help combine different conditions in programming.
Exercise

I. Fill in the blanks
1. Conditionals allow a program to decide what to do based on ______________.
2. The if statement is used to execute a block of code only when a specified condition is
3. The __________ operator is used to combine two conditions, and the result is true only if both conditions are true
II. True or False
1. The AND operator requires both conditions to be true for the entire expression to be true.
2. The OR operator requires at least one of the conditions to be true for the entire expression to be true.
III. Answer the following questions
1. How do logical operators help in decision-making within programming?
2. Explain “and” operator with an example.
3. Provide an example of a situation where an if statement would be useful.

Design a chart to visually represent the Logical Operators: AND, OR, and NOT and its functions.


By the end of this chapter, you will be able to,
• Explain the concept of functions and events
• Explore function blocks and events in blockly
• Create a function in blockly programming
Now that you are quite aware of the blockly programming, let us take the blockly programming and understand a new programming concept called functions. For instance, you are guiding a character in a game to reach its destination. Take a look at Figure 10.1. It shows a girl who needs to follow a path to get to school.
What do you think the steps might look like? Here’s an example: repeat(4): moveforward turn right repeat(4): moveforward
Did you notice how the “repeat move forward” step is used twice? Instead of writing the same instructions repeatedly, we can group them together into a single command, like gotoSchool.
This grouping a set of instructions together and reusing them whenever needed is called a function.
In computer science, a function works in a similar way—it’s a set of instructions written once that can be reused to solve problems or perform tasks.
A function is a group of instructions that accepts inputs, performs a certain calculation, and outputs the results.
Let’s consider a simple task of adding two sets of numbers, such as 4 and 2, or 6 and 7. To calculate the sum for each set, you follow the same steps:
Step 1: Take the first number.
Step 2: Take the second number.
Step 3: Use the + symbol to add them.
Step 4: Display the result.
Example 1
Step 1: First number - 4
Step 2: Second number - 2
Step 3: Adding 4+2
Step 4: Result 6
Now, let’s name this set of instructions as addition and call it a function. Whenever we use the addition function, it automatically follows all the steps inside it. This function requires two inputs: the two numbers you want to add. The steps remain the same, but based on the input values, the function performs the addition and shows the result.
Figure 10.2: Output of the addition
Function creation includes a simple step as follows:
• Define a function
• Add set of instructions
• Call the function
Let’s look in blockly environment and learn how to create a function.
Task 1: Consider we are creating a function to add two numbers.
Phase 1: Defining a function
Step 1: Click on ‘Functions’ block. Drag and drop the function block in the workspace as shown.


Phase 2: Adding instructions
Step 2: Click on Variables block. Click on create variable to create two variables named a and b
A variable is a letter or a word that acts as a container that can hold values. So here we will create two variables a and b that will hold the two numbers we will give to add.
Figure 10.4: Variables block

Step 3: Now define the function, by giving a name addition, and set of commands where two variables a and b are getting added. The sum is getting stored in the variable result. So, make sure to create a third variable named result. Then to show the result the Notify block is used from Alerts block.

Figure 10.5: Defining the addition function
Phase 3: Calling the function
Step 4: Now set the variables a and b to 5 and 5. Then click on the Function block, you will
get an addition function that you created. Call the function addition shown in figure 10.6.

Figure 10.6: Calling the addition function
Step 5: Click on Run button to execute the code and look at the result as shown.
Figure 10.7: Output notification of the function

Think and Answer
Create a function with a name that represents the steps you follow each day to get ready for school. These steps will be part of your daily routine from Monday to Friday.
Function name: ______________________________
Set of instructions:

Can you try it in your next lab session?
Task 1: Perform the subtraction of two variables in the lab using the functions block.

Task 2: Creating function to make the Pegman go to the destination.
Step 1: Drag and drop the function block and name it as gotoSchool.

Figure 10.8: A function named gotoSchool
Step 2: Observe the path given in preview panel.

Figure 10.9: Boy following the path
Step 3: Write the commands inside the function as shown to define it.
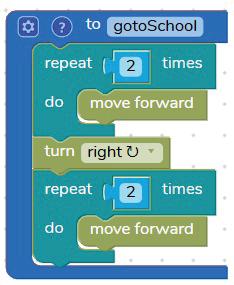
Figure 10.10: Defining the gotoSchool function
Step 4: Call the function under the start block. Run and execute the command.


Think
Answer

Give a suitable name to the set of instructions to form a function.
Take pet food. Put the food in the pet’s bowl. Give water to the pet.
Now that you understand how functions are created, let’s take a closer look at how they are executed. If you noticed, in both the gotoSchool and addition functions, the code was executed only when the Run button was clicked. This click triggered an event, which caused the functions to run and produce their output.

10.12: The triangle button reprersenting the Run button

This concept introduces us to Event-Driven Programming. In event-driven programming, the flow of the program is determined by events-such as a mouse click, a key press, or any other user interaction. These events serve as triggers that activate specific parts of the code, like functions, to perform their tasks. Let us learn few concepts more about Even-Driven Programming.
Event-driven programming is a way of telling a computer or a device to listen for something to happen and then act when it does. These “happenings” are called events. An event can be anything like pressing a button, clicking a mouse, touching a screen, or even moving your hand.
For example:
• When you press the play button on a music app, the app starts playing your favourite song.
• When you move in front of an automatic door, the door opens for you. In event-driven programming, events come in many different types and forms. These events are actions or occurrences that a program can respond to. There are input events, sensor events, timer events, and custom events. Out of theses, in this chapter we will explore few of the input events.
A mouse click event happens when a user presses and releases a button on a mouse. This event is one of the most common ways people interact with computers and programs. Example 1: Clicking the buttons in Blockly to see blocks or run the code.

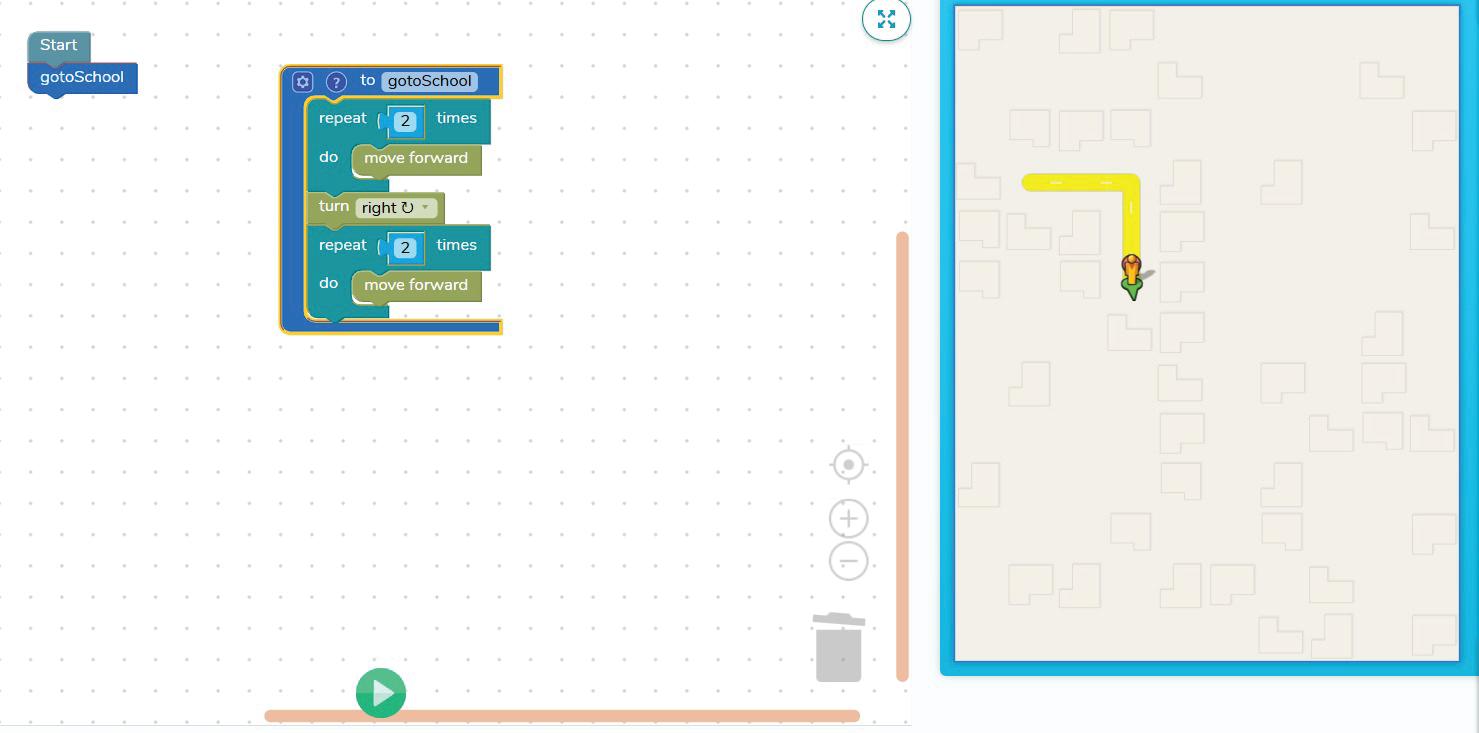

A key press event happens when a user presses a key on a keyboard. This event allows users to interact with a program or device by typing or pressing specific keys. For example:
• Pressing the “Enter” key to submit a form or start a new line in a document.
• Typing a letter on the keyboard to write a message in a text box.
• Pressing the arrow keys to move a character in a game or navigate through menus.

A mouse hover event is triggered when a user moves their mouse pointer over a specific element on the screen, such as a button, image, or text. This event is often used to enhance interactivity and improve the user experience by displaying additional information, changing the element’s appearance, or activating certain actions.
For example: Button Highlighting
When the mouse hovers over a button, its colour changes to indicate that it can be clicked. For example, when you see the instruction button at right side of the blockly environment


Note: Observe these event driven actions whenever you are in the lab.
A touch event happens when a user touches a screen with their finger or another object. This type of event is commonly used in smartphones, tablets, and other touchscreen devices.
For example:
• Tapping on a screen to open an app or select an item.
• Swiping to scroll through photos or pages in an app.
• Pinching to zoom in or out on an image or map.
Functions and events are everywhere in our daily lives. Using a calculator, playing a musical instrument, or even asking a friend for help are all examples of how functions work by taking input and producing a result. They help us break down complex tasks into smaller, manageable parts, making our lives easier. Event-driven programming allows programs to listen and respond to actions, making them more engaging and fun. Keep exploring these concepts to unlock your creativity and build amazing programs that surprise and delight everyone.

Functions - Functions are blocks of a program that perform a specific task or action. They are like mini programs within a larger program.
Events - Actions or occurrences that happen during program execution, such as mouse clicks, key presses, or timer expiration.

• Functions are blocks of a program that perform a specific task or action. They are like mini-programs within a larger program
• A function name is like a special nickname for a set of instructions. You use this nickname to call and use those instructions from different parts of the computer program.
• The output is like the answer from a function’s job, and it goes back to the program that asked for it.
• To call this function from within your program, you simply use the function name followed by any arguments you want to pass in, enclosed in parentheses.

I. Choose the correct answer
1. By mouse hover it is meant
a. To left click the mouse to check for an information
b. To place the mouse cursor on text or button to see its hidden information
c. To drag and drop any object
d. To press any key from keyboard
2. Function will perform its action only when it’s ________.
a. Called
b. Saved
c. Made
d. Deleted
3. The phase where we create a function is called _____________.
a. Statement
b. Function’s task
c. Defining
d. Function’s Call
II. Answer the following
1. What is a function?
2. Write few lines on event handling methods.
3. Write briefly about creating a function.

Activity Name: Explore Functions and Events in Blockly Steps for the Activity
1. Create a Function:
• Open the Blockly environment.
• Create a simple function of that prints a message ‘Hello! Welcome to Blockly’.
• Name your function and write down the steps you followed to create it.
2. Test Your Function:
• Test the function by calling it in your program.
• While testing, pay attention to the events you encounter:
• Key Pressed, Mouse Click, Mouse Hover
3. Explore Mouse Hover Events:
• Write down the information displayed when you hover over a code block.
• For example: Does it tell you the name of the block, its function, or an error?

4. Document Your Work:
Creates a function with no output.
• Write a step-by-step description of what you did to create and test the function.
• Include details about the events you encountered and what you learned by hovering over blocks.
