

Intro to Hummingbird Teacher Edition


Intro to Hummingbird
Challenge
Computer control is found in many modern systems. These systems would not function without quality programming to process inputs and provide appropriate outputs unique to each system. This starts with basic understanding of how to connect to a micro:bit processor of a given system, how to utilize a programming language, in this case Snap!, and use inputs in order to produce the desired outputs.
Specifications (what does the design have to do)
Successful completion of this activity will allow teachers and students to
● Prepare the Hummingbird Kits for students
● Get started with Snap!
● Become familiar with the major components of the Hummingbird robot
● Assemble the major components of the Hummingbird robot
● Connect to the robot using Snap!
Constraints (things that limit your solution)
Constraints for this activity will include
● Prior knowledge of Snap!
● Knowledge of Hummingbird robot and the blocks used with the robot
● Use of the materials described below
Materials
Hummingbird Breakout Board
micro:bit
Battery pack
Bluetooth-enabled computer
(Potential needs: If downloading hex file, USB port and USB-to-micro-USB cable labeled “Cord for micro:bit” in Hardware Guide)
Guides and Descriptions
Hummingbird Premium Kit Contents Guide
Hummingbird Premium Kit Hardware Guide
Hummingbird Bit Block Descriptions
Optional: Printable resources at https://www.birdbraintechnologies.com/hummingbird-start-teaching/ Most resources will be found in section 5.
Knowledge and Skill Builders (KSBs)
KSB 1T What The Teacher Needs
Teachers should complete some set up of new Hummingbird kits prior to using the kit with students. Setting up the hardware only needs to be completed by the teacher once for each kit. Making a Snap! account allows a teacher to create a Snap! account. There is a separate activity to allow teachers to create bulk student accounts.
Setting up the hardware
1. Get 4 AA batteries per Hummingbird kit
2. In order to use the BirdBrain Snap! web app on the Chrome browser, you must make sure the Chrome settings allow third-party cookies.
3. Watch the ‘unbox’ video at: https://www.birdbraintechnologies.com/hummingbird-start-teaching/ Choose “Premium kit”.
4. A hardware guide in pictures https://learn.birdbraintechnologies.com/docgenerator.php?file=hummingbir d-bit-hardware&resource=5763
5. Learn about outputs and inputs starting at: https://learn.birdbraintechnologies.com/hummingbirdbit/snap/program/6-1
Setting up the Hummingbird Micro:bit and connecting to Snap!:
(This is the full teacher version from BirdBrain Technologies) https://learn.birdbraintechnologies.com/professional-development/videocourses/hummingbirdbit/snap/2
Short student version is listed under KSB 2.
Note:
1. This video discusses the 3 states you will find your micro:bit in when you first open it. Follow the video carefully at the 3 minute and 30 second mark to determine what steps you will need to take depending on which state you find your micro:bit in.
2. The video also discusses multiple ways to connect the Hummingbird to Snap! beginning at the 8 minute and 45 second mark. You will want to follow the instructions for "Setup with BlueTooth Chrome" also referred to in the video as the web app.
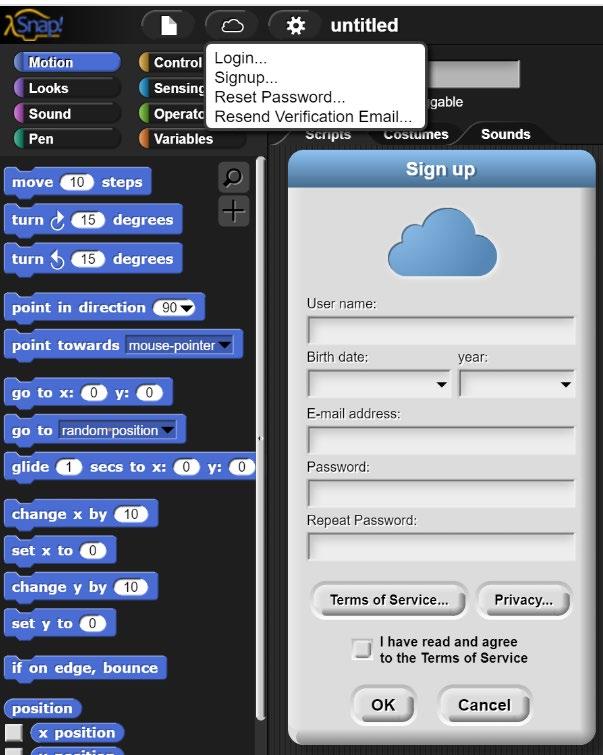
3. Making a Snap! Account:
While in Snap! from step 2 above, click on the cloud icon, “Signup”, and fill in the form:
4. Save files in Snap! https://learn.birdbraintechnologies.com/hummingbirdbit/snap/program/3-4
NOTES FOR TEACHERS:
1. In many districts, student accounts will need to be created and provided to the students. See the Creating Student Snap! Accounts Wakelet for assistance creating these accounts.
2. The student or host device determines how Snap! is set up. For example: to use the BirdBrain Snap! web app on the Chrome browser, you must make sure the Chrome settings allow third-party cookies.
3. Device choices and setup options are listed at: https://learn.birdbraintechnologies.com/hummingbirdbit/snap/program/1-5
Miscellaneous classroom management suggestions:
1. The recommended age for this equipment is greater than 9 years.
2. Students should be trained to avoid touching/holding Hummingbird Bit parts when they are moving. “Hands behind your back when power is on” can be a useful strategy.
3. Turn off the battery pack when not in use; remove batteries to preserve life.
4. Avoid liquids, gum and food near the Hummingbird Bit components. Do not expose to extreme temperatures.
5. If parts are broken or malfunctioning, use an established procedure for writing a repair ticket and isolate the part in a repair queue (“the Lockbox”).
KSB 1 Why Computer Control?
All computer systems will have inputs, processes and outputs. For example, you receive an email from a teacher, that is a form of input (an information input). The computer has the ability to process that message and then output the message on your screen in a way that you can read it.
Computers are found in many places but most do not look like or even function like the system that allows you to read an email. These are often referred to as “embedded computers” and are the kinds of microprocessor-based control systems found in microwave ovens, GPS systems, and automobiles.
There are multiple computers in a car that control specific systems such as brakes. These computers are not operated by a keyboard or mouse. The inputs received from the braking system when the brake is pressed would be processed by the computer and the outputs would be used to control the brakes of the car. This is known as computer control.
Identify the Parts of a Computer:
Here is a list of three systems that involve computer control. With a partner, determine the input, process and output of each system.
System Input Process Output
Bluetooth speaker
Washing machine
Automatic doors
*See Google dock for an activity that can be placed in an LMS or printed.
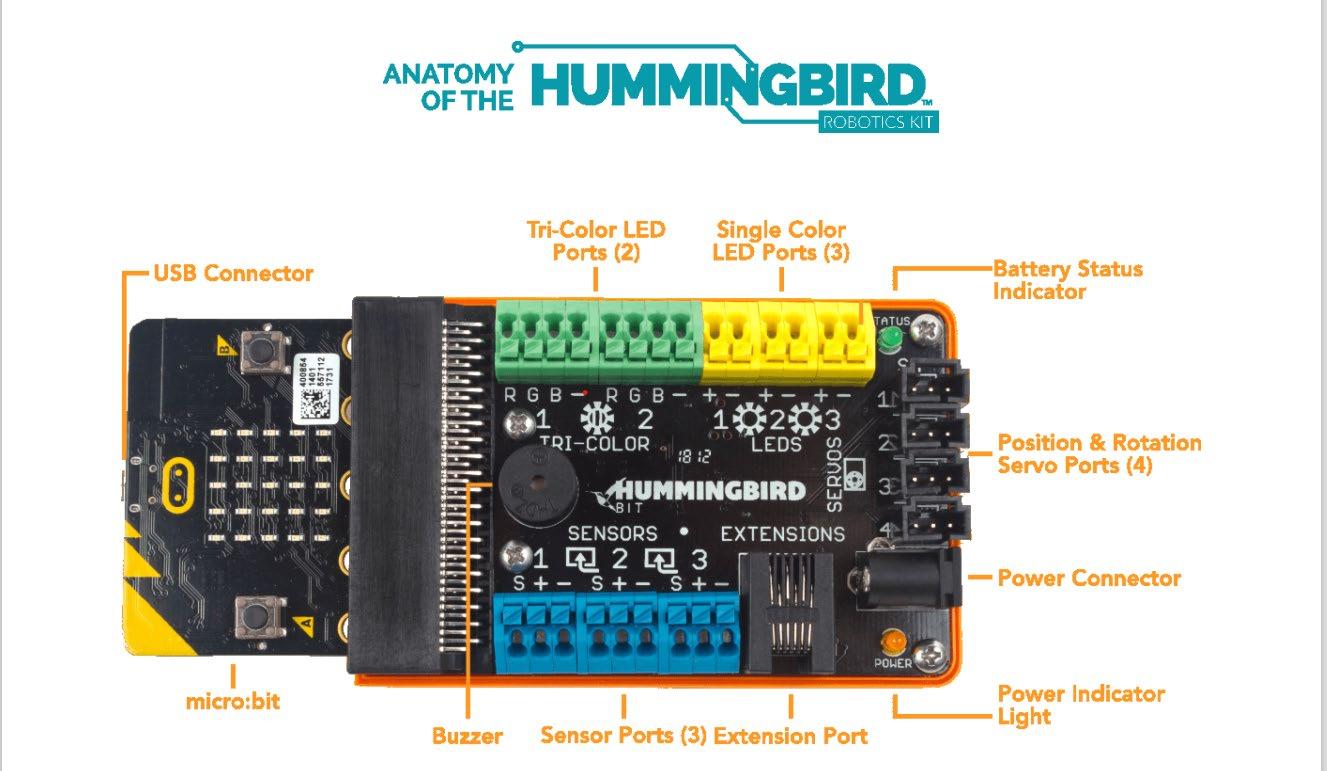
KSB 2 Gather and Assemble Breakout Board and micro:bit Now set up the Hummingbird robot so we can prepare to see how computer control works.
Watch a brief video to set up and connect the basic parts of the Hummingbird robot including the micro:bit, Breakout Board and battery pack.
https://drive.google.com/file/d/1B_ersmmASJH79Eend1V7T9WeTqtaqdeZ/view?usp=sh aring
The image below identifies the parts of the micro:bit and Breakout Board. Use this resource to help find the parts needed in this lesson and future lessons.
KSB 3 Connect to Snap!
Follow the instructions in steps 7-8 found in the link below to connect your robot to the computer.
https://learn.birdbraintechnologies.com/hummingbirdbit/snap/program/1-7
If you are successful, the Hummingbird version of Snap! should appear on your screen as shown:
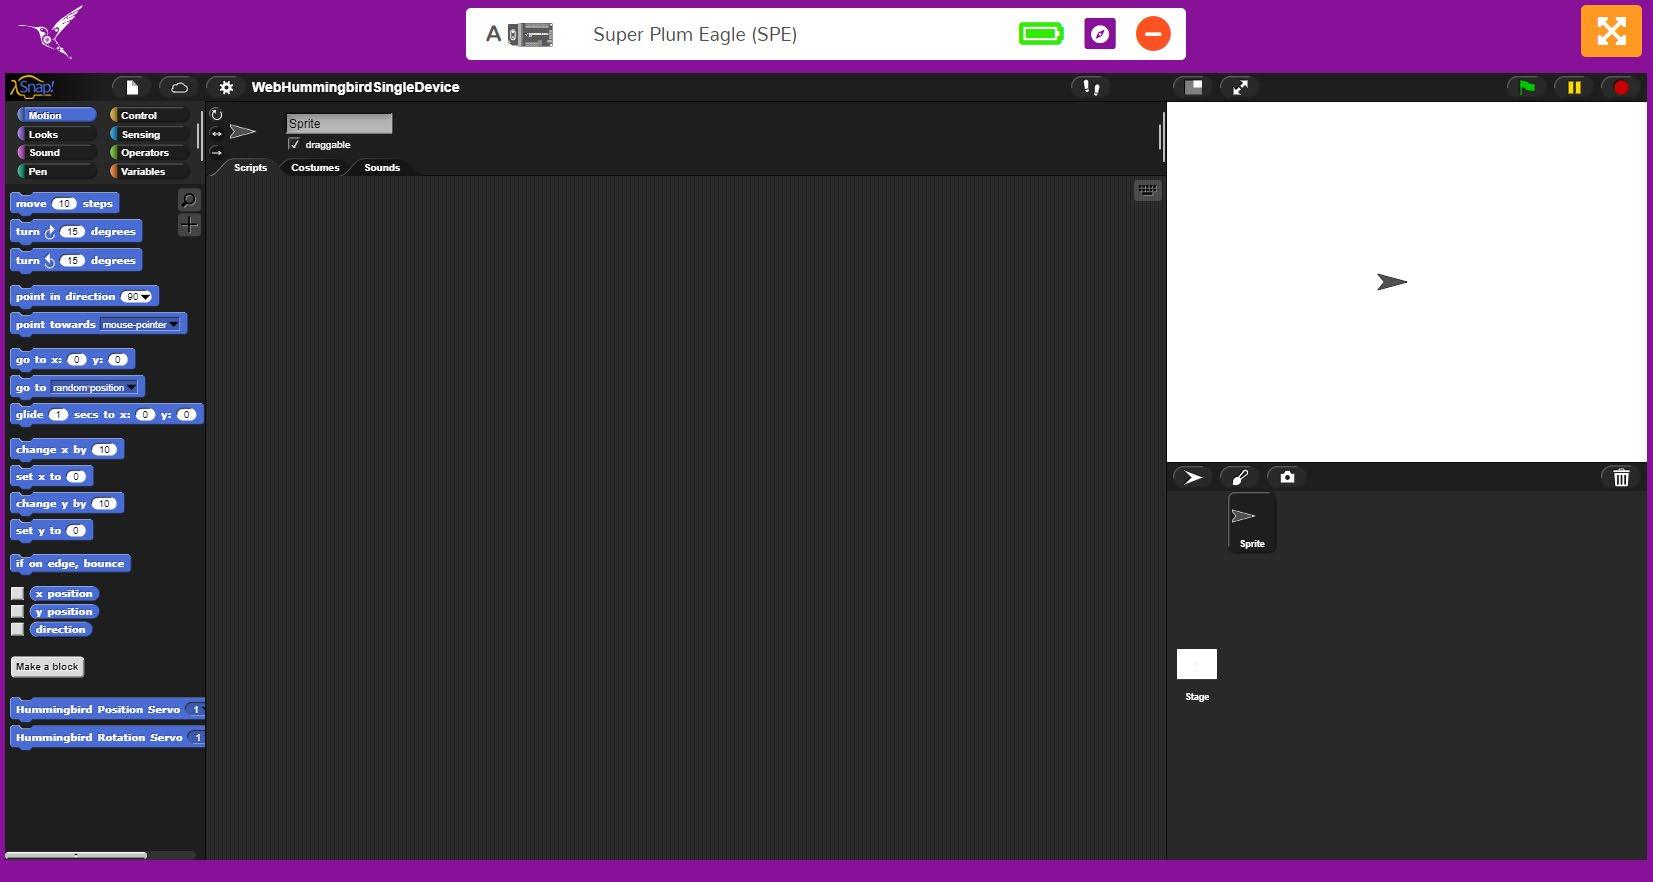
BirdBrain Snap!A Web App from BirdBrain Technologies.
Use Snap! to program your Finch Robot 2.0 or Hummingbird Robotics Kit. Click the link above to access BirdBrain Snap! directly. Create a favorite in your browser for this site so that you can access this site again.
KSB 4 Test the Connection
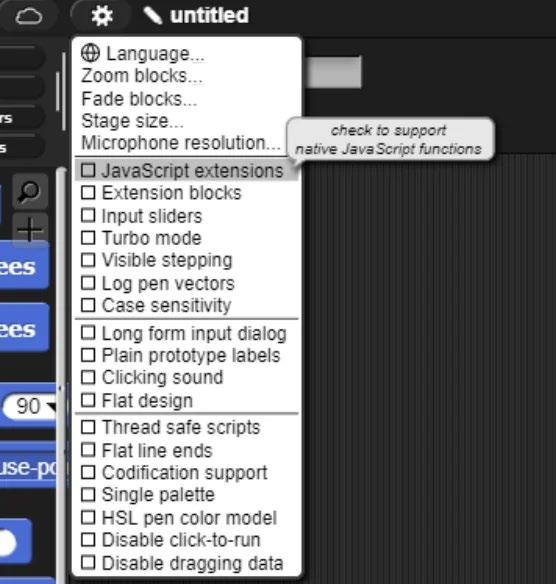
Before starting to code be sure to enable JavaScripts extensions.
Click Settings and select JavaScripts extensions.
View steps 1 to 6 in the link below to use the blocks below and the micro:bit Display block to ensure that your robot is successfully connected to your computer.
https://learn.birdbraintechnologies.com/hummingbirdbit/snap/program/8-1
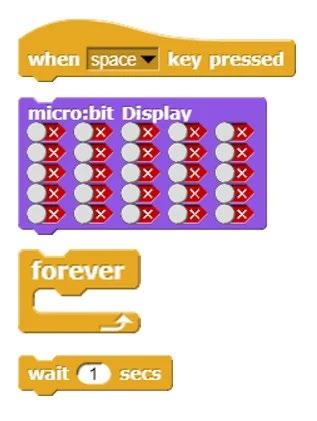
Step 6 challenges you to create a program that shows your own animation. Spend a few minutes thinking about the animation you could create on the micro:bit Display. Create your own animation using at least two different blocks.

Create your own anim ation using at least two different micro:bit Display blocks. You may also find the when space key pressed, forever and wait 1 second blocks helpful when creating an animation.
Take pictures of each of the images created on the display to share with your teacher.
Save your work.
KSB 5 Thinking Like a Computer
“Computational Thinking” is a mindset and a process for problem-solving based on methods from computer science. As each challenge is attempted, it may be helpful to consider the following approaches:
1. Decomposition: Break a complex problem into several smaller problems and work on each piece. Joining the solved pieces together can lead to the solution to the original complex problem.
2. Algorithmic Design: Develop a step-by-step strategy for solving problems. What has to happen first, next and last? Which actions are repeated?
3. Pattern recognition: Look for similarities in actions or objects. Consider how similar problems have been solved previously.Take advantage of the patterns and repetitions.
4. Abstraction: Focus on the important information only, ignoring irrelevant detail. Identify the main problem to be solved.
How does this apply to the Hummingbird Bit environment?
As each small challenge is attempted, keep track of solutions that may be reused later in your design notebook.
For instance, when learning how to make the LEDs blink, think ahead to a project like a stoplight where the LED outputs will be controlled by traffic rules and road conditions.
Test and Evaluate
Finish the sentence : During the “Blink an LED” challenge, I learned to
Did your solution work and meet the design specification? Briefly explain why it did or did not.
You can include a picture of your code and the animation on the micro:bit display.
Additional Stuff
A Computational Thinking assessment guide can be found at:
https://learn.birdbraintechnologies.com/wp-content/uploads/2018/11/CT-AssessmentGuide-HB-101910.pdf