PREPARE HIDEOUT for your

We are thrilled to welcome you to Hideout, where your journey towards creating an exceptional glamping experience begins
At Hideout, we believe in the transformative power of nature and the unique charm of a well-crafted cabin Our cabins are more than just structures; they are gateways to creating unforgettable memories, fostering connections, and discovering the uncharted beauty of the natural world
As you consider becoming a part of our growing community of landowners, we want you to know that Hideout is more than a provider; we are your partners in this exciting venture. We understand the intricacies of creating, launching, and marketing a successful glamping resort. From the craftsmanship of our cabins to the strategic insights of our marketing platform, every aspect of Hideout is designed to ensure your success and the satisfaction of your guests.
Our commitment extends beyond the sale of a cabin We are dedicated to supporting you every step of the way – from setting up your resort to managing bookings and beyond Our online platform simplifies the complexities of running a glamping resort, allowing you to focus on what truly matters – providing an exceptional experience for your guests Joining Hideout means being part of an innovative movement that redefines outdoor hospitality Whether you are a seasoned landowner or new to this venture, we are here to guide you towards realizing your vision of a perfect retreat.
We look forward to embarking on this exciting journey together and witnessing the remarkable experiences you will create for your guests. Welcome to Hideout, where extraordinary adventures await.

NOW YOUR LAND
HAVE A PLAN
DRAFTING LOCATION
PREPARE YOUR LAND
CABIN SITE LAYOUT
THE IMPORTANCE OF ORIENTATION
CONNECTIVITY & ACCESS
BRING IN UTILITIES
PREPARE FOR DELIVERY
LEVELING YOUR CABIN
TIE-DOWN
SET UP YOUR GLAMPING RESORT
OTHER QUESTIONS


We are excited for you and looking forward to helping you make your glamping resort a reality. Before we dive into details, make sure you check the following important steps:
Review local zoning laws and building codes you must comply with
Obtain any necessary permits for construction, land alteration, and utility installation
Ensure compliance with environmental regulations, especially if the site is near sensitive areas
Conduct a safety assessment to ensure the site is free from hazards.
Check your local maps for potential Flood zones and confirm if your property lies within them or not. Consider implementing erosion control measures, especially if the land has been significantly altered.
We are excited for you and looking forward to helping you make your glamping resort a reality. Before we dive into details, make sure you check the following important steps:

Review local zoning laws and building codes you must comply with
Obtain any necessary permits for construction, land alteration, and utility installation.
Ensure compliance with environmental regulations, especially if the site is near sensitive areas.
Conduct a safety assessment to ensure the site is free from hazards.
Check your local maps for potential Flood zones and confirm if your property lies within them or not.
Consider implementing erosion control measures, especially if the land has been significantly altered.
Get a Site plan of your property, pen, paper and let get planning!

Know your property, walk/drive around and familiarize yourself with the areas, flora, type of trees and overall terrain After you are convinced you have a good grasp it is time to get it on paper
Print a copy of your Site plan or satellite image, (we suggest printing in a larger page format like 24"x36"), Lay it out on a table and mark the following:
Identify the Main Street access
Identify Utility Main line paths for water, electricity and sewage (if available or draw them in if they will be installed in the future)
Identify other main features of your land:
Large Trees
Water features (pond, creek, etc...)
Large boulders
Hills or big sloped areas
Are there any other structures/buildings in place? Where are they?
Are there any existing drive paths or walking trails?
Remember to PLAN FOR THE FUTURE:
How many Glamping sites you’d envision having in your land? It is important to plan all potential sites at the beginning so everything is set up for it, even if it is not an immediate plan to expand
*Check a Site Plan example on next page
Main Street Access
Main water line entering the property
Main electrical poles along this line
Existing Vine crops
Existing house
Large Oak tree
Running water creek
Downward sloping hill
Existing main drive path

Based on what you’ve identified already, determine your ideal cabin locations considering the following:
The perfect cabin location will have access to daylight and some shaded areas If shade is not naturally occurring on your land check page XXX for some ideas
The cabin will need a leveled surface to sit on, if you have any naturally flat areas on your land consider using one of those


Each cabin site is ideally connected through drive and walking paths to access the main road When planning location is important to consider any changes in elevation on your land that might make it challenging for guests to move around
Your cabin’s main feature are the large windows, find compelling landscape views to aim these windows at to maximize guest satisfaction


SITE AREA

SITE AREA
SITE AREA
Sun path (direction of sunlight)
Flood Zone area due to existing creek
Potential Site areas: Close to existing drive path
Potential views of the vineyard vines Mostly leveled land
Lightly forested
*for Example purposes only

Once you’ve selected your site location the next step is clean up In general we look to clean up an area big enough for the cabin and some additional area to have an outdoor patio for your cabin’s use
As a first step, familiarize yourself with your local flora, it is a good idea to know what they are and categorize them broadly as follows:
Species Type 1
2
3
Size or Height: how tall can they grow to be?
Leaf Type: are they broadleaf or needleleaf trees? This distinction can be useful for understanding the overall aesthetic and debris they might create.
4.
Deciduous vs. Evergreen: Categorizing trees as deciduous (those that lose their leaves seasonally) or evergreen (those that retain their leaves yearround) can provide insights into the site's seasonal changes and ecological dynamics
5
6.
Fruit-Bearing vs. Non-Fruit Bearing.
Native vs. Non-Native: Categorizing trees based on their native or nonnative status can help assess their ecological impact and inform decisions regarding biodiversity conservation and habitat restoration
7
Aesthetic Value: Trees can be categorized based on their aesthetic value, such as flowering trees, ornamental trees, or trees with vibrant foliage
8
Health and Condition: Categorizing trees based on their health and condition, such as healthy, diseased, or damaged, can inform management and maintenance strategies, including pruning, pest control, and tree removal
9
Age or Growth Stage: Trees can be categorized based on their age or growth stage, such as mature trees, saplings, or seedlings

Once you’ve done your research and you’ve taken care of any trees that are damaged or have pests, etc. It is time to clear up an area for your cabin.
You’ll want to leave any larger / mature trees untouched to provide some shade and natural beauty. Some lower branches might need trimming. Clear up any smaller trees, bushes and weeds. Consider filling in any holes or too steep areas to provide walkable areas around your cabin
See an example bellow:

An easy way to find out is to consider how far apart the units should be. We suggest around 200-300FT radius between sites.

Consider several steps:
It is beneficial to find a leveled area to set your cabin at, if there are no naturally leveled zones in your land, you’ll need to create one
Note the leveled area should be larger than the cabin footprint We suggest allowing enough space for one parking spot at the back of the cabin and some outdoor patio space for the guests to enjoy a fire-pit, chairs, grill, or similar. (See nest page for some Layout examples
Once you’ve determine the limits of your cabin area, proceed with some landscape clean up. (As described in previous page)
Finally, fill in the area with loose gravel or small stones.

Based on the overall length of the property area we’ve identified as suitable cabin locations, here is an example of 6 initial sites
All of these have the advantage of being close to the vineyard, so potential views of it are a plus of these sites, they are outside the flood zone and can have some landscape areas in between to provide guests some privacy.
*for Example purposes only


*for Example purposes only
There are different Layouts you can use depending on your land and preference.
We would suggest an allowance of minimum 600 square feet of total footprint, this includes the Cabin area and outdoor patio for your guests (Some examples to consider on the right)
Typically the patio area acts as an extension of the cabin, Hideout suggests ar least considering to provide each cabin site with the following:
Pic-nic style table
Lounge chairs
Fire fit and/or grill
Other things considered “nice to have” might be, flower pots/planters, an outdoor bath/jacuzzi, hammock

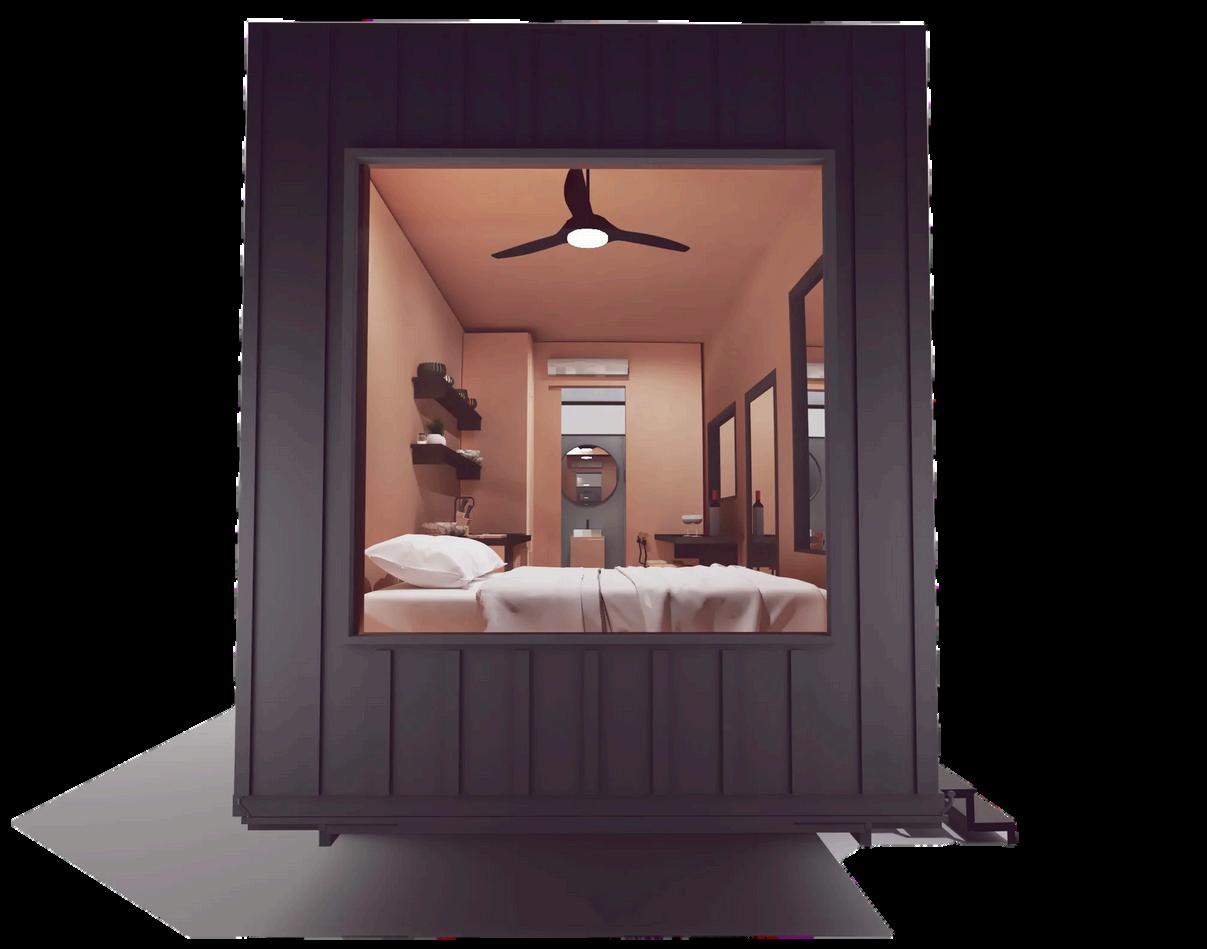
LARGE FRONT WINDOW, AND COMPLETELY BLIND LEFT SIDE
MAIN WINDOWS ON RIGHT SIDE AND FRONT
BACK HIGH WINDOW AT THE BATHROOM
Your HIDEOUT features one large main window that can be considered the most photogenic spot As such we strongly suggest orienting the main window towards a compelling view, some examples might be a heavily wooded area, long hill view, aimed towards the sunset, towards a vineyard

Vineyard views
PARKING
*In general what you want to avoid is the cabin’s main window to look at other cabins, drive paths and surrounding streets
Keep in mind your cabin is the perfect set up to disconnect from the world and enjoy nature, so providing a sense of privacy is key for the experience
See some orientation examples on the left


It is important to create distinct paths for your guests to go around Make sure you create drive paths for vehicles to get from the property’s main street entrance to the Cabin, consider the following:
Paths do not need to be leveled or straight, but they need to be well defined and drivable. (your guest might not all arrive in 4X4 vehicles or trucks, make sure a regular compact car can drive through).
Provide signage. Place clear signs along the path to direct guests to the different cabins and other amenities around the property. (HIDEOUT can provide Templates for this, ask us!) If there are any other structures around the property that will be accessible to guests make sure to connect those with the cabins. (this can be the drive paths or specific walking paths)


It is ket to provide clear directions to your guest so consider placing signage along the main and secondary paths to direct them to all amenities on your land
We provide signage Templates for each Outpost, we’ll send you a Google Drive link alongside this document were you can find those
Trace potential drive paths to each cabin from the main driveway. Ideally these paths run along the back side of the cabins, so your guests dont see any cars approaching from any of their cabin windows Parking spots for each cabin should also be located at the back (as per the diagram showed on the orientation page) Drive paths should be at least 12FT wide and clearly marked using loose gravel or similar
Potential walkways can be made more organic and follow the natural landscape To clearly mark these consider cleaning up plants and shrubs and creating a clear path amongst the wilderness.


The cabin is set up with a 50amp electrical panel
All you need is for an electrician to set up an electrical panel with a connector on site to plug your unit to A 50amp connector will have 4 prongs, as the image on the right

The electrical connection on your cabin is located under the trailer, as marked in the diagram above and seen on the photo to the left
There are two options to connect your unit into the electrical hook up, you should confirm with your electrician which one is best suited for you:
Option 1 - Set up a panel with a 50 amp connector then you’ll need a 50 amp power cord

Option 2 - Set up a panel with a standard 15 amp connector Then you’ll need a 50 amp/15amp adapter and you can plug any standard outdoor electrical cord


NOTE: the Water Heater requires a minimum water pressure of 45 PSI to function properly Connection to a county water line should provide enough pressure. When using a water tank, consider 45 PSI min when selecting a water pump for your system.

Your Cabin uses propane gas for the Kitchen stove and water heater The connection to a commercial tank can be made using a hose and a 1/2 female3/8 male adapter. (Included on this Amazon link and sold by Home depot here)
For connection to water supply all you need is a standard water hose connector
Ask a plumber to set up a water hose nozzle connected to your main water line at each cabin site and you’ll be able to connect with HIDEOUT using an outdoor hose.
We suggest asking the plumber to include an emergency shut-off valve in your water line, in case of any water maintenance or issues, you’ll be able to shut down the water supply
All you’ll need is a hose, we recommend you invest in a heavy duty one so it is able to remain connected all year long If your site experiences extreme freeze conditions for part of the year consult with your local plumber in the best alternative to insulate your line and protect it from freezing

Your cabin will be delivered with the proper preparations to set up a semi permanent Sewage connection to your on-site septic
A plumber will need to add the final PVC connection to your sewage line. Note this connection is done with a non flexible PVC pipe, since your cabin is meant to stay in place for a while If you ever need to move it the connection can be taken down and set-up at the new location
Make sure you have a shut off valve for Water and Septic, so you can shut off in case of emergency or if you need to move the unit. Same for electrical, make sure to add a breaker switch so you can turn off if needed
We’ve set up an Amazon list with the general parts you’ll need to complete your installation, you can consult it here:
https://wwwamazoncom/hz/wishlist/ls/27X3P OZDMRRIP?ref =wl share
Note: you don’t need to use these products specifically (we are not making any commissions here), it is just meant to help you know what is needed.

We love the natural look of untouched wilderness, however to maintain your cabin sites free of unwanted weeds you might want to employ a landscaping company to come by and take care of that
We’ve already noted the importance of creating paths to and from your cabins, you might also want to consider adding lighting to these paths so they can be safely travelled after sunset. There are multiple alternatives and products to achieve this If you want help, let us know, we are happy to provide some options
When your delivery date is approaching, we suggest the following:
Set up markers or guideposts for the exact placement of the cabin
Ensure all necessary tools and equipment for the cabin installation are available and ready

Delivery windows for your cabin are between 9am and 4pm. Please plan for you or someone in your team to be available on site at the time of delivery.
We’ve emphasized the importance of having your cabin site ready, however, you should also make sure the path to the cabin site is prepared for the tow truck and cabin to be able to go through it
Clean up any tree branches that will be in the way ( consider the unit is 13.5FT tall, so clear up branches up to 14FT high)
Take out any big boulders and determine the best path for the tow truck to travel Ideally the most leveled option and with less holes and loose stones
Make sure you have the delivery driver’s number, any final coordination should be handled directly Let us know if you need help!

Once cabin construction is finished we will reach out via email and give you a call to schedule your delivery.

When you hear from us it means the unit has been inspected, certified and is ready to go.
The cabin will be shipped via our shipping partner and will be towed to your site.


If you decide to move your Park Model after it's been set up and delivered, just make sure to follow the local rules and guidelines for moving homes Some Tiny Homes can be towed without needing any special permits or a Commercial Driver’s License (CDL) But if you're thinking about moving your unit, it's all on you to understand and follow all the local, state, federal, and road rules
When it comes to towing, be sure you've got the right gear and someone who knows what they're doing behind the wheel. The weights listed in the table below are just for empty homes, so keep in mind that yours might weigh differently depending on what's inside.


2.
Gather Equipment: You'll need a bubble level (preferably a long one), leveling blocks or wedges, a tape measure, and possibly a shovel or rake for minor adjustments to the ground.
1. Position the Trailer: Park the trailer in the desired location, ensuring it is on a stable and relatively flat surface.
Assess Levelness: Place the bubble level on a flat surface inside the tiny home, such as a countertop or floor, to determine which direction the trailer needs to be leveled Check both lengthwise and widthwise to ensure accuracy
3. Chock Wheels: Secure the trailer in place by placing wheel chocks on both sides of the wheels This prevents the trailer from rolling during the leveling process 4
Adjust Trailer Height: Use leveling blocks or wedges to raise or lower the trailer's wheels as needed to achieve levelness Start with the lowest side and gradually build up the blocks or wedges until the bubble level indicates that the trailer is level 5
6
Check Stability: Once the trailer is leveled, carefully test its stability by gently pushing on different areas of the structure Ensure that it feels solid and does not rock or sway excessively.
Fine-Tune Levelness: Make any necessary adjustments to achieve precise levelness. This may involve adding or removing leveling blocks or wedges, or making minor changes to the placement of the trailer.
8.
7. Secure Trailer: Once the trailer is leveled, securely anchor it to the ground using stabilizing jacks or tie-downs to prevent movement or shifting.
9
Test Doors and Windows: Open and close doors and windows to ensure they operate smoothly without sticking or jamming, which can indicate that the trailer is not level
Regular Maintenance: Periodically check the levelness of the trailer, especially after heavy rainfall or other events that may affect the ground's stability
Your cabin is going to be delivered to you with 4 mounting jacks already in place: two scissor jacks at the hitch side and two crank jacks at the opposite side. (See diagram below).


Two scissor jacks are mounted to the underside of the trailer at these locations. To level use a drill or the included rod to open up the jack.

Two crank jacks mounted to the front of the trailer at these locations. To level use the handle to expand the height.

Since different site conditions might have different leveling needs, we suggest having a few square/rectangular stones that could help facilitate some leveling.
You can get these in any Home Depot or similar, an example below:

https://www.homedepot.com/p/12-in-x-12in-x-1-5-in-Pewter-Square-Concrete-StepStone-71200/100333077

Tie-downs are typically comprised of sturdy straps, cables, or chains, along with anchors or stakes that are securely fastened into the ground The purpose of RV tie-downs is to prevent the Tiny House/cabin from shifting, moving, or tipping over due to strong winds, seismic activity, or other external forces
Tie-downs might be necessary for several reasons:
1

2
Safety: Securing a Tiny homes with tie-downs enhances safety for occupants and nearby individuals. It helps prevent accidents or injuries that could result from the home tipping over or shifting unexpectedly
Stability: RV tie-downs provide stability and peace of mind, especially during adverse weather conditions such as high winds or storms. They help keep the Tiny home firmly anchored to the ground, reducing the risk of damage or displacement
3
Compliance: Some jurisdictions or camping sites may require RVs to be properly secured with tiedowns as a safety regulation. Compliance with these requirements ensures legal and regulatory adherence
4
Long-Term Parking: For Tiny homes parked in one location for an extended period, such as seasonal or permanent residences, tie-downs offer added stability and security against shifting ground conditions or natural events
HOW MANY DO I NEED?
At minimum consider adding Tie-down points per the diagram on the left
Tie-down your cabin using some ground anchors and hooks, similar to these:


If your cabin is located in an area subject to strong (hurricane) winds, earthquakes or other extreme weather, we’d suggest you add stronger anchor points, such as concrete foundations with mounting hooks to stabilize your unit against adverse weather. ( See an example of that set up below)


In parallel to Site planing there are a few other details to take care of to make sure your Glamping Resort is ready to be operational once your unit arrives
If you are using Hideout to manage the cabin, we provide nightly coverage for up to $1 million protection against damages and bodily injury lawsuits from travelers.
This program only covers active stays and should be treated as supplemental to your own homeowners / property owner insurance Contact us for more details
Consider adding general amenities for your guests to enjoy, some examples could be adding a place to gather, be social and maybe play some table games or even adding an outdoor court to play sports (soccer, volley ball, tennis, pickle ball, etc). This will improve your overall site appeal.
Once your cabins are delivered and connected you can start booking guests as soon as you want In preparation for that it is a good idea to set up the cleaning service, determine who will be in charge for the turn around between guests and create a cleaning schedule Hideout can help with some of the online management and scheduling, ask us how!


The "Prepare for your Hideout Cabin" document provided is intended solely as a guide for owners preparing to manage their glamping cabins. While every effort has been made to ensure the accuracy and usefulness of the information contained herein, it is important to note that this document is not a legally binding agreement or contract.
The information provided in this document is subject to change without notice, and we cannot guarantee its completeness or accuracy at all times Owners are encouraged to use this document as a helpful resource to enhance their management of our cabins, but they should also rely on their own judgment and discretion when making decisions or taking actions based on the information provided
Furthermore, the contents of this document do not constitute legal advice or create any legal obligations between owners and Hideout or its affiliates Owners are advised to review and adhere to any official policies, terms, and agreements provided by Hideout or its representatives.
By using the information in this document, owners acknowledge and agree that Hideout and its affiliates shall not be liable for any direct, indirect, incidental, special, or consequential damages arising out of or in any way connected with the use or reliance on this document
Thank you for understanding that this document is meant to serve as a helpful tool for managing your Hideout cabins, and we look forward to supporting you in providing enjoyable and memorable experiences for your guests