12 minute read
OPERATION


Read and Observe All Warnings Before operating this vehicle.
Before starting. be sure all preliminary service is done and that you are familiar with the controls and know how to stop the vehicle.
OPERATOR QUALIFICATIONS
Only trained and authorized operators shall be permitted to operate this vehicle. Operators of this vehicle shall be qualified as to visual, auditory, physical, and mental ability to operate the vehicle.
OPERATOR TRAINING
An effective operator training program should center around user company's policies, operating conditions, and vehicle type. The program should be presented completely to all new operators and not condensed for those claiming previous experience.
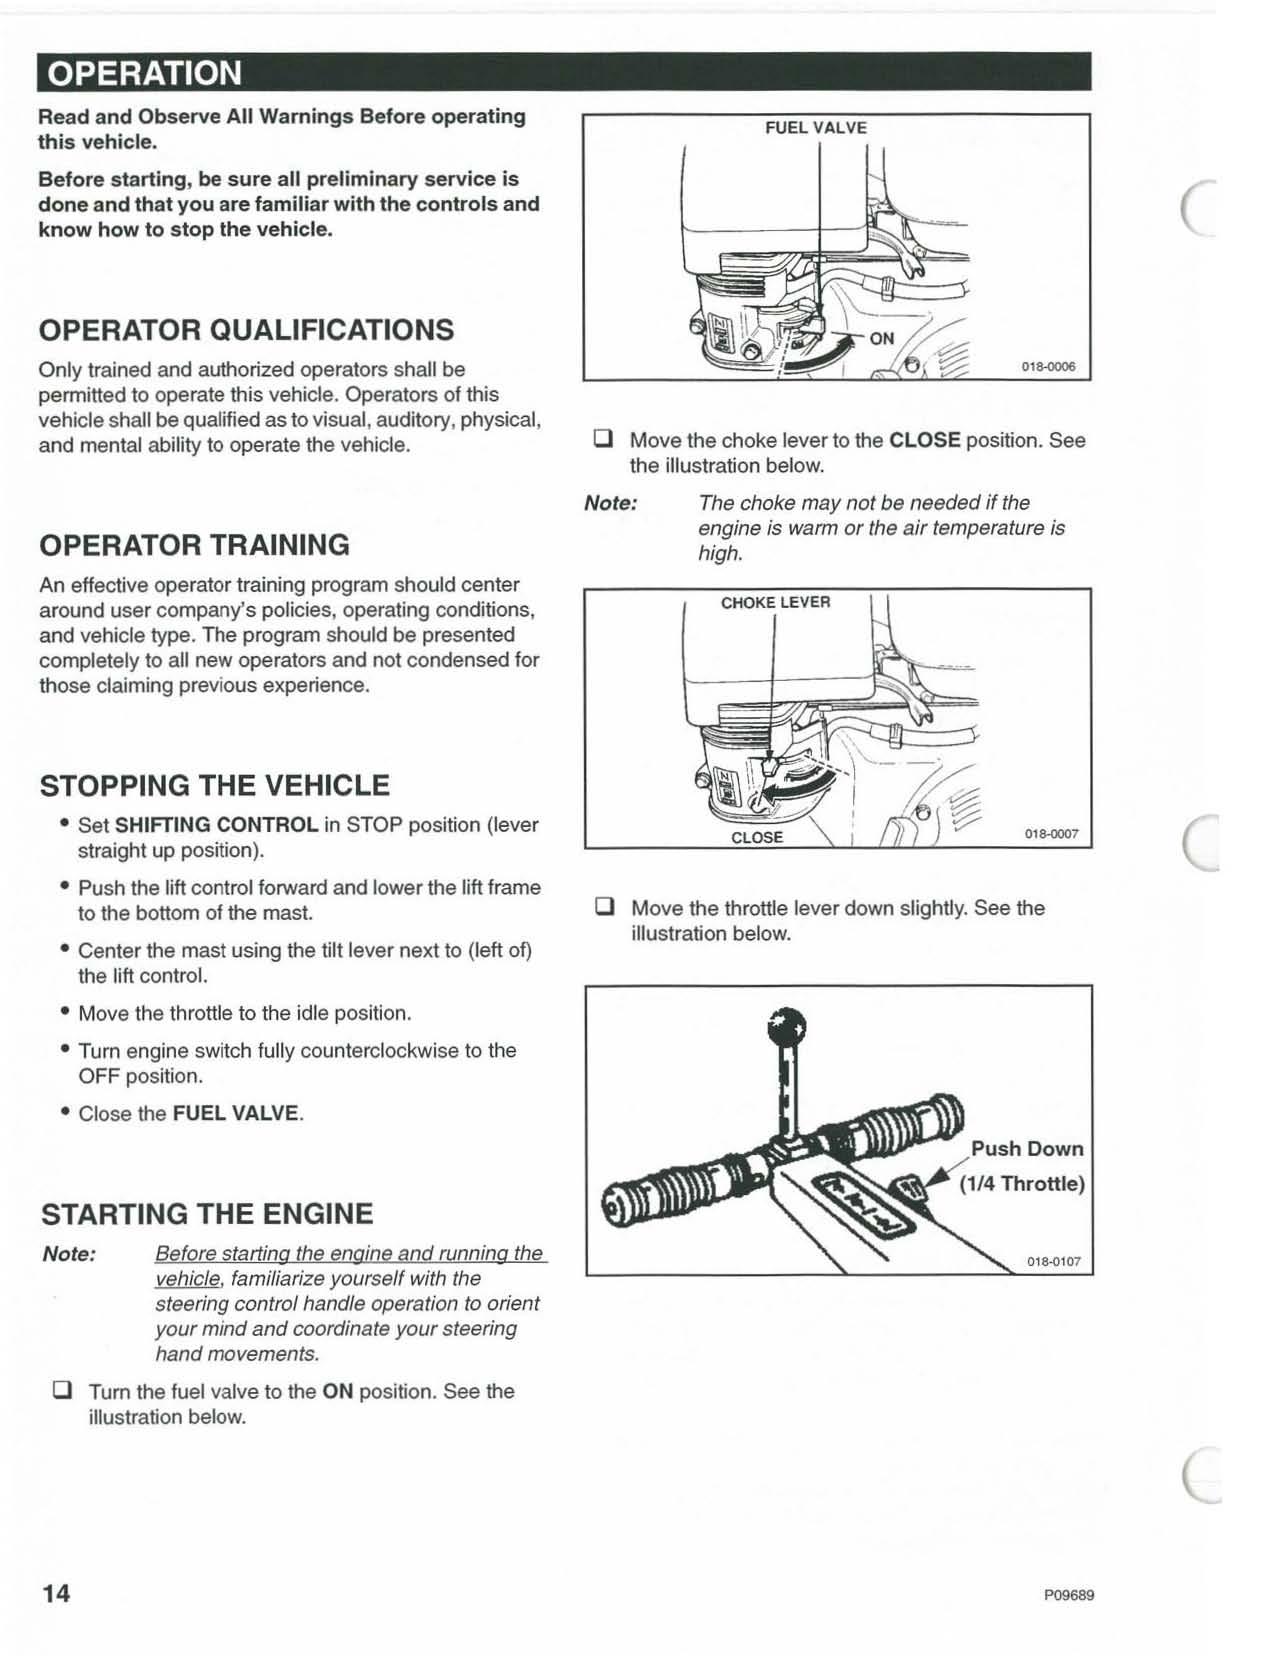
oMove the choke lever to the CLOSE position. See the illustration below.
Note: The choke may not be needed if the engine is warm or the air temperature is high.
LEVER
STOPPING THE VEHICLE
• Set SHIFTING CONTROL in STOP position (lever straight up position). • Push the lift control forward and lower the lift frame to the bottom of the mast.
• Center the mast using the tilt lever next to (left of) the lift control.
• Move the throttle to the idle position. • Turn engine switch fully counterclockwise to the
OFF position. • Close the FUEL VALVE.
STARTING THE ENGINE
Note: Before stat1ing the engine and running the vehicle. familiarize yourself with the steering control handle operation to orient your mind and coordinate your steering hand movements. o Turn the fuel valve to the ON position. See the illustration below.
018-0007
oMove the throttle lever down slightly. See the illustration below.
Down
oStart the engine. •
Note:
With recoil starter: Tum the engine switch to the ON position. Pull the starter grip lightly until resistance is felt, then pull briskly.
DO NOT af/ow the starter grip to snap back against the engine. Return it gently to prevent damage to the starter.
ACAUTION
• DO NOT crank engine continuously for more than 5 seconds at a time or starter motor damage may occur.
• A 60 second cool down period must be allowed between cranking attempts if the engine does not start. Failure to follow these guidelines may result in bum-out of the starter motor.
• In the event of false start, that is, if the engine develops sufficient speed to disengage the starter, but fails to continue running, the engine must be allowed to come to a complete stop before a restart attempt is made. (If starter is engaged while flywheel is still rotating, the starter pinion and flywheel ring gear may clash, resulting in damage to the starter.)
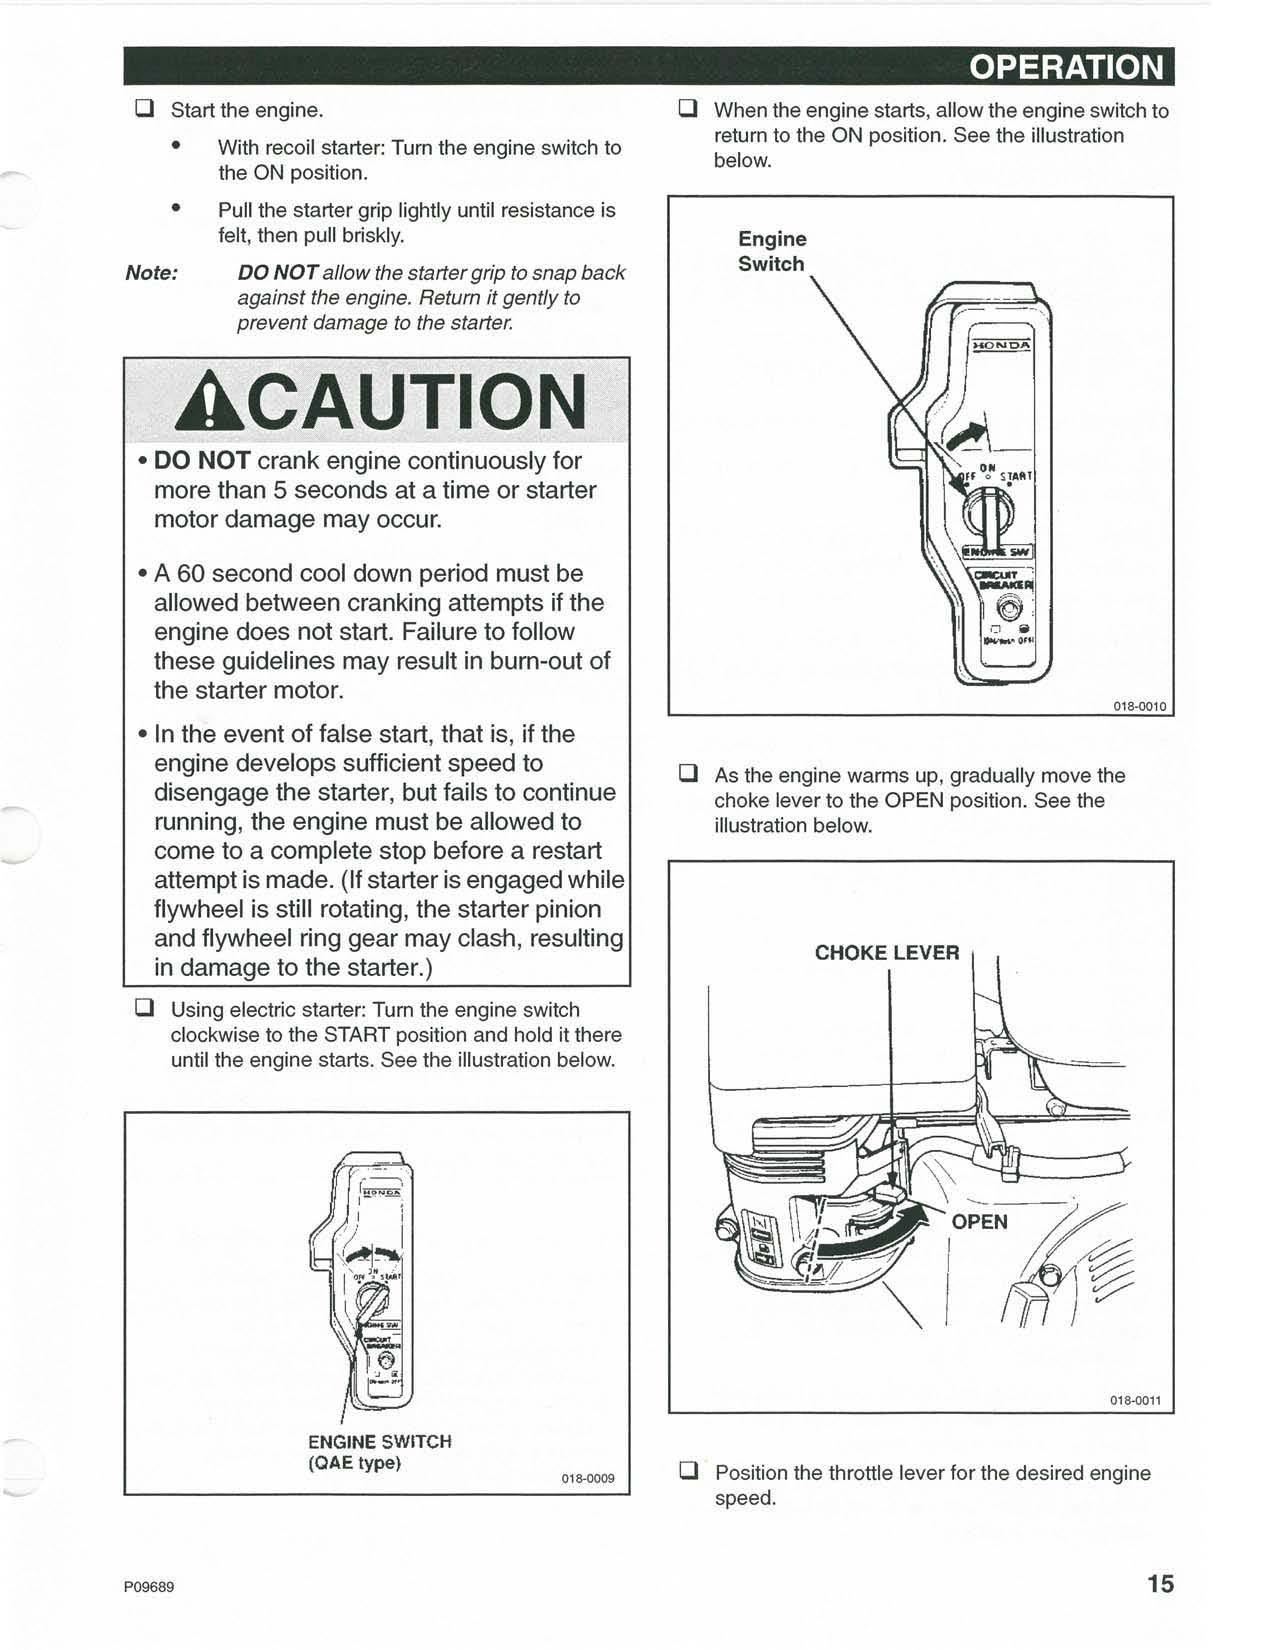
oUsing electric starter: Tum the engine switch clockwise to the START position and hold it there until the engine starts. See the illustration below.
oWhen the engine starts, allow the engine switch to return to the ON position. See the illustration below.
Engine Switch
@o • _ ..
018-0010
D As the engine warms up, gradually move the choke lever to the OPEN position. See the illustration below.
CHOKE LEVER
6 , .
ENGINE SWITCH (OAE type)
018-0011
D Position the throttle lever for the desired engine speed.
JUMP STARTING PROCEDURE (FOR VEHICLE WITH A DEAD BATTERY)
ACAUTION
• Improper jump starting procedures can cause an explosion resulting in personal injury.
• Sparks near batteries can cause explosions • DO NOT allow jump cable ends to touch each other or the vehicle.
• Battery acid can cause personal injury if it contacts skin or eyes. ALWAYS wear eye protection when jump starting a vehicle. • ALWAYS connect battery positive (+) to battery positive (+) and battery negative (- ) to battery negative (-). • This vehicle has a 12 volt starting system.
Use the same voltage (12 volts) for jump starting. Use of higher voltage can damage the electrical system. • NEVER charge a frozen battery.

• Move the boost start vehicle (or auxiliary power source) close enough to the stalled vehicle for the cables to reach without allowing the vehicles to touch.
• On the stalled vehicle, place the vehicle Direction
ControllShifting Control into STOP and tum the ignition switch to OFF. • Unlatch engine compartment cover. Lift and prop open cover. • Connect the positive (+) jumper cable to the positive (+) cable terminal of the discharged battery on the stalled vehicle. To expose the battery post and cable clamp lift the rubber boot and slide it off the battery clamp and onto the battery cable.
Ensure a solid connection. DO NOT allow positive cable clamps to touch ANYTHING other than the positive battery terminal.
• Connect the other end of the positive (+) jumper cable to the positive (+) terminal of the boost battery (or auxiliary power source). • Connect one end of the negative (-) jumper cable to the negative (-) terminal of the boost battery (or auxiliary power source). • Make the final connection of the negative (-) jumper cable to the frame of the stalled vehicle away from the battery, fuel tank, hydraulic lines, and moving parts.
• Turn the ignition switch of the disabled vehicle to
ON.
• Start the engine on the boost vehicle or energize the auxiliary power source . • Wait at least two minutes for the battery in the stalled vehicle to partially charge. • Attempt to start the stalled vehicle. • Immediately remove the negative cable from the frame of the weak battery vehicle after the engine starts. Then, remove the positive cable from the battery. • Remove prop from cover; lower cover and snap the two cover latches.
TO OPERATE
AWARNING
• Before starting the engine and attempting to operate the vehicle for the first time, review the warnings and controls section of this manual. Know how to stop travel of the vehicle if you are an inexperienced operator.
• Operation of the vehicle at full throttle should only be attempted after complete familiarity with all operations. ALWAYS exercise caution and good judgment while running this equipment.
• Let engine warm up before placing under load. • Open throttle about 1/4 of the way. With both hands grasping the handles, rotating the wrists up produces travel forward. Rotating the wrists downward produces travel backward. Stop is achieved when the shift control is straight up. The directional control assembly, when no force is applied, is spring loaded to default into the STOP (stop travel) position when you are in either
FORWARD or REVERSE.
• Drive motor in STOP is the brake on this vehicle.
When the drive motor stops turning the single rear drive wheel axle leaves the wheel capable of rolling about 1IB-tum.
• In an emergency, the vehicle can be stopped by reversing the direction of the drive motor. • To shut engine off push throttle control (located on the engine) toward front of vehicle and turn engine switch to OFF (counterclockwise).
ADJUSTING THE FORKS
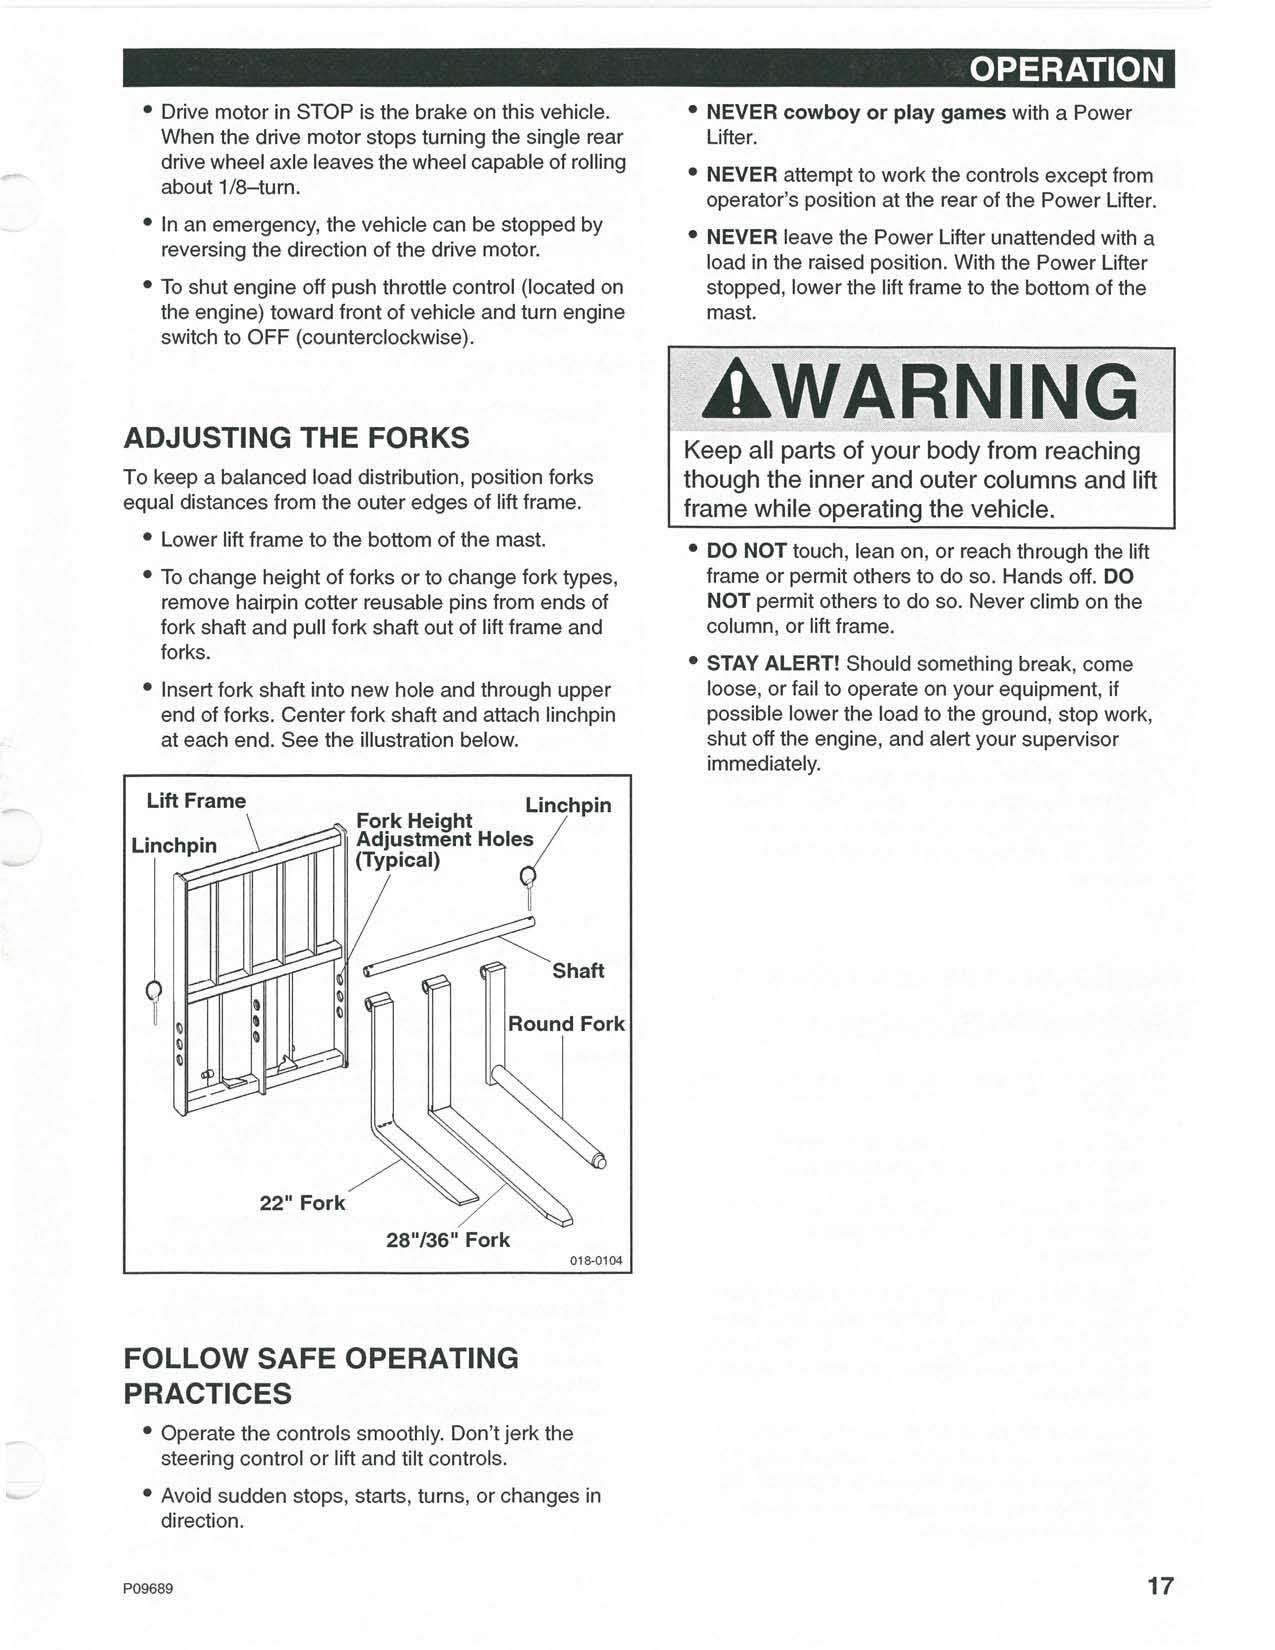
To keep a balanced load distribution, position forks equal distances from the outer edges of lift frame. • Lower lift frame to the bottom of the mast.
• To change height of forks or to change fork types, remove hairpin cotter reusable pins from ends of fork shaft and pull fork shaft out of lift frame and forks.
• Insert fork shaft into new hole and through upper end of forks. Center fork shaft and attach linchpin at each end. Lift Frame See the illustration be Fork Height low. Linchpin t r'" Adjustment (Typical) Holes • NEVER cowboy or play games with a Power
Lifter.
• NEVER attempt to work the controls except from operator's position at the rear of the Power Lifter. • NEVER leave the Power Lifter unattended with a load in the raised position. With the Power Lifter stopped, lower the lift frame to the bottom of the mast.
AWARNING
Keep all parts of your body from reaching though the inner and outer columns and lift frame while operating the vehicle.
• DO NOT touch, lean on, or reach through the lift frame or permit others to do so. Hands off. DO
NOT permit others to do so. Never climb on the column, or lift frame.
• STAY ALERT! Should something break, come loose, or fail to operate on your equipment, if possible lower the load to the ground, stop work, shut off the engine, and alert your supervisor immediately.
Round Fork
22" Fork
28"/36" Fork
01!K1104
FOLLOW SAFE OPERATING PRACTICES
• Operate the controls smoothly. Don't jerk the steering control or lift and tilt controls. • Avoid sudden stops, starts, turns, or changes in direction.
WHEN PICKING UP THE LOAD ...
• If possible, plan to load, unload, and turn on flat, level ground. If not level it is NOT recommended to use this vehicle to pick up a load. There is danger of tipping the load if the load is raised. • Be sure there is enough clearance overhead and all around for lifting and traveling. Watch the front and side clearances when turning. • If loads are not on pallets and are to be handled several times, place stacking blocks under loads. • Slide the forks to the widest position on the fork shaH or the widest position of the pallet. ALWAYS center the forks in the lift mast. 00 NOT attempt to use the forks in an offset manner as lifting the load may cause the vehicle to tip. • Inspect load to be lifted. Approach the load slowly and squarely with fork tips straight and level. If necessary, adjust pallet forks. Travel slowly forward and engage load. Position the load equally on both forks. Travel forward until load touches the lift frame.
• Tilt the forks back to position the load for travel, then lift the load only enough to clear obstacles.
Avoid erratic stops. Be sure there is sufficient clearance overhead and around for lifting and traveling.
TRANSPORT THE LOAD SAFELY
WHEN TRANSPORTING THE LOAD ...
• Keep the forks tilted back and the load close to the ground.
• Slow down for turns, ramps, dips, uneven or slippery surfaces and in congested areas. • Keep the load as low as possible. Carry the load no higher than necessary to clear ground obstructions.
• Where the load will obstruct the operator's vision, it is recommended that the vehicle be operated in
REVERSE, looking backwards in the direction of travel. Travel at a slower speed and get someone to direct you. • Avoid excessively steep slopes or unstable surfaces. If you must drive on a slope, keep the load low and proceed with extreme caution. DO
NOT, under any circumstances, drive across excessively steep slopes.
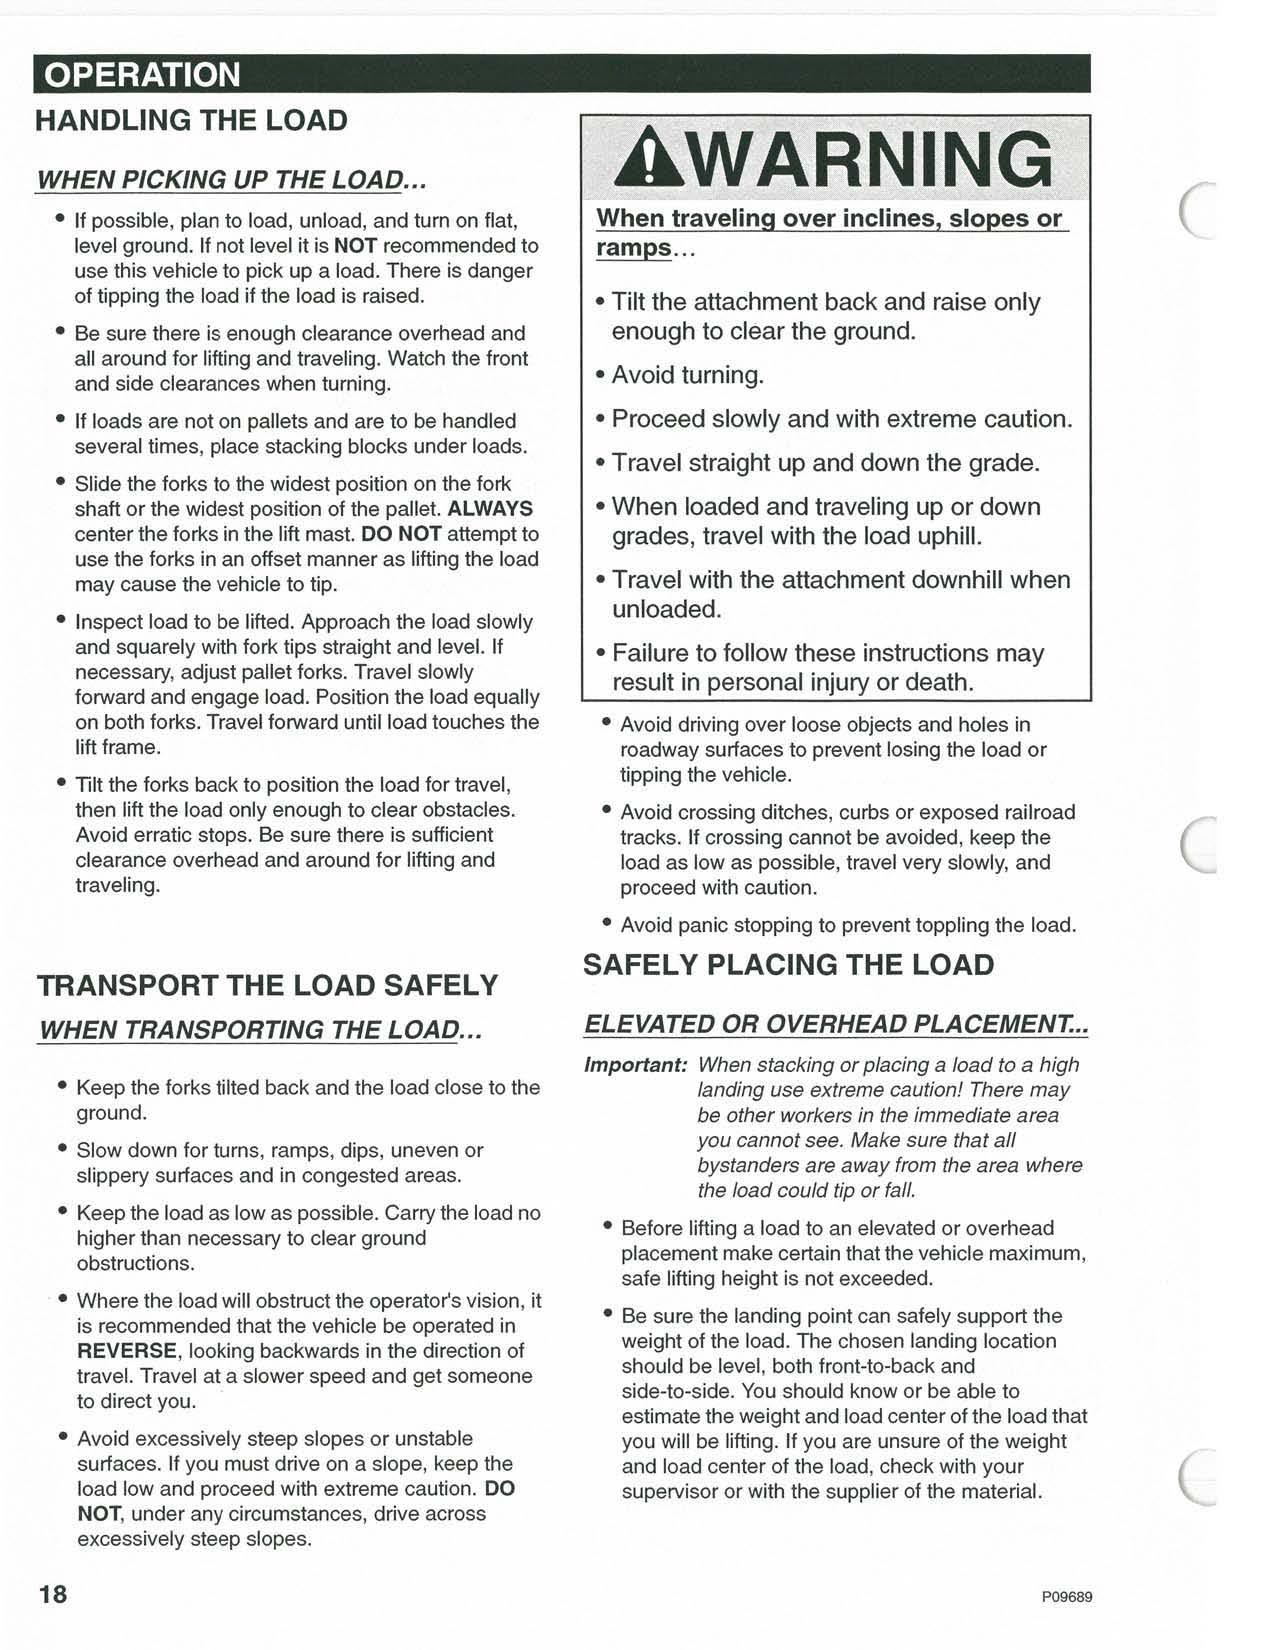
AWARNING
When traveling over inclines, slopes or ramps ...
• Tilt the attachment back and raise only enough to clear the ground. • Avoid turning. • Proceed slowly and with extreme caution. • Travel straight up and down the grade. • When loaded and traveling up or down grades, travel with the load uphill. • Travel with the attachment downhill when unloaded.
• Failure to follow these instructions may result in personal injury or death.
• Avoid driving over loose objects and holes in roadway surfaces to prevent losing the load or tipping the vehicle. • Avoid crossing ditches, curbs or exposed railroad tracks. If crossing cannot be avoided, keep the load as low as possible, travel very slowly, and proceed with caution. • Avoid panic stopping to prevent toppling the load. SAFELY PLACING THE LOAD
ELEVATED OR OVERHEAD PLACEMENT...
Important: When stacking or placing a load to a high landing use extreme caution! There may be other workers in the immediate area you cannot see. Make sure that all bystanders are away from the area where the load could tip or fall. • Before lifting a load to an elevated or overhead placement make certain that the vehicle maximum, safe lifting height is not exceeded. • Be sure the landing point can safely support the weight of the load. The chosen landing location should be level, both front-to-back and side-to-side. You should know or be able to estimate the weight and load center of the load that you will be lifting. If you are unsure of the weight and load center of the load, check with your supervisor or with the supplier of the material.

• Drive as close as possible to the landing location.
Check for clearance of front frame assembly and wheels. Approach very slowly with the load as low as possible. It is possible that ground clearance may be inadequate to drive close enough to safely lower the load. 00 NOT attempt to place the load under such conditions.
• The inner and outer masts may not extend high enough to safely place the load. DO NOT attempt to place the load under such conditions. • DO NOT raise the load for placement if the forks are tilted to one side. If the vehicle cannot be positioned so the load is level before lifting, reposition the vehicle. The likelihood for vehicle overturn is greatly increased if the load is not level before lifting. • Slowly and carefully raise the load. If there is any indication of instability during the lift (such as movement, leaning, swaying), stop immediately, lower the load, move the vehicle to a more stable, level position. As lift height increases, your depth perception decreases. Placing the load safely at a high elevation may require signaling by a second person. • When the load is slightly higher than the landing point, SLOWLY stop the lift.
AWARNING
DO NOT ram the hydraulic lift cylinder to the end of its stroke. The jolt could spill the load resulting in death or serious injury.
• If there is any indication that the landing point cannot handle the weight of the load, pick the load back up, lower it to the ground and lift a lighter load.
• Lower the load slowly to place it and relieve the weight from the forks. Slowly back away from the load and stop to lower the forks BEFORE moving the vehicle.
• The vehicle can now be moved from the landing location to continue work.
LIFTING PERSONNEL
Compact Technologies strongly recommends that you DO NOT use a Power Lifter as a personnel lift. It is designed for material handling ONLY.