
2 minute read
Coolant pump, changing

from Volvo Penta TAD1240GE TAD1241GE-VE TAD1242GE-VE, TWD1240VE Group 22-26 Workshop Manual_381897674

Open the main switch(es) and check that there is no power to the engine.
Drain the cooling system, see “Cooling system, drain-
NOTE: Lubricate the sealing rings to make it easier to fit the gear unit in the coolant pump.
12
Lubricate the sealing rings with a thin layer of engine oil and install the new coolant filter. See installation instructions on the filter canister.
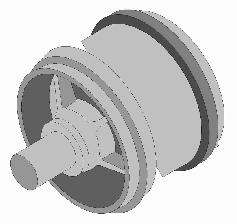
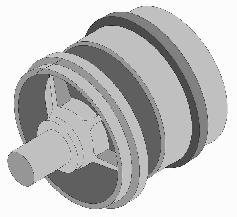
Install the coolant pump.
NOTE: Be sure that the coolant pump is correctly seated and that all bolts are screwed in before being tightened.
13 (TAD)
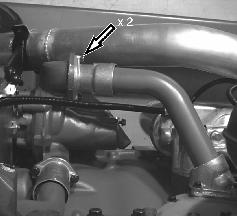
Reinstall the radiator hose between the coolant pump and the radiator.
13 (TWD)
16
18
Add coolant according to specifications. See “Technical data TAD1240GE, TAD1241GE/VE, TAD1242GE/VE, TWD1240VE”.
NOTE: Mix the correct volume in advance to be sure that the system is filled.
19
Start the engine and check for leaks.
Coolant filter, changing
NOTE: Turn the valve at the coolant pump 90 degrees before removing the coolant filter. Do not forget to turn the valve back after the new coolant filter has been installed.
See “Coolant pump, changing” steps 6 and 12
Piston thermostat, changing
Drain the cooling system, see “Cooling system, draining”.
Remove the thermostat housing and take out the thermostat.
NOTE: Two bolts must be removed from the exhaust manifold in order to be able to remove the thermostat housing. 3
Clean all contact surfaces.
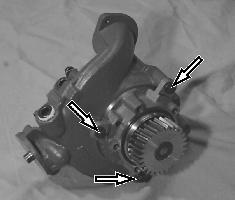
Install a bolt (M8 x 20) with nut, washer and spacer between the flange of the exhaust manifold and the finished surface of the thermostat housing. Tighten the nut so that the spacer braces the thermostat housing against the gasket for the piston thermostat. Then tighten the thermostat housing bolts in the order shown in the picture. Remove the brace bolt.
6
Reinstall the two bolts on the exhaust manifold.
7
Add coolant according to specifications. See “Technical data TAD1240GE, TAD1241GE/VE, TAD1242GE/VE, TWD1240VE”.
NOTE: Mix the correct volume in advance to be sure that the system is filled.
8
Piston thermostat, functional check
1
Drain the cooling system, see “Cooling system, draining.”
2
Start the engine and perform functional and leakage checks.
Remove the piston thermostat, see “Piston thermostat, changing.”
3
Place the piston thermostat in a large pan of water and heat it to the temperature at which it should open: TAD 1240-42GE, TAD1241-42VE at 82° C (187° F) and TWD 1240VE at 75° C (165° F).
4
If the piston thermostat does not open at the proper temperature, replace it with a new one.
Drive belts, changing
Special tools: 9998304, 9998305
1
Open the main switch(es) and check that there is no power to the engine.
2
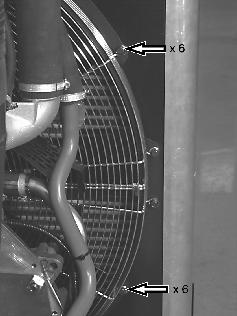
Remove the protective grille around the cooling fan.
3
Remove the protective plates around the drive belts.
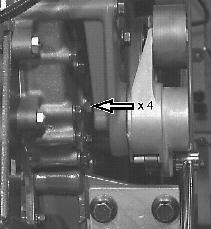
Loosen the inner mounting bolt (1) a few turns. Loosen the locking bolt (2) so that the tensioning bolt (3) can operate freely. Screw down the tensioning bolt and remove the drive belt.
5
Install the new drive belt and tension the drive belt with the tensioning screw (3) so that the slack is about 5 mm (0.2").
6 Checking belt slack
Place holder 9998305 with the hole halfway between the pulleys where the drive belt is longest.
7
Push down the O-ring on the gauge 9998304 so that it lies below the graduated scale.
8
Keeping the holder in position, insert the gauge into the hole and push it in so that the end of the pin is flush with the upper part of the gauge (push with thumb or finger).
Remove the gauge carefully and read it.
The slack should be 3 mm (0.1") for a new belt, 3-4 mm (0.10-0.15") for an old belt.
NOTE: Tighten the tensioner before making the measurement because the belt will become tighter when the tensioner is snugged up.
Check that the belt pulleys are clean and undamaged. 11
Reinstall
Start the engine and perform a functional check.


