2 minute read
4. Assembly Procedures


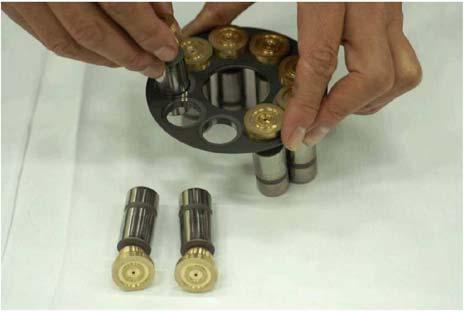
5) Remove the cylinder block [104] from the shaft [102]. 6) Remove the piston assemblies (pistons [105], shoes [106]) and retainer plate [107] from the cylinder block [104].
Note •When removing the piston assembly, hold the retainer plate [107] with both hands and remove together with the retainer plate. •The pistons [105] and shoes [106] are pressed and held together at the spherical hole sections of the pistons. Pistons and shoes cannot be separated without damaging the shoes [106]. When replacement is necessary, replace them as 1 set. (Referred to as piston assembly below) 7) Remove the piston assemblies [105] and [106] from the retainer plate [107]. (9 sets)
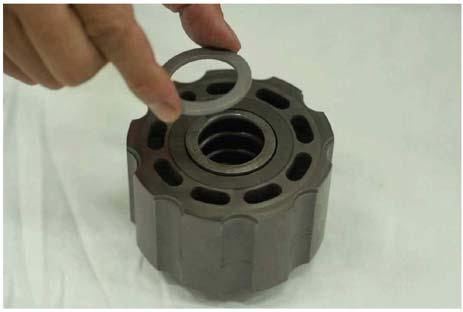
8) Remove the thrust ball [108] from the cylinder block [104].
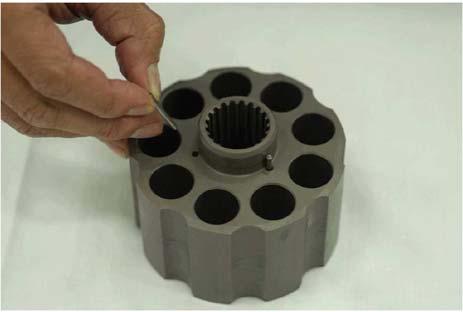
9) Remove the washer [111] and 3 rollers [151] from the cylinder block [104].

[15]Removal of spring inside cylinder block 1) Place the cylinder block [104] on the press work platform. Note •Remove the spring only when replacing it. •Align the axis centers of the holder fitting (I) and washer during spring removal to prevent damage to the cylinder block due to contact. •Place a plastic sheet over the cylinder block so that the surface of the cylinder block does not get scratched. 2) Place the holder fitting (I) on the washer [110] and remove the snap ring [145] from the snap ring groove of the cylinder block [104] using the snap ring pliers while pressing down on the holder fitting (I) (b) with the press (a).
Caution Note •If the press (a) is suddenly loosened, the spring can fly out and cause injury. Loosen the press (a) slowly.
3) Remove the snap ring [145], washer [110], spring [114] and washer [110] inside the cylinder block [104].
[16]Removal of swash plate 1) Remove the swash plate [103] from the shaft [102]. Note •Be careful when removing the swash plate [103], as pivots [167] are sometimes attached to it.