5 minute read
Assembly Diagram


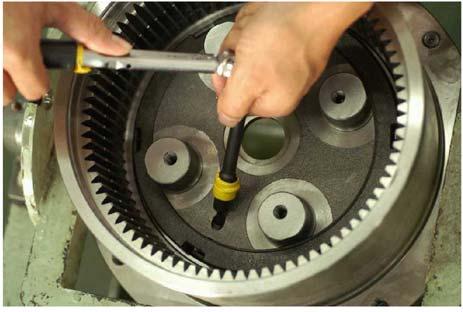
2) Remove the shaft [102] from the spindle [2].
At this time, the ball bearing [149] attached to the shaft is also removed.
Note •The shaft can easily be removed if the shaft end on the reduction gear side is first struck lightly with a plastic hammer. Be careful as the shaft can fly out if it is struck forcefully. 3) Remove the 2 pivots [167] and 2 parallel pins [171] from the spindle [2].
4) Remove the 2-speed switchover piston assembly and spring [190] from the spindle [2].
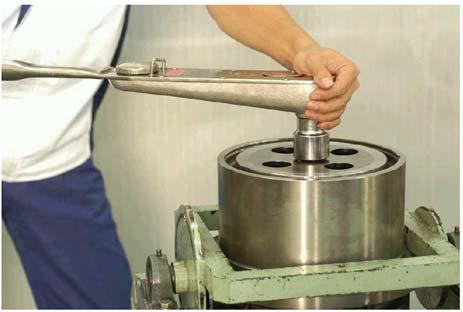
[17]Removal of ball bearing
Note •Remove the ball bearing only when replacing it. 1) Place the holder fitting (II) (c) on the press work platform and insert the shaft [102] within the holder fitting. 2) Press down on the shaft end section with the press (a) to remove the ball bearing inner race [149] from the shaft [102]. Note •During reassembly, do not reuse the ball bearing. [18]Removal of ring nut 1) Tighten and fasten the 3 or 1 fastening fitting(s) to the hub [1] and spindle [2]. At this time, tighten on the fastening fitting so that the positions are uniform. 2) Invert the travel motor. (reduction gear side faces up)
・ Piston assembly ・ Piston [161] ・ Shoe [162]

3) Remove the 2 hexagon socket head locking screws [47].
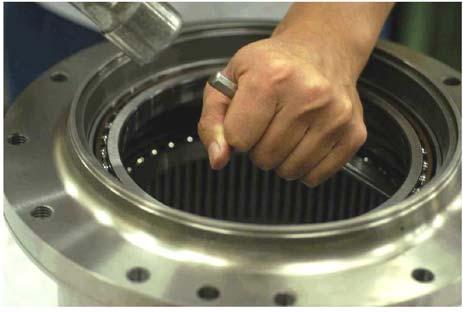
4) Loosen the ring nut [22] using the primary bearing precompression adjustment jig (d).
Note •Do not reuse the removed ring nut [22]. The teeth surfaces may be damaged.
5) Remove the ring nut [22] from the spindle [2].

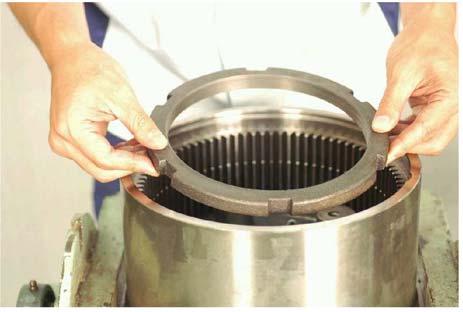
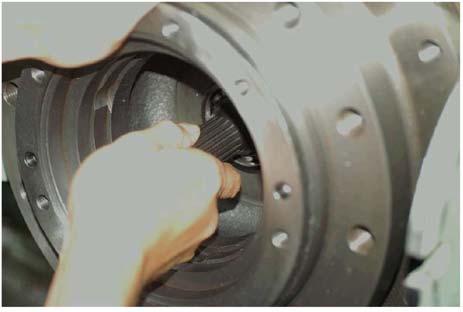
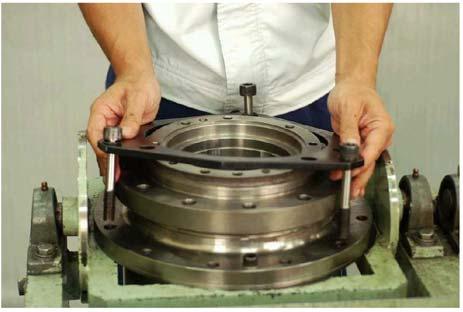
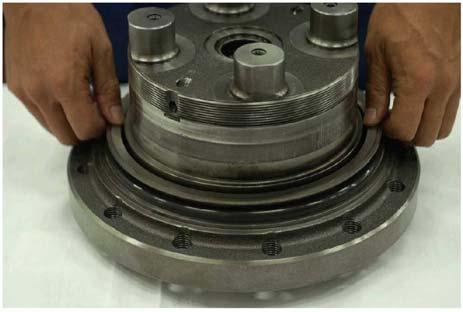
[19]Removal of spindle 1) Invert the travel motor. (motor faces up) 2) Remove the 3 or 1 fastening fitting(s) from the work platform. 3) Tighten the 2 eyebolts (for M16) into the threaded installation holes on the spindle [2] so that they are in opposing positions. 4) Attach the wires with hooks to the eyebolts (for M16), lift up with a liftcrane, and remove the spindle [2] from the hub [1]. At this time, the floating seal [31] and oil seal [132] are removed together with the spindle. [20]Removal of ball bearing 1) Remove the floating seal [31] from the hub [1]. Note •Do not reuse the removed floating seal [31].


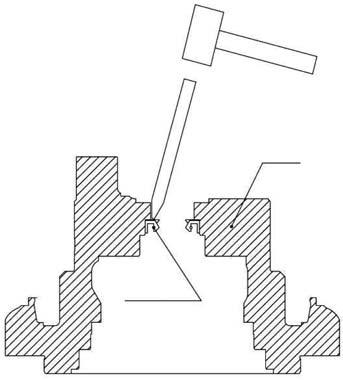
2) Press a pin punch against the end surface of the outer race of the ball bearing [24] in the hub [1], tap the pin punch with a hammer, and remove the ball bearing [24] from the hub [1].
Note •When removing the ball bearing [24], do so by tapping the end surface of the outer race of the ball bearing [24] at 3 - 4 locations evenly spaced along the circumference so that the ball bearing [24] moves a bit at a time and is not pried out. •The ball bearing [24] will fall from the hub [1] if the outer race bonding section of the ball bearing [24] is detached from the hub [1], so place a container under the work platform and place a rubber mat on it so that parts are not scratched. 3) Invert the travel motor. 4) Press a pin punch against the end surface of the outer race of the ball bearing [24], tap the pin punch with a hammer, and remove the ball bearing [24] from the hub [1].
Note •When removing the ball bearing [24], do so by tapping the end surface of the outer race of the ball bearing [24] at 3 - 4 locations evenly spaced along the circumference so that the ball bearing [24] moves a bit at a time and is not pried out.
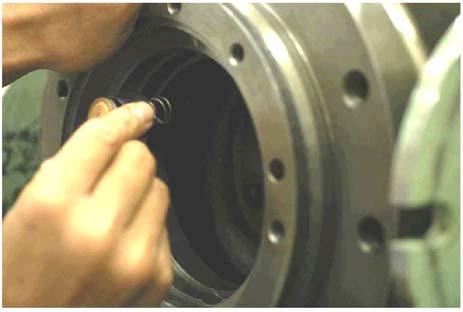
[21]Removal of parts mounted on spindle 1) Remove the floating seal [31] from the spindle [2].
2) Remove the oil seal [132] from the spindle [2].
Note •Do not reuse the removed floating seal [31] and oil seal [132].
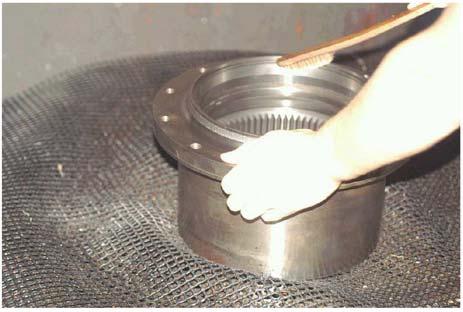
[22]Rough cleaning of all parts 1) Divide the 4 parts: hub [1], spindle [2], cover [13] and rear flange [301] from other parts (hereafter, referred to as built-in parts). 2) Place the hub, spindle, cover and rear flange into the cleaning tank and clean them. Note •Parts have dirt stuck to their external surfaces, so thoroughly clean parts and remove dirt.
Caution Note •White kerosene is flammable. Be very careful about fires or burns and injuries due to fire.
Note •Scratching can easily occur if parts cleaning is begun just after parts are immersed in white kerosene, so let parts sit in white kerosene until debris and grease sufficiently loosen off and float to the surface. 3) Clean all built-in parts by placing them in a rough cleaning container filled with white kerosene.
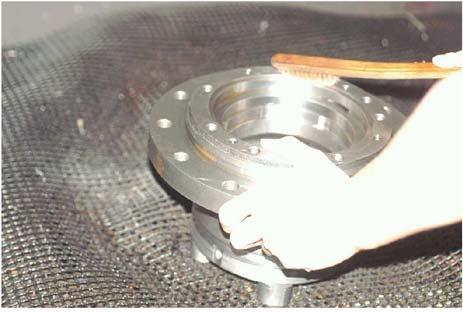
[23]Finish cleaning 1) Clean all parts by placing them in a finish cleaning container filled with white kerosene, and clean them thoroughly, including the interior, while slowly rotating them. 2) Use a rag to thoroughly remove any white kerosene stuck to parts. Note •Spray the inside surfaces of the hub [1] and spindle [2] with compressed air in a location free of dust and moisture to dry them. Coat each part with hydraulic oil after drying. •Let the inside surfaces of the rear flange [301], hydraulic motor parts, and gears dry naturally in a location free of dust and moisture. Coat each part with hydraulic oil after drying.