INSTRUCTION SHEET FOR EH215LC 2 WAY - HAND CONTROL (W/BOOM and STD ARM PIPING) 20. With the new clamp on top of the existing clamp, fastened the clamps with two ZS18C08065 Capscrews (79) and two ZW16X08000 Washers (93). Use medium strength thread locking adhesive on the capscrews and tighten to 10 ± 1 N.m (7 ± 0.7 lbf-ft) torque. 21. Continue routing the pilot hoses towards the rear of the cab.
1 Figure 22
DC04A214
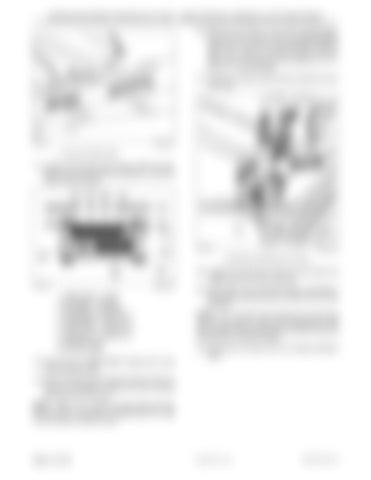
1. RH PILOT HOSE CLAMP
17. Locate the RH pilot hose clamp under the cab. Remove the clamp bolts and washers. Lower the clamp with the hoses.
4
5
6
7
1
1 2
8 9
3 Figure 23
DC04C636
1. 2. 3. 4. 5. 6. 7. 8. 9.
YN68H01035P1 - CLAMP ZW16X08000 - WASHER ZS18C08065 - CAPSCREW 2420R349D305 - HOSE (S/V B) 2420R349D340 - HOSE (S/V A) 2444R1120D110 - HOSE (S/V T) 2420R349D110 - HOSE (S/V P) EXISTING CLAMP EXISTING HOSES
18. Insert the new YN68H1035P1 Clamp (57) on top of the existing clamp.
Figure 24
DC04B331
1. EXISTING STANDARD PILOT BLOCK
22. Locate the pilot block under the cab where the middle lower cover was removed. 23. Label each one of the pilot hoses connected to the existing standard block and take note of their locations. NOTE: Put a wooden block between the pilot block and the cab floor to avoid over stressing the pilot block bracket while disconnecting the pilot hoses and removing the connector fittings. 24. Disconnect all hoses from the existing standard block.
19. Place the pilot hoses through the slots of the new clamp as indicated in Figure 23 (view looking from the front of the cab). NOTE: Make sure to place the pilot hoses (S/V B), (S/V A), (S/V T), and (S/V P) respectively from right to left through the plastic clamp.
Page 10 of 39
Issued 07-04
Cst
IS04-007A-NH NA
