1 minute read
Hydraulic Equipment


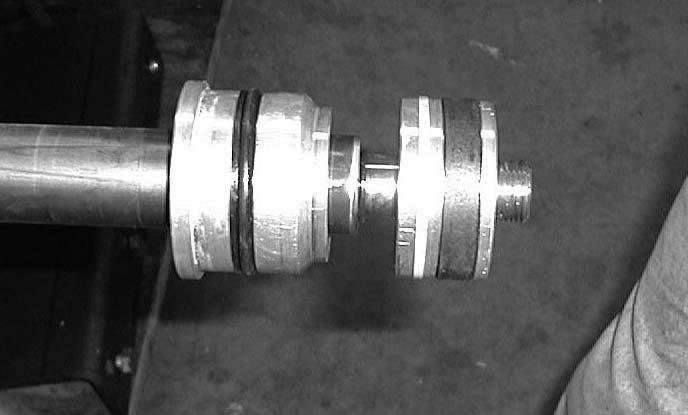
7.Remove piston assembly (E, Fig. 521) from the cylinder rod.
Cylinder Assembly
One-piece teflon piston seals can be difficult to install on the piston. Soaking the seals in hot 130°140° F (54°-60° C), clean hydraulic oil for a short time prior to installation will make the seals more resilient and easier to install on the piston.
Before installing the piston and rod assembly into the cylinder base, lubricate the piston seals and wear rings liberally with clean hydraulic oil. Using an engine piston ring compressor to compress the piston seals tightly for a short period of time will often aid in the assembly procedure.
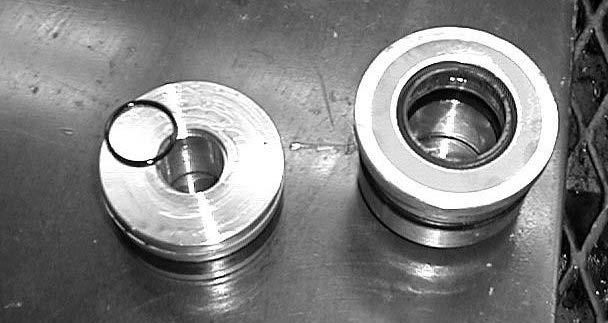
8.Slide the head gland, seals, and o-rings off the cylinder rod and inspect them for wear.
9.Change the seals as needed.
NOTE: Lubricate all new seals with clean hydraulic fluid or petroleum jelly.
1.Slide the collar onto the cylinder rod (threaded end of the collar should face the threaded end of the cylinder rod).
2.Slide the head gland, larger diameter first, onto the cylinder rod.
3.Install the piston on the cylinder rod.
4.Secure the head gland and piston on the cylinder rod with a locknut. The locknut should be torqued to 350 ft.-lbs. (474 N•m).
5.Install the cylinder rod into the tube.
6.Slide the collar down to the cylinder tube, thread it onto the tube and tighten with a chain clamp wrench. Tighten the set screw on the collar.
Bleeding Air After Cylinder Installation
Bleed air from the system after replacing hydraulic components. Air in the system can cause seizure and cavitation. Air trapped in the system will compress/ expand, causing jerky operation and shortened service life.
1.Run the engine at medium speed and operate all hydraulic functions for about 10-15 minutes.
2.Set the engine to low idle and extend/retract cylinders 2-4” (50-100mm) from each stroke end slowly 4/5 times.
3.With the engine still at low idle, fully extend/ retract cylinders 3-4 times.


