1 minute read
Electronics Diagnostic Kit


The Eaton Diagnostic Kit (order # 50301947) provides real-time telemetry information useful for troubleshooting compact track loader electronic propel and loader system functions.
Diagnostic Kit Operation
1.Plug the licensing dongle included in the kit into a USB port on the PC. The PC should detect the connected dongle.
2.Connect the CAN connector harness and the USB adapter together.
3.Plug the USB adapter into a USB port on the PC.
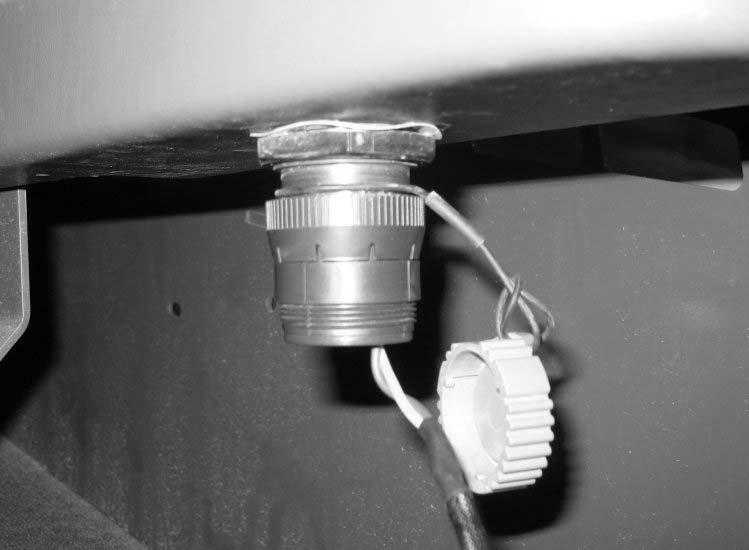
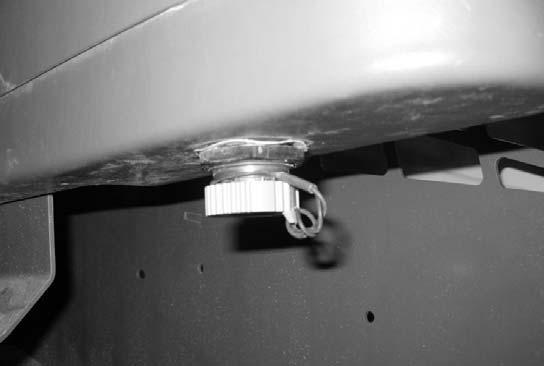
4.Twist the CAN data port cover (A, Fig. 557) and remove it from data port (D) on the bottom of the left console inside the compact track loader cab.
6.Turn on the machine ignition.
NOTE: Machine engine does not need to be running for the software to run. The machine must be running, however, to display real-time telemetry information.
7.On the PC, select “Start > All Programs > MotoTools > MotoService > MotoViewer”.
8.Once the application is running, select “Open” from the “File” menu.
9.Select and open the latest “ssl#.dis” file located at: “C:\ECUfiles\Displays\”.
5.Connect the CAN harness (B, Fig. ) to data port (D). Twist locking collar (C) on the CAN harness connector to lock it in place on the data port.
10.A window containing real-time telemetry information about the compact track loader is displayed. Refer to the following page for details about the displayed information.
11.Disconnect CAN harness (B, Fig. ) from data port (D) when finished. Replace CAN data port cover (A, Fig. 557) on the data port. Twist the cap to lock it in place on the data port.
NOTE: Replace cover (A) on data port (D) when the diagnostic kit is not in use to protect the data port from dust, dirt and damage.


