20 minute read
Attachments (Optional Fitment)


Jerrycan Weights
To obtain additional level of traction and stability, these weights are provided as an optional fitment. With loader application on the tractor, these weights are to be removed. However the weight mounting bracket shall not be removed and can be used for towing purpose.
For procuring “Jerrycan Weights” if required contact your Mahindra Dealer
Wheel Weights
The drawbar pull of the tractor can be increased by the addition of weight to the driving wheels, either by adding cast iron wheel weights or by use of liquid in the tires. Should the tractor tires wear excessively due to wheel slippage, increase the traction by adding weight to the rear wheels.
If increased drawbar pull is required to suit different applications and conditions, only experience can indicate the correct amount of extra weight required, it may be sometimes necessary to use both cast iron wheel weights and liquid ballast.
For procuring weights if required contact your Mahindra Dealer.

Adjustment of Front Wheel Tread
Adjustment of the front axle extension allows variation of the tread in 4” (10.16 cm) increments from 52.5" (133.35 cm) to 68.5" (173.99 cm). The axle can be off-set in 4” (10.16 cm) increments as required.
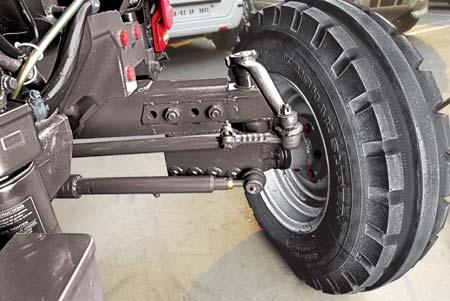
Milled in the tie rod are adjustment grooves, which give adjustment to correspond with the axle extension settings. Whenever the axle extensions are altered the tie rod and toe-in must be re-set. It is to be noted that the track width may vary with change in the front tire size. To adjust the front wheel tread, raise the front end of the tractor and remove bolts holding the axle extension pieces. Remove the tie rod nut and bolt and pull out the axle extensions.
Move the axle extensions to the required position and adjust the tie rod to the corresponding position. Replace bolts in holes selected and tighten the axle extensions. Replace the tie rod bolt and tighten.
152.5"A1 & C311
256.5"B1 & D322
360.5"C1 & E333
464.5"D1 & F344


568.5"E1 & G355
# For Front tire size 7.5 x 16
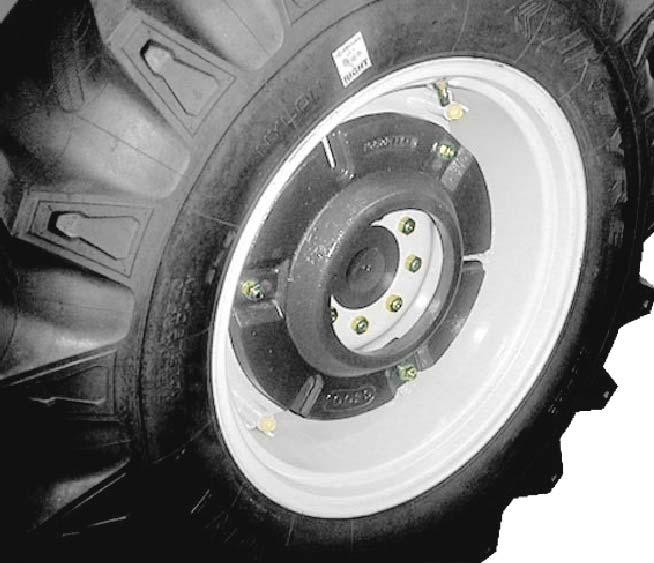
Adjustment of Rear Wheel Tread
The track of the rear wheels of 14.9 x 28 can be adjusted from 60" (152.4 cm) to 72" (182.88 cm) by assembling the rim in different positions as shown in illustration. The track changes are in increment of 4”.
NOTE : An arrow is marked on the side wall of the tire, which must always point in the direction of forward rotation to obtain maximum traction.
Adding Liquid Weight
Tractor tire can be 80% filled with liquid as follows.
1.Raise the wheel. Rotate the tire until the valve, stem is at 1’O Clock position.
2.Remove the valve core housing and screw on the adapter.
3.Force liquid into the tire from a tank placed at least five feet higher than the tractor tire, or by using a compressor and pressure tank filled with water.
4.When the liquid has reached the required level, remove the adapter, screw in the valve core and inflate to the recommended pressure.
Inflation
Keep tires properly inflated to the pressure as shown in the Chart below. Under inflation will damage tire cord and may cause the tire to slip on the rim and tear out the tube valve stem. Over inflation results in excessive slippage, causing rapid tire wear. Air pressure should be checked once a week with an accurate low pressure gauge having one pound graduations. Air pressure should not be allowed to drop or exceed the recommendations.
Always see that the tire valve caps are in place and screwed tight. The caps prevent loss of air through the valve core. Further, they prevent debris from entering and damaging the valve core and air chamber in the tires.
Exceptions (Rear Tires only)
When plowing with a moulded plow, the left hand or land wheel should be inflated to 2 p.s.i. lesser than right hand or furrow wheel.
NOTE : Where ambient temperatures are likely to fall below freezing point use calcium chloride solution, methanol for antifreeze.
The instructions and recommendation shown below should be followed in order to secure maximum life and efficient service from pneumatic tires.
Maximum recommended load carrying capacity per tire w.r.t it’s size & ply rating at varied air pressures.
NOTE : Load can be increased by 20% without increasing inflation pressure if the Tractor is operated at speed upto 16 Kmph.
Care of Tires
Cuts in tires should be repaired immediately. If neglected, it will decrease the tire life. Avoid stumps, stones, deep ruts and other hazards. Keep tires free from oil and grease as both destroy rubber. After using the tractor for spraying, wash off any chemicals that may be left on the tractor and tires.
Shipping Tractors Equipped with Pneumatic Tires
When tractors are transported on a carrier, inflation pressure should be as follows to make possible rigid blocking and to prevent bouncing.
Front - 36 psi
Rear - 30 psi
Tire Protection during Storage
When not in use the tractor should be stored where the tires are protected from light. Before storing the tractor clean the tires thoroughly. Jack up the tractor so that the load is off the tires when it is to be out of service for a long period. If it is not jacked up, the tires should be inflated at regular intervals. Before putting the tractor in service, always inflate tires to the correct operating pressures.
Do not load tires beyond their rated capacity.
Mounting Tires on the Rim
After mounting a new or old tire on the rim, inflate it to 30 p.s.i. pressure to seat the tire bead on the rim flange and to prevent the tire from creeping and shearing off the valve. Then deflate or inflate tire to correct operating pressure.
Inflating or servicing tires can be dangerous. Whenever possible, trained personnel should be called in to service or install tires. In any event to avoid the possibility of serious or fatal injury, follow the safety precautions below:
Upon receiving your tractor, check the air pressure in the tires and recheck every 50 hours or weekly.
When checking tire pressures, inspect the tires for damaged tread and side walls. Neglected damage will lead to early tire failure.
Inflation pressure affects the amount of weight that a tire may carry. Do not over or under inflate the tires.
Never attempt tire repairs on a public road or highway.
Do not inflate a steering tire above the manufacturer’s maximum pressure shown on the tire or beyond the maximum shown in the tire pressure and load Table - A. If tire is not marked with the maximum pressure.
Never inflate a traction tire (any rear tire) over 35 psi (2.4 bar). If the bead does not seat on the rim by the time this pressure is reached, deflate the tire, relubricate the bead with a soap/water solution and re-inflate. Do not use oil or grease. Inflation beyond 35 psi with unseated beads may break the bead or rim with explosive force sufficient to cause a serious injury.
After seating the beads, adjust inflation pressure to the recommended operating pressure. Do not re-inflate a tire that has been run flat or seriously under-inflated until it has been inspected for damage by a qualified person.
Torque wheel to axle nuts to specification after reinstalling the wheel. Check nut tightness daily until torque stabilizes. Ensure the jack is placed on a firm, level surface.
Ensure the jack has adequate capacity to lift your tractor.
Use jack stands or other suitable blocking to support the tractor while repairing tires.
Do not put any part of your body under the tractor or start the engine while the tractor is on the jack. Never hit a tire or rim with a hammer. Ensure the rim is clean and free of rust or damage. Do not weld, braze, repair or use a damaged rim. Do not inflate a tire unless the rim is mounted on the tractor or is secured so that it will not move if the tire or rim should suddenly fail.
When fitting a new or repaired tire, use a clip on valve adapter with a remote gauge that allows the operator to stand clear of the tire while inflating it. Use a safety cage, if available.
Before Starting the Tractor
1.Clean the tractor.
2.Make all prestart checks according to preventive maintenance schedule.
3.Check coolant level in surge tank & oil level in engine and transmission.
4.Check fuel level in fuel tank.
5.Ensure all the tires are properly inflated as per the load conditions.
6.For operator’s maximum comfort, adjust seat suspension as per the operator’s weight. Also adjust seat position forward or rearward as per operators convenience to operate all controls and switches.
7.If, necessary, ballast the tractor.
8.Adjust wheel tread, if necessary.
9.Adjust stabilizer and three point linkage.
Do not use starting fluid. Tractor is equipped with intake manifold heater.
Starting the Tractor
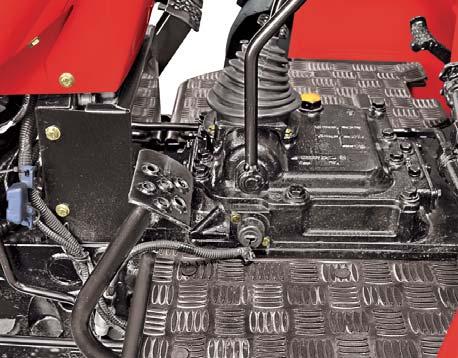
1. Move the controls as under : a.Forward reverse shuttle lever in neutral. b.Speed and Range shift lever in neutral. c.PC and DC levers in lowermost position. d.PTO lever in neutral. e.Auxiliary valve lever in neutral position.
2.Turn the Key to ON position and observe SELF TEST function of instrument cluster.
3.Turn the starter key in clockwise to engage the starter and hold in this position till the engine fires.When released, the key springs back to the “ON” position.
4.Idle the Engine for 1 to 2 minutes before driving it. If required, warm-up the engine at suitable speed. For faster warm-up, raise the engine rpm to approx. 2000. NOTE : The starter safety switches are provided on the transmission speed shifter and PTO lever. The tractor can be started when speed shifter lever is in neutral and PTO lever as well in neutral.
It is normal for the engine to be louder and have bluish-white exhaust smoke during engine warm-up. The amount of smoke depends on the temperature of air entering the engine. In cold weather, idle the engine and warm-up for 5 minutes at approx. 2000 rpm before loading.
The engine should not be put under full load immediately after start. Do not accelerate the engine rapidly.
Never push or tow the tractor to start the engine. Doing so may overstress the drive train.
Do not crank the starter continuously for more than 30 seconds to avoid starter motor failure.
Don't operate the engine in low idle speed for more than 10 mins. Doing so will affect the performance of the turbocharger.
Stopping the Engine
a.Idle the Engine for 1 to 2 minutes.
b.Turn the Key to “OFF” position.
Cold Starting Aid
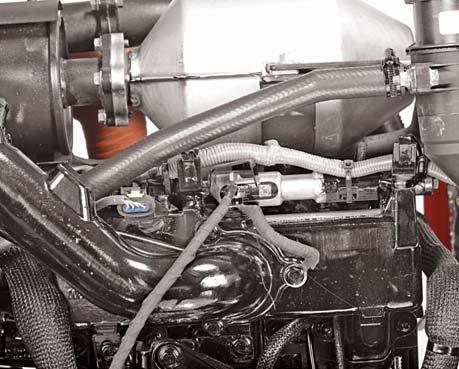
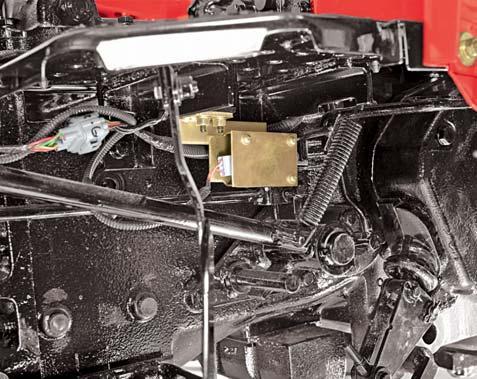
A heater element (A) is provided in engine intake manifold to aid the engine starting during cold weather [for temperatures below 20°C (68°F)]. When the Key is turned to “ON” position, the element is activated. The heater indicator in the instrument cluster indicates the heater element operation. Based on the prevailing ambient cold temperature, the heater operating duration is adjusted automatically. The element continues to heat the air in the intake manifold for some specific duration.
Follow the below procedure during the cold weather starts:
1.Turn the Key to “ON” position and hold it till the heater indicator is put-off.
2.Crank the engine when the heater indicator is put-off.
NOTE : Engine runs at a higher idle rpm (about 1200 rpm) and drops gradually to the normal idling speed (850 rpm) until coolant temperature reaches to 20°C (68°F).

The heater indicator glows for some specific duration after starting the engine, depending on the ambient temperature.
Glow Plug
The tractor is equipped with Intake Manifold Heater for easy startability in cold conditions. However to enhance the startability in extreme cold ambient conditions, the tractor is equipped with provision for fitment of glow plugs (an optional fitment). These glow plugs can be fitted in the cylinder head after removing the plugs.
A glow plug kit consisting of requisite spares is available with Mahindra dealer. Contact your nearest Mahindra dealer for further details on installation and maintenance of glow plugs.
Driving the Tractor
With the engine running and the clutch in disengaged position, engage Forward Reverse shuttle, Speed lever and the Range lever to their appropriate desired positions. Free the parking brake. Slowly release the clutch and tractor will start moving.
During the field operations, assistance in making sharp turns can be gained by applying pressure to the independent foot brake pedal of the side to which the turn is to be made.
The brakes can be latched together to act simultaneously by means of the brake pedal latch. Do not attempt to start the engine while standing beside the Tractor, because serious injury or death would occur. Always sit on the operator’s seat. Always latch the brake pedals together when tractor is not being used in field.
5.Drain the old lubricating oil from the crankcase sump and fill to normal level with new rust preventive lubricating oil.
6.Run the engine for 1.5 minutes. Switch off the engine. Remove the starting key.
7.If calibrating oil is filled, drain it from the fuel tank only.
8.Seal the fuel system with the same quantity of calibrating oil (if available) in it.
9.Remove the hose between intercooler air outlet and intake manifold of the engine and spray rust preventive oil through the air intake while the engine is being turned.
10.Drain the engine cooling system.
11.Plug all orifices which expose the internal parts of engine to the atmosphere. Detach additional weights from tractor, if any.
Do not apply load on tractor at low engine speeds. Always apply heavy loads at full throttle rpm of engine.
If the tractor is being used after long storage, care must be taken to prime the engine and turbocharger lubrication by cranking the engine for at least 5 seconds without firing the engine.
To avoid firing of engine while cranking, remove the electrical connection to common rail, FIP and crank the engine.
12.Jack the tractor so that the tires are clear off the ground. If this is not possible, check tire pressures regularly and keep inflated to recommended pressures. Rotate wheels periodically to prevent them from standing on the same place for long periods.
13.Remove batteries and store in a cool dry place, keep topped up and fully charged.
14.Keep the clutch disengaged.
15.Disconnect the hydraulic accessories.
Using The Tractor After Storage
1.Check tire air pressure and inflate, if necessary
2.Jack the tractor up and remove the support blocks from under the front and rear axles.
If the engine stalls while operating under load, start engine immediately to prevent abnormal heat build up in engine.
Tractor Storage
If the tractor is not in frequent use, make sure the battery connections are removed & installed properly. However if the tractor is to be out of service for extended period, it should be stored in a dry place. Leaving the tractor exposed to weather will shorten its life considerably.
When placing the tractor in storage for more than a month, follow the procedure given below,
1.Wash down and thoroughly clean and dry the tractor.
2.Completely lubricate the tractor in accordance with the lubrication chart.
3.Drain the fuel tank, water trap, feed pump and fuel filters.
4.Disconnect the return pipe at the fuel tank and connect a suitable tubing to allow excess fuel to drain into a container. Fill the system with calibrating oil (if available) of 4 US gallon (15 lit.) quantity.
3.Install the battery. Be sure it is fully charged.
4.Check the fan and alternator belt tension.
5.Refill the engine coolant into the cooling system.
6.Drain the rust preventive oil from engine and oil filter and fill the crankcase with specified oil & refit oil filter.
7.Check all fluid level (engine oil, transmission / hydraulic oil and engine coolant.
8.Remove the extra plugs, if fitted on the engine.
9.Service air cleaner.
10.Drain the calibrating oil from fuel system and fill the fuel tank with clean fuel.
11.Open all the doors and windows or move the tractor out of storage room, to avoid danger from exhaust fumes. Then start the engine and run it at 1500 rpm to ensure that the lubricant attains operating temperature and reaches all points. Observe all gauges and be sure they are functioning properly and reading normal. Ensure there is no evidence of oil or water leakage. Now run the engine at low idle rpm for 1 minute and shut off the engine. Remove the key and apply the parking brake.
Operating the Tractor
1.Before starting the tractor ensure parking brake is engaged, place the P.T.O. lever in the “OFF” position, hydraulic control levers in downward position, remote control valve levers and transmission in neutral.
2.Do not apply load on tractor at low engine speeds. Always apply heavy loads at full throttle rpm of engine.
3.Do not start the engine or operate controls while standing besides the tractor. Always sit on the tractor seat when starting the engine or operating controls.
4.PTO and Transmission Neutral switch
In order to prevent accidental starting of the tractor in gear, safety switches are provided. The starting system of the tractor is connected through switches on HighLow Range Selection System and PTO lever. These become operative to complete the starting circuit only if the transmission is in neutral position and PTO lever disengaged. Do not bypass the safety Key Switch. Consult your Mahindra tractor Dealer if your Safety starting switch malfunctions.
5.Avoid accidental contact with the gear shifter lever while the engine is running. Unexpected tractor movement can result from such contact and may cause accident.
6.Do not get off or climb the tractor while it is in motion.
7.Shut off the engine and apply the parking brake before getting off the tractor.

8.Do not operate tractor in an enclosed building without adequate ventilation. Exhaust fumes can cause death.
9.Do not park the tractor on a steep slope.
10.If power steering ceases to operate, stop the tractor immediately.
11.Pull only from the swinging drawbar or the lower link drawbar in the down position. Use only a drawbar pin that locks in place. Pulling from the tractor rear axle carriers or any point above the rear axle may cause the tractor’s front end to lift and the tractor to turnover.
12.Always use hydraulic position control lever when attaching equipment / implements and when transporting equipment. Be sure that the hydraulic couplers are properly mounted and will disconnect safely in case of accidental detachment of implement.
13.Do not leave equipment / implements in the raised position.
14.Use the turn signal lamps and slow moving vehicle (SMV) signs when driving on public roads during both day and night time, unless prohibited by law.
15.Dim tractor Head lamps when meeting a vehicle at night. Be sure the Head lamps are adjusted to prevent blinding on the eyes of oncoming vehicle operator.
16.Emergency stopping instruction : If tractor fails to stop even after application of brakes shut off the engine while the tractor is in gear and clutch engaged.
A careful operator is the best operator. Most accidents can be avoided by observing certain precautions. Read and take the following precautions before operating the tractor to prevent accidents. The tractor should be operated only by those who are responsible and instructed to do so.
The Tractor
1.Read the operator’s manual carefully before using the tractor. Lack of operating knowledge can lead to accidents.
2.Use an approved rollover bar and seat belt for safe operation. Overturning of a tractor without a rollover bar can result in death or injury.
3.Do not remove ROPS (Roll Over Protective Structure). Always use the seat belt.
4.Be aware that fiber glass canopies do not give any protection.
5.To prevent falls, keep steps and platform cleared of mud, oil and debris.
6.Do not permit anyone but the operator to ride on the tractor. There is no safe place for extra riders.
7.Replace all missing, illegible or damaged safety signs.
8.Keep safety signs clean of dirt and grease. Driving the Tractor
1.Watch where you are going especially at row ends, on roads, around trees and low hanging obstacles.
2.To avoid rollover, drive the tractor with care and at speeds compatible with safety, especially when operating over rough ground, crossing ditches or slopes, and when turning at corners.
3.Lock the tractor brake pedals together when transporting on roads to provide proper wheel braking.
4.Keep the tractor in the same gear when going downhill as used on uphill. Do not coast or free wheel down hills
5.Any towed vehicle and/or trailer, whose total weight exceeds that of the towing tractor, must be equipped with its own brakes for safe operation.
6.When the tractor is stuck or tires are frozen to the ground, back out to prevent roll over.
7.Always check overhead clearance, especially when transporting the tractor.
8.Do not engage the High-low Range Shift lever while the tractor is in motion.
9.The “balancing” of the braking system should be checked every week, or whenever the tractor is taken on the road after working extensively or when one brake is used more often than the other. If this precaution is not taken an accident may occur. Hand brake should only be used for parking purpose.
10.When driving on wet, icy or graveled surfaces, reduce speed and be sure tractor is properly ballasted to avoid skidding and loss of steering control.
Servicing the Tractor
1.Keep the tractor in good operating condition for your safety. An improperly maintained tractor can be hazardous.
2.Stop the engine before performing any service on tractor.
3.The cooling system operates under pressure which is controlled by the radiator cap. It is dangerous to remove the cap while the system is hot. First turn the cap slowly to first stop & allow the pressure to escape before removing the cap entirely.
4.The fuel in injection system is under high pressure and can penetrate the skin. Unqualified persons should not remove or attempt to adjust fuel injection pump, injector, nozzle or any part of the fuel injection system. Failure to follow these instructions can result in serious injury.
5.Keep open flame away from battery or cold weather starting aids to prevent fire or explosions.
6.Do not alter or permit anyone else to modify or alter this tractor or any of its components or functions.
7.Ensure all electrical connections are secure and clean.
8.Ensure that no connection in the charging circuit, including battery, is broken while engine is running.
9.Observe correct polarity when refitting the battery or when using a slave battery to start the engine.
10.Do not short the Alternator output leads to check its working.
Operating the PTO (Power Take Off)
1.When operating PTO driven equipment, shut off the engine and wait until the PTO stops before getting off the tractor and disconnecting the equipment.
2.Do not wear loose clothing when operating the power take-off or near rotating equipment.
3.When operating stationary PTO driven equipment, always apply the tractor parking brake and block the rear wheels from front and rear side.
4.To avoid injury, always move down flip part of PTO shield do not clean, adjust or service PTO driven equipment when the tractor engine is running.
5.Make sure the PTO master shield is installed at all times and always replace the PTO shield cap when the PTO is not in use.
Rops
1.Never attach chains or ropes to the ROPS for pulling purposes; this will cause the tractor to tip backwards.
2.Always pull from the tractor drawbar.
3.Be careful when driving through door openings or under low overhead objects. Make sure there is sufficient overhead clearance for the ROPS.
4.If the ROPS is removed or replaced, make certain that the proper hardware is used to replace the ROPS and the recommended torque values are applied to the attaching bolts.
5.Always wear your seat belt if the tractor is equipped with a ROPS.
Transporting Tractor on a Trailer
1.Drive machine forward onto a trailer.
2.Lower any attachments to trailer deck.
3.Lock the parking brake.
4.Stop the engine.
5.Remove the key.
6.Fasten tractor to trailer with heavy-duty straps, chains or cables. Both front and rear straps must be directed down and outward from the tractor. Trailer must have signs and lights as required by law.
7.Cover the silencer outlet with water proof material to avoid entry of foreign material.
Towing
1.Hitch the towed load only to the drawbar. Lock the drawbar and pin in place.
2.Before descending a hill, shift to a gear low enough to control tractor travel speed without having to use the brake pedals to brake the tractor and installed attachments.
3.Try to balance the load primarily on the implement wheels. Avoid overloading the drawbar. Add Jerrycan weights for improved stability. Engage the clutch smoothly, avoid jerking and use brakes cautiously to avoid jackknifing.
4.Use 3 point hitch only with implements designed for its use, not as a drawbar.
1.Pull PTO “ON-OFF” rearward to OFF position.
2.Disengage differential lock.
3.Place Range shift lever in neutral
4.Place Speed shift lever in neutral.
5.Connect LH & RH brake pedals together to slow down or brake the tractor.
Diesel Fuel
1.Keep the equipment clean and properly maintained.
2.Always use recommended Diesel Fuel.
3.Under no circumstances should gasoline, alcohol or blended fuels be added to diesel fuel. These combinations can create an increased fire or explosive hazard. Such blends are more explosive than pure gasoline in a closed container, such as a fuel tank. DO NOT USE THESE BLENDS.
4.Never remove the fuel cap or refuel the tractor with the engine running.
5.Do not smoke while refuelling or standing near fuel.
6.Maintain control of the fuel filler pipe when filling fuel.
7.Do not fill the fuel tank to capacity. Allow room for expansion.
8.Wipe up spilled fuel immediately.
9.Always tighten the fuel cap securely.
10.If the original fuel tank cap is lost, replace it with Mahindra approved cap. A non-approved cap may not be safe.
11.Do not drive equipment near open fire.
12.Never use fuel for cleaning purposes.
13.Arrange fuel purchases such that winter grade fuel are not held over and used in the spring.
NOTE : It is suggested that after repairs if any of the safety decal/sign is peeled/damaged, the same must be replaced immediately in interest of your safety.
DO’S - For Better Performance
DO-Ensure that all safety shields are in place and in good condition.
DO-Read all operating instructions before commencing to operate tractor.
DO-Ensure all lights are in 'OFF' position before starting the tractor.
DO-Carry out all maintenance tasks without fail.
DO-Keep the air cleaner clean.
DO-Ensure that the correct grade of lubricating oils are used and that they are replenished and changed at the recommended intervals.
DO-Watch the oil pressure warning light and investigate any abnormality immediately.
DO-Keep the radiator filled with clean anti-freeze mixture. Drain the system only in an emergency and fill before starting the engine.
DO-Ensure that the transmission is in neutral before starting the engine.
DO-Keep all fuel in clean storage and use a filter when filling the tank.
DO-Attend to minor adjustments and repairs as soon as necessity is apparent.
DO-Allow the engine to cool before removing the radiator cap and remove the radiator cap slowly.
DO-Shift into low gear when driving down steep hills.
DO-Latch the brake pedals together when driving on a highway.
DO-Keep draft control lever and position control lever fully down when not in use.
DO-Visit dealer for adjustment on Injector pressure. Adjust if required.
DO-Keep the auxiliary valve levers in neutral (N) when not in use.
DO-Replace both clutch and brake cables after 1000 hours of tractor operation.
DONT’S - For Safe Operation
DON’T-Run the engine without the air cleaner.
DON’T-Start the tractor in high idle.
DON’T-Start the tractor in an enclosed building unless the doors and windows are open for proper ventilation.
DON’T-Operate the tractor or engine while lubricating or cleaning.
DON’T-Allow the tractor to run out of diesel fuel otherwise it will be necessary to bleed the system.
DON’T-Tamper with the fuel injection pump. If the seal is broken the warranty becomes void. Tampering with the injection pump may constitute an EPA violation. Significant fines could apply.
DON’T-Allow the engine to run idle for a long period.
DON’T-Run the engine if it is not firing on all cylinders.
DON’T-Ride the brake or clutch pedal. This will result in excessive wear of the brake linings, clutch driven member and clutch release bearing.
DON’T-Use the independent brakes for making turns on the highway or at high speeds.
DON’T-Refuel the tractor with the engine running.
DON’T-Use draft control lever for lifting of implements.
DON’T-Start the engine with the P.T.O. engaged.
DON’T-Use the hand throttle while driving on roads.
DON’T-Run cold engine at full throttle.
DON’T-Operate forward reverse lever while tractor is in motion.
DON’T-Operate the power steering when the oil level is below the minimum level in the reservoir.
DON’T-Run the tractor if the power steering system is damaged. In this condition, contact the dealer.
DON’T-Park the tractor on a gradient with transmission gear engaged and with no parking brake.