3 minute read
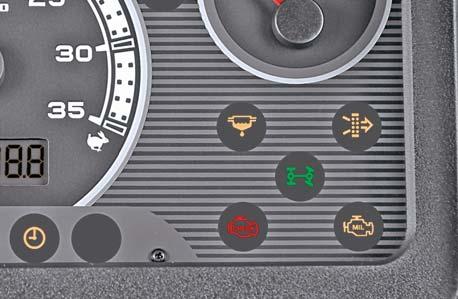
Instrument Cluster


Parking Brake Indicator
It glows when parking brake or foot brake pedals (latched together) is applied.
Battery Charging Indicator
This indicator will glow if battery is not getting charged. Once the engine is running, this indicator should go OFF, if the Battery is getting charged. If the indicator glows continuously even when the engine is running above low idle rpm of the engine, the cause should be investigated to prevent complete discharge of battery and possible damage of alternator.
High Temperature Warning Indicator
This is RED Led marked as "High Temp" and is located in the Temperature Gauge. It will glow continuously when temperature of coolant rised above 1100C.
The pointer of Temperatur gauge will lie in the RED band under such condition.
Low Oil Pressure Indicator

This indicator when glows indicates the engine operation at low lub oil pressure. The indicator will also glow alone when the key is in ON position before starting the engine and continue to glow till engine oil pressure builds up after starting the engine.
Water in Fuel Indicator
This indication will be ON when the water is accumulated in the fuel filter.
Air Filter Clog Indicator
It is ON when air filter requires periodic maintenance.
4WD Indicator
It glows when 4WD is engaged.
CHK ENG (Check Engine) Indicator
This indicator (E) will glow when the starter switch is turned to "ON" position. This indicator shall turn-off after engine is CRANKED.
A malfunction other than Emission, such as Sensor failures would be indicated by a continuously "GLOWING" or "BLINKING" Indicator, even past CRANKING of the engine. In such an event, get the problem rectified by an authorized Mahindra Dealer.
MIL (Malfunction) Indicator
This indicator (J) will glow when the starter switch is turned to "ON" position. This indicator shall turn-off after engine is CRANKED.
A malfunction in the electronic emission control system (ECU) is indicated by a continuously "GLOWING" or "BLINKING" Indicator, even past CRANKING of the engine. In such an event, get the problem rectified by an authorized Mahindra Dealer.
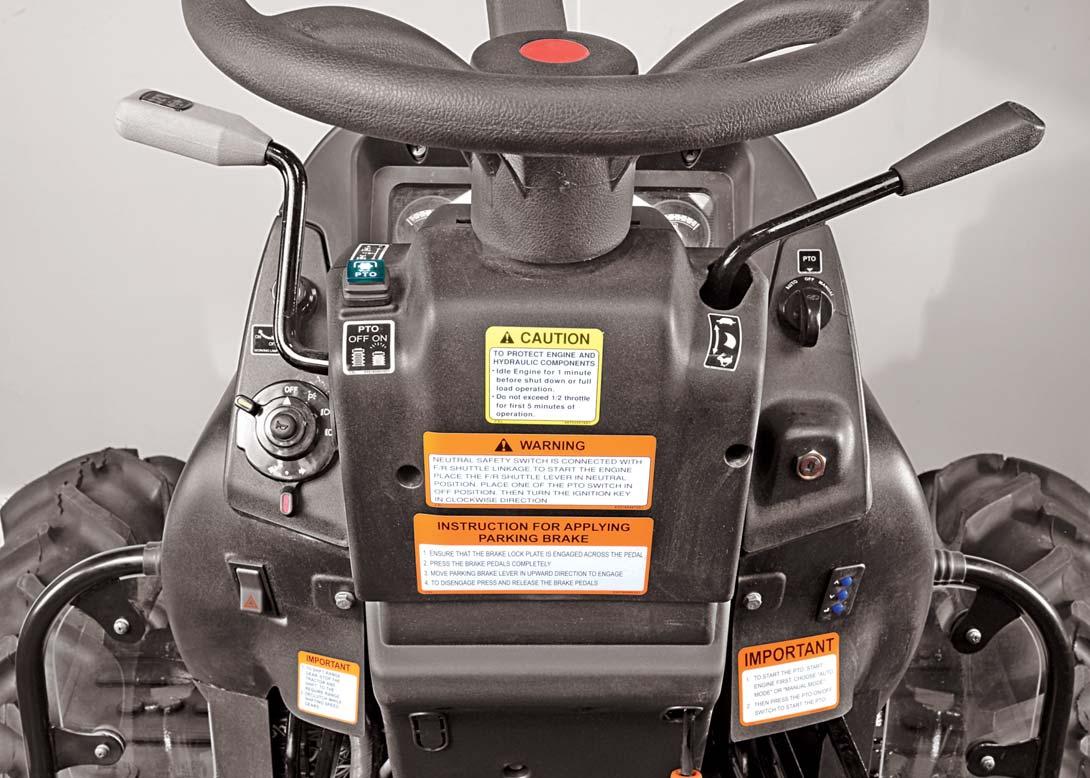
Switches

Following switches are provided for various operations.
Hazard Switch
The piano type switch is located below the combination switch in LH side of steering column on dashboard.
ON position operates LH, RH turn signal lamps simultaneously. This operation can be performed even if the key switch is in OFF position.
Switches
Combination Switch
It is located in LH side of steering column on dashboard. It consists of:

1.Horn (in centre)
2.Light Switch

3.Turn Signal Switch
Horn
Pressing the horn switch will blow the horn.
Light Switch
It is a 4 positions rotary switch. It operates in clockwise direction and positions are as follows:
1.Off
2.Illuminate Parking Lamps
3.Illuminate low beam of head lamp & Parking Lamp
4.Illuminate high beam of head lamp & Parking Lamp
Turn Signal Switch
This is 3 positions rotary switch. The vertical position of knob operates in both directions and the positions are as follows:
1.Vertical - OFF
2.Left - Operates LH Turn signal Lamp
3.Right - Operates RH Turn Signal Lamp
Starter Key Switch

It is a key operated 3 positions rotary switch. It is located on RH side of steering column on dashboard. It operates in clockwise direction and positions are as follows:
1.Off
2.It gives readiness to electrical circuit for operation of work lamp switch, combination switch, instrument cluster.
3.Activates the starting circuit for engine.
NOTE : The starting circuit is interconnected with forward/reverse system & PTO system. Thus the engine will not start unless the forward/reverse pedal is in neutral & PTO Auto manual off switch in OFF condition.
Work Lamp Switch
It is a 2 positions rotary switch located in LH side of steering column on dashboard. It operates in clockwise direction and positions are as follows:
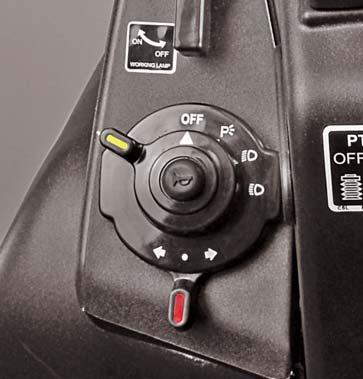
1.Off
2.Illuminates the work lamp
PTO Operation Switches
PTO can be operated by using a combination of “PTO Engage - Disengage Switch” and “PTO Mode Switch”. After switching ON the “PTO Engage - Disengage Switch” the operator has a CHOICE to select AUTO or MANUAL MODE through “PTO Mode Switch”.
The PTO will turn-Off if the “PTO Engage - Disengage Switch” or “PTO Mode Switch” is in OFF position.
PTO Engage / Disengage Switch
This is a 2 in 1 switch, located on LH side of steering column on the dashboard.
1.Press the PTO switch to engage the PTO.
2.To disengage the PTO, press the PTO switch again.
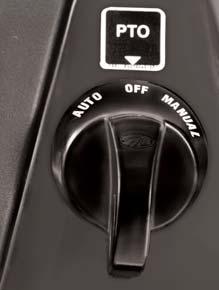
PTO MODE switch (PTO Auto/Manual/Off Switch)
This rotary switch enables the operator to choose the AUTO or Manual mode of PTO and even turn-off the PTO when desired.
The Operating positions of knob are as follows:
1.Alignment of OFF - Mark with Pointer - PTO Turn-OFF
The Auto and Manual Mode switch will be activated when the “PTO Engage - Disengage Switch” is in ON position.
2.Alignment of Auto-mark with pointer - Operates AUTO mode
This switch can be used when the “PTO Engage - Disengage Switch” is in ON position.
When this switch is in AUTO-POSITION, the PTO shaft rotation will be stopped as soon as the implement is raised. This will happen irrespective of clutch being engaged or disengaged. Such a situation is indicated by A BLINKING “PTO Engage - Disengage Switch”
While this switch is in AUTO-POSITION, IF the PC lever is lowered and clutch pedal released, the PTO shaft will become operative and will be indicated by a CONTINUOUSLY-GLOWING “PTO Engage - Disengage Switch”
While this switch is in AUTO-POSITION and the clutch pedal is pressed, the PTO shaft rotation will be stopped and indicated by A BLINKING “PTO Engage - Disengage Switch”
Tampered electrical wiring or connections will render this feature INEFFECTIVE. In such a case, some Inadvertent movement of personnel near the PTO shaft can prove fatal.


