3 minute read
DIAGNOSTIC CODE 3-5 (ADVANCED)


Test 16
Determining severity and correcting the problem
1.Check the inactive fault table with a diagnostic tool (Pro-Link or PC).
If there are only a couple occurrences of the timing actuator fault (code 3-5) and the driver reported that the electronic fault light only came on occasionally for a brief time, there was probably a piece of debris in the timing actuator that has been flushed out. Remove the timing control valve and clean the oil supply and secondary filters. Reinstall the timing control valve, using a new gasket. Retest to be sure the problem has been corrected.
If there are numerous counts of the timing actuator fault (code 3-5) or the driver reported that the electronic fault lamp remains ON constantly, the ECONOVANCE is sticking at advanced timings. Repair or replace the ECONOVANCE. Retest to be sure the problem has been corrected.
Test 18
Checking current to the timing control valve
If the current is between 0.6 and 0.9 amps, proceed to Test 37.
If the current to the timing control valve is above the range of 0.9 to 1.1 amps, proceed to Test 36.
If the current to the timing control valve is less than 0.6 amps, but greater than 0 amps, replace the V-MAC II module. Retest to be sure the problem has been corrected.
If the current to the timing control valve is 0 amps, verify that there is power to the V-MAC II module. If there was no power to the V-MAC II module, restore power and retest. If there was power, and the current was 0, replace the V-MAC II module. Retest to be sure the problem has been corrected.
Test 20
Checking for wrong target, bad data file or V-MAC II module
1.Use the diagnostic tool (Pro-Link or PC) to display the engine model, data file part number and static timing.
2.Verify the following information: a.Initial (static) timing on the emissions plate agrees with the value displayed by V-MAC II. b.ECONOVANCE is approximately 5 inches long.
If the information matches but the timing is still too advanced, replace the V-MAC II module. Retest to be sure the problem has been corrected.
If the information does not match, V-MAC II is trying to use a data file which may not match the engine hardware’s capabilities (static timing and timing range). Change the hardware to match the hardware requirements of the data file and attach the proper emissions plate, or download the correct data file for this engine. Retest to be sure the problem has been corrected.
DIAGNOSTIC CODE 3-5 (ADVANCED)
Test 21
Checking for improperly installed timing control valve gasket
If the static timing is incorrect by more than 1 degree, and the static timing was correct in Test 1 of the Basic Mechanical Section, the ECONOVANCE is sticking. Repair or replace the ECONOVANCE. Retest to be sure the problem has been corrected.
If Test 1 of the Basic Mechanical Section showed that the static timing was incorrect by more than 1 degree and had to be reset, and the static timing status still indicates that the timing is still too advanced, the ECONOVANCE is sticking. Repair or replace the ECONOVANCE. Retest to be sure the problem has been corrected. Otherwise, proceed to Test 47.
Test 36
Checking the timing valve retainer plate
1.Visually inspect the timing control valve for signs of oil leakage between the round valve body and the housing or from the wiring.
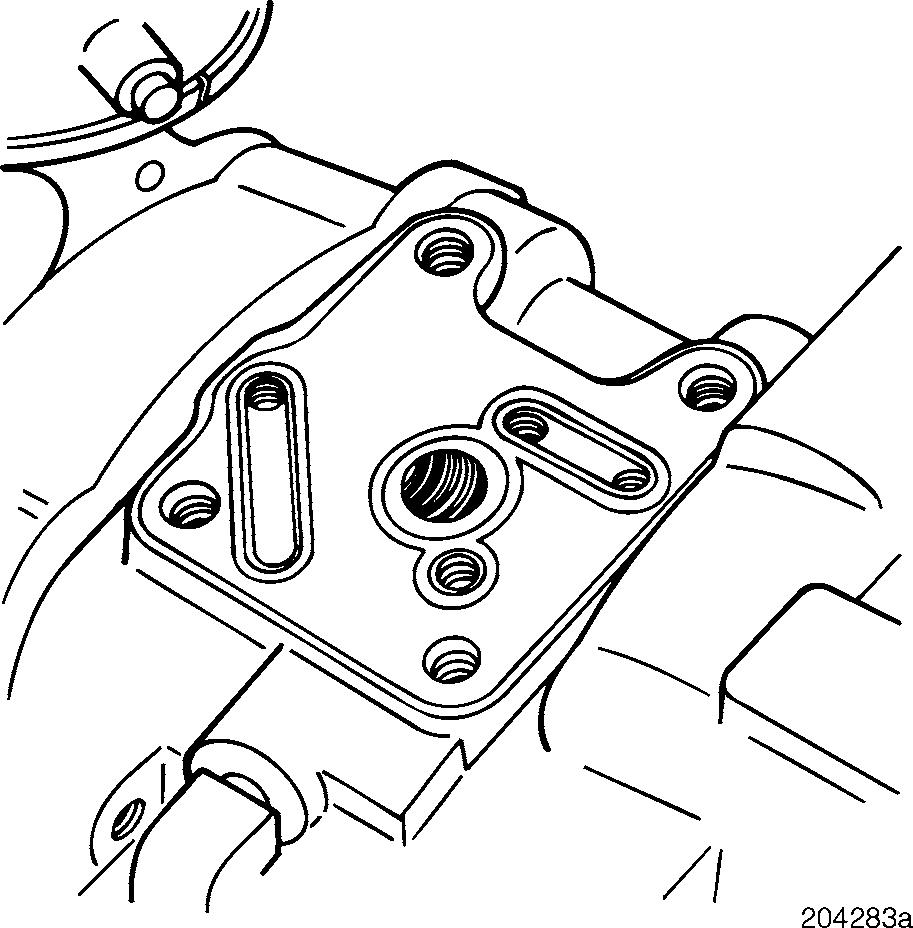
Figure 155 — Checking Timing Control Valve Gasket
1.Turn the ignition key to the OFF position.
2.Remove the timing control valve assembly from the ECONOVANCE.
3.Inspect the gasket for proper installation. If the gasket is installed properly, proceed to Test 42.
If the gasket is not installed properly, clean the timing valve oil supply filter. Correctly install a new gasket. Reinstall the timing control valve. Retest to be sure the problem has been corrected.
Test 23
Checking for a stuck ECONOVANCE
1.Turn the ignition key to the OFF position.
2.Recheck the static timing (See Setting Engine Timing Section).
If there is a leak, replace the entire control valve assembly.
If there is no leak, continue with the next step.
2.Grasp the round valve body and attempt to turn it using light force.
If the valve body can be turned with a light force, clean the front portion of the control valve and retainer plate and remove the plate. Examine the contact area of the plate and valve for signs of wear (DO NOT REMOVE THE VALVE FROM THE ASSEMBLY). If the valve is worn around the entire circumference, replace the complete timing control valve assembly. If only a portion of the valve circumference is worn, rotate the valve body so that the worn portion will not be touching a new retention plate. Install a new retention plate, using Loctite 242 on the plate bolts. Retest to be sure the problem has been corrected.
If there is no oil leakage and the valve body cannot be turned with light force, proceed to Test 72.