6 minute read
Name and Function of Each Part


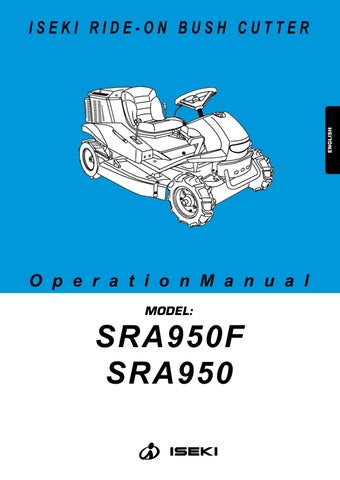
Name of Each Part
Cutting-blade clutch lever
Cutting Height Adjustment Lever
Front Axle (SRA950F)
HST Lever
Cutting-blade Cover
HST Pedal
Inclination Meter
Parking Brake Lever
Light SwitchChoke Ignition Switch
Oil Warning Lamp
Parking Brake Pedal
Hour Meter
Differential Lock Lever
Throttle Lever Engine Cover
Cutting-blade Cover Wash PipeCutting-blade Cover (Figure SRA950)
Name and Function of Each Part
Function of Each Part
■ Ignition Switch
Ignition switch is used to start and stop the engine.
p osition --- When the ignition switch is in this position, the engine stops and the ignition key can be removed or inserted.
position --- The engine is running when the ignition switch is in this position.
position --- Turning the ignition switch in this position to start the engine. When released, the switch automatically returns to the “ ” position.
●If the machine will not be used for a while and will remain in storage, be sure to remove the ignition key.
●Refer to p.30~33 of this manual for information on starting and stopping the engine.
■ Throttle Lever
The throttle lever is used to raise/lower the engine speed.
The maximum horsepower (power) is available at the maximum engine speed.
In the Eco-drive mode, the engine speed drops to the level at which the amount of fuel is economically consumed and the Eco-lamp remains lit. Since the horsepower decreases by 10% compared to horsepower at full-throttle, use the Eco-drive mode as necessary according to the load. (Refer to p.45 of this manual)
■ Choke
Pulling the choke lever closes the choke valve, while returning it opens the valve. Pull the choke when starting the engine(in case of cold start, etc.) and be sure to returning it once the engine has started. (Refer to p. 32 of this manual)
Name and Function of Each Part
■ HST Pedal
Function
■ HST Pedal
Depress the Forward pedal to move forward, or depress the Reverse pedal to move backward. The traveling speed can be adjusted steplessly by adjusting the pedal angle.
■ Light Switch
Depress the Forward pedal to move forward, or depress the Reverse pedal to move backward. The traveling speed can be adjusted steplessly by adjusting the pedal angle.
■ Light Switch
The light switch is used to turn the headlight in “On” or “Off”
The light switch is used to turn the headlight in “On” or “Off”
Important
● Use the headlight when operating.
■ Inclination Meter
Display the angle of left and right of the machine. Travel on slope at low speed.
● SRA950 : Do not travel over the angle 15 °
● SRA950F: Do not travel over the angle 25 °
Important
Important
● Use the headlight when operating.
■ Inclination Meter
Display the angle of left and right of the machine. Travel on slope at low speed.
● SRA950 : Do not travel over the angle 15 °
● SRA950F: Do not travel over the angle 25 °
Important
● Because the display of inclination meter is guidelines, be sure to measure the inclined angle before working.
● Because the display of inclination meter is guidelines, be sure to measure the inclined angle before working.
■ Parking Brake Pedal
■ Parking Brake Pedal
The parking brake pedal is normally used to apply the parking brake. In case of emergency, depressing this brake pedal puts a brake on the rear wheels. To stop the traveling machine, do so after returning the HST lever and HST pedal to the “Neutral” position.
The parking brake pedal is normally used to apply the parking brake. In case of emergency, depressing this brake pedal puts a brake on the rear wheels. To stop the traveling machine, do so after returning the HST lever and HST pedal to the “Neutral” position.
Parking brake pedal
Name and Function of Each Part
■ Parking Brake Lever
Depress the brake pedal and pull this parking brake lever, and then the brake pedal will be “Locked”, so the parking brake will remain effective. To release the parking brake, depress the brake pedal again to “Unlock” this lever.
■ Differential Lock Lever
The differential lock lever is used when one of the rear wheels gets stuck in the mud, etc. and the machine cannot be pulled out because the wheel is slipping. Shifting the lever to the “On” position locks the differential, while shifting it to “Off” position unlocks the differential. When traveling in a normal condition, be sure to keep the lever in the “Off” position.
■ Grass Cutting-height Adjustment lever
The grass cutting-height adjustment lever is used to adjust the height of the cutting blade. Tilting the lever toward the seat unlocks the adjustment mechanism so that you can adjust the height. After the adjustment of grass cutting height, tilt the lever outward to “Lock” the cutting height.
Name and Function of Each Part
Name and Function of Each Part
■ Grass Cutting-height Stopper
■ Grass Cutting-height Stopper
The grass cutting-height stopper is used to set the lower-limit position of grass cutting height. Loosen the knob bolt, adjust the cutting-height stopper position and tighten the knob bolt. Then, the bolt will function as a stopper for the cutting-height adjustment lever.
The grass cutting-height stopper is used to set the lower-limit position of grass cutting height. Loosen the knob bolt, adjust the cutting-height stopper position and tighten the knob bolt. Then, the bolt will function as a stopper for the cutting-height adjustment lever.
■ Cutting-blade Clutch Lever
■ Cutting-blade Clutch Lever
The cutting-blade clutch lever is used to turn on/off the power of the cutting blade. Shifting the lever to the ‘Off” position activates the interlocked brake on the cutting blade to stop the cutting blade. The cutting-blade clutch lever cannot be shifted to the “On” position while the cutting-height adjustment lever is in the “Start Engine” position.
The cutting-blade clutch lever is used to turn on/off the power of the cutting blade. Shifting the lever to the ‘Off” position activates the interlocked brake on the cutting blade to stop the cutting blade. The cutting-blade clutch lever cannot be shifted to the “On” position while the cutting-height adjustment lever is in the “Start Engine” position.
■ Cutting-blade Cover
■ Cutting-blade Cover
The cutting-blade cover is used to prevent small stones and foreign matters from scattering during work. It can be removed by loosening one bolt when replacing blade or servicing.
The cutting-blade cover is used to prevent small stones and foreign matters from scattering during work. It can be removed by loosening one bolt when replacing blade or servicing.
(Refer to p.78 of this manual)
(Refer to p.78 of this manual)
■ Seat
■ Seat
This is the seat only for the operator. Tilt the seat forward, loosen the knob bolts at the back of the seat. Then, slide the seat forward and backward to adjust it at suitable position, according to body size of the operator.
Cutting-height
Stopper Cutting-blade clutch lever
Name and Function of Each Part
■ Cutting-blade Cover Wash Pipe
Connect a water hose to this pipe when washing the interior of the cutting-blade cover after work.
■ Engine Cover
Warning
● The operator or any other people may cause injury sandwiched between the engine cover. When opening the engine cover, be sure to do it on flat groundwithout being blowed by strong wind.
Open the engine cover for easy access to the engine for cleaning, inspection and maintenance.
Seat
1. Tilt the seat forward and remove the knob bolts at the rear left-hand corner of the seat.
2. Return the seat to the original position and by holding the front part of the seat, open the engine cover slowly toward to rearward.
3. Follow the same steps in reverse order to close the engine cover. Be sure to tighten the knob bolt.
■ HST Lever
Tilt the lever forward to move forward, or tilt it backward to move rearward. The traveling speed can be adjusted steplessly by adjusting the lever angle.
Name and Function of Each Part
■ Oil Warning Lamp
If the engine oil quantity drops while the engine is running,the warning lamp flashes to warn any potential engine seizure caused by low engine oil. When the warning lamp flashes, stop the engine right away and refill engine oil.
Important
● Wh ile the engine stops, the warning lamp flashes when the engine switch is in the “On” position. If the warning lamp does not flash then, there is defective electrical part. Inspect and repair the defective part.
■ Hour Meter
The hour meter is helpful to roughly determine when to change oil or conduct other inspections of the parts of machine.