2 minute read
w/Tapered Bearings

Special Instructions
For "A" Series, go to “A” Series Section.
To make auxiliary section assembly easier, you can make an auxiliary section fixture out of a 2" x 12".
Make sure to use an auxiliary drive gear retaining bolt with thread sealant material.
Special Tools
• Typical Service Tools • Auxiliary countershaft retaining straps • Toolmaker’s dye
Procedure -
1. Place the countershaft assembly vertical on a clean, flat surface. If previously removed, use the proper driver and maul to install the countershaft bearings.
2. Mark each countershaft for correct timing. Locate the "O" stamped on the countershaft and mark the tooth with highly visible toolmaker's dye or paint.
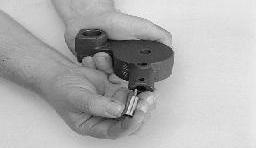
3. Install the synchronizer assembly on output shaft front.
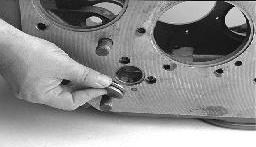
4. Place the thrust washer, the rear auxiliary drive gear, the thrust washer, the retainer and the 15/16" capscrew on the output shaft assembly. Finger tighten the capscrew.
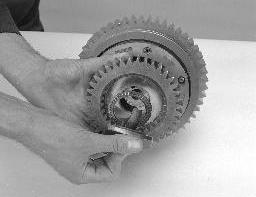
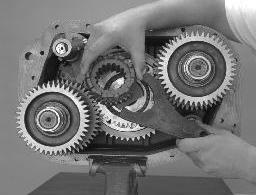
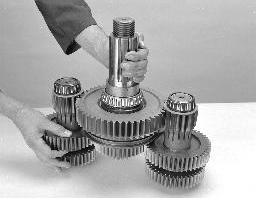
5. Place the countershafts in the fixture or on a flat surface for reassembly. Turn the countershafts so that the two teeth marked on each LO range gear are towards the middle.
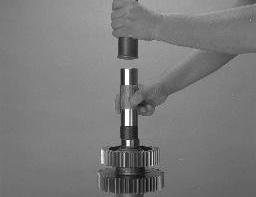
6. Align the output shaft between the countershafts, match the timing marks.
7. With range yoke offset side facing down, install into the synchronizer sliding slot.
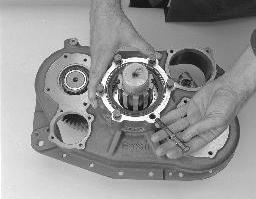
8. Place the auxiliary housing over the countershaft assemblies and the output shaft assemble.
9. Heat the rear output bearing cone and install the bearing, tapered side down, on the shaft.
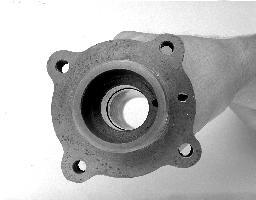
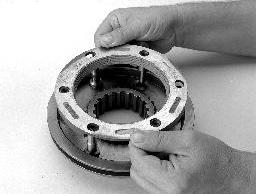
10.Position a new gasket on the rear bearing cover mounting surface.


11.Position the rear bearing cover.
12.Apply Eaton/Fuller Sealant #71205 or equivalent to the retaining capscrews.
13.Install the five (5) retaining capscrews in the non-chamfered hole, tighten to 35-45 lb-ft of torque.
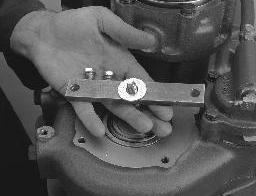
14.Install the nylon collar and brass washer in the chamfered hole, tighten to 35-45 lb-ft of torque.
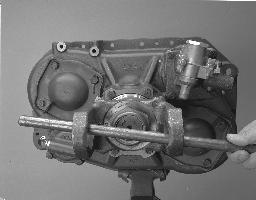
15.Install each auxiliary countershaft retaining strap with 2 - 3/ 8" NC x 1" and 1 - 3/8" NC x 2 -1/2" clean capscrews.
WARNING: Do not use an air gun. Tighten by hand until the capscrews are snug.