3 minute read
2.5 O peration of the machine


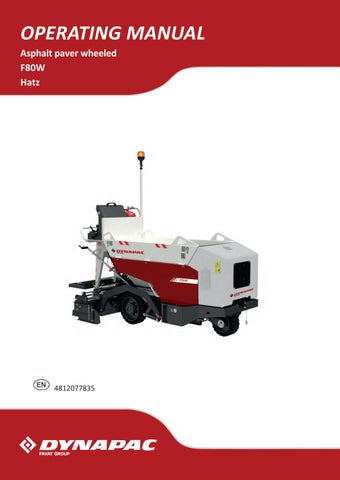
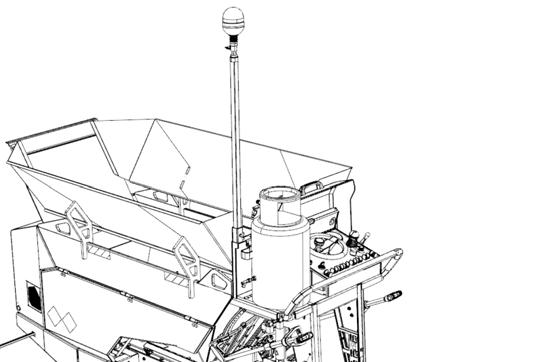
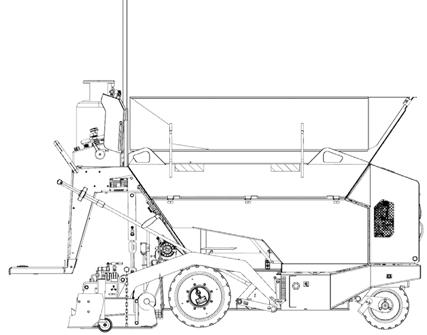
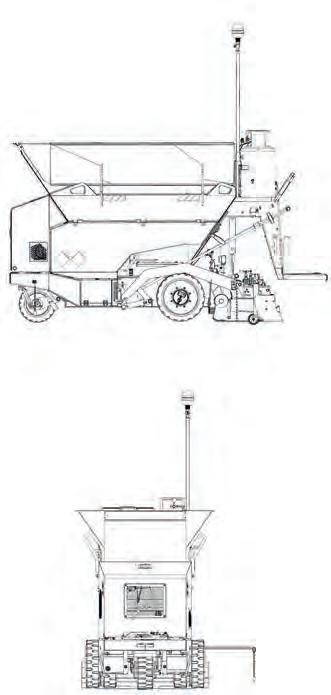
2.5.6 Beacon
The machine is delivered from the manufacturer with a beacon dismounted. Before starting the operation of the machine the beacon must be mounted on the machine.
Turning on the beacon:
• When the engine is started, the beacon (1) will be automatically turned on.
Turning off the beacon:
• Turning the key in the ignition box to the “0” position automatically turns off the beacon (1).
Mounting the beacon:
• Mount the beacon (1) on the beacon holder (2).
• Mount the beacon holder (2) on the machine and secure it using a wing nut (3).
Connecting the electrical wiring to the beacon:
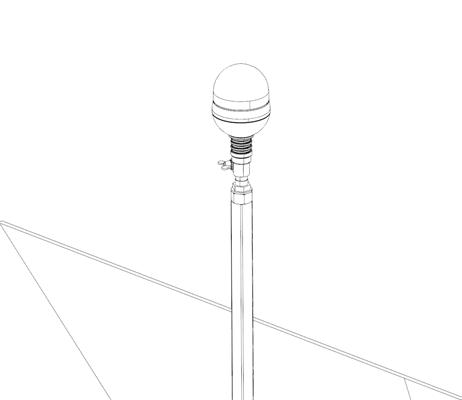
• Insert the plug of the beacon (4) to the mounting socket 12 V (5) on the main dashboard (6).
It is forbidden to operate the machine without the beacon mounted on.
2.5.7 Driver's stand
To access the driver's stand use only places intended for this purpose, the footboard and the handle.
When getting on and off:
• Clean your footwear before getting on the machine.
• Always face the machine and pay increased attention during the action.
• Always observe a safe three-point contact with the footboard and the handle.
Procedure for entering onto the driver's stand:
• If required, set the footboard (2) to the operating position.
• Firmly hold on to the handle (1).
• Get on the footboard (2).
• Move to the centre of the footboard (2).
• Continue to firmly hold on to the handle (1).
• During the operation of the machine always observe a safe three-point contact with the footboard and the handle.
Jumping off the parked or moving machine is prohibited. It is forbidden to get on or off the machine when it is moving.
It is prohibited to use the steering wheel, control parts of the machine or its other parts not intended for this purpose for holding.
Keep the footboard and holders clean, remove any grease, coarse dirt, ice or snow and do not place any objects on the surface. By failure to observe these rules the danger of injury by falling down of the machine arises. For safe movement on the machine, always use protective shoes.
During the operation of the machine always observe a safe three-point contact with the footboard and the handle.
2.5 O peration of the machine
2.5.8 Starting the engine
• Before starting the engine, daily check the oil level in the engine, hydraulic tank and fuel level in the fuel tank. Check that there are no loosened, worn or missing parts on the machine.
Start the engine only from the driver’s stand! Use the alarm horn to signal the engine starting and check that nobody is endangered by starting the engine!
Start-up procedure:
• Turn on the battery disconnecter.
• Set the travel controller (8) to the neutral position – the parking brake is activated.
• Check that the screed gas heating (13) is turned off.
• Check that the emergency switch (1) is not activated.
• Insert the key into the ignition box (11) in the position “0” and switch over to the position “I”.
• The brake indicator lamp (23), charging (21), hydraulics operating mode switch-off (29) and engine lubrication (22) will light up on the display.
• Set the key between position “I” and “II” and the engine glowing indicator lamp (24) will light up.
• Do not perform engine glowing for more than 15 s.
• Use the alarm horn (12) to signal that the engine is starting.
• Turn the key to position “II” to start the engine.
• The engine lubrication indicator lamp (22) and the battery charging indicator lamp (21) will turn off.
• After the machine moving-off is completed, the brake indicator lamp goes out (23).
Do not start the engine for more than 20 seconds. Wait at least for 2 minutes before starting again.
If the charging indicator lamp does not go off after starting the engine, immediately remove the failure.
If the charging (21) and lubrication (22) indicator lamps do not go off, switch off the engine and remove the failure. It is forbidden to operate the machine without the beacon on.
2.5.9 Starting the engine using starting leads from external power supply
Start-up procedure using leads from an external power supply: The starting supply voltage from the external power supply must be 12 V.
Always follow the undermentioned operation sequence.
1/ Connect one end of the (+) pole of the cable to the (+) pole of the discharged battery.
2/ Connect the other end of the (+) pole of the cable to the (+) pole of the external battery.
3/ Connect one end of the (-) pole of the cable to the (-) pole of the external battery.
4/ Connect the second end of the (-) pole of the cable to any part of the started machine, which is attached to the engine (or with the engine block itself).
5/ Start the engine according to Chapter 2.5.8.
After starting, disconnect the starting leads in reverse order.
Do not connect the (-) pole of the cable to the (-) pole of the discharged battery of the machine being started! During starting heavy sparking may occur and gases of the charged battery may explode.
Uninsulated parts of clamps of the jump leads must not touch each other!
The jump lead connected to the (+) pole of the batteries must not come into contact with electrically conductive parts of the machine – danger of a short circuit! Do not lean over the batteries – possibility of electrolyte burns!
Remove flammable sources (open flame, burning cigarettes, etc.)
Do not check the presence of voltage in the wire by sparking against the machine frame.