9 minute read
Maintenance Procedures at 2,000 Hours or 2 Years


Maintenance Procedures - Overview
General Information
All maintenance checks and inspections listed in previous maintenance intervals must also be performed at this time, in addition to those listed under this maintenance interval.
Cooling System
Drain
WARNING!
Do not remove the pressure cap from a hot engine. Wait until the coolant temperature is below 50°C [120°F] before removing the pressure cap. Heated coolant spray or steam can cause personal injury.
Remove the pressure cap.
A drain pan with a capacity of 19 liters [5 gal] will be adequate for most applications. Drain the cooling system by opening the drain valve on the radiator and removing the plug in the bottom of the water inlet hose.
WARNING!
Coolant is toxic. Keep away from children and pets. If not reused, dispose of in accordance with local environmental regulations. Figure 108
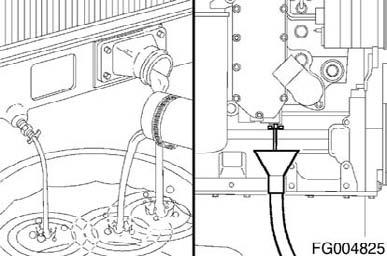
Figure 109
QSL9CumminsEng QSL9 Cummins Engine Page 89
Check for damaged hoses and loose or damaged hose clamps. Replace as required. Check the radiator for leaks, damage, and buildup or dirt. Clean and replace as required.
Flush
WARNING!
Do not use caustic cleaners in the cooling system. Aluminum components will be damaged.
The cooling system must be clean to work correctly and to eliminate buildup of harmful chemicals.
Restore is a heavy-duty cooling system cleaner that removes corrosion, silica gel, and other deposits. The performance of Restore, is dependent on time, temperature, and concentration levels. An extremely scaled or flow-restricted system, for example, can require higher concentrations of cleaners, higher temperatures, or longer cleaning times, or the use of Restore Plus Up to twice the recommended concentration levels of Restore can be used safely. Restore Plus must be used only at its recommended concentration level. Extremely scaled or fouled systems can require more than one cleaning.
After draining the coolant, immediately add 3.8 liters [1 gal] of Fleetguard Restore Plus or equivalent, for each 38 to 57 liters [10 to 15 gal] of cooling system capacity, and fill the system with plain water. Turn the cabin heater temperature switch to high to allow maximum coolant flow through the heater core. The blower does not have to be on.
CAUTION!
Fleetguard Restore contains no antifreeze. Do not allow the cooling system to freeze during the cleaning operation.
QSL9 Cummins Engine Page 90 Figure 110
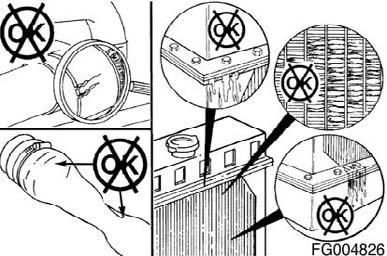
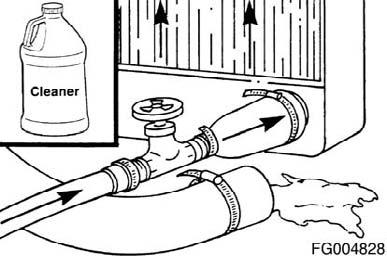
Figure 111
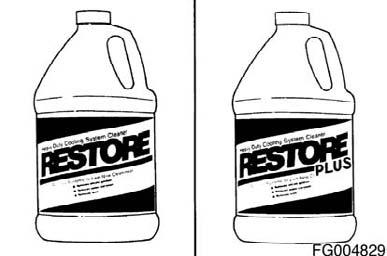
Figure 112
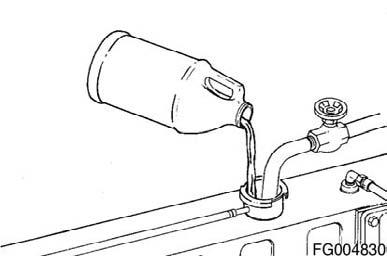
Figure 113
QSL9CumminsEng
Do not remove the pressure cap from a hot engine. Wait until the coolant temperature is below 50°C [120°F] before removing the pressure cap. Heated coolant spray or steam can cause personal injury.
WARNING!
Coolant is toxic. Keep away from children and pets. If not reused, dispose of in accordance with local environmental regulations.
Operate the engine at normal operating temperatures, at least 85°C [185°F] for 1 to 1-1/2 hours. Shut off the engine and drain the cooling system. Fill the cooling system with clean water.
Operate the engine at high idle for five minutes with the coolant temperature above 85°C [185°F]. Shut off the engine and drain the cooling system.
WARNING!
Do not remove the pressure cap from a hot engine. Wait until the coolant temperature is below 50°C [120°F] before removing the pressure cap. Heated coolant spray or steam can cause personal injury.
WARNING!
Coolant is toxic. Keep away from children and pets. If not reused, dispose of in accordance with local environmental regulations.
QSL9CumminsEng Figure 114
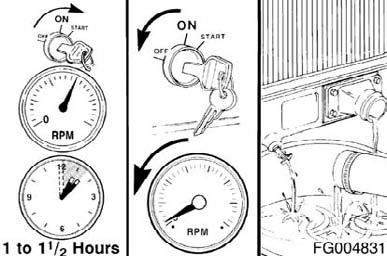
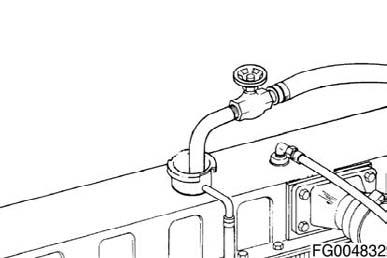
Figure 115
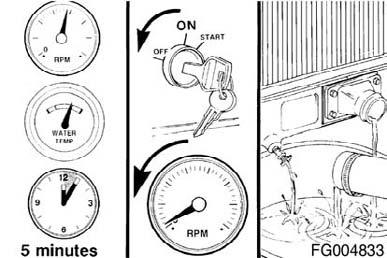
Figure 116
QSL9 Cummins Engine Page 91
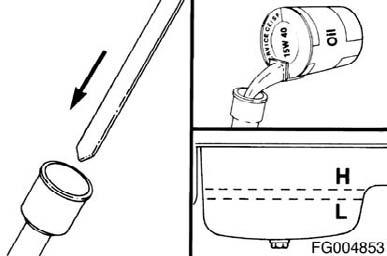
Fill
Close the radiator drain valves. Install the lower radiator hose(s). Tighten the hose clamps. Torque Value: 5 Nm [44 in-lb]
The system is designed to use a specific quantity of coolant. If the coolant level is low, the engine will run hot. If the addition of coolant is necessary, the engine or system has a leak. Find and repair the leak. The system has a designed fill rate of 19 liters [5 gal] per minute.
Use a 50-percent water and 50-percent ethylene glycol or propylene-glycol-based antifreeze to fill the cooling system.
CAUTION!
Never use water alone for coolant. This can result in damage from corrosion. Figure 117
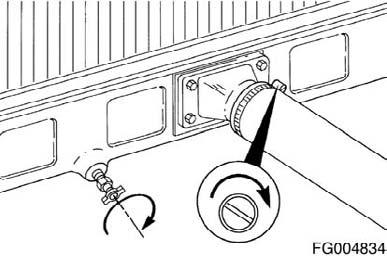
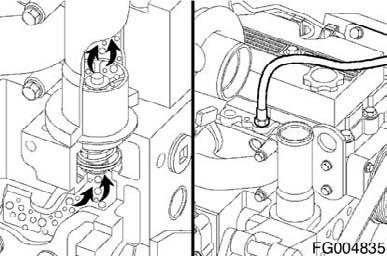
Figure 118
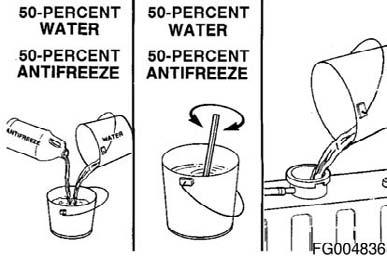
Figure 119
QSL9 Cummins Engine Page 92 QSL9CumminsEng
Cummins Inc. recommends using Fleetguard COMPLEAT ES. It is available in glycol forms (ethylene and propylene) and complies with ASTM D6210 (EG) and ASTM D6211 (PG) specifications.
Fill the cooling system with heavy-duty coolant and install the correct service filter (if equipped).
Install the pressure cap. Operate the engine until the coolant reaches a temperature of 80°C [176°F] and check for coolant leaks. Check the coolant level again to make sure that the system is full of coolant or that the coolant level has risen to the hot level in the recovery bottle on the system, if so equipped.
Figure 120

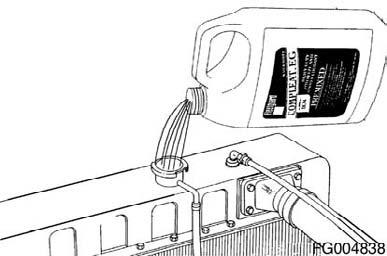
Figure 121
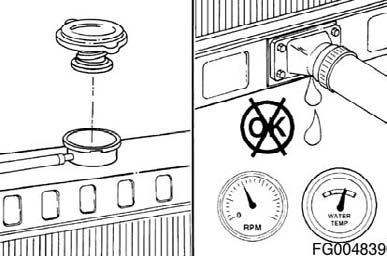
Figure 122
Vibration Damper, Rubber
Inspect for Reuse
Check the index lines (A) on the damper hub (B) and the inertia member (C). If the lines are more than 1.59mm [1/16 in] out of alignment, replace the damper. Inspect the vibration damper hub (B) for cracks. Replace the damper if the hub is cracked.

Figure 123
QSL9CumminsEng QSL9 Cummins Engine Page 93
Inspect the rubber member for deterioration. If pieces of rubber are missing or if the elastic member is more than 3.18mm [1/8 in] below the metal surface, replace the damper. NOTE: Also look for forward movement of the damper ring on the hub. Replace the damper if any movement is detected.
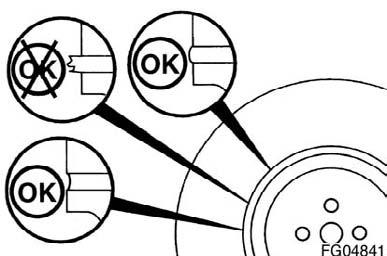
Figure 124
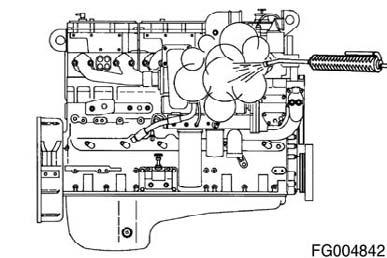
Engine Steam Cleaning
Clean
WARNING!
When using a steam cleaner, wear safety glasses or a face shield, and protective clothing. Hot steam can cause serious personal injury.
Steam is the best method of cleaning a dirty engine or a piece of equipment. If steam is not available, use a solvent to wash the engine. Protect all electrical components, openings, and wiring from the full force of the cleaner spray nozzle.
Figure 125
Radiator Hoses
Maintenance Check
Check all hoses for cracks, cuts, or collapsing. NOTE: The silicone engine coolant hose will exhibit swelling due to the elasticity of the hose.
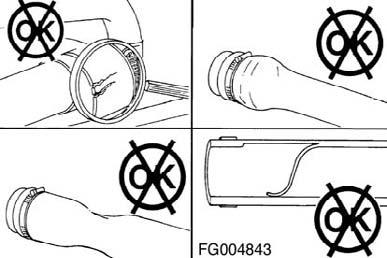
Figure 126
QSL9 Cummins Engine Page 94 QSL9CumminsEng
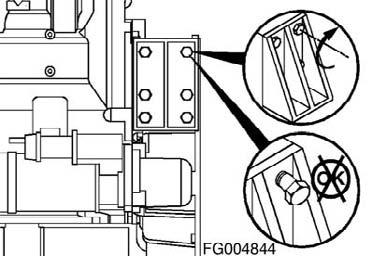
Maintenance Check
CAUTION!
Damaged engine mounts and brackets can cause engine misalignment. Driveline component damage can result in vibration complaints.
Inspect all rubber-cushioned mounts for cracks or damage. Inspect all mounting brackets for cracks or damaged bolt holes. Check the torque on the engine-mounting nuts and bolts. Tighten any that are loose. Refer to the equipment manufacturer for torque specifications.
Figure 127
QSL9CumminsEng QSL9 Cummins Engine Page 95
MAINTENANCE PROCEDURES AT 5000 HOURS OR 4 YEARS
Overhead Set
Preparatory Steps
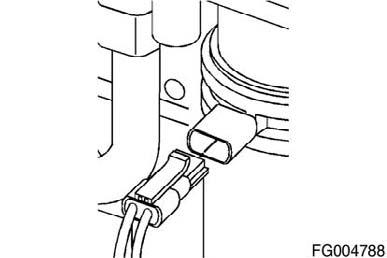
Remove the crankcase breather tube, rocker lever cover mounted breather only. Remove the variable geometry turbocharger actuator air supply line, if equipped. Remove the cap screws.
Remove the rocker lever cover and gasket. NOTE: Rocker lever cover configurations will be different based upon if the cover is center bolted or perimeter bolted. The rocker lever cover can also be taller if the engine is equipped with engine brakes. Remove the plastic fuel pump drive cover located on the front of the engine.
With the engine in this position, lash can be checked on the following rocker arms: 1l, 1E, 2l, 3E, 4l, and 5E.
Intake
Exhaust
Lash Check Limits
Min. 0.152mm Min. 0.006 in Max. 0.559mm Max. 0.022 in Min. 0.381mm Min. 0.015 in Max. 0.813mm Max. 0.032 in
NOTE: Lash checks are performed as part of a troubleshooting procedure, and resetting is not required during checks as long as the lash measurements are within the above limits. Measure lash by inserting a feeler gauge between the crosshead and the rocker lever ball insert and socket while lifting up on the end of the rocker arm. If the lash measurement is out of specifications, loosen the locknut and adjust the lash to nominal specifications.
Lash Reset Specifications
Intake 0.305mm 0.012 in Exhaust 0.559mm 0.022 in
QSL9 Cummins Engine Page 96 Figure 128
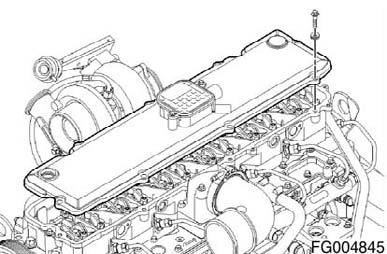
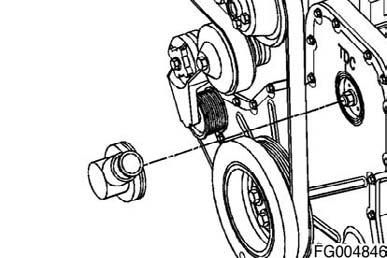
Figure 129
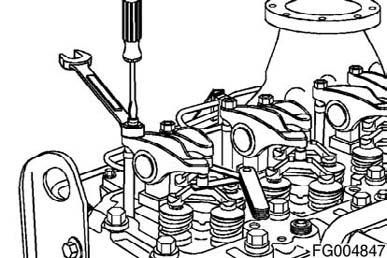
Figure 130
QSL9CumminsEng
NOTE: Lash resets are only required at the interval specified in the Maintenance Schedule when lash is measured and found out of specification, or when engine repairs cause removal of the rocker arms and/or loosening of the adjusting screws. Tighten the locknut and measure again. Torque Value: 24 Nm [18ftlb] Using the barring tool, Part Number 3824591, rotate the crankshaft 360 degrees and measure lash for rocker arms 2E, 3l, 4E, 5l, 6l, and 6E. Reset the lash if out of specification.
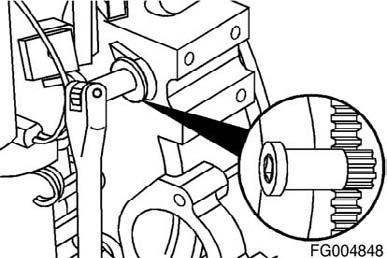
Figure 131
Finishing Steps
Center Bolted Rocker Lever Cover Place the gasket on the cylinder head. Be sure the gasket is properly aligned around the cylinder head cap screws. Install the rocker lever cover and cap screws.
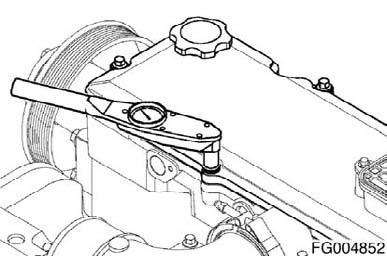
Tighten the cap screws. Torque Value: 12 Nm [106 in-lb]
Figure 132

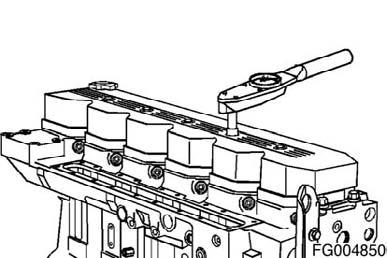
Figure 133
QSL9CumminsEng QSL9 Cummins Engine Page 97
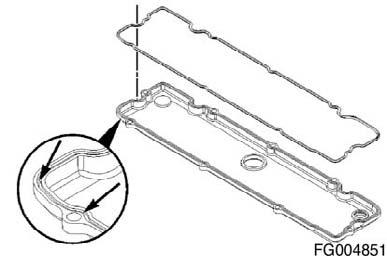
Perimeter Bolted Rocker Lever Cover NOTE: If the gasket has been removed from the rocker lever cover, a new gasket must be used. The following installation procedure must be used when installing the press-in gasket. 1. Press the molded gasket into the corners of the rocker lever cover. 2. Press the gasket around the cap screw mounting holes. 3. Press the remaining gasket into the rocker lever cover.
Install the rocker lever cover and cap screws. Torque Value: 12 Nm [106 in-lb]
Figure 134