3 minute read
Conveyor chain ........................................................ 5
BI632977
Conveyor chain
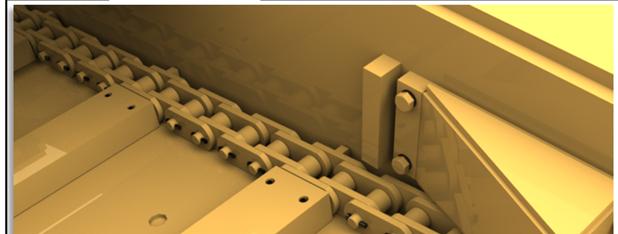
The conveyor chain (Fig. 54) is made up of one basic chain assembly which repeats sequentially along the entire chain loop. As soon as any component of the conveyor chain is worn the component or complete conveyor chain assembly must be replaced.
Each conveyor chain section consists of the following main components:
■ 6 link chain section
■ flight bar
■ spiral pin
Fig. 54: Conveyor chain main components
6 link chain section
Spiral pin

Flight bar

BI632977
How to assemble the conveyor chain sections
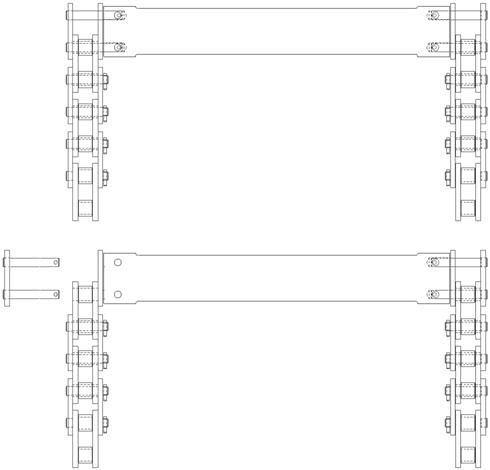
To assemble the conveyor chain sections proceed as follows (Fig. 55):
Lay conveyor chain sections on a clean flat surface.
Insert connector pins through flight end and align holes in spiral pin with holes in flight bar.
Insert spiral pin.
Drive spiral pin in with a hammer and punch. Ensure that spiral pin is recessed on both sides of flight bar.
Repeat the previous assembly instructions until the complete chain has been assembled.
Fig 55: Conveyor chain assembly
Extended pin connecting link
Block link assembly Spiral pin (4) Flight bar

Side bar
6 link chain section
BI632977
How to remove the conveyor chain assembly
To remove the conveyor chain assembly proceed as follows: Release tension on the conveyor. (See Conveyor chain adjustment in this chapter). Separate conveyor chain by removing spiral pins and connecting links in one section of the chain.
Connect an additional pulling or lifting device (e.g. winch or lifting tackle with adequate load limit) to either end of the conveyor chain and slowly pull the conveyor chain completely out of the machine.
WARNING! When using an additional pulling device (e.g. winch or lifting tackle with adequate load limit) for pulling the conveyor chain, the connection could fracture under the load. You could be seriously injured or killed by the recoiling chain or cable. Use only approved lifting equipment for connecting pulling devices to the conveyor chain.
How to install the conveyor chain assembly
To install the conveyor chain assembly proceed as follows: Check to ensure that the conveyor tail shaft is completely retracted.
If not retracted, see Conveyor chain adjustment in this chapter. Run a cable or pull rope with an adequate load limit through the bottom conveyor pan and connect to the conveyor chain. Connect an additional pulling or lifting device (e.g. winch or lifting tackle with adequate load limit) to the other end of the cable or pull rope and slowly pull the conveyor chain completely through the bottom conveyor pan.
IMPORTANT! If old conveyor chain is still on machine, installation can be facilitated by connecting the new conveyor chain to the old conveyor chain via the chain connectors and pulling it through the bottom conveyor pan.
Fold conveyor chain back over the tail shaft and drive shaft and slowly pull the chain along the conveyor ensuring that the chain is under the chain hold downs.
Ensure that the chain is properly meshed with the drive sprockets and aligned with the tail shaft roller. Connect conveyor chain (see How to assemble the conveyor chain sections in this chapter for proper connection). Adjust tension on the conveyor chain (see Conveyor chain adjustment procedure in this chapter. With machine running, visually inspect tail shaft to ensure that that the shaft is turning and conveyor chain is not sliding across tail shaft.


