1 minute read
Accessory Drive (Front


HYDRAMECHANICAL SHUTOFF CONTROL
DISASSEMBLE HYDRAMECHANICAL SHUTOFF CONTROL
Tools Needed A B C
1P1855 Pliers 1 1P1853 Pliers 1 1P510 Driver Group 1
start by: a) remove hydramechanical shutoff control
1. Remove the bolts and remove actuator valve (1) from the pressure control valve.
There is spring pressure on cover (2). To prevent possible personal injury slowly release the bolts that hold cover (2) until all the pressure is removed.
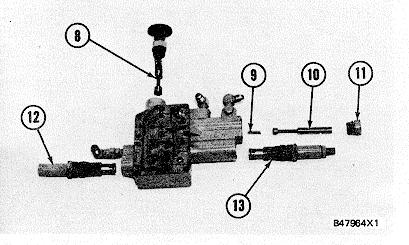
2. Remove the bolts and remove cover (2) from the actuator valve body. 3. Remove springs (4), spacer (5) and valve assemblies (3) from the valve body. 4. Remove tube assembly (7) from the shutoff control. 5. Remove pressure control valve (6) from the shutoff control. 6. Put identification marks on valve assemblies (12) and (13) for assembly purposes. Remove rack shutoff valve (12) and air inlet shutoff valve (13) from the pressure control body assembly. Remove three O-ring seals from each valve. 7. Remove plug (11) to remove pilot valve (10), and spring (9) from the pressure control body assembly. 8. Remove manual shutoff valve (8) as a unit from the pressure control body assembly.
334
HYDRAMECHANICAL SHUTOFF CONTROL
9. Loosen nut (16) to remove knob (17) and nut (16) from valve (14). Remove adapter (18) and spring (19) from valve (14). Remove O-ring seal (15) from adapter (18).
10. Remove seal (20) from adapter (18).
11. Remove eight bolts (22) to remove gerotor pump group (21) from the shutoff control housing assembly.
12. Use tool (A) to remove ring (24) and the washer from the carrier assembly shaft.
NOTE: Do not remove bolts (23) at this time.
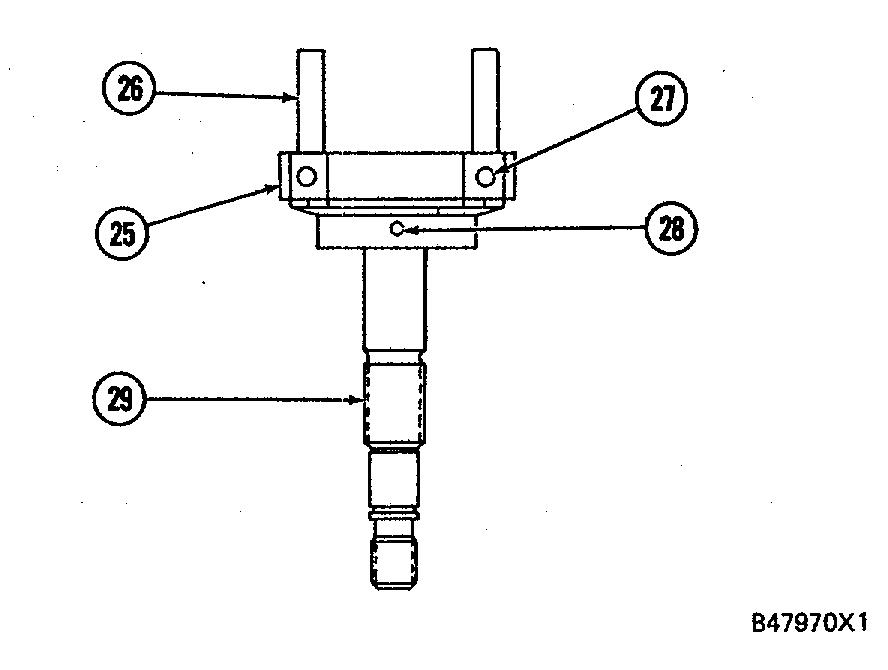
13. Remove carrier assembly (25) from the gerotor pump group.

335
HYDRAMECHANICAL SHUTOFF CONTROL
14. Remove dowels (27) to remove weights (26) from carrier (25). Remove pin (28) and use a press to remove shaft (29) from carrier (25).
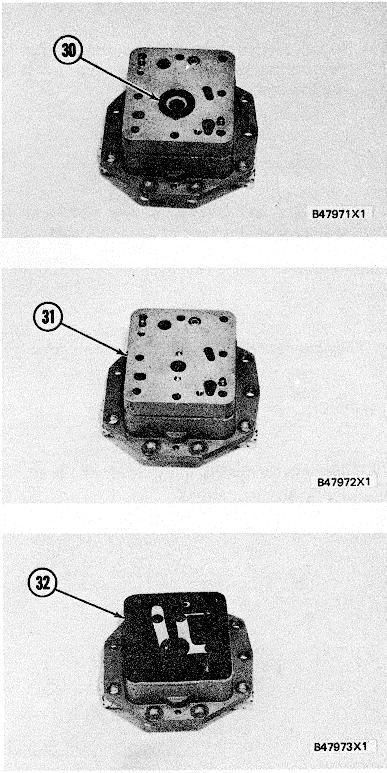
15. Remove washer (30) from the pump group.
16. Remove the two bolts (23) to remove cover assembly (31) from the plate.
17. Remove gasket (32) from the plate.
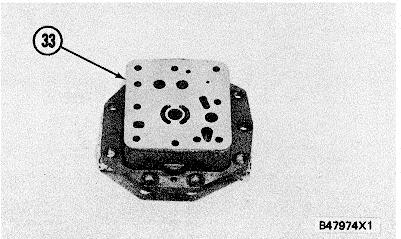
18. Remove plate (33) from the housing assembly.